Sign and Generate Secure Workspace Application Container
Overview
Purpose
In this tutorial, you learn how to sign and generate the ipa file for the workspace application.
Time to Complete
Approximately 1.5 hours
Introduction
Oracle Mobile Security Suite (OMSS) enhances employee
productivity by allowing secure access to corporate applications
and
data from mobile devices while preserving a rich user experience.
The Mobile Security Container creates an enterprise workspace
on any mobile device, corporate owned or personal, and for all
mobile platforms.
Employees get seamless access to intranet resources, corporate
data and mobile apps with enterprise-grade security and deep
integration with Oracle Access Manager and Microsoft Active
Directory authentication for true Single Sign-On.
Overview of Mobile Security Container
The Oracle Mobile Security Container is designed to secure
“containerized” apps, i.e., apps that have been securely linked to
their
specific container (Apple iOS or Google Android). Many Oracle
applications such as Oracle Business Intelligence (BI), Oracle
Fusion Tap,
Oracle Social Network, Oracle Enterprise Manager Cloud Control,
Oracle WebCenter Spaces, etc., and a broad range of third-party
enterprise applications have been containerized and verified for
compatibility with the Oracle Mobile Security Container. Oracle
Mobile
Security Containers use a key hierarchy to protect data. All keys
are derived from user credentials. The user credentials are never
stored.
Sign the workspace application with the Enterprise Distribution
Certificate from Apple, then re-build the application and archive
the
workspace application as an ipa file ready to be
deployed.
Hardware and Software Requirements
The following is a list of software and hardware requirements:
- Linux machine OL6
- Oracle Database 11g version 11.2.0.3
- Oracle Mobile Security Suite 3.0.1.0.0
- Active Directory Windows 2008(Optional)
- iMac or Macbook Pro laptop (Mac Operating system should be Version 10.9.4 or up)
- XCode Version 5.1.1 or up
Prerequisites
Before starting this tutorial, you should complete the following OBE
Note: It is required that the organization or developer be a
member of the Apple iOS Developer Program(https://developer.apple.com)
and have an understanding of the Apple iOS development process.
Signing the Workspace app
Generate the Enterprise Certificate
A certificate from Apple is used to sign an application
developed through XCode. Now you will sign the workspace app,
with the Enterprise
Distribution Certificate from Apple. There are two types of
Enterprise Certificates. Development and Production. This OBE
demonstrates
creating a Development Certificate. However in real life
scenarios (in typical organizations), iOS developers may have
their own development
certificate when they develop the application. Before
archiving, the application is given to the Enterprise Security
team who replace the
development certificate with an Enterprise Distribution
certificate. There is only one Enterprise Distribution
certificate per organization.
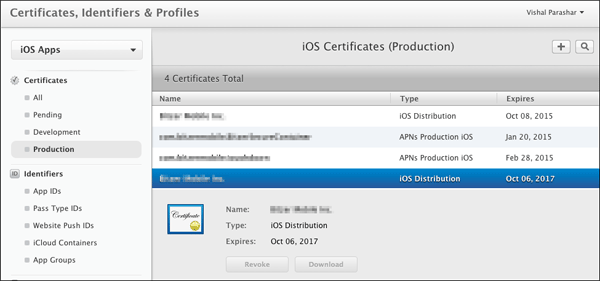
A sample of a Production certificate is shown below.
-
Open a browser in an iMac or a Macbook Pro laptop. Login to https://developer.apple.com. Click
Certificates, Identifiers and Profiles.
-
Click
Certificates.
-
Click
Add("+")to generate a new iOS Certificate for the Enterprise. This will be used to sign the workspace container.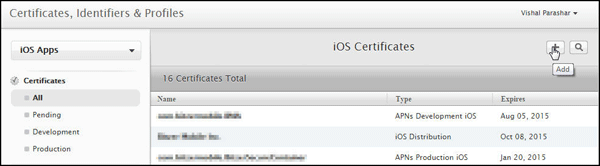
-
Select
iOS App Development. ClickWorldwide Developer Relations Certificate Authorityto download
the intermediate certificate.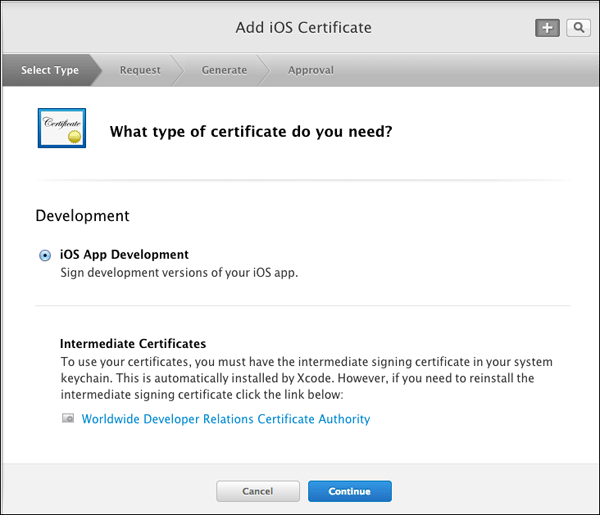
-
Click
Add. The certificateAppleWWDRCA.ceris added to the Keychain.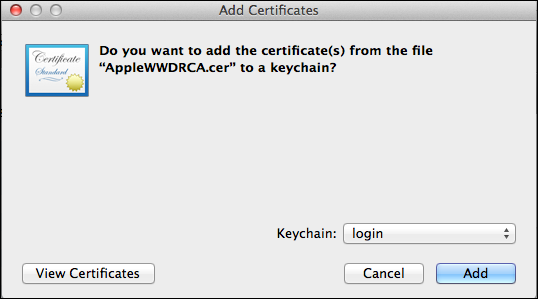
-
The next screen contains instructions to create a CSR using Keychain Access. Click
Continue.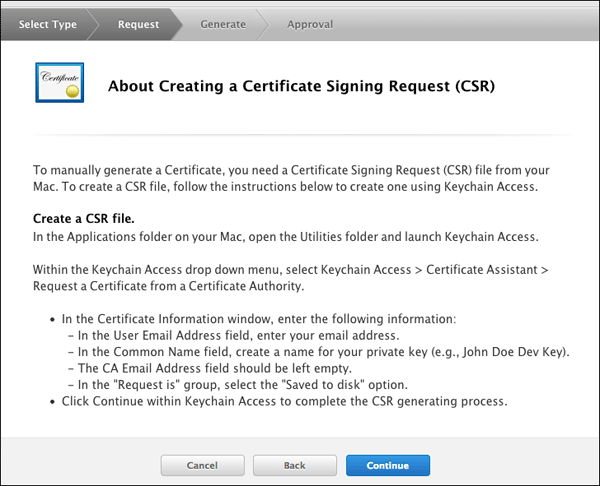
-
On your Mac desktop, Navigate to
Applications > Utilities.OpenKeychain Access.
-
Select
Keychain Access > Certificate Assistant
                        > Request a Certificate from a CA
.
In theCertificate Assistantwindow, enter the following information.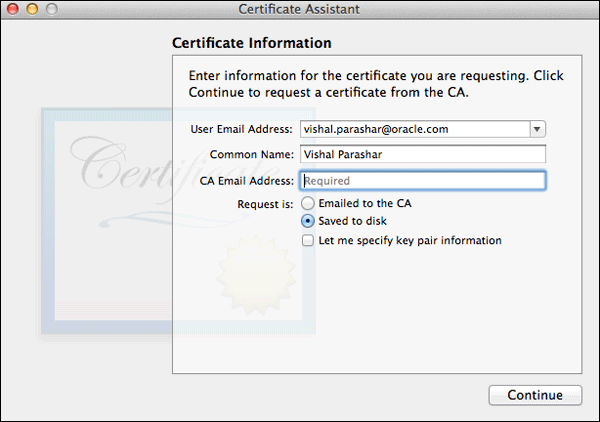
-
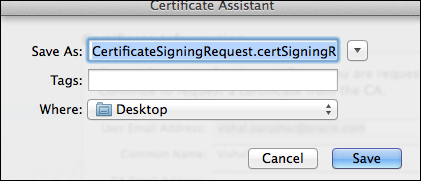
Save the certificate request to the desktop.
-
On
Generate your certificate, clickChoose Fileand select the CSR (Certificate Signing Request) that you saved
above to the Desktop. ClickGenerateto generate the certificate.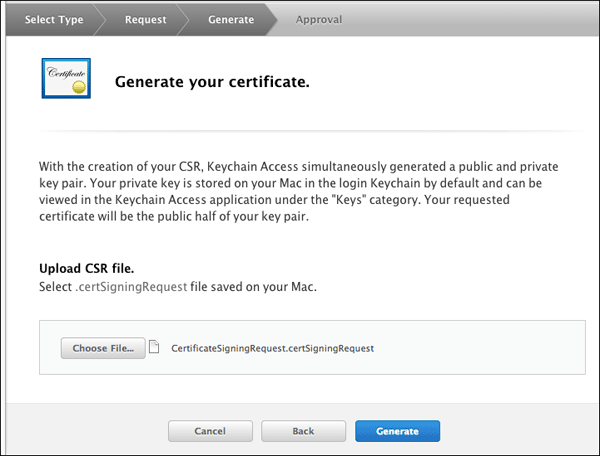
-
The status of the certificate shows
Pending
                        Approval
. It needs to be approved by the team administrator.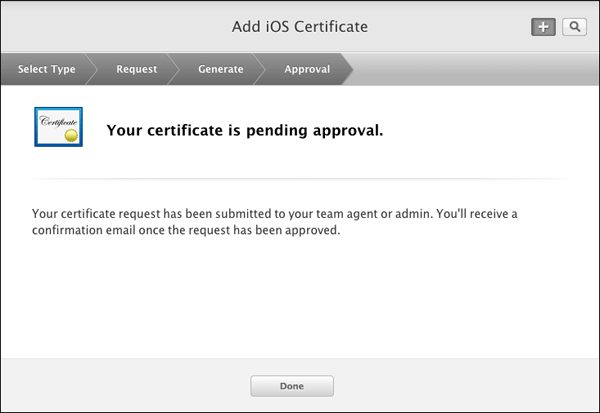
-
The new certificate has a status of
Pending
                        Approval
.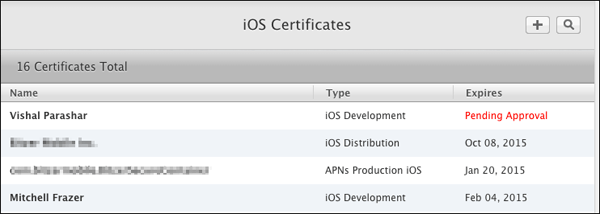
-
Once approved by the team administrator, it is ready for download. Click
Download.
-
Add the certificate
ios_development.certo the keychain.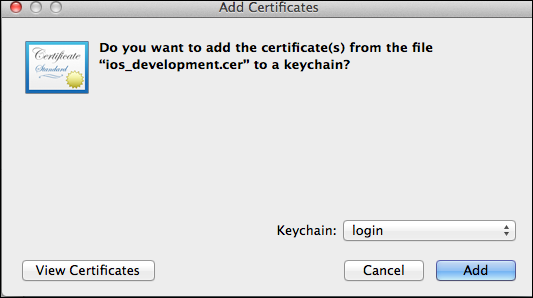
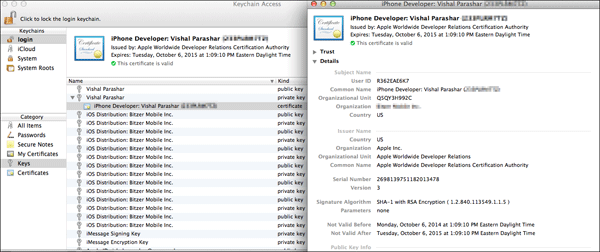
-
You can see the public, private keys, and the certificate in the KeyChain Access.

Follow the steps below to generate a Development Certificate.
Register an Application ID
Bundle ID is the identifier of an application (i.e.,Bundle ID
is a string used to precisely identify a single application).
App ID is the
connection between the application and provisioning profile.
App ID’s primary use is, as part of a provisioning profile, it
specifies
which applications are authorized by the profile to be signed
and launched. App ID has 2 parts: "bundle seed ID" and
"bundle ID search string".
Bundle seed ID makes applications share keychain data, that
is, it's the key chain entry of the applications which have
the
same bundle seed ID. Bundle ID search string defines how many
applications are covered by this App ID.
If you use a Wildcard App ID, that means many applications
will be authorized by the provisioning profile associated with
this App ID. Provisioning profile ties the certificates, App
id and Device id together.
For more details on Bundle Identifier, Application ID and Provisioning Profile, Please refer to Apple Documentation.
-
Login to https://developer.apple.com. Click
Certificates, Identifiers and Profiles.
-
Under
Identifiers, clickApp IDs. ClickAdd(+)to register an App ID.
-
Enter a name or description for the App ID in the
Namefield.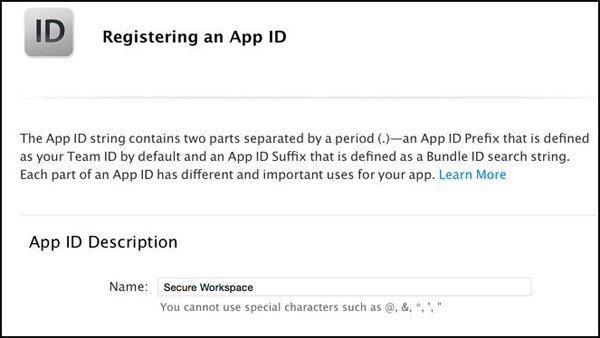
-
Select the corresponding checkboxes to enable the app services you want to use.
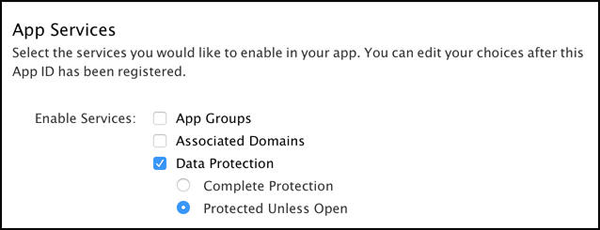
Note: A checkbox is disabled if the technology requires an explicit App ID and you are creating a
wildcard App ID, or the technology is enabled by default. -
To create an Explicit App ID, Select
Explicit App
                        ID
and enter the app’s bundle ID in theBundle ID
field. An Explicit App ID exactly matches the bundle ID of an app you’re building, for example,
com.bitzermobile.BitzerSecureContainer.
An explicit App ID can’t contain an asterisk (*). To create a wildcard App ID, select Wildcard App ID and
enter a bundle ID suffix in the Bundle ID field.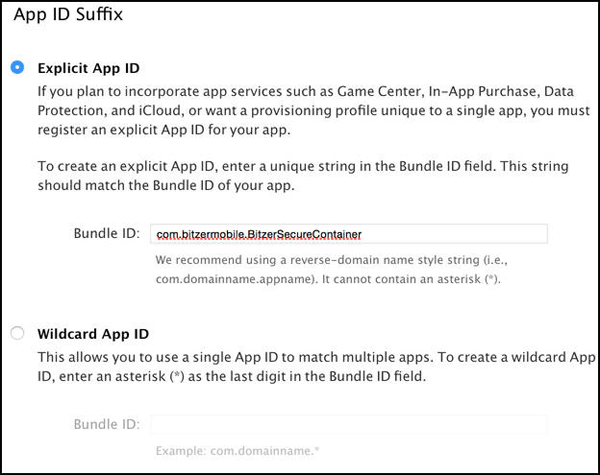
-
Click
Continue. Review the registration information, and clickSubmit. ClickDone.
Register a device
You must add the device to your account for testing before
you can download the provisioning profile. This is required
only while creating a Development provisioning profile. This
step is not required while creating an Enterprise Distribution
provisioning Profile.
-
The UDID of the device to be registered has to be determined first. In your Mac, connect to iTunes and under
MyDevice look for Summary page. The UDID of the device can be obtained as shown below.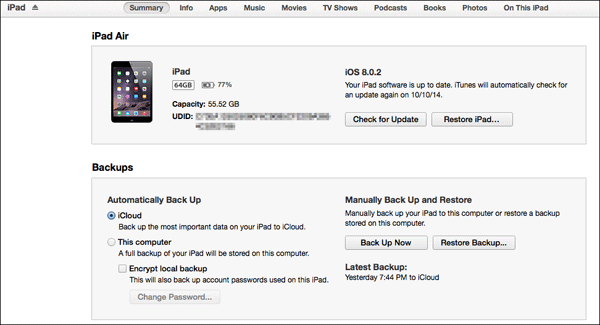
-
Login to https://developer.apple.com. Click
Certificates, Identifiers and Profiles.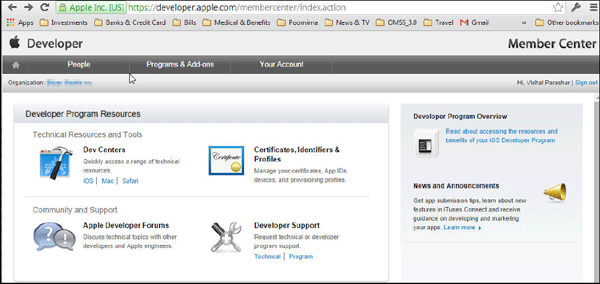
-
Under
Devices, clickAll. ClickAdd(+)to register a new device. Use the UDID of the device (obtained above)
to register the device.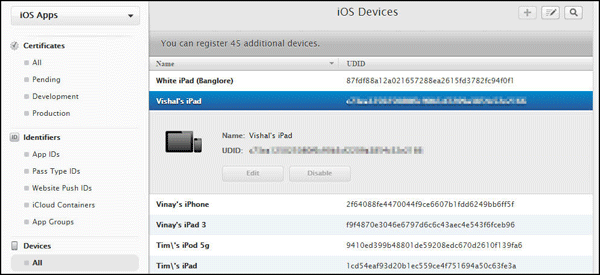
Note: For Enterprise Distribution profile this is not required. You need this device id when working with Enterprise
Development provisioning profile only.
You have now completed creating the artifacts required for creating a provisioning profile.
Building and Deploying the Workspace app
Create a Provisioning Profile
A provisioning profile is a collection of digital entities
that uniquely ties developers and devices to an authorized
iPhone Development
Team and enables a device to be used for testing.
There are two types of provisioning profiles. Development and
Distribution. For this OBE, you will create a Development
provisioning profile.
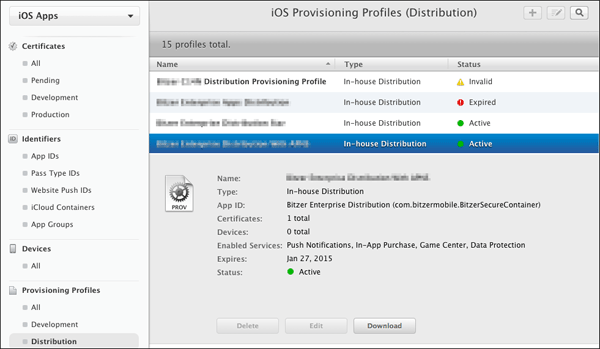
But in a real life scenario (In Organizations) only a
Distribution provisioning profile will be created. A sample of
a Distribution provisioning
profile is shown below.
Note: One provisioning profile can be used with one
application or a generic provisioning profile can be created
(commonly referred
to as star (*) profiles) that can be used with many
applications. If you are building the application in XCode,
the bundle identifier must
have the app id of the provisioning profile as the prefix,
otherwise it will not compile.
-
Login to https://developer.apple.com. Click
Certificates, Identifiers and Profiles.
-
Under
Provisioning Profiles, ClickAll. ClickAdd(+)to register a new provisioning profile. -
Select
iOS App Developmentand clickContinue.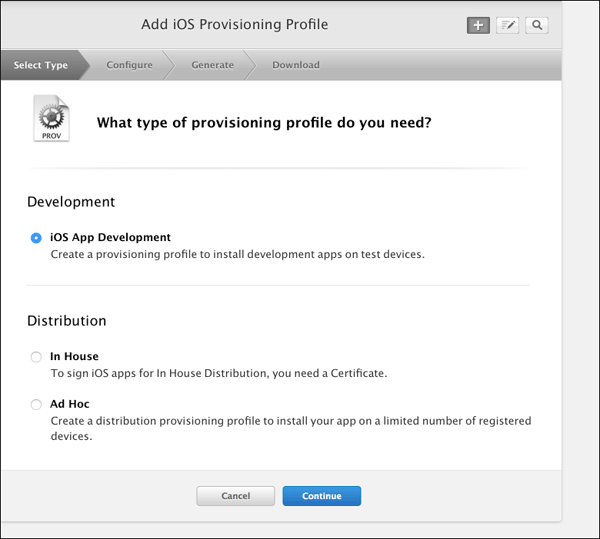
-
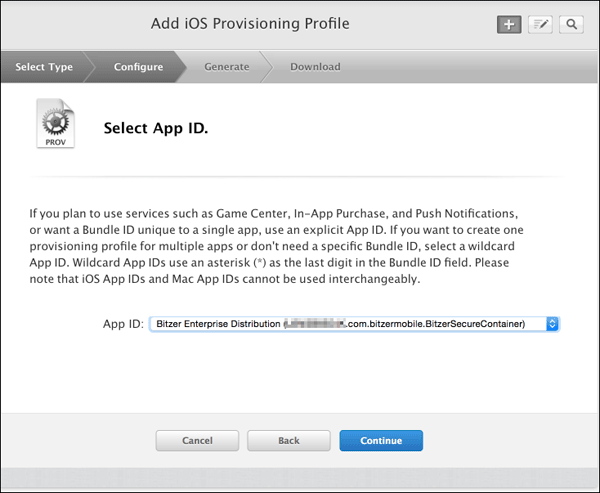
In the next few steps you will associate the provisioning profile with artifacts generated in the previous step.
Select the app id generated.
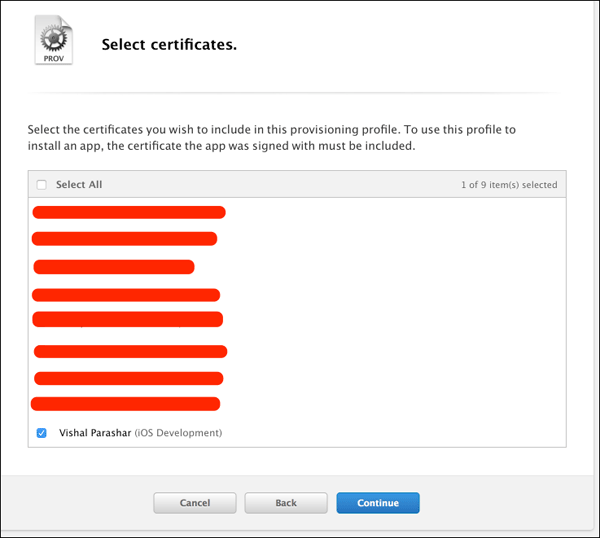
Select the certificates that you wish to be included in the provisioning profile.
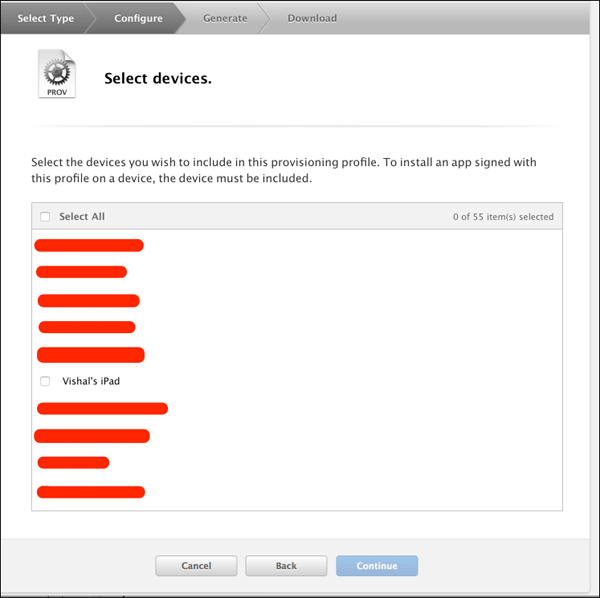
Select the devices that you wish to be included in the provisioning profile.
-
Provide a name for the provisioning profile and associate it with its Certificate, Device id and App id.
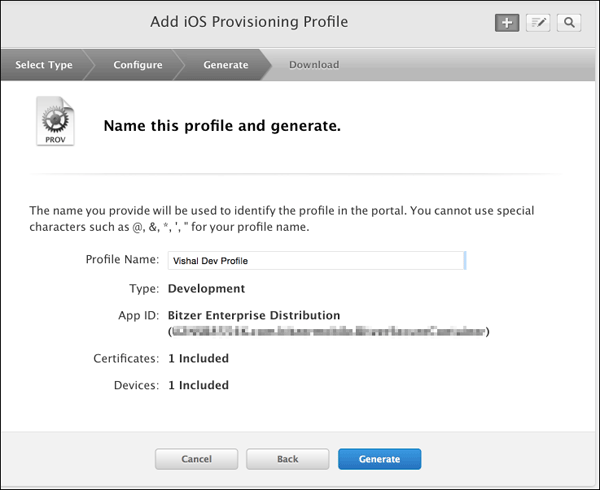
-
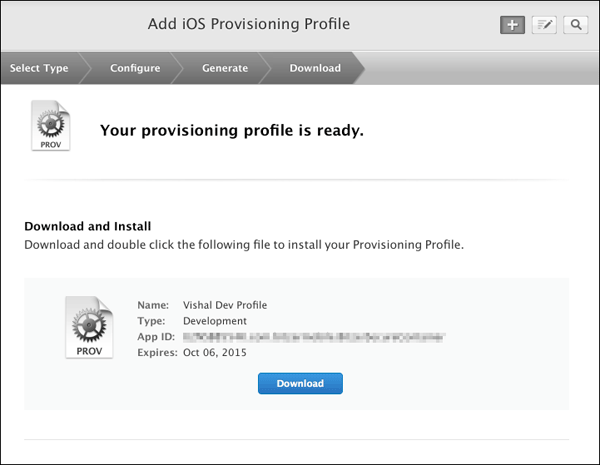
Once the provisioning profile is generated, click
Download.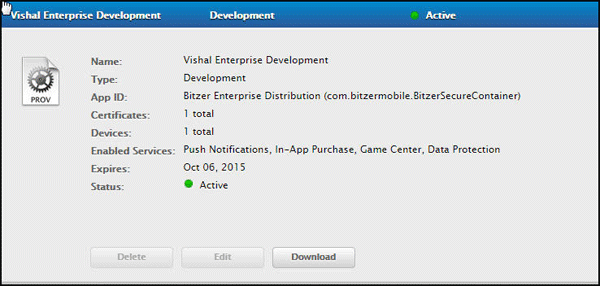
The file downloaded is
Vishal_Enterprise_Development.mobileprovision
Follow the steps to create a Development provisioning profile.
Sign and secure the Workspace application
You will use the artifacts generated in the above sections and sign and secure the workspace application.
-
Open XCode on your Mac. Open
BitzerSecureContainerwithin XCode. This is the workspace application
that was customized earlier.
Open the provisioning profileVishal_Enterprise_Development.mobileprovisionto populate the provisioning profile
and the certificate associated with the profile within theCode Signingsection of theBuild/Settingstab. If it does not
get loaded automatically, click the pick list underCode Signing Identityand load it.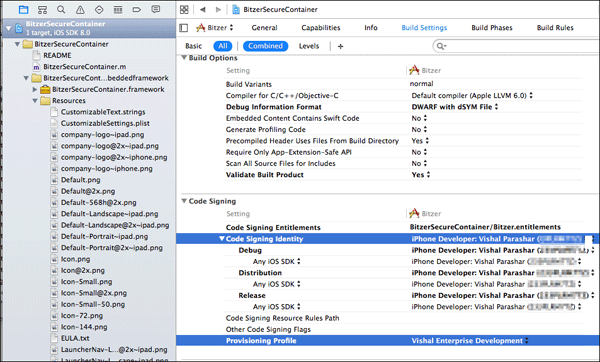
-
Before building the application, make sure the device is set to iOS device (in production deployment) or to a connected
iOS device such as iPad (build fails in case you selected an emulator). Build the app to verify that there are no code errors.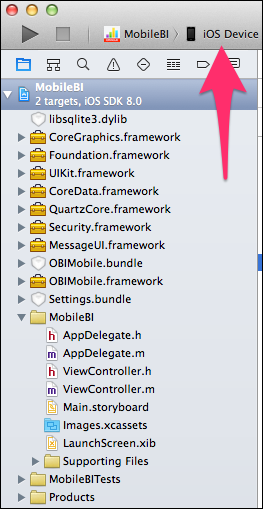
-
Select
Product > Buildmenu option within XCode to successfully build the application.
Archive and export file
Archive the workspace application as ipa file, so that it is ready to be deployed.
-
Click
Product > Archivein XCode to openOrganizer - Archiveswindow. ClickExportto export the archive
of the secure workspace container app as anipafile.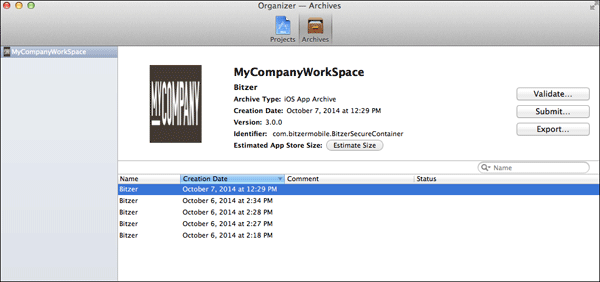
-
Select
Save for Ad Hoc Deployment.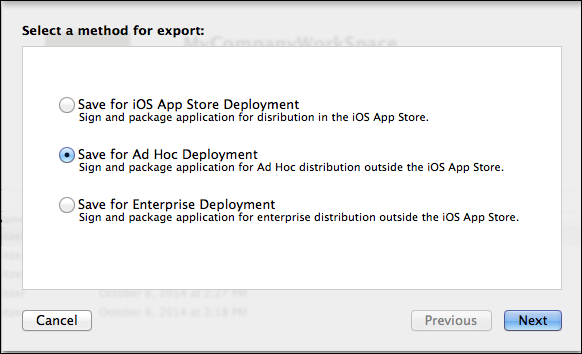
-
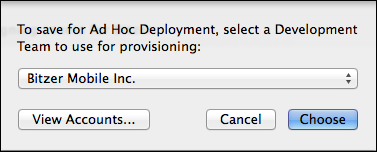
Select the deployment team to use for provisioning.
-
Click
Exportin the Summary window.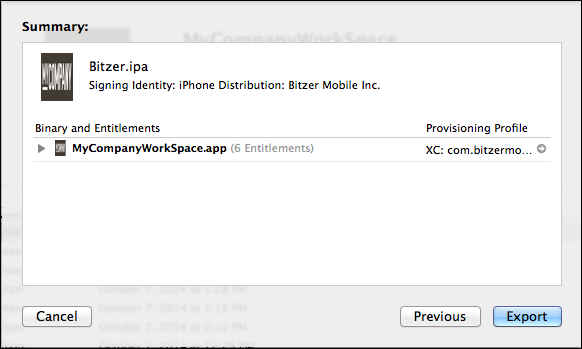
-
Specify the destination for the file.
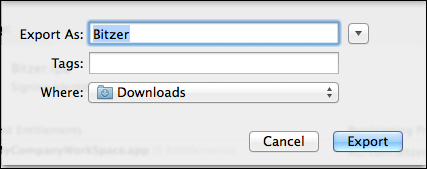
-
View the exported ipa file.

You have now completed signing and generating the ipa file for workspace application. This is ready to be deployed in a mobile device.
Summary
The enterprise certificate has been generated for the workspace
application and it has been rebuilt. The ipa file(signed and
generated)
for the workspace application is ready to be deployed in a mobile
device.
In this tutorial you learned to:
- Create artifacts required for provisioning profile
- Register an application ID
- Register a mobile device
- Create a provisioning profile
- Sign and secure the workspace app
- Archive and export the ipa file
Resources
-
For additional OBEs, please refer to the Oracle Mobile Security Series
Credits
- Lead Curriculum Developers: Vishal Parashar, Vandana Rajamani
- Product Manager: Sanjay Sadarangani
- Other Contributors: Pradeep Bishnoi, Ali Ahmed, Ashish Singh, Mukesh Singh, Satishkumar Venkatasamy
To navigate this Oracle by Example tutorial, note the following:
- Topic List:
- Click a topic to navigate to that section.
- Expand All Topics:
- Click the button to show or hide the details for the sections. By default, all topics are collapsed.
- Hide All Images:
- Click the button to show or hide the screenshots. By default, all images are displayed.
- Print:
- Click the button to print the content. The content that is currently displayed or hidden is printed.
To navigate to a particular section in this tutorial, select the topic from the list.