Upgrading Oracle Access Manager 11g Release 2 to 11g Release 2 PS2
Overview
Purpose
In this tutorial, you learn how to upgrade an Oracle Access Manager (OAM) cluster from version 11g R2 (11.1.2.0) to version 11g R2 PS2 (11.1.2.2).
Time to Complete
Approximately 1 hour
Introduction
The environment used for this tutorial consists of three machines. The machines are organized into roles, where two are the OAM cluster members and the third is the Oracle database and Lightweight Directory Access Protocol (LDAP) server. The upgrade process here covers the OAM components in the cluster, including WebLogic Server (WLS), Oracle HTTP Server (OHS), OAM components, and Oracle Platform Security Services (OPSS). Other components used in the environment are not upgraded as they are already at a supported level for OAM 11g R2 PS2. These components include Oracle Database, Oracle Unified Directory (OUD) and the WLS instance on the database server.
As an existing user of a previous version of OAM, such as R2 (11.1.2) or R2 PS1 (11.1.2.1), consider the following scenarios:
- Upgrade
- Migration
- Coexistence
This tutorial covers the upgrade scenario for OAM. You upgrade your environment by installing the new release on the servers that are running the older version. The primary advantage is that the installers will preserve the existing configuration and policy settings and provide you with a functioning environment for the new release without the need for additional hardware. It is important to determine that your current servers have sufficient capacity and are at a supported operating system release. You also must consider the required downtime for the environment while you perform the upgrade as well as the risk of a failed upgrade. You should determine and potentially reduce the amount of time required for the upgrade by exploring your specific upgrade tasks in a non-production environment. Additionally, you mitigate the risk of a failed upgrade by performing a complete backup of the environment prior to the upgrade.
In the other two scenarios, you provision new machines for the new release. You migrate to the new release by copying over the configuration and policy from the old environment to the new environment. After you successfully migrate, you can then deprovision the old environment. Migration is also a convenient way to upgrade the hardware in your environment.
Alternatively, you can choose to have a coexistence environment that comprises components at different release levels. For example, you would choose coexistence when you have deployed applications that are protected by Sun OpenSSO Enterprise 8.0 and will deploy new applications and protect them with Oracle Access Manager 11g R2 PS2. The coexistence environment is a long-term migration scenario that gives you more time to change the protection for already deployed applications. The risk you incur in these two scenarios is lessened, because your old environment remains relatively unchanged during the process.
The following graphic illustrates the upgrade process. You must complete the topics in this tutorial in the order shown here, because each topic depends on at least one previous topic.

Hardware and Software Configuration for This Tutorial
This tutorial is based on a two-node cluster installation of OAM. The following tables and environment information provide details about this environment. This tutorial is intended to guide you through the upgrade process, however you must first adapt the steps to your environment. For example, your machine configuration is different or other products are installed and integrated.
- Two OAM servers with Oracle Linux 6.5 and 8 GB RAM:
Software Component Version Upgrade to OAM 11.1.2.0 11.1.2.2 WLS 10.3.5 10.3.6 OHS 11.1.1.7 unchanged WebGate 11.1.2.0 11.1.2.2 - Environment variables set in .bash_profile:
- export MW_HOME=/u01/app/oracle/product/middleware
- export ORACLE_HOME=$MW_HOME/iam_home
- export DOMAIN_BASE=$MW_HOME/user_projects/domains
- export DOMAIN_HOME=$DOMAIN_BASE/oam_domain
- export JDK_HOME=/u01/app/oracle/product/jdk1.6.0_29
- export JAVA_HOME=$JDK_HOME
- export PATH=$JDK_HOME/jre/bin:$PATH:$HOME/bin
- export OHS_HOME=$MW_HOME/ohs_home
- Database server with 6 GB RAM:
Environment variables set in .bash_profile:
- export JAVA_HOME=/u01/app/oracle/product/jdk1.6.0_29
- export JDK_HOME=$JAVA_HOME
- export ORACLE_HOME=/u01/app/oracle/product/database/db_home
- export ORACLE_SID=orcl
- export PATH=$JAVA_HOME/jre/bin:$PATH:$HOME/bin:$ORACLE_HOME/bin
- export MW_HOME=/u01/app/oracle/product/middleware
- export INSTANCE_NAME=oud_instances/oud1
- export OUD_HOME=$MW_HOME/oud_home
- export DOMAIN_BASE=$MW_HOME/user_projects/domains
Software Component Version Upgrade to Oracle Database 11.2.0.3 unchanged WLS 10.3.5 unchanged OUD 11.1.2.0 unchanged
Prerequisites
You must have a supported environment. For more information, see the next section, "Supported Starting Points for OAM 11.1.2.2." This tutorial covers the upgrade of OAM from 11.1.2.0 to 11.1.2.2. For other upgrade, migration, and coexistence scenarios, consult the 11.1.2.2 release documentation.
Supported Starting Points for OAM 11.1.2.2
The following components must be at a supported version level before you can perform an upgrade for your OAM environment:
- Operating system
- Oracle Database
- WebLogic Server
- Fusion Middleware and OAM
- OAM schema
To check if your environment is supported and confirm which components to upgrade:
- Ensure that the following servers are running:
- WLS Administration Server
- Managed Servers in the OAM cluster
- Oracle database
- OUD or other user repository
- OHS
-
Check your operating system (OS) level.
For the tutorial environment, the following command displays the current OS level:
cat /etc/*releaseFrom the following output, the servers in the tutorial environment are running 64-bit Oracle Linux 6.5. The Linux Operating System Requirements shows that Oracle Linux is supported at level 6.1 and later.

-
Check your Oracle database level.
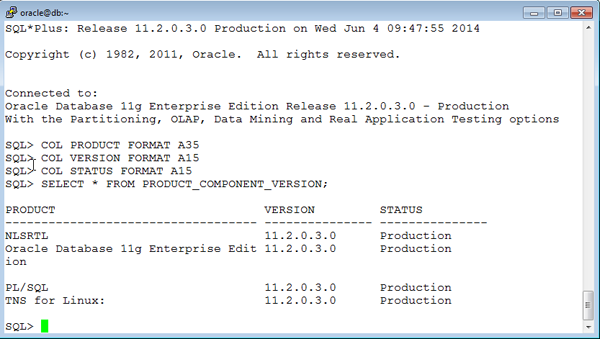
Enter the following SQL query on your Oracle Database server:
sqlplus / as sysdba
COL PRODUCT FORMAT A35
COL VERSION FORMAT A15
COL STATUS FORMAT A15
SELECT * FROM PRODUCT_COMPONENT_VERSION;
From the following output, the tutorial environment is running version 11.2.0.3. This meets the minimum requirements of version 11.1.0.7.0 or later in Oracle® Fusion Middleware System Requirements and Specifications.
- Check your WLS version.
. $MW_HOME/wls_home/server/bin/setWLSEnv.sh
java weblogic.version
From the following output, WLS is at version 10.3.5. Both 10.3.5 and 10.3.6 are supported per Oracle® Fusion Middleware System Requirements and Specifications for Oracle Identity and Access Management. Upgrading WLS is optional in this scenario; however, this tutorial covers the upgrade for the OAM cluster. Upgrading WLS on the database server is not covered.

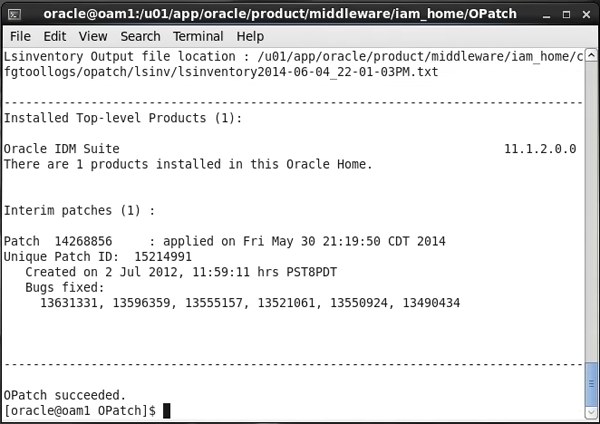
- Check your Fusion Middleware version.
cd $MW_HOME/iam_home/OPatch
./opatch lsinventory
From the output, the Middleware version is 11.1.2.0.0, which is 11g R2. The upgrade scenarios are described in Oracle® Fusion Middleware Upgrade Guide for Oracle Identity and Access Management and include the following starting points:
- Oracle Identity and Access Management 11g R2 (11.1.2.1.0)
- Oracle Identity and Access Management 11g R2 (11.1.2)
- Oracle Identity and Access Management 11g R1 (11.1.1.7.0)
- Oracle Identity and Access Management 11g R1 (11.1.1.5.0)
- Oracle Identity Manager 9.1.x.x
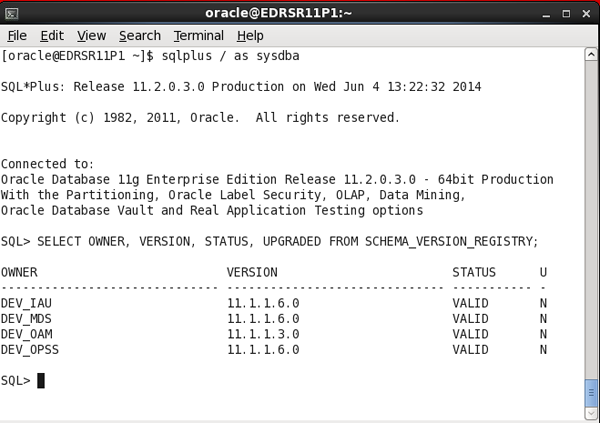
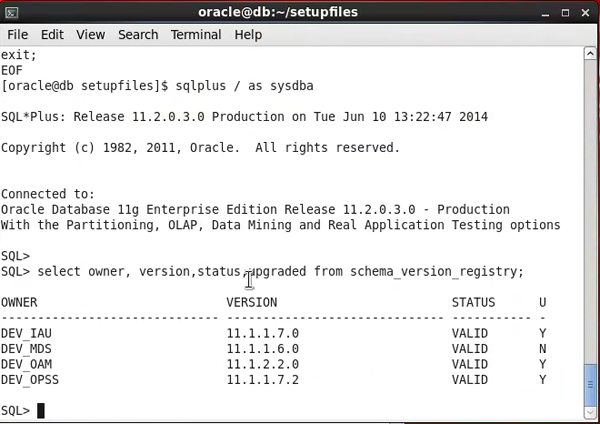
- Check the schema version.
sqlplus / as sysdba
SELECT OWNER, VERSION, STATUS, UPGRADED FROM SCHEMA_VERSION_REGISTRY;
Per Oracle® Fusion Middleware Upgrade Guide for Oracle Identity and Access Management, the supported version of the OAM schema is either 11.1.1.3.0 or 11.1.2.1.0. From the command output, the tutorial environment has version 11.1.1.3.0.
If the checks in this topic are all successful, the environment is supported for an upgrade. For other scenarios, you must get the environment to a supported starting point before performing the upgrade. You also have the alternative of a migration to the new OAM release, which is described in Oracle® Fusion Middleware Migration Guide for Oracle Identity and Access Management. This guide also covers coexistence scenarios.
Setting Up the Test Cases
You determine the success of the upgrade process by verifying that the product upgrade is completely installed and that the environment functions as expected.
For this tutorial, you use the OAM Access Tester to simulate user access for protected resources. The functions to be tested include:
- Verifying user authentication
- Accessing a protected resource
The Access Tester is described in Oracle® Fusion Middleware Administrator's Guide for Oracle Access Management. The tool enables you to simulate user access requests and responses. You also use it to simulate agents and to script and run test cases from the command line. This method allows for a before-and-after comparison of the output from the test cases for the upgrade.
The following sections show how to create the test cases for the tutorial environment in graphical mode and in command-line mode. You save the test cases and configuration to XML files so that you can repeat them in batch mode.
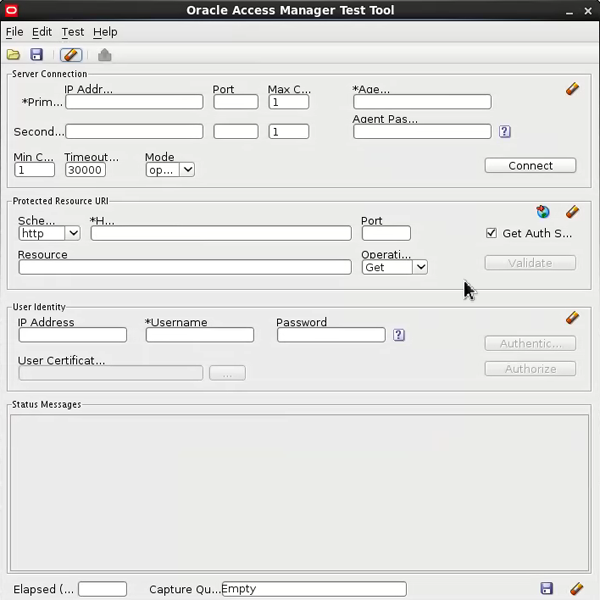
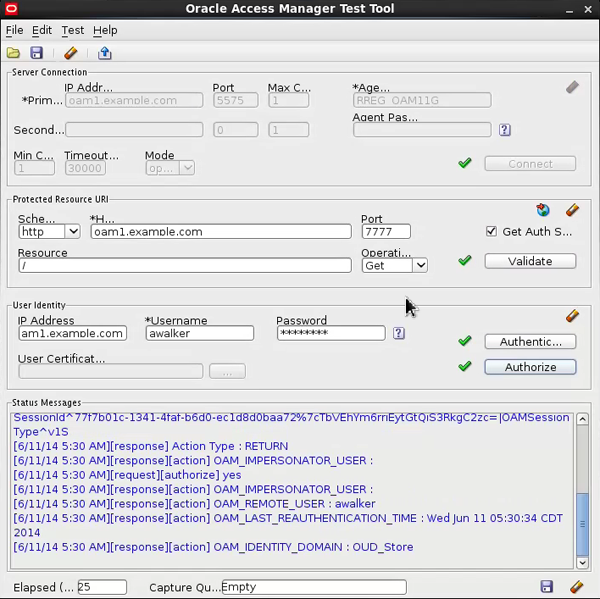
Setting Up the Test Cases in Graphical Mode
- Start the OAM Access Tester. Note that the webgates are configured with no password and open security. If your environment uses encrypted communications with a setting of either simple or cert for security, you must configure the certificates that are used for the OAM Access Tester. Refer to the product documentation for the steps to configure the keystore.
cd $MW_HOME/iam_home/oam/server/tester
java -jar oamtest.jar
-
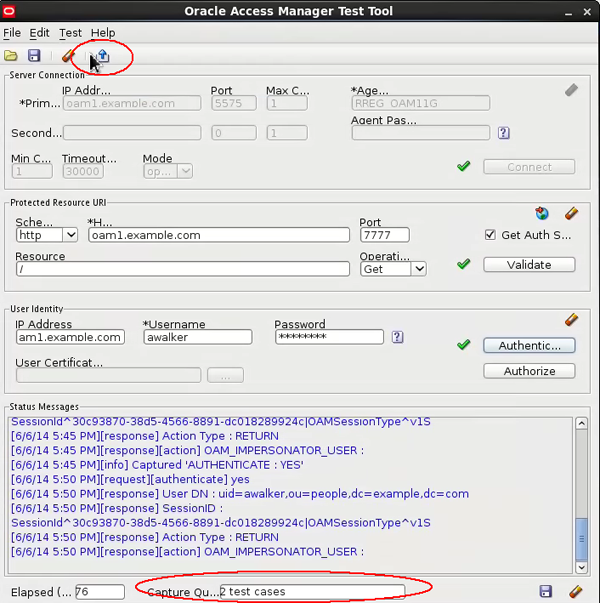
Fill in the connection and request details. The name to use for the agent, in this case a WebGate, is in the OAM console (go to System Configuration > Access Manager > SSO Agents > OAM Agents).
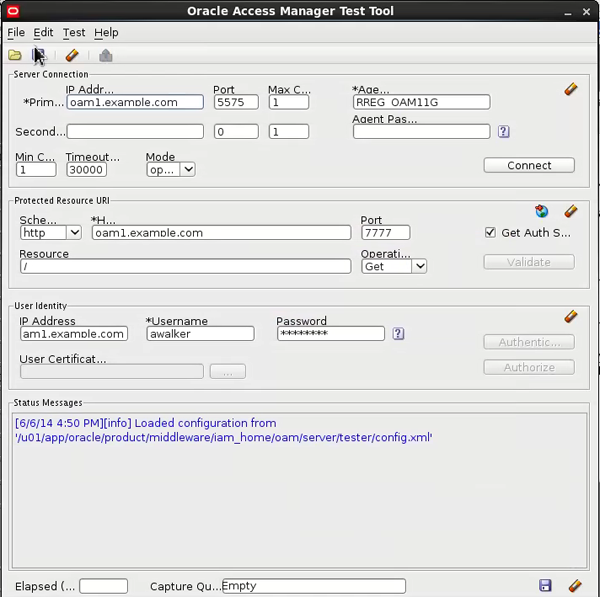
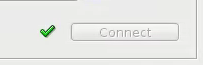
- Click Connect to verify the connection information. The green checkmark indicates that the agent can connect to the OAM server.
.
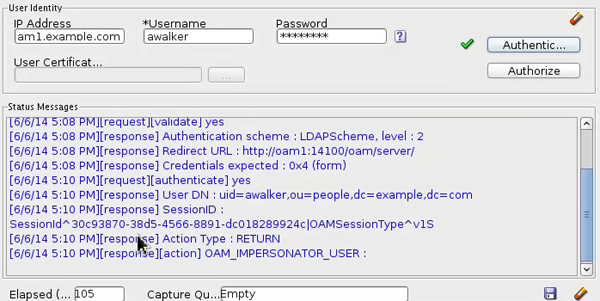
- Click Validate to initiate the request for the protected resource. The green checkmark indicates that the initial HTTP request is successful.

- Click Authenticate to authenticate the user. Check the status messages to see the progression of the requests.
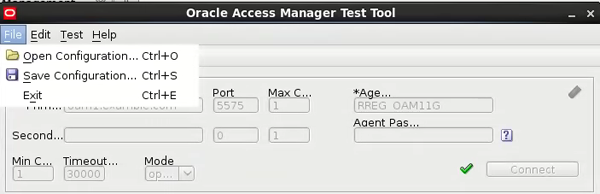
- To save the configuration for batch processing, select Save from the File menu or click the save icon. Name the file config.xml.
- To save the test cases for batch processing, perform the following steps:
- For each new path you connect to, click Validate, Authenticate, and Authorize to test access.
- Click the capture last request button after you press any of the three buttons.
The test case is saved to the queue, as indicated at the bottom of the window.
- Select Test > Generate Script and save the test script as testscript.xml.
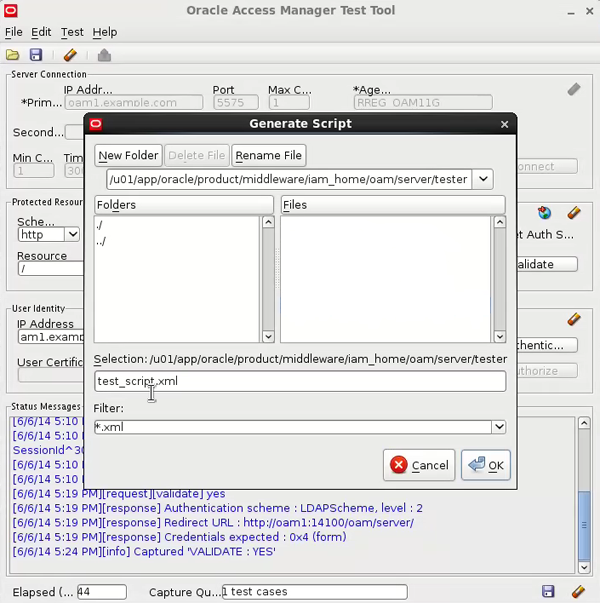
Because you may need to repeat the test cases as you develop them, the save options enable you to avoid manually entering the test configuration each time. In this example, you tested access only to the / path. However, you should have test cases for paths that are associated with specific policies, to ensure correct operation before and after the upgrade process.
Setting Up the Test Cases in Command-Line Mode
-
Start the tester from the command line and specify the configuration file and the test cases file. Notice that three output files are created. The
*target.xml file captures the results, the*stats.xml file captures the response time, and the log file captures the messages.cd $MW_HOME/iam_home/oam/server/tester
java -Dscript.scriptfile="test_script.xml" -Dcontrol.configfile="config.xml" -jar oamtest.jar
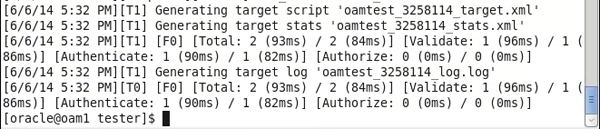
- Save the results of the test cases so that you can compare them after the upgrade. Each time you run the tester in command-line interface mode, the output files are named with a timestamp.
mkdir ~/testcases
cp * ~/testcases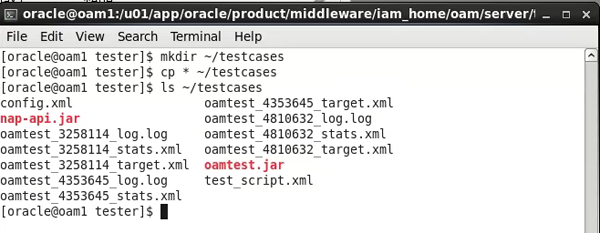
Backing Up the Environment
With an in-place upgrade it is important that you create a backup of the file systems being changed during the upgrade and the Oracle database. If the upgrade is not successful, you can use the backups to restore the environment. Be sure to shut down the application servers and the Oracle database before you perform the backup.
- Stop each cluster node server.
cd $DOMAIN_HOME/bin
./stopManagedWebLogic.sh oam_server1

You can also shut down the cluster nodes in the admin console.
- Select Environment > Servers.
- Select the servers.
- Select Shutdown > When work completes.
Starting the Node Manager is required for managing the cluster servers remotely.

- Stop the WLS Administration Server.
cd $DOMAIN_HOME/bin
./stopWebLogic.sh
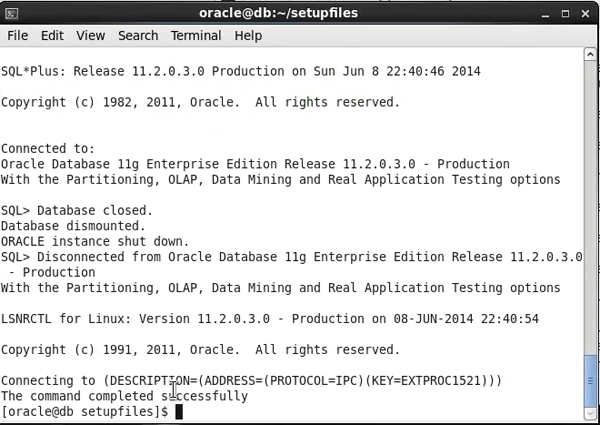
- Stop the Oracle database server.
export ORACLE_HOME=/u01/app/oracle/product/database/db_home
export ORACLE_SID=orcl
export PATH=$ORACLE_HOME/bin:$PATH
sqlplus / as sysdba
shutdown immediate
exit
lsnrctl stop
- Back up the
middleware , domain home, andapplications directories. This example creates the archive files in the home directory of the oracle account. Check for available space in the target file system before creating the archive files.mkdir ~/backups
df -k ~/backups
cd $DOMAIN_HOME
tar -czvpsPf ~/backups/oam_domain.tgz ./*
cd $MW_HOME
tar -czvpsPf ~/backups/middleware.tgz ./*
cd $MW_HOME/user_projects/applications
tar -czvpsPf ~/backups/applications.tgz ./*
cd /u01/app/oraInventory
tar -czvpsPf ~/backups/inventory.tgz ./*

- Back up the Oracle database by using Oracle Recovery Manager (Oracle RMAN).
rman TARGET /
startup mount;
backup full database;
exit;

You can use several methods to back up an Oracle database, such as a cold file system backup, Data Pump utility, and Oracle RMAN. In this example, you used Oracle RMAN, which is a recommended method for backing up the Oracle database.
Upgrading WebLogic Server
Now that you have backed up the environment, you can start the actual upgrade of the software. The first component that you upgrade is the WebLogic server. In this example, you are upgrading from 10.3.5 to 10.3.6. For the tutorial environment, you perform the following on the oam1 and oam2 cluster members:
- The upgrade installer is different than the installer that is used for fresh installations. If necessary, download the upgrade installer from My Oracle Support.
-
Start the 10.3.6 upgrade installer.
java -jar wls1036_upgrade_generic.jar
-
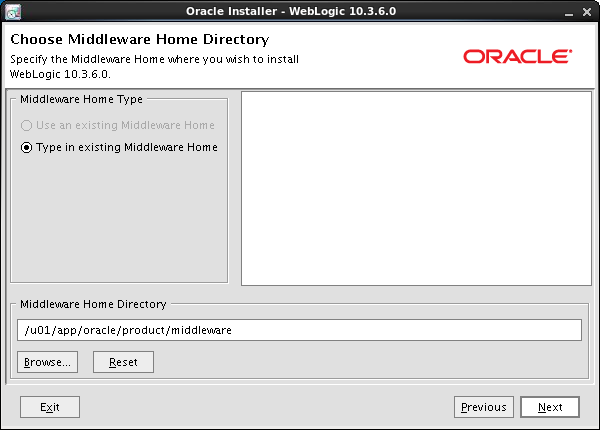
The existing middleware home should already be selected. If it is not, then enter it.
-
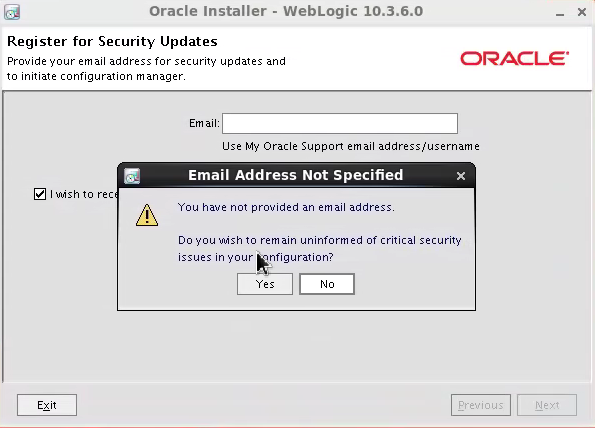
For the tutorial environment, bypass the registration for security updates.
-
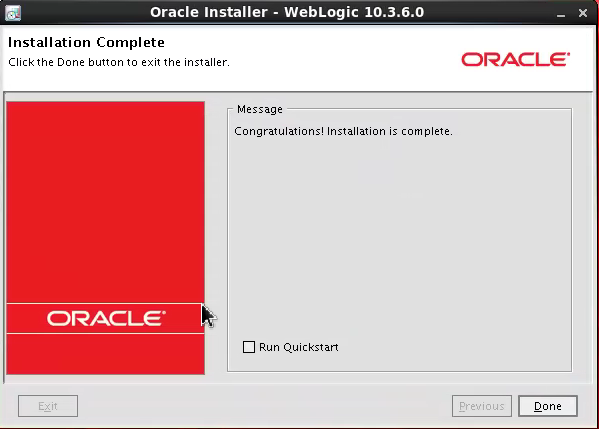
Click Next through two screens to start the upgrade. On the Installation Complete page, do not select the Run Quickstart check box.
- Repeat steps 1 through 5 for the oam2 cluster member.
Updating the OAM Binaries
In this topic, you update the OAM binaries to 11.1.2.2. The installer is the same one used for fresh installations and you can download it from OTN.
-
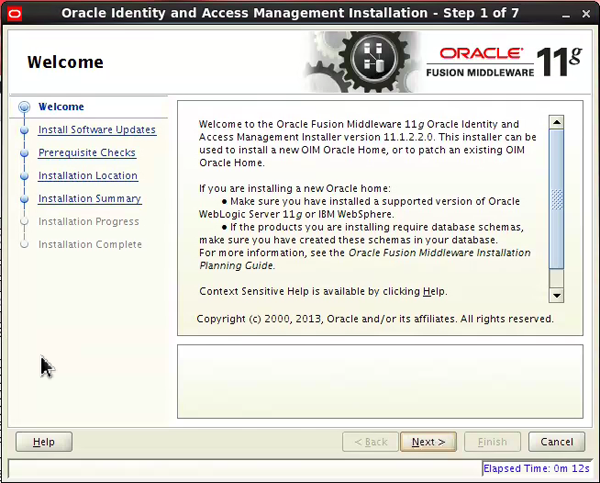
Start the installer.
./runInstaller -jreLoc $JDK_HOME
-
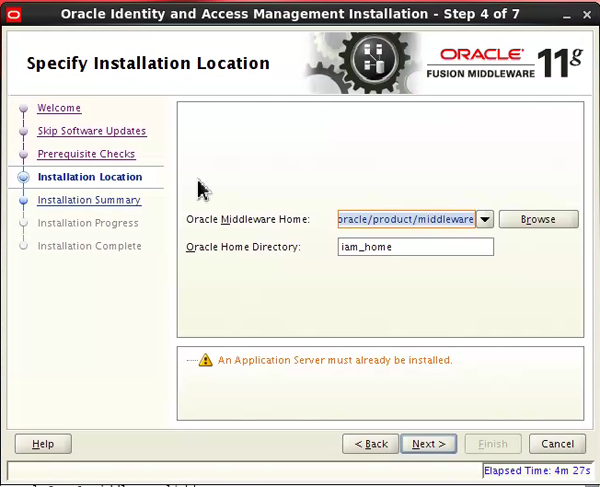
Skip the software updates. On the Specify Installation Location page, the existing Oracle middleware and home directories should already be populated. Correct the paths if necessary and click Next.
-
In the Warning dialog box, click Yes to upgrade the existing home.

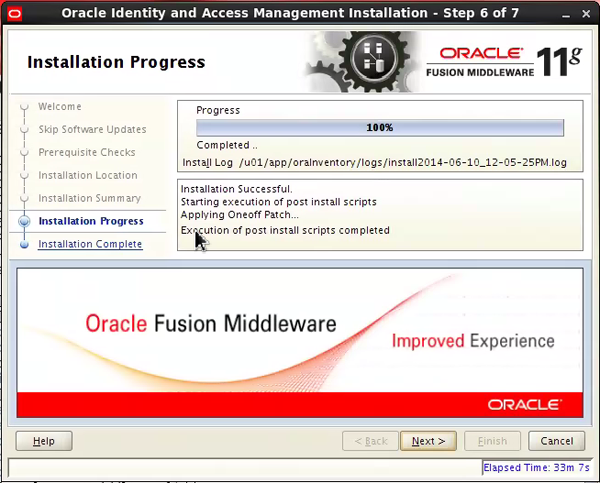
Complete the installation. The installer will pause at 98% and then complete.
-
Repeat steps 1 through 4 for the oam2 cluster member.
Upgrading OAM and OPSS Schemas
In a previous topic, you checked to ensure that your existing schemas were supported for upgrade to 11.1.2.2. In this topic, you use the Patch Set Assistant (PSA) to upgrade them. Take note of which server you are on for each step because you perform some on the oam1 server, and others on the database server.
-
Start the Oracle database on the database server.
export ORACLE_HOME=/u01/app/oracle/product/database/db_home
export ORACLE_SID=orcl
export PATH=$ORACLE_HOME/bin:$PATH
lsnrctl start
sqlplus / as sysdba
startup
exit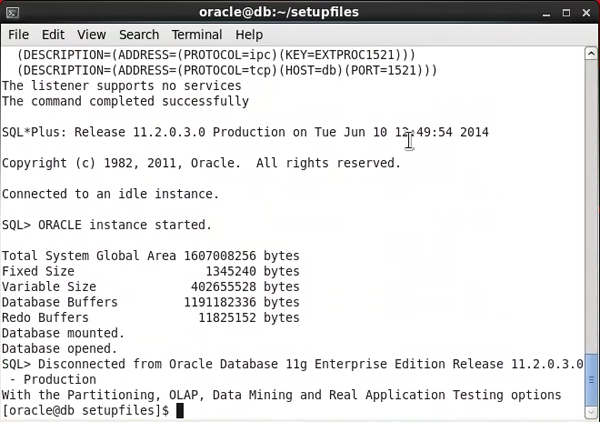
-
Perform the following actions:
- Start the PSA on the OAM server.
cd $MW_HOME/oracle_common/bin
./psa - Click Next and then select Oracle Access Manager on the Select Component screen.
Notice that OPSS is selected automatically. If the selection cannot be made or if there are Java class loader errors, ensure that you have the correct
JAVA_HOME set in the environment. Also the psa script calls the$WL_HOME/common/bin/commEnv.sh script for WebLogic Server. If WebLogic Server was installed with the incorrect JRE, psa fails to start. Correct the path forJAVA_HOME in the commEnv.sh script.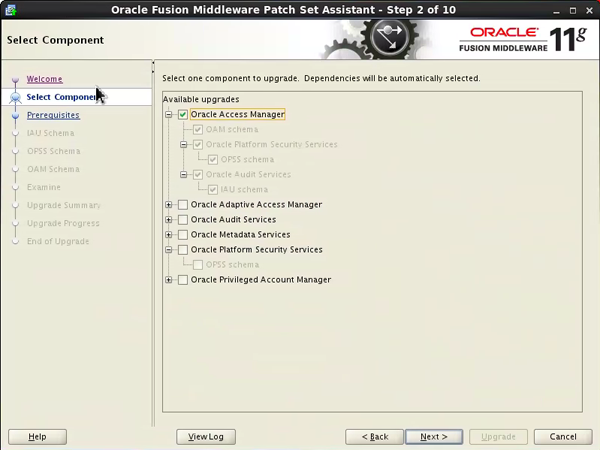
- Start the PSA on the OAM server.
-
On the Prerequisites screen, check the boxes that you have satisfied the database prerequisites and click Next.
-
Enter the connect string. Click Connect and then enter the schema credentials for the Audit Services (IAU) schema. The credentials are carried forward to the next screens for the OPSS and OAM schemas.
Your environment may use the short or long version of the SID. For example, "orcl" or "orcl.example.com."
- Connect string: db.example.com:1521/orcl
- DBA user: sys as sysdba
- Passwords: welcome1

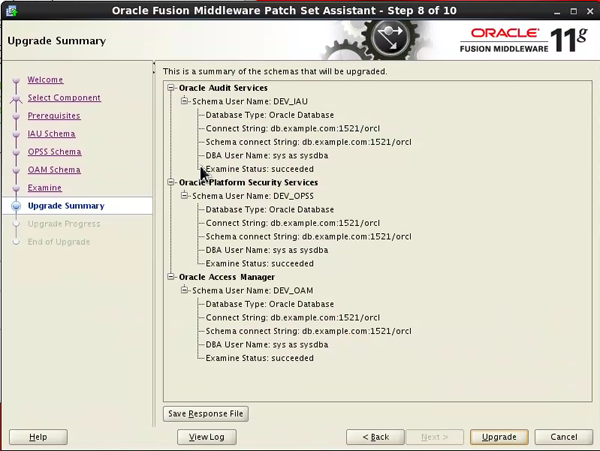
-
On the Upgrade Summary screen, click Upgrade.
-
On the Upgrade Success screen, write down the location of the log file. You will review the log file to ensure success.
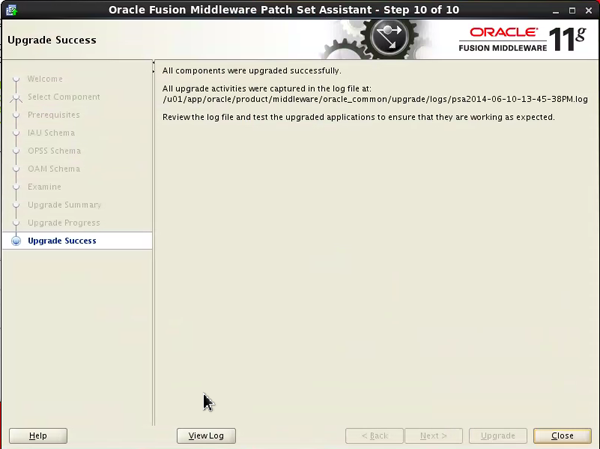
-
Click View Log.

You should see the following message in the log file: "3 components upgraded with success." You can ignore other error messages about missing components for Oracle Identity Manager (OIM) and Oracle SOA Suite (SOA), which are not installed in the environment.
- Check the new schema versions on the database server.
sqlplus / as sysdba
SELECT OWNER, VERSION, STATUS, UPGRADED FROM SCHEMA_VERSION_REGISTRY;
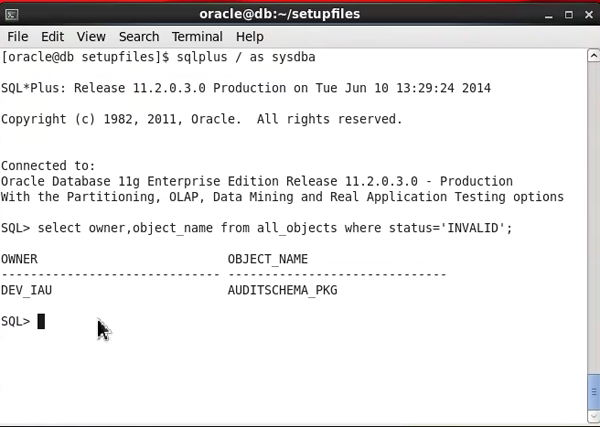
- Enter the following query to check for invalid objects that must be recompiled:
sqlplus / as sysdba
SELECT owner, object_name FROM all_objects WHERE status='INVALID';
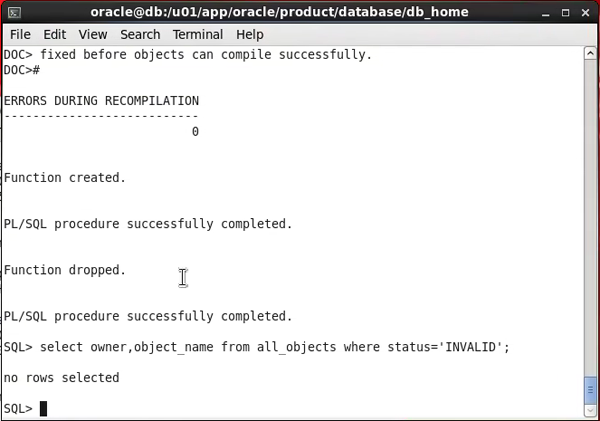
- Recompile the invalid objects and check again for invalid objects.
cd $ORACLE_HOME
sqlplus / as sysdba
@rdbms/admin/utlrp.sql
SELECT owner, object_name FROM all_objects WHERE status='INVALID';
Upgrading OPSS
After upgrading the schemas, you must upgrade OPSS with a WebLogic scripting tool (WLST) command on oam1.
-
Start the WLST and enter the upgrade command. Your environment may use the short or long version of the SID. For example, "orcl" or "orcl.example.com."
cd $MW_HOME/oracle_common/common/bin
./wlst.sh
upgradeOpss(jpsConfig="/u01/app/oracle/product/middleware/user_projects/domains/oam_domain/config/fmwconfig/jps-config.xml",jaznData="/u01/app/oracle/product/middleware/oracle_common/modules/oracle.jps_11.1.1/domain_config/system-jazn-data.xml",jdbcDriver="oracle.jdbc.OracleDriver",user="DEV_OPSS",password="welcome1",url="jdbc:oracle:thin:@db.example.com:1521/orcl")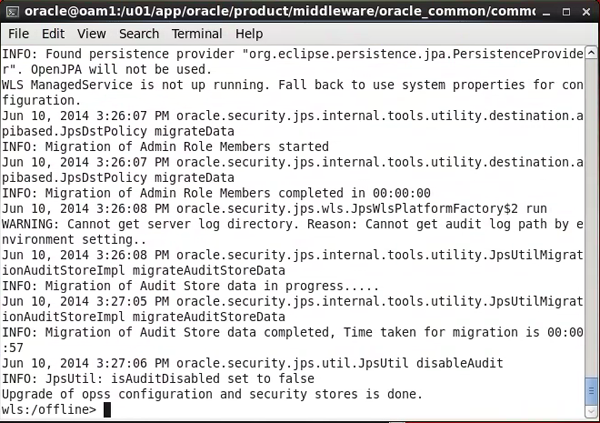
Copying Modified System MBean Configurations
-
Start the WLST and enter the copy command. You must use the version of WLST in the Identity and Access Management (IAM) home. Do this only on oam1.
cd $MW_HOME/iam_home/common/bin
./wlst.sh
copyMbeanXmlFiles('/u01/app/oracle/product/middleware/user_projects/domains/oam_domain')
Upgrading the System Configuration and Propagating It to the Cluster
In this topic, you finish the upgrade process on the primary cluster member, oam1. You copy the domain changes that were made during the upgrade on oam1 over to oam2. Use the WLS pack and unpack utilities to propagate the changes to other cluster members.
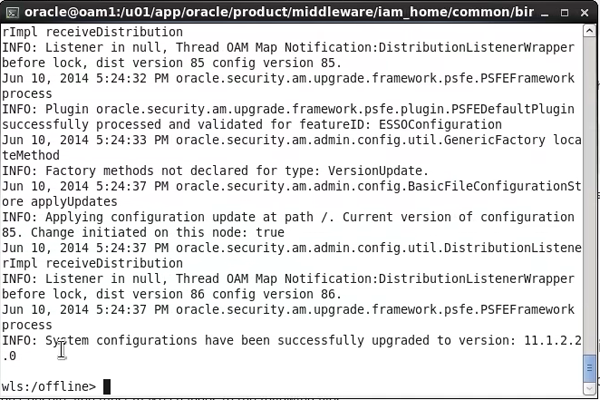
Use the WLST to upgrade the OAM system configuration to 11.1.2.2.0. Your environment may use the short or long version of the SID. For example, "orcl" or "orcl.example.com." cd $MW_HOME/iam_home/common/bin cd $DOMAIN_HOME/bin cd $DOMAIN_HOME/bin Close any current browser sessions, open a new browser, and log in to the OAM console. The primary OAM panel is shown in this graphic. http://oam1.example.com:7001/oamconsole Notice that the console is updated for 11.1.2.2. mkdir /home/oracle/oam2 scp @oam1:/home/oracle/oam2/oam_mgd.jar .
cd $DOMAIN_BASE cd $DOMAIN_HOME/binUpgrading the System Configuration on oam1
./wlst.sh
upgradeConfig("/u01/app/oracle/product/middleware/user_projects/domains/oam_domain", "sys", "welcome1", "DEV_OAM", "jdbc:oracle:thin:@db.example.com:1521/orcl")
./startWebLogic.sh
./startManagedWebLogic.sh oam_server1 http://oam1:7001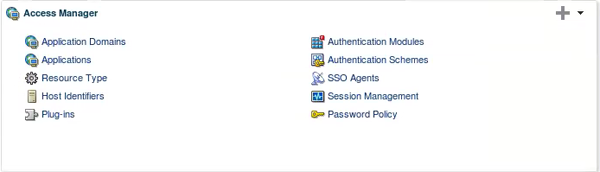
Propagating the Changes to the Cluster
cd $MW_HOME/oracle_common/common/bin
./pack.sh -managed=true -domain=$DOMAIN_BASE/oam_domain -template=/home/oracle/oam2/oam_mgd.jar -template_name="OAM Server Template"
mv oam_domain oam_domain.old
cd $MW_HOME/user_projects/applications
mv oam_domain oam_domain.old
cd $MW_HOME/oracle_common/common/bin
./unpack.sh -domain=$DOMAIN_BASE/oam_domain -template=/home/oracle/oam_mgd.jar -app_dir=$MW_HOME/user_projects/applications/oam_domain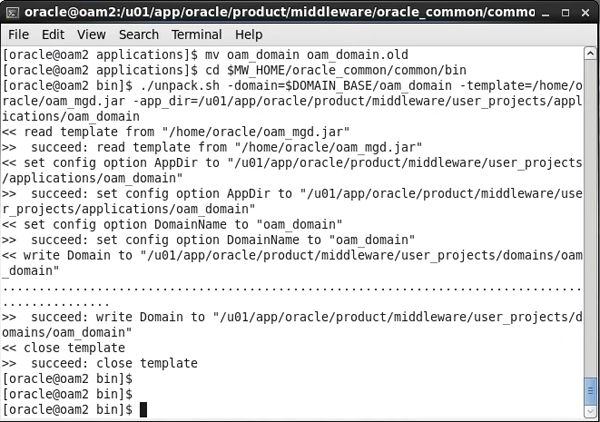
./startManagedWebLogic.sh oam_server2 http://oam1:7001
Verifying the Upgrade
- Ensure that the following servers are running:
- WLS Administration Server
- Managed servers on oam1 and oam2.
- Oracle Database
- OUD
- OHS
-
Start the access tester in graphical mode.
cd $ORACLE_HOME/oam/server/tester
java -jar oamtest.jar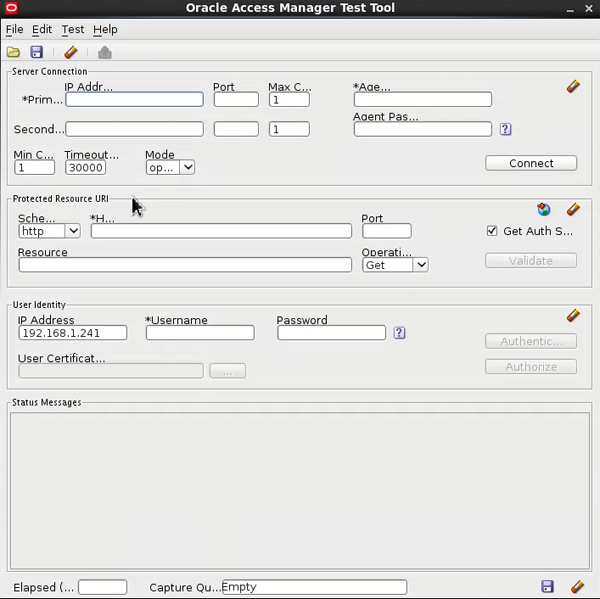
Open the
config.xml configuration file that you saved earlier.
-
Click Connect, Validate, Authenticate, and Authorize to test the access.
-
Run the saved test in command-line mode.
cd $ORACLE_HOME/oam/server/tester
java -Dscript.scriptfile="test_script.xml" -Dcontrol.configfile="config.xml" -jar oamtest.jar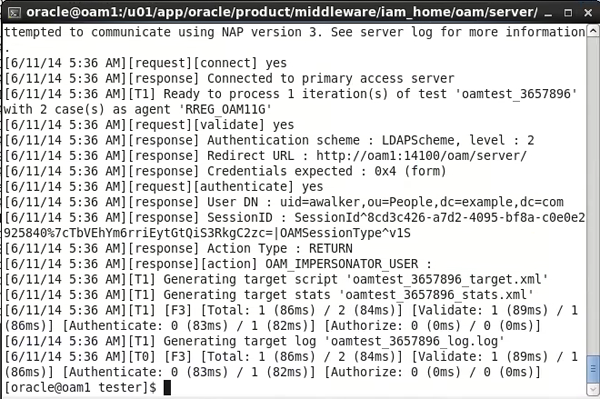
-
Compare the output in the target, stats, and log files to those you saved before performing the upgrade. You should have saved test cases for target paths that are associated with policies.
Troubleshooting
Sections 3.1.1.1 through 3.1.1.33 in the Fusion Middleware 11g R2 PS2 Release Notes contain known issues and fixes.
Bundle patches are released to address specific issues between releases. Bundle patch 1 is available for OAM 11.1.2.2. If you require this bundle patch to address any of the following issues, you can download patch 18333689 from My Oracle Support:
- 16741458 SUPPORT DN BASED LOOKUP FOR USER INSTEAD OF CN-BASED LOOK UP
- 17693994 FTU BETWEEN LM AND REST / REST AND LM NEEDS TO BE COMPATIBLE
- 17829958 ERROR THROWN WHILE UPDATING EXISTING IDP PARTNER IN UPGRADED ENV.
- 17851107 WNA FALLABACK -REDIRECTION TO FAILURE URL FAILS WHEN SERVERREQUESTCACHETYPE=FORM
- 17863555 ESSO ACL - UNABLE TO DENY ACCESS FOR A USER FOR A SPECIFIC APPLICATION TEMPLATE
- 17890010 PRE-FETCH ATTRIBUTES FEATURE NOT WORKING
- 17910258 REDIRECT TO PWDMGMT.JSPX IS MISSING HOSTNAME WHEN PORT 80/443 IS USED
- 17942443 UNABLE TO SEE RESOURCES & AUTHZ POLICIES AFTER UPGRADE FROM 11.1.1.5.X
- 17945056 DELEGATED ADMIN AND POLICY ORDER INFO FAIL TO MIGRATE FROM 10G
- 17951025 STRESS:OAM RESPONSE TIME OF AUTHENTICATION TEST WITH NOLOGOUT IS TOO HIGH
Summary
In this tutorial, you learned how to upgrade an OAM cluster from 11g R2 (11.1.2.0) to 11g R2 PS2 (11.1.2.2).
Resources
To learn more about the OAM 11g R2 PS2 release, see the following resources:
- IAM 11g R2 PS2 Release Documentation
- Courses: Oracle Identity Governance and OAM Advanced Administration
- Information Center: Oracle Access Manager 11g and later
- OBE: Setting up the environment for Mobile and Social Access Management hands-on
Credits
- Lead Curriculum Developer: Dave Silvestro
- Other Contributors: Vishal Parashar, Mark Lindros
To navigate this Oracle by Example tutorial, note the following:
- Topic List:
- Click a topic to navigate to that section.
- Expand All Topics:
- Click the button to show or hide the details for the sections. By default, all topics are collapsed.
- Hide All Images:
- Click the button to show or hide the screenshots. By default, all images are displayed.
- Print:
- Click the button to print the content. The content that is currently displayed or hidden is printed.
To navigate to a particular section in this tutorial, select the topic from the list.