Using the OPSS Common Audit Framework
Purpose
This tutorial covers using the Oracle Platform Security Services (OPSS) common audit framework.
After completing this exercise, you should be able to:
- Identify audit configuration files in Java and system component environments
- Configure audit policies for Java and system component environments
- Identify, locate, and analyze audit log files called bus-stops in Java and system component environments
- Continue on to using an Audit database store
Please note that this OBE does not cover configuring and using an audit database store, and the features associated with it.
Time to Complete
Approximately 1 hour
Overview
OPSS is Oracle's security framework for developing and managing security services in Java SE and EE environments. This tutorial is Using the OPSS Common Audit Framework.
Using the OPSS Common Audit Framework for Java Components

This is the architecture that depicts the OPSS Common Audit Framework for Java component environments. This OBE covers how to use the OPSS auditing features in a WebLogic domain. The environment consists of the following:
- A single OPSS-enabled WebLogic AdminServer running on port 7001
- The FMW Control console used to configure audit policies
- The jps-config.xml file where audit policies and the audit framework configuration is stored
- The OPSS audit-store.xml file that contains the audit metadata store containing the format of audit event records
- The OPSS bus-stop file where audit records are written
Using the OPSS Common Audit Framework for System Components

This is the architecture that depicts the OPSS Common Audit Framework for system component environments. This OBE covers how to use the OPSS auditing features in an IdM domain. The environment consists of the following:
- A single IdM AdminServer running on port 7001
- The FMW Control console used to configure audit policies
- The auditconfig.xml file where audit policies and the audit framework configuration is stored
- The OPSS audit-store.xml file that contains the audit metadata store containing the format of audit event records
- The OPSS bus-stop file where audit records are written
Software and Hardware Requirements
The following is a list of requirements:
- All software and hardware requirements are outlined in the OPSS Environment Set Up OBE
Prerequisites
Before starting this tutorial, complete the following prerequisites:
. |
This OBE requires that you have completed the OPSS Environment Set Up OBE. |
|---|---|
. |
This OBE requires that you have completed the OPSS Configuring an OID Authentication Provider in WebLogic OBE. |
Using the OPSS Common Audit Framework for Java Components
Follow the steps below to configure and use the OPSS auditing features for Java components:
. |
Start myxmldomain: Click the cd $DOMAINS/myxmldomain Make sure the WebLogic Server is running before continuing on to the next step.
|
||||||||
|---|---|---|---|---|---|---|---|---|---|
. |
Deploy OpssADFDemoApp: Execute the following commands to deploy the practice application to the domain: cd $LAB_HOME/bin Your output should resemble the following: Welcome to WebLogic Server Administration Scripting Shell Type help() for help on available commands Connecting to t3://localhost:7001 with userid weblogic ... Warning: An insecure protocol was used to connect to the ***Connected successfully***
|
||||||||
. |
Examine OPSS audit-related files: When using the OPSS auditing feature with Java components, it uses the following files. Locate and open each file to examine its contents so you can become familiar with them.
|
||||||||
. |
Configure audit policies: Execute the following commands to configure a custom audit policy that triggers audit events for authorization requests, namely the CheckPermission, CheckSubject, and IsAccessAllowed calls made by the application. $ $MW_HOME/Oracle_IDM1/common/bin/wlst.sh The server does not need to be restarted. Your audit policy is now configured and stored in the OPSS audit metadata store.
|
||||||||
. |
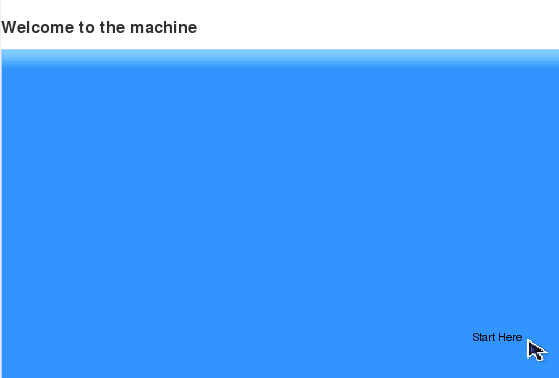
Run application: Now that an audit policy is configured for the domain, you must run an application that performs OPSS authorization requests to trigger audit events so that records are written to the audit log. Using Firefox, browse to http://localhost:7001/OpssADFDemoApp/faces/view1 to use the OpssADFDemoApp application. Click the Start Here button as shown below.
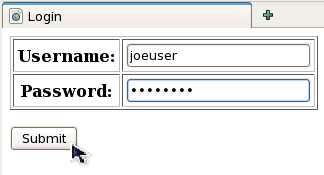
You are then presented with a log in page. Use one of the credentials below to log in to trigger auditing events. Credential 1: Credential 2:
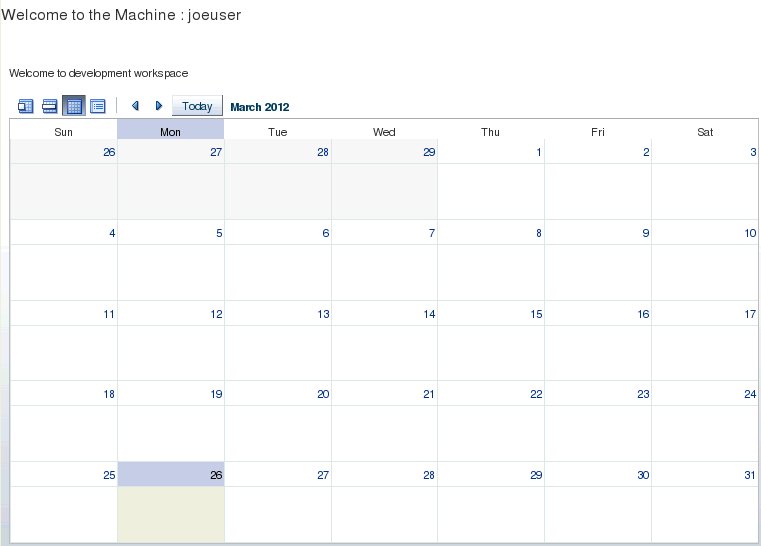
Within the application, an authorization request is made to determine if the currently logged in user can access the task flow that shows the calendar for the development workspace. Users that can see the calendar are granted access while users that cannot see the calendar are denied access. These events should have triggered audit records to get written to the domain's audit log file. The joeuser account should be able to see the calendar, and the weblogic user should not be able to see the calendar.
|
||||||||
. |
Examine bus-stop file: Within a terminal window open the $DOMAIN_HOME/servers/AdminServer/logs/auditlogs/JPS/audit_1_0.log file for viewing. Search the file for audit records associated with the logins you just performed. Your output should look similar to the following entries: 2012-04-27 01:24:50.779 - "CheckSubject" true "Executing privileged action in doAsPrivileged mode as subject null." "OpssADFDemoApp(V2.0)" - - "11d1def534ea1be0:-7ee78cc2:136f07dd47b:-8000-000000000000018c,0" "Authorization" "success" - - - - - - - - - "file:/u01/app/oracle/Middleware/oracle_common/modules/oracle.jps_11.1.1/jps-ee.jar" - - - - - - - - - - - - - - - - - - - - - - - - - - - - - - - - - - - - - - - - - - - - - - - - - - - - - - - "[]" - - - - - - - - - - - - - - - - - - - - - - "(principals([(Name:joeuser) (Class name:weblogic.security.principal.WLSUserImpl)] [(Name:employees) (Class name:weblogic.security.principal.WLSGroupImpl)] [(Name:authenticated-role) (Class name:oracle.security.jps.internal.core.principals.JpsAuthenticatedRoleImpl)] [(Name:Developer) (Class name:oracle.security.jps.service.policystore.ApplicationRole)] [(Name:anonymous-role) (Class name:oracle.security.jps.internal.core.principals.JpsAnonymousRoleImpl)] ))" - - - - - - - - "1" "0" - - - - - - - "96" - 2012-04-27 01:24:52.779 "joeuser" "CheckPermission" true "Authorization check permission succeeded." "OpssADFDemoApp(V2.0)" - - "11d1def534ea1be0:-7ee78cc2:136f07dd47b:-8000-0000000000000190,0" "Authorization" "success" - - - - - - - - - "file:/u01/app/oracle/Middleware/oracle_common/modules/oracle.adf.share_11.1.1/adf-share-support.jar" - - - - - - - - - - - - - - - - - - - - - - - - - - "view" "true" "TaskFlowPermission" - - "/WEB-INF/taskFlowCall1.xml#taskFlowCall1" - - - - - - - - - - - - - - - - - - - - - - - "" - - - - - - - - - - - - - - - - - - - - - - - - - - - - - - - "1" "0" - - "oracle.adf.controller.security.TaskFlowPermission//WEB-INF/taskFlowCall1.xml#taskFlowCall1/view" - - - - "103" -
|
||||||||
. |
Undeploy application and shut down myxmldomain: There is another OBE exercise that guides you through deploying the OpssADFDemoApp using FMW Control. You must undeploy the application now so this practice will work properly. Execute the following commands to undeploy the practice application to the domain: cd $LAB_HOME/bin Your output should resemble the following: Welcome to WebLogic Server Administration Scripting Shell Type help() for help on available commands Connecting to t3://localhost:7001 with userid weblogic ... Warning: An insecure protocol was used to connect to the ***Connected successfully*** Shutdown myxmldomain by pressing Ctrl-C in the terminal window where you started it.
|
Using the OPSS Common Audit Framework for System Components
Follow the steps below to configure and use the OPSS auditing features for System components:
. |
Start IDMDomain: Click the cd $DOMAINS/IDMDomain Enter weblogic and welcome1 as the boot credentials for starting up the server. Make sure the WebLogic Server is running before continuing on to the next step.
|
||||||||||
|---|---|---|---|---|---|---|---|---|---|---|---|
. |
Examine OPSS audit-related files: When using the OPSS auditing feature with System components, it uses the following files.
|
||||||||||
. |
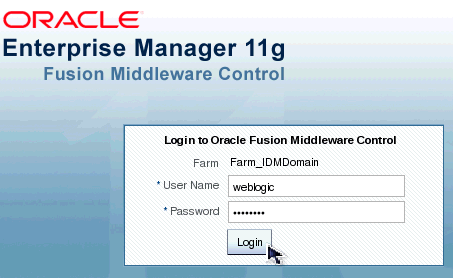
Configure audit policies: Open Firefox and browse to http://localhost:7001/em to open Enterprise Manager (EM) and gain access to FMW Control. Login using the following credentials: User name: weblogic
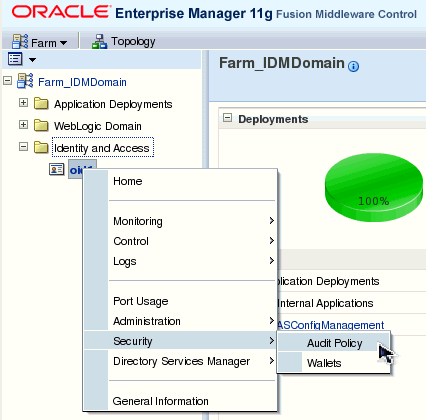
Open the Audit Policy page by expanding the Identity and Access node on the left-hand pane, then right-clicking oid1 and selecting Security>Audit Policy.
Expand the Oracle Identity Management node if it is not already expanded. Feel free to explore the interface for a few moments. When you are ready, select the Custom Audit Level, and select the main Enable Audit check box. This will automatically select all check boxes for OID. This configures auditing for all authentication requests that are made against OID, inlcuding log in and log out events. Click Apply to save your changes and put them into effect.
|
||||||||||
. |
Generate audit event records: Now that an audit policy is configured for the OID component, you must perform some operations that trigger audit events so audit records get written to the log file. Within an available terminal window, execute the following commands to watch for audit events for OID: cd $MW_HOME/asinst_1/auditlogs/OID/oid1 Perform a directory lookup to see the correct file to view: ls -l Find the file with today's date on it and take note of the process identifier (PID). Run the following command to keep an open tail of the audit file. Replace the PID portion of the file name with the PID you noted in the previous instruction. tail -f audit-pidPID.log You should see output that shows either fields or audit records. Press the enter key a few times to create some blank lines to make it easier to see when there are new records. Open JXplorer just as you did in the OPSS 11g Environment Set Up OBE. Use JXplorer to connect and disconnect from OID. Each of these events is a log in and log out event to OID and as you log in and log out, you should see audit records displayed in the terminal window that correspond to your log in and log out events. Also try logging in with invalid credentials so you can see some failure audit events. Here are the OID log in credentials for reference: User name: joeuser 2012-03-26 22:39:31.677037 "OID" - - - "10" - - "UserLogout" TRUE - "cn=emd admin,cn=oracle internet directory" "Operation name: unbind" - "::ffff:127.0.0.1" - - - - "unbind" -
|
||||||||||
. |
Shut down IDMDomain: Shutdown IDMDomain by pressing Ctrl-C in the terminal window where you started it.
|

Summary
You have now completed the Using the OPSS Common Audit Framework OBE . You are ready to continue with the other OBE tutorials included in this series.
In this tutorial, you have learned how to:
- Identify audit configuration files in Java and system component environments
- Configure audit policies for Java and system component environments
- Identify, locate, and analyze audit log files called bus-stops in Java and system component environments
Resources
- Oracle Platform Security Services (OPSS) 11gR1 Self-Study Series
- Oracle FMW Application Security Guide
- To learn more about Oracle FMW products, refer to additional OBEs in the OLL Web site
Credits
- Lead Curriculum Developer: Mark Lindros
- Other Contributors: Srikant Tirumalai, Shankar Raman, Sachin Kapur, Robert La Vallie, Linda Ross, William Cai, Michael Khalandovsky, Andre Neto, Ganesh Kirti, Jason Haley, Akila Natarajan, Steve Jackal, Sophia Maler, Anand Vaidyanathan, Ganesh Kirti, Diganta Choudhury
![]()
|
|
Copyright © 2012, Oracle and/or its affiliates. All rights reserved |