Oracle WebCenter Sites 11g: Customizing Global Configuration Properties, Toolbars, and Menu Bars
Overview
Purpose
This tutorial shows you how to customize global configuration properties, toolbars, and menu bars in the Oracle WebCenter Sites 11g Contributor interface.
Time to Complete
Approximately 60 minutes
Introduction
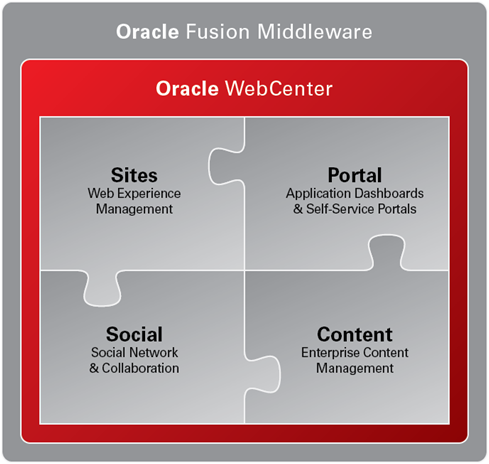 Oracle WebCenter
is an integrated platform that enables social businesses to
improve customer loyalty with targeted websites. The websites
offer their customers seamless access to the right information
in context.
Oracle WebCenter
is an integrated platform that enables social businesses to
improve customer loyalty with targeted websites. The websites
offer their customers seamless access to the right information
in context.
One of the major pillars of Oracle WebCenter is Oracle WebCenter Sites. The Oracle WebCenter Sites 11g Web Experience Management (WEM) platform enables marketers and business users to easily create and manage contextually relevant social and interactive online experiences across multiple channels on a global scale to drive sales and loyalty.
- Modify the number of tabs that can be open simultaneously
- Add a custom button and action to the AVIArticle inspect view toolbar
- Add a custom menu and menu command to the AVIArticle menu bar
- Oracle WebCenter Sites 11g JumpStart Kit or full installation with sample sites installed and running
- WebCenter Sites Developer Tools plug-in installed, configured, and running or WebCenter Sites Explorer (included with WebCenter Sites)
- The Developer's Guide for Customizing the Contributor Interface downloaded from the Oracle Technology Network (OTN)
- Sample elements provided with the developer's guide
- Mozilla Firefox or Microsoft Internet Explorer web browser
This tutorial shows you how to customize the Contributor interface global configuration properties, toolbars, and menu bars.
Scenario
In this tutorial, you perform the following:
Hardware and Software Requirements
- Have attended the Oracle WebCenter Sites 11g for Developer training course offered by Oracle University
- Have a working knowledge of the Oracle WebCenter Sites 11g Contributor interface
- Have experience with Java, JavaScript, Dojo Toolkit, and HTML
- Have solid familiarity with the WebCenter Sites Developer Tools plug-in
- Have thoroughly reviewed the Developer's Guide for Customizing the Contributor Interface (specifically chapters 1 and 2)
Prerequisites
To successfully complete this tutorial, you must:
User Interface Framework
- Configuration phase
- Action phase
- Presentation phase
- Asset type-specific paths for a single site:
CustomElements/<SiteName>/<AssetType>/<controllerElementName>Config - Asset type-specific paths for all sites:
CustomElements/<AssetType>/<controllerElementName>Config - Site-specific paths:
CustomElements/<SiteName>/<controllerElementName>Config - Global paths:
CustomElements/<controllerElementName>Config
In this section, you learn about the user interface (UI) framework and process flow of the UI Controller.
The Contributor interface framework sits on top of the Service layer and handles client requests. The UI Framework consists of the Presentation layer and the UI Controller.

The Presentation Layer consists of elements that render views and elements that generate a response. After it receives requests from the Contributor interface, the UI Controller processes the requests in three phases:
The UI Controller checks for custom elements at each phase.
Each phase is conditional. If the UI Controller finds that a
custom element does not exist for that phase, it moves on to the
next phase. It looks for custom elements by traversing all paths
under CustomElements in the ElementCatalog
table in the following order. (The list shows sample
paths for a custom configuration phase element.)
- Configuration phase elements:
<controllerElementName>Config - Action phase elements:
<controllerElementName>Action - Presentation phase elements:
<controllerElementName>Html
You create custom elements under CustomElements
in the ElementCatalog. Here are the element
naming conventions:
The following diagram shows the UI Controller process flow:

It is best practice to store custom elements and system default
elements separately. If you directly override system defaults,
the customizations are overridden when you upgrade your system
to a newer version of WebCenter Sites. Here is an example data
structure view for CustomElements from WebCenter
SItes Explorer:

Customizing Configuration Properties
- The
configobject - System-defined configuration properties
Configuration properties set display conditions for the Contributor interface across all content management sites. This section covers the following topics:
The config Object
The client-side framework retrieves its
main configuration settings from the server-side
controller element, UI/Config/GlobalHtml.
The client-side application executes this presentation
element at startup. The presentation element serves
JavaScript code, which defines a JavaScript function whose
name is given as a request parameter by the client-side
application:
<%@ taglib prefix="cs"
                        uri="futuretense_cs/ftcs1_0.tld"%>

                        <cs:ftcs>

                            webcenter.sites['${param.namespace}']
                        = function (config) {

                                config.maxTabCount
                        = 50;

                                config.defaultView
                        = …;

                                … merge

                            }

                        </cs:ftcs>
You manipulate the config
object as needed in the function body. The client-side
application sets configuration properties as specified in
the UI/Config/GlobalHtml element. The
client-side application can retrieve additional
configuration properties from the server-side controller
element and merge settings from multiple sources, without
having to duplicate the global configuration properties in
multiple locations. Examples of configuration settings
derived from multiple sources include default global,
site-specific, and custom configurations.
System-Defined Configuration Properties
The following is a list of system-defined configuration properties that you can modify. For more information about system-defined configuration properties, see the Developer's Guide to Customizing the Contributor Interface.

Note: By default, enableWebMode
and enableDatePreview properties take the
value of the xcelerate.enableinsite
and cs.sitepreview properties found in the futuretense.ini
system file. You can override these values by modifying
them in the futuretense.ini
file or by creating a custom global configuration element,
as described in the next section.
Adding Custom Global Configuration Properties
- Create a custom
UI/Configelement - Test your customization
- Host name or address:
localhost - Username:
fwadmin - Password:
xceladmin - Port:
8080 - Select application server URL path:
CS
                              servlet (/cs/CatalogManager)
The client-side application retrieves
configuration settings from all elements under UI/Config
and merges them. To add custom global properties, you create an
element under UI/Config and then create its custom
counterpart under CustomElements. This custom
element changes the default value of maxTabCount for all sites
(from 50 to 5) and introduces a custom global property called foo.
In this section, you complete the following tasks:
Creating a Custom UI/Config
Element
Launch WebCenter Sites Explorer and complete the following steps to log in:
a. Select Open Oracle
WebCenter Sites from the File menu.
b. In the Oracle WebCenter Sites Login window, enter the following values and click OK:

Expand Tables, ElementCatalog, and UI, and then click Config. The contents of Config are displayed on the right.

In the right panel, right-click under the elementname column and select New.

Enter CustomConfigHtml for the element
name.

For CustomConfigHtml,
click under the url column and then click the button
that appears.

In the "New file" dialog box, verify that Type/Ext. is set to .jsp and click OK.

In the element window, enter the following code
snippet after <!-- user code here -->
webcenter.sites['${param.namespace}'] =
                            function (config) {
    // override this
                            element in order to provide site-specific
                            configuration settings
    //
                            (CustomElements/UI/Config/CustomConfigHtml)
}
Click Save.

Click the close (x) button to close the element window.

In the left panel, right-click CustomElements and select New > Folder.

Enter UI for the folder name.

Right-click UI and select New > Folder.

Enter Config for the folder name and
then click Config to open its
contents in the right panel.

In the right panel, right-click under the elementname column and select New.

Enter CustomConfigHtml for the element
name.

For CustomConfigHtml,
click under the url column and then click the button
that appears.

In the "New file" dialog box, verify that Type/Ext. is set to .jsp and click OK.

In the element window, replace all of the code with the following code snippet:
<%@ taglib prefix="cs"
                            uri="futuretense_cs/ftcs1_0.tld" %>

                            <%@ taglib prefix="ics"
                            uri="futuretense_cs/ics.tld" %>

                            <cs:ftcs>

                            webcenter.sites['${param.namespace}'] = function
                            (config) {

                                // override existing properties

                                config.maxTabCount = 5;

                                // add custom properties

                                config.foo = "bar";

                            }

                            </cs:ftcs>
Click Save.

Click the close (x) button to close the element window.

Click Save to commit the changes to the database.

Testing Your Customization
In a web browser, log in to the Contributor interface
as fwadmin (password: xceladmin).

For Site, select avisports and click the Contributor button.

In the left panel, click Content Tree.

In the Content Tree, expand Articles and Baseball Articles.

Double-click an article to display its contents in the right panel.

Double-click four other articles in the left panel. How many articles are you able to open before the following message is displayed?

With the maxTabCount property now set
to 5, you should be able to open four
article asset tabs simultaneously. The Home tab (which
cannot be closed) counts as an open tab. Because you
created a global configuration element, you should be
able to test this with other sites on the same
installation.
Adding Custom Site-Specific Configuration Properties
GlobalHtmlCustomConfigHtml(or any other custom global properties element)SiteConfigHtml- Customizing the toolbar
- Customizing the menu bar
- Host name or address:
localhost - Username:
fwadmin - Password:
xceladmin - Port:
8080 - Select application server URL path:
CS servlet (/cs/CatalogManager) - Modifying the SiteConfigHtml
.jspelement - Testing your customization
- Host name or address:
localhost - Username:
fwadmin - Password:
xceladmin - Port:
8080 - Select application server URL path:
CS servlet (/cs/CatalogManager)
The controller loads configuration settings from
the UI/Config element in the following order:
The UI/Config/SiteConfigHtml
controller element specifies site-specific properties. By
default, UI/Config/SiteConfigHtml does not provide
any site-specific properties. You can override the
system-default UI/Config/SiteConfigHtml controller
by creating your own SiteConfigHtml
under CustomElements/your_site_name/UI/Config/.
Here are two types of site-specific customizations that you can
perform:
Customizing the Toolbar
You can customize the toolbar to display actions for operating on assets in Web mode or Form mode. You can further customize it for specific asset types and their subtypes. The default toolbar for a Page asset is shown here:

The UI/Config/GlobalHtml
element describes the list of actions to display for a
specific view (such as inspecting an asset in Web mode or
editing an asset in Form mode) in the toolbar. You
configure the toolbar by using the toolbar
property:
    config.toolbars =
                        {
"viewAlias": {
"view_mode_1" : [action_1, action_2,
...],
"view_mode_2" : [action_1, action_2,
...]
...
}
The viewAlias configuration
setting indicates the type of view for which this toolbar
is displayed. The alias must match one of the available
aliases defined in the UI/Config/GlobalHtml
element under config.views. Supported
aliases are as follows:

The view_mode_i
mode is one of the modes supported by a view such as
edit or view. For example, you
can edit and view an asset in Web mode:
    config.toolbars =
                        {
"web": {
"edit" : [action_1,
action_2, ...],
"view" : [action_1, action_2,
...]
...
}
The action_i
configuration setting indicates an action that is included
in the toolbar. Standard actions, such as save
and approve, are mapped to their own icons,
titles, alternative text, and so on. For example:
    config.toolbars =
                        {
"web": {
"edit" : ["form-mode",
"inspect", "separator", "save", "preview", ...],
"view" : ["form-mode", "edit",
"separator", "preview", "approve", ...]
To add a custom action to the toolbar for a
specific asset type in your site, you create a custom SiteConfigHtml
element. In the next sections, you modify the SiteConfigHtml
element to include a custom toolbar action and test your
customization. The custom toolbar action adds a button to
the toolbar. When you click the button, a message is
displayed on the asset screen. The inspect view toolbar
for an AVIArticle asset currently looks like the
following:

Modifying the SiteConfigHtml.jsp
element
Launch WebCenter Sites Explorer and complete the following steps to log in:
a. Select Open Oracle
WebCenter Sites from the File menu.
b. In the Oracle WebCenter Sites Login window, enter the following values and click OK:
In the left panel, expand Tables, ElementCatalog, CustomElements, avisports, and UI, and then click Config to display its contents.

For SiteConfigHtml,
click in the url column and then
click the button that appears.

In the element window, add the following code snippet before the last closing brace ( } ):
config.toolbars["web/AVIArticle"] = {
"view":
                                  ["form-mode", "edit", "separator", "preview",
                                  "approve", "separator", "checkincheckout",
                                  "separator", "helloWorld", "refresh"],
                                      "edit":
                                  config.toolbars.web.edit // reuse default web
                                  mode toolbar
}
config.toolbarButtons.helloWorld = {
                                      src:
                                  'js/fw/images/ui/ui/toolbarButton/smartlist.png',
onClick: function () {
                                          var doc
                                  = SitesApp.getActiveDocument(), // the
                                  document in the active tab
                                          asset =
                                  doc.get('asset'), // the asset object
                                          view =
                                  SitesApp.getActiveView(); // the active view
                                  view.info('Hello World! The asset is an ' +
                                  asset.type + ' with id: ' + asset.id);
}
}

Click Save.

Click the close (x) button to close the element window.

Click Save to commit the changes to the database.

Testing Your Customization
In a web browser, log in to the Contributor
interface as fwadmin (password: xceladmin).
If prompted, select avisports from the Sites menu, and then click the Contributor button.
In the left panel, click Content Tree.
In the Content Tree, expand Articles and Baseball Articles.
Double-click an article to display its contents in the right panel.

The article tab toolbar now displays a new icon.
Click the icon.

A custom message is displayed.

Adding a Custom Menu to the Menu Bar
You can add custom menu commands and actions to the menu bar for all asset types or specific asset types and their subtypes. In this section, you add a custom menu to the menu bar for the AVIArticle asset type. The custom menu consists of one custom option. The following tasks are demonstrated:
Without any customizations, your AVIArticle menu bar looks similar to the following:

Modifying the SiteConfigHtml.jsp
Element
Launch WebCenter Sites Explorer and complete the following steps to log in:
a. Select Open Oracle
WebCenter Sites from the File menu.
b. In the Oracle WebCenter Sites Login window, enter the following values and click OK:
Expand Tables, ElementCatalog, CustomElements, avisports, and UI, and then click Config to display its contents in the right panel.
For SiteConfigHtml,
click under the url column and
then click the button that appears.
In the element window, add the following code snippet before the last closing brace ( } ):
                                  config.menubar["AVIArticle"] =
                                  config.menubar["default"].slice(0);
config.menubar["AVIArticle"].push({
"id": "customMenu",
"label": "Custom Menu",
"children": [{
                                          "label":
                                  "Custom Action",
                                  "action": function () { alert("My custom
                                  action"); }
}]
});

Click Save.

Click the close (x) button to close the element window.

Click Save to commit the changes to the database.
Testing Your Customization
In a web browser, log in to the Contributor
interface as fwadmin (password: xceladmin).
If prompted, select avisports from the Sites menu and then click the Contributor button.
In the left panel, click Content Tree.
In the Content Tree, expand Articles and Baseball Articles.
Double-click an article to display its contents in the right panel.

The article inspect view shows the custom menu in the menu bar.
Place your cursor over Custom Menu to view the menu commands, and then click Custom Action.

An alert similar to the following should be displayed:

Summary
- Modify the number of tabs that can be open simultaneously
- Add a custom button and action to the AVIArticle inspect view toolbar
- Add a custom menu and menu command to the AVIArticle menu bar
- Oracle WebCenter Sites 11g on OTN
- Oracle WebCenter Sites documentation
- Oracle WebCenter Sites 11g for Developers training course
- Oracle Learning Library
- Oracle University
- Dojo Toolkit documentation
- Lead Curriculum Developer: Jenny Wongtangswad
- Editor: Susan Moxley
- QA: Veera Putrevu and Krishna Chitta
In this tutorial, you learned how to:
Resources
Credits
To navigate this Oracle by Example tutorial, note the following:
- Hide Header Buttons:
- Click the title to hide the buttons in the header. To show the buttons again, click the title again.
- Topic List:
- Click a topic to navigate to that section.
- Expand All Topics:
- Click the button to show or hide the details for the sections. By default, all topics are collapsed.
- Hide All Images:
- Click the button to show or hide the screenshots. By default, all images are displayed.
- Print:
- Click the button to print the content. The content that is currently displayed or hidden is printed.
To navigate to a particular section in this tutorial, select the topic from the list.