Overview
Purpose
In this tutorial you learn to install and configure the Oracle WebLogic Maven Plugin with NetBeans - using NetBeans to connect to WebLogic Server and deploy an application.
Time to Complete
Approximately 45 minutes.
Introduction
The Oracle WebLogic Maven Plugin enables you to install, start and stop servers, create domains, execute WLST scripts, compile and deploy WebLogic applications.
Hardware and Software Requirements
The following is a list of hardware and software requirements:
- A Linux development machine with sufficient CPU, memory, and hard disk space
- Sufficient hardware to run WebLogic Server (For details, see the list of certified platforms.)
- Java Development Kit (JDK 1.7) has been installed on the development machine - this tutorial has been tested with JDK version 7u76.
- WebLogic Server 12.1.3 has been installed on the development machine - this tutorial has been tested with WebLogic Server 12.1.3 Zip Distribution Update 1.
- NetBeans 8.0.2 has been installed on the development machine.
- Apache Maven 3.3.3 has been installed on the development machine.
- JPA 2.1 support has been enabled in WebLogic Server.
- The jdbc/ActionBazaarDB datasource has been created for the application.
Prerequisites
- Before starting this tutorial, you should have access to the internet to retrieve plugin dependencies on the development machine.
- Review the following WebLogic Server 12.1.3 Developer Guide Oracle By Example tutorials, which will create the prerequisite environment:
- Using the Zip Distribution and Code Examples
- Java EE 7 and WebLogic Server
- Configuring the Oracle Maven Repository
- Installing the following products in these locations has been tested with this tutorial:
- JDK 1.7 -
/u01/jdk1.7.0_76 - WebLogic Server 12.1.3 -
/u01/wls12130 - NetBeans 8.0.2 -
/u01/netbeans-8.0.2 - Apache Maven 3.3.3 -
/u01/apache-maven-3.3.3
While other versions of these products may function for this tutorial, they have not been tested.
Installing the Oracle WebLogic Maven Plugin
-
Open an SSH session to the Linux development machine.
-
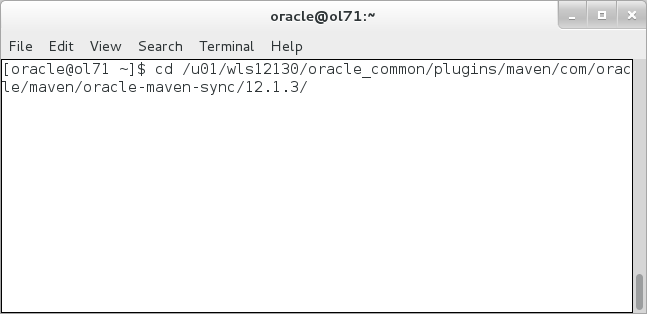
Execute
cd
                                  /u01/wls12130/oracle_common/plugins/maven/com/oracle/maven/oracle-maven-sync/12.1.3/
to change the current directory to the location of the Oracle WebLogic Maven Plugin. - Execute
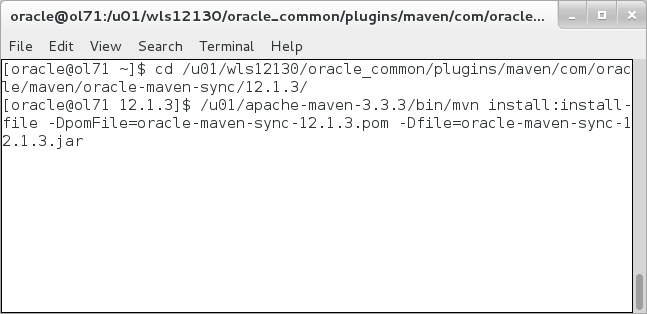
/u01/apache-maven-3.3.3/bin/mvn
                                install:install-file
                                -DpomFile=oracle-maven-sync-12.1.3.pom
                                -Dfile=oracle-maven-sync-12.1.3.jar
to install the Oracle WebLogic Maven Plugin. - Execute
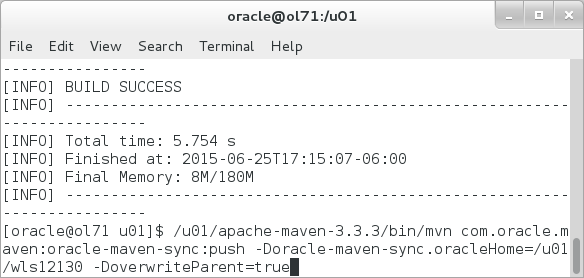
/u01/apache-maven-3.3.3/bin/mvn
                                com.oracle.maven:oracle-maven-sync:push
                                -Doracle-maven-sync.oracleHome=/u01/wls12130 -DoverwriteParent=true
to push the plugin and dependencies into the local repository. - Execute
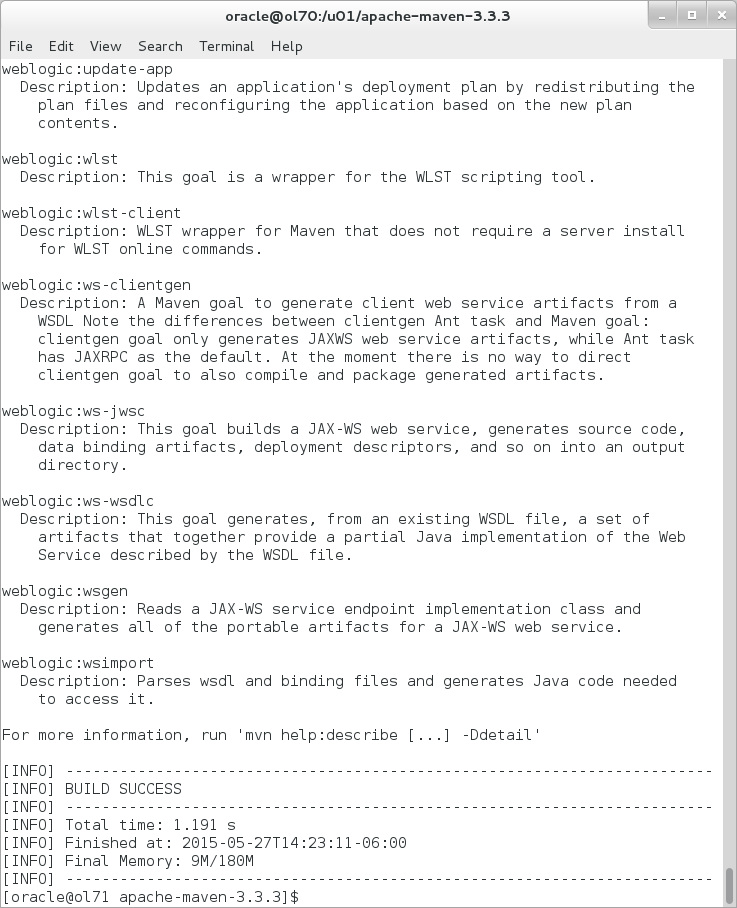
/u01/apache-maven-3.3.3/bin/mvn
                                help:describe -DgroupId=com.oracle.weblogic
                                -DartifactId=weblogic-maven-plugin
                                -Dversion=12.1.3-0-0
to verify the Oracle WebLogic Maven Plugin installation.
The Oracle WebLogic Maven Plugin is
installed.

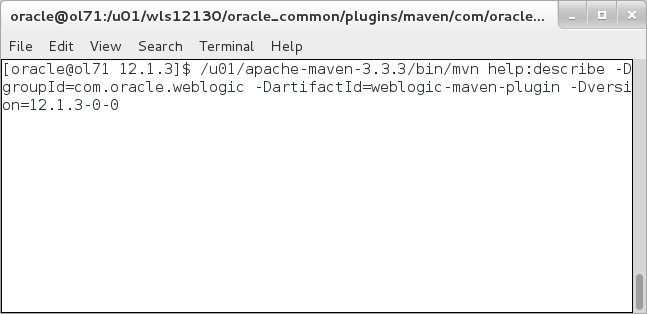
The successful plugin validation displays a set
of goals supported by the plugin.
For example, the goal weblogic:wlst can execute a WebLogic Scripting Tool (WLST) script.
In the next section, you will use NetBeans and an application with the Oracle WebLogic Maven Plugin.
Copying the Application
-
Download the actionbazaar.zip file from this tutorial to
/u01on the development machine. -
Execute
cd /u01/change to the directory where the actionbazaar.zip archive is located. -
Execute
unzip actionbazaar.zipto extract the archive contents - the application will be located in/u01/actionbazaar.
In this tutorial, you use an application called actionbazaar which utilizes newer Java EE 7 features and has preconfigured Maven goals and tests.
Running NetBeans and Opening the Project
-
Execute
/u01/netbeans-8.0.2/bin/netbeansto start NetBeans.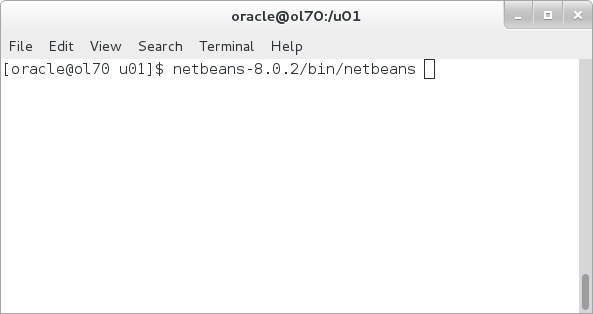
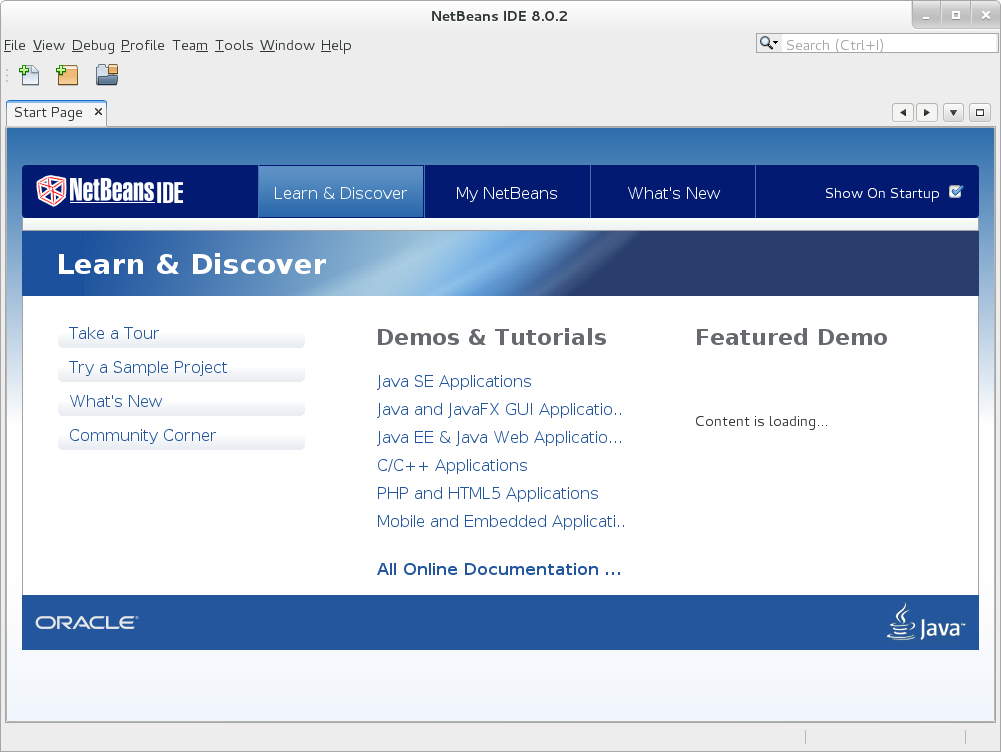
The NetBeans IDE window displays.
-
In the NetBeans menubar, select File and Open Project. Navigate to
/u01and select the actionbazaar application. Click Open Project.
Creating a WebLogic Server in NetBeans
-
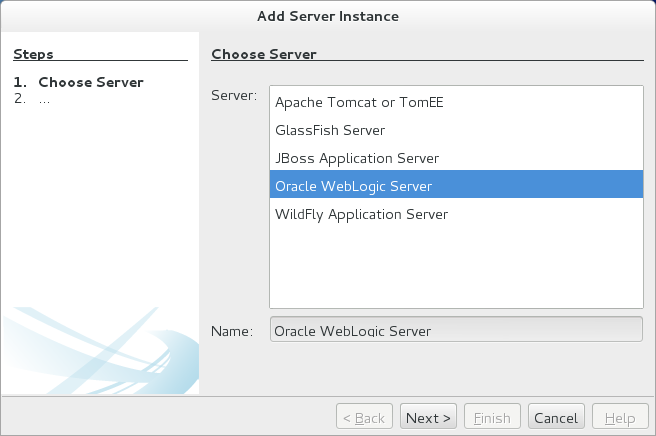
In the NetBeans menubar select Servers from the Tools menu.
-
Click the Add Server... button.

-
Select Oracle WebLogic Server and click Next.
-
Click on the Browse... button and navigate to
/u01/wls12130/wlserverand click Next.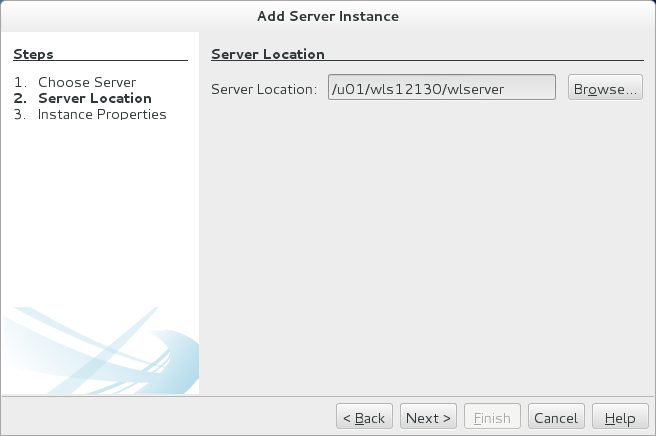
-
Click the Browse... button and navigate to
/u01/wls12130/user_projects/domains/mydomain,enterweblogicfor Username andwelcome1for Password; and click Finish.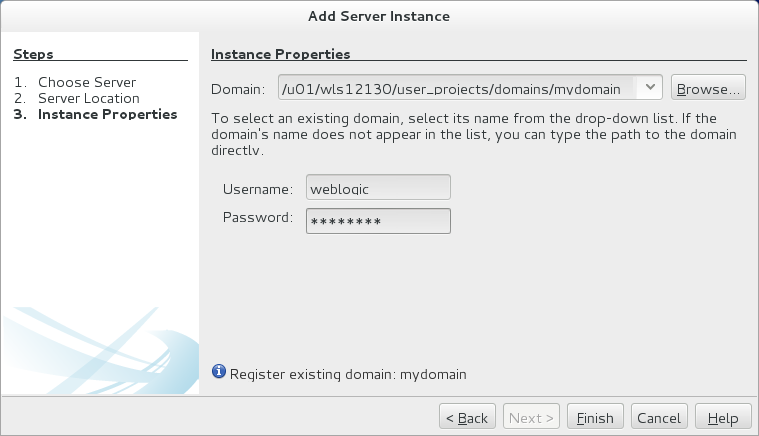
-
Click Close.
Reviewing the Maven Configuration in pom.xml
-
In NetBeans, expand the
actionbazaarproject and expand the Project Files entry. Double-click on thepom.xmlfile to open it in the editor.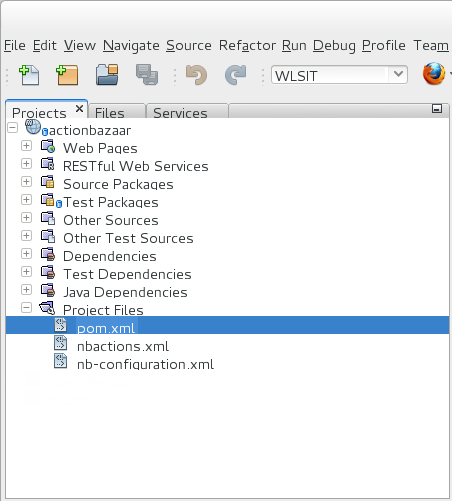
-
Scroll down to the profiles section - notice that the profile that uses the weblogic-maven-plugin is WLSIT and it uses a WebLogic Server with the
localhostaddress.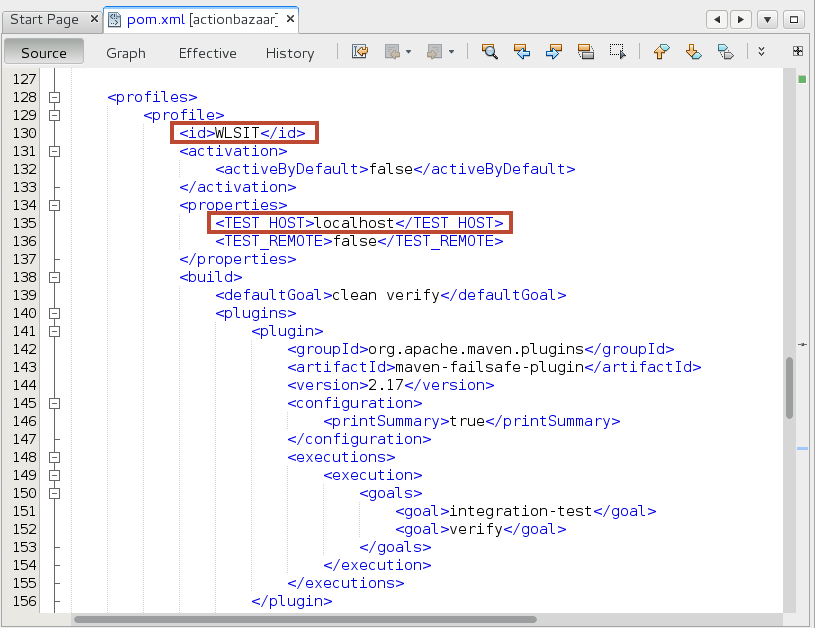
-
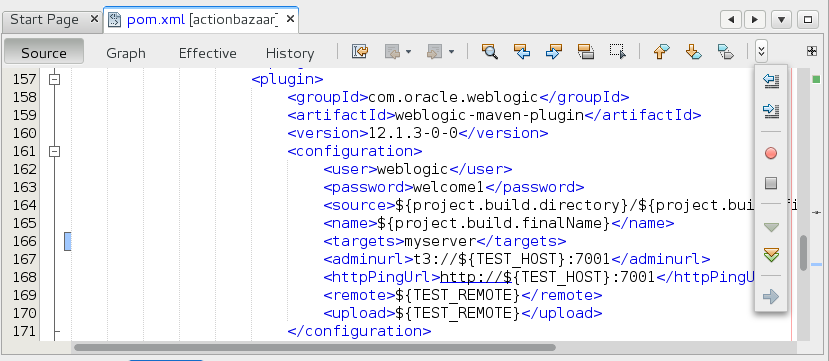
Scroll down into the configuration section - note that the weblogic user, password, target, and urls are specified in this section.
-
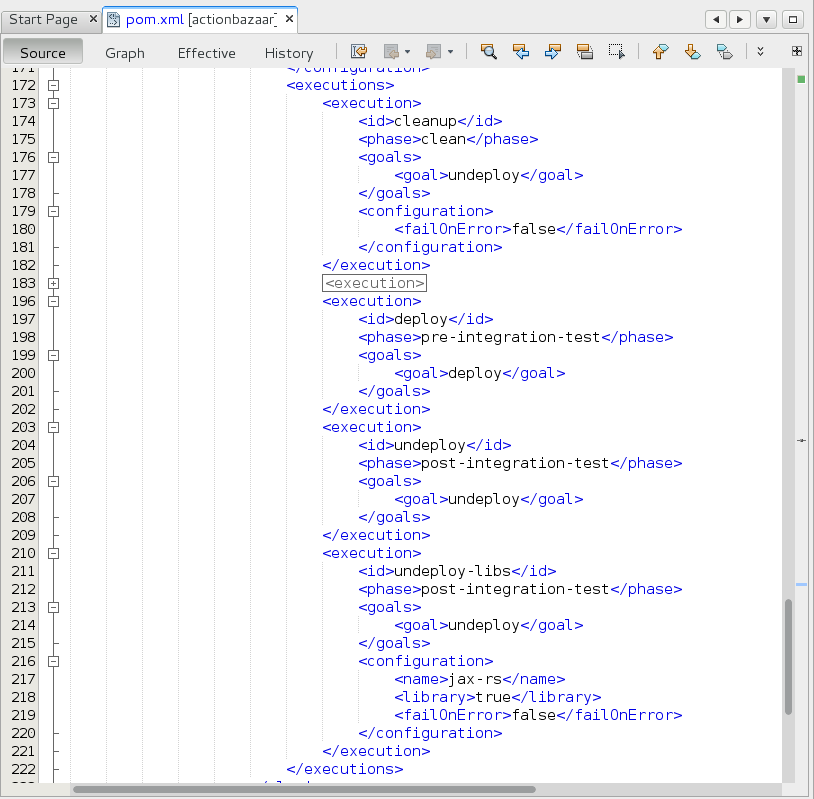
Scroll down to the execution section - this section maps the id and phase to an Oracle WebLogic Maven Plugin goal.
-
Close the pom.xml file.
Setting the Configuration and Running the Goal
-
In NetBeans, set the Maven Configuration profile to WLSIT by right-clicking the actionbazaar application, selecting Set Configuration and then selecting WLSIT.

-
Execute the goal by right-clicking the actionbazaar project, selecting Custom and then selecting verify.
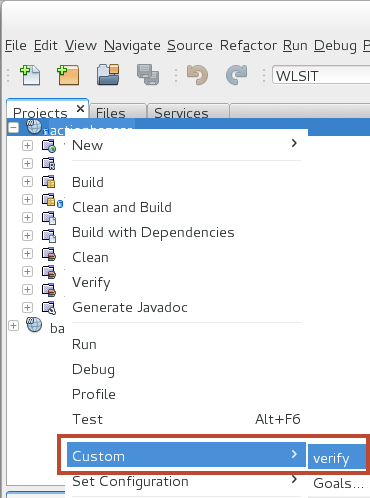
Note that the verify goal builds the actionbazaar application, deploys the JAX-RS 2.0 library, deploys the actionbazaar application, executes the tests, and then undeploys the application and library. During the test execution the output tab displays the test activities and when tests complete.

At the end of the test execution the results display.

Summary
In this tutorial, you learned to:
- Install and Configure the Oracle WebLogic Maven Plugin
- Create a new server in NetBeans
- Execute a Maven goal that utilizes the Oracle WebLogic Maven Plugin and review the test results
Resources
- Oracle® Fusion Middleware Developing Applications Using Continuous Integration
- Configuring the Oracle WebLogic Maven Plugin
- WebLogic Server 12.1.3 Documentation
- To learn more about WebLogic Server refer to additional OBEs in the Oracle Learning Library
Credits
- Lead Curriculum Developer: Tom Eliason
- Other Contributors: TJ Palazzolo