Before You Begin
Purpose
This tutorial shows you how to configure Oracle HTTP Server 12c(12.2.1) in a WebLogic Server Domain uisng the Configuration Wizard.
Time to Complete
Approximately 30 minutes
Background
Oracle HTTP Server is the web server component for Oracle Fusion Middleware.
Oracle HTTP Server provides the following services:
- Delivers the HTTP Listener for the Oracle WebLogic Server through the built-in Oracle WebLogic Server Proxy Plug-In
- Provides the Web Server component for Oracle Fusion Middleware
- Serves static web content, such as HTML, JavaScript, images, and dynamic web content built with CGI/FastCGI-based applications.
In this tutorial, you will learn about how to configure Oracle HTTP Server(OHS) using the Configuration Wizard.
What Do You Need?
Operating System and Software Requirements
- A Linux machine with version 6 or greater of Oracle Linux or Red Hat Linux
- JDK 1.8 update 51 and above
- Oracle WebLogic Server 12c (12.2.1) software
Prerequisites
You should have completed the HTTP Server 12c (12.2.1): Installing Oracle HTTP Server tutorial.
Configuring Oracle HTTP Server using the Configuration Wizard
In the Installing Oracle HTTP Server tutorial, the last step in the Installing the Oracle HTTP Server(OHS) topic has the following instructions in the Next Steps region of the Installation Wizard:
- Create a domain using the Configuration Wizard.
- Start Node Manager and Domain Servers.
In this section you will create a domain using the Configuration Wizard.
-
Navigate to the
ORACLE_HOME/oracle_common/common/bindirectory and start the WebLogic Server Configuration Wizard.$ cd /scratch/u01/app/fmw1221_infra/oracle_common/common/bin
$ ./config.shThe Configuration Wizard opens.
-
On the Configuration Type page, provide the following information, and click Next:
- Select Create a new domain.
- Enter a location for the domain.
In this tutorial, the location is/scratch/u01/domains/ohs_domain.
Note: You can choose a different name and location for your domain.

Description of this image -
On the Templates page, make the following selections, and click Next:
- Create Domain Using Product Templates: Selected
- All Templates: Selected for Template Categories
- Under Available Templates:
- Basic WebLogic Server Domain: Selected
Basic WebLogic Server Domain cannot be deselected. - Oracle HTTP Server (Collocated) - 12.2.1 [ohs] : Selected
- Oracle Enterprise Manager - 12.2.1 [em] : Selected
- Oracle JRF - 12.2.1 [oracle_common] : Selected
- WebLogic Coherence Cluster Extension - 12.2.1 [wlserver] : Selected
- Basic WebLogic Server Domain: Selected

Description of this image -
On the Application Location page, provide the following information, and click Next:
-
Enter a location for the applications.
In this tutorial, the location is
/scratch/u01/applications/ohs_domain.Note: You can choose a different name and location for your applications.

Description of this image -
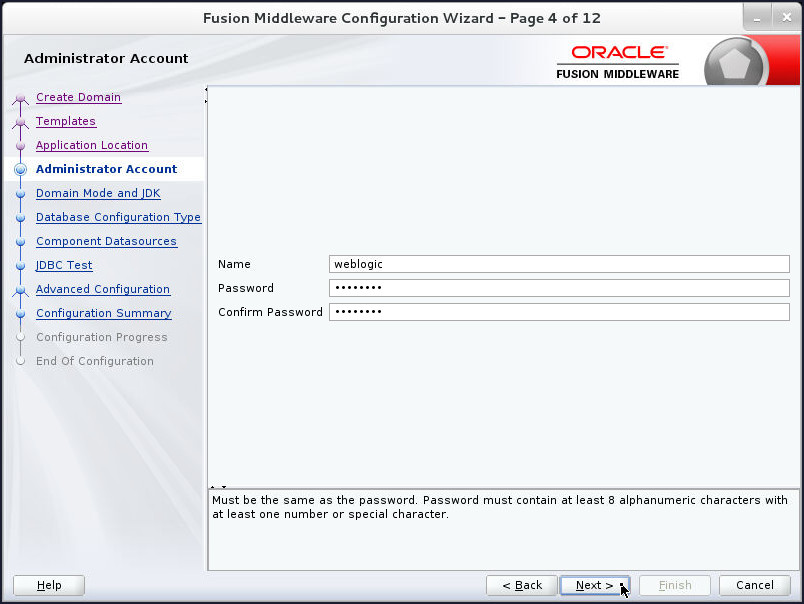
-
On the Administrator Account page, enter a name and a password, confirm the password, and then click Next.
In this tutorial, the username is
weblogicand the password iswelcome1.Important: Do not forget the username and password. You need them to perform every administrative task.
Description of this image -
On the Domain Mode and JDK page, make the following selections, and then click Next:
- Domain Mode: Production
- JDK: Oracle HotSpot 1.8.0_60
/scratch/jdk1.8.0_60
The version and location of your HotSpot JDK may be different.

Description of this image -
On the Database Configuration Type page, enter or select the following and click Get RCU Configuration:
Field Value Vendor OracleDriver DefaultDBMS/Service orcl.example.comHost Name host01.example.comPort 1521Schema Owner DEV_STBSchema Password welcome1Important Note: Before performing this step you should have a database(Oracle Database 12c or later (Express Edition may work as well but has not been tested.) installed(Refer Installing Oracle Database Software and Creating a Database) and should have created Schemas as a User with Full SYS or SYSDBA Privileges using Repository Creation Utility(RCU). Refer Creating Schemas for detailed instructions.
Once getting the RCU configuration is successfully done, click Next.

Description of this image -
On the JDBC Component Schema page, click Next.

Description of this image -
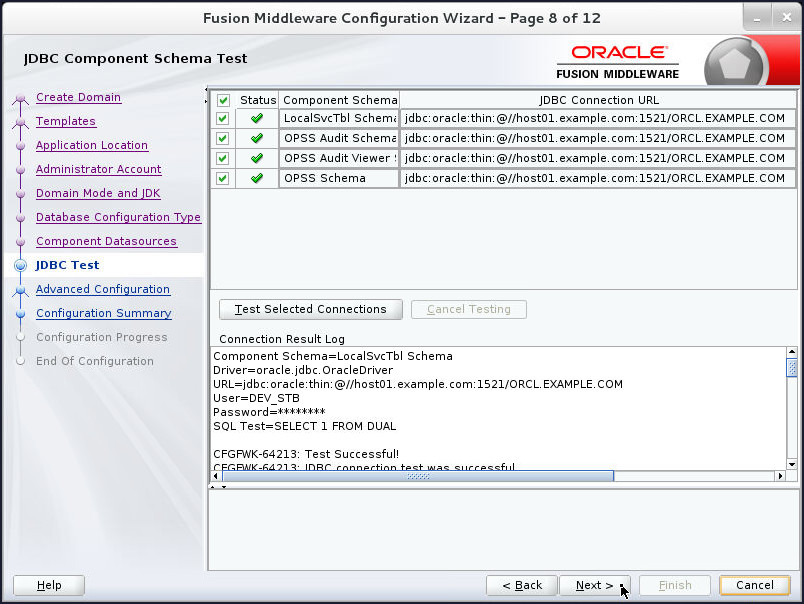
On the JDBC Component Schema Test page, verify that all the Schema Tests are successful and click Next.
Description of this image -
On the Advanced Configuration page, select which domain resources that you want to configure, and click Next.
In this tutorial, Administration Server, Node Manager, and Managed Servers, Clusters and Coherence are selected.
As you select more options, more screens are listed on the left side of the wizard.

Description of this image - On the Administration Server
page, accept the default values, and click Next:

Description of this image -
On the Node Manager page, enter the following information and click Next:
- Node Manager Type: Per Domain Default Location
- Username:
weblogic - Password:
welcome1
You will use these credentials to communicate with Node Manager.
Note: The credentials for Node Manager do not have to match the administrator account credentials.

Description of this image -
On the Managed Servers page, click Add to add servers as shown in the screenshot below and click Next:

Description of this image -
On the Clusters page, click Add add to add a cluster
cluster1and click Next: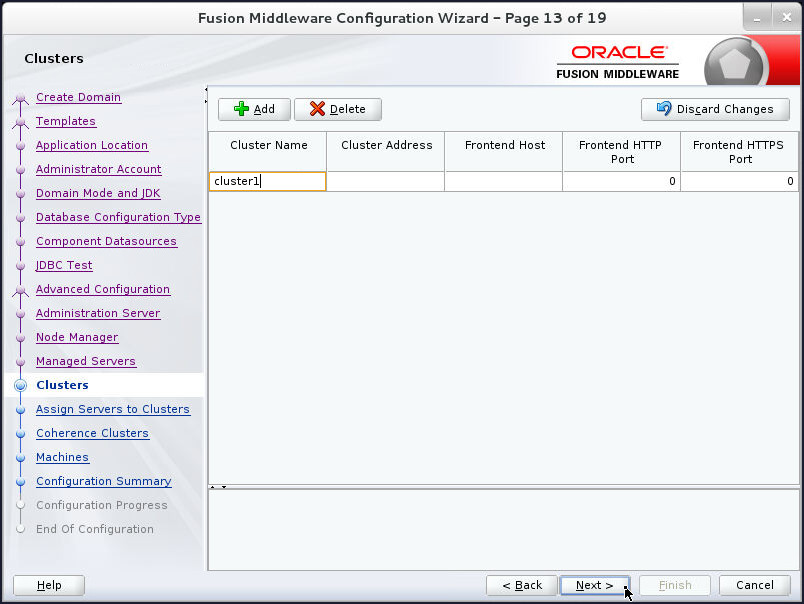
Description of this image -
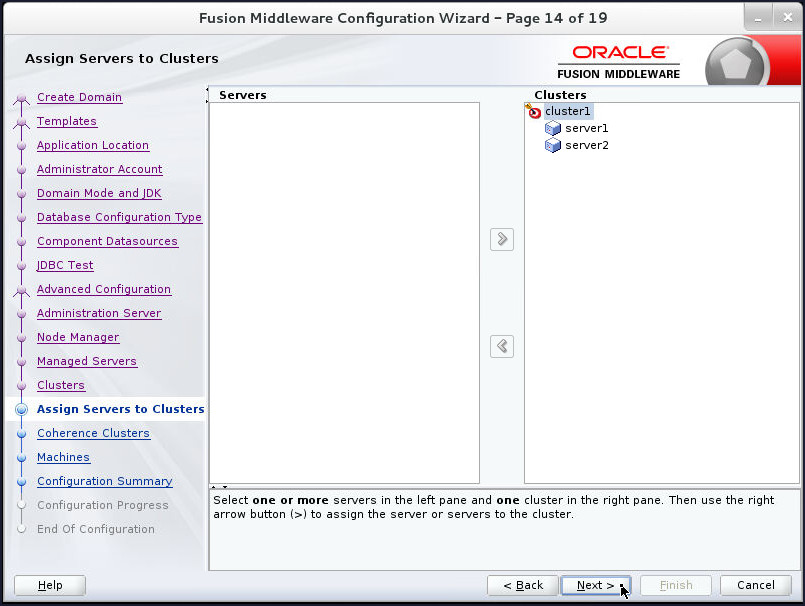
On the Assign Servers to Clusters page, perform the following steps:
- Under Clusters, ensure that cluster1 is selected.
- Under Servers, select server1 and click the right arrow button to move it under cluster1.
- Select server2 and click the right arrow button to move it under cluster1.
- Click Next.
Description of this image -
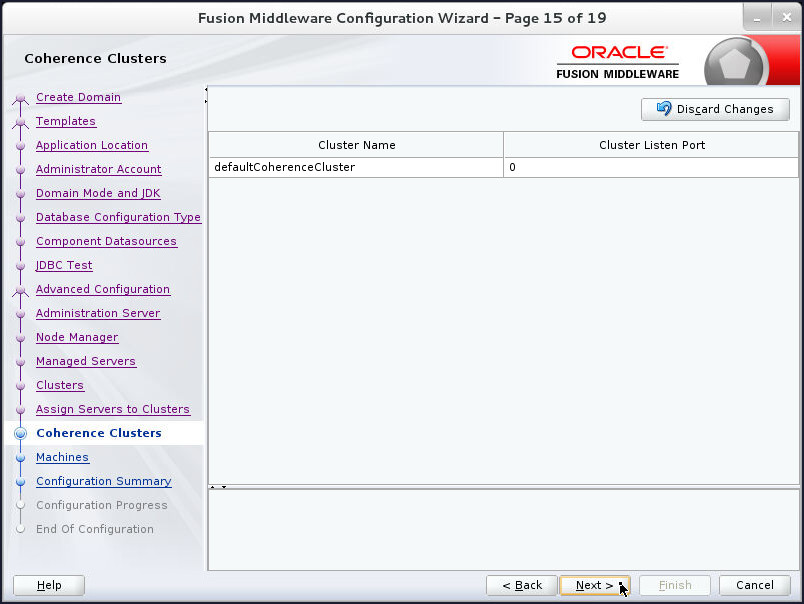
On the Coherence Clusters page, click Next.
Description of this image -
On the Machines page, click Next.

Description of this image -
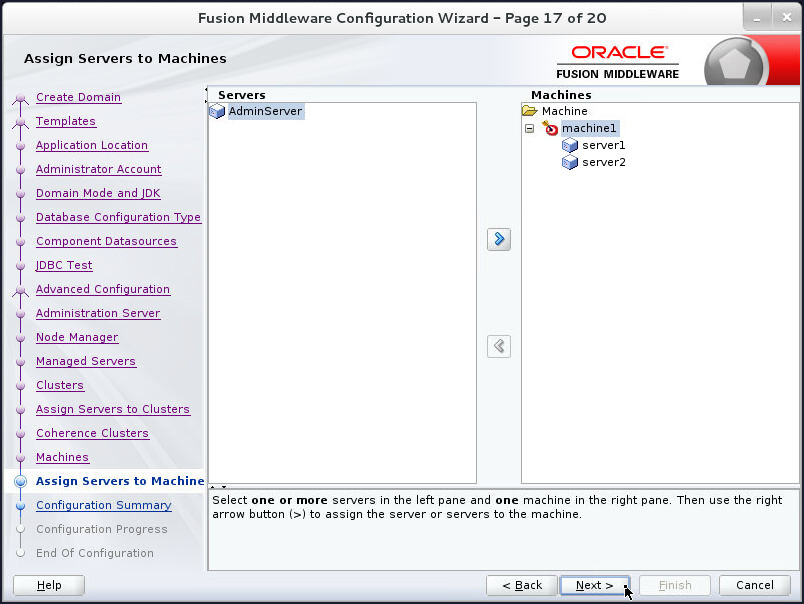
On the Assign Servers to Machines page:
- Shuttle server1 and server2 servers to Machines and make sure that both the servers are assigned to machine1.
- Click Next.
Description of this image -
On the Configuration Summary page, click Create.

Description of this image Note: Ignore the warning.
-
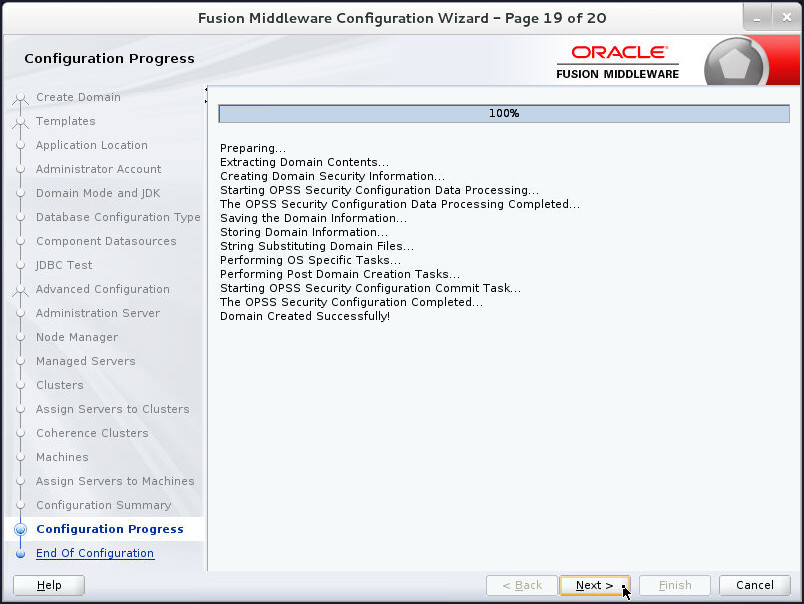
On the Configuration Progress page, click Next after the progress bar reaches 100%.
Description of this image -
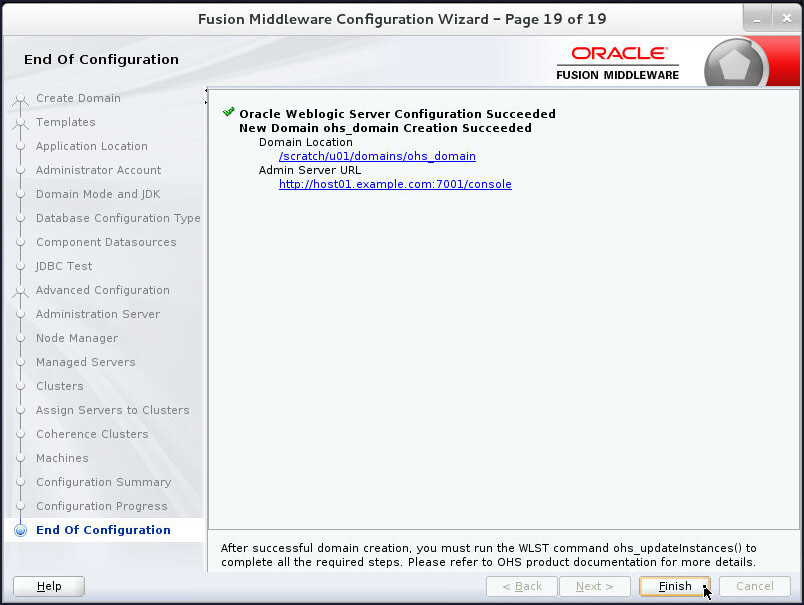
On the Configuration Success page, make note of the domain location and the URL of the administration console, and then click Finish.
Description of this image
Starting Node Manager and Domain Servers
To start the Node Manager and the Domains Servers, perform the following steps:
-
Open a terminal and navigate to the following location:
$ cd /scratch/u01/domains/ohs_domain/bin/ -
Execute
startNodeManager.shscript to start the Node Manager.$ ./startNodeManager.sh NODEMGR_HOME is already set to /scratch/u01/domains/ohs_domain/nodemanager CLASSPATH=/scratch/jdk1.8.0_60/lib/tools.jar:/scratch/u01/app/fmw1221_infra/wlserver/server/lib/weblogic.jar:/scratch/u01/app/fmw1221_infra/wlserver/../oracle_common/modules/net.sf.antcontrib_1.1.0.0_1-0b3/lib/ant-contrib.jar:/scratch/u01/app/fmw1221_infra/wlserver/modules/features/oracle.wls.common.nodemanager.jar::/scratch/u01/app/fmw1221_infra/wlserver/.. . . Domain name mappings: ohs_domain -> /scratch/u01/domains/ohs_domain<12.2.1.0.0> -
In the same terminal window, open a tab and execute
startWebLogic.shscript to start Administration Server.$ ./startWebLogic.sh . . -
Repeat the above step to start the servers
server1andserver2using thestartManagedWebLogic.shscript.$ ./startManagedWebLogic.sh server1 . .$ ./startManagedWebLogic.sh server2 . .
Apply JRF Template to the Cluster
Oracle JRF (Java Required Files) consists of those components not included in the Oracle WebLogic Server installation and that provide common functionality for Oracle business applications and application frameworks.
Oracle JRF consists of several independently developed libraries and applications that are deployed into a common location. The components that are considered part of Java Required Files include Oracle Application Development Framework shared libraries and ODL logging handlers.
Perform the following steps to apply JRF Template
to the Cluster cluster1:
-
To display Fusion Middleware Control:
- Enter the URL,
http://host01.example.com:7001/emin your Web browser. - Enter
weblogicas User Name andwelcome1as Password and click Login.

Description of this image - Enter the URL,
-
On the ohs_domain home page, click on the arrow mark in the Clusters tile.

Description of this image -
Next, click on the
cluster1cluster in the Clusters table.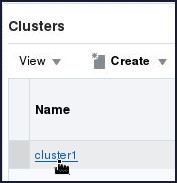
Description of this image - In the Change Center, click Lock
& Edit.

Description of this image -
Click Apply JRF Template button in the Information section.
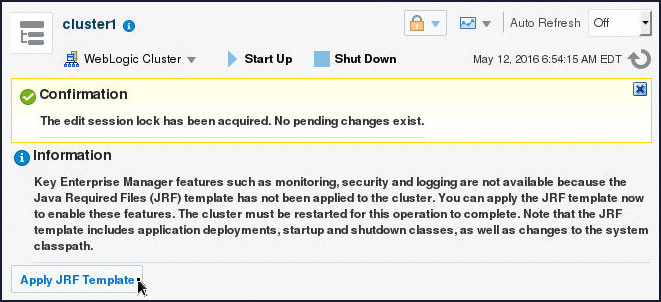
Description of this image -
A confirmation message gets displayed:
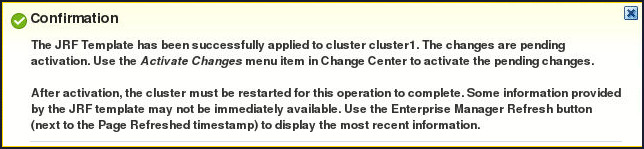
Description of this image -
Click Activate Changes in the Change Center to activate the changes.
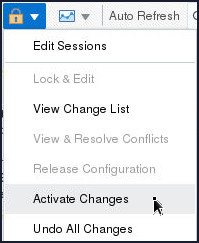
Description of this image -
Restart the cluster cluster1:
- On the cluster1 page,
click Shutdown.

Description of this image - Click Shutdown in the confirmation popup window.
- Click Close.
- On the cluster1 page,
click Startup.

Description of this image - A processing pop up window appears which shows the progress of cluster start process. Click Close on the Confirmation pop up window.
- On the cluster1 page,
click Shutdown.
Want to Learn More?
-
For documentation on Oracle WebLogic Server 12c (12.2.1), visit the Oracle WebLogic Server Documentation Library.
-
For more information about Oracle HTTP Server, see the Oracle® Fusion Middleware Administering Oracle HTTP Server
-
To learn more about Oracle WebLogic Server, refer to additional OBEs in the Oracle Learning Library
Credits
- Lead Curriculum Developers: Tom Eliason, Veerabhadra Rao Putrevu