Before You Begin
Purpose
This tutorial describes how to use the Weblogic Server 12.2.1 Reconfiguration Wizard to reconfigure WebLogic Server Domain that was created using WebLogic Server 10.3.6.
When you use the Reconfiguration Wizard to reconfigure a WebLogic Server domain, the following items are automatically updated, depending on the applications in the domain:
- WLS core infrastructure
- Domain version
Time to Complete
Background
Reconfiguration is the process of upgrading a domain that was created with a previous WebLogic Server version so that it is compatible with the WebLogic Server version to which you have upgraded. This can be done using either the Reconfiguration Wizard or WLST. This tutorial describes how to upgrade your domain from an earlier WebLogic Server release to WebLogic Server 12c Release 1 (12.2.1). WebLogic Server 12.2.1 includes the Fusion Middleware Reconfiguration Wizard to assist you with upgrading WebLogic Server and your application environments. Most WebLogic Server applications can be run without modifications in the new WebLogic Server 12.2.1 application environment.
When you reconfigure a domain:
- The domain version number in the config.xml file for the domain is updated to the Administration Server's installed WebLogic Server version major and minor version number (for example, 12.2.1.0).
- Reconfiguration templates for all installed Oracle products are automatically selected and applied to the domain. These templates define any reconfiguration tasks that are required to make the WebLogic domain compatible with the current WebLogic Server version.
- Start scripts are updated.
General Roadmap for Upgrading Your Application Environment
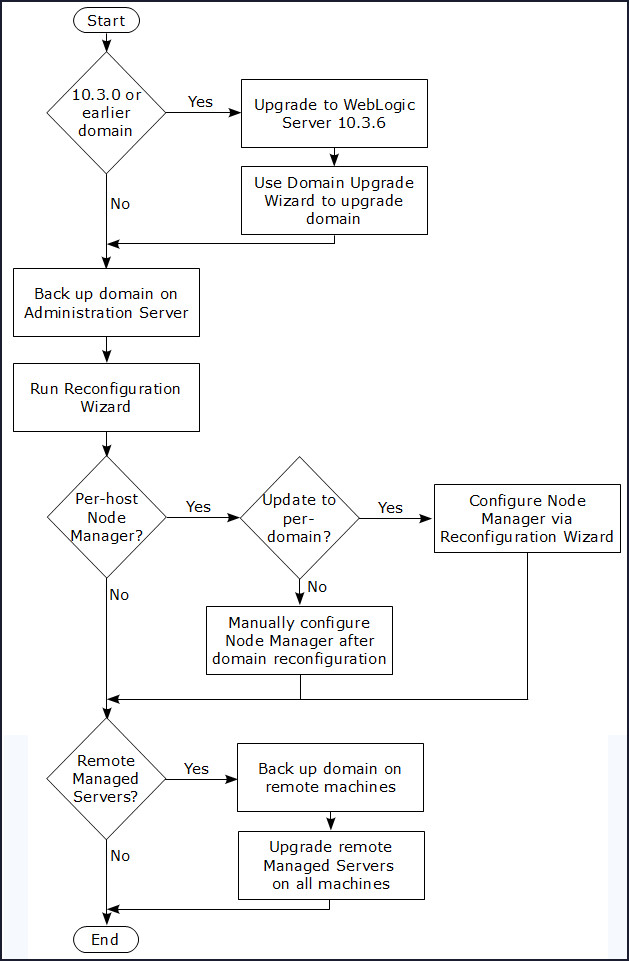
The instructions in this tutorial are for the following upgrade scenario:
- Upgrading a domain created with WebLogic Server 10.3.6 release to WebLogic Server 12.2.1
What Do You Need?
Operating System and Software Requirements
- A Linux machine with version 6 or greater of Oracle Linux or Red Hat Linux
- Oracle WebLogic Server 12c (12.2.1) software
- JDK 1.8 update 51 and above
Prerequisites
- You should have installed Oracle Weblogic Server 10.3.6 and configured it appropriately. Refer "Fusion Middleware Installation Guide for Oracle WebLogic Server" for installation details.
- You should have created a domain using the Oracle Weblogic Server 10.3.6. Refer "Creating a Weblogic Domain" for assistence regarding the creation of domain.
- You should have completed the tutorial Oracle WebLogic Server 12c (12.2.1): Installing WebLogic Server Using the Generic Installer
Before Running the Reconfiguration Wizard
Perform the following steps prior to beginning the upgrade process:
- Ensure your applications are compatible. You should review the WebLogic Server and domain compatibility requirements for WebLogic Server 12.2.1. For more information, see "Compatibility Within a Domain" in Understanding Oracle WebLogic Server document.
- Shutdown all the servers related to Oracle
Weblogic Server version 10.3.6.
In this tutorial, the following servers are
shutdown:
- server1 Managed server:

- AdminServer:
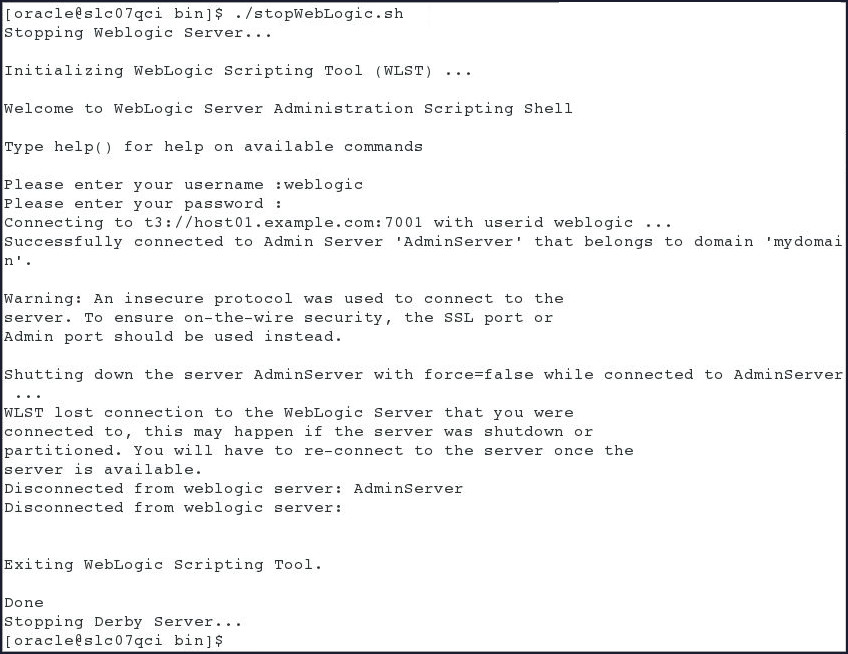
- server1 Managed server:
- Create a backup copy of the domain directory.
Navagate to /scratch/10.3.6 and
execute the copy command as shown:

Caution: Once the domain reconfiguration process starts, it is irreversible. Prior to using the Reconfiguration Wizard or WLST to upgrade the domain, ensure that you have backed up the domain. If an error or other interruption occurs during the reconfiguration process, you must restore the domain by copying the files and directories from the backup location to the original domain directory. This is the only way to ensure that the domain has been returned to its original state prior to reconfiguration.
-
Set the CONFIG_JVM_ARGS environment variable to the following value to use the operating system's random number generator:
-Djava.security.egd=file:/dev/./urandom
This decreases the amount of time it takes for the Reconfiguration Wizard to reconfigure a domain.

Note: Make sure you use the same terminal to run the reconfiguration wizard.
- If you have not already done so, install the new version of WebLogic Server (12.2.1) by following the steps in Oracle WebLogic Server 12c (12.2.1): Installing WebLogic Server Using the Generic Installer tutorial.
Reconfiguring a WebLogic Domain in Graphical Mode
To start the Reconfiguration Wizard in graphical mode perform the following steps:
-
Go to the following directory, where <ORACLE_HOME> is your Oracle home directory:
<ORACLE_HOME>/oracle_common/common/bin
In this tutorial, the <ORACLE_HOME> has been set to: /scratch/u01/app/fmw

-
Execute the following command to bring up the graphical reconfiguration wizard:
./reconfig.sh

Note:
When you run the reconfig.sh command, the following error message might be displayed to indicate that the default cache directory is not valid:
*sys-package-mgr*: can't create package cache dir
You can change the cache directory by including the -Dpython.cachedir=valid_directory option in the command.
To create a log file of the Reconfiguration Wizard session, include the -log=reconfig.log -log_priority=debug parameter in the command. You can specify any file name for the log file, such as config_today.log. The log file is stored in the logs directory of the Oracle Home directory. Other valid values for log_priority are OFF, SEVERE, WARNING, INFO, CONFIG, FINE, FINER, FINEST, and ALL.
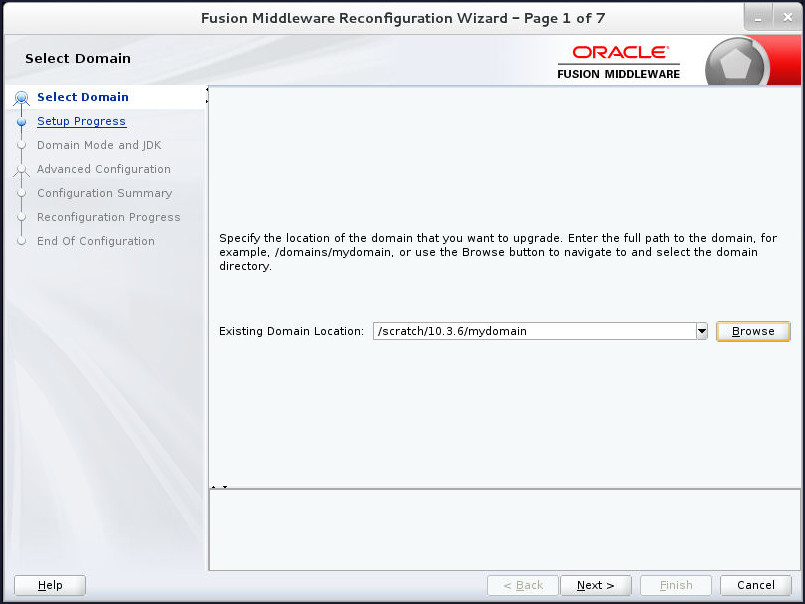
-
On the Select Domain screen of the wizard, enter the full path to the domain directory or click Browse to navigate to and select the domain directory. In this tutorial, it is:
/scratch/10.3.6/mydomain
Click Next to continue.
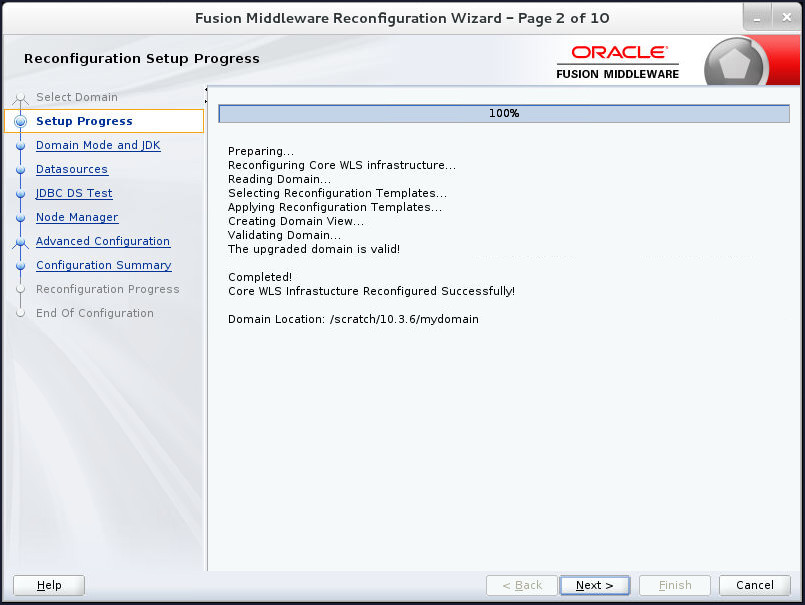
-
The Reconfiguration Setup Progress screen, shows the progress of the application of reconfiguration templates. The upgrade is also validated.
When the process completes, click Next to continue.
-
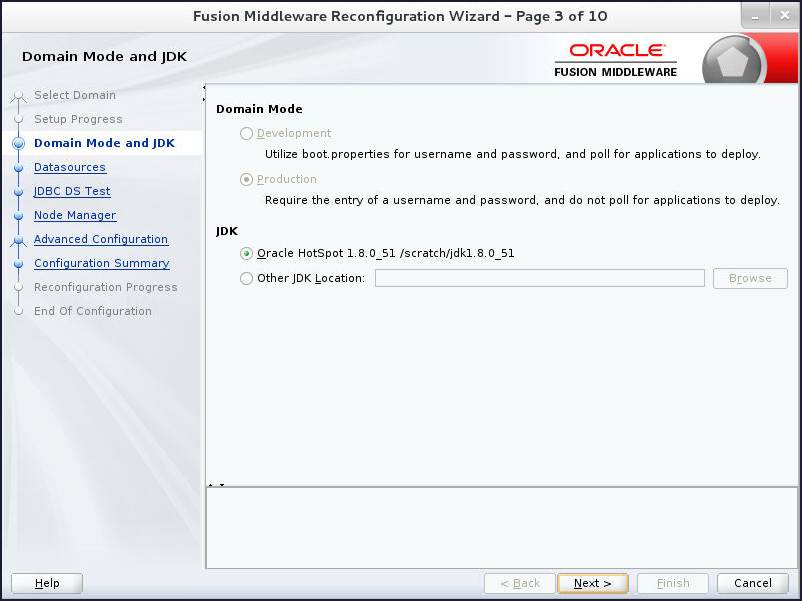
On the Domain Mode and JDK screen, the mode comes from the existing domain and it cannot be changed by the wizard. The JDK which was used when you installed the new version of Weblogic Server is automatically selected as the JDK for the reconfigured domain. You can also click Browse to navigate to the JDK you want to use.
In this tutorial, the default is selected.Click Next to continue.
-
On the JDBC Data Sources screen, the data source defined in the existing domain are listed in the lower half of the screen. Select the data source or data sources for which you want to change settings. Once the data source is selected you can update the values in the appropriate fields.
Note that if you select multiple data sources, the text that varies among component schemas might be displayed in certain fields indicating that the current values of those fields are different across the selected data sources. If you change the values in such fields, the new values are applied to all the selected datasources.
In addition to changing a data source settings you can convert the data source from a generic data source to want to be used with an Oracle RAC Database by selecting either Convert to GridLink or Convert to RAC multi data source. If you select either of these options, when you click Next, additional screens are displayed.
In this tutorial, there are no changes made to the settings of the selected data source. The data source has been selected in order to enable the fields for demonstration purposes.
Click Next to continue.

-
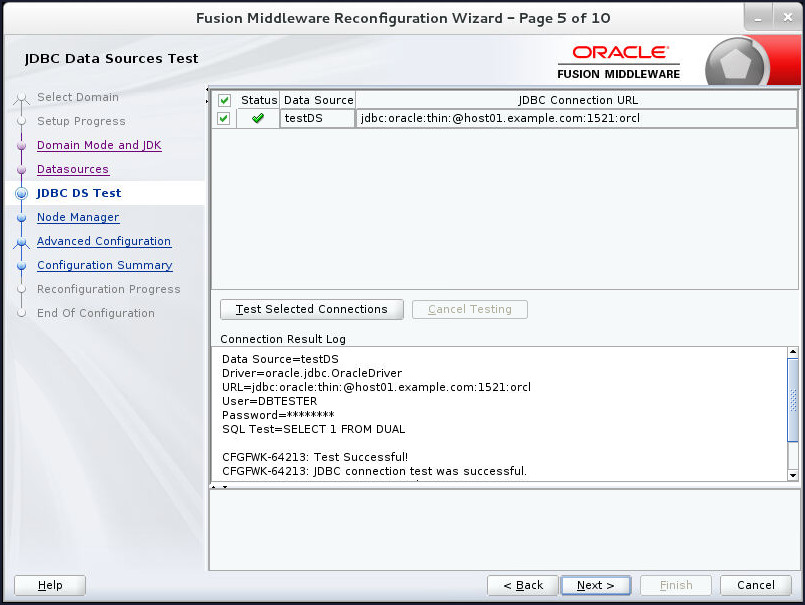
On the JDBC Data Sources Test screen, select the check box for the data source you want to test, and then click Test Connections.
The wizard tests the configuration for the selected data source by attempting to connect to a URL that is constructed by using the driver, host, port, and other information that you specified while configuring the data source.
The result of the test is indicated in the Status column. Details are displayed in the Connection Result Log section.
If any tests fail then use the Back button to change the settings for the failed data source.
When all tests are successful, click Next.
-
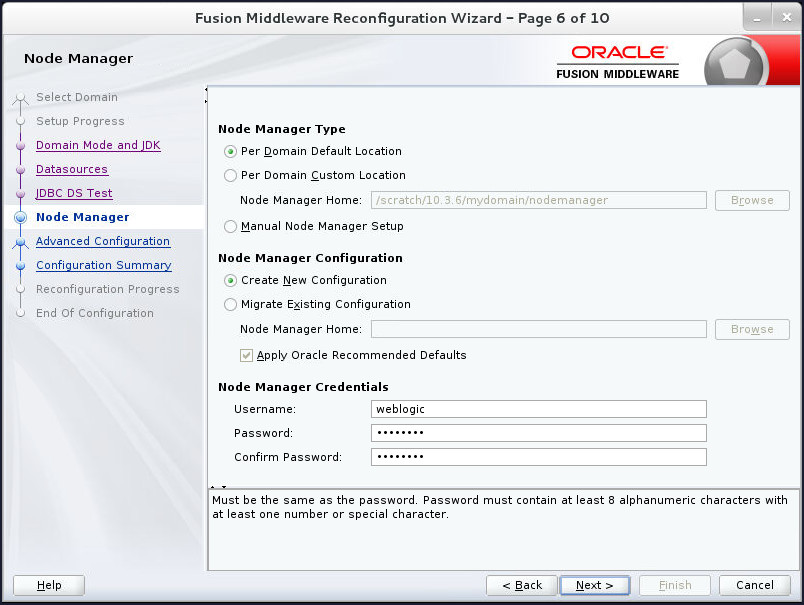
The Node Manager screen is displayed only if the domain you are reconfiguring is currently using a per host Node Manager. Use this screen to select the Node Manager configuration to use for the reconfigured domain. The resulting configuration depends on the combination of options you select for Node Manager Type and Node Manager Configuration.
Under Node Manager Type, select Per Domain Default Location. Selecting Per Domain Default Location will make sure that the Node Manager will be per domain and the Node Manager home will be under the domain in a directory named Node Manager.
For the Node Manager Configuration the choices are:
- Create New Configuration: A per domain Node Manager Configuration will be created for the reconfigured domain by using the default settings in nodemanager.properties . You can modify this file after the domain has been successfully reconfigured.
- Migrate Existing Configuration: The existing per host node manager configuration will be migrated to a per domain configuration for the reconfigured domain. This does not include environment specific settings for listen address, listen port, start script name, java home and log file. You will need to set those manually after the domain has been successfully reconfigured.
Select Create New Configuration.
Next, enter the Node Manager Credentials. In this tutorial, the username is weblogic and the password is welcome1
.Click Next to continue.
-
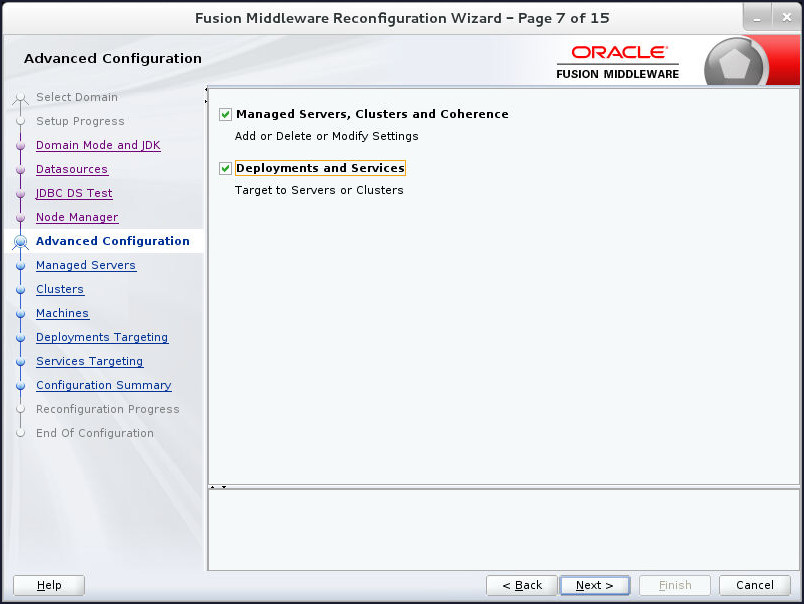
On the Advanced Configuration screen, all the categories (if any) for which you want to perform advanced configuration can be selected. For each category you select, the appropriate configuration screen is displayed to allow you to perform advanced configuration. If you do not select any items on this screen, the Configuration Summary screen is displayed next.
Select Managed Servers, Clusters and Coherence and Deployments and Services options.
Click Next to continue.
-
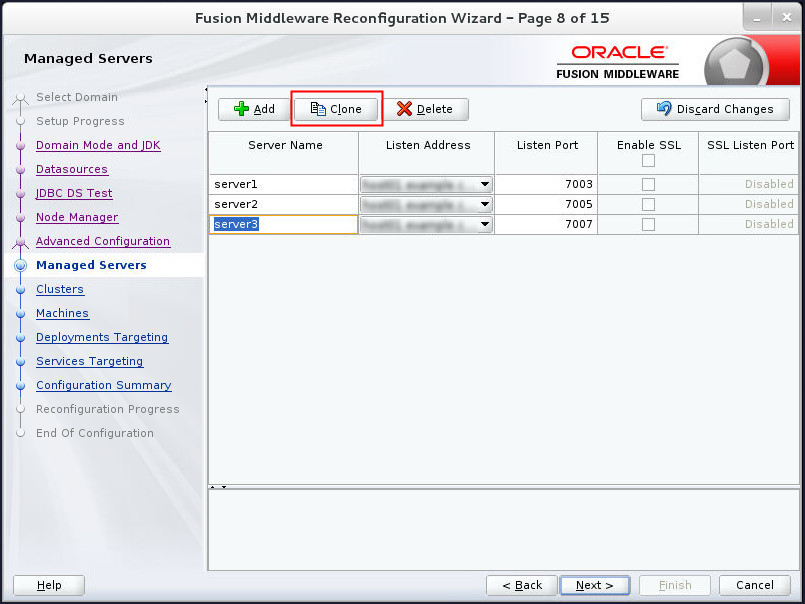
On the Managed Servers screen, you can add, delete, or clone Managed Servers. You can also change the settings for an existing Managed Server.
To add a server, click Add and configure the settings for the new server. The default name for a new server is new_ManagedServer_n, where n starts at 1 and increments for each new server you add.
To clone a server, click in the row for the server you want to clone, and then click Clone. The default name for the new clone is original_server_name_clonen, where n starts at 1 and increments for each new server that you clone from that server. When you create a Managed Server that is a clone of an existing Managed Server, all applications and libraries that are targeted to the source server are also deployed to the clone. The cloned server is also assigned to all server groups to which the source server is assigned (if any).
To delete a server, select the server and click Delete. You can delete only one server at a time.
Select the row corrsponding to server3 and click Clone.
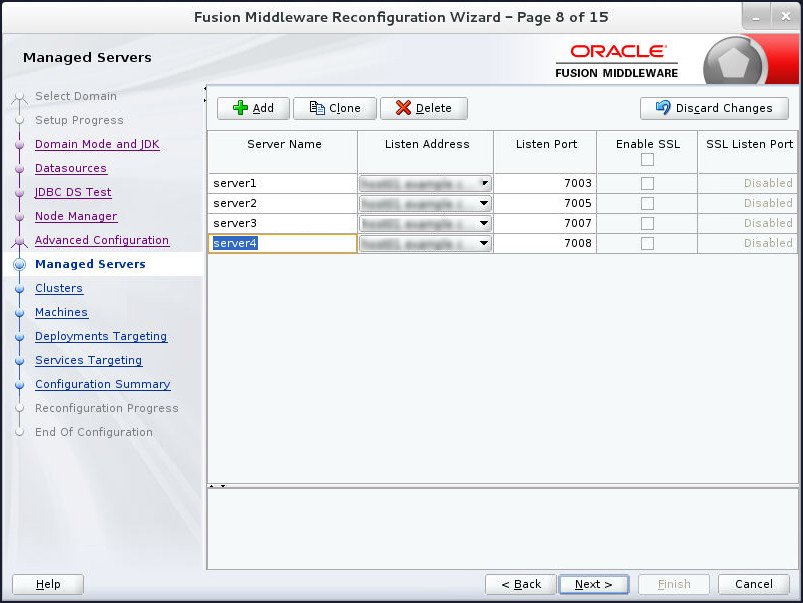
The clone appears in its own row and you can edit it's attributes. Update the name and port of the clone to server4 and 7008 respectively.
Click Next to continue.
-
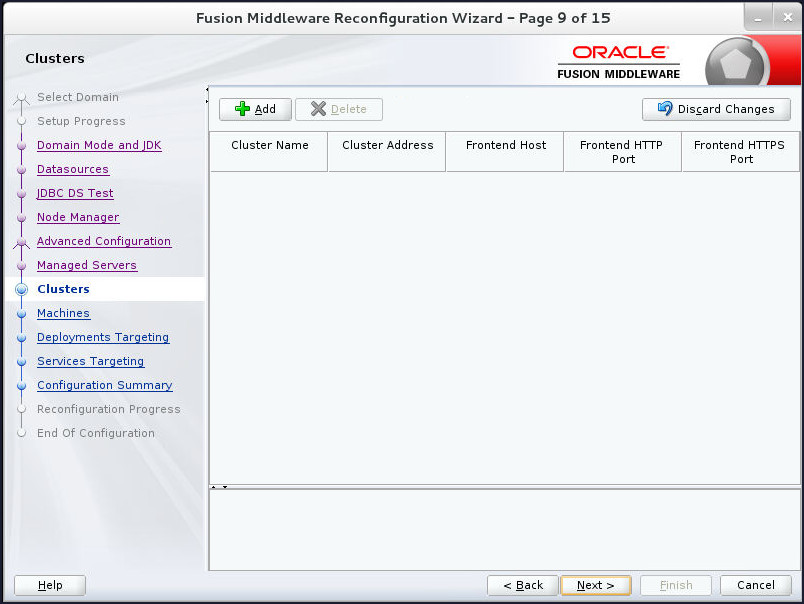
Use the Clusters screen to add or delete clusters. You can also change the settings for an existing cluster.
A cluster is a group of WebLogic Server instances that work together to provide scalability and high-availability for applications. By creating clusters, you can group Managed Servers such that they operate as a single unit for hosting applications and resources.
In this tutorial, cluster has not been configured in the previous release of weblogic server installation that is being upgraded. Hence, there are no clusters available. You can add a new cluster if required.
Click Next to continue.
-
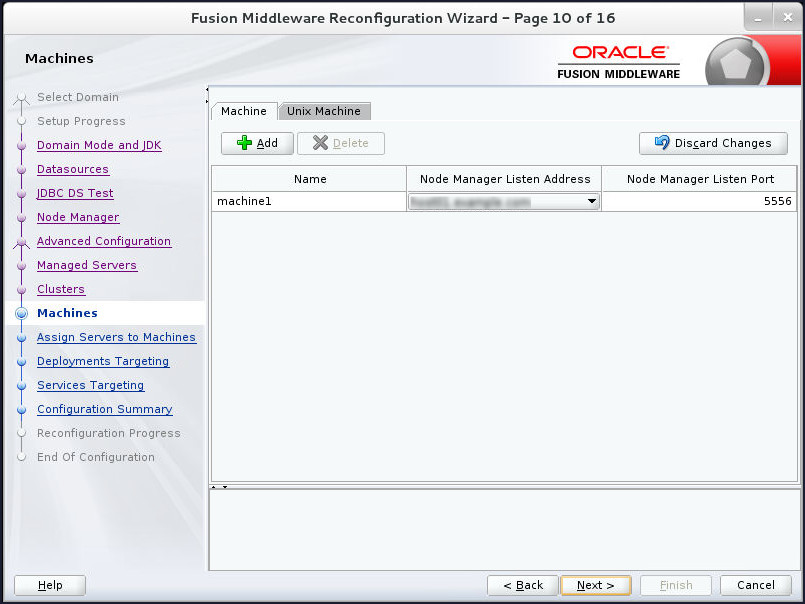
Use the Machines screen to add or delete machines, or to modify the settings for an existing machine.
In a WebLogic domain, the machine definitions identify physical units of hardware and are associated with the WebLogic Server instances or system components (such as OHS servers) that they host.
In this tutorial, no changes are made to the existing machine machine1. Click Next to continue.
-
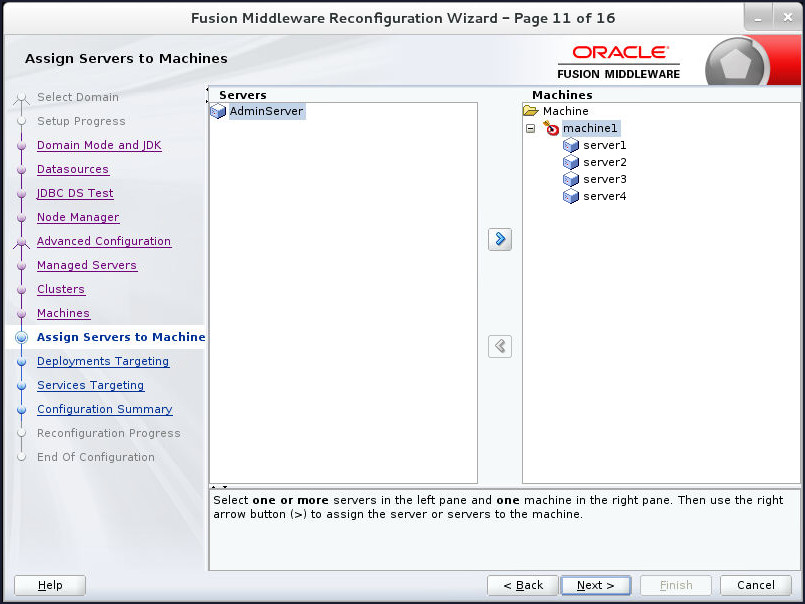
On the Assign Servers to Machines screen, select machine1 in the Machines list box.

Assign WebLogic Server instance server4 to the selected machine in one of the following ways:
- Double-click the WebLogic Server instance in the Server list box.
- Select the appropriate WebLogic Server instance in the Server list box and click the right arrow.
The name of the WebLogic Server instance server4 is removed from the Server list box and added, below the name of the target machine machine1, in the Machine list box.
Click Next to continue.
-
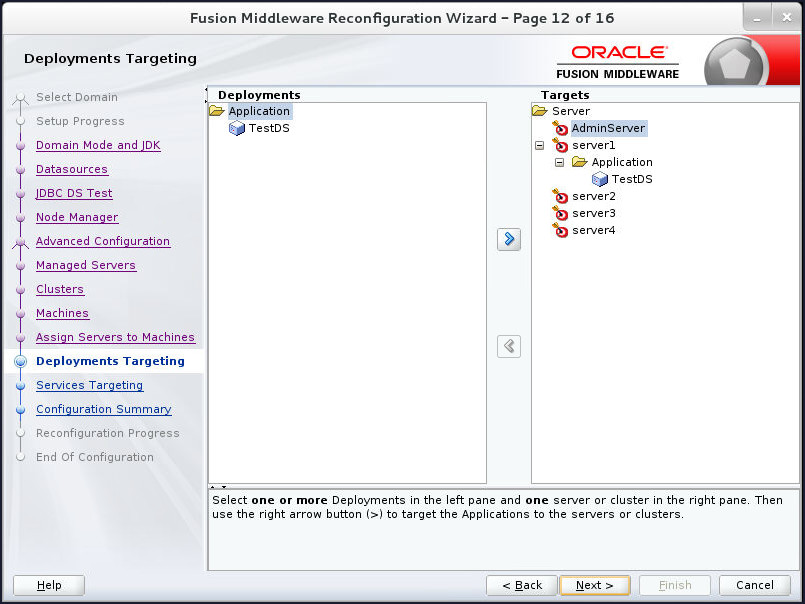
Use Deployments Targeting screen to target applications for deployment on servers or clusters.
Applications associated with the product for which you are configuring the domain are targeted automatically to the Managed Server created for that product or to the cluster to which that Managed Server is assigned. In this screen, you can target applications to additional servers and clusters.
In this tutorial, application TestDS has been targeted automatically to Managed Server server1. Hence, click Next to continue.
-
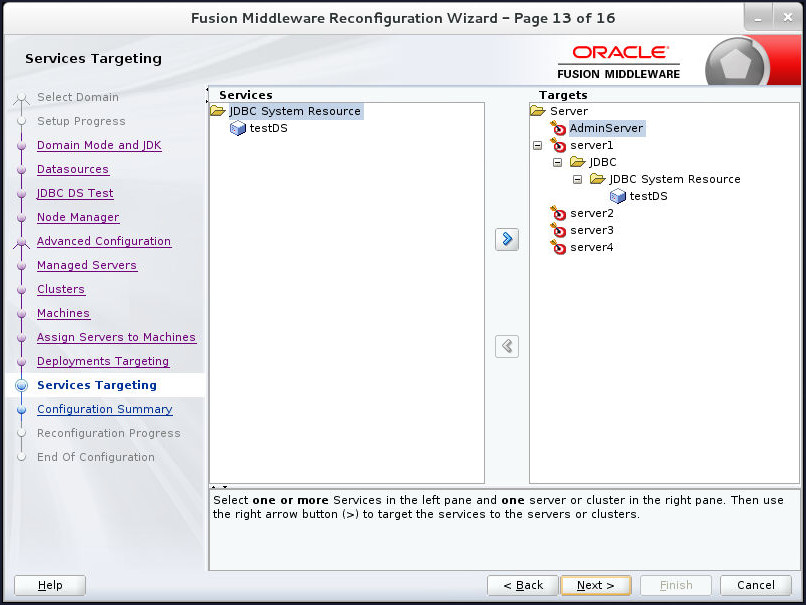
Use Services Targeting screen to target services to the appropriate Managed Servers or clusters.
Services that are associated with the product for which you are configuring the domain are targeted automatically, to the Managed Server created for that product or to the cluster to which that Managed Server is assigned. In this screen, you can target services to additional servers and clusters.
In this tutorial, the service testDS has been targeted automatically to Managed Server server1. Hence, click Next to continue.
-
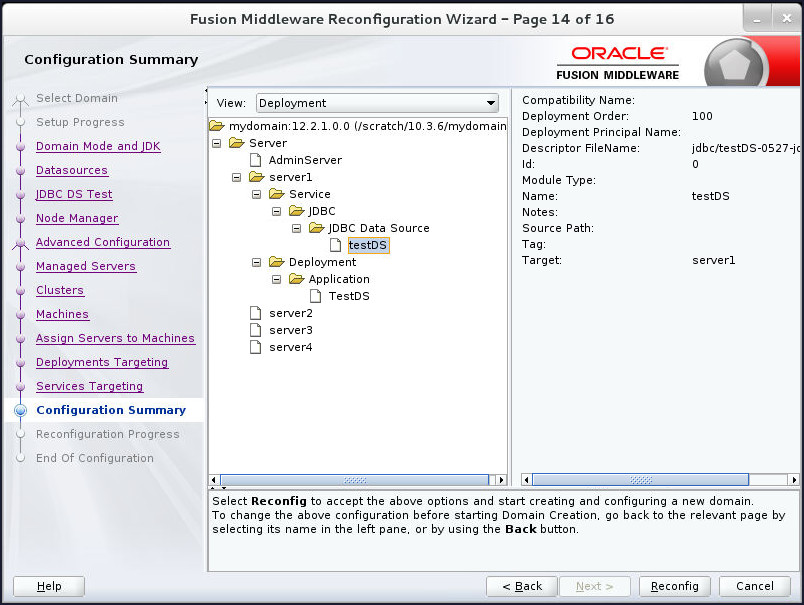
Review the detailed configuration settings of the domain before continuing.
You can limit the items that are displayed in the right-most panel by selecting a filter option from the View drop-down list.
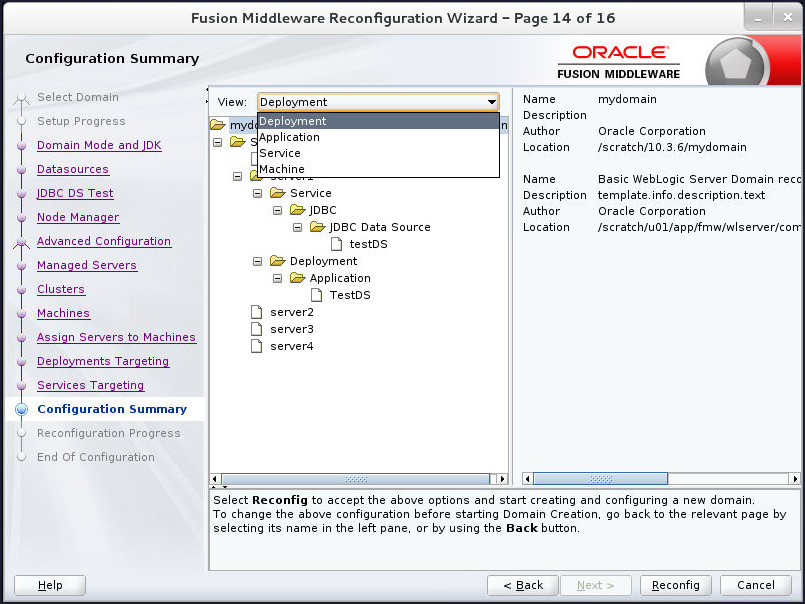
If you need to change the configuration, click Back to return to the appropriate screen.
When done, click Reconfig to reconfigure the domain. The location of the domain does not change.
-
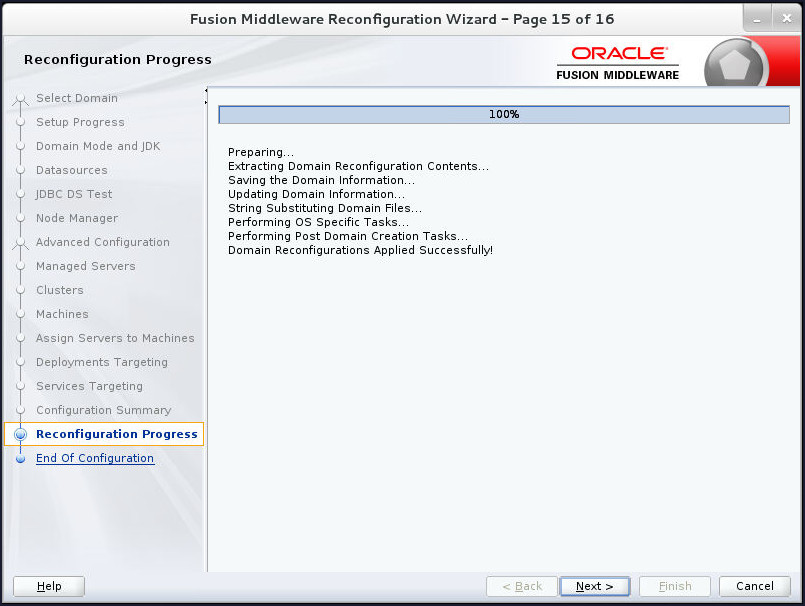
The Reconfiguration Progress screen displays the progress of the reconfiguration process. During this process:
- Domain information is extracted, saved, and updated
- Schemas, scripts, and other such files that support your Fusion Middleware products are updated.
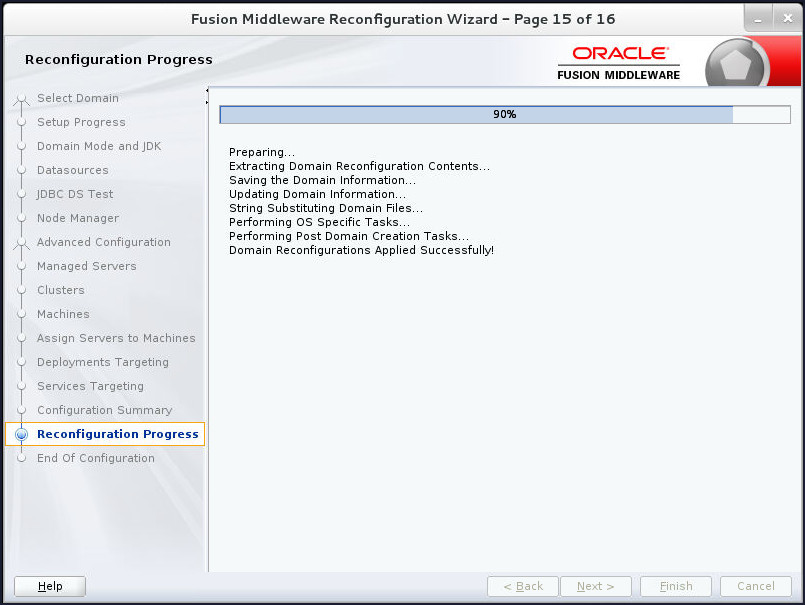
When the process completes, click Next.
-
The End Of Configuration screen indicates whether the reconfiguration process completed successfully or failed. It also displays the location of the domain that was reconfigured as well as the Administration Server URL (including the listen port).
Click Finish.
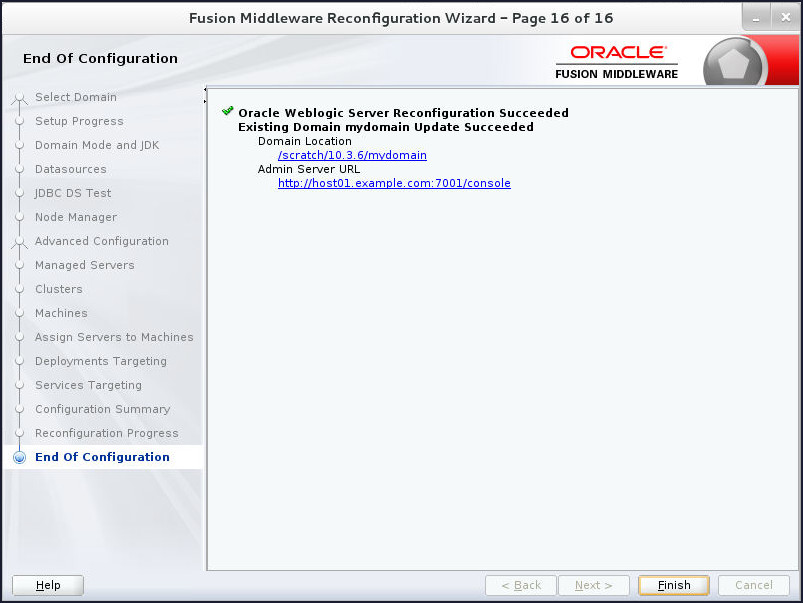
If the reconfiguration process did not complete successfully, an error message is displayed to indicate the reason. Take appropriate action to resolve the issue. If you cannot resolve the issue, contact My Oracle Support.
Want to Learn More?
-
For documentation on Oracle WebLogic Server 12c (12.2.1), visit the Oracle WebLogic Server Documentation Library.
- Visit Reconfiguring WebLogic Domains for more information on Reconfiguration of Weblogic Domains.
-
To learn more about Oracle WebLogic Server, refer to additional OBEs in the Oracle Learning Library
Credits
- Lead Curriculum Developer: Tom Eliason
- Original Oracle by Example tutorial for version 12c created by: Bill Bell
- Original Oracle by Example tutorial for version 11g created by: TJ Palazzolo
- Other Contributors: Veerabhadra Rao Putrevu, Susan Moxley
Version
- 01-05-001-UpgradeDomain