Before You Begin
Purpose
This tutorial shows you how to configure an external LDAP server and configure the LDAP server as one of the authentication providers of the WebLogic Server security realm.
Time to Complete
Background
Authentication is the process whereby the identity of users and system processes are proved or verified. Authentication also involves remembering, transporting, and making identity information available to various components of a system when that information is needed.
The WebLogic Server security architecture supports: password-based and certificate-based authentication directly with WebLogic Server; HTTP certificate-based authentication proxied through an external Web server; perimeter-based authentication (Web server, firewall, VPN); and authentication based on multiple security token types and protocols.
WebLogic Server offers the following types of Authentication providers:
- WebLogic Authentication provider, also known as the DefaultAuthenticator
- Oracle Internet Directory Authentication provider
- Oracle Virtual Directory Authentication provider
- LDAP Authentication providers
- RDBMS Authentication providers
- WebLogic Identity Assertion provider
- SAML Authentication provider
- Negotiate Identity Assertion provider
- SAML Identity Assertion provider
In this tutorial, you will perform the following tasks:
- Configure an external LDAP server, ApacheDS
- Update the WebLogic Server default authentication provider's control flag
- Set the external LDAP, ApacheDS, as one of the authentication providers in your WebLogic Server domain
- Configure the LDAP authentication provider control flag
- Deploy an Application,
SecureWebApp,to the Weblogic Server - Finally, you test the external LDAP configuration using the
SecureWebAppapplication.
Note: The WebLogic Server default embedded LDAP continues as one of the authentication providers and retains all the administrative users, groups, and roles. The external LDAP authenticatino provider is used for all other users, groups, and roles.
LDAP Authentication providers access external LDAP stores. You can use an LDAP Authentication provider to access any LDAP server. WebLogic Server provides LDAP Authentication providers already configured for Open LDAP, Oracle Directory Server Enterprise Edition (ODSEE), Microsoft Active Directory, and Novell NDS LDAP servers.
What Do You Need?
Operating System and Software Requirements
- A Linux machine with version 6 or greater of Oracle Linux or Red Hat Linux
- JDK 1.8 update 51 and above
- Oracle WebLogic Server 12c (12.2.1) software
Prerequisites
You should have completed the following tutorials:
-
Oracle WebLogic Server 12c (12.2.1): Installing WebLogic Server Using the Generic Installer
- Oracle
WebLogic Server 12c (12.2.1): Creating a
Domain
Note: A domain with just an Admin Server should be sufficient.
Download and Install ApacheDS
ApacheDS™ is an extensible and embeddable directory server entirely written in Java, which has been certified LDAPv3 compatible by the Open Group. Besides LDAP it supports Kerberos 5 and the Change Password Protocol. It has been designed to introduce triggers, stored procedures, queues and views to the world of LDAP which has lacked these rich constructs.
Perform the following steps to download and install an external LDAP authentication provider, ApacheDS:
-
Open a browser and navigate to http://www.us.apache.org/dist//directory/apacheds/dist/2.0.0-M21/apacheds-2.0.0-M21-64bit.bin. It should directly prompt you to save the
apacheds-2.0.0-M21-64bit.binfile. Or you can visit https://directory.apache.org/ to download the latest available version of ApacheDS.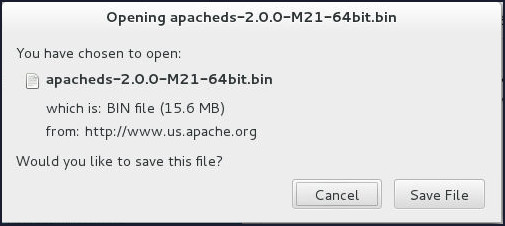
-
Save the file in the
/scratchdirectory.
-
Open a new terminal, change directory to
/scratchand verify the presence of theapacheds-2.0.0-M21-64bit.binfile.
Note: The
apacheds-2.0.0-M21-64bit.binfile do not have executable permissions by default. -
Install ApacheDS as root user:
- Switch to root user.
- Provide executable permissions to the
apacheds-2.0.0-M21-64bit.binfile and verify the same. - Run the
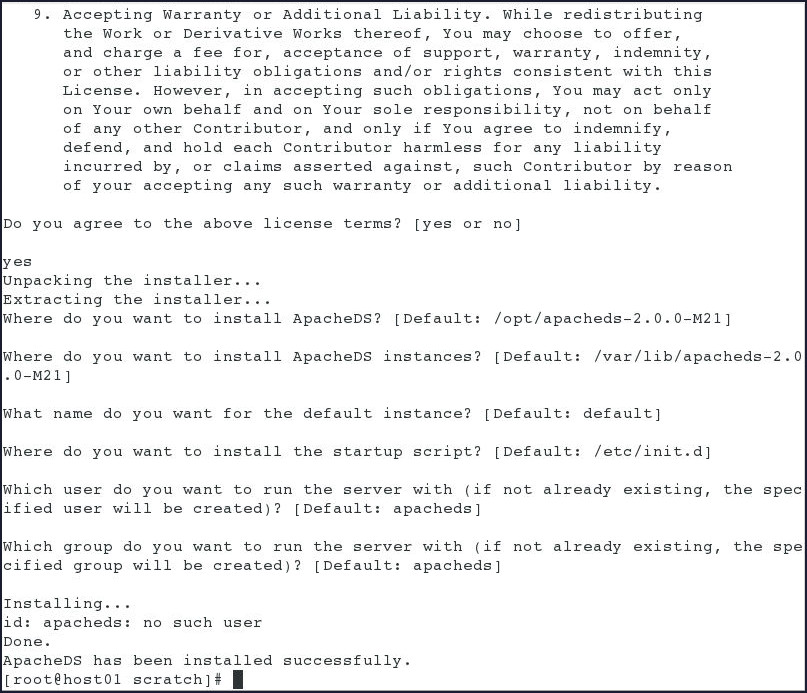
apacheds-2.0.0-M21-64bit.bininstaller file. The installation starts with the installer showing the License Agreement initially and as you go on pressing the <Enter> key, a series of questions get displayed: -
After the ApacheDS gets installed successfully, run the following command to start the services:
# service
                                        apacheds-2.0.0-M21-default start

Downloading and Accessing Apache Directory Studio
Apache Directory Studio is a complete directory tooling platform intended to be used with any LDAP server however it is particularly designed for use with ApacheDS. It is an Eclipse RCP application, composed of several Eclipse (OSGi) plugins, that can be easily upgraded with additional ones. These plugins can even run within Eclipse itself.
Perform the following steps to Download and Open Apache Directory Studio.
-
Open a browser and navigate to http://www.us.apache.org/dist/directory/studio/2.0.0.v20151221-M10/ApacheDirectoryStudio-2.0.0.v20151221-M10-linux.gtk.x86_64.tar.gz. It should directly prompt you to save the
ApacheDirectoryStudio-2.0.0.v20151221-M10-linux.gtk.x86_64.tar.gzfile. Or you can visit https://directory.apache.org/ to download the latest available version of Apache Directory Studio.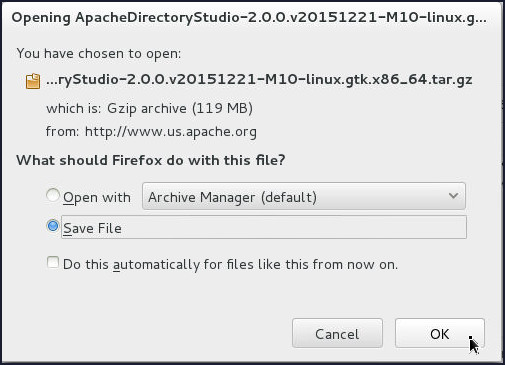
-
Save the file in the
/scratchdirectory.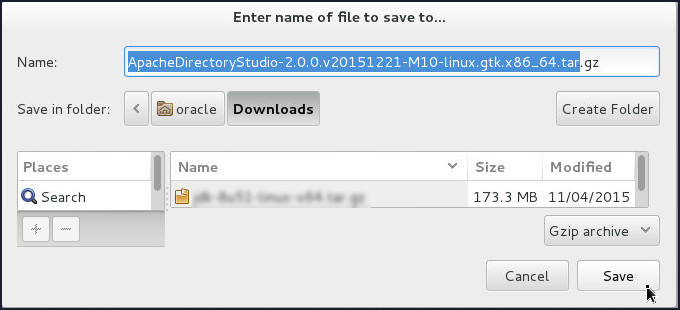
-
Open a new terminal, change directory to
/scratchand extract theApacheDirectoryStudio-2.0.0.v20151221-M10-linux.gtk.x86_64.tar.gzfile.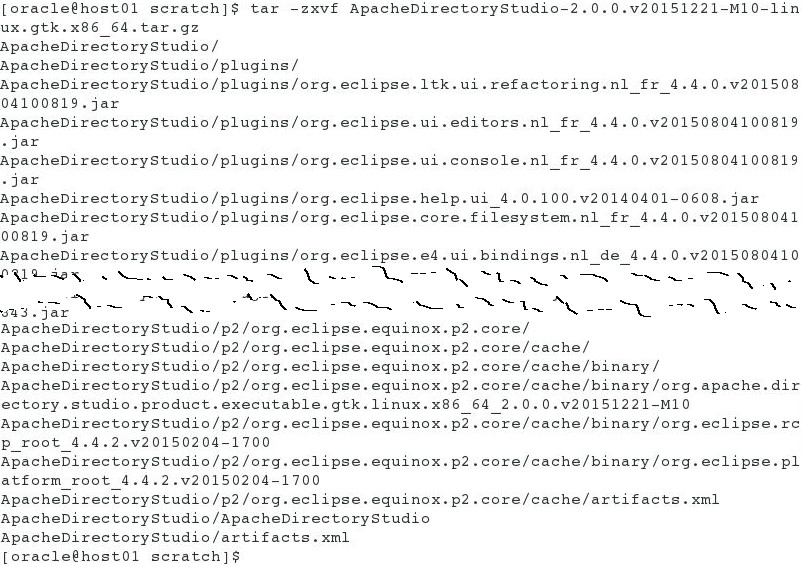
-
Change directory to ApacheDirectoryStudio and execute ApacheDirectoryStudio executable file to launch the Apache Directory Studio.

Configure External LDAP system ApacheDS
Create a New LDAP Connection
Perform the following steps to Create a New LDAP Connection:
-
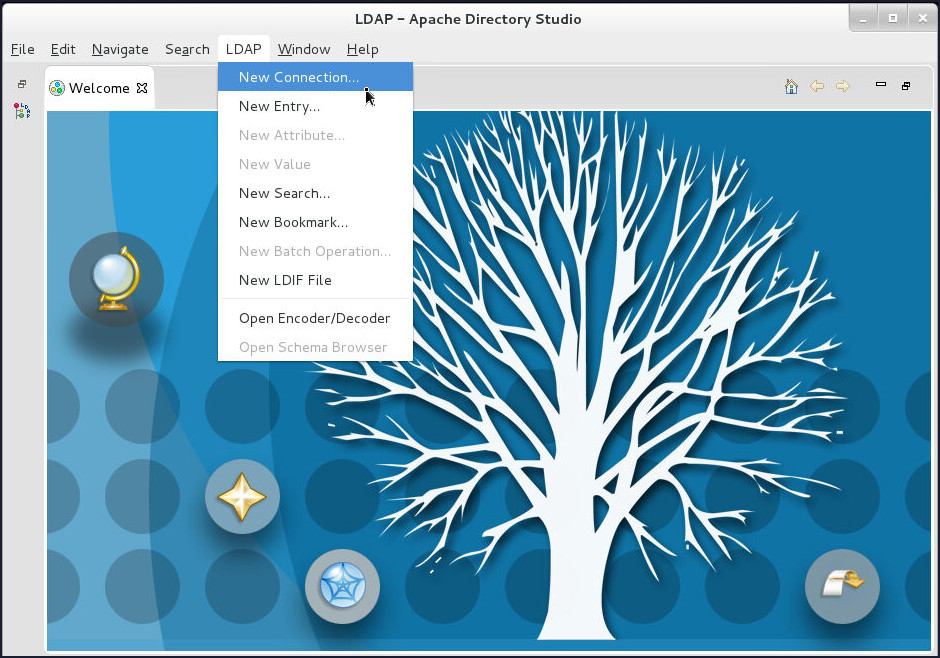
Click LDAP > New Connection... on the Apache Directory Studio toolbar.
-
On the Network Parameter page, enter
localhostin the Connection name field,localhostin the Hostname field,10389in the Port field and click Next.
-
On the Authentication page, enter
uid=admin,ou=systemin the Bind DN or user field,secretin the Bind Password field and click Next.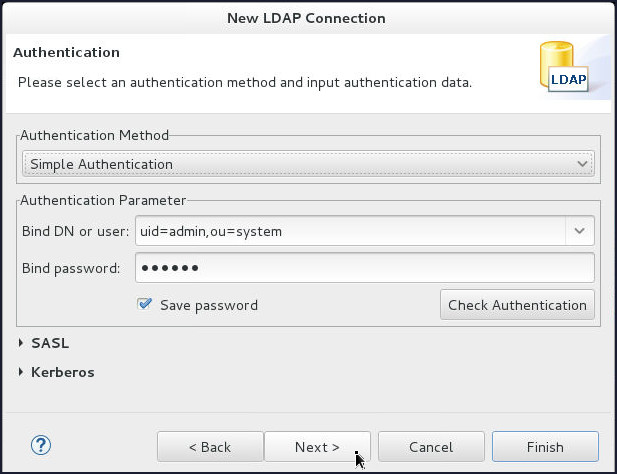
-
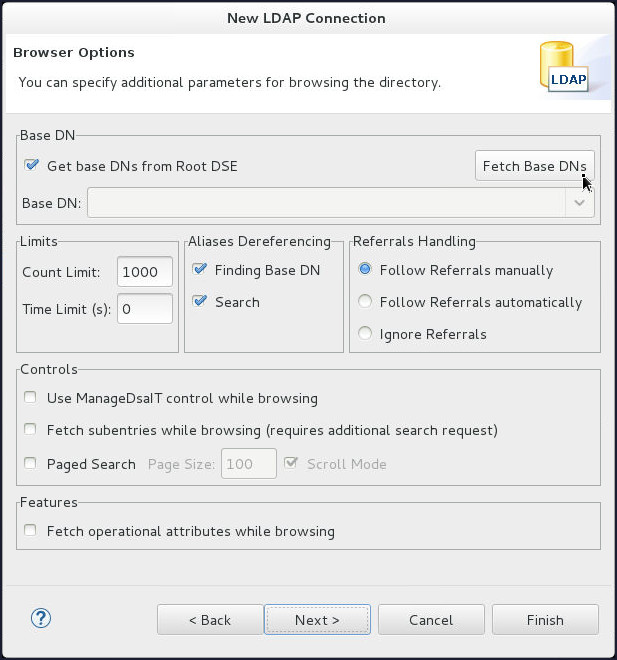
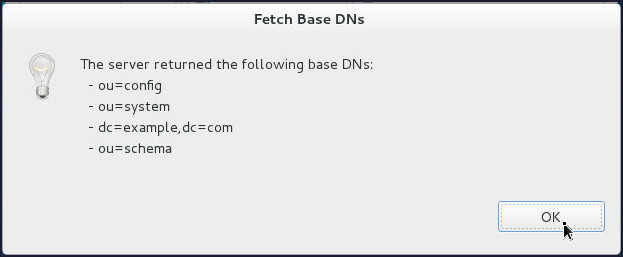
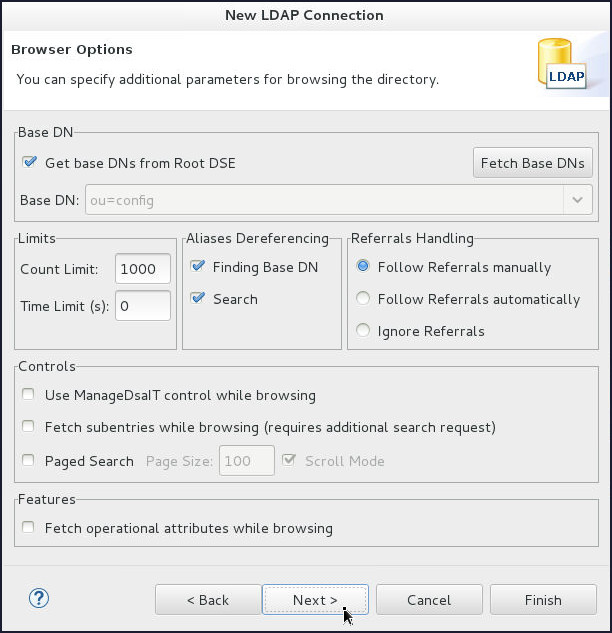
On the Browser Options page, click Fetch Base DNs.
-
Click OK on the Fetch Base DNs popup window.
-
Back on the Browser Options page, click Next.
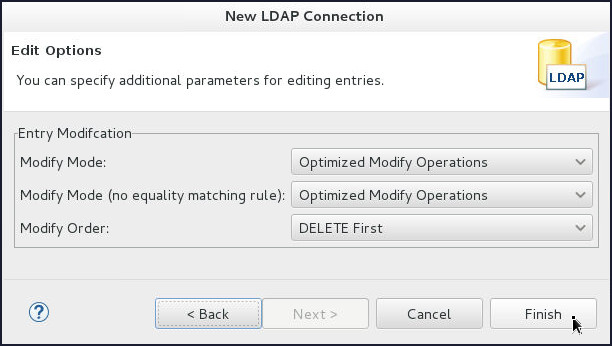
- On the Edit Options page, click Finish.
Create groups and people Organizational Units(ou)
In LDAP, directories are viewed as a tree, analogous to a computer’s file system. Each entry in a directory is called an object. These objects are of two types: containers and leaves. A container is like a folder; it contains other containers or leaves. A leaf is simply an object at the end of a branch. A tree cannot contain any arbitrary set of containers and leaves. It must match the schema defined for the directory.
The top level of the LDAP directory tree is the base, referred to as the base DN. A base DN can be one of several forms. Here are some examples:
- A domain name, broken into components
(dc=Acme,dc=com) - An organization name
(o=Acme Corp) - An organization name along with a country
(o=Acme
                                    Corp,c=India)
Organizational units are
standard LDAP object classes that act as
containers for other entries. The identifying
attribute for an organizational unit is “ou.”
The standard LDAP schema also defines a person
class and a group class, which is
a collection of people.
The person type
also includes other attributes such as Common
Name (a person’s full name: cn),
Unique Identifier (uid), Surname
(last name: sn), and Password (userpassword).
Perform the following steps to create groups and people Organizational Units(ou):
-
Create the groups Organizational Unit:
-
Once connected, double-click localhost on the lower left corner of the Apache Directory Studio console.
-
Right-click on
dc=example,dc=com(this is the top-level DN where all our users/groups will reside), select New and then click New Entry...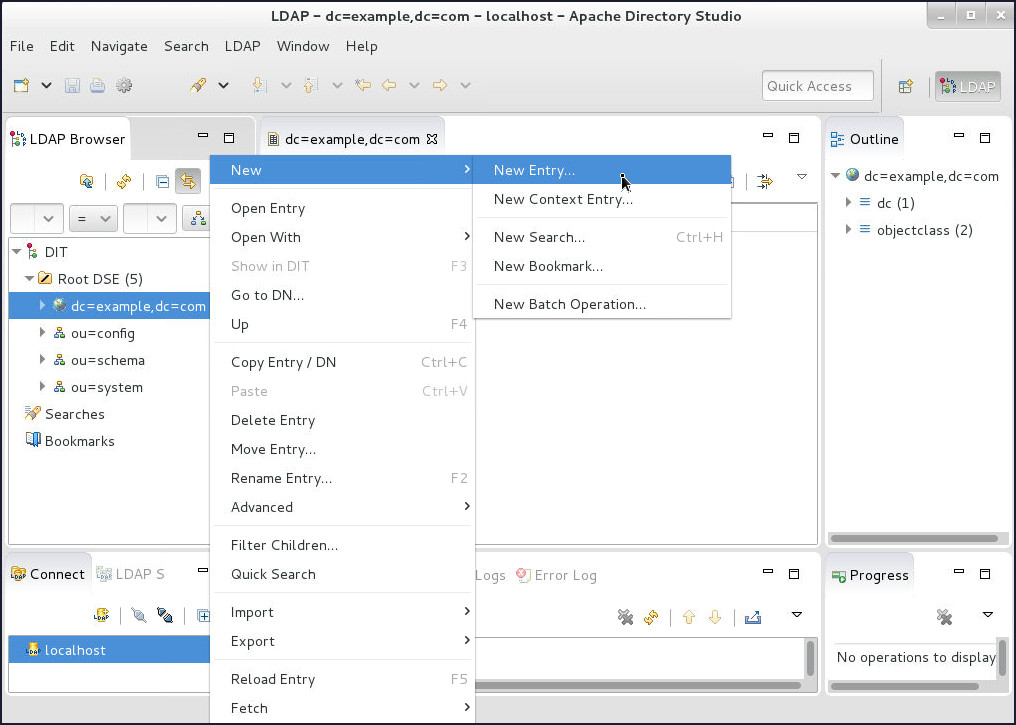
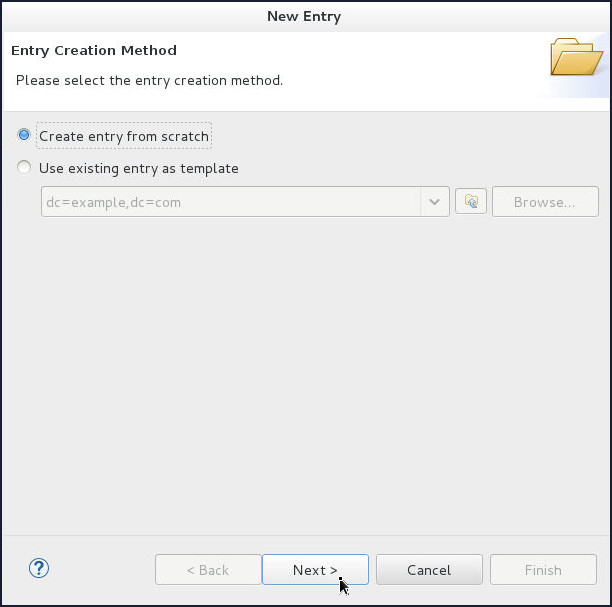
-
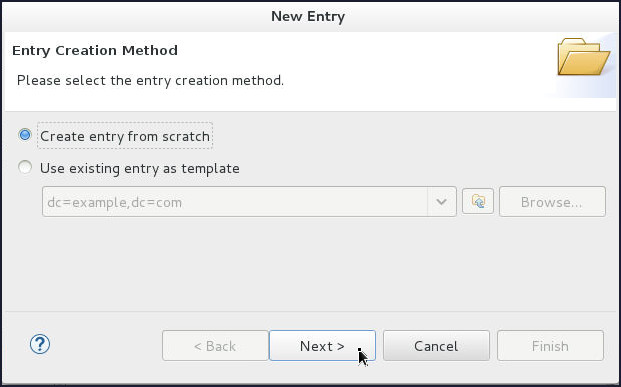
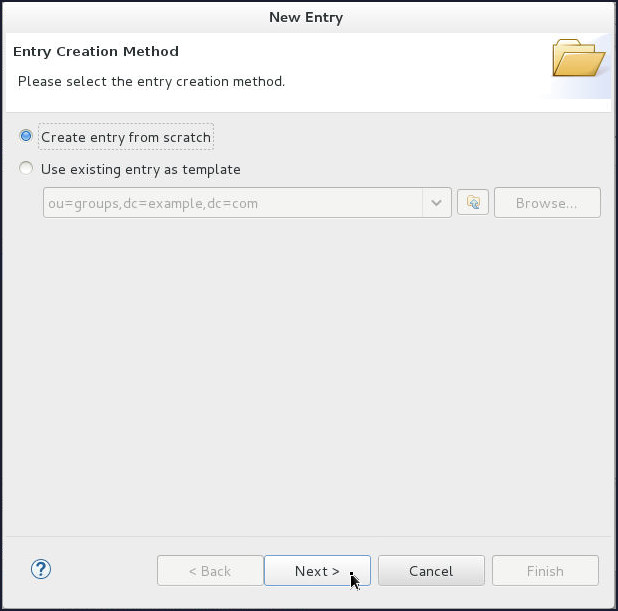
On the Entry Creation Method page, select Create entry from scratch and click Next.
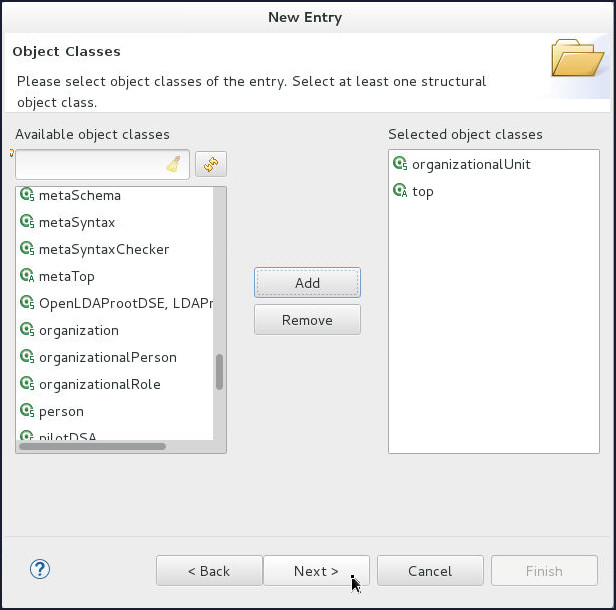
-
On the Object Classes page, shuttle organizationalUnit object class to Selected object classes and click Next.

-
On the Distinguished Name page, select
oufrom the RDN drop down and enter groups in the value field.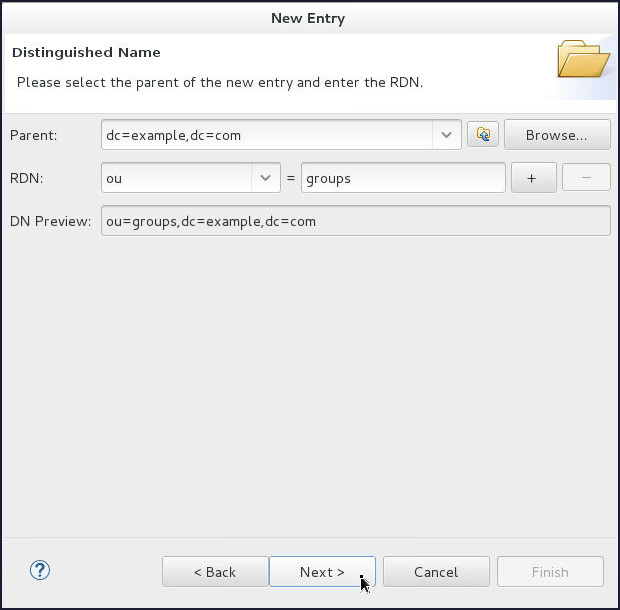
-
On the Attributes page, click Finish.
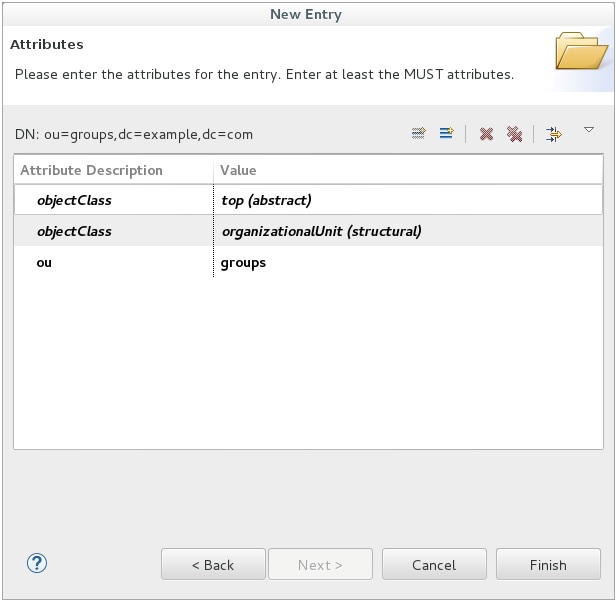
Now you have a DN for groups.
-
-
Similarly, create people Organizational Unit:
-
Right-click on
dc=example,dc=com, select New and then click New Entry...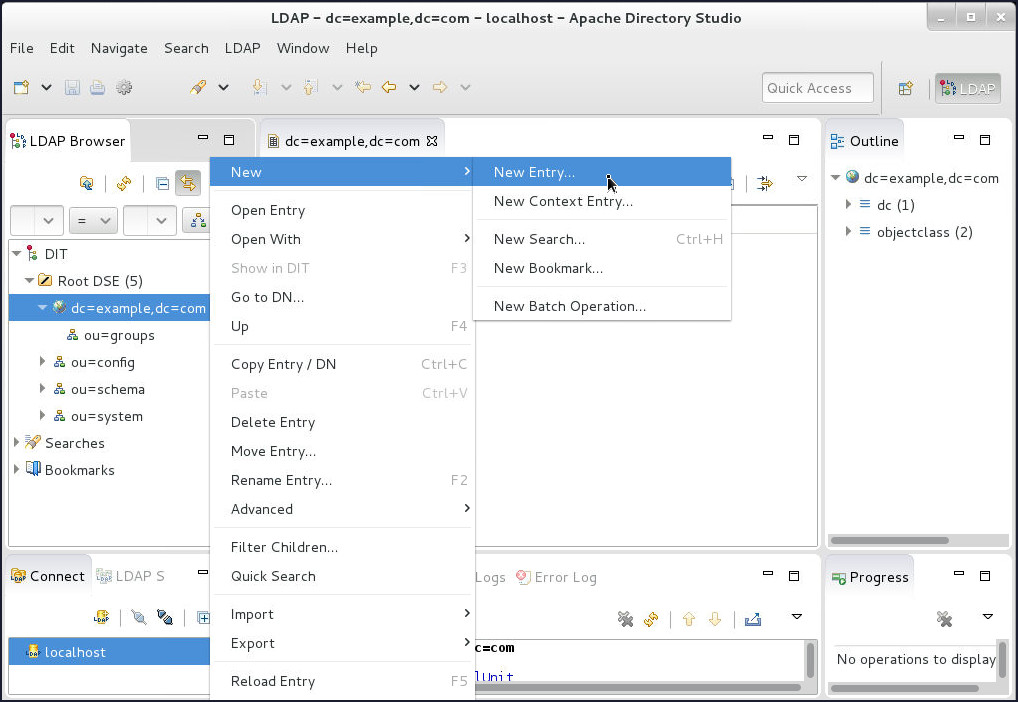
-
On the Entry Creation Method page, select Create entry from scratch and click Next.
-
On the Object Classes page, shuttle organizationalUnit object class to Selected object classes and click Next.
-
On the Distinguished Name page, select
oufrom the RDN drop down and enter people in the value field. Click Next.
-
On the Attributes page, click Finish.
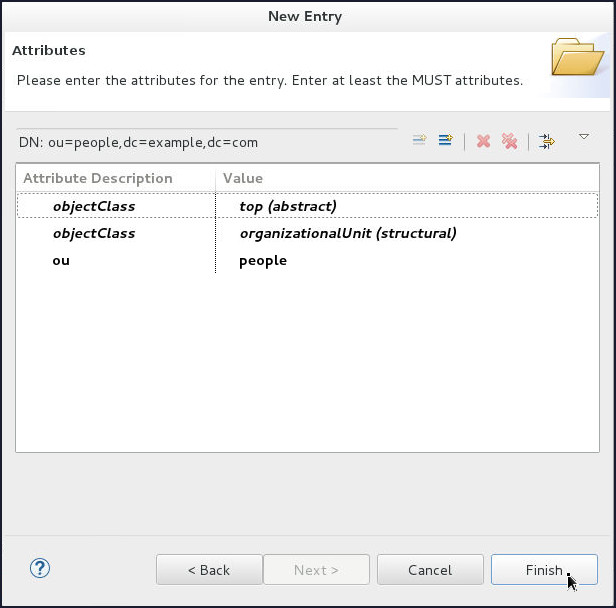
Now you have a DN for people.
-
Create Users and Groups
-
Create webuser user:
-
Right-click on
ou=peopleDN, select New and then click New Entry...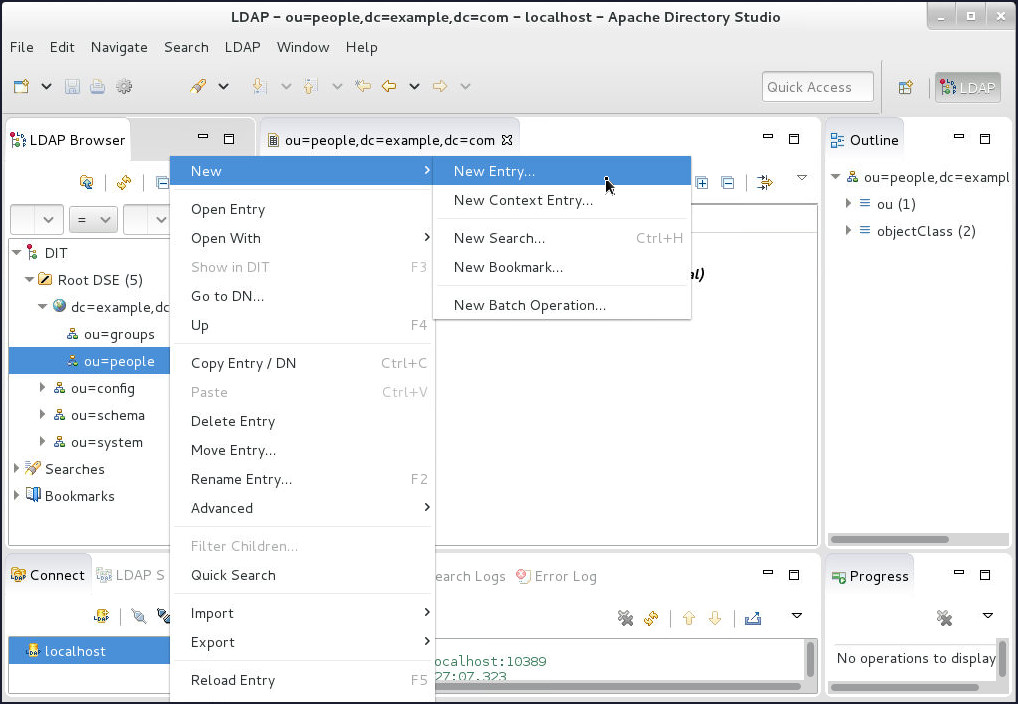
-
On the Entry Creation Method page, select Create entry from scratch and click Next.

-
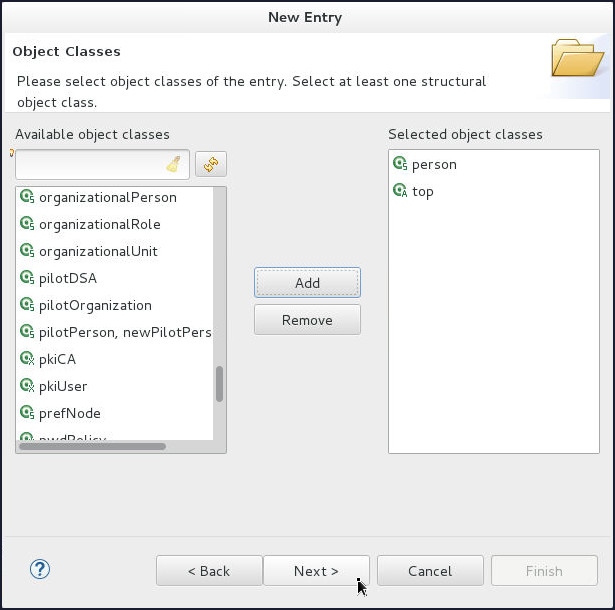
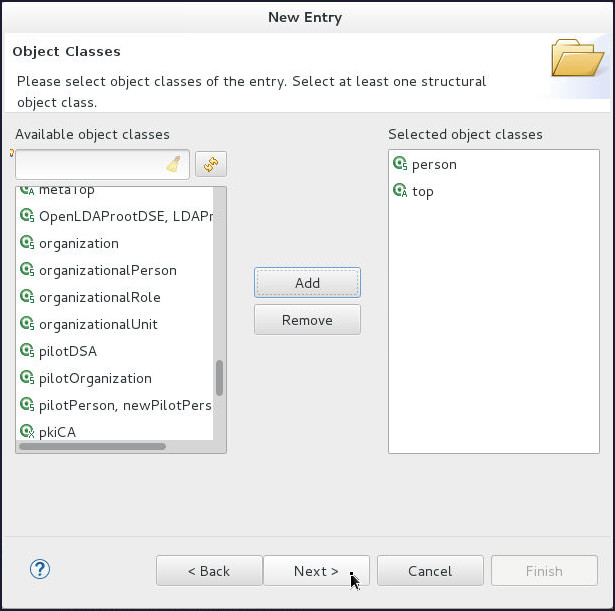
On the Object Classes page, shuttle person object class to Selected object classes and click Next.
-
On the Distinguished Name page, select
snfrom the RDN drop down and enter webuser in the value field. Click Next.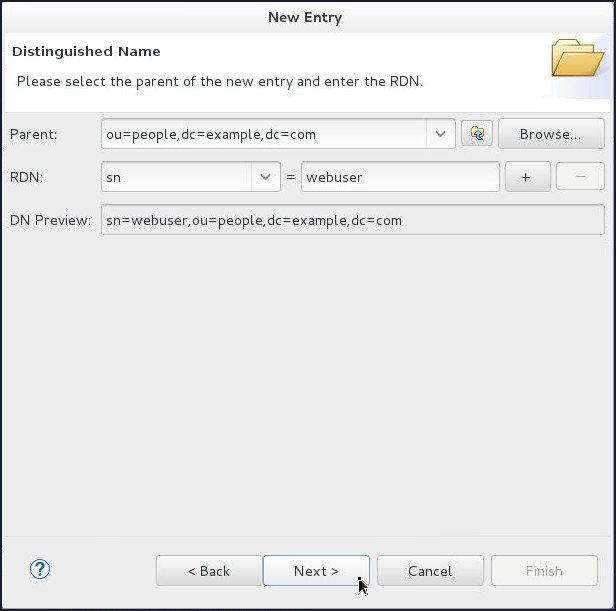
-
On the Attributes page, enter webuser in the Value field corresponding to
cnAttribute and click Finish.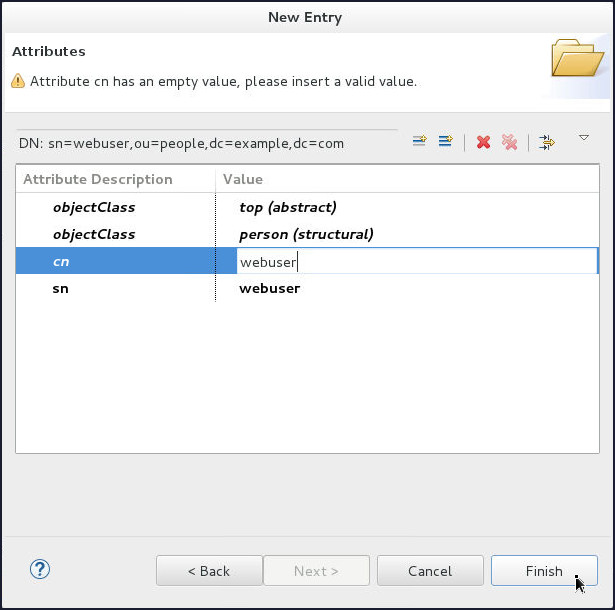
-
-
Similarly, create adminuser user:
-
Right-click on
ou=peopleDN, select New and then click New Entry....
-
On the Entry Creation Method page, select Create entry from scratch and click Next.

-
On the Object Classes page, shuttle person object class to Selected object classes and click Next.
-
On the Distinguished Name page, select
snfrom the RDN drop down and enter adminuser in the value field. Click Next.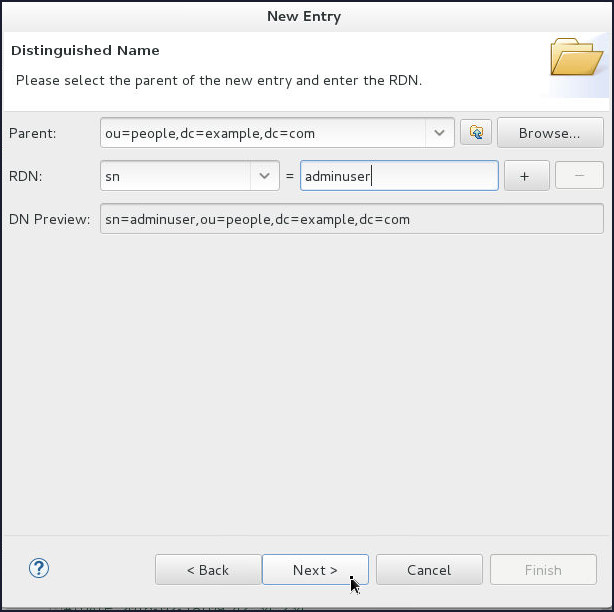
-
On the Attributes page, enter adminuser in the Value field corresponding to
cnAttribute and click Finish.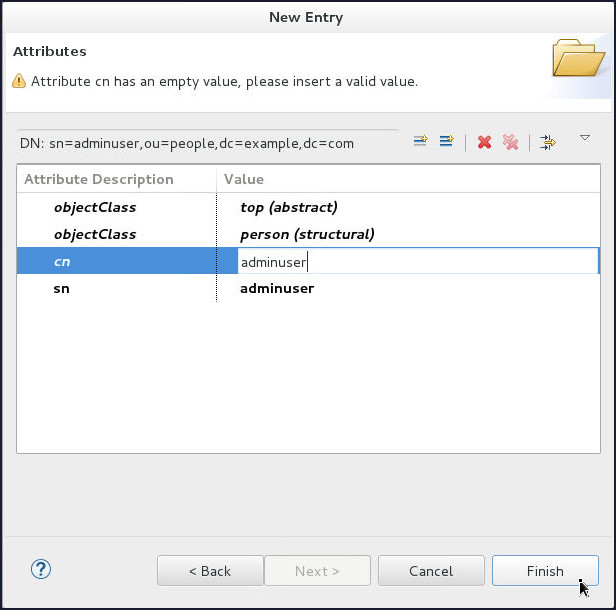
-
-
Next, you will create the groups. Create the admingroup group:
-
Right-click on
ou=groupsDN, select New and then click New Entry....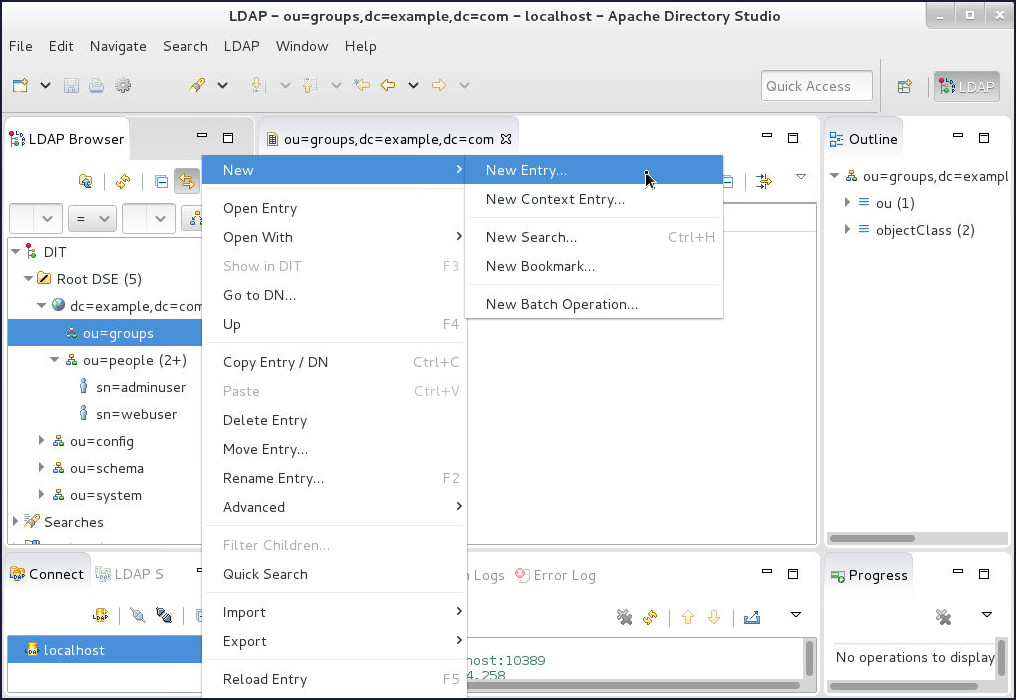
-
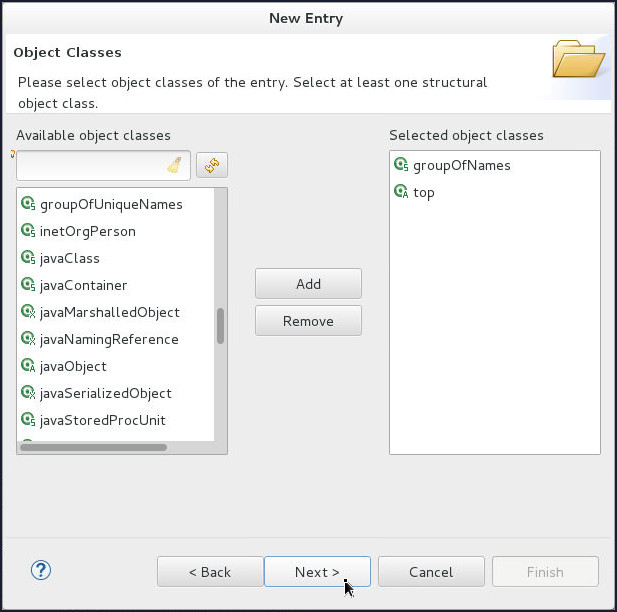
On the Entry Creation Method page, select Create entry from scratch and click Next.
-
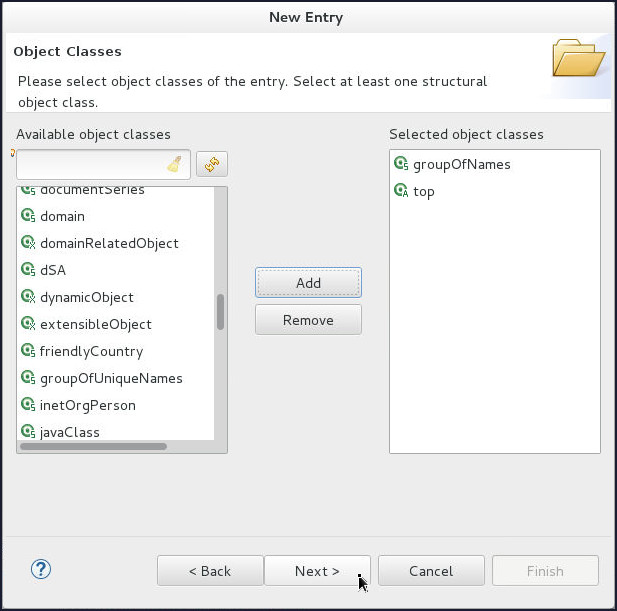
On the Object Classes page, shuttle groupOfNames object class to Selected object classes and click Next.
-
On the Distinguished Name page, select
cnfrom the RDN drop down and enter admingroup in the value field. Click Next.
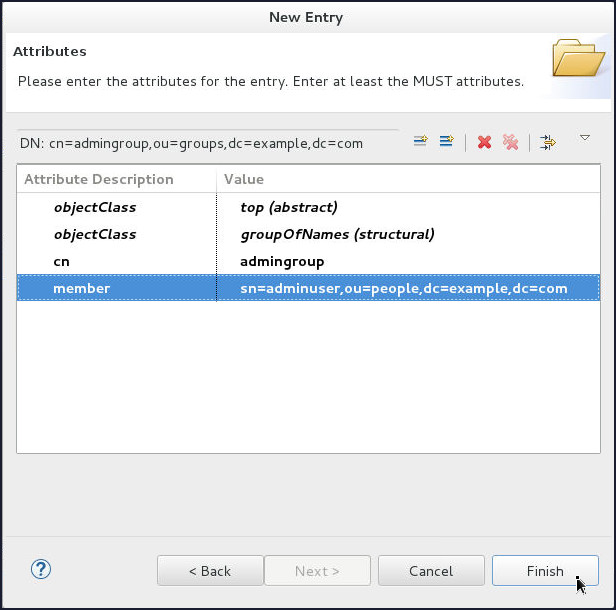
-
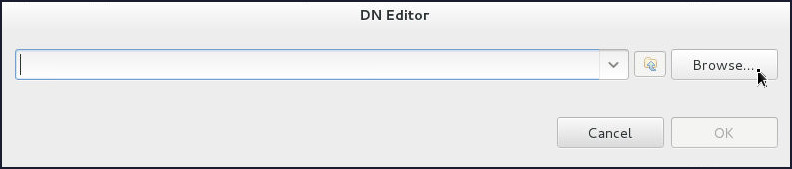
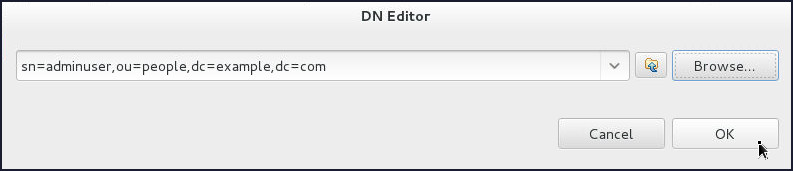
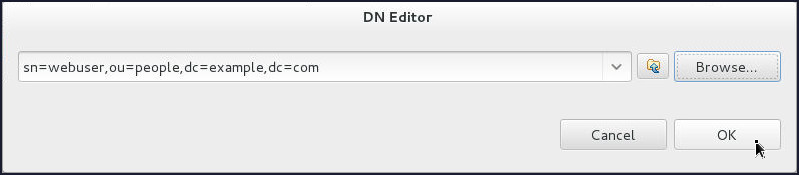
On the DN Editor pop up window:
- Click Browse.
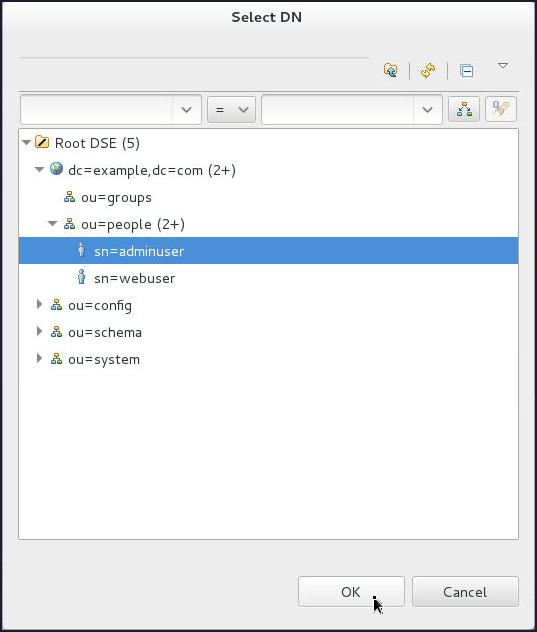
- Select
ou=people>sn=adminuseron the Select DN window and click OK. - Click OK.
-
On the Attributes page, click Finish.
-
-
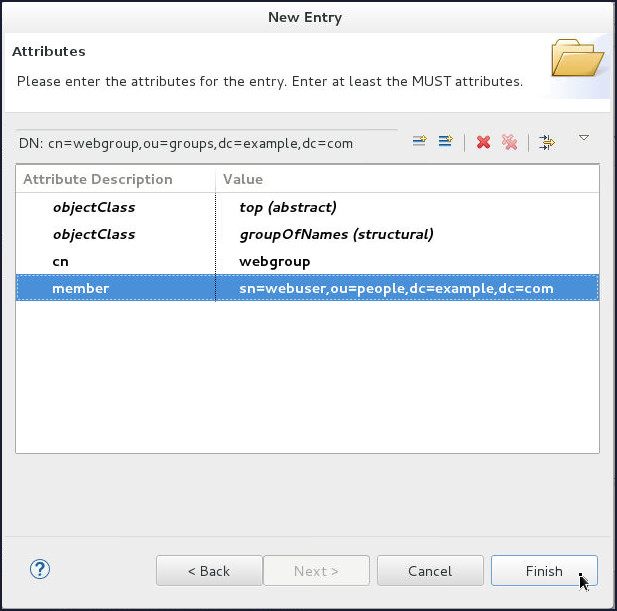
Similarly, create the webgroup group:
-
Right-click on
ou=groupsDN, select New and then click New Entry....
-
On the Entry Creation Method page, select Create entry from scratch and click Next.

-
On the Object Classes page, shuttle groupOfNames object class to Selected object classes and click Next.
-
On the Distinguished Name page, select
cnfrom the RDN drop down and enter webgroup in the value field. Click Next.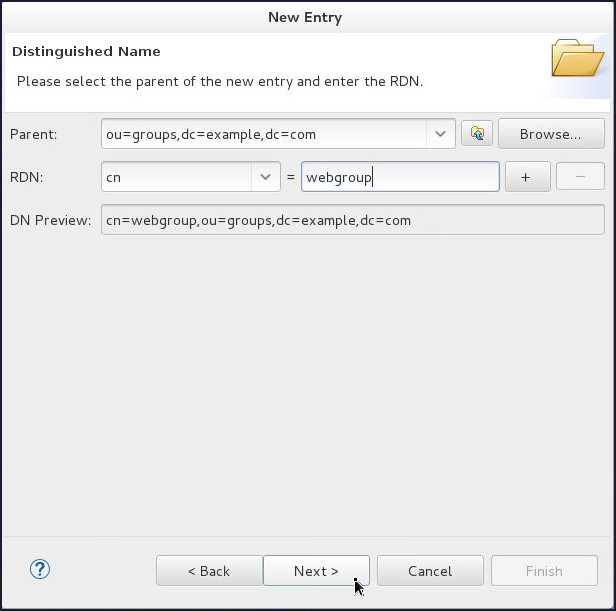
-
On the DN Editor pop up window:
- Click Browse.
- Select
ou=people >
                                              sn=webuser
on the Select DN window and click OK. - Click OK.


-
On the Attributes page, click Finish.
-
-
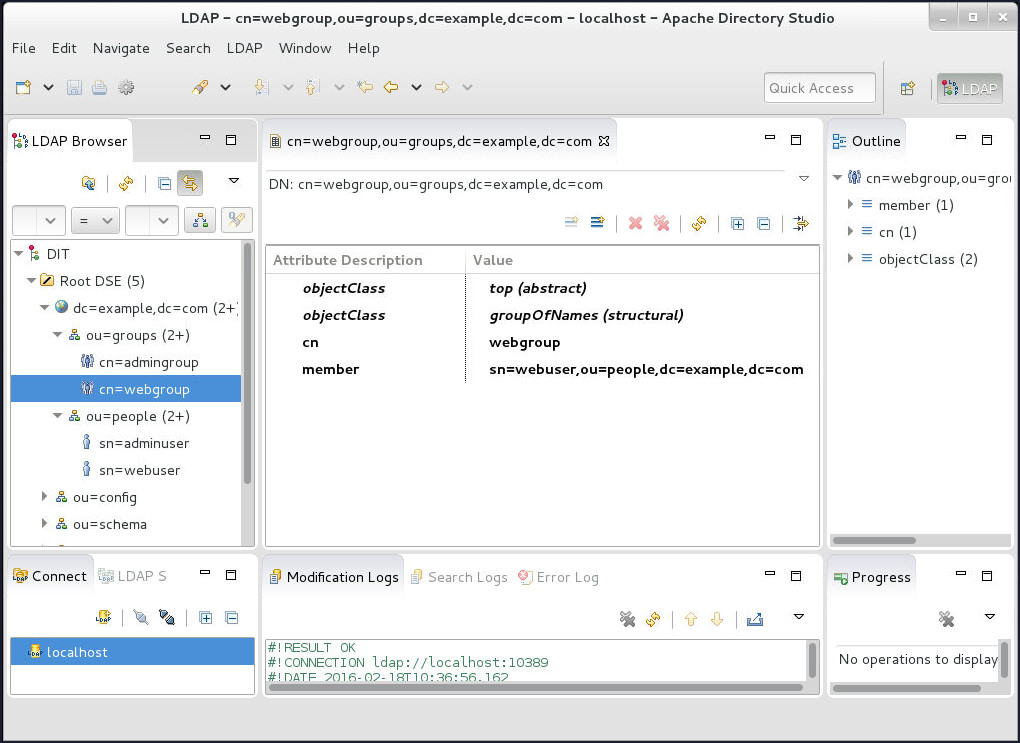
The configured image of Apache Directory Studio should look like the one shown below:
-
Now, set the passwords for adminuser and webuser to
welcome1:-
On the Apache Directory Studio console, select the
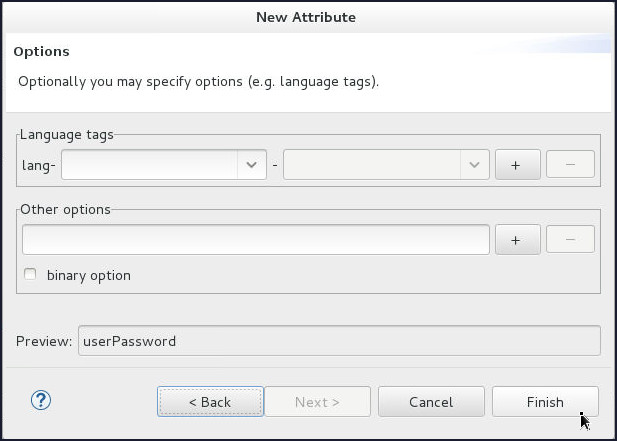
sn=adminuserentry in the LDAP Browser section and click on the New Attribute... icon.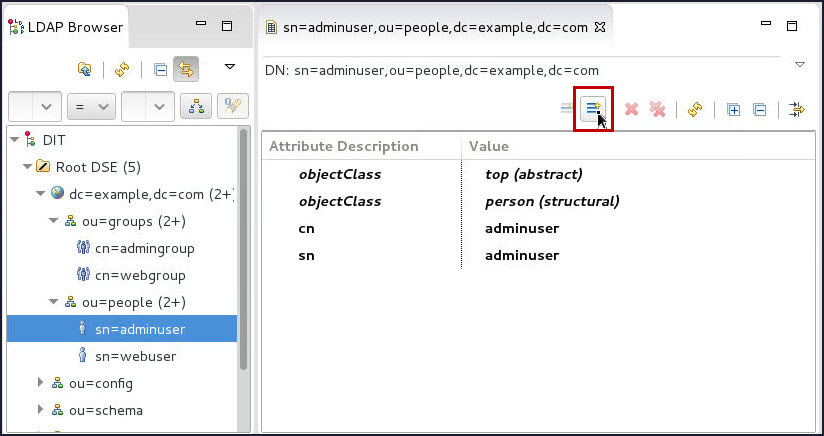
-
On the Attribute Type page of the New Attribute window, enter or select userPassword from the Attribute Type drop-down list and click Next.
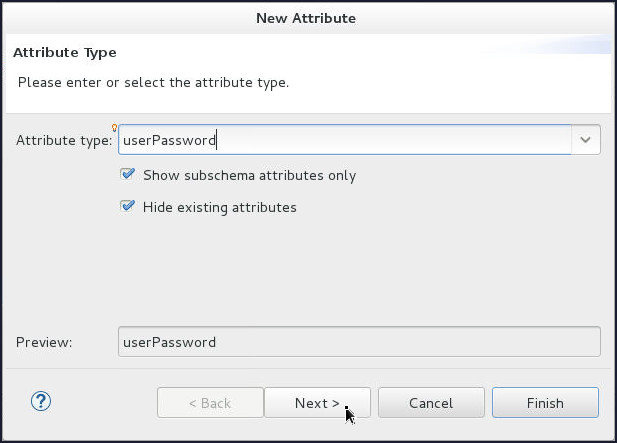
-
On the Options page click Finish.
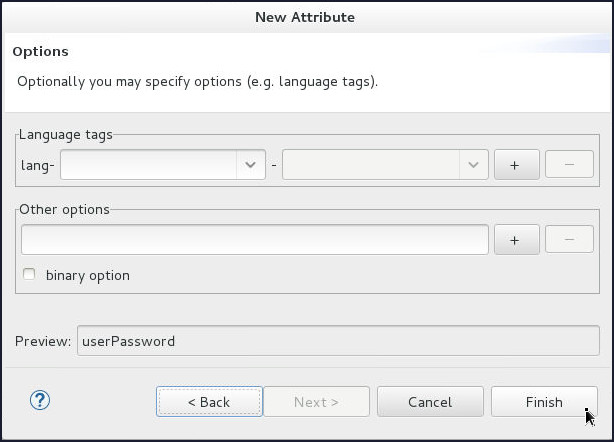
-
Password Editor window opens up. Enter
welcome1in the Enter New Password and Confirm New Password fields. Click OK.
-
Similarly, repeat above steps to set the password for webuser.
On the Apache Directory Studio console, select the
sn=webuserentry in the LDAP Browser section and click on the New Attribute... icon.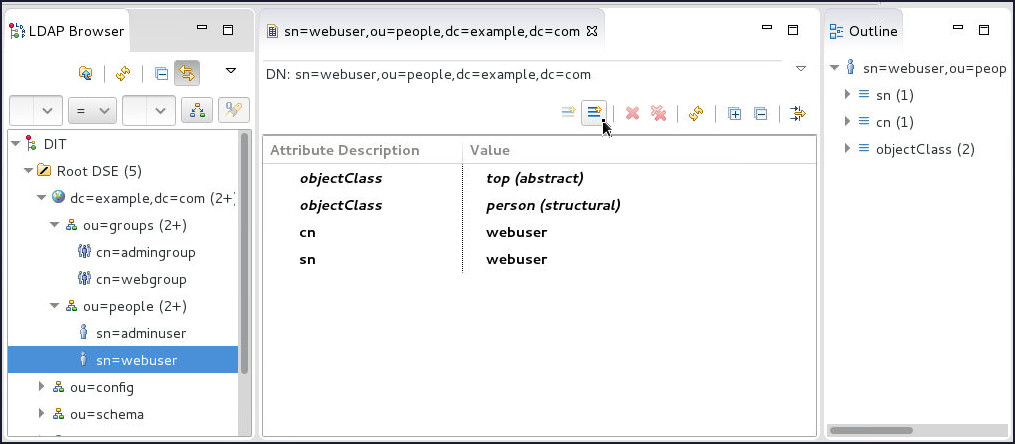
-
On the Attribute Type page of the New Attribute window, enter or select userPassword from the Attribute Type drop-down list and click Next.
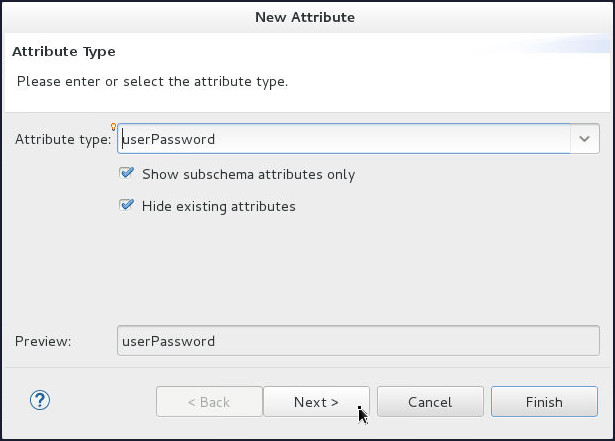
-
On the Options page click Finish.
-
Password Editor window opens up. Enter
welcome1in the Enter New Password and Confirm New Password fields. Click OK.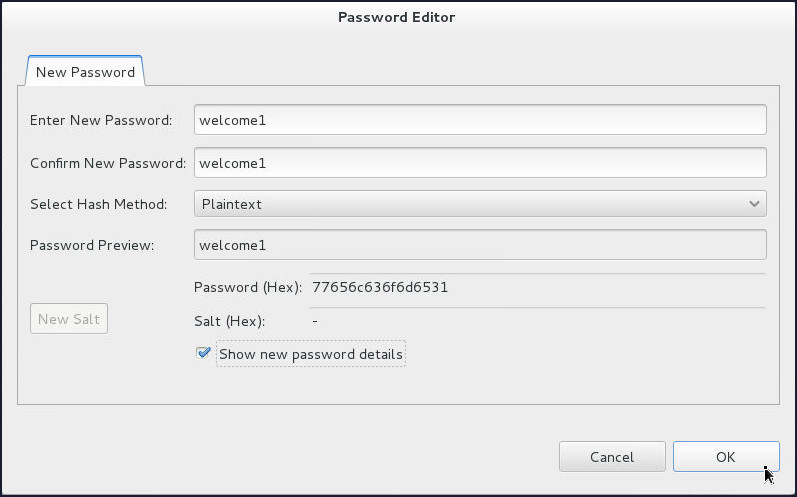
-
Configuring an LDAP Authentication Provider in WebLogic Server
To configure an LDAP Authentication provider in Weblogic Server, perform the following steps:
-
If the administration server of the domain is not already running, start it.
- Open a Terminal window and navigate to the domain
directory. In this tutorial, the directory is
/scratch/u01/domains/mydomain - In the domain directory, enter the following
command:
$ ./startWebLogic.sh - At the prompt, enter the administrator
username and password that you entered when
you created the domain.
In this tutorial, the username isweblogicand the password isWelcome1.
- Open a Terminal window and navigate to the domain
directory. In this tutorial, the directory is
- After the Admin server is up and running,
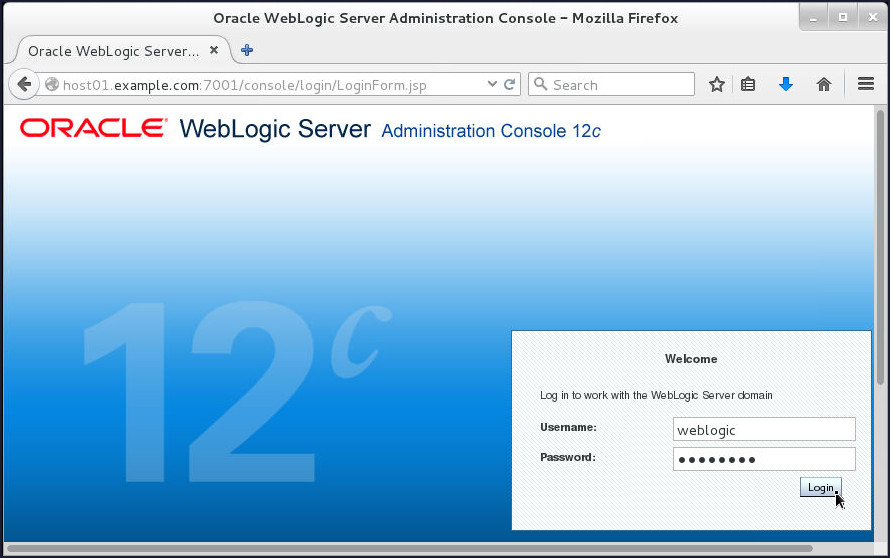
access the WebLogic Server administration console.
- Open a web browser and enter the URL:
http://hostname:port/console.
In this tutorial, that ishttp://host01.example.com:7001/console.
- On the Welcome screen, log in by using the
username and password that you entered to
start the administration server.
- Open a web browser and enter the URL:
-
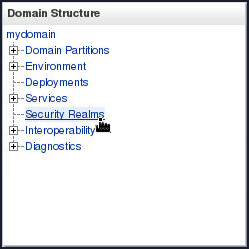
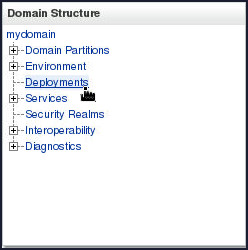
Under Domain Structure, click Security Realms.
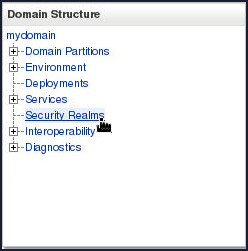
-
Click myrealm in the Realms table.
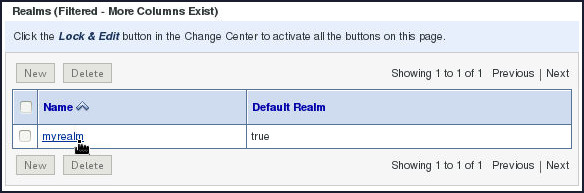
-
Select Providers tab under Settings for myrealm region.

-
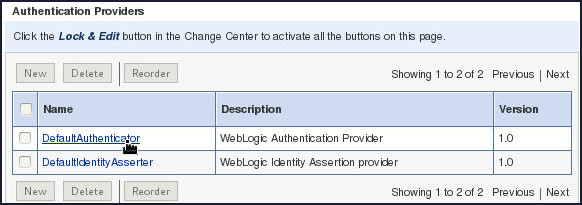
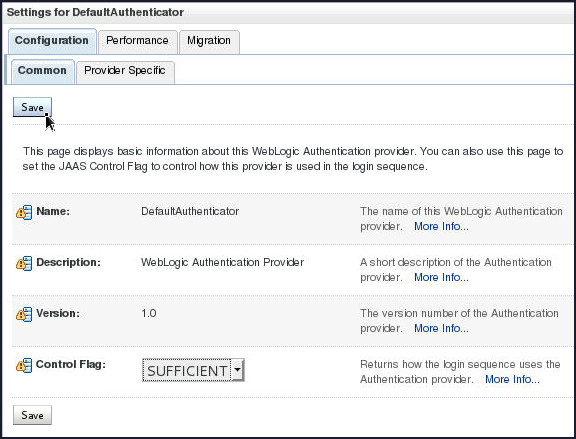
Click DefaultAuthenticator in the Authentication Providers table.
-
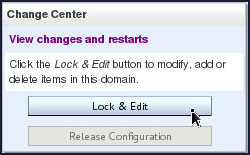
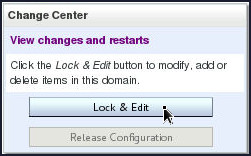
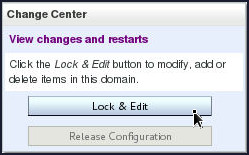
In the Change Center, click Lock & Edit.
-
Select SUFFICIENT from the Control Flag drop-down and click Save.
-
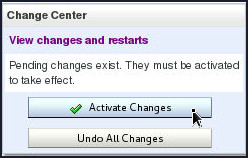
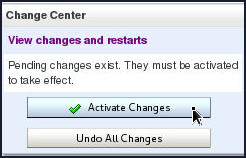
In the Change Center, click Activate Changes.
-
Following message gets displayed:

You must restart the Admin Server for the changes to take effect.
-
Restart the Admin Server:
-
Open a terminal, change directory to
/scratch/u01/domains/mydomain/binand execute the following command:$ ./stopWebLogic.sh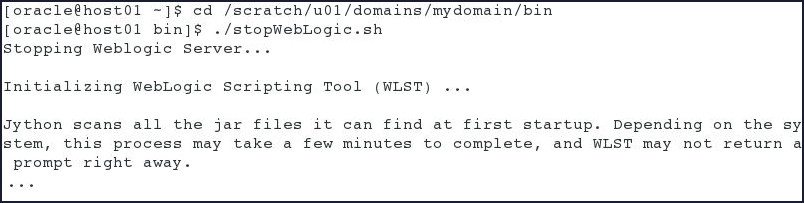
When prompted, enter the username and password and wait for the server to stop.
-
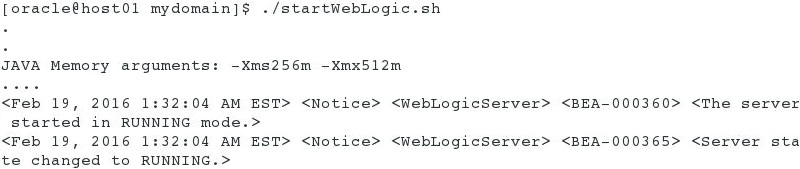
Once the server stops successfully, restart it using the following command:
$ ./startWebLogic.shNote: You can use the same terminal that was used in Step 1(a) to start the Admin Server.
- At the prompt, enter the administrator
username and password that you entered when you created the domain.
In this tutorial, the username isweblogicand the password isWelcome1.
-
-
Once the Admin Server restarts, re-login into the WebLogic Server administration console.
-
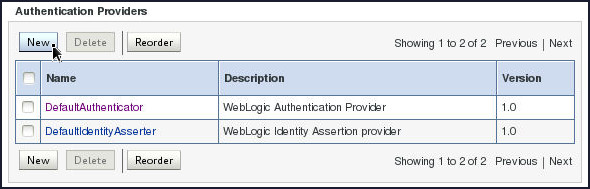
Under Domain Structure, click Security Realms.
-
Click myrealm in the Realms table.
-
Select Providers tab under Settings for myrealm region.
-
In the Change Center, click Lock & Edit.
-
Click New under Authentication Providers region.
-
On the Create a New Authentication Provider page, enter
apachedsin the Name field, selectOpenLDAPAuthenticatorfrom the Type drop-down and click OK.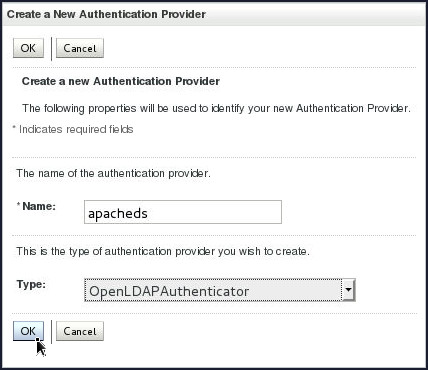
-
Back on the Settings for myrealm page, click the newly created Authentication Provider
apacheds.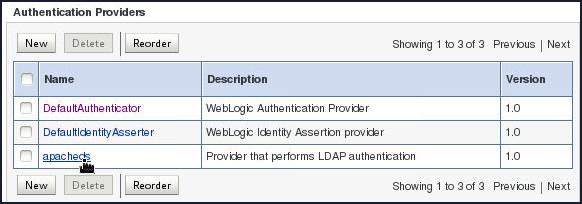
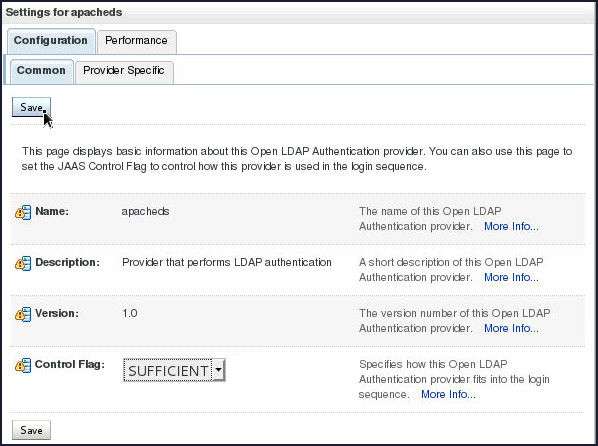
-
On the Settings for apacheds page, select SUFFICIENT from the Control Flag drop-down and click Save.
-
In the Change Center, click Activate Changes.
-
Following message gets displayed:

You must restart the Admin Server for the changes to take effect.
-
Restart the Admin Server:
-
Open a terminal, change directory to
/scratch/u01/domains/mydomain/binand execute the following command:$ ./stopWebLogic.sh When prompted, enter the username and password and wait for the server to stop.
-
Once the server stops successfully, restart it using the following command:
$ ./startWebLogic.shNote: You can use the same terminal that was used in Step 1(a) to start the Admin Server.
- At the prompt, enter the administrator
username and password that you entered when you created the domain.
In this tutorial, the username isweblogicand the password isWelcome1.
-
-
Once the Admin Server restarts, re-login into the WebLogic Server administration console.
-
Under Domain Structure, click Security Realms.
-
Click myrealm in the Realms table.
-
Select Providers tab under Settings for myrealm region.
-
On the Settings for myrealm page, click the Authentication Provider
apacheds. -
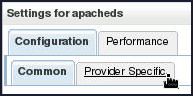
On the Settings for apacheds page, select Provider Specific tab.
-
In the Change Center, click Lock & Edit.
-
On the Settings for apacheds, Provider Specific tabbed page, enter the following in the respective fields and click Save.
Description Choices or Values Host host01.example.comPort 10389Principal uid=admin,ou=systemCredential secretConfirm Credential secret
-
In the Change Center, click Activate Changes.
-
Following message gets displayed:

Deploying and Starting SecureWebApp Application
To deploy a 'securewebapp' application by using the administration console, perform the following steps:
- Download the securewebapp.war file to the machine where your domain's administration server is located. This is a sample Java web application archive to deploy.
-
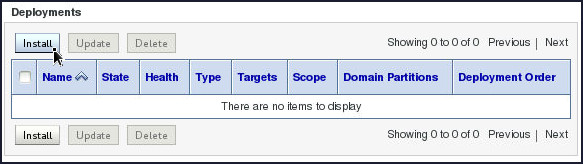
In the Weblogic Administration Server Console, under Domain Structure, click Deployments.
-
Deploying an application is a change to the domain's configuration, so you must first lock it. In the Change Center, click Lock & Edit.
-
On the right, above the Deployments table, click Install.
-
Locate the downloaded archive file.
- To the right of Current Location, click the
links to browse to the location where you
placed the downloaded
securewebapp.warfile. In this tutorial, the file is in the/home/oracledirectory. - Select the
securewebapp.waroption that is displayed after you click the link and locate thesecurewebapp.warfile. The console fills in the Path field for you.
Alternatively, you can manually enter the path and the file name in the Path field. - Click Next.
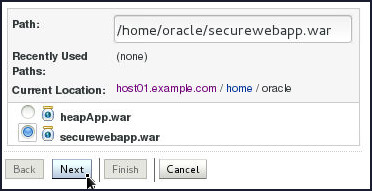
- To the right of Current Location, click the
links to browse to the location where you
placed the downloaded
-
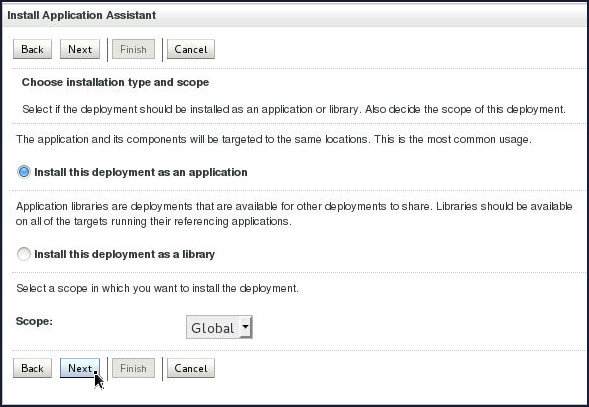
On the next screen, ensure that Install this deployment as an application is selected, and then click Next.
-
On the next screen, keep all the default values and click Next.
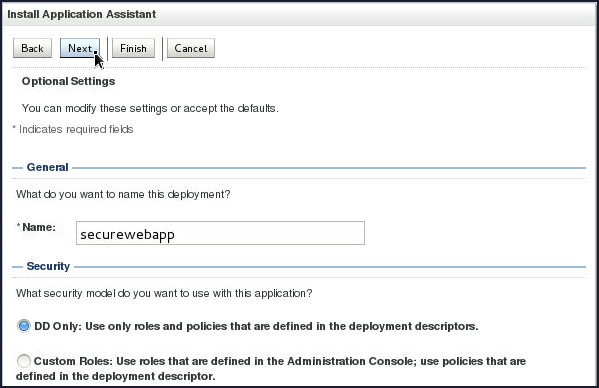
-
On the review screen, select No, I will review the configuration later, and then click Finish.
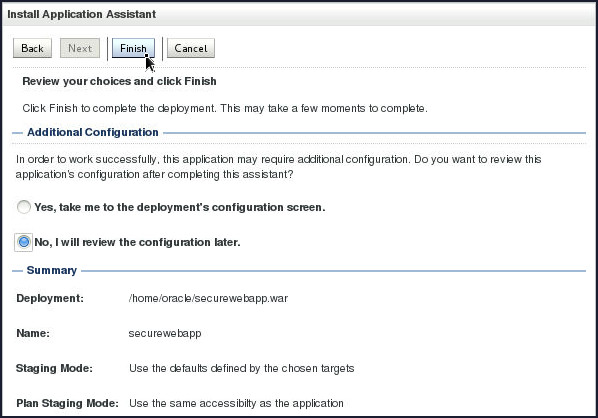
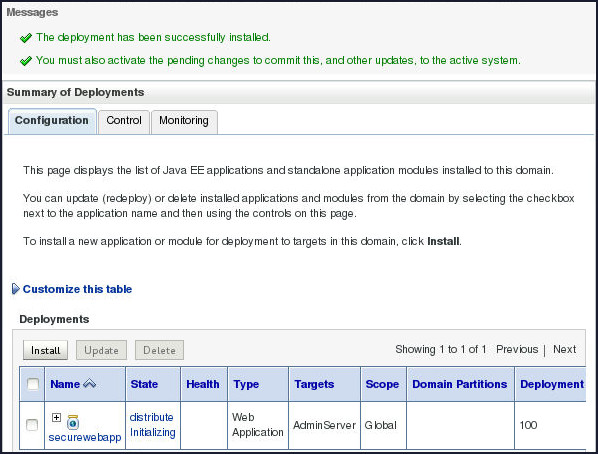
Messages indicate that the deployment was installed, but changes must be activated. The securewebapp application is listed in the Deployments table.
-
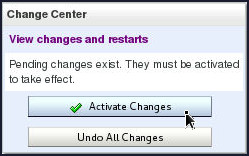
To activate the changes, click Activate Changes in the Change Center.
-
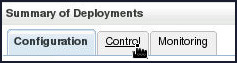
Under Summary of Deployments, select Control tab.
-
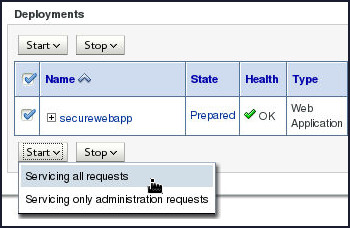
In the Deployments table, select the check box to the left of the securewebapp application, and then select Servicing all requests in the Start list.
-
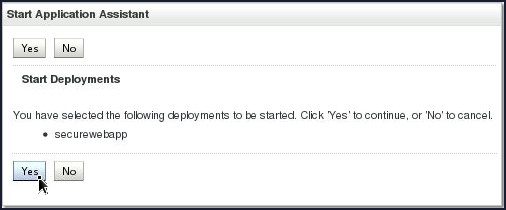
Click Yes to continue.
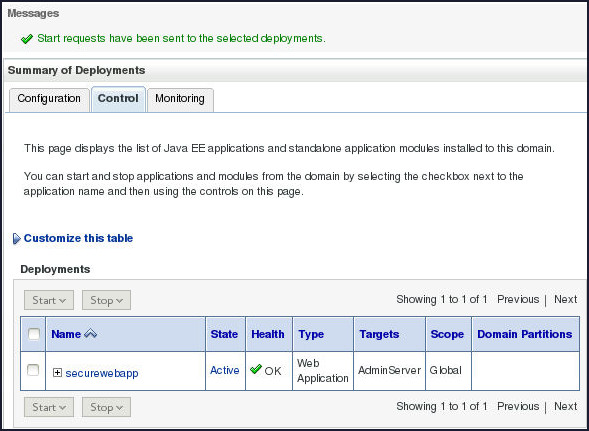
A message indicates that a start request was sent. Momentarily, the state of the securewebapp application becomes "Active." This means that the application is available to those who have access to the server.
Testing the External LDAP Configuration
Perform the following steps to test the External LDAP Configuration:
-
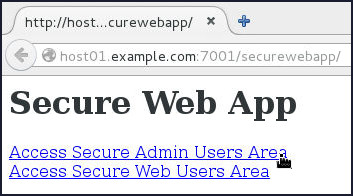
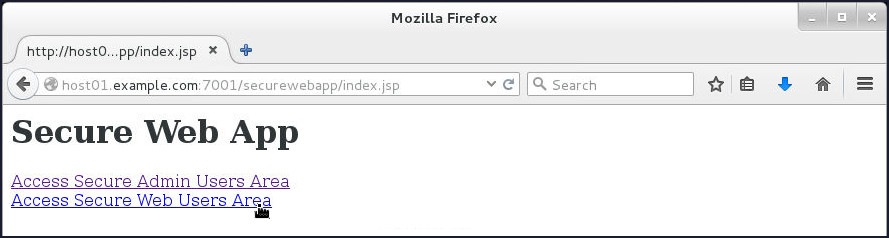
Open the web browser and enter the following URL to access the new securewebapp application:
http://host01.example.com:7001/securewebapp/
-
The securewebapp application opens.

-
Click Access Secure Admin Users Area link.
-
Enter
adminuserin the Username field,welcome1in the Password field and click Submit.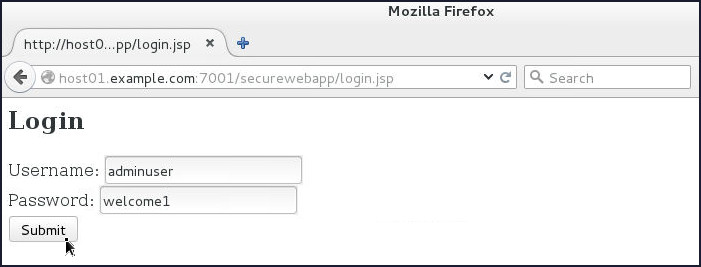
-
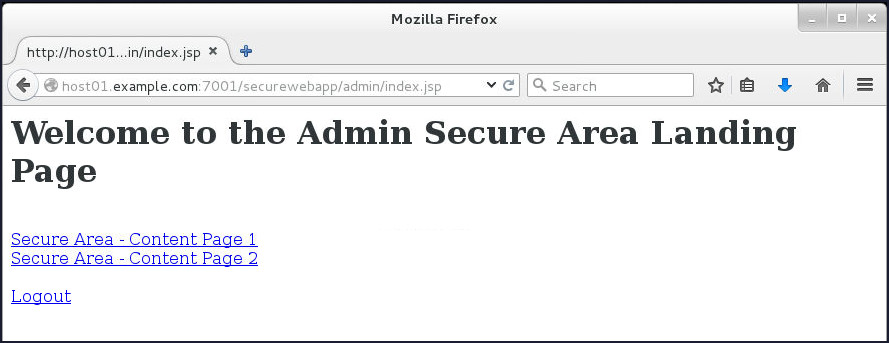
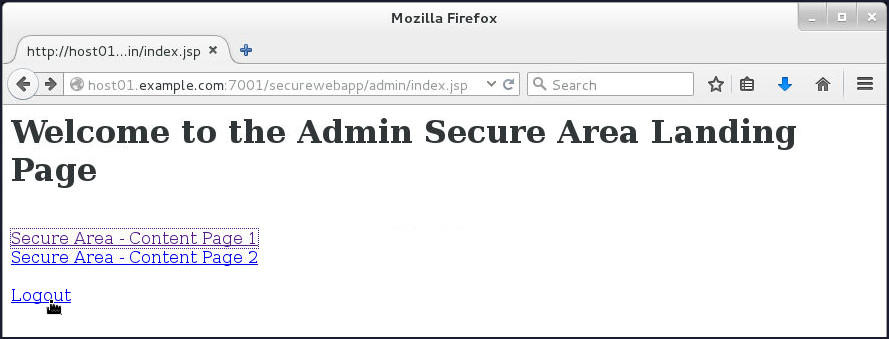
The Admin Secure Area Landing page gets displayed.
-
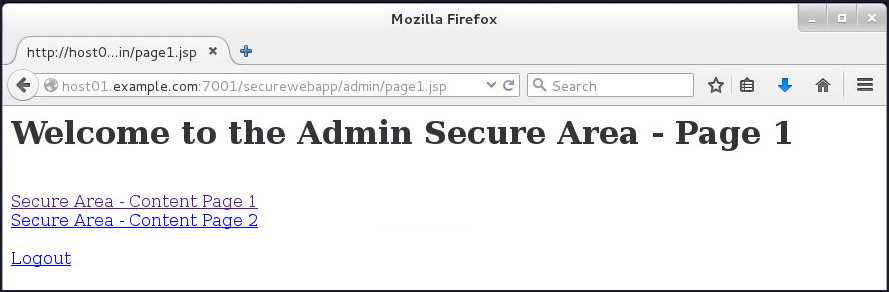
Explore the application by clicking Secure Area - Content Page1 link. You may try the other link as well.
-
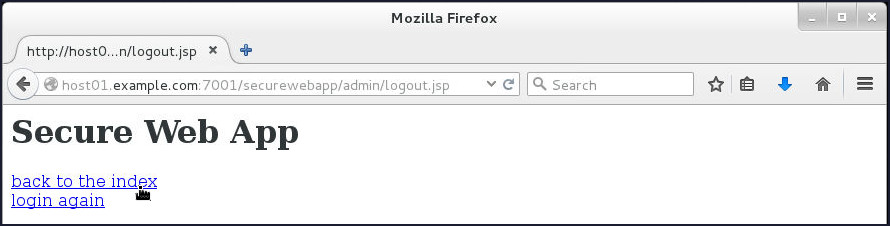
Navigate back to the Admin Secure Area Landing page and click Logout.
-
On the logout page, click back to the index link.
-
Click Access Secure Web Users Area link.
-
Enter
webuserin the Username field,welcome1in the Password field and click Submit.
-
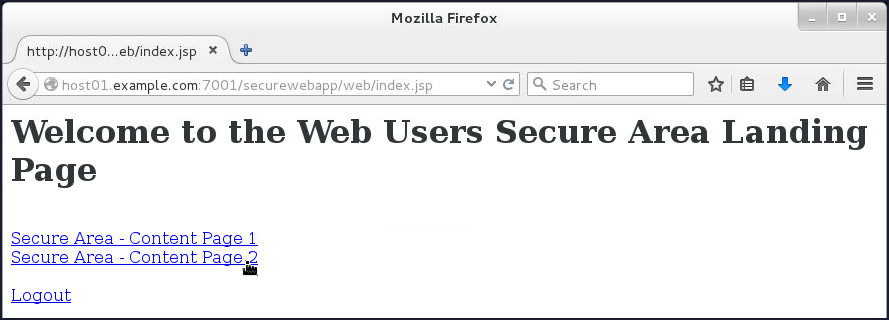
The Web Users Secure Area Landing page gets displayed.
-
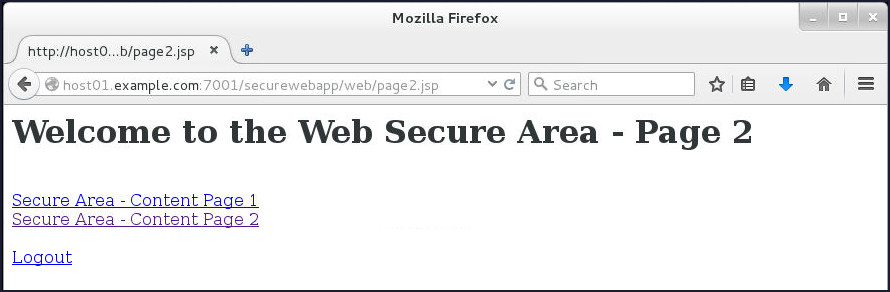
Explore the application by clicking Secure Area - Content Page2 link. You may try the other link as well.
Want to Learn More?
-
For documentation on Oracle WebLogic Server 12c (12.2.1), visit the Oracle WebLogic Server Documentation Library.
- For more information on Configuring an LDAP Authentication Providers, visit the Oracle® Fusion Middleware Administering Security for Oracle WebLogic Server 12.2.1
-
To learn more about Oracle WebLogic Server, refer to additional OBEs in the Oracle Learning Library
Credits
- Lead Curriculum Developers: Tom Eliason, Veerabhadra Rao Putrevu
Version
- 01-39-001-Int_Domain_with_an_Ext_LDAP