Before You Begin
- Dowloaded and installed Oracle Java Developers Kit (JDK) version 1.8.0_74+
- Downloaded Oracle WebLogic Server 12c (12.2.1) infrastructure installer (includes Oracle Coherence)
- Installed WebLogic Server 12c (12.2.1) by using the infrastructure installer
Purpose
This tutorial shows you how to create a Restricted JRF WebLogic Server 12c (12.2.1) domain on a Linux system by using the Configuration Wizard. A Restricted JRF domain includes the capability for Fusion Middleware Control - but Restricted JRF does not require a database connection (a Full JRF domain does require a database connection).
Time to Complete
Approximately 15 minutes
Introduction
This tutorial shows you how to use the Configuration Wizard to create a WebLogic Server 12c (12.2.1) domain, assuming you have already installed the Java Developers Kit (JDK) and WebLogic Server software.
What You Need
Your Linux machine's operating system must be Oracle Linux 6.6+.
You should have completed the Oracle WebLogic Server 12c (12.2.1): Installing WebLogic Server Using the Infrastructure Installer tutorial. As a result, you should have:
Creating a Restricted JRF WebLogic Server 12c (12.2.1) Domain
To create a domain by using the Configuration Wizard, perform the following steps:
- In a Terminal window, perform the following
steps:
- Navigate to
ORACLE_HOME/oracle_common/common/bin.In this tutorial,
ORACLE_HOMEis/scratch/u01/app/fmw1221_infra. - To run the Configuration Wizard, enter the
config.shcommand.$>cd /scratch/u01/app/fmw1221_infra/oracle_common/common/bin $>./config.sh
The Configuration Wizard opens.
- Navigate to
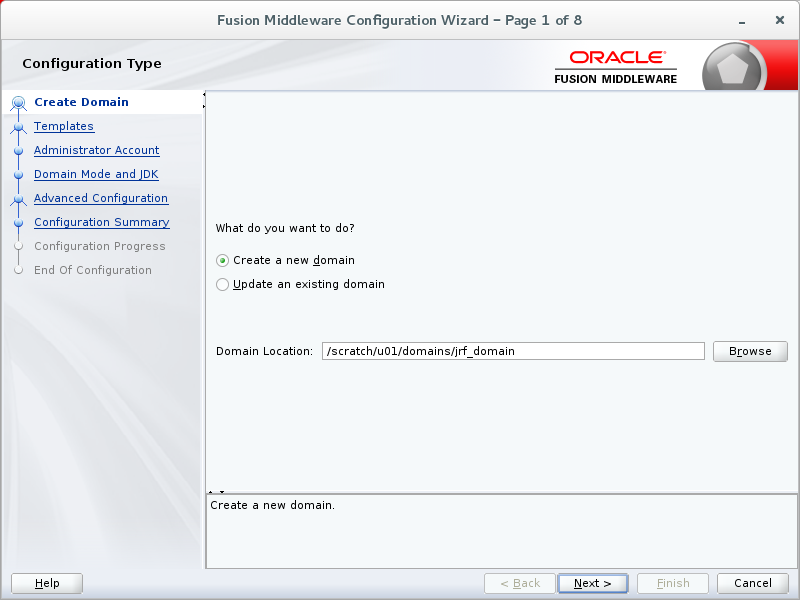
- On the Configuration Type page, provide the
following information, and click Next:
- Select Create a new domain.
- Enter a location for the domain.
In this tutorial, the location is
/scratch/u01/domains/jrf_domain.Note: You can choose a different name and location for your domain.
Description of this image - On the Templates page, make the following
selections, and click Next:
- Create Domain Using Product Templates: Selected
- All Templates: Selected for Template Categories
-
Under Available Templates:
-
Basic WebLogic Server Domain: Selected
Basic WebLogic Server Domain cannot be deselected.
- Oracle Enterprise Manager-Restricted JRF: Selected
- Oracle Restricted JRF: Selected
- WebLogic Coherence Cluster Extension: Selected
-

Description of this image - On the Application Location page, provide the
following information, and click Next:
- Enter a location for the applications.
In this tutorial, the location is
/scratch/u01/applications/jrf_domain.Note: You can choose a different name and location for your applications.

Description of this image - Enter a location for the applications.
- On the Administrator Account page, enter a name
and a password, confirm the password, and then
click Next.
In this tutorial, the username is
weblogicand the password isWelcome1.Important: Do not forget the username and password. You need them to perform every administrative task.

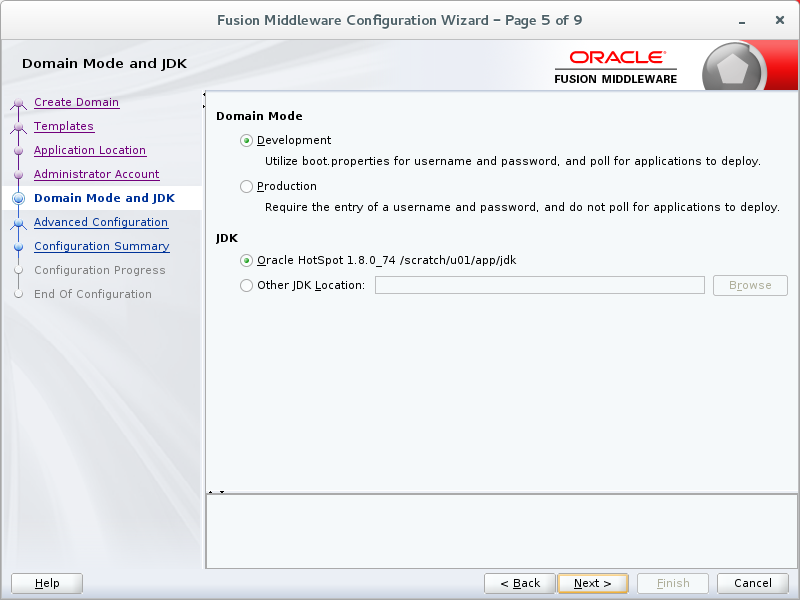
Description of this image - On the Domain Mode and JDK page, make the
following selections, and then click Next:
- Domain Mode: Production
- JDK: Oracle HotSpot 1.8.0_74
/scratch/u01/app/jdk/
The version and location of your HotSpot JDK may be different.
Description of this image - On the Advanced Configuration page, select
which domain resources that you want to configure,
and click Next.
In this tutorial, Administration Server, Node Manager, and Managed Servers, Clusters and Coherence are selected.
As you select more options, more screens are listed on the left side of the wizard.

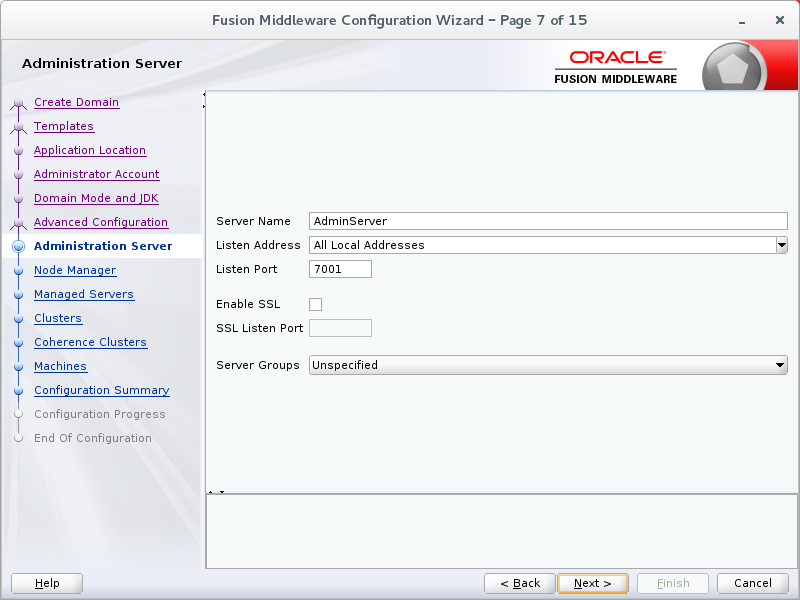
Description of this image - On the Administration Server page, enter the
following values, and click Next:
- Server Name: AdminServer (which is the default value)
- Listen Address: All Local Addresses
- Listen Port:
7001 - Enable SSL: Deselected
Note: For the Listen Address, you can also select the host name or IP address of the machine. Selecting All Local Addresses simplifies the process of porting the domain across machines with different IP addresses.
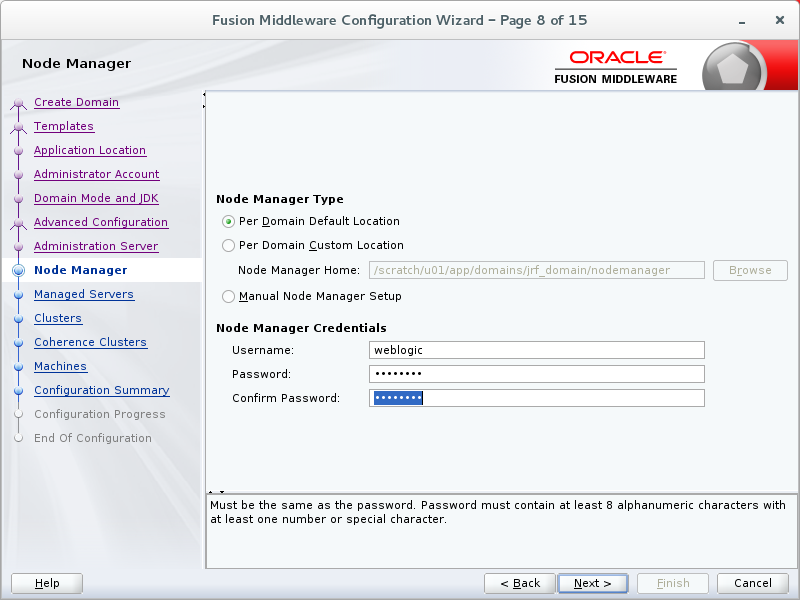
Description of this image - On the Node Manager page, enter the following
information and click Next:
- Node Manager Type: Per Domain Default Location
- Username:
weblogic - Password:
Welcome1You will use these credentials to communicate with Node Manager.
Note: The credentials for Node Manager do not have to match the administrator account credentials.
Description of this image - On the Managed Servers page, click Add
to display a row in the table.

Description of this image - In the new row, enter the following
information:
- Server Name:
server1 - Listen Address: All Local Addresses
- Listen Port:
7003 - Enable SSL: Deselected
Note: For the Listen Address, you can also select the host name or IP address of the machine. Selecting All Local Addresses simplifies the process of porting the domain across machines with different IP addresses.
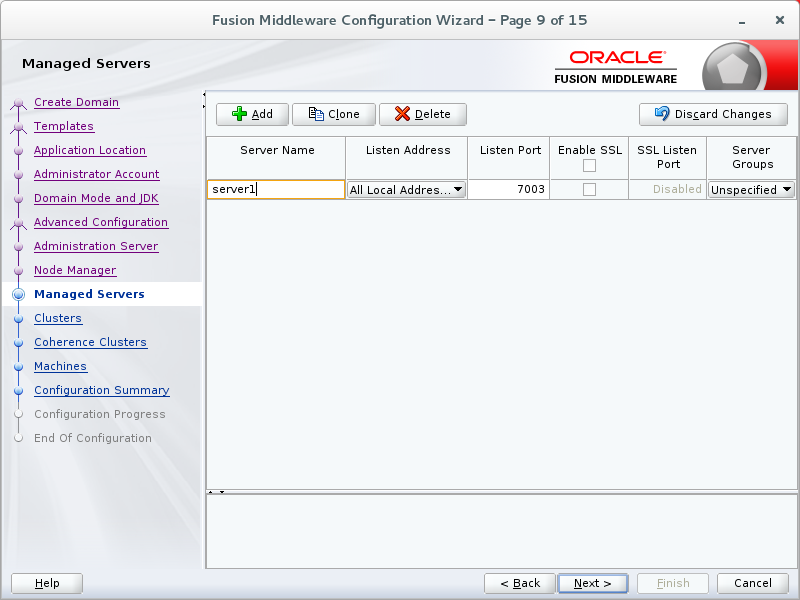
Description of this image - Server Name:
- Click Add to display a second
row. In the new row, enter the following
information and click Next:
- Server Name:
server2 - Listen Address: All Local Addresses
- Listen Port:
7005 - Enable SSL: Deselected
Note: For the Listen Address, you can also select the host name or IP address of the machine. Selecting All Local Addresses simplifies the process of porting the domain across machines with different IP addresses.
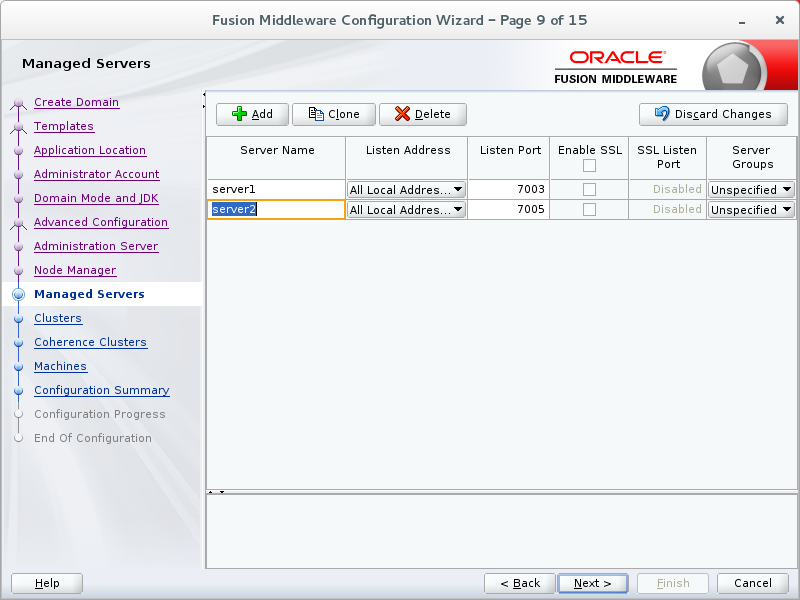
Description of this image - Server Name:
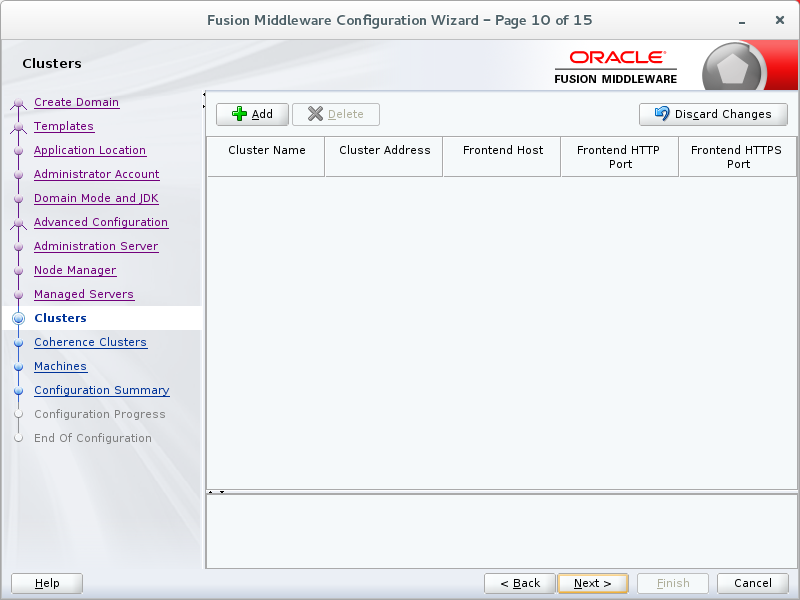
- On the Clusters page, click Next.
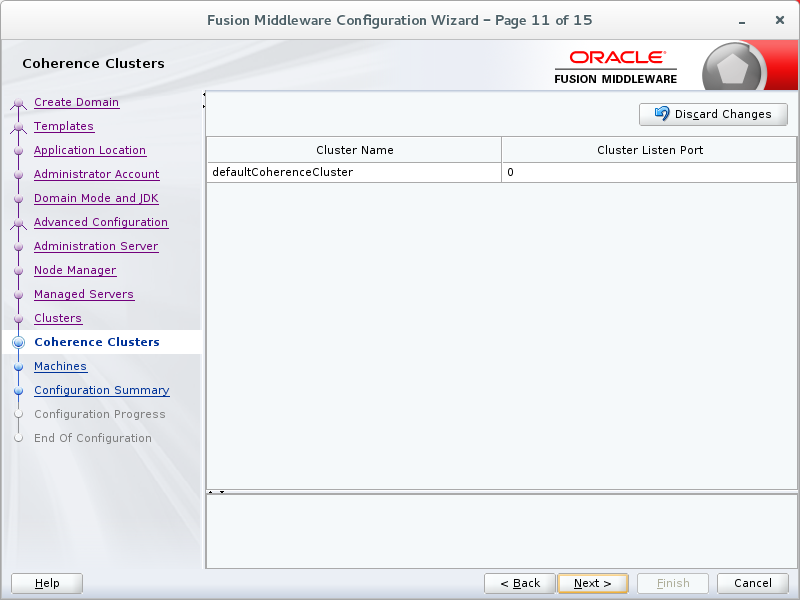
Description of this image - On the Coherence Clusters page, click Next.
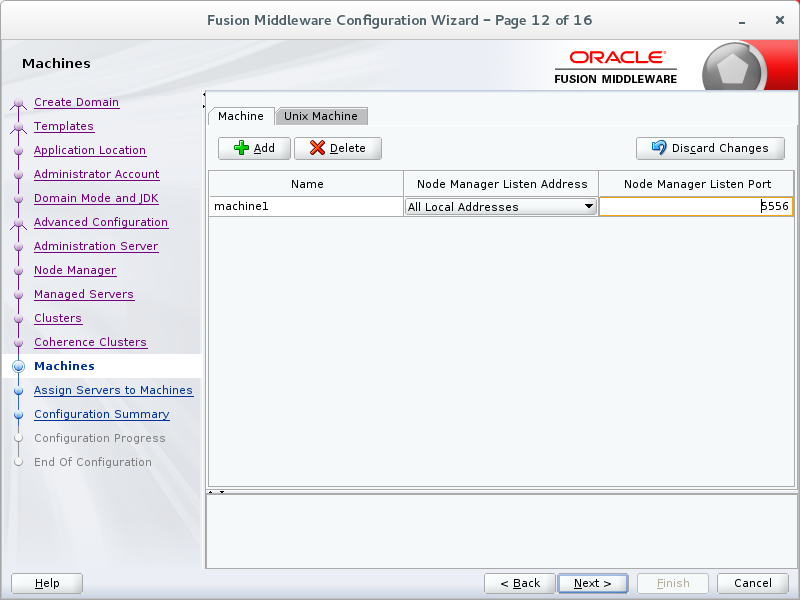
Description of this image - On the Machines page, perform the following
steps:
- Select the Machine tab.
- Click Add.
- In the new row, enter
machine1for the Name. - Select All Local Addresses
- Leave the Node Manager Listen Port as
5556. - Click Next.
Note: For the Node Manager Listen Address, you can also select the host name or IP address of the machine. Selecting All Local Addresses enables the Node Manager to manage all the domains you may create.
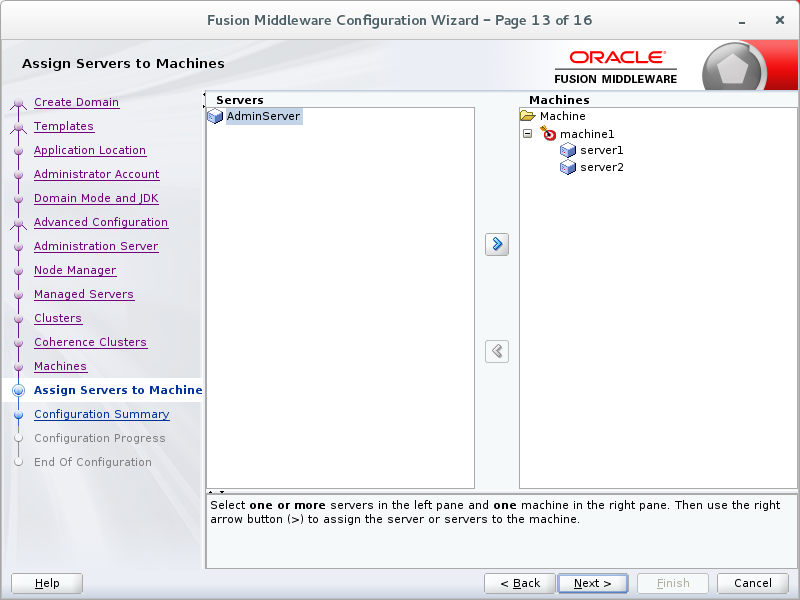
Description of this image - On the Assign Servers to Machines page, perform
the following steps:
- Under Machines, ensure that machine1 is selected.
- Under Servers, select server1 and click the right arrow button to move it under machine1.
- Select server2 and click the right arrow button to move it under machine1.
- Click Next.
Description of this image - On the Configuration Summary page, click Create.
Note: If the Fusion Middleware Configuration Wizard indicates an Invalid coherence server address, the coherence server configuration will be adjusted in a subsequent tutorial using Coherence Clusters.

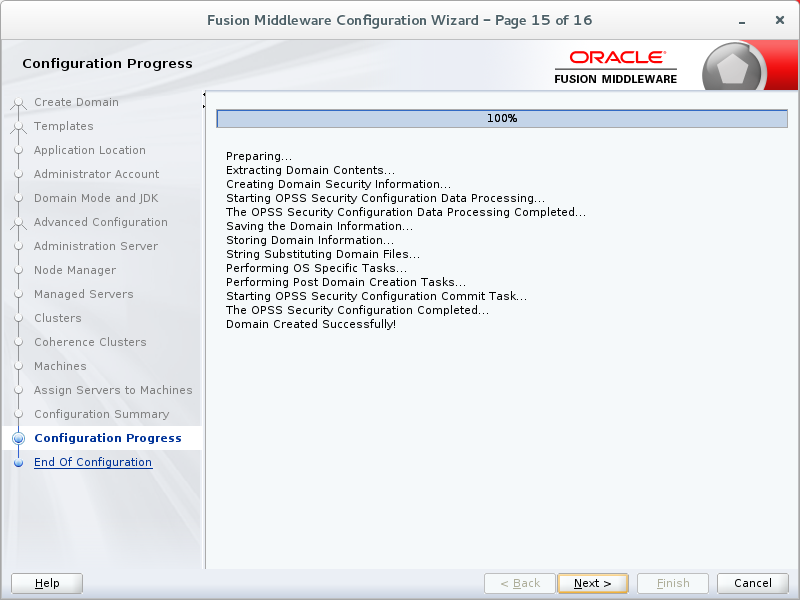
Description of this image - On the Configuration Progress page, click Next
after the progress bar reaches 100%.
Description of this image - On the Configuration Success page, make note of
the domain location and the URL of the
administration console, and then click Finish.

Description of this image You have created a WebLogic Server domain.
Viewing the Domain Files and Starting the WebLogic Server 12c (12.2.1) Domain
- Open a Terminal window and enter the following
commands:
$>cd /scratch/u01/domains/jrf_domain
$>ls
Note: If you placed the domain in a different location, use that directory instead.
$>cd /scratch/u01/domains/jrf_domain $>ls autodeploy derby.log init-info servers bin derbyShutdown.loglibstartManagedWebLogic_readme.txt commonedit.loknodemanagerstartWebLogic.shfileRealm.properties
console-ext generated_classes security -
Start the administration server of the domain by entering
startWebLogic.shfrom the domain directory, for example:$>./startWebLogic.sh -
At the prompt, enter a username and password. Use the administrator
username and password that you entered when you created the domain.
In this tutorial, the username is
weblogicand the password isWelcome1.Note: The password is not displayed.
Enter username to boot WebLogic server:weblogic Enter the password to boot WebLogic server: -
As the script continues to run, look for the following message:
The server is started in RUNNING mode.The message means that the Administration Server is up and running.
<Oct 23, 2015 1:44:34 PM EDT><Notice><WebLogicServer><BEA-000360><The server started in RUNNING mode.>
To view the directory structure and files for the newly created domain, complete the following steps:
Accessing the WebLogic Server Administration Console
- Open a browser and enter the following URL:
http://hostname:port/console.In this tutorial, the URL is
http://ip_address:7001/console.Note: Use your administration server machine's host name, the machine's IP address, or
localhostforip_address. - On the Welcome screen, enter the administrator username and password
and click Login.
- Username:
weblogic - Password:
Welcome1
Note: These are the username and password used in this tutorial. Otherwise, enter the username and password that you used to start the administration server.
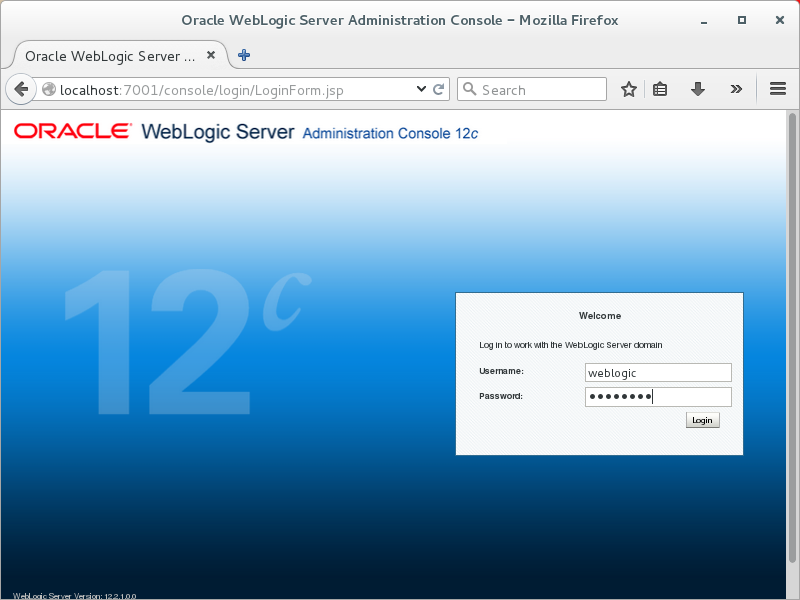
Description of this image The home page of the administration console is displayed.

Description of this image - Username:
To access the WebLogic Server administration console, complete the following steps:
Accessing Fusion Middleware Control
- Open a browser and enter the following URL:
http://hostname:port/em.In this tutorial, the URL is
http://ip_address:7001/em.Note: Use your administration server machine's host name, the machine's IP address, or
localhostforip_address. - On the Welcome screen, enter the administrator username and password
and click Login.
- Username:
weblogic - Password:
Welcome1
Note: These are the username and password used in this tutorial. Otherwise, enter the username and password that you used to start the administration server.
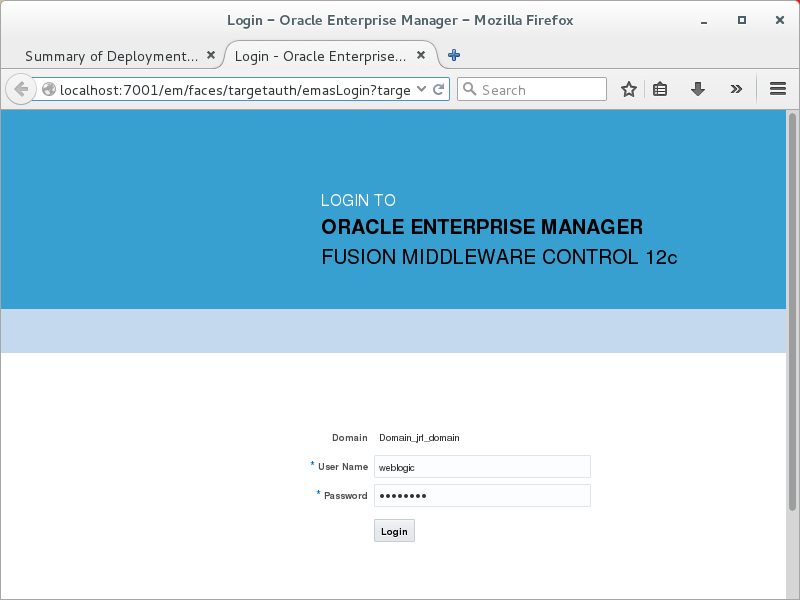
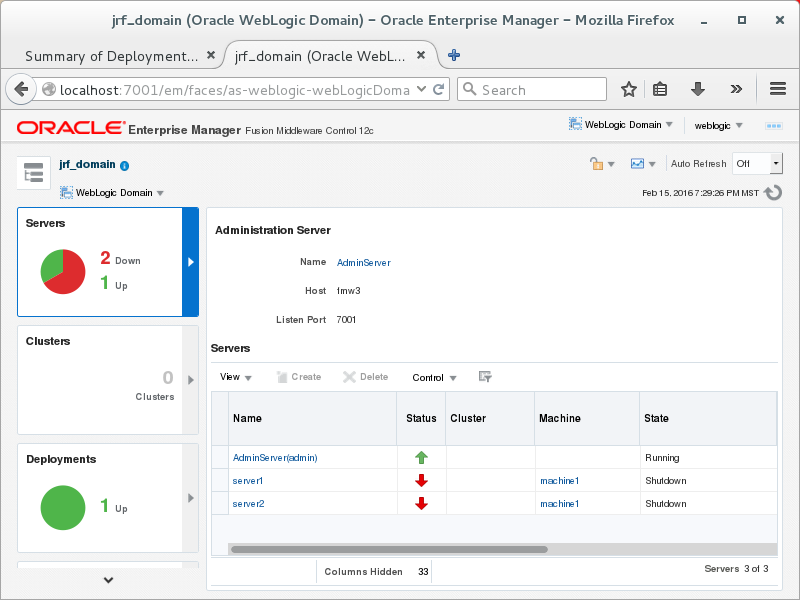
Description of this image The Fusion Middleware Control home page is displayed.
Description of this image - Username:
To access Fusion Middelware Control, complete the following steps: