Exporting Hierarchy Nodes in Generation Format
Purpose
This tutorial covers how to export nodes in generation format.
Time to Complete
Approximately 30 min.
Overview
Exports in a generation or level-based format are useful when you want to output specific nodes and hierarchy ancestor levels as separate columns. Examples of exports in a generation format include products by line and group, vendors by country and city, and customers by territory and region.
You have two ways to export nodes in generation format:
- Generation Export—This method enables you to export balanced or unbalanced hierarchies as separate columns based on hierarchy structure.
- Version or Hierarchy Export—This method enables you to export separate node-level properties to represent the different levels of a "virtual" hierarchy.
For this type of export, configure the export wizard tabs as follows:
- Source—Select a normal, baseline, or as-of version. For a Generation Export or Hierarchy Export, you also need to select one or more hierarchies.
- Style—Output ancestor level columns in a top-down order (root to node) or bottom-up order (node to root). Because ancestor levels are output in separate columns, you may only need to export nodes that represent the bottom hierarchy level. For a Generation Export, the number of columns displayed for each node is either dynamic (based on the hierarchy structure) or fixed (based on a specified value). You can output blanks or repeat values for nodes with ancestor levels that do not equal the specified value.
- Filter—Define a query or validation or specify a text file that lists nodes to include or exclude in the results. Only nodes that meet the query criteria or that fail the validation are exported. For a Generation Export, you can use an exclusion filter to exclude ancestor nodes from the output.
- Columns—Select as many properties as needed for the export results. You can select different properties for bottom-level and ancestor nodes.
- Target—Specify whether to export results to a client or a server file. To export to a database table, you must create a Version or Hierarchy Export.
In this tutorial, you export nodes in generation format.
Prerequisites
Before starting this tutorial, you should have access to or have installed Oracle Hyperion Enterprise Performance Management 11.1.2.1.0 and Oracle Hyperion Data Relationship Management, Fusion Edition 11.1.2.1.0.
Exporting Nodes Using Generation Export
In this topic, you create a generation export and view the export results.
. |
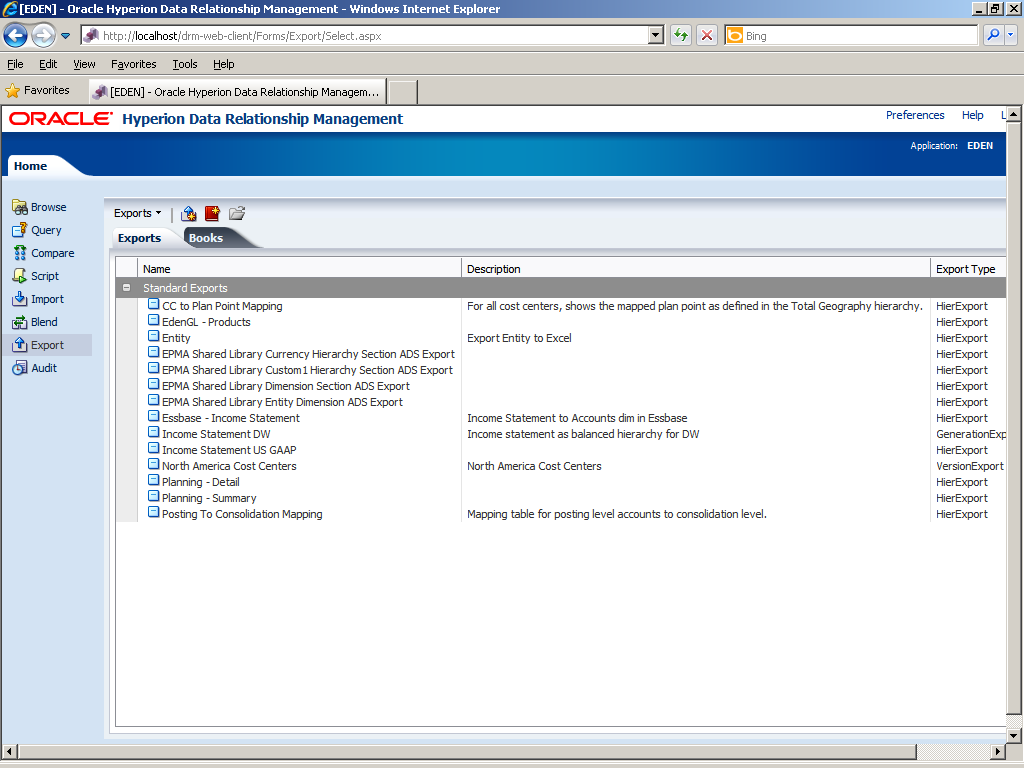
Begin by navigating to the Export task group. Use the Export task group to create and manage exports.
|
|---|---|
. |
Open the Generation Export named Income Statement DW, which outputs separate columns of nodes dynamically based on hierarchy structure. This method enables you to output balanced or unbalanced hierarchies. Double-click Income Statement DW.
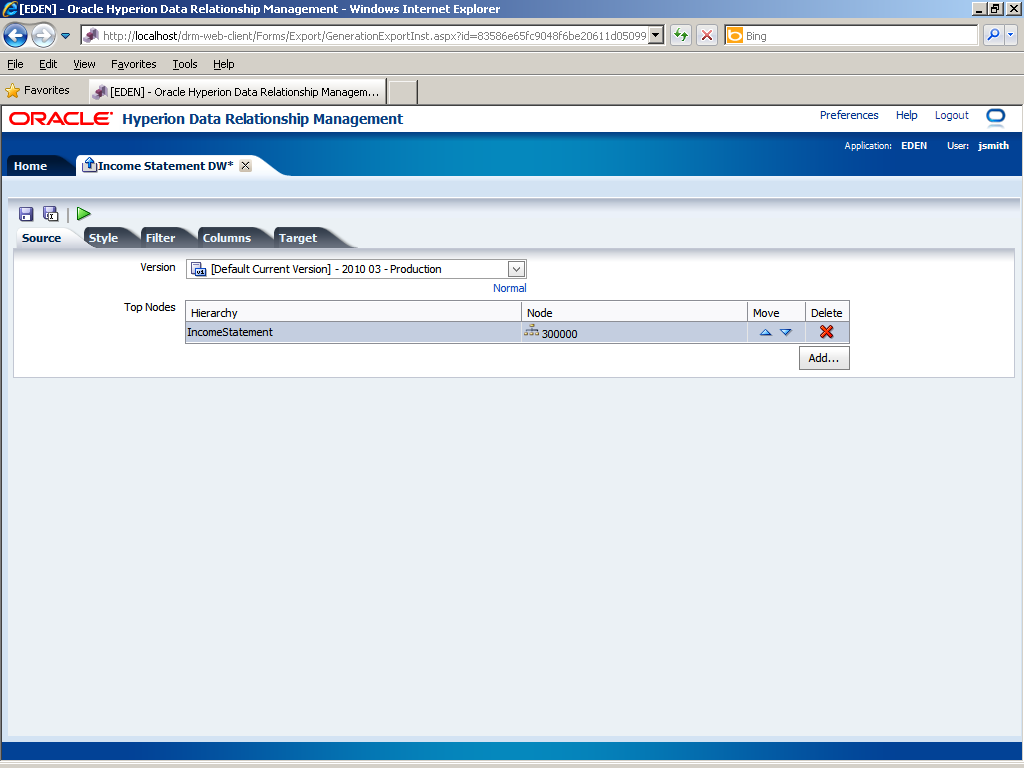
Use the export wizard to define the source, style, filter, columns, and target for the export. You begin on the Source tab. Use the Source tab to specify the version and one or more hierarchy/top node sets that you want to export. You can select a normal, baseline, or as-of version. In this example, you leave the [Default Current Version] - 2010 03 - Production normal version selected.
|
. |
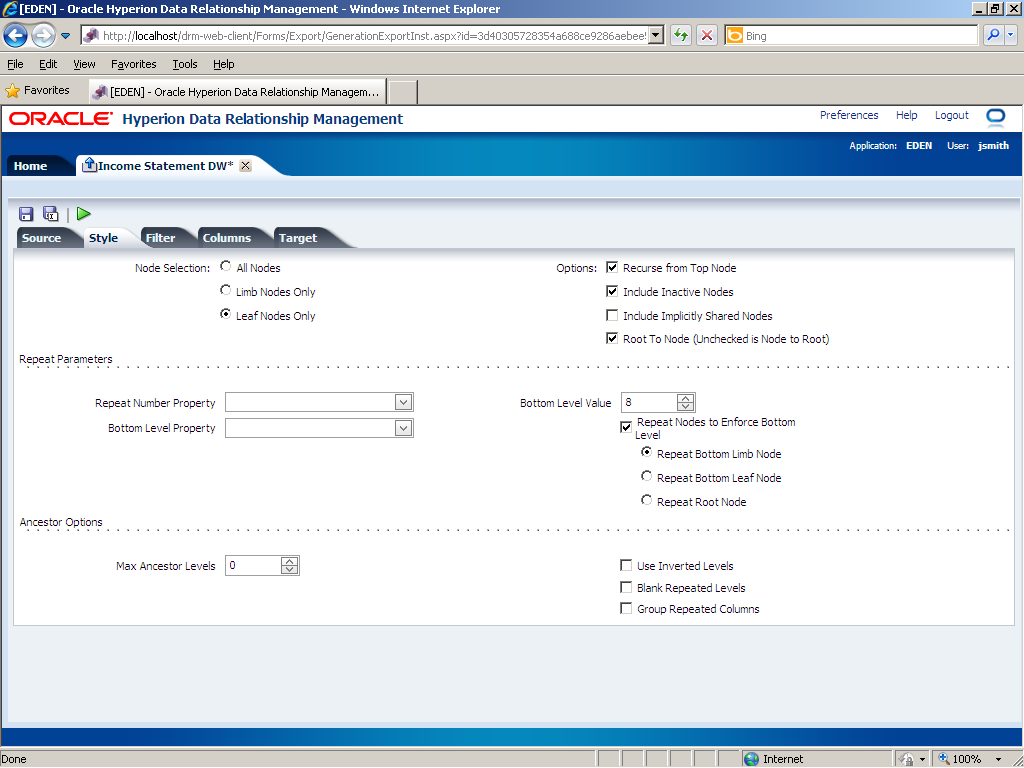
Click the Style tab.
Use the Style tab to specify the type of nodes to be included in the export and to specify whether to include implicitly shared nodes. In this example, you export leaf nodes, recurse from the top node, include inactive nodes, and output the nodes in a top-down column order (root to node).
|
. |
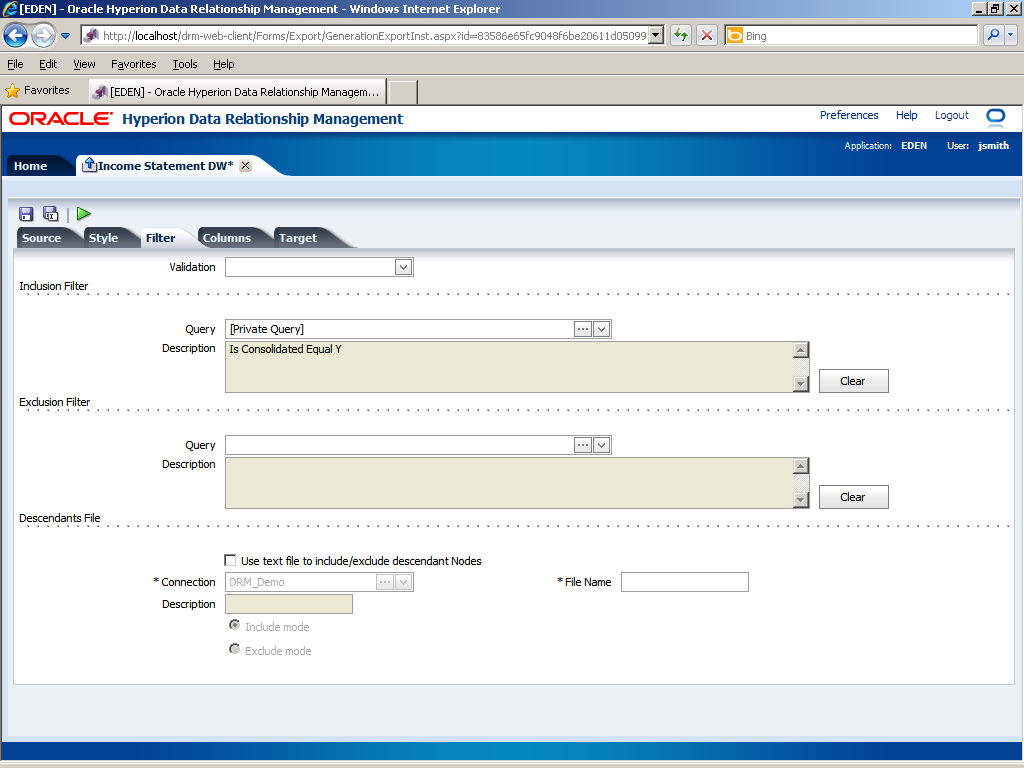
Click the Filter tab.
Use the Filter tab to define filter criteria (validation, inclusion filter, exclusion filter, and descendants file) for the exported data. Only nodes that fail the validation or that meet the query criteria are included in the export results. In this example, a private query is already defined. It finds nodes that have the Is Consolidated property equal to Y.
|
. |
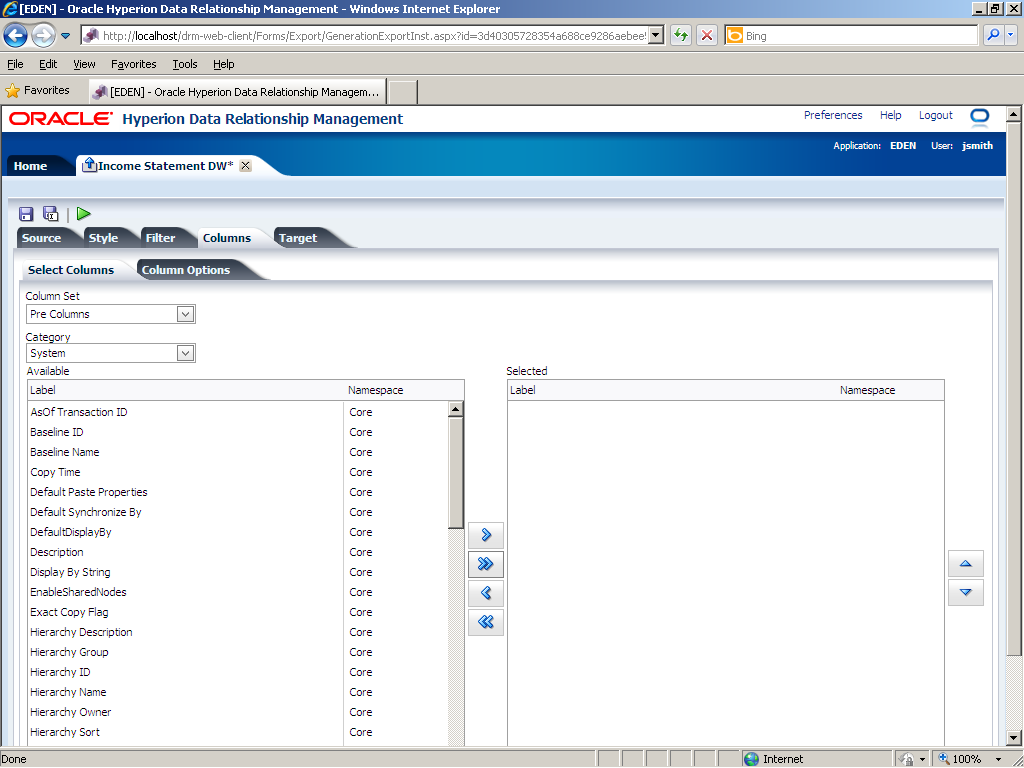
Click the Columns tab.
Use the Columns tab to select properties for output columns for each column set, and to configure column options.
|
. |
Use the Column Set drop-down list to configure the following:
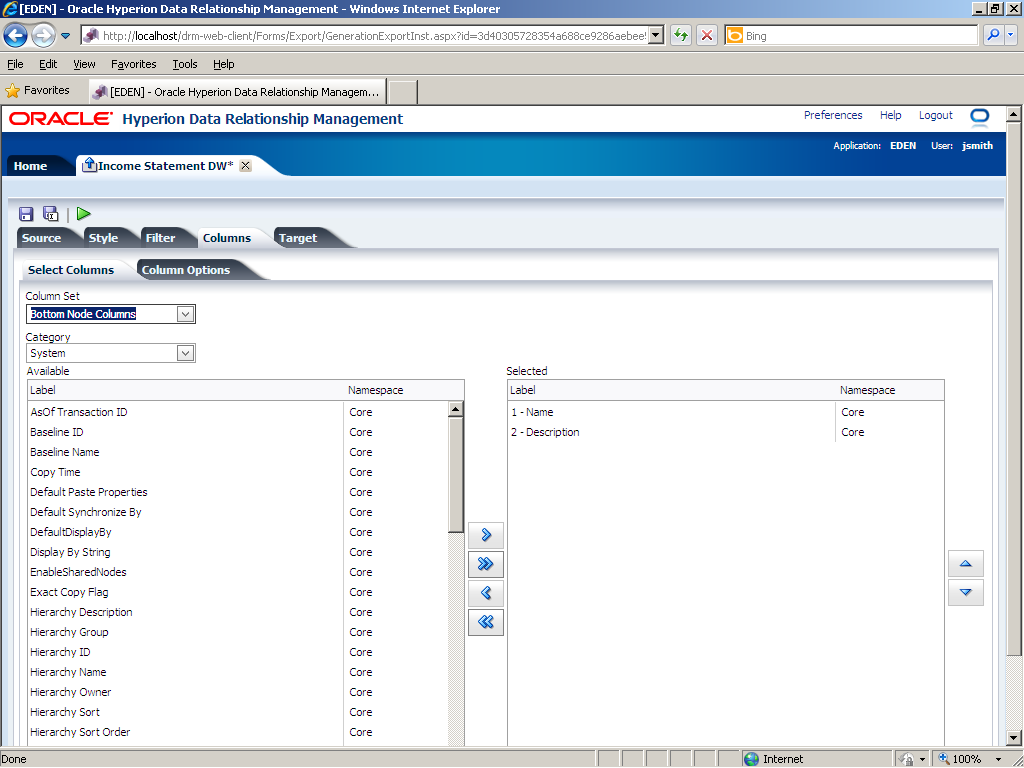
In this example, no properties are selected to be displayed at the beginning of each export record. In the Column Set drop-down list, select Bottom Node Columns.
|
. |
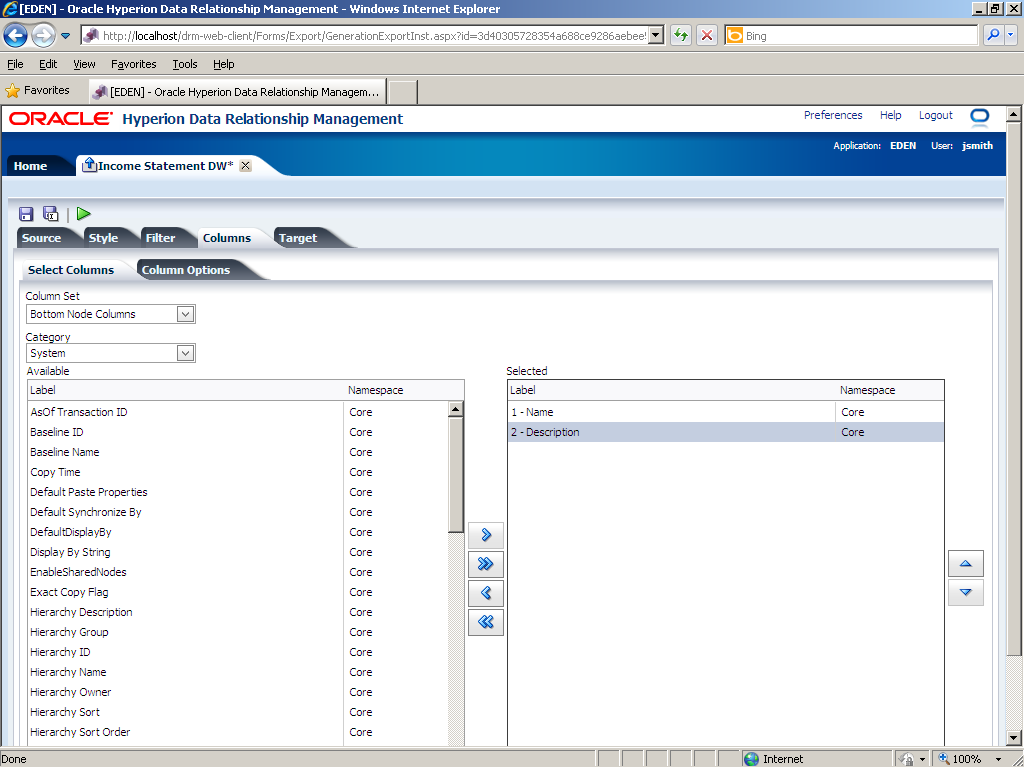
Configure just the Name property to be displayed for the bottom node. In the Selected list, click 2 - Description.
|
. |
Click the Remove (
The Description property is displayed in the Available list.
|
. |
In the Column Set drop-down list, select Ancestor Columns.
In this example, the Name property will be displayed in the ancestor columns.
|
. |
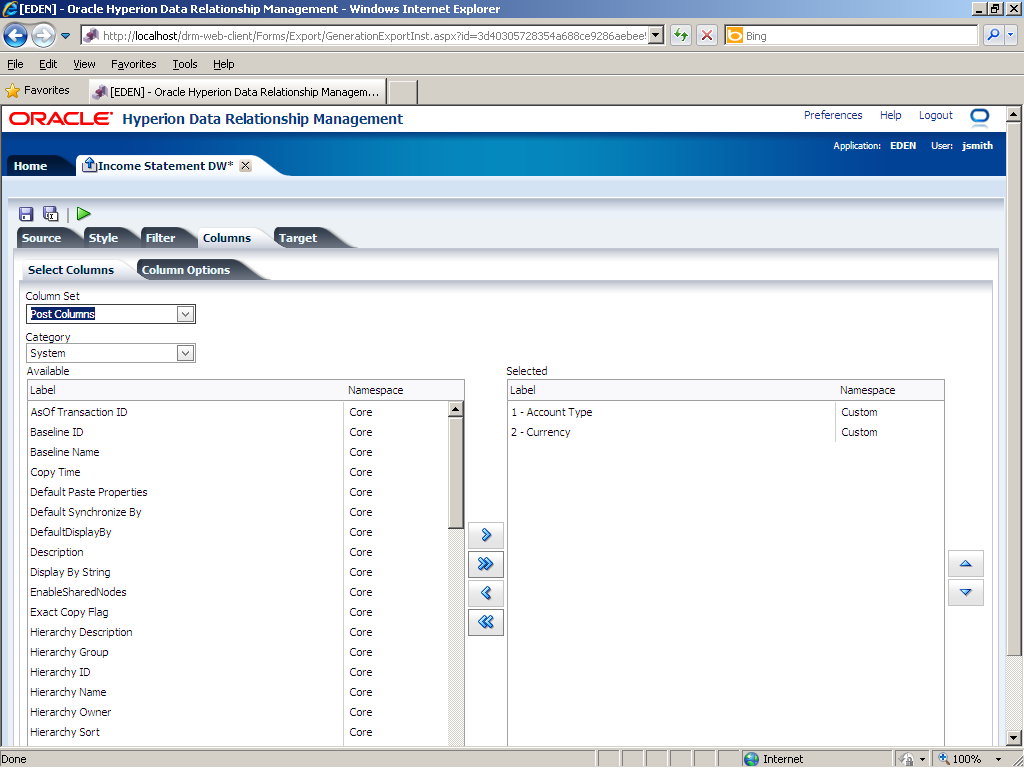
In the Column Set drop-down list, select Post Columns.
In this example, the Account Type and Currency properties will be displayed at the end of each export record.
|
. |
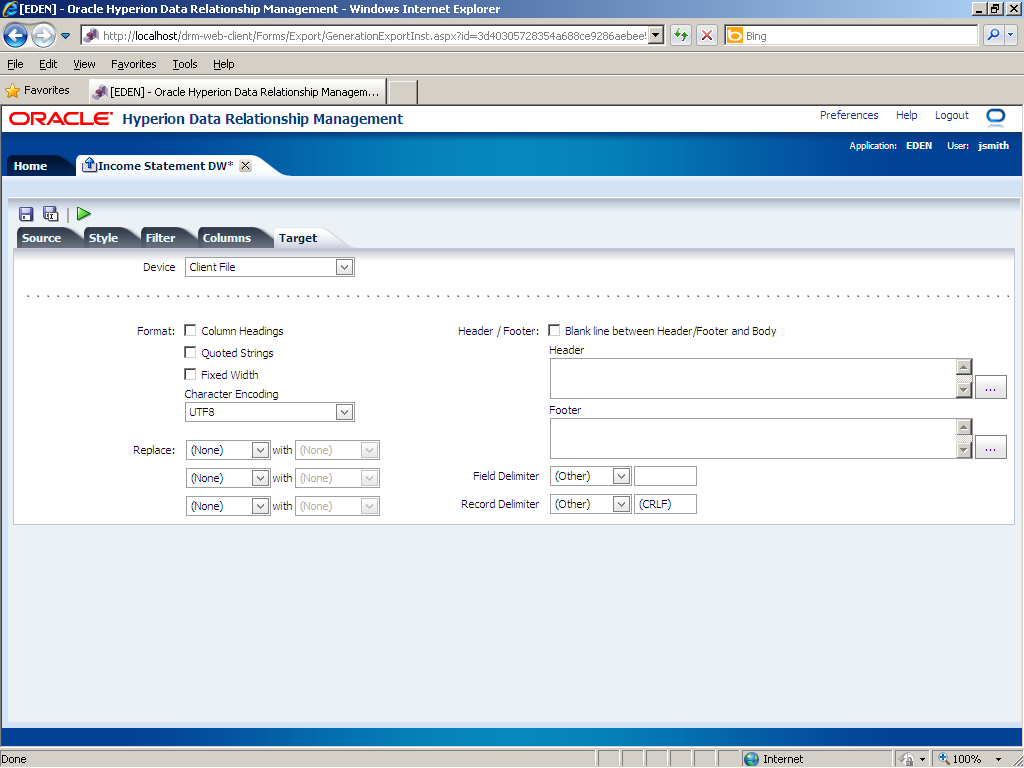
Click the Target tab.
Use the Target tab to configure where the data is to be exported and the format of the exported results. In this example, you leave Client File selected (it is the default), and you do not configure any other options.
|
. |
Click the Run (
The File Download dialog box is displayed. Use the File Download dialog box to open or save the export results. You can also cancel the export, if necessary.
|
. |
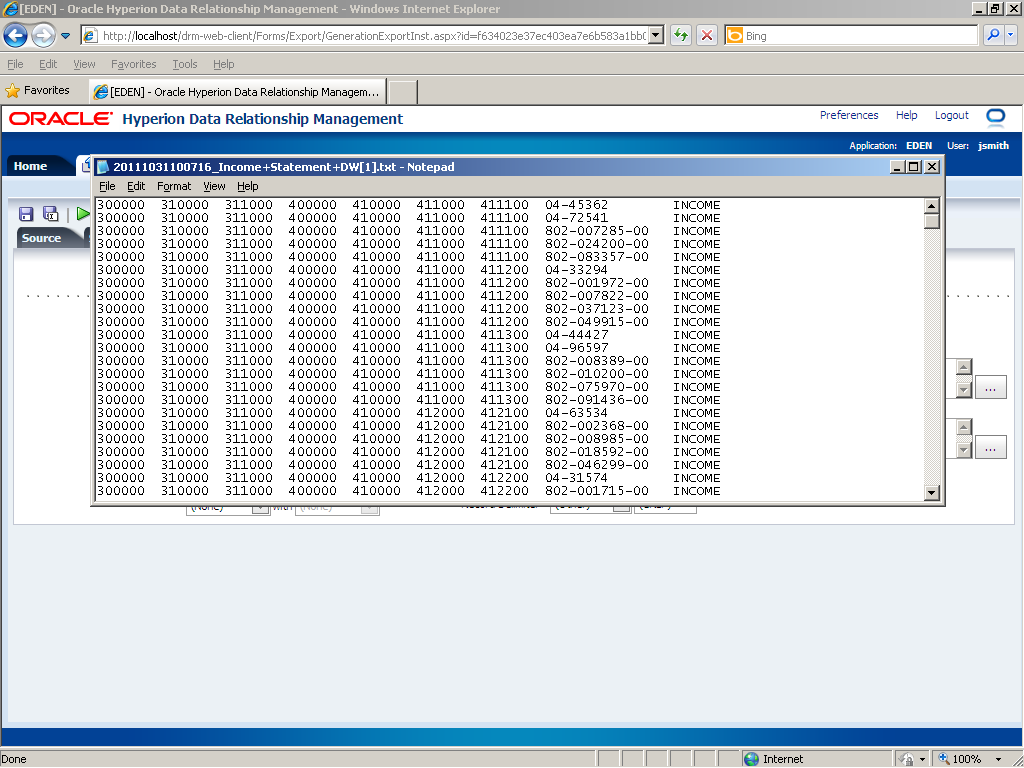
Click Open.
The export results are displayed in Notepad. Separate columns of nodes are generated dynamically based on the Income Statement hierarchy structure.
|
. |
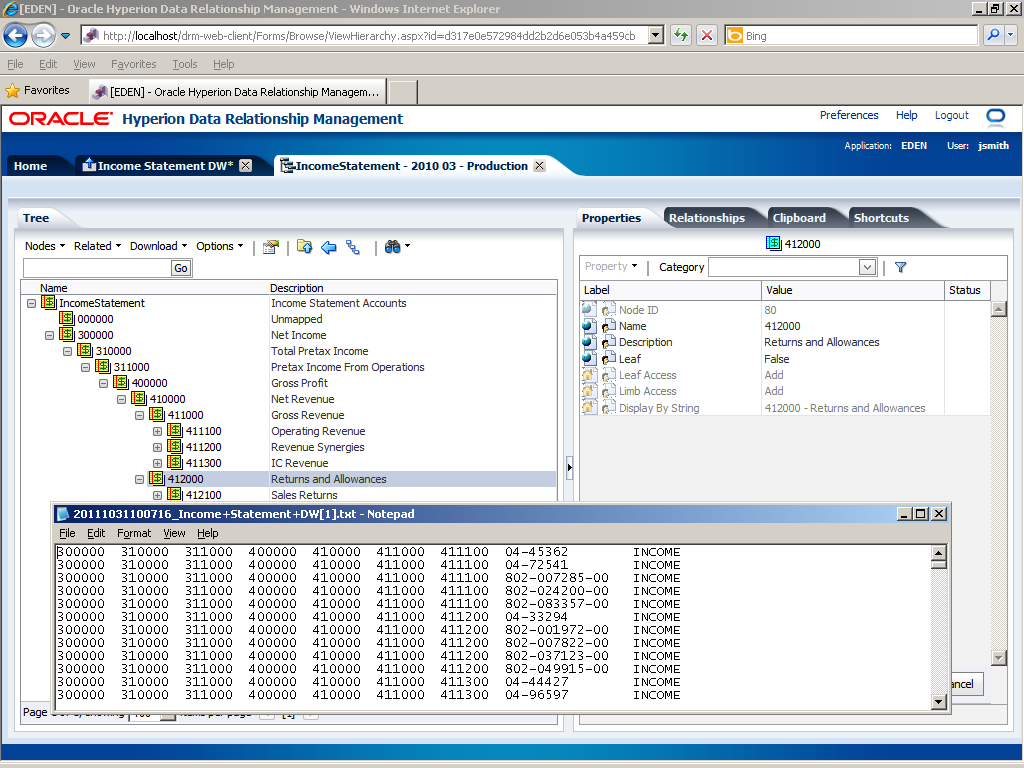
View the IncomeStatement hierarchy, which was opened for you, to compare it to the export results.
|
 ) button.

 ) button to process the export.
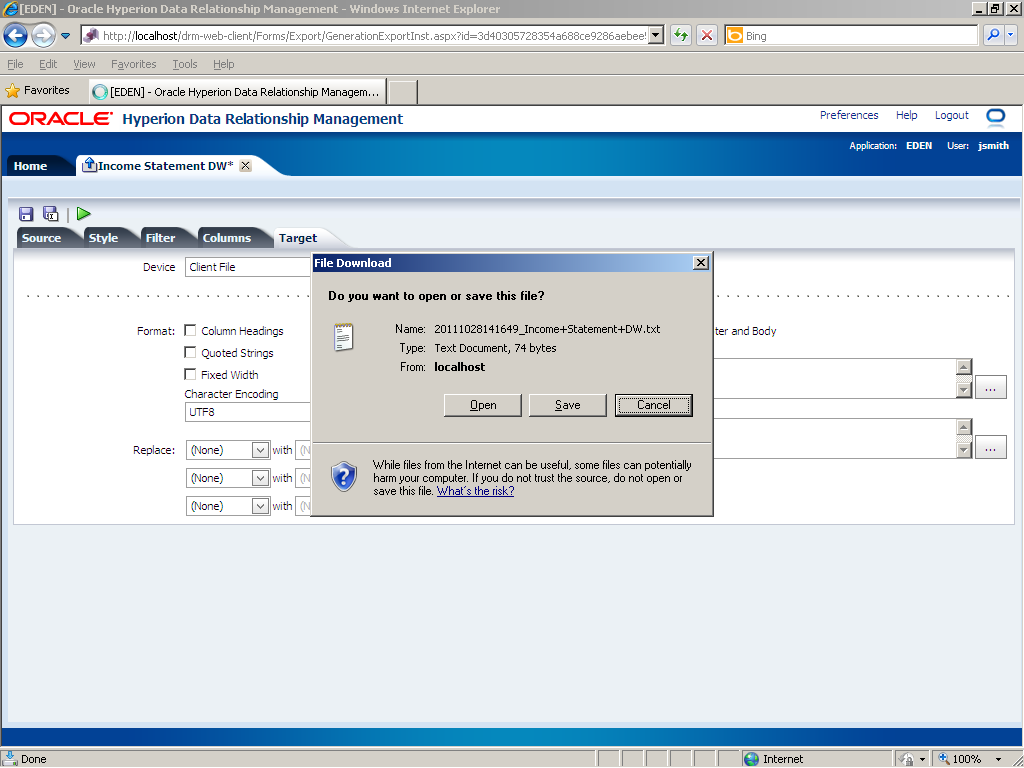
Exporting Nodes Using Version Export
Another way to export generation data is to create a Version or Hierarchy export. This type of export outputs separate node-level properties to represent the different levels of a "virtual" hierarchy. In this example, you create a Version export that outputs a few properties for leaf nodes.
. |
Begin by navigating to the Export task group. Use the Export task group to create and manage exports.
|
|---|---|
. |
Click the New Export (
Use the Choose Export Type dialog box to select an export type (hierarchy, comparison, version, property, or log).
|
. |
Click Version.
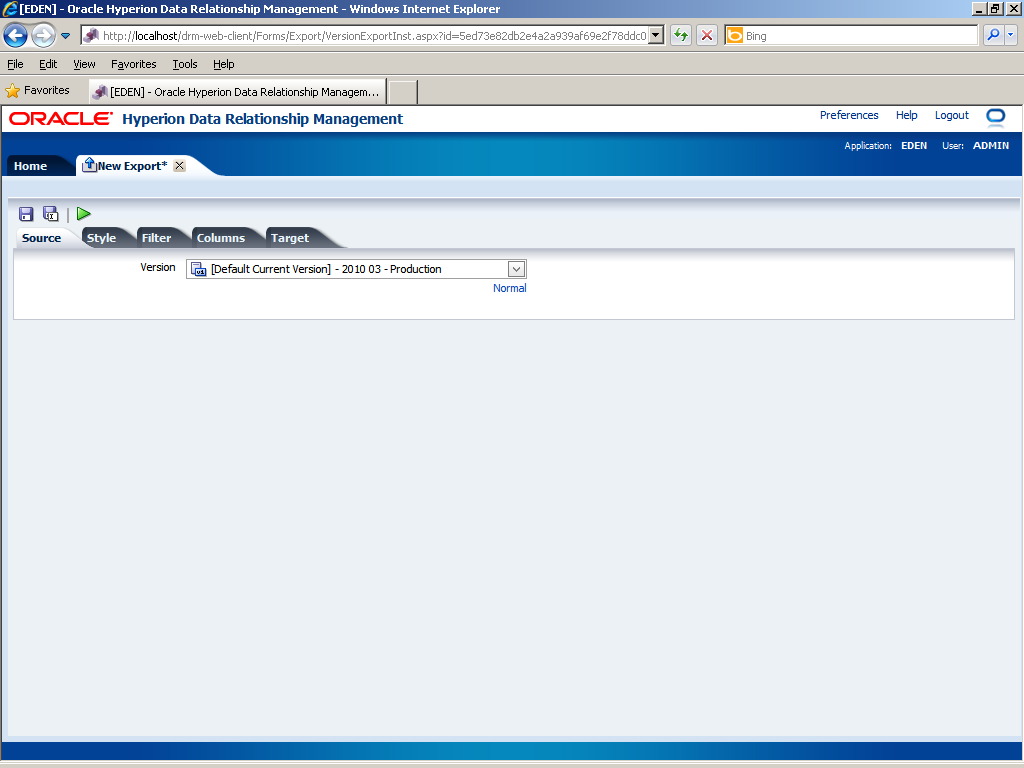
Use the export wizard to define the source, style, filter, columns, and target for the export. You begin on the Source tab.
|
. |
Use the Source tab to specify the version that you want to export. You can select a normal, baseline, or as-of version. In this example, you leave the [Default Current Version] - 2010 03 - Production normal version selected. Click the Style tab.
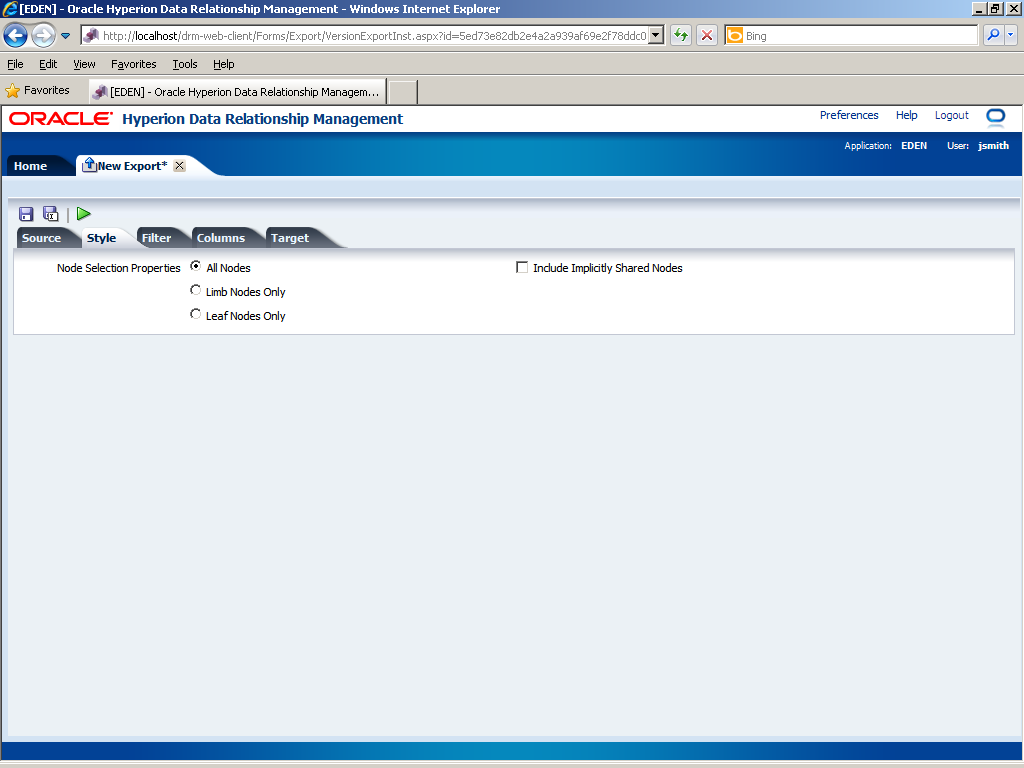
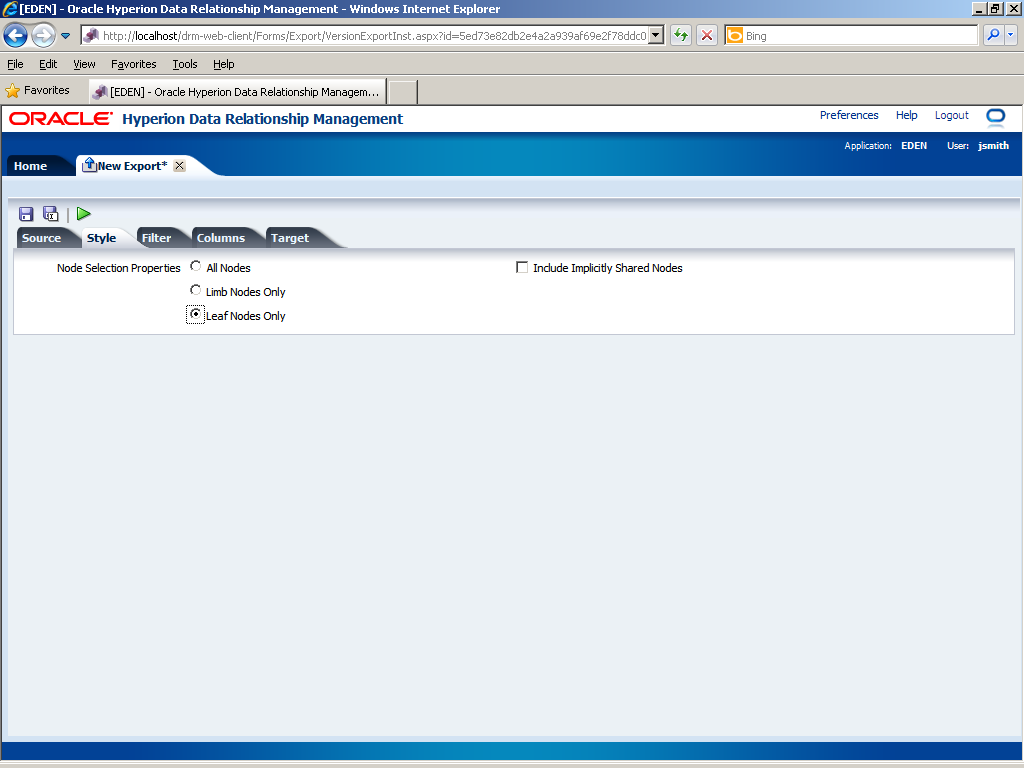
Use the Style tab to specify the type of nodes to be included in the export and to specify whether to include implicitly shared nodes.
|
. |
Perform the following actions on the Style tab:
|
. |
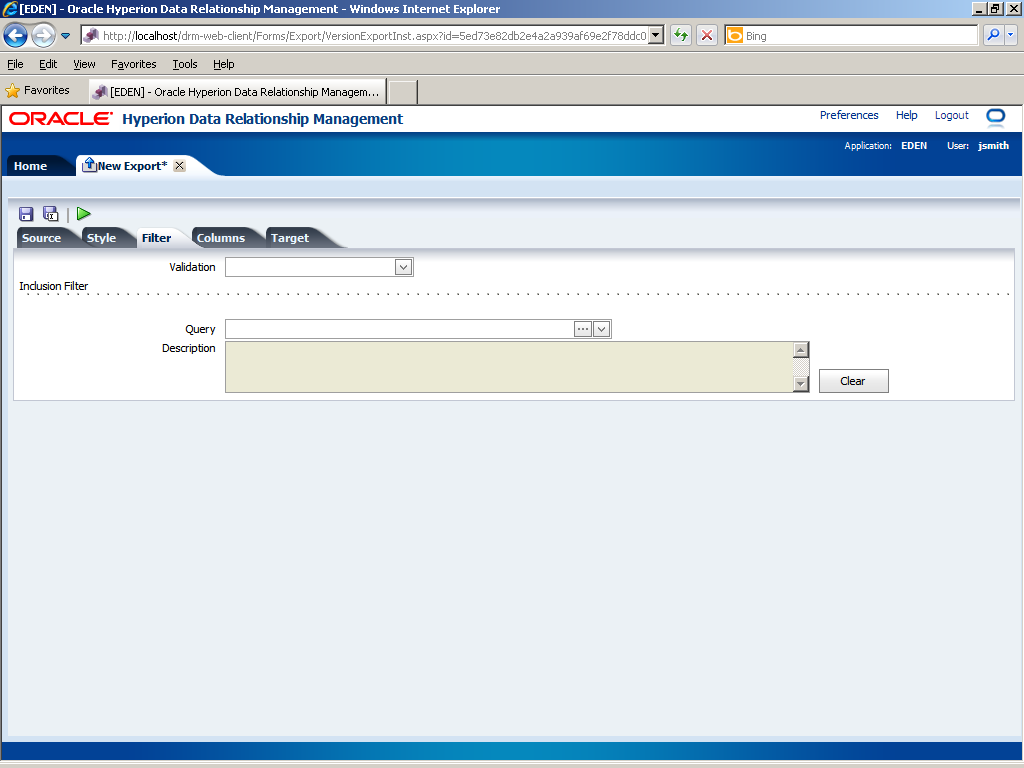
Click the Filter tab.
Use the Filter tab to define filter criteria for the exported data. Only nodes that fail the validation or that meet the query criteria are included in the export results.
|
. |
In this example, you create a private query filter that finds nodes where the Continent property is equal to North America or South America. Click the … (
|
. |
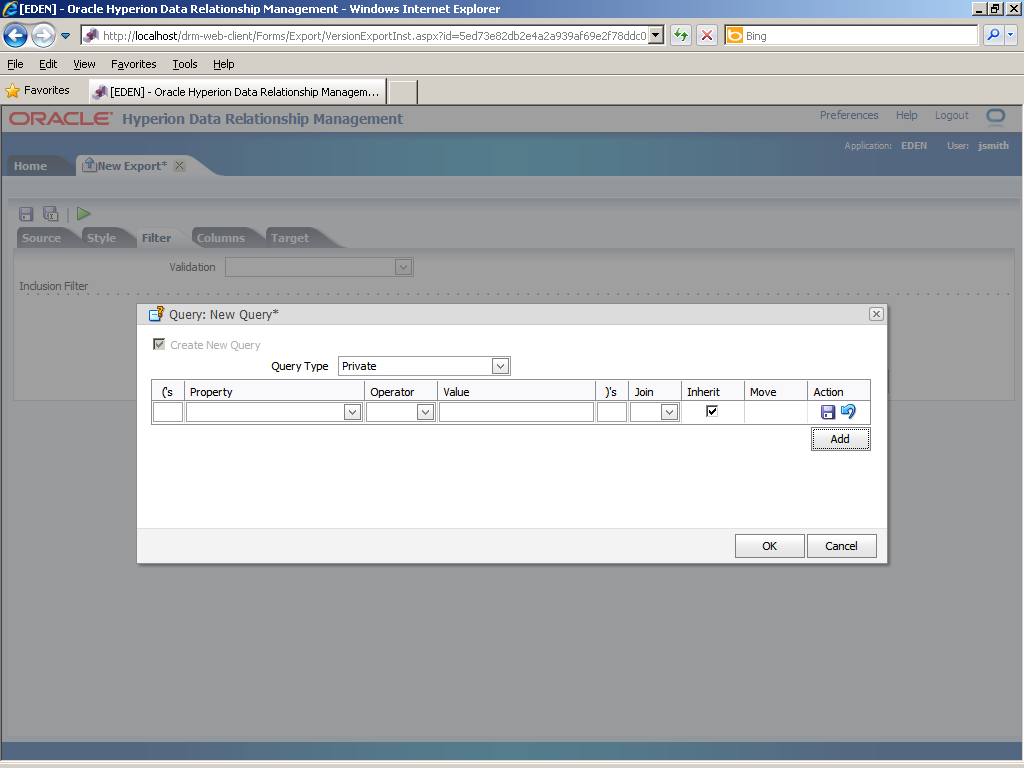
Click Add.
|
. |
Perform the following actions:
|
. |
In the Actions column, click the Update (
|
. |
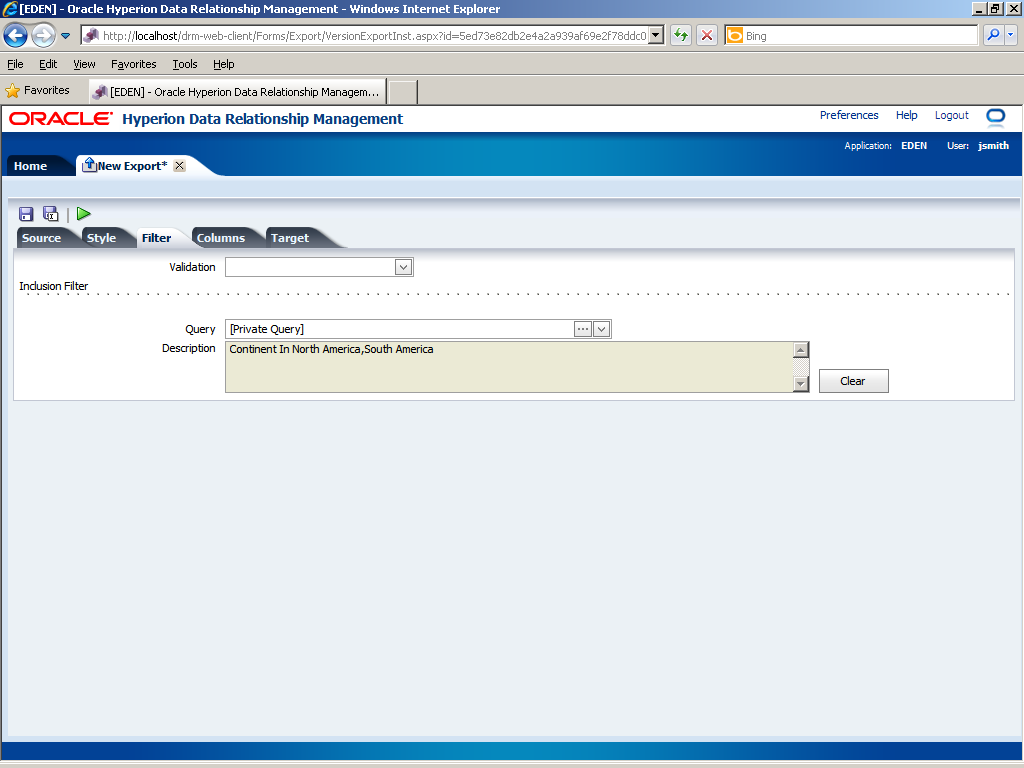
Click OK.
The filter criteria is displayed in the Description field.
|
. |
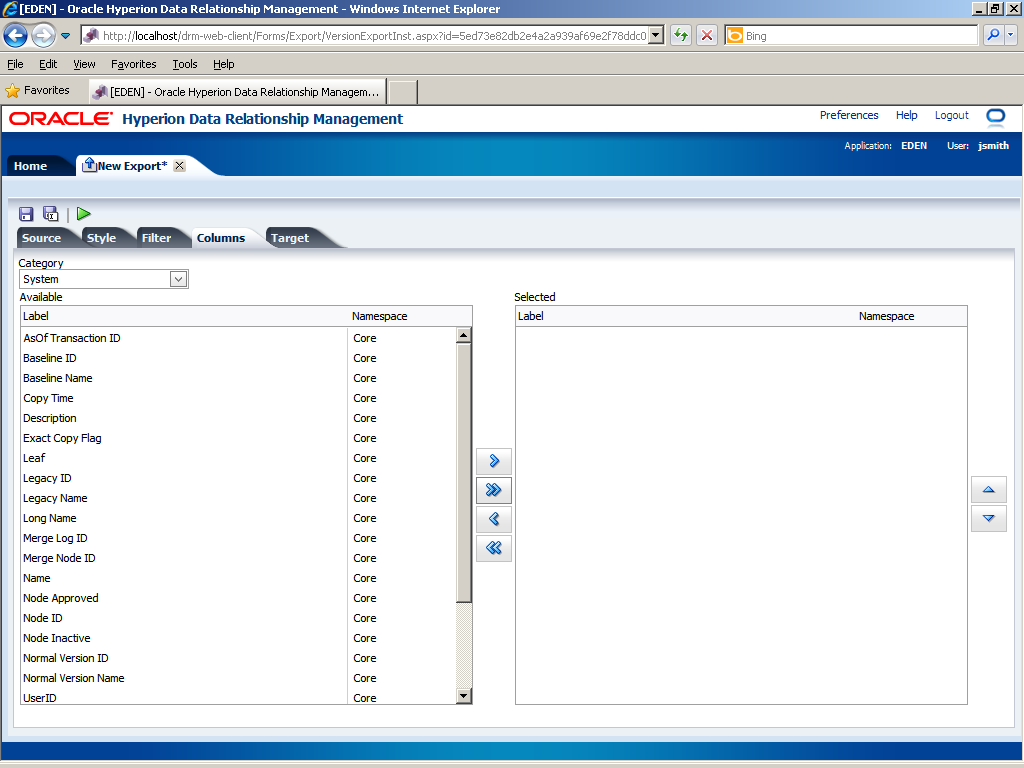
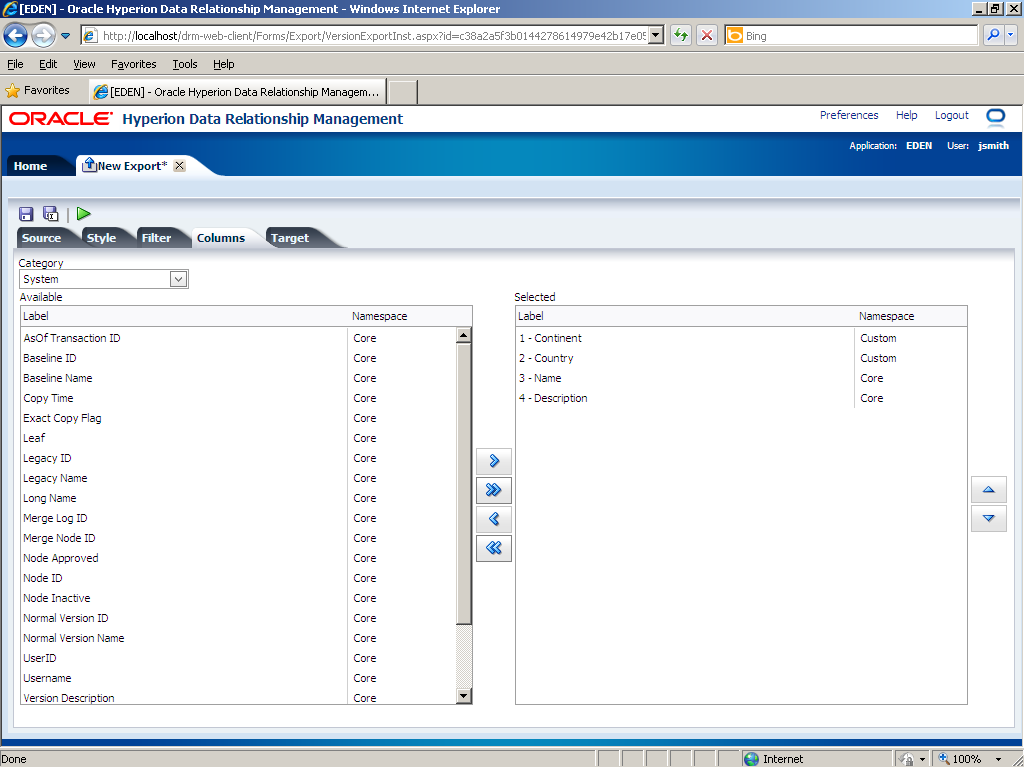
Click the Columns tab.
Use the Columns tab to select properties for output columns. In this example, you select the Continent, Country, Name, and Description properties.
|
. |
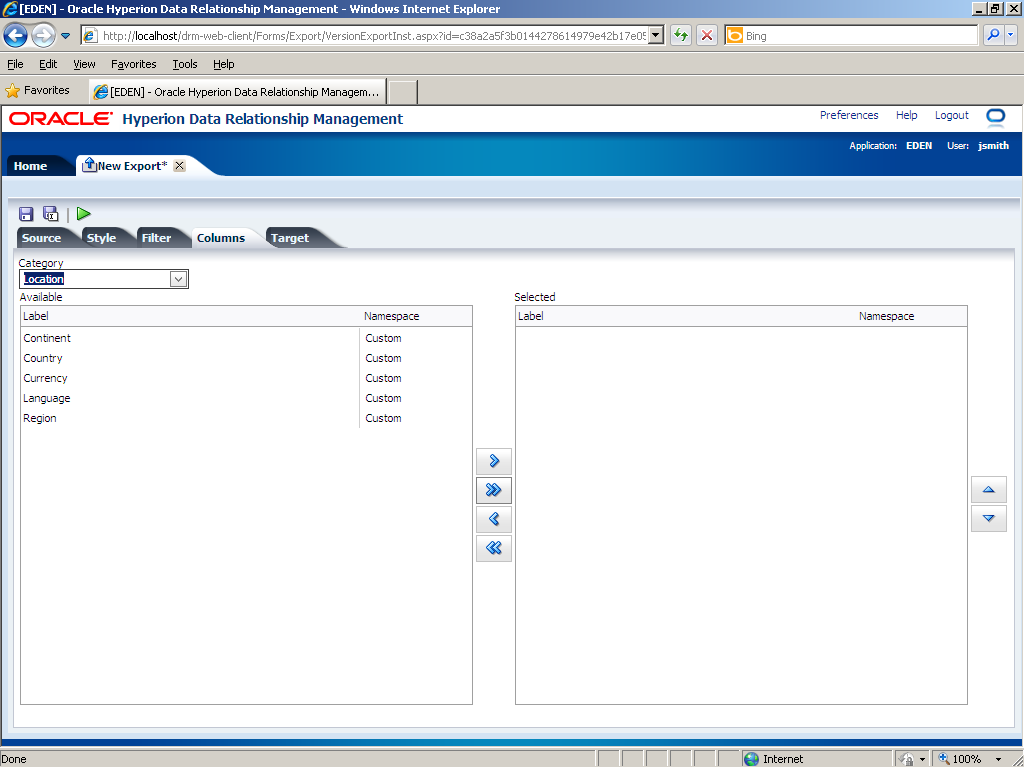
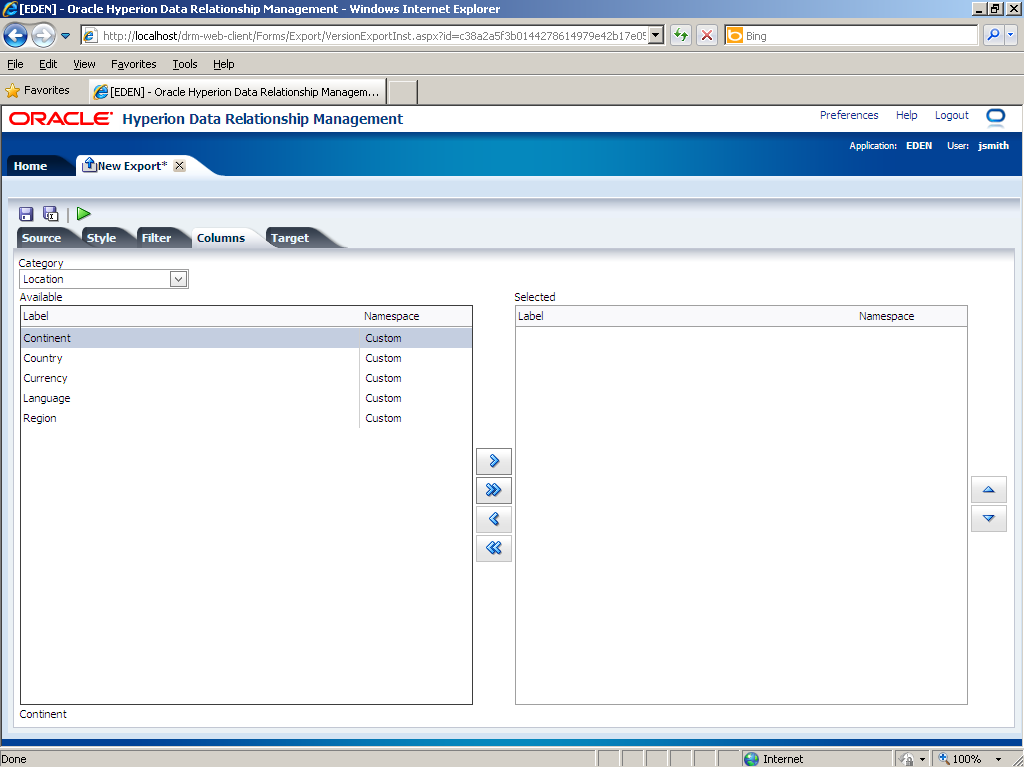
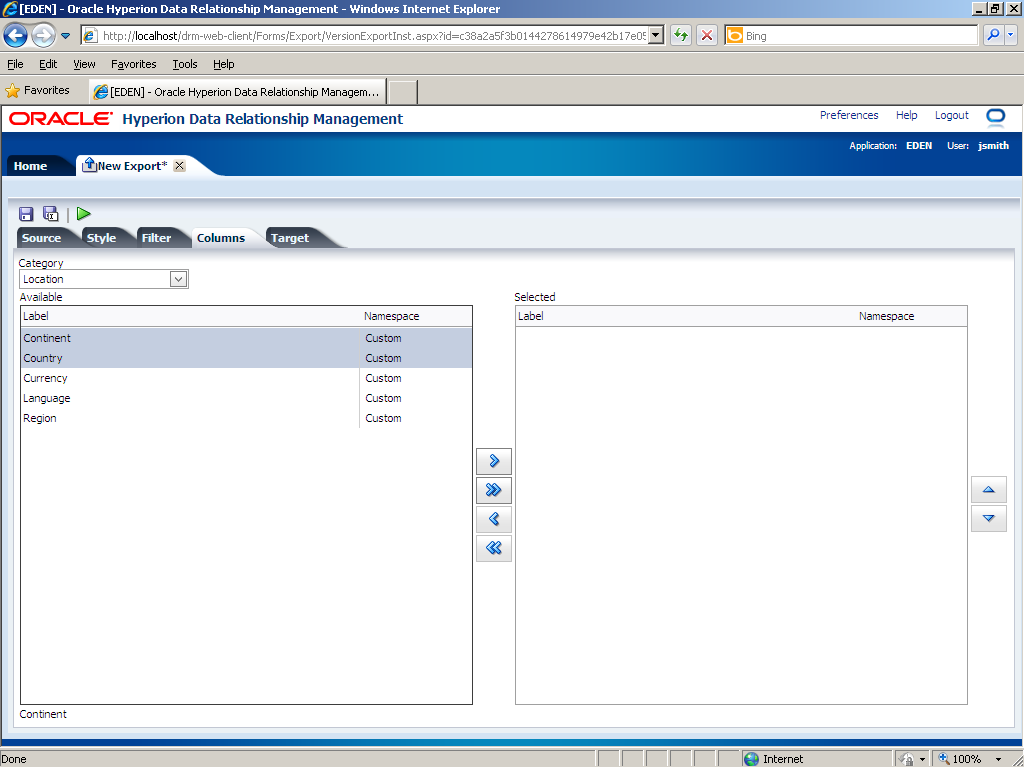
In the Category drop-down list, select Location.
|
. |
In the Available list, click Continent.
|
. |
Press the [Ctrl] key and click Country .
|
. |
Click the Select (
Continent and Country are displayed in the Selected list.
|
. |
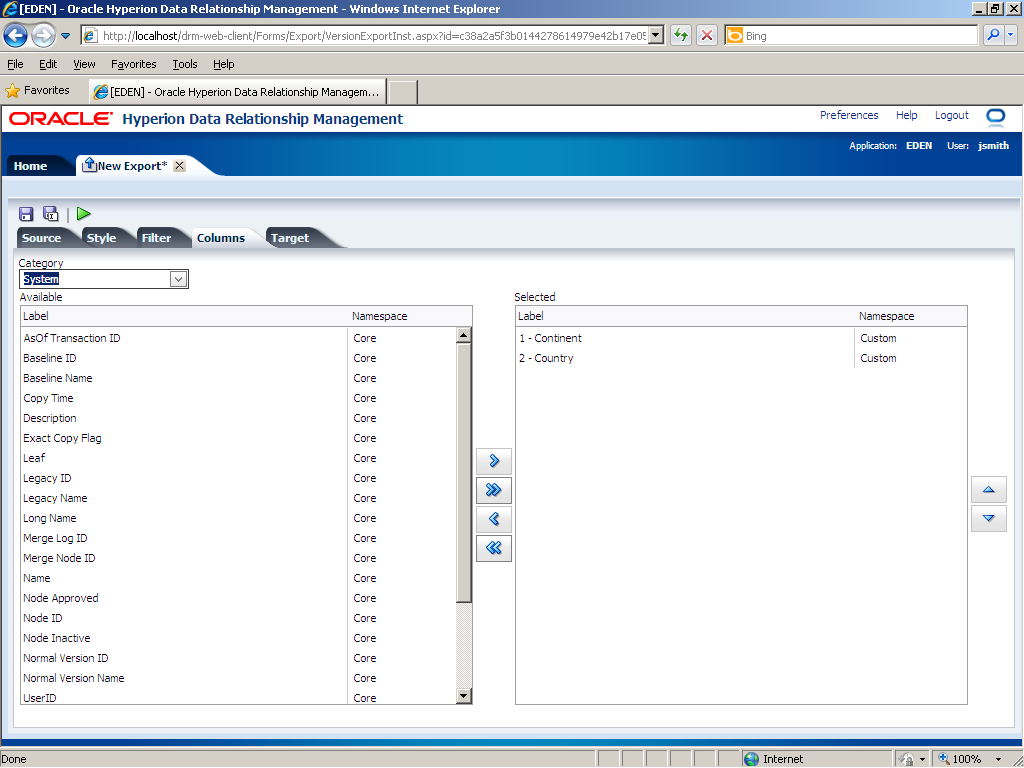
In the Category drop-down list, select System.
|
. |
In the Available list, click Name.
|
. |
Click the Select (
The Name property is displayed in the Selected list.
|
. |
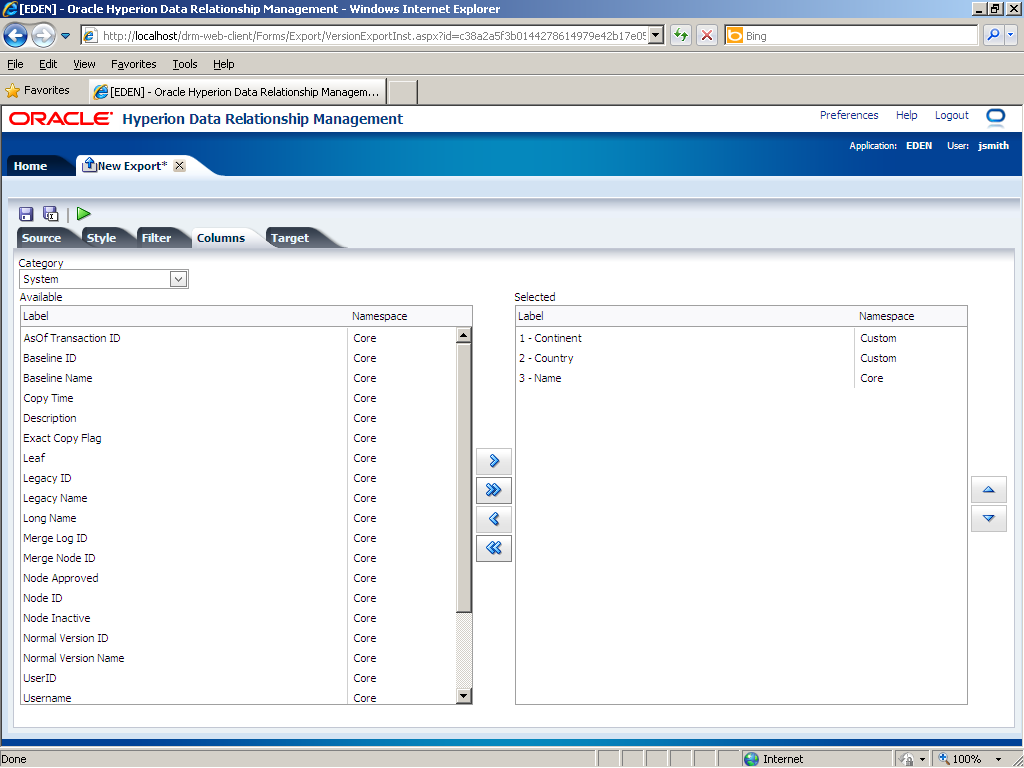
In the Available list, click Description.
|
. |
Click the Select (
The Description property is displayed in the Selected list.
|
. |
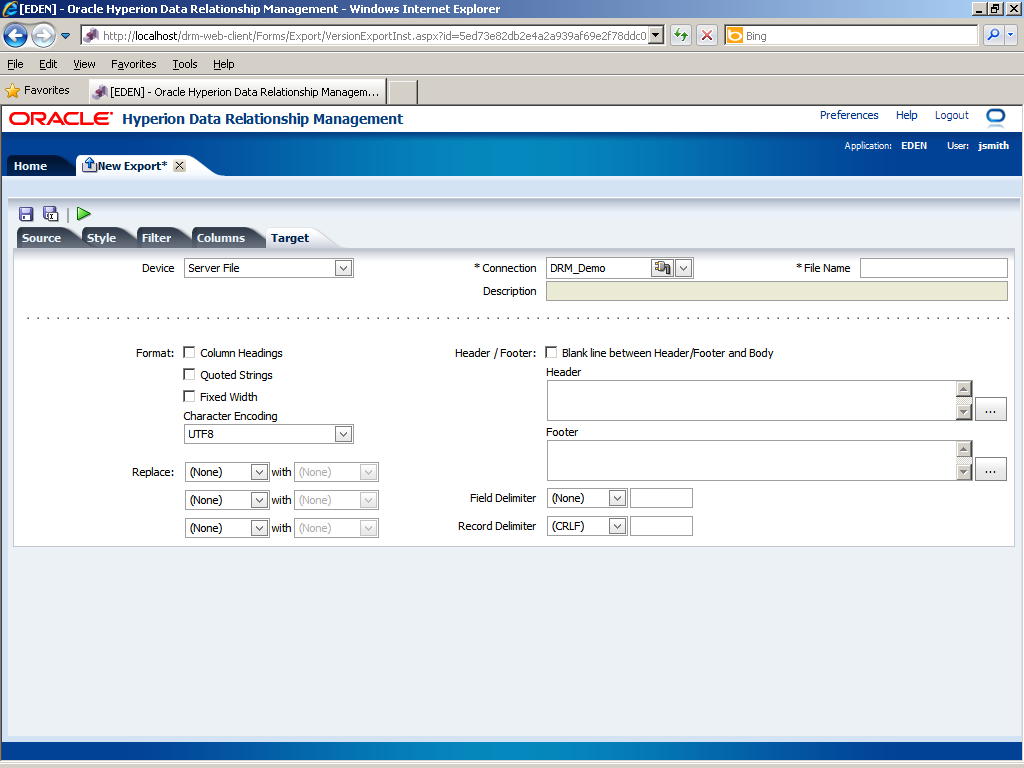
Click the Target tab.
Use the Target tab to configure where the data is to be exported and the format of the exported results.
|
. |
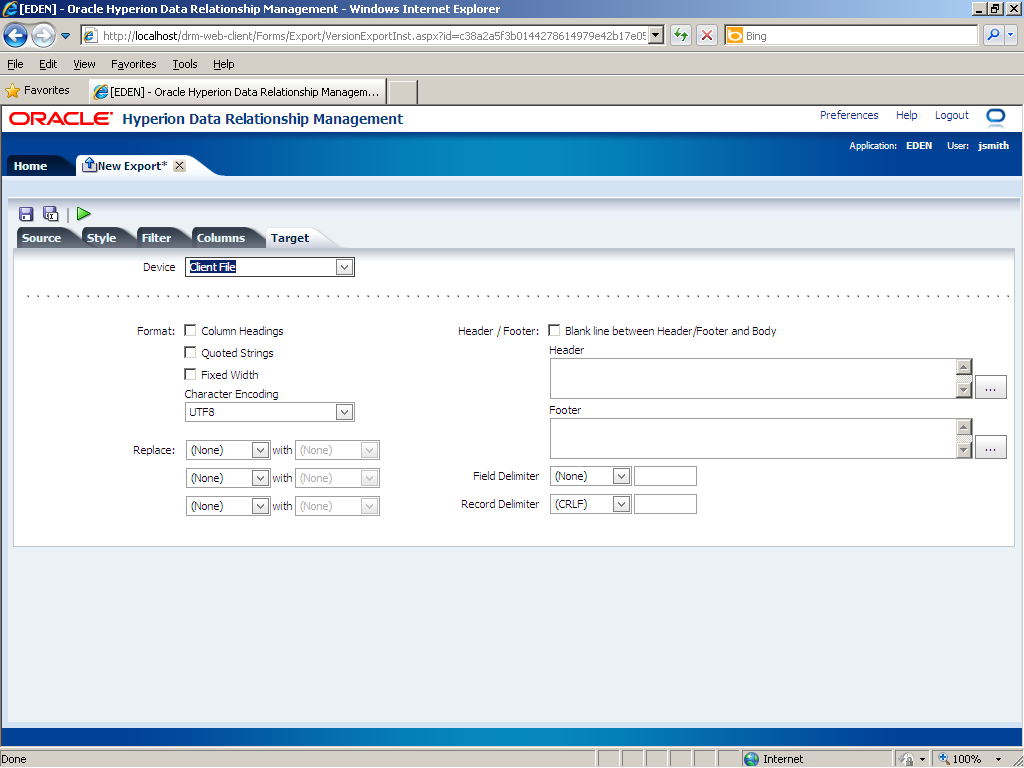
In the Device drop-down list, select Client File to export data to a client file.
|
. |
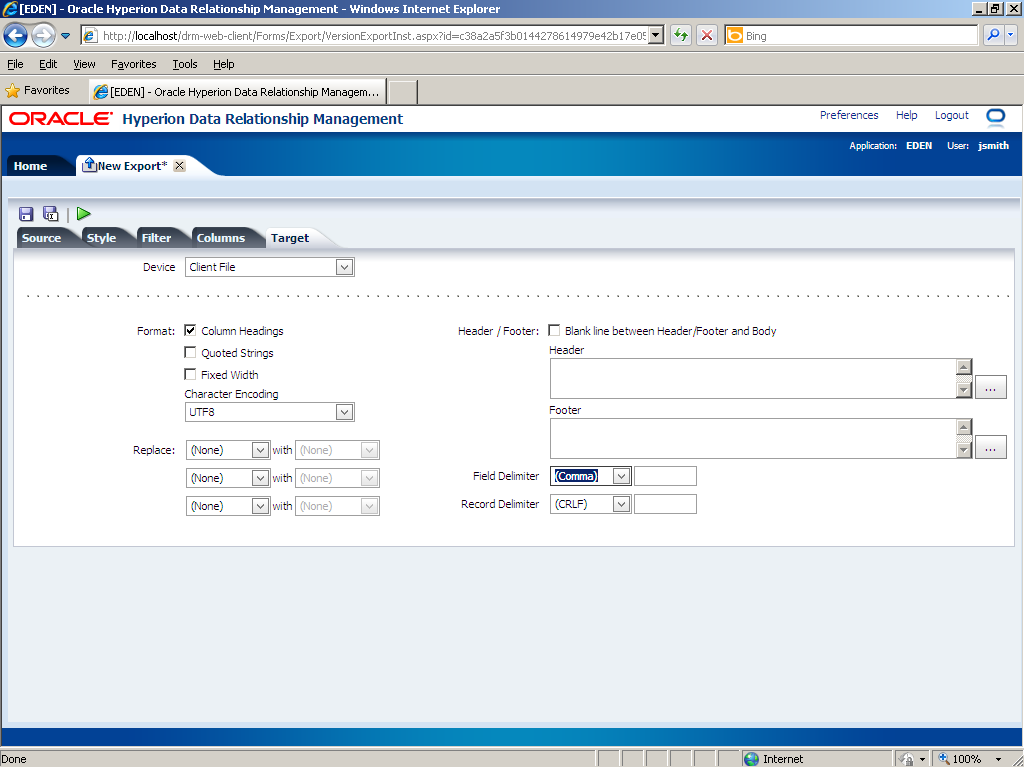
Perform the following actions:
|
. |
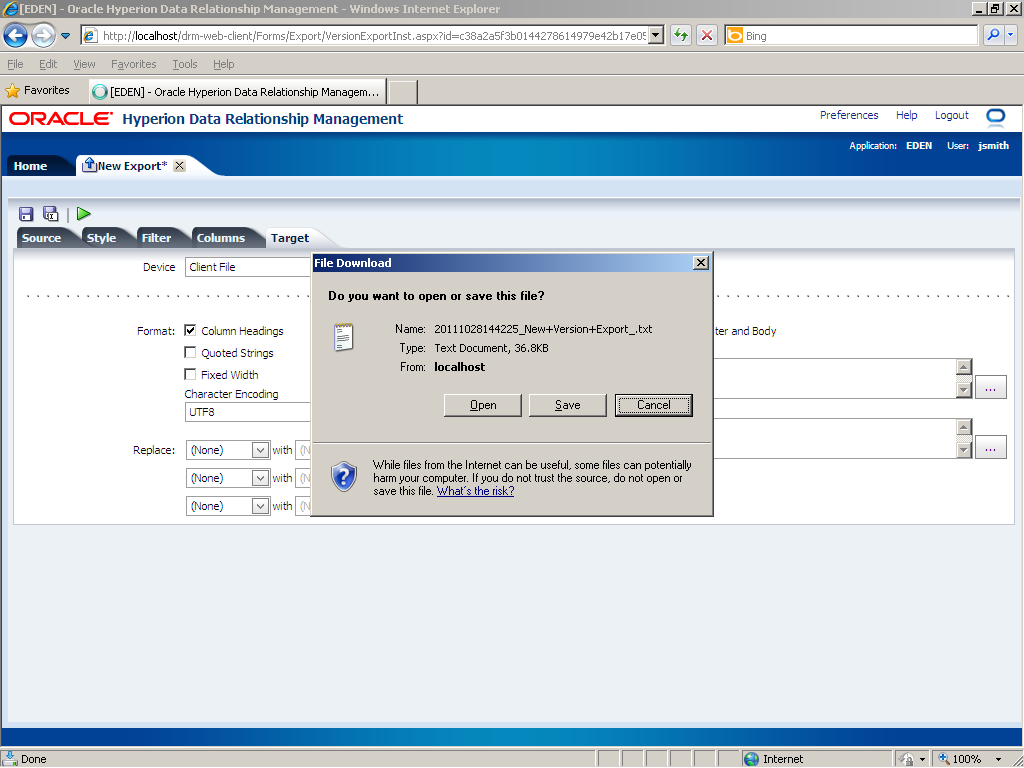
Click the Run (
The File Download dialog box is displayed. Use the File Download dialog box to open or save the export results. You can also cancel the export, if necessary.
|
. |
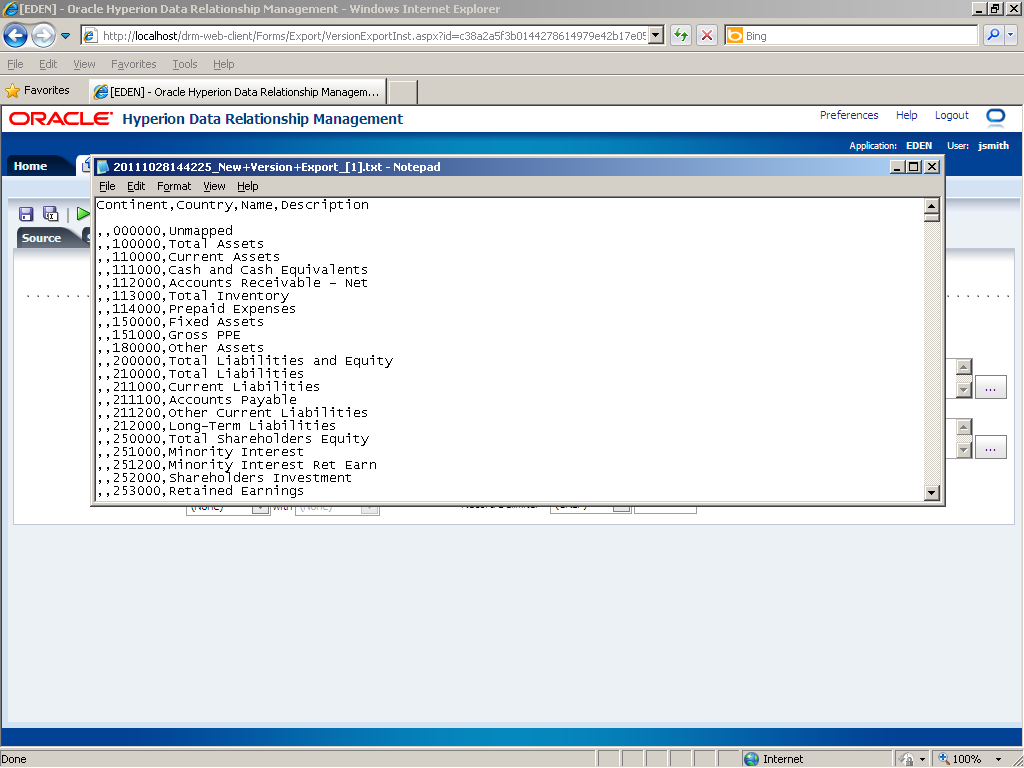
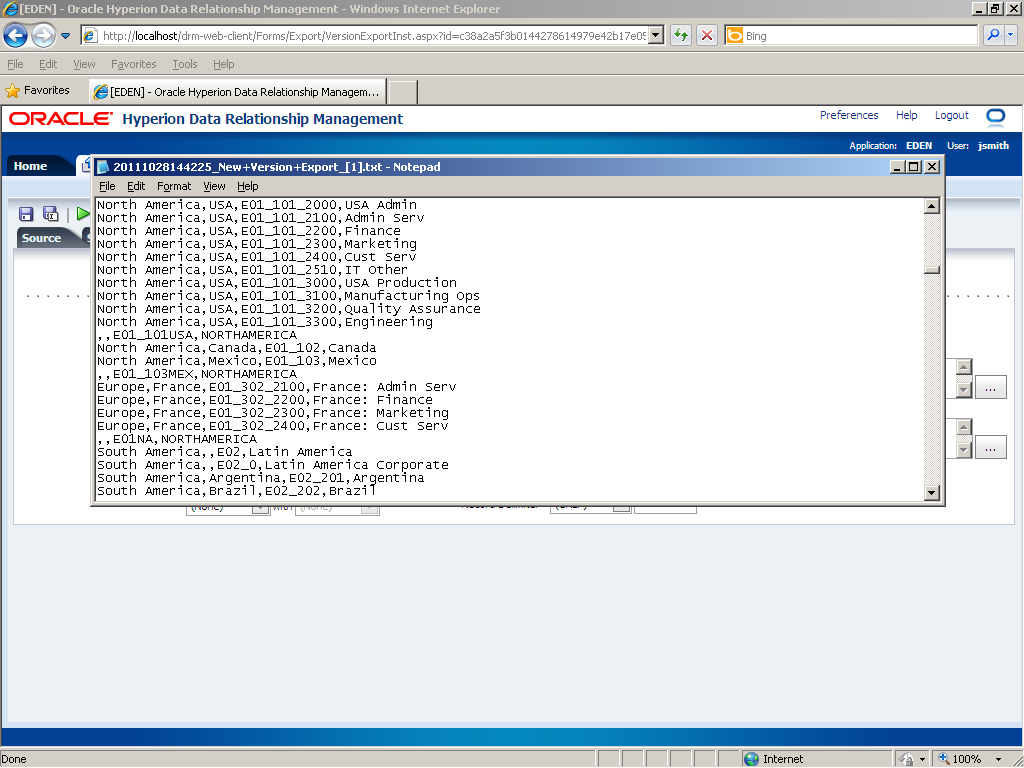
Click Open.
The export results are displayed in Notepad. The following leaf node properties are outputted under the columns titled Continent, Country, Name, and Description.
|
. |
Scroll down to view additional rows that have all values in all columns.
|

 ) button.
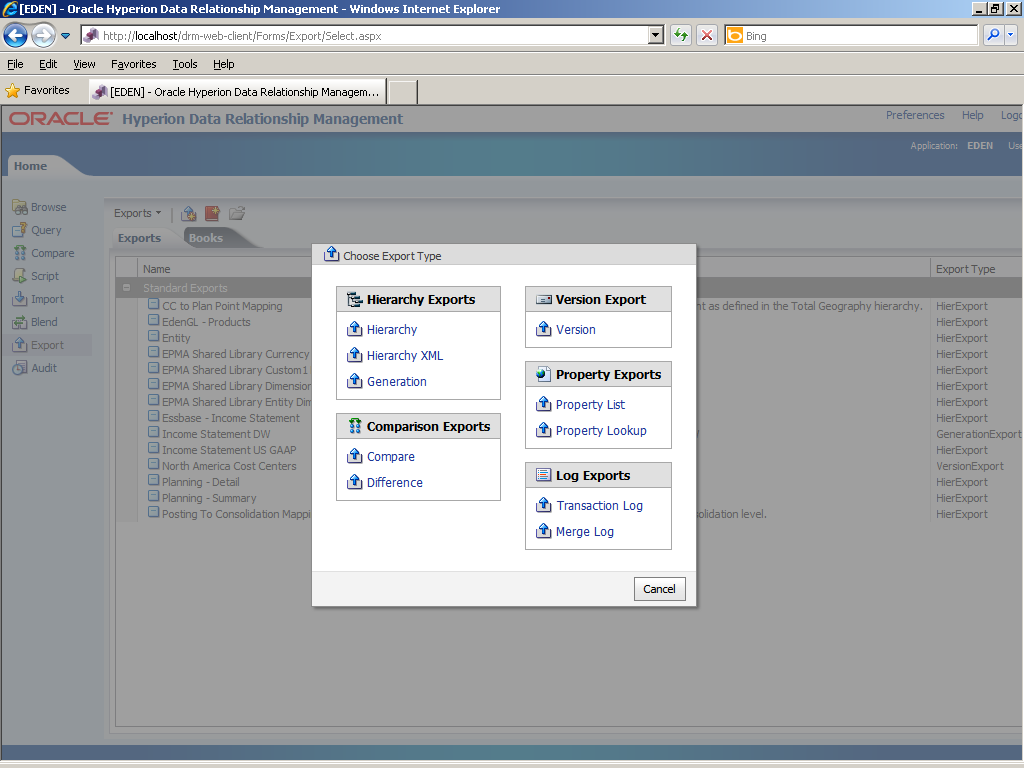
 ) button.
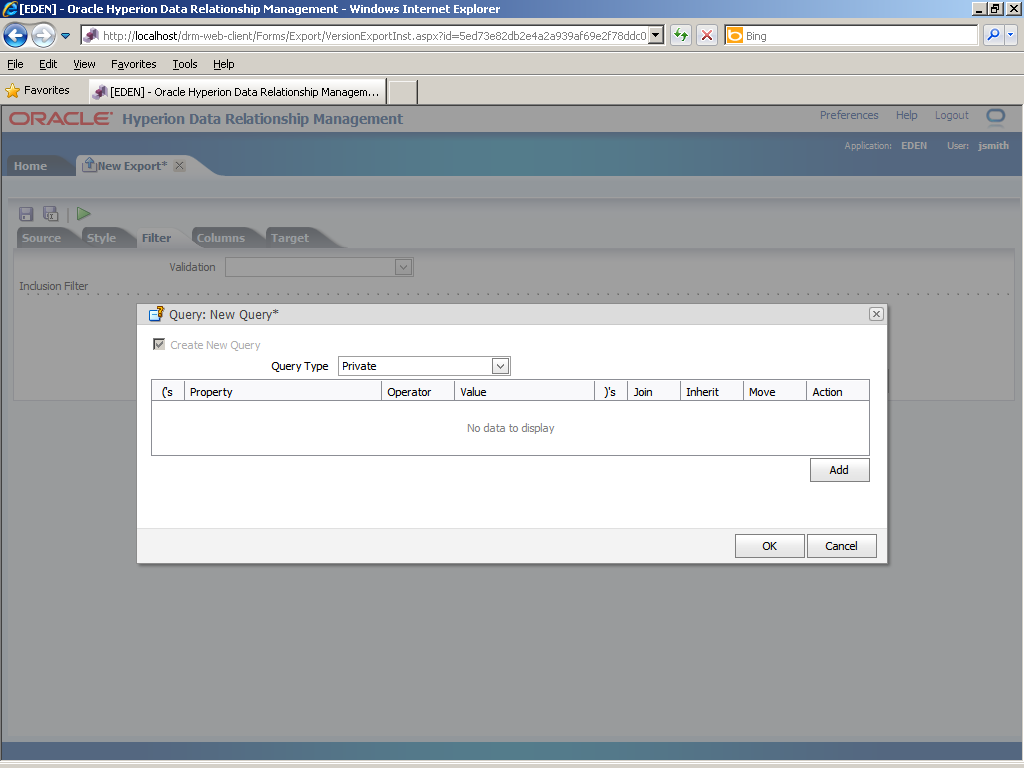

 ) button.
 ) button.
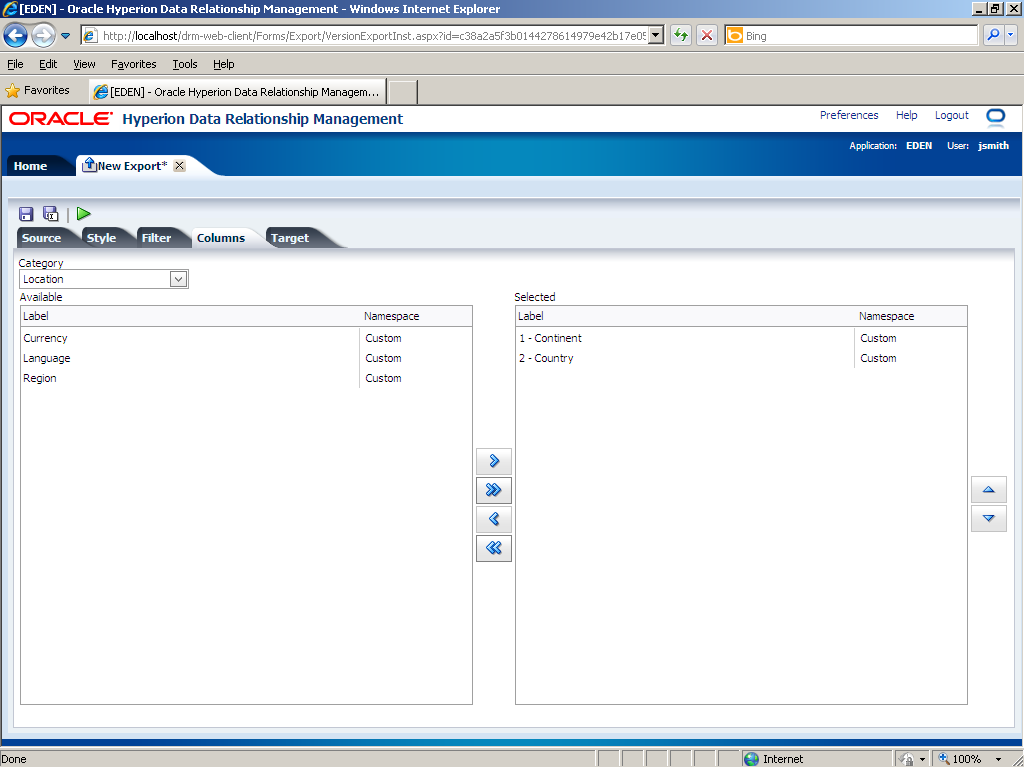

Summary
In this tutorial, you have learned how to export nodes in generation format.
Resources
- Oracle EPM System, Fusion Edition 11.1.2.1 Documentation Library
- To learn more about Data Relationship Management, refer to additional OBEs in the OLL Web site
![]()