Deploying and Configuring Data Relationship Management Web Service API
Purpose
This tutorial covers steps to deploy and configure Data Relationship Management Web Service API.
Time to Complete
Approximately 30 min.
Overview
The Data Relationship Management Web Service Application Programming Interface (API) is the public interface for remotely interacting with the Data Relationship Management Server. This SOAP-based web service can be used for product integration or to develop custom Data Relationship Management applications or clients. The Data Relationship Management Web Service is implemented in Java and is deployed to the Oracle WebLogic Application Server as a J2EE Web Application. The Web Service communicates with the Data Relationship Management Server via the API Adapter. The DRM Web Service depends on the Oracle Web Services Manager (OWSM) for policy management and security of service infrastructure.
In this tutorial, you install and configure Oracle Web Service Manager. You also deploy and configure a security policy for DRM Web Service and test the DRM Web API adapter in Enterprise Manager.
Software and Hardware Requirements
The following is a list of software requirements:
- Oracle Database 11g 11.1.0.7.0
- Oracle Identity Management 11g (11.1.1.4.0)
- Oracle Hyperion Foundation Services 11.1.2.1.0
- Oracle Hyperion Data Relationship Management, Fusion Edition 11.1.2.1.0
Prerequisites
Before starting this tutorial, you should:
. |
Have access to or have installed Oracle Hyperion Enterprise Performance Management 11.1.2.1.0 and Oracle Hyperion Data Relationship Management, Fusion Edition 11.1.2.1.0. |
|---|---|
. |
Have access to edelivery.oracle.com for software download. |
Installing Metadata Services Schema for Oracle Web Services Manager
DRM Web Service uses Oracle Web Services Manager (OWSM) to secure the web-service, so OWSM must be deployed on the same Weblogic Server and domain where the DRM Web Service is deployed. For this illustration, the DRM Web Service will be deployed to the EPMSystem domain created when Oracle Hyperion Foundation Services was installed.
Oracle Web Services Manager requires a repository database in order to function; therefore, you must install the Metadata Services Schema for this database repository using Oracle Fusion Middleware Repository Creation Utility 11g (RCU).
Note: It is assumed that RCU has been previously downloaded from edelivery.oracle.com and installed into the C:\Software\RCU directory.
. |
Run RCU from the command line: C:\Software\RCU\rcuHome\BIN\rcu.bat
|
|---|---|
. |
Click Next.
|
. |
Select Create and click Next. In the Database Connection Details page, specify database connection details including host name, port number, service name, username, and password.
|
. |
Click Next. The utility performs prerequisites check and displays the results in the Checking Prerequisites dialog box.
Click OK to close the dialog box.
|
. |
In the Select Components page, expand AS Common Schemas and select Metadata Services.
|
. |
Click Next. The utility performs prerequisites check. Click OK to close the Checking Prerequisites dialog box.
|
. |
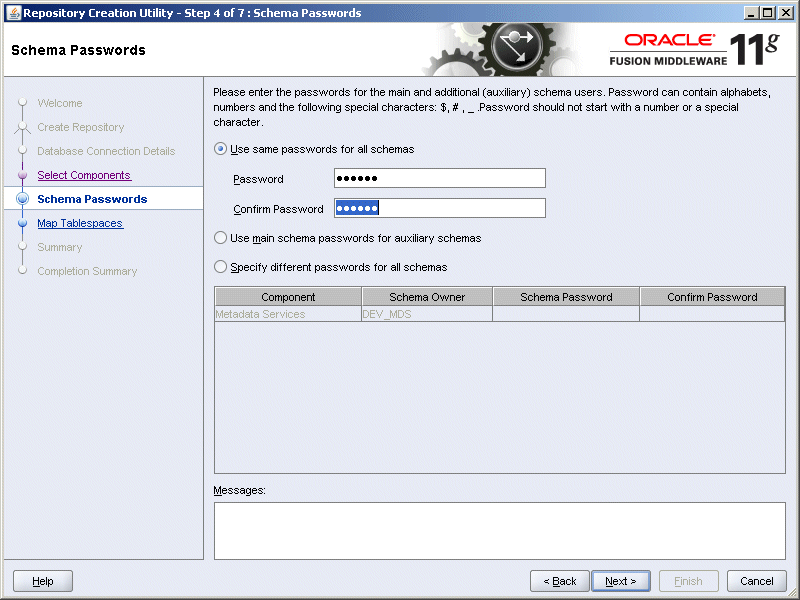
In the Schema Passwords page, leave Use same passwords for all schemas selected and set the password to oracle.
|
. |
Click Next.
|
. |
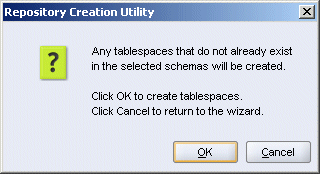
In the Map Tablespaces page, click Next. The utility displays a warning dialog box with the following message: Any tablespaces that do not already exist in the selected schemas will be created. Click OK to create tablespaces.
The utility validates and creates tablespaces and displays a confirmation dialog box. Click OK.
|
. |
In the Summary page, verify the operations about to be performed based on your selections from the previous steps and click Create.
|
. |
In the Completion Summary page, verify that the operations have been completed successfully and click Close.
|
Configuring Oracle Web Services Manager
You configure Oracle Web Services Manager by running the Oracle Fusion Middleware Configuration Wizard to configure a WebLogic domain, and select the products that you want to configure in that domain.
Note: EPM System and Oracle Web Services Manager must be deployed to the same domain. The choice you make for the domain depends on your deployment scenario:
- In a new deployment, where you have not yet configured any EPM System products, create a new WebLogic domain.
- In an existing deployment, where you have already configured some EPM System products (which you have in this example) and now want to extend the deployment to include the Data Relationship Management Web service, you must extend the existing WebLogic domain created during EPM System deployment.
. |
Start the WebLogic Configuration Wizard. From Windows toolbar, select Start > Programs > Oracle WebLogic > Weblogic Server 11g1 > Tools > Configuration Wizard.
|
|---|---|
. |
Select Extend an existing WebLogic domain and click Next.
|
. |
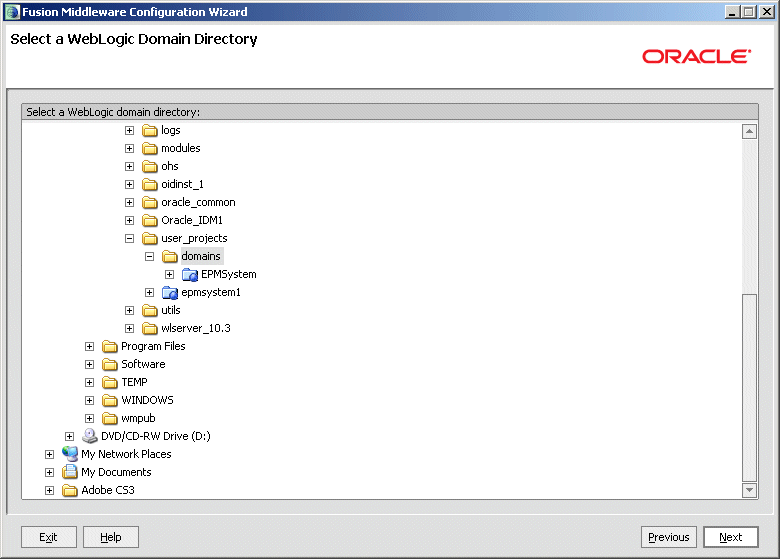
In the Select the WebLogic Domain Directory page, select the directory that was created during EPM System deployment: C:\Oracle\Middleware\user_projects\domains\EPMSystem and click Next.
|
. |
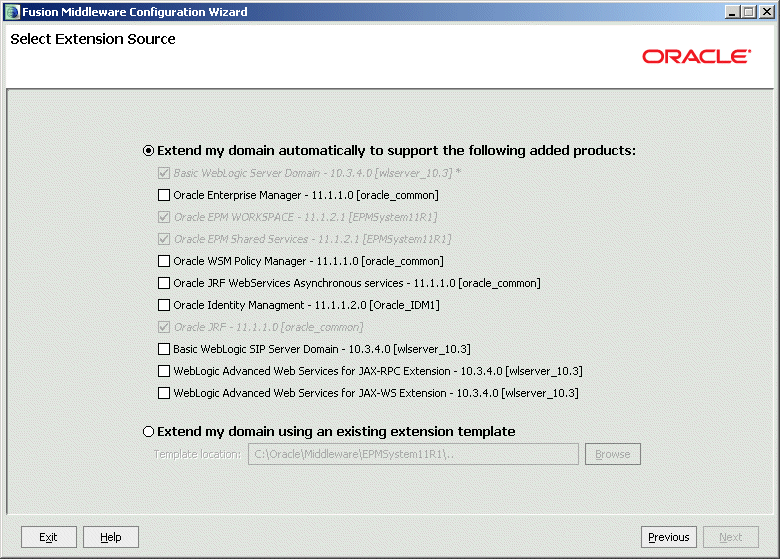
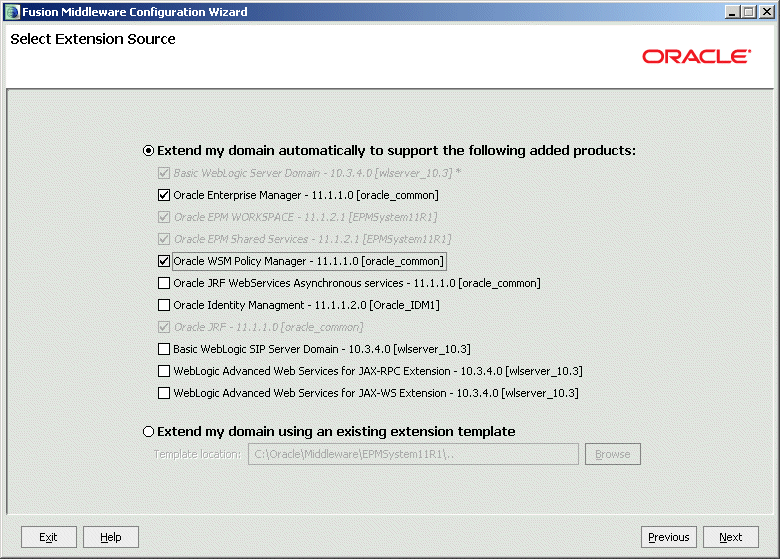
In the Select Extension Source page, select Oracle Enterprise Manager -11.1.1.0 [oracle_common], Oracle WSM Policy Manager – 11.1.1.0 [oracle_common], and Oracle JRF – 11.1.1.0 [oracle_common]. Note: In this example, Oracle JRF was extended into the domain earlier on.
Click Next
|
. |
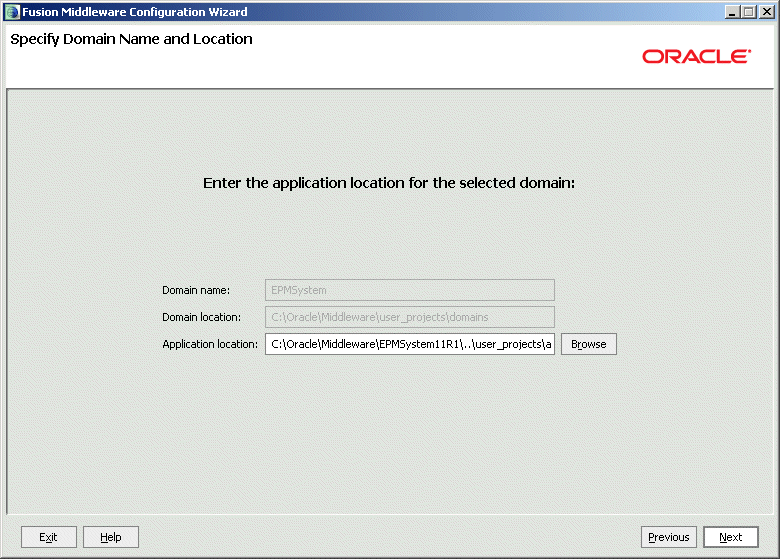
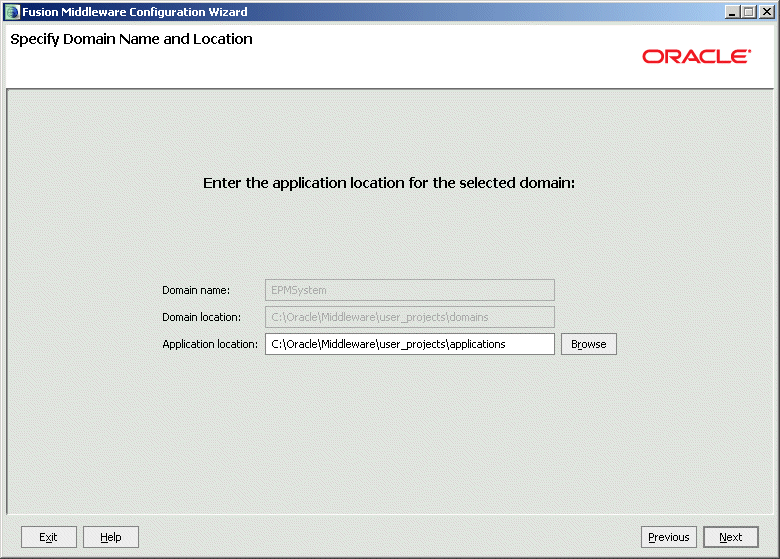
In the Specify Domain Name and Location page, specify location for WebLogic applications (for example, C:\Oracle\Middleware\user_projects\applications).
Click Next
|
. |
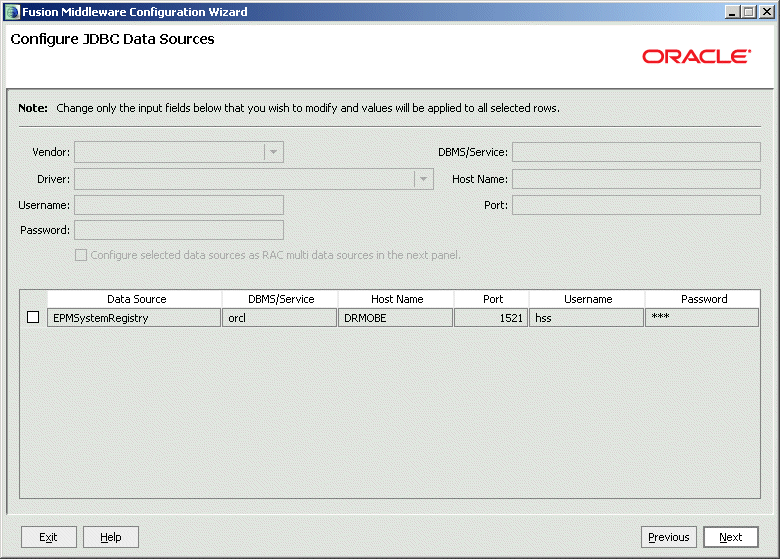
In the Configure JDBC Data Sources page, click Next.
|
. |
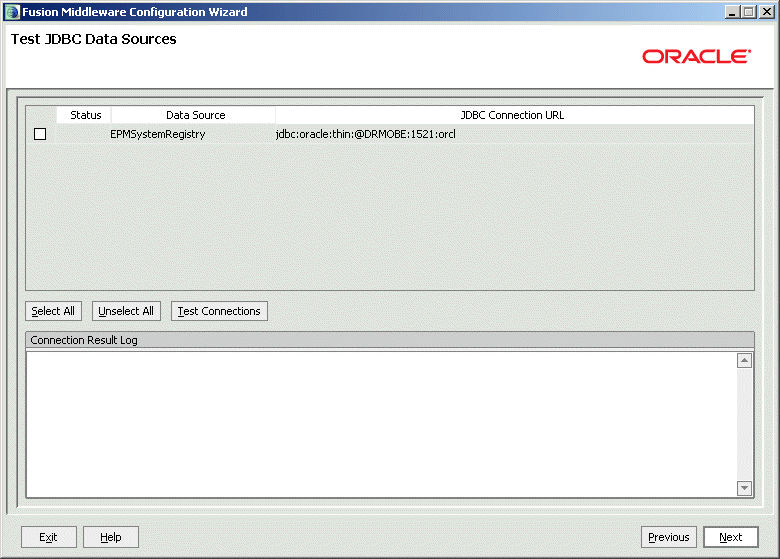
In the Test JDBC Data Sources page, click Next.
|
. |
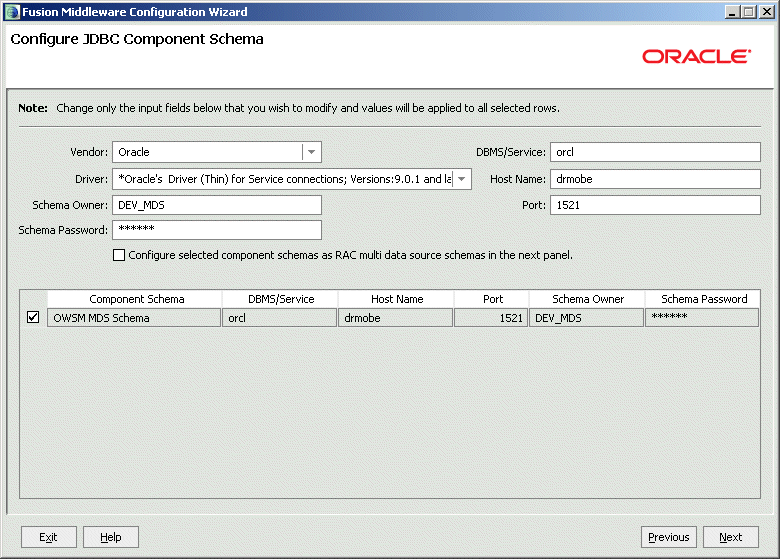
In the Configure JDBC Component Schema page, perform the following actions:
Click Next
|
. |
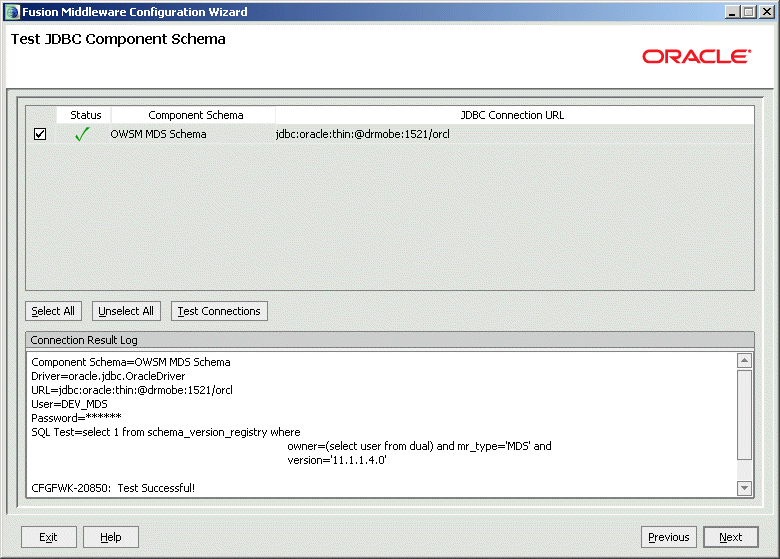
In the Test JDBC Component Schema, verify that the test was successful and click Next.
|
. |
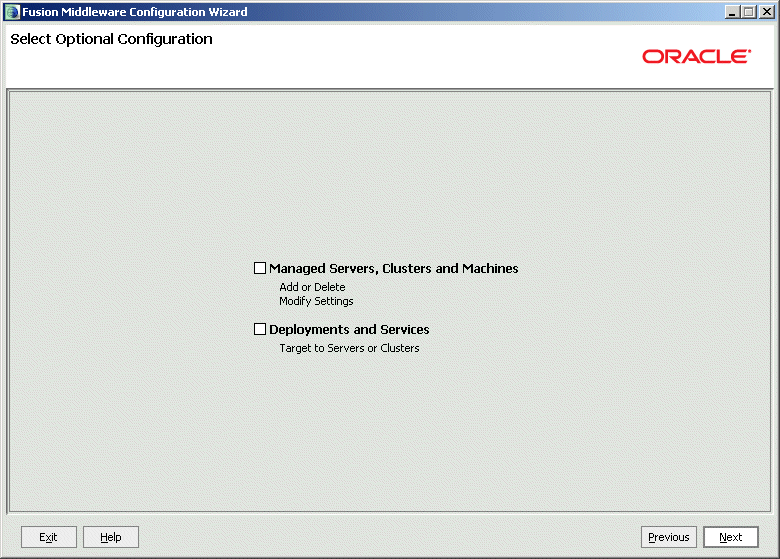
In the Select Optional Configurations page, click Next.
|
. |
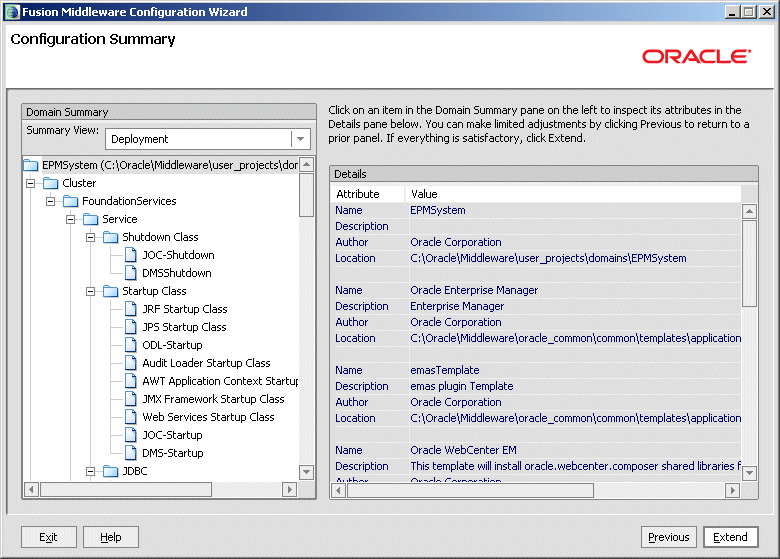
In the Configuration Summary page, click Extend. The Wizard performs configuration and displays the progress.
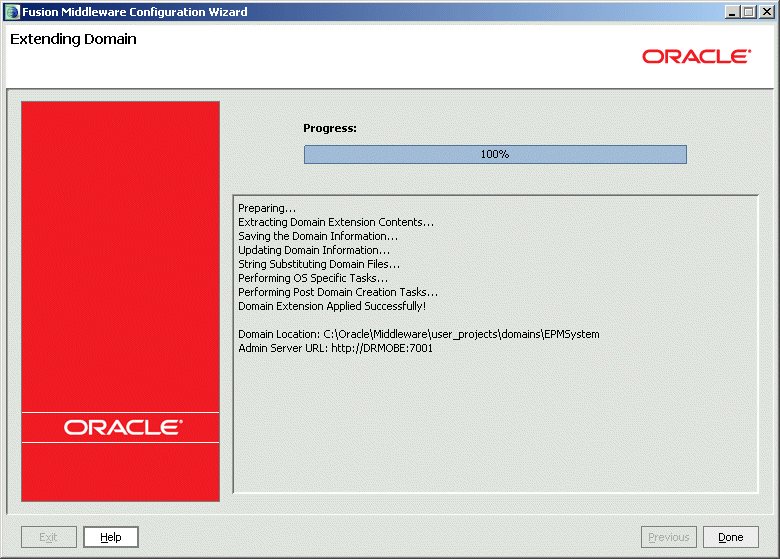
Ensure that Domain Extension Applied Successfully! is stated, and then click Done. |
Configure WebLogic to use Oracle Internet Directory
In this topic you configure WebLogic server to use the same Oracle Internet Directory (OID) instance for EPMSystem domain.
. |
Launch and log on to WebLogic Server Administration Console as administrator (for example, epm_admin/Welcome!).
|
|---|---|
. |
Select Security Realms.
|
. |
In the Realms table, select myrealm.
|
. |
Select the Providers tab.
|
. |
Click the Lock & Edit button.
|
. |
Click DefaultAuthenticator.
|
. |
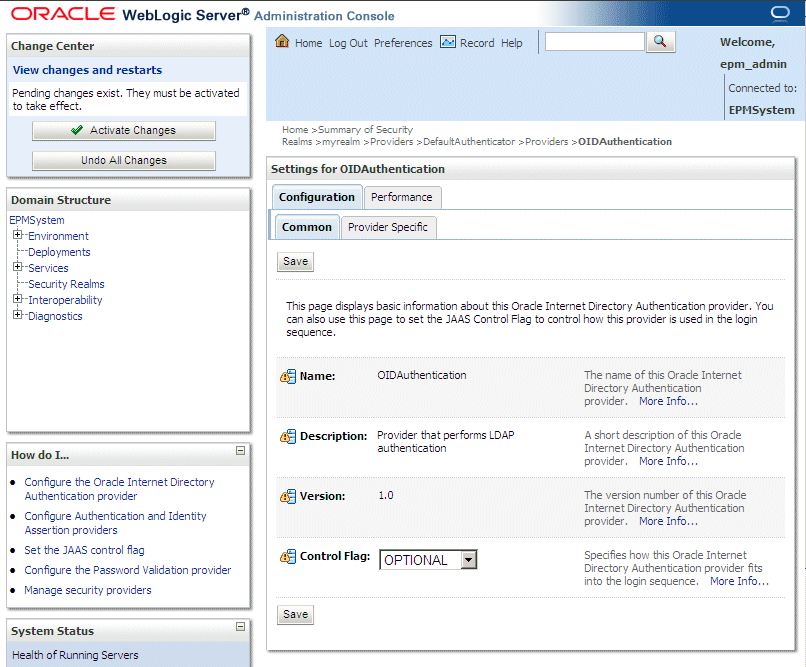
In the Control Flag drop-down list, select SUFFICIENT and click Save.
|
. |
In the navigation path, click Providers to return to the providers list for myrealm.
|
. |
Click New to add another authentication provider.
|
. |
In the Create a New Authentication Provider page, perform the following actions:
Click OK.
|
. |
In the Authentication Providers table, click OIDAuthentication.
|
. |
Select the Provider Specific tab. In the Connection section, perform the following actions:
In the Users section, enter user base DN (for example, cn=Users,dc=us,dc=oracle,dc=com) for the User Base DN field and leave the rest of the section defaults as is.
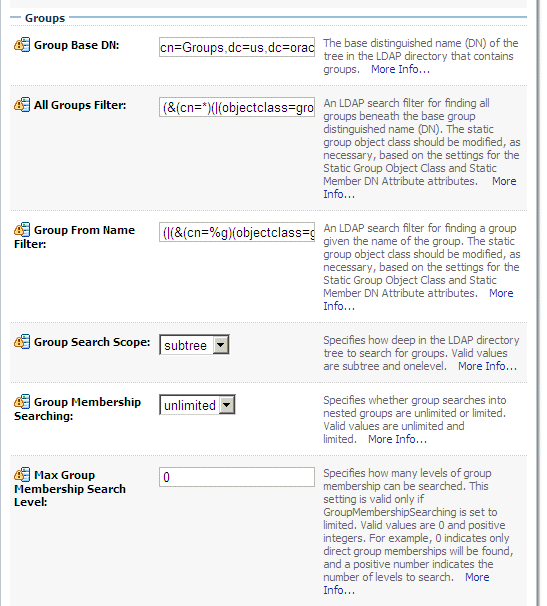
In the Groups section, enter user base DN (for example, cn=Groups,dc=us,dc=oracle,dc=com) for the Group Base DN field and leave the rest of the section defaults as is.
Click Save.
|
. |
Click the Activate Changes button.
|
. |
Log out WebLogic Server Administration Console and restart WebLogic Administration Server.
|
. |
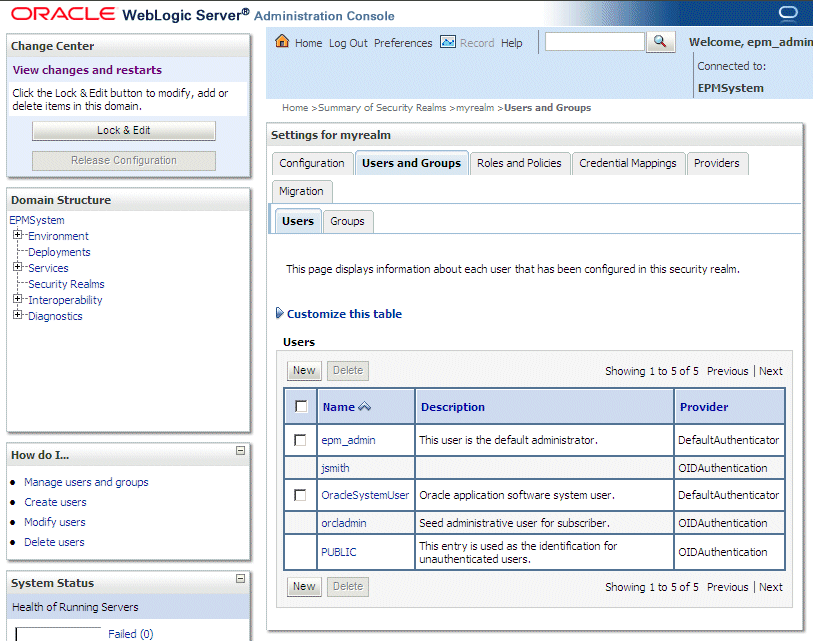
Log in to WebLogic Server Administration Console as administrator (for example, epm_admin/Welcome!) and verify that OID users are listed for myrealm (for example, jsmith and orcladmin).
|
Configuring the API Adapter Host
The API Adapter must be configured using the Data Relationship Management Configuration Console. When you configure a Data Relationship Management application, you set up API Adapter Hosts on the Host Machines tab.
. |
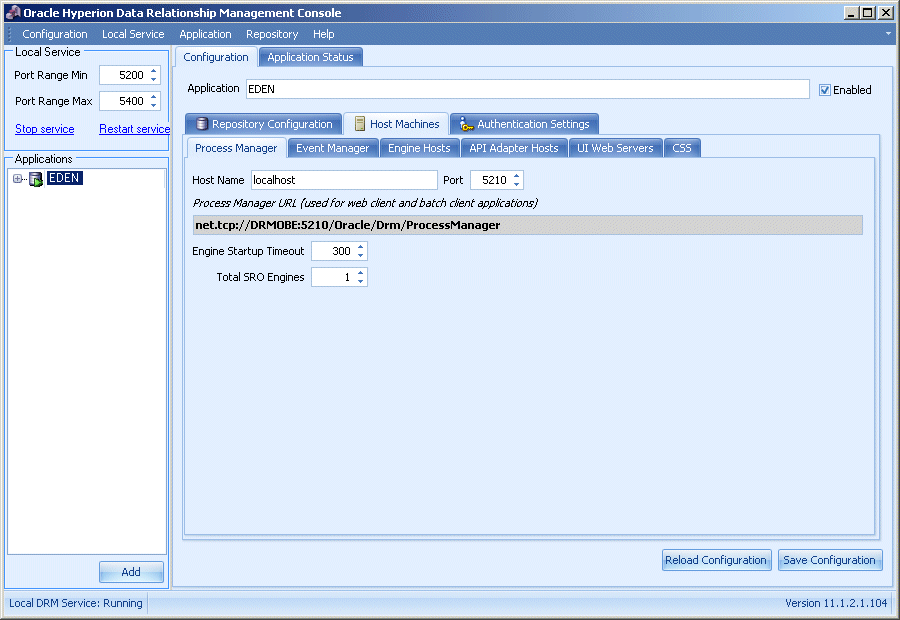
Launch Data Relationship Management Console and select the Host Machines tab.
|
|---|---|
. |
Select the API Adapter Hosts tab.
|
. |
At the bottom, click + (Append).
|
. |
In the Host Name field, enter drmobe, accept the default value 5240 for the Port field, leave the Cert Name field blank, and click Save Configuration. Note: The default port 5240 is only valid as the selection for this step if this is the first DRM application that is using an API adapter.
|
Deploying the DRM Web Service
In this topic, you deploy the oracle-epm-drm-webservices.ear file to the EPMSystem WebLogic domain. This EAR file is delivered with DRM and is dropped in the file system where DRM is installed. It can be found at this location: C:\oracle\middleware\EPMSystem11R1\products\DataRelationshipManagement\api .
. |
Start the Admin Server for the EPMSystem WebLogic domain by selecting Start>Programs>Oracle WebLogic>User Projects>EPMSystem>Start Admin Server for Weblogic Server Domain or by running the C:\oracle\middleware\user_projects\domains\EPMSystem\bin\startWebLogic.cmd script.
|
|---|---|
. |
Launch and log on to WebLogic Server Administration Console as administrator (for example, epm_admin/Welcome!).
|
. |
Click Deployments.
|
. |
Click the Lock & Edit button.
|
. |
Click Install.
|
. |
In the Locate deployment to install and prepare for deployment page, navigate to the C:\Oracle\Middleware\EPMSystem11R1\products\DataRelationshipManagement\api directory and select oracle-epm-drm-webservices.ear file.
Click Next.
|
. |
In the "Choose targeting style" page, select Install this deployment as an application.
Click Next.
|
. |
In the "Select deployment targets" page, select FoundationServices, then FoundationServices0 to deploy the EAR file to the FoundationServices0 managed server specifically. Note: Oracle recommends that you do not deploy the EAR file to the AdminServer.
Click Next.
|
. |
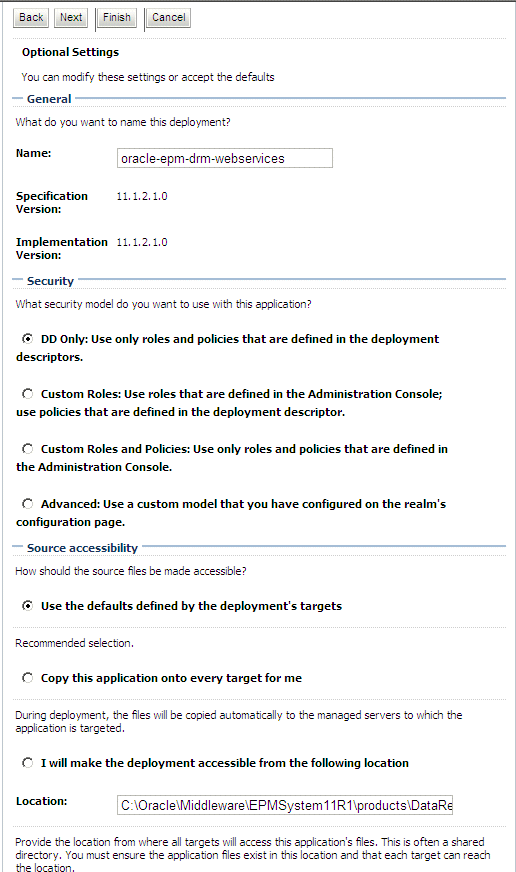
In the Optional Settings page, leave default DD Only selected as the security model (use only roles and policies that are defined in the deployment descriptors). In the Source Accessibility section, leave the Use the defaults defined by the deployment’s targets selected.
|
. |
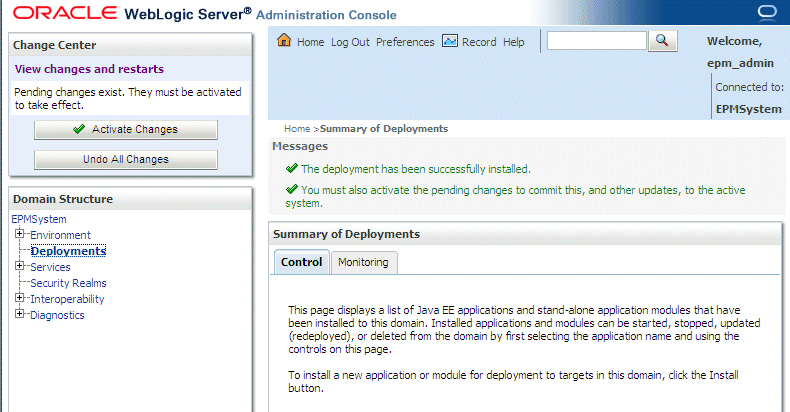
Click Finish.
|
. |
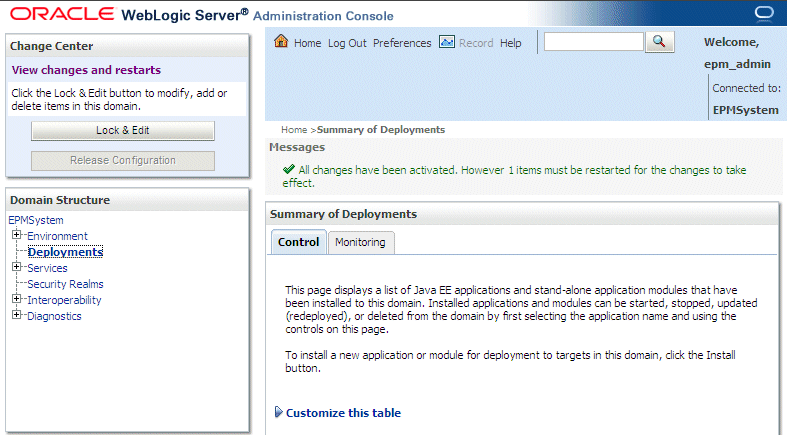
Click Activate Changes.
|
. |
In the Deployments table, browse to oracle-epm-drm-webservices, and verify that its state is Prepared.
|
. |
Select the check box for the oracle-epm-drm-webservices item, and then select Start > Servicing All Requests , and click Yes. Browse to oracle-epm-drm-webservices, and verify the state of the deployment is Active.
|
. |
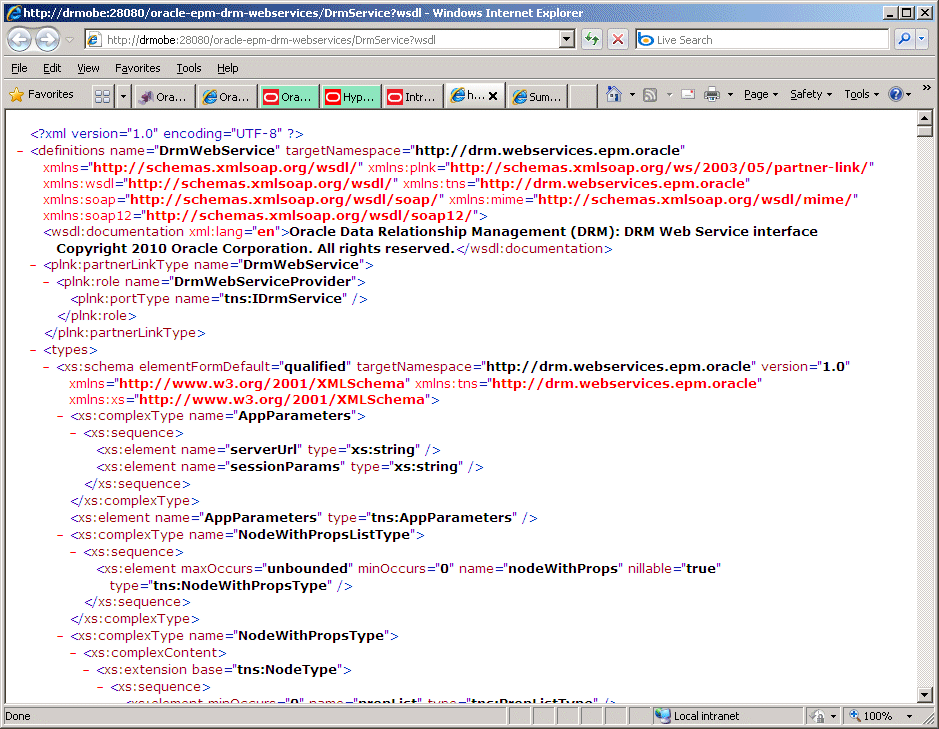
Verify that the web service was deployed successfully by accessing the Web Service Definition Language (WSDL) page using the following URL: http://drmobe:28080/oracle-epm-drm-webservices/DrmService?wsdl
|
Configuring Security Policy for the DRM Web Service
Because web services use HTTP for communication, a web service with minimal security would require the client to pass the user credentials in clear text. These credentials could be captured by programs that log HTTP activity. However, if you use a policy such as wss_username_token_service_policy, the client makes a request to WebLogic Server to get a system generated token for the user which can be passed to DRM. DRM can then validate that token with OID to verify authentication instead of requiring a username/password. In this topic, you configure security policy for the DRM Web Service in Oracle Web Services Manager.
Note: Ensure that the DRM Web Service has an Oracle Web Services Manager security policy attached that does not include message protection. A local or global policy can be attached. For example: oracle/wss_username_token_service_policy. You can have only one policy at a time attached to the DRM Web Service.
. |
Launch Oracle Enterprise Manager by entering the following URL in your browser: http://drmobe:7001/em
|
|---|---|
. |
Log on as epm_admin/Welcome!.
|
. |
In the left pane, expand WebLogic Domain.
|
. |
Right-click on the domain name EPMSystem, select Web Services > Policy Sets.
|
. |
Click Create to create a new policy set for the EPM Web Services.
|
. |
In the Enter General Information page, perform the following actions:
Click Next.
|
. |
In the Enter Resource Information, perform the following actions:
Click Next.
|
. |
In the Add Policy References page, select oracle/wss_username_token_policy from the list of available policies and click Attach.
Click Next.
|
. |
Review the Summary page.
Click Save.
|
. |
Restart the Shared Services (Hyperion Foundation Services - Managed Server) service.
|
Testing the DRM Web Service
Before testing the DRM Web Service, ensure that the DRM Web Service has an Oracle Web Services Manager security policy attached that does not include message protection. You can attach a local or global policy.
. |
In Enterprise Manager, select the domain to which the Data Relationship Management Web Service is deployed (EPMSystem), right-click, select Web Services, and then Test Web Service.
|
|---|---|
. |
In the WSDL field, enter http://drmobe:28080/oracle-epm-drm-webservices/DrmService?wsdl.
|
. |
Click Parse WSDL.
|
. |
In the Operation drop-down list, select getSysPrefs. The page is refreshed and the Request tab is displayed by default.
|
. |
Configure Security settings by expanding Security and performing the following actions in the Security section:
|
. |
Configure the input parameters by performing the following actions in the Input Arguments section:
<soap:Header> </soap:Header>
|
. |
The test was successful and the Response tab displays the response from the Web Service.
|
Summary
In this tutorial, you should have learned how to:
- Install metadata services schema for Oracle Web Services Manager
- Configure Oracle Web Services Manager
- Configure WebLogic to use Oracle Internet Directory
- Configure the API Adapter Host for Data Relationship Management
- Deploy the Data Relationship Management Web Service
- Configure security policy for the Data Relationship Management Web Service
- Test the Data Relationship Management Web Service
Resources
- Oracle EPM System, Fusion Edition 11.1.2.1 Documentation Library
- To learn more about Data Relationship Management, refer to additional OBEs in the OLL Web site
![]()


