Performing a Silent Installation and Configuration of Financial Management 11.1.2
Purpose
In this tutorial, you learn how to perform a silent installation and configuration of Oracle Hyperion Financial Management, Fusion Edition, Release 11.1.2.
Time to Complete
Approximately 1 hour.
Overview
Financial Management software is a comprehensive, Web-based Enterprise Performance Management (EPM) application. It delivers global collection, financial consolidation, reporting, and analysis in a single, highly scalable software solution. In this tutorial, you learn how to perform a silent installation and configuration of Oracle Hyperion Foundation Services and Financial Management. You also learn how to use Oracle Hyperion Enterprise Performance Management Architect, Fusion Edition, Batch Client to create and deploy a Financial Management application from a script.
Software and Hardware Requirements
The following is a list of software requirements:
- The software to install Oracle Hyperion Enterprise Performance Management System Installer, Fusion Edition, Oracle Hyperion Foundation Services, and Financial Management must be downloaded and unzipped from Oracle's e-Delivery Web site.
- A relational database for Oracle Hyperion products must be created.
Prerequisites
Before starting this tutorial, you should:
. |
Have downloaded and unzipped the installation packages for EPM System Installer, Foundation Services, and Financial Management. |
|---|---|
. |
Have created a database schema for Hyperion Shared Services and Enterprise Performance Management System products, and assigned appropriate roles or rights for the users or resources. You must use the same database schema for Shared Services and all EPM System products in a silent configuration. |
Performing a Silent Installation
To enable silent installation, record your installation settings in a response file. You can then run a silent installation from the command line, and use the installation options that you saved in the response file.
. |
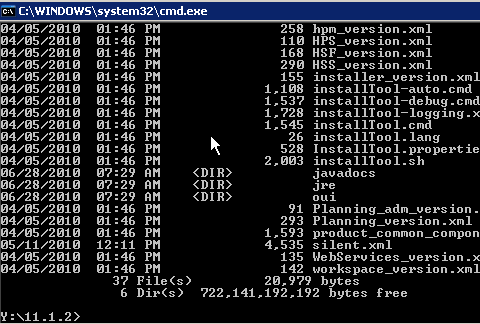
At a command prompt, navigate to the directory that contains EPM System Installer. The EPM System Installer executable is installTool.cmd.
|
|---|---|
. |
Enter installtool.cmd -record filename, where filename is the name of the response file that you want to create.
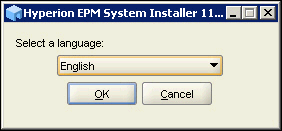
EPM System Installer is displayed.
|
. |
Select English, and click OK.
|
. |
On the Welcome panel, verify that the system prerequisites were met, and click Next.
|
. |
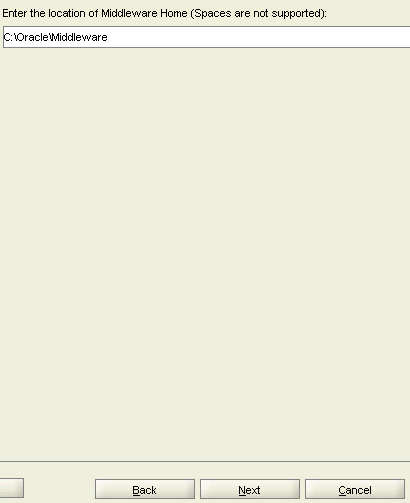
On the Destination panel, enter the name of your Middleware Home directory, and click Next.
|
. |
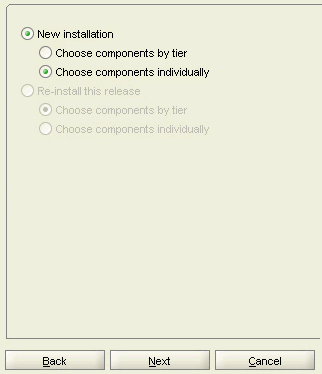
On the Installation Type panel, under New Installation, select Choose components individually, and click Next.
|
. |
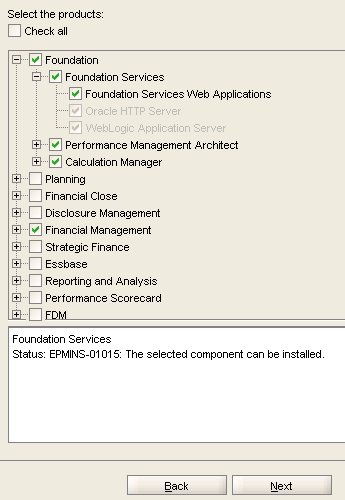
On the Product Selection panel, select the products that you want to install, and click Next. In this example, you install Foundation Services and Financial Management.
|
. |
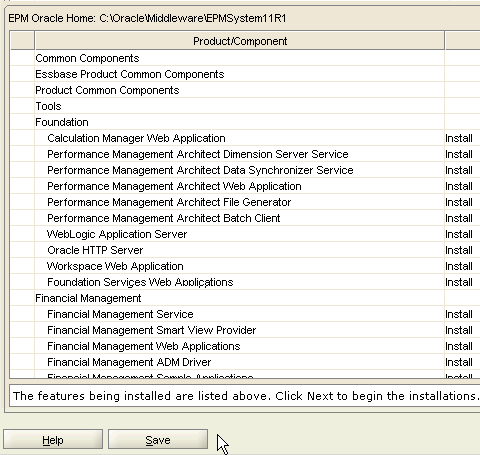
On the Summary panel, verify the products that you want to install, and click Save to record the response file without installing the products on this machine.
|
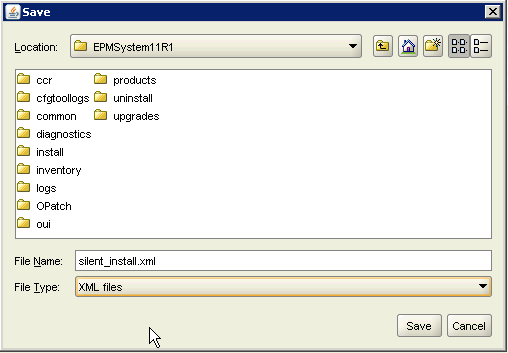
. |
Enter a name for the response file, and click Save.
The response file is recorded.
|
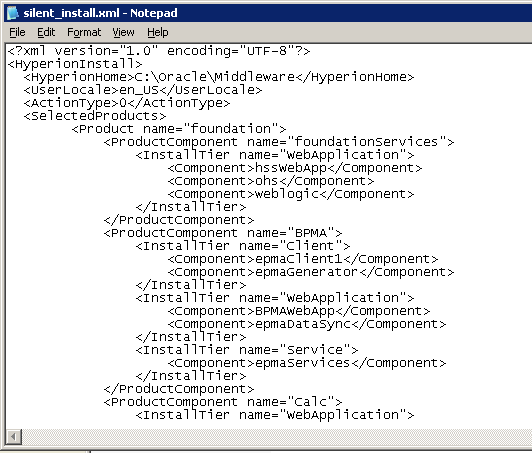
. |
Navigate to the location of the saved installation response file, and open it in a text editor.
|
. |
Perform the following installation steps:
The system installs the components that you recorded in the response file, and returns to a command prompt when the installation is completed.
|
. |
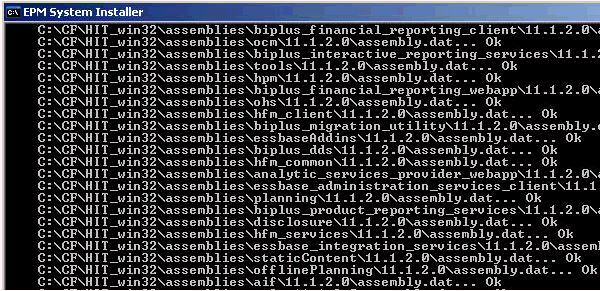
Verify that the installation was completed successfully.
|


Performing a Silent Configuration
Silent configurations automate the configuration process so that you can configure EPM System products on multiple machines without manually specifying configuration settings on each machine.
To enable silent configurations, record your configuration settings in a response file. You can then run a silent configuration from the command line, and use the configuration options that you saved in the response file.
. |
At a command prompt, navigate to the directory that contains EPM System Configurator. By default, the directory is EPM_ORACLE_HOME/common/config/11.1.2.0.
|
|---|---|
. |
Enter configtool.bat -record filename, where filename is the name of the response file that you want to create.
EPM System Configurator is displayed.
|
. |
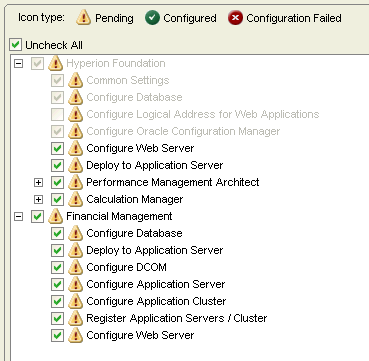
On the Task Selection panel, select the products and tasks to configure for this machine. In this example, you configure Hyperion Foundation and Financial Management.
|
. |
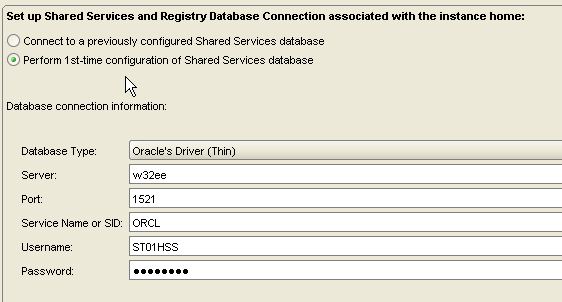
On the Shared Services and Registry Database panel, perform the following actions:
|
. |
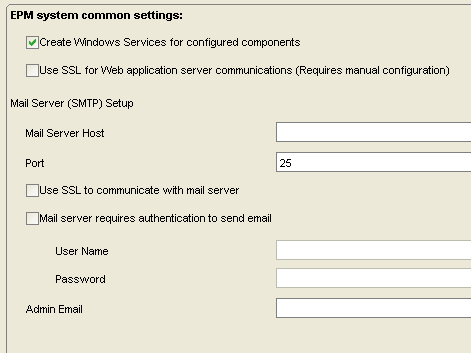
On the common settings panel, specify the common system settings for all products or accept the default values, and click Next.
|
. |
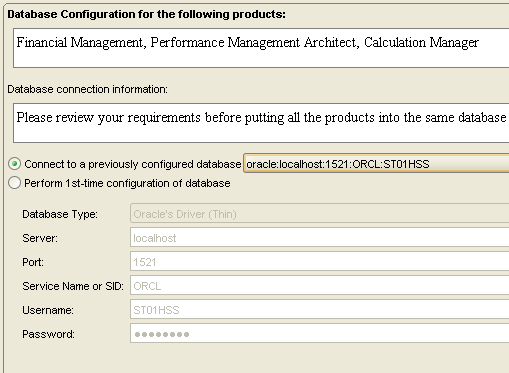
On the Database Configuration panel, perform the following actions:.
|
. |
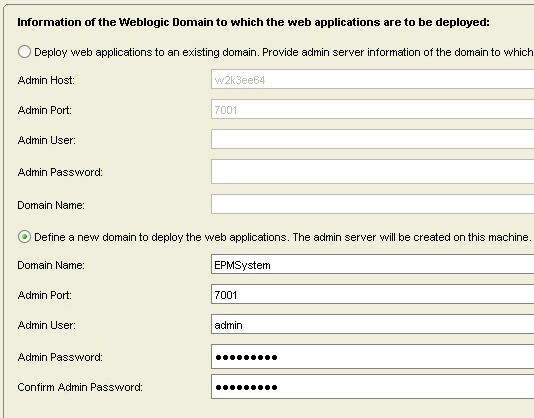
On the Weblogic Domain panel, perform the following actions:.
.
|
. |
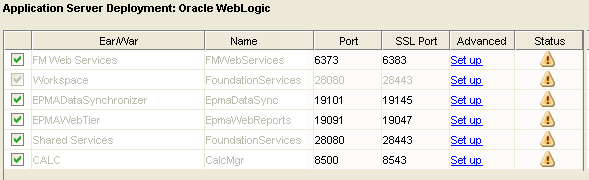
On the Application Server Deployment panel, review the components to be deployed, and click Next.
|
. |
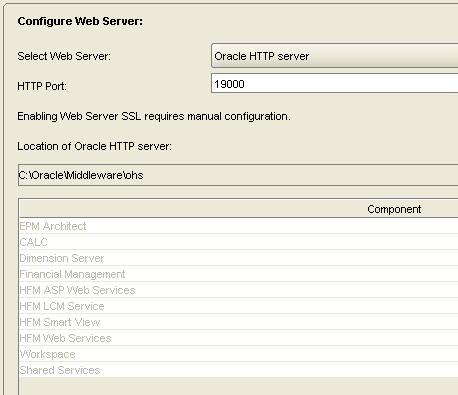
On the Configure Web Server panel, review the information for the Oracle HTTP Web server, and click Next.
|
. |
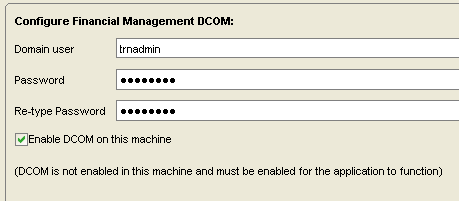
On the Financial Management DCOM panel, specify the Distributed Component Object Model (DCOM) account information to configure DCOM security, and click Next. You must specify the Windows administrator under whose identity the application server processes are launched. All Financial Management application server processes are run under the specified Windows administrator, so no other administrator is required to log on to the application server to start the application server processes.
|
. |
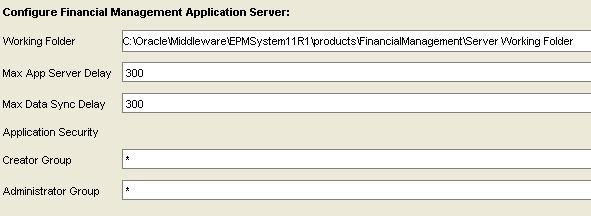
On the Financial Management Application Server panel, specify the application server information or accept the default values, and click Next.
|
. |
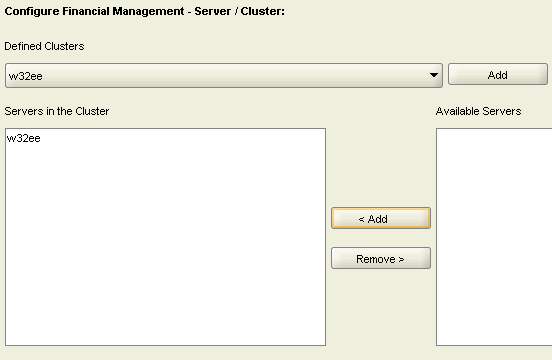
On the Financial Management Server/Cluster configuration panel, specify the application cluster and the names of the servers that participate in the cluster, and click Next. An application server cluster is a set of application servers that run the same application. Clustered application servers provide load balancing and failover capability and enable the servers to be transparently maintained while applications remain available for users.
|
. |
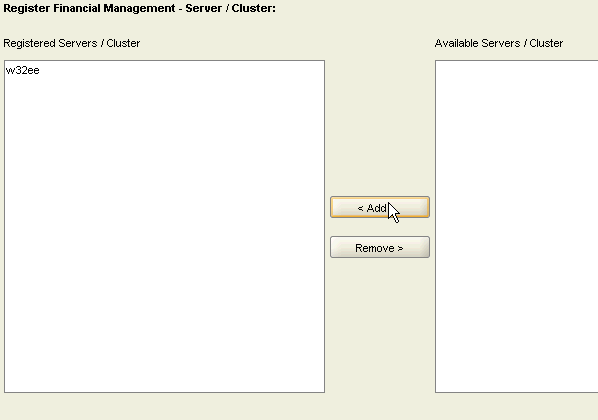
On the Financial Management Server/Cluster registration panel, perform the following actions:
|
. |
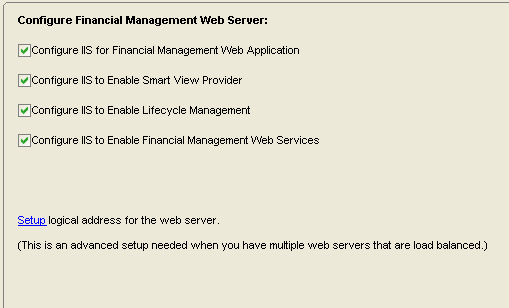
On the Financial Management Web Server configuration panel, specify the components that you want to enable as Web applications in IIS or accept the default values, and click Next.
|
. |
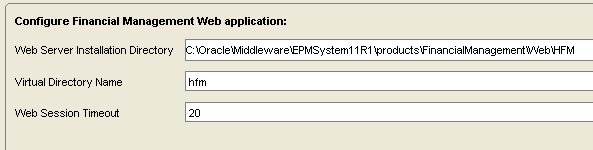
On the Financial Management Web application panel, specify the components for the Financial Management Web application or accept the default values, and click Next.
|
. |
On the Financial Management Smart View provider panel, specify the components for the Smart View Web application or accept the default values, and click Next.
|
. |
On the Financial Management Life Cycle Management panel, specify the components for the Lifecycle Management Web application or accept the default values, and click Next.
|
. |
On the Financial Management Web Services panel, specify the components for the Financial Management Web services or accept the default values, and click Next.
|
. |
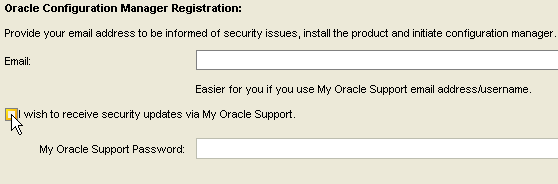
On the Oracle Configuration Manager Registration panel, clear the "I wish to receive security updates via My Oracle Support" checkbox, and click Next. Note: In a production environment, Oracle recommends that you specify the contact information to use for notifications from My Oracle Support and Oracle Configuration Manager.
|
. |
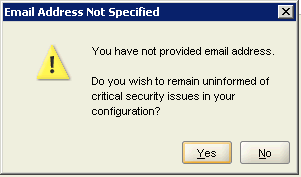
In the Email Address Not Specified window, click Yes.
|
. |
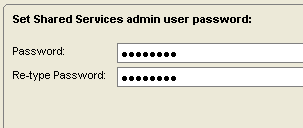
On the Set Shared Services admin user password panel, enter a password for the Shared Services admin user, and click Next. In this tutorial, you enter hyperion.
|
. |
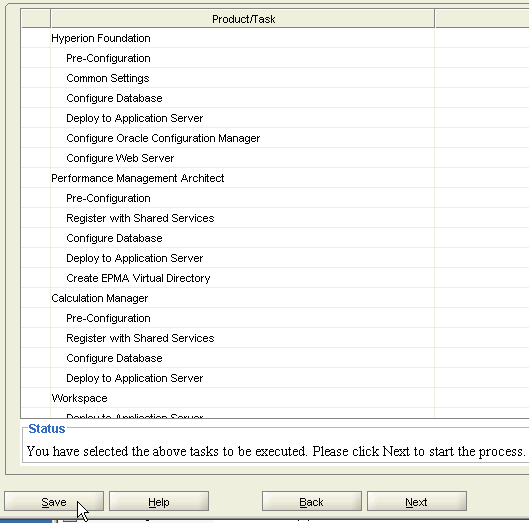
On the summary panel, review the configuration tasks to be performed, and click Save.
|
. |
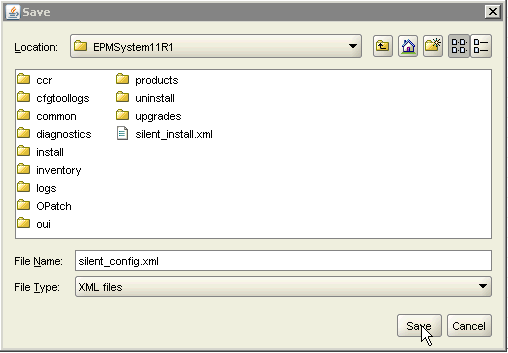
Enter a name for the response file, and click Save.
The response file is created.
|
. |
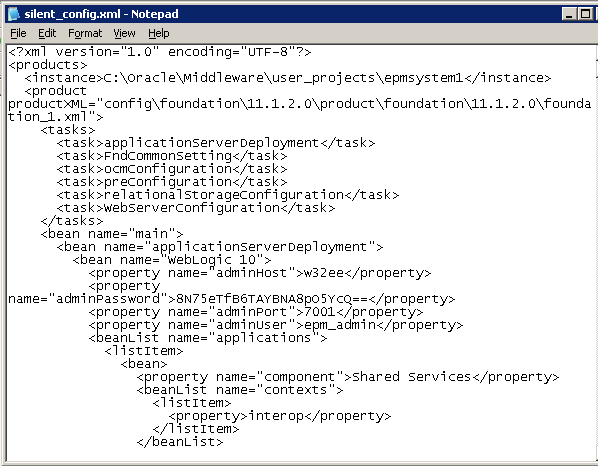
Navigate to the location of the saved configuration response file, and open it in a text editor.
|
. |
Copy the configuration file to the server that you want to configure and perform the following steps:
The system configures the product components by using the response file that you created.
|


Creating and Deploying an Application with Performance Management Architect Batch Client
After installing and configuring Financial Management, you can verify the installation by using Performance Management Architect Batch Client to create and deploy an application. The batch client is installed automatically when you install Performance Management Architect. You can run the batch client in two modes:
- Command-line mode enables you to enter commands interactively and execute them immediately.
- Script mode enables you to execute multiple commands without your interaction. You can schedule the execution of a script in a third-party scheduler.
In this section, you create a script to create and deploy a Financial Management application.
Creating an Application in a Script
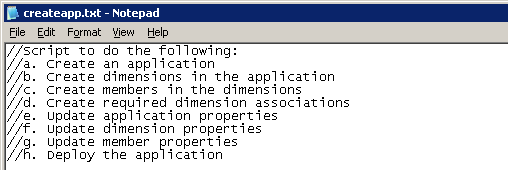
. |
Perform the following steps to create the script:
Notepad is displayed. You can use any text editor to create the script.
|
|---|---|
. |
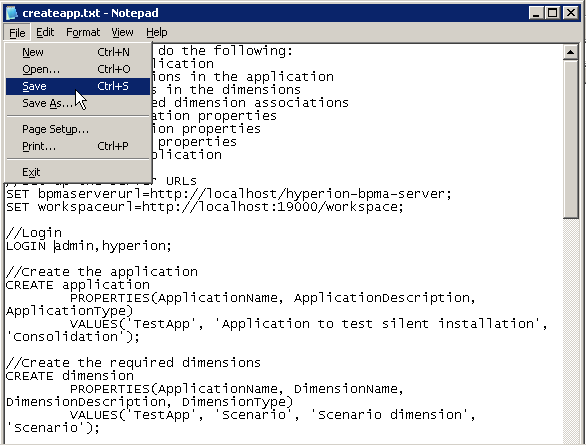
Enter the following text to describe the tasks that the script will perform:
You can comment out lines in a script by inserting two forward slashes (//) at the beginning of the line. If a line spans multiple lines, you must comment out each line separately. Commented lines are informational only; the system ignores the lines when the script runs.
|
. |
Enter the following text to specify the URL information for Performance Managment Architect and Workspace.
|
. |
Enter the following login credentials. Note: You specified the password for the admin user in EPM System Configurator.
|
. |
Enter the following information to create the application:
The application type for a Financial Management application is Consolidation.
|


Creating Dimensions in a Script
Dimensions describe an organization’s data and usually contain groups of related members. Examples of dimensions are Account, Entity, and Period. In this section, you create the dimensions that are required for a Financial Management application.
. |
Enter the following information for the Scenario dimension:
|
|---|---|
. |
Enter the following information for the Account dimension:
|
. |
Enter the following information for the Entity dimension:
|
. |
Enter the following information for the Period dimension:
|
. |
Enter the following information for the View dimension:
|
. |
Enter the following information for the Value dimension:
|
. |
Enter the following information for the Intercompany Partner (ICP) dimension:
|
. |
Enter the following information for the Year dimension:
|
. |
Enter the following information for the Custom1 dimension:
The dimension type for the four custom dimensions is Generic.
|
. |
Enter the following information for the Custom2 dimension:
|
. |
Enter the following information for the Custom3 dimension:
|
. |
Enter the following information for the Custom4 dimension:
|
. |
Enter the following information for the Currency dimension:
|
. |
Enter the following information for the Security Class dimension:
|
. |
Enter the following information for the Alias dimension:
|
. |
Enter the following information for the Consolidation Method dimension:
|


Creating Members in a Script
A member is a discrete component within a dimension that identifies and differentiates the organization of similar units. For example, the Period dimension might include such members as Jan, Feb, and Qtr1. In this section, you create the members that are required for a Financial Management application.
. |
Enter the following information for the United States Dollar (USD) member:
|
|---|---|
. |
Enter the following information for the Close member:
|
. |
Enter the following information for the English member:
|
. |
Enter the following information for the 2009 member in the Period dimension:
|
. |
Enter the following information for the 2009 member in the Year dimension:
|
. |
Enter the following information for the Year-to-Date (YTD) member:
|
. |
Enter the following information for the Half-Year-to-Date (HTD) member:
|


Creating Dimension Associations and Updating Properties in a Script
Before deploying a Financial Management application, you must create an association between the Entity and Currency dimensions and update the properties of the application, dimensions, and members.
. |
Enter the following information to create an association between the Entity and Currency dimensions:
|
|---|---|
. |
Enter the following information to update the application properties. You must define a default currency and a default rate for Balance and Flow account types.
|
. |
Enter the following information to update the Custom1 dimension. You must assign a custom dimension ID to each custom dimension.
|
. |
Enter the following information to update the Custom2 dimension.
|
. |
Enter the following information to update the Custom3 dimension.
|
. |
Enter the following information to update the Custom4 dimension.
|
. |
Enter the following information to update the Close member with a consolidation account type:
|


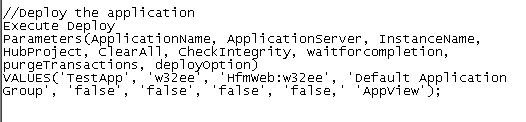
Deploying an Application in a Script
After creating the application, dimension, members, and associations, and updating the properties, you deploy the application to your application server.
. |
Enter the following information to deploy the application:
|
|---|---|
. |
Save the application creation script, and exit Notepad.
|
Running the Application Creation and Deployment Script
You use Performance Management Architect Batch Client to execute the script that you created.
. |
Navigate to the directory where Performance Managment Architect Batch Client is installed. By default, the location is C:\Hyperion\products\Foundation\BPMA\EPMABatchClient.
|
|---|---|
. |
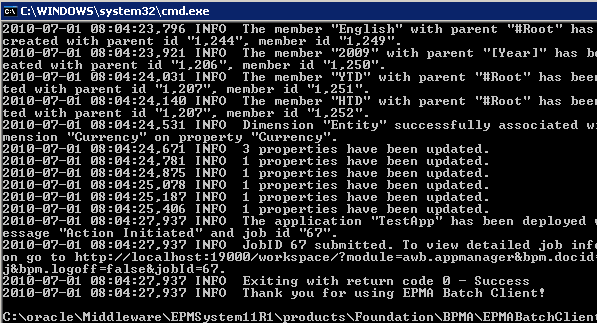
Enter epma-batch-client -Cfilename, where filename is the name of the script that you created. Note: Use the -C option to specify the name of a script file.
Performance Management Architect Batch Client executes the script that you created.
|
. |
Verify that the script was completed successfully.
You completed the tutorial.
|


Summary
In this tutorial, you learned how to:
- Create and execute a silent installation response file.
- Create and execute a silent configuration response file.
- Create and execute a script to create and deploy a Financial Management application.
Resources
- Oracle Hyperion Enterprise Performance Management Architect, Fusion Edition, Release 11.1.2, Batch Client User's Guide
- Oracle Hyperion Enterprise Performance Management System, Fusion Edition, Release 11.1.2, Installation and Configuration Guide
- To learn more about Financial Management, refer to additional OBEs in the Oracle Learning Library
![]()
 |
About
Oracle | |