Creating Auto-Reversing Journal Entries in Oracle® Hyperion Financial Management, Fusion Edition 11.1.2
Purpose
This tutorial covers creating and reviewing auto-reversing journal entries.
Time to Complete
Approximately 30 minutes.
Overview
Auto-reversing journals affect two periods of data. You post an auto-reversing journal to adjust values in one period; the system automatically creates a journal that reverses those adjustments for the next period. The journal created in the following period has the Approved status. You can then post this approved journal for the reversal to take effect.
Scenario
You create auto-reversing journals to enter adjustments that you want to reverse in the next period. For example, your company mistakenly booked February revenue in January. You can create an auto-reversing journal entry to debit the revenue in January. The journal entry reverses in February, and credits revenue in the correct period.
Prerequisites
Before starting this tutorial, you should:
. |
Have access to or have installed Financial Management |
|---|---|
. |
Have installed and opened a Financial Management application |
. |
Have created a child entity. (WestSales is used for this tutorial.) |
. |
Opened the periods for which you are generating and reviewing auto-reversing journal entries |
Creating Auto-Reversing Journal Entries
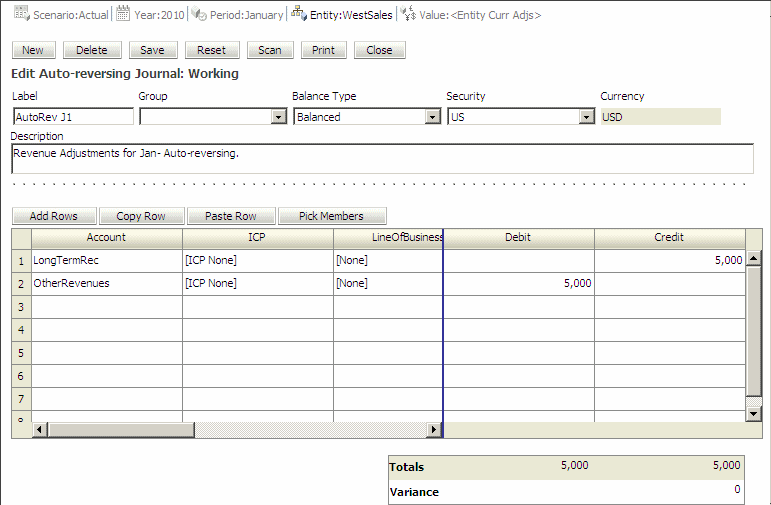
In this part of the tutorial, you create an auto-reversing journal entry in the WestSales entity. The entry is for February revenue that was incorrectly credited in January 2010.
. |
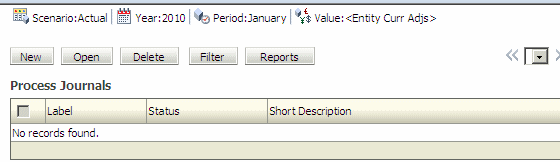
Open your Financial Management application, and In the Browser View pane, navigate to Tasks > Journal Tasks > Process Journals.
|
||||||||||||||||||||||||
|---|---|---|---|---|---|---|---|---|---|---|---|---|---|---|---|---|---|---|---|---|---|---|---|---|---|
. |
On the point of view (POV) bar, select the following:
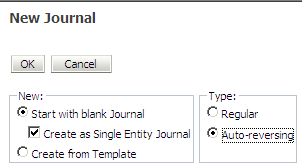
Click New.
|
||||||||||||||||||||||||
. |
Perform the following steps: a) Select Start with blank Journal. b) Under Type, select Auto-reversing. c) Click OK.
|
||||||||||||||||||||||||
. |
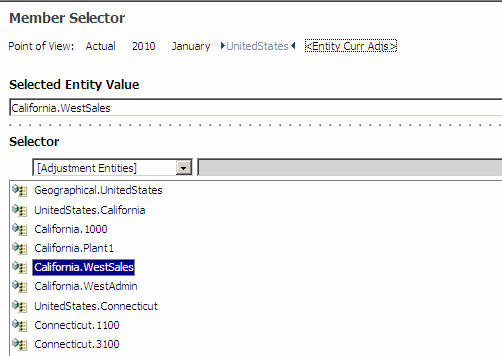
In the POV for Entity, select California.WestSales, and click OK.
|
||||||||||||||||||||||||
. |
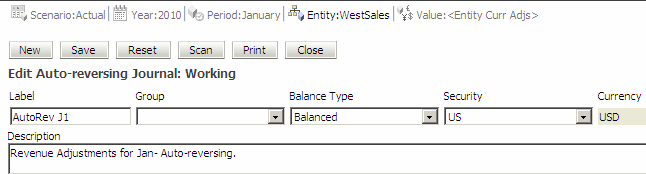
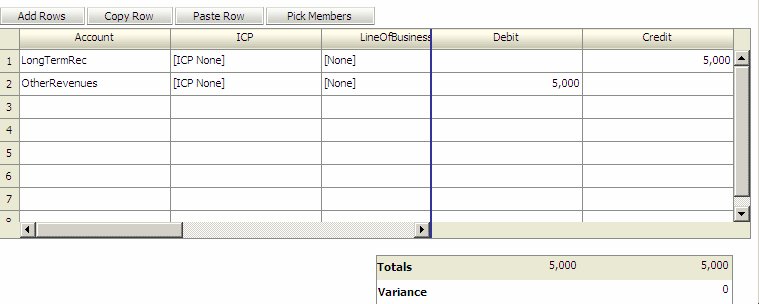
Under Edit Auto-reversing Journal, enter the following information:
|
||||||||||||||||||||||||
. |
Place your cursor in the first cell in the Account column, click Pick Members, and enter the following member information:
|
||||||||||||||||||||||||
. |
Click Save.
|
||||||||||||||||||||||||
. |
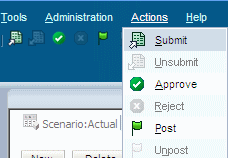
Select Actions > Submit to submit the journal entry for approval and posting.
|
||||||||||||||||||||||||
. |
Click Close to return to the Process Journals window.
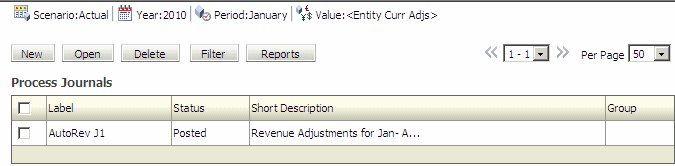
The journal is displayed in the list. The status is Submitted.
|


Reviewing Auto-Reversing Journal Entries
After the auto-reversing journal entry is approved and posted, you can review it in the next period (February) to ensure that it was reversed correctly.
. |
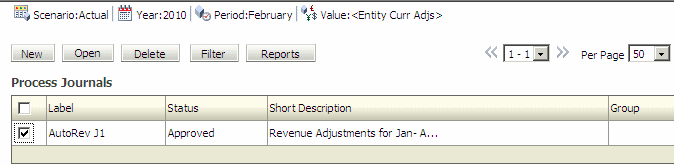
In the Browser View pane, navigate to Tasks > Journal Tasks > Process Journals.
The journal is displayed in the list. The status is Posted.
|
||||||||||||||||||||||
|---|---|---|---|---|---|---|---|---|---|---|---|---|---|---|---|---|---|---|---|---|---|---|---|
. |
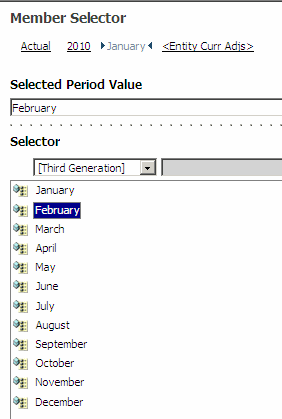
In the POV for Period, select February, and click OK.
The status of the journal for February is automatically set to Approved.
|
||||||||||||||||||||||
. |
Select the check box to the left of AutoRev J1, and click Open.
|
||||||||||||||||||||||
. |
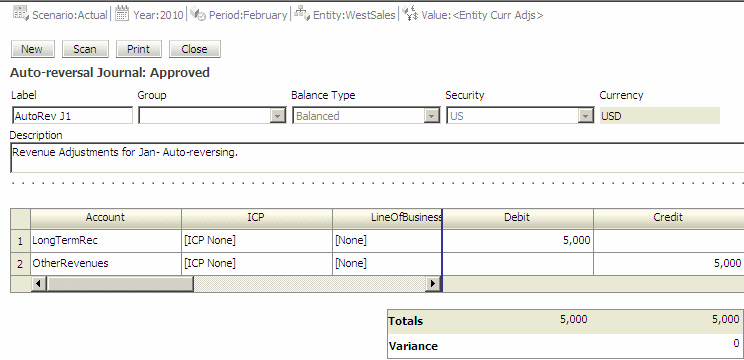
Perform the following actions: a. Review the journal.
The journal is reversed in February and is ready to be posted. b. Click Close.
|
||||||||||||||||||||||
. |
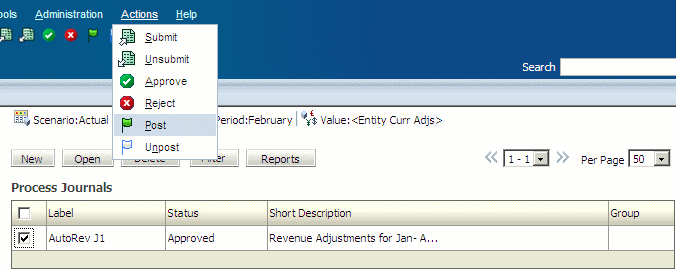
Select the check box to the left of AutoRev J1, and select Actions > Post.
|
||||||||||||||||||||||
. |
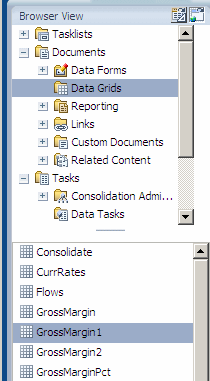
In the Browser View pane, navigate to Data Grids > GrossMargin1.
|
||||||||||||||||||||||
. |
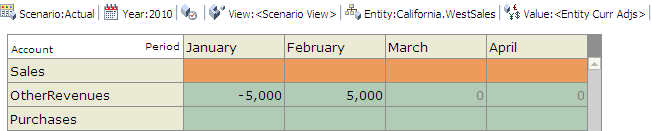
In the POV, select the following:
The account OtherRevenues is debited in January and credited in February. Similarly, the account ShortTermRec is credited in January and debited in February.
|
Summary
In this tutorial, you learned how to:
- Create auto-reversing journal entries
- Review auto-reversing journal entries
Resources
- To learn more about journals, refer to additional OBEs in the Oracle Learning Library.
![]()
 |
About
Oracle | |