Installing and Configuring Oracle Financial Management Analytics 11.1.2.3
Overview
- Oracle Business Intelligence Enterprise Edition 11.1.1.7.0, plus patch 16423091
- Financial Management ADM Driver Release 11.1.2.3
- Financial Management Release 11.1.2.3.000
- Hyperion Tax Provision Release 11.1.2.3.000
- Financial Close Management Release 11.1.2.3.000
- FDM Release 11.1.2.3.000
- Installed Oracle BI EE 11.1.1.7.0, plus patch 16423091.
- Installed the Financial Management ADM driver on the same server as Oracle BI EE.
- Created the Financial Management and Tax Provision applications that you want to analyze with Oracle Financial Management Analytics.
- Ensured that the administrative user for Oracle Financial Management Analytics has write access to the directory that is used for the installation and has administrative rights to all associated software.
Purpose
This tutorial covers installing and configuring Oracle Financial Management Analytics 11.1.2.3.
Time to Complete
Approximately 90 minutes
Introduction
Oracle Financial Management Analytics provides executive access to a unified financial and non-financial picture of the performance of the organization through a series of dashboards. Prebuilt consolidation dashboards display key performance indicators, reports, and metrics by using data from EPM System applications. The dashboards enable users to analyze the data in an accessible format, according to various business and financial scenarios.
In this tutorial, you install and configure Oracle Financial Management Analytics.
Software Requirements
The following is a list of software requirements:
Prerequisites
Before starting this tutorial, you should have:
Installing Oracle Financial Management Analytics
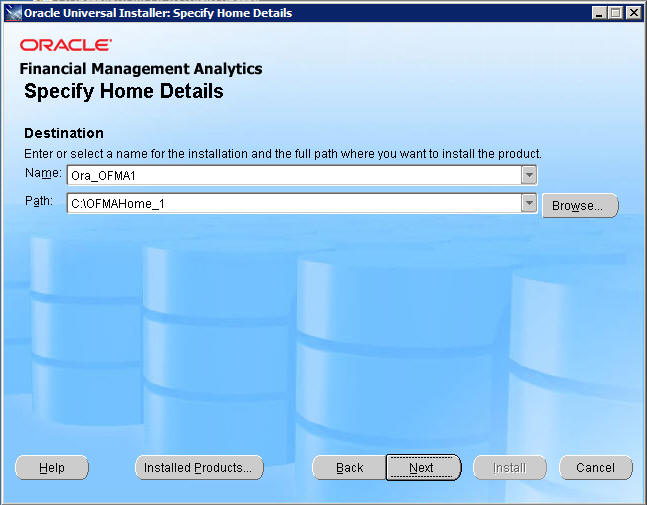
- Enter the name of the installation. By default, the name is Ora_OFMAx, where x is the number of the previous installation of Oracle Financial Management Analytics + 1.
- Enter the path, or browse to the location where you want to install Oracle Financial Management Analytics. By default, the path is C:\OFMAHome_x, where x is the number of the previous installation of Oracle Financial Management Analytics + 1.
To install Oracle Financial Management Analytics, perform the following steps.
Download the OFMA installer files from Oracle Software Delivery Cloud Web page (https:// edelivery.oracle.com/), and unzip them.
Navigate to OFMA Installer Unzipped Location\Disk1\install, and double-click Setup.exe.
For Linux: Open a terminal and change the directory to OFMA Installer Unzipped Location/Disk1/install, and then run bash runInstaller.sh.
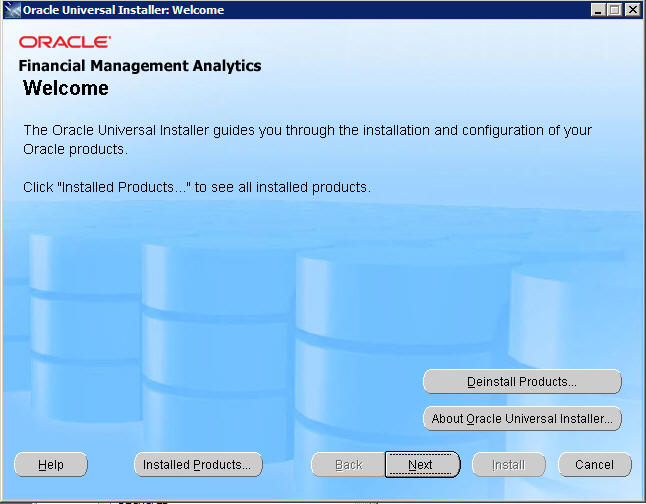
At the Welcome screen, click Next.
On the Select Installation Type screen, select Complete, then click Next.
The complete installation automatically installs the following components of the application: Catalog (the Financial Management Analytics folder) and Configuration Utility.

English is the default language for Oracle Financial Management Analytics. If you want to use a different language, click Product Languages.
On the Specify Home Details screen, enter the following details for the installation, and click Next.
On the Summary screen, review the selected installation options, then click Install.
On the End of Installation screen, click Finish, and then click Yes at the confirmation prompt.
Configuring OFMA.XML
Before running the Configuration Tool, you must ensure that the OFMA.XML file is properly configured. To configure OFMA.XML:
Locate the OFMA.xml file, make a backup copy, and then open it in a text editor or XML editor.
For Windows the default file location of OFMA.XML is OFMA Installed Location\OFMAHome_1\OFMA\. For Linux, the default file location of OFMA.xml is OFMA Installed Location/OFMAHome_1/OFMA/.
Verify that <ENABLE HFM Config> is set to Yes, and provide values for <EPM_ORACLE_INSTANCE> and <EPM_ORACLE_HOME>.
The default location for <EPM_ORACLE_INSTANCE> is:
EPM Installed Location\Oracle\Middleware\user_projects\epmsystem1.
The default location for <EPM_ORACLE_HOME> is:
EPM Installed Location\Oracle\Middleware\EpmSystem11r1.
Save the file.
Launching the Configuration Utility
- Select Product Configuration.
- If you are running the Configuration Utility for the first time, you must create the repository password. Enter a password for in the Set RPD Password field, and reenter it in the Confirm Password field. If you are a returning user, enter the repository password.
- Click Validate.
You can use the Configuration Utility to to create a Oracle Financial Management Analytics configuration for a product, or to modify an existing one. To launch the Configuration Utility, perform the following steps:
For Windows, select Start, then All Programs, then Oracle Financial Management Analytics, and then Configuration Utility.
Note: For Linux, open a terminal and change the directory to OFMA Installed Location/OFMAHome_1/OFMA, and then run bash config_utility.sh file.
On the Welcome screen, perform the following:
After you click Validate, the products in the Select a Product list are available for selection.
Select a product from the Select a Product list on the left to begin product configuration.
Configuring the Product for Financial Management
- Select the parent in the hierarchy to display the parent member only on the report. No children of that parent are selected.
- To select children from the hierarchy, select the parent member, click the drop down list next to the Add arrow, and select children.
- To select siblings from the hierarchy, select the parent member, click the drop down list next to the Add arrow, and select siblings.
- Select an individual child under the hierarchy to display only the child separately on the report.
To configure OFMA for Financial Management, perform the following steps:
In the product list of the Configuration Tool, select HFM Configuration, and enter the cluster for your Financial Management application (in Server Name), the name of the Financial Management application, and a user name and password. Click Next.
On the System Setup screen, select Configure OPMN.XML file and Configure NQSConfig.ini file, enter connection information for your BI Server, and click Next.
Note: You do not need to configure OPMN.XML and NQSConfig.ini if you are a returning user updating an existing configuration. These options display [Configured] if you are a returning user.
On the Scenario Selection screen, for each scenario in the Scenario column of the Selected Members list, select a member from the Available Members list, then click Next.
On the Region Selection screen, move the entities to be displayed on dashboards from the Available Members for Entity list to the Selected Members list, then click Next.
Note: You must select parent entities. If you select entities without children, then a blank white space is displayed in the Process Management reports within the Executive Dashboard.
Note: When selecting members in the Configuration Tool, you have several options for selecting parents, children, or siblings:
On the Default Dimension screen, select a default member for each dimension by selecting the dimension in the Selected Members list, and then selecting a member from the Available Members list. When you are finished, click Next.
Note: You must select a default member for each dimension. The selection list for the Period dimension displays only base members.
On the KPI Selection screen, select the required accounts to be displayed on the dashboards by moving accounts from the Available Members for Account list to the Selected Members list, and then click Next.
On the Financial Statements screen, for each cell in the Selected Members list, select an account from the Available Members list. When you have finished selecting accounts for the Balance Sheet, Cash Flow, and Income tabs, click Next.
On the Constant Rate Mapping screen, select a dimension from the Constant Rate Hierarchy list, then select a cell for which you want to map the members within the Selected Members list, and then select a dimension member from the Available Members list. When you are finished, click Next.
On the Sales Analysis screen, select a sales analysis account in the Selected Members list for which you want to map an account, and then select an account from the Available Members for Account list. After you have selected members for all sales analysis accounts, click Next.

On the Cost Analysis screen, on the Cost Accounts tab, for each cost analysis account in the Selected Members list, select an account from the Available Members for Account list. Repeat for the Expense Categories tab, and then click Next.
Note: The selected members should be parent accounts.
On the Analysis by Custom screen, for each custom dimension in the Selected Members list, select a custom dimension from the Custom Dimension list, and then select a member from the Available Members list. When you are finished, click Next.
Note: You can perform analysis on up to three custom dimensions. The selected members should be parent accounts.
On the Summary screen, review the summary information, and click Save to save the configuration.

After saving the configuration, you can either configure another product by selecting another product from the product list, or you can select Upload to BI Server to load the configuration to your BI server.
Configuring the Product for Tax
To configure OFMA for Tax, perform the following steps:
In the product list of the Configuration Tool, select Tax Configuration, and enter the cluster for your Tax application (for Server Name), the name of the Tax application, and a user name and password. Click Next.
On the System Setup screen, select Configure OPMN.XML file and Configure NQSConfig.ini file, enter connection information for your BI Server, and click Next.
Note: You do not need to configure OPMN.XML and NQSConfig.ini if you are a returning user updating an existing configuration. These options display [Configured] if you are a returning user.
On the Scenario Selection screen, for each scenario in the Scenario column of the Selected Members list, select a member from the Available Members list, then click Next.
On the Region Selection screen, move the entities to be displayed on dashboards from the Available Members for Entity list to the Selected Members list, then click Next.
On the Reporting Standard screen, move the reporting standards to be displayed on dashboards from the Available Members for ReportingStand list to the Selected Members list, then click Next.
On the Default Dimension screen, select a default member for each dimension by selecting the dimension in the Selected Members list, and then selecting a member from the Available Members list. When you are finished, click Next.
Note: You must select a default member for each dimension. The selection list for the Period dimension displays only base members.
On the KPI Selection screen, on the Total Expenses tab, select the required accounts to be displayed on the dashboards by moving accounts from the Available Members for Account list to the Selected Members list. Repeat for the Total Revenue tab, and then click Next.
On the Summary screen, review the summary information, and click Save to save the configuration.
After saving the configuration, you can either configure another product by selecting another product from the product list, or you can select Upload to BI Server to load the configuration to to your BI server.
Configuring the Product for Financial Close Management
To configure OFMA for Financial Close Management, perform the following steps:
In the product list of the Configuration Tool, select FCM Configuration, and in the Select Database list select Oracle or MS SQL, and then enter the database details for the FCM database. Click Next.
Note: User Name should be a database user with write permission to the FCM database schema.
On the Select Modules screen, select the FCM modules. (If you select Account Reconciliation Manager, in the ARM Configuration Options section, select the currency bucket and rate type.) Click Next.
Note: If your ARM application is a single currency application, the Currency bucket and Rate Type options are disabled.
On the Summary screen, review the summary information, and click Save to save the configuration.
After saving the configuration, you can either configure another product by selecting a product from the product list, or you can select Upload to BI Server to load the configuration to your BI server.
Configuring the Product for FDM
To configure OFMA for Financial Close Management, perform the following steps:
In the product list of the Configuration Tool, select FDM Configuration, and in the Select Database list select Oracle or MS SQL, and then enter the database details for the FDM database. Click Next.
Note: User Name should be a database user with write permission to the FDM database schema.
On the Summary screen, review the summary information, and click Save to save the configuration.
After saving the configuration, you can either configure another product by selecting a product from the product list, or you can select Upload to BI Server to load the configuration to your BI server.
Uploading the Catalog and Repository to BI Server
- Select Upload Catalog to upload the catalog folder.
- Select Upload Repository to upload the RPD file-related changes.
- In the BI Server Details section, enter the information for connecting to the BI server.
- Click Upload.
After changing settings in the Configuration Utility and saving the configuration changes, or after Modifying the RPD or Catalog files, you need to upload the catalog and RPD files to BI server.
To upload the catalog and RPD files to the BI server:
In the product list of the Configuration Tool, select Upload to BI Server.
On the Upload to Bi Server screen, perform these tasks:
Launching Oracle Financial Management Analytics
- ServerName is the name of the computer hosting the Oracle BI EE server
- Port is the Oracle BI EE server port number
- analytics is the directory set for Oracle BI EE server
- Enter the user ID. This user must have the required permissions in both the configured products and in Oracle Business Intelligence Enterprise Edition.
- Enter the password.
- Select a language. The default is English.
- Click Sign in.
After installation and configuration, you access Oracle Financial Management Analytics through Oracle Business Intelligence Enterprise Edition.
To launch Oracle Financial Management Analytics:
In a browser, enter the URL details such as:http://server name:port number/analytics, where:

Perform the following actions:
On the Oracle BI EE home page, select Dashboards, and then OFMA, and then the product for which you want to view dashboards.
Summary
- Install Oracle Financial Management Analytics
- Configure OFMA.XML
- Launch the Configuration Utility
- Configure the product for Financial Management
- Configure the product for Tax Provision
- Configure the product for Financial Close Management
- Configure the product for FDM
- Upload the catalog and repository to BI Server
- Lead Curriculum Developer: Mark Mitsock
- Other Contributors: Murali Govindarajulu
In this tutorial, you have learned how to:
Credits
To navigate this Oracle by Example tutorial, note the following:
- Hide Header Buttons:
- Click the title to hide the buttons in the header. To show the buttons again, click the title again.
- Topic List:
- Click a topic to navigate to that section.
- Expand All Topics:
- Click the button to show or hide the details for the sections. By default, all topics are collapsed.
- Hide All Images:
- Click the button to show or hide the screenshots. By default, all images are displayed.
- Print:
- Click the button to print the content. The content that is currently displayed or hidden is printed.
To navigate to a particular section in this tutorial, select the topic from the list.