Before You Begin
Purpose
This tutorial covers automating certain tasks in Financial Management.
Time to Complete
Approximately 30 minutes.
Background
This tutorial covers creating a taskflow for automatically loading and consolidating data. You create a taskflow by defining it and adding Stage 1 and Stage 2 tasks to it. The Stage 1 task loads data, and the Stage 2 task consolidates data. Next, you add a link to each stage. The link to the Stage 1 task enables the taskflow to proceed to the Stage 2 task if the Stage 1 task is completed successfully. The link to the Stage 2 task ends the automation process. Finally, you test the taskflow to ensure that it loads and consolidates the data automatically.
Scenario
Your company asked you to create and test a taskflow that automatically loads and consolidates data for a parent entity.
What Do You Need?
Before starting this tutorial, you should:
-
Have access to or have installed Oracle® Hyperion Financial Management 11.1.2.4
-
Have access to or have installed a Financial Management application (The Training application is used for this tutorial)
-
Have created a parent entity (California is used as a parent entity for this tutorial)
Creating a Taskflow
You create a taskflow by defining a taskflow and adding Stage 1 and Stage 2 tasks to the taskflow. Next, you add links to the Stage 2 and Stage 1 tasks. Finally, you save the taskflow.
Defining the Taskflow
-
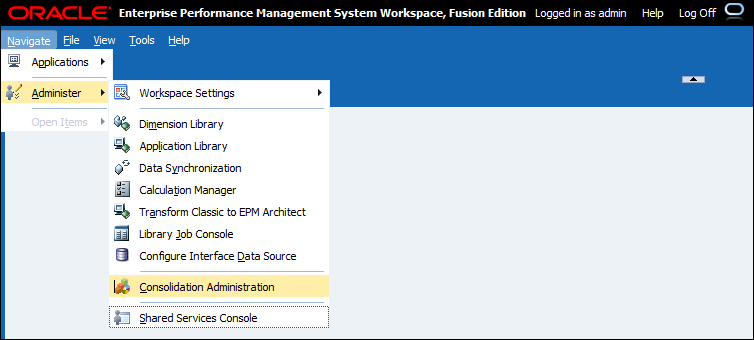
Open your Financial Management application, and select Navigate > Administer > Consolidation Administration.
-
In the Admin Tasks pane, select Task Flows and double click Manage.

The Taskflow Listing Summary page is displayed.
-
Click New.

The Define Taskflow page is displayed.
-
a. In the Name box, enter LoadandConsolidateCA.
b. In the Description box, enter " To automate loading and consolidating data for California."
c. In the Application box, enter REPORTS.
d. Click Submit.

The Taskflow page is displayed.
-
Verify that the name of the taskflow is LoadandConsolidateCA, and that the name of the stage is Stage 1.
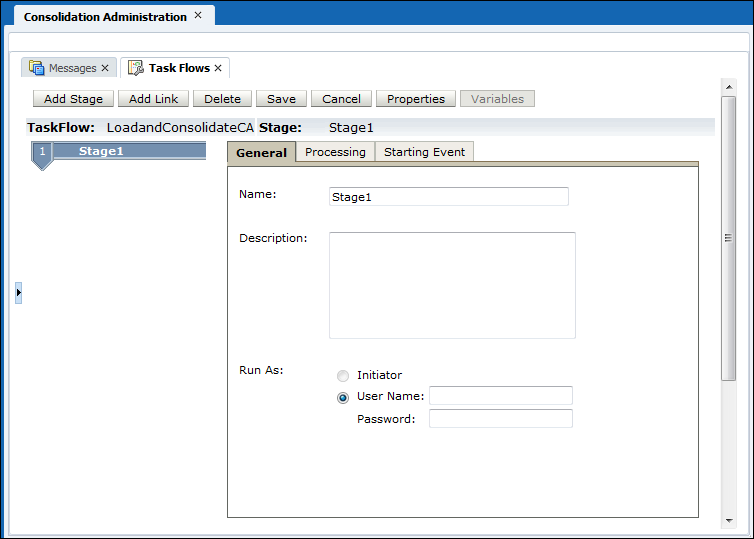
You have successfully defined a taskflow.
Adding Stage 1 and Stage 2 Tasks
-
On the General tab, perform the following actions:
a. In the Name box, enter LoadData.
b. In the Description box, enter Load Data.
Tip: No spaces are allowed in stage names.
c. Under Run As, enter user name admin and password hyperion.

-
On the Processing tab, perform the following actions:
a. In the Application list, select the REPORTS application.
b. In the Action list, select Load Data.
c. Enter or select the following parameters:
Parameter Type Entry/Selection Data File Text box C:\AllData.dat Log File Text box C:\CF\Training\eastwest.log Delimiter Text box ; Mode Picklist Replace Accumulate within File Picklist False Contains Ownership Data Picklist False 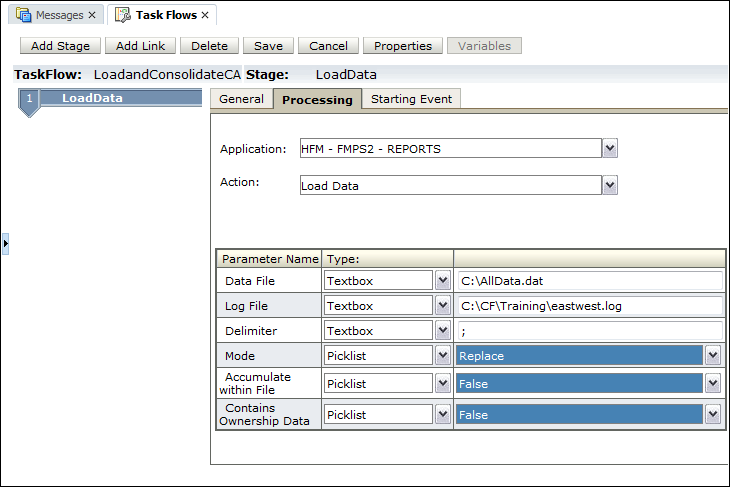
-
On the Starting Event tab, perform the following actions:
a. In the Starting Event list, select ScheduledEvent.
b. Enter a start date and start time.
Tip: You can enter any date and time.
Note: The server date is the time on the Financial Management application server.

-
Click Add Stage to add the Stage 2 task to the taskflow.

-
On the General tab, perform the following actions:
a. In the Name box, enter ConsolidateCA.
b. In the Description box, enter Consolidate California.
Tip: No spaces are allowed in stage names.
c. Under Run As, select Initiator.

-
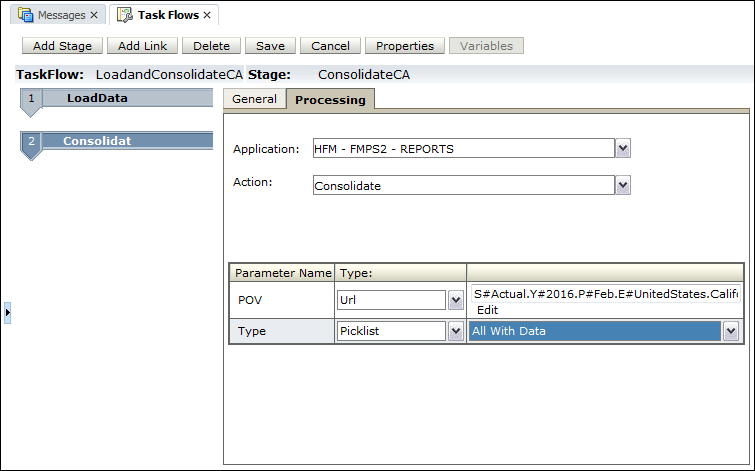
On the Processing tab, perform the following actions:
a. In the Application list, select the REPORTS application.
b. In the Action list, select Consolidate.

-
Under Parameter Name, perform the following actions:
a. In the POV list, select URL.
b. Click the Edit link.

-
Under POV, select the following dimensions, and click OK.
Category Year Period Entity Actual2016FebruaryUnitedStates.California 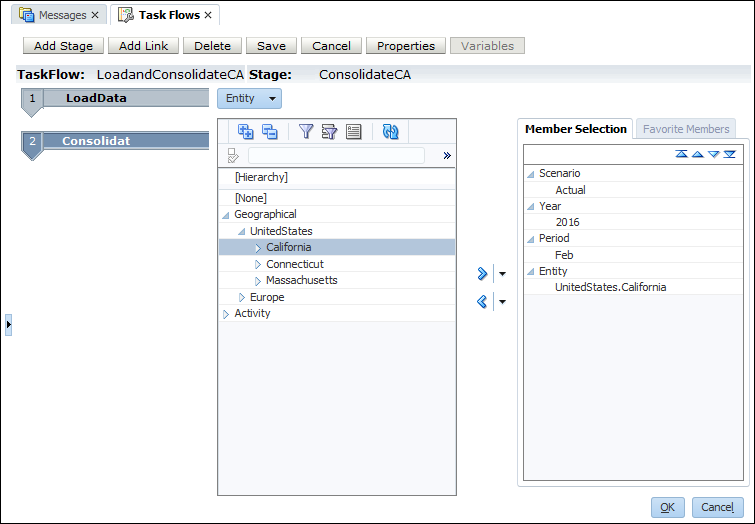
-
In the Type list, select Picklist, and from the list to the right of the Type list, select All With Data.
You have successfully added Stage 1 and Stage 2 tasks to the taskflow.
Adding Links to Stage 2 and Stage 1 Tasks
-
Select ConsolidateCA, and click Add Link.

-
On the General tab, perform the following actions:
a. In the Name and Description boxes, enter End.
b. In the Receiving Stage list, select End.

You have successfully added a link to the Stage 2 task.
-
Select LoadData.

-
Click Add Link.

-
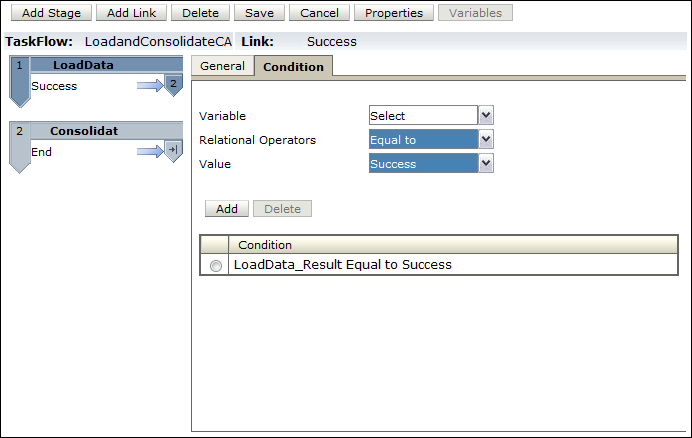
On the General tab, perform the following actions:
a. In the Name and Description boxes, enter Success.
b. In the Receiving Stage list, select ConsolidateCA.

Note: The Receiving Stage is defined as ConsolidateCA, because the taskflow proceeds to Stage 2 if the data load is successful.
-
On the Condition tab, perform the following actions:
a. In the Variable list, select LoadData_Result.
b. In the Relational Operators list, select Equal to.
c. In the Value list, select Success.
d. Click Add.

-
Under Condition, ensure that the condition reads as LoadData_Result Equal to Success, and click Add Link.
-
On the General tab, perform the following actions:
a. In the Name and Description boxes, enter Failure.
b. In the Receiving Stage list, select End.

-
On the Condition tab, perform the following actions:
a. In the Variable list, select LoadData_Result.
b. In the Relational Operators list, select Equal to.
c. In the Value list, select Failure.
d. Click Add.

-
Under Condition, ensure that the condition reads as LoadData_Result Equal to Failure, and click Save to save the taskflow.

The Taskflow Listing Summary page is displayed.
Testing theTaskflow
After creating the taskflow, you are ready to test it.
-
On the Taskflow Listing Summary page, select the taskflow, and click Run Now.

The system displays the message, "Taskflow Initiated successfully."
-
Click OK.

-
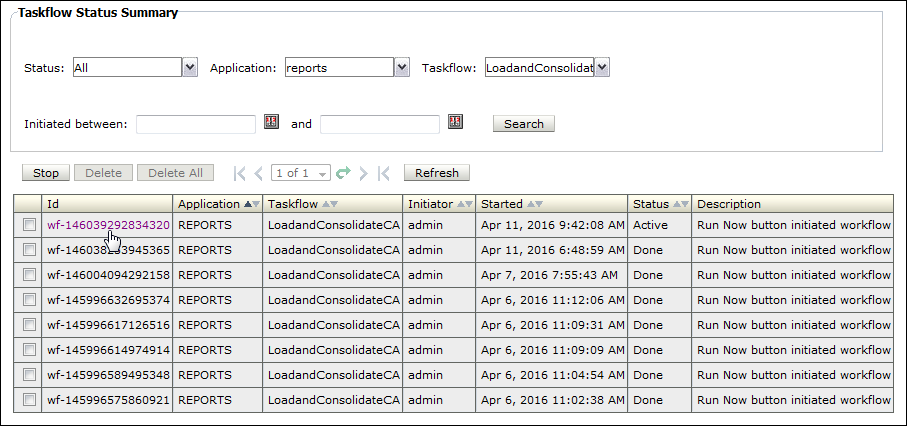
Select Administration > Task Flows > Status.

The Taskflow Status Summary page is displayed.
-
Perform the following actions:
a. In the Status list, select All.
b. In the Application list, select REPORTS.
c. In the Taskflow list, select LoadandConsolidateCA.
d. Click Search.

The taskflow appears as a line item.
-
Select the ID link to view information about the taskflow.
The Taskflow Participant Summary page is displayed.

-
In the Financial Management application, select Navigation>Applications>Consolidation>REPORTS.

-
Select Consolidation > Maintenance > Task Audit.

You have successfully created and tested a taskflow that automates loading and consolidating tasks.
Want to Learn More?
-
To learn more about journals, refer to additional OBEs in the Oracle Learning Library.