Before You Begin
Purpose
This tutorial covers entering, matching, posting, and verifying intercompany transactions in Financial Management.
Time to Complete
Approximately 1 hour.
Background
The Intercompany Transactions module provides an efficient way to identify, report, and reconcile intercompany account differences. With the ability to view the details of transactions at any time, you can reconcile intercompany account differences frequently and thus minimize the impact of such differences on the closing cycle.
Scenario
Your company is closing its books for March 2016 and discovers that its Connecticut sales office owes $10,000 to its UK sales office. You must enter and reconcile the intercompany transactions between the two sales offices. In the Intercompany Transaction module of Financial Management, you enter the transaction amount and the conversion rate between the two currencies, match the transactions, and post and verify the intercompany payables and receivables transactions. The current exchange rate between the US dollar (USD) and British pound (BP) is $2.00 = £1.00.
What Do You Need?
Before starting this tutorial, you should:
-
Have access to or have installed Oracle® Hyperion Financial Management 11.1.2.4
Have access to or have created a Financial Management application (The Reports application is used for this tutorial.)
Have loaded currencies in the Currency dimension and set the display in Intercompany Transactions to Yes.
Entering Intercompany Transactions
In this part of the tutorial, you enter intercompany payables and receivables transactions for Connecticut.EastSales and UK.1500. In entity Connecticut.EastSales you enter an intercompany payables transaction with the transaction amount and the entity currency amount in USD. In entity UK.1500 you enter a corresponding intercompany receivables transaction with the transaction amount in USD and the entity currency amount in BP. Before entering transactions, you open the period in which the transactions occur.
Opening Periods for Intercompany Transactions
-
On your desktop, perform the following actions:
a. Double-click the Workspace URL icon.
b. Enter the user name admin and the password hyperion.
c. Click Log On to log on to Workspace.

-
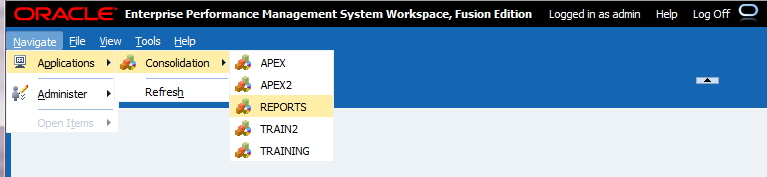
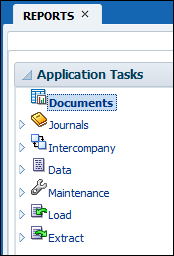
Select Navigate > Applications > Consolidation > REPORTS.
-
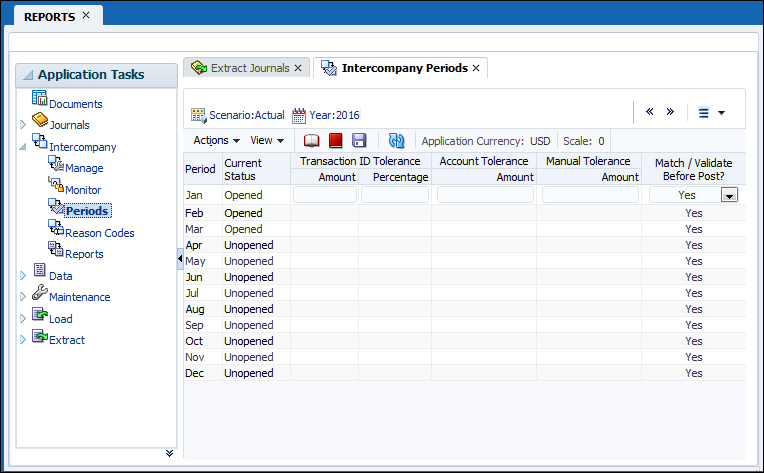
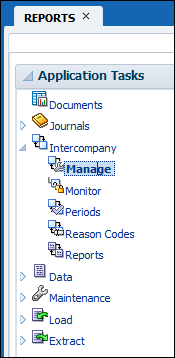
In the Application Tasks pane, under Intercompany double-click Periods.
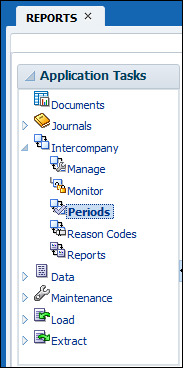
The Intercompany Periods page is displayed in a new tab.
-
Perform the following actions:
a. In the Scenario list, select Actual.
b. In the Year list, select 2016.
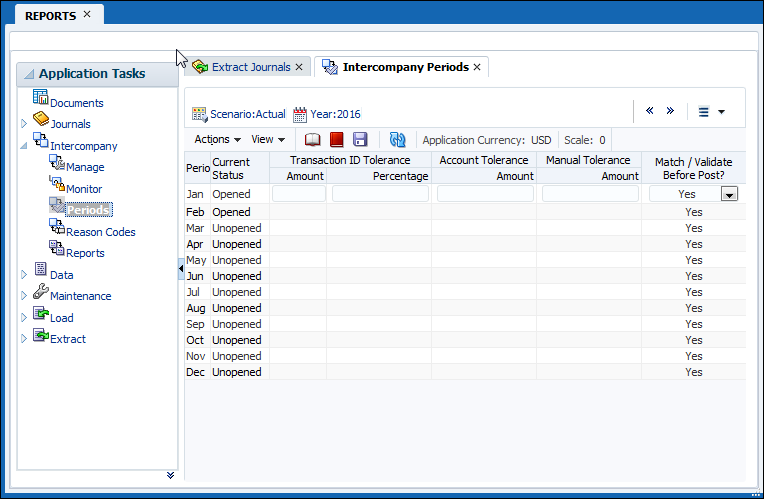
c. In the Period column, select March.
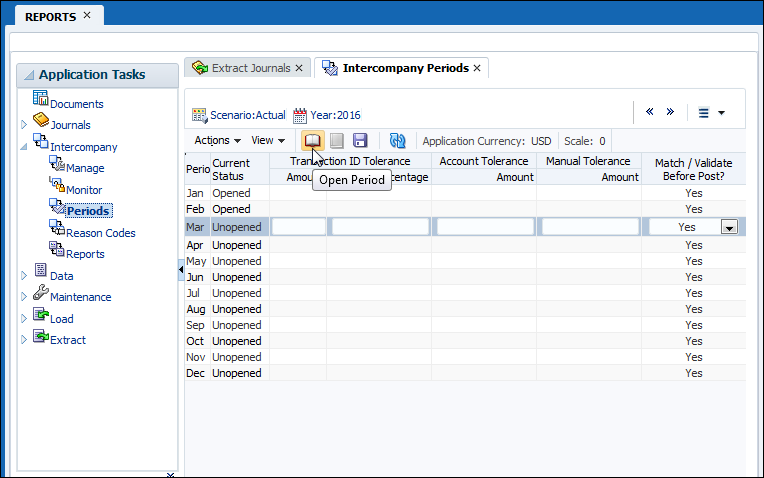
d. Click the Open Period icon.
You successfully opened a period.
Entering Intercompany Payables Transactions
-
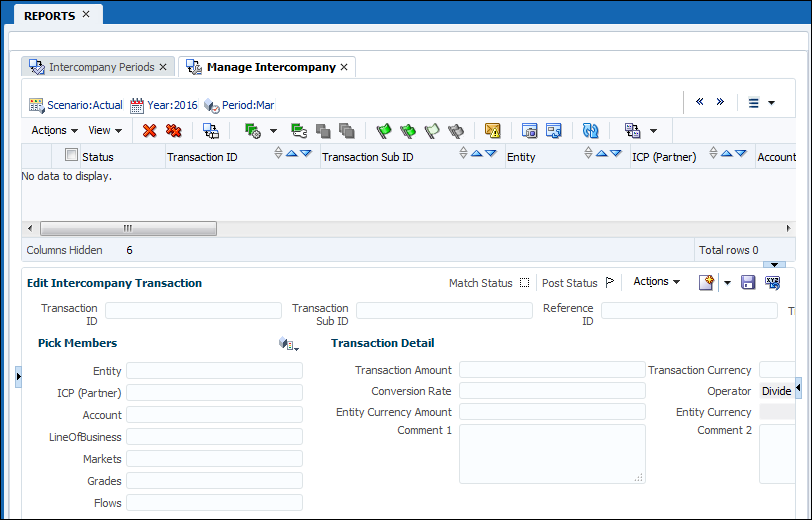
In the Application Tasks pane, under Intercompany double-click Manage.
The Manage Intercompany page is displayed.
-
Perform the following action:
a. Verify that the point of view is set to Actual, 2016, March.
-
Perform the following actions:
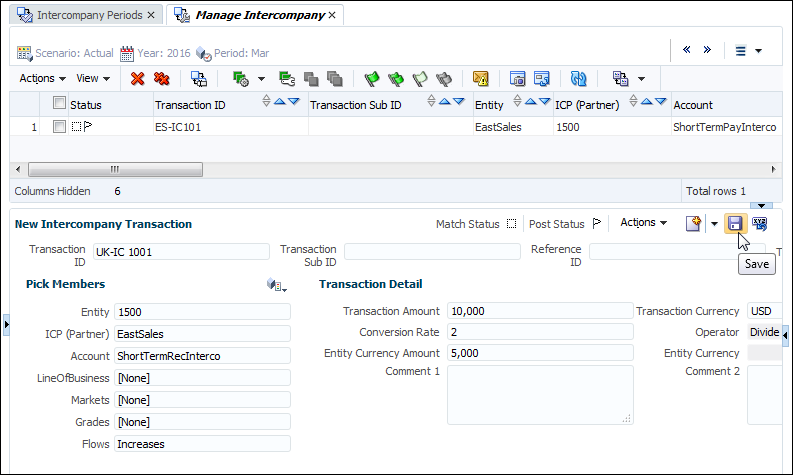
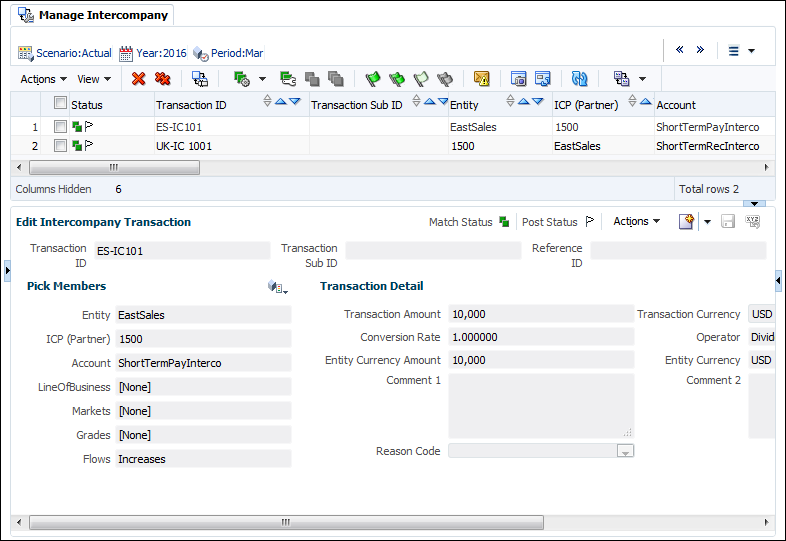
a. In the Transaction ID box, enter ES-IC101.
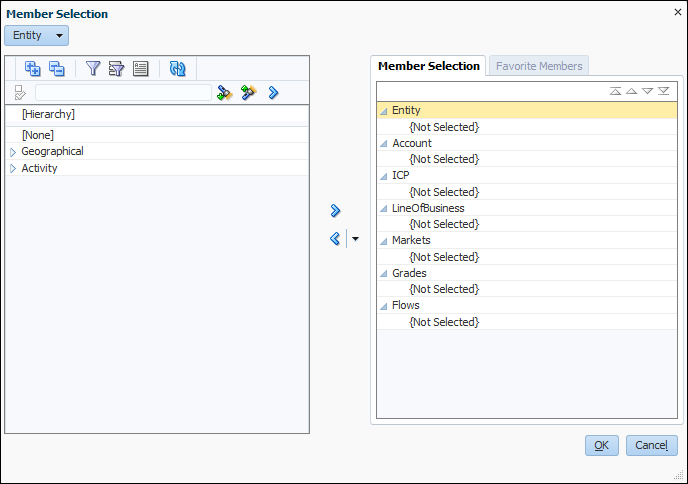
b. Click Pick Members.

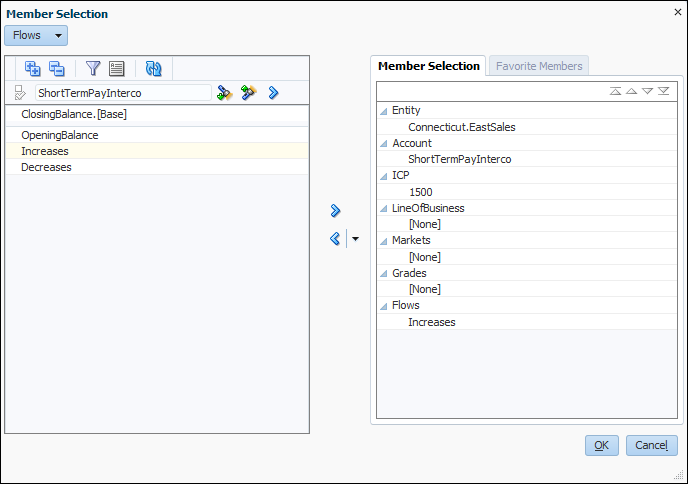
The Member Selection dialog box is displayed.

-
a. Set the members as follows:
Dimension Value Entity Connecticut.EastSales Account ShortTermPayInterco ICP 1500 LineOfBusiness [None] Markets [None] Grades [None] Flows Increases b. Click OK.
The New Intercompany Transaction pane displays the selected members.
-
Perform the following actions:
a. In the Transaction Amount box, enter 10000.
b. In the Transanction Currency drop-down list, select USD.
c. In the Conversion Rate box, enter 1.
d. Click Save.

The system displays the message, "Transaction saved successfully. You must refresh the transactions table for changes to be reflected."
f. Click OK.

-
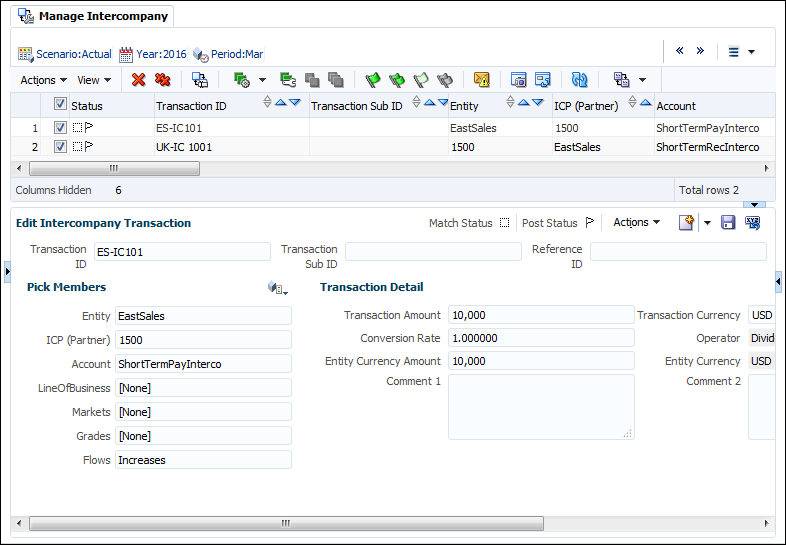
Verify that the ES-IC101 transaction is listed on the Manage Intercompany page.
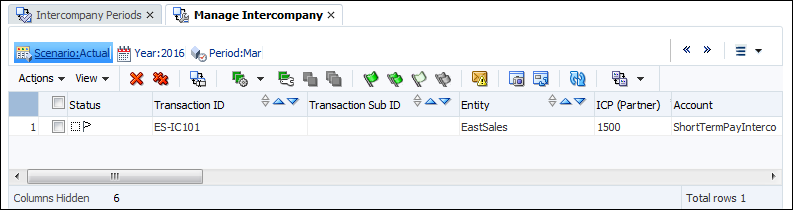
You successfully entered an intercompany payables transaction for Connecticut.EastSales.
Entering Intercompany Receivables Transactions
-
From the Edit Intercompany Transaction pane menu bar, select New.
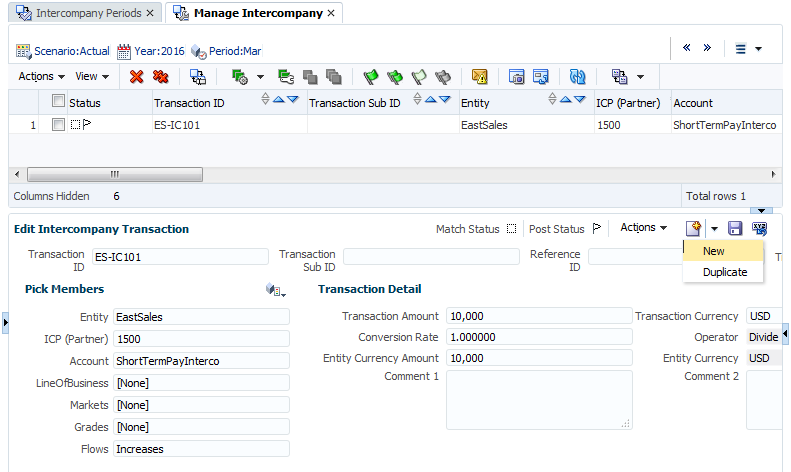
The New Intercompany Transaction pane is displayed.
-
Perform the following actions:
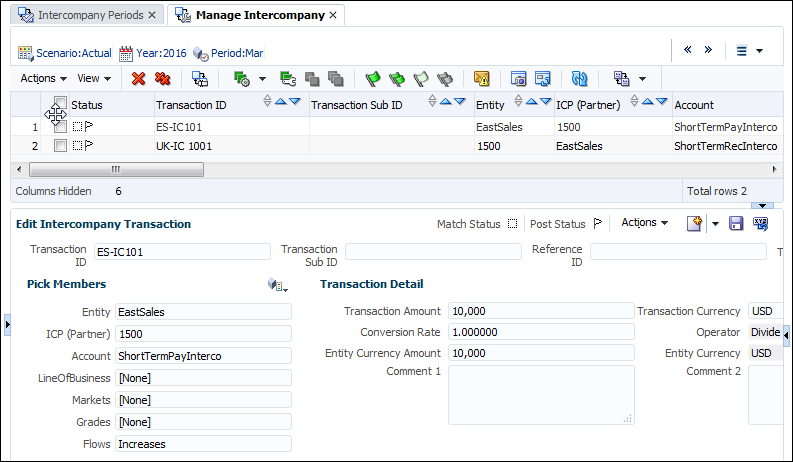
a. In the Transaction ID box, enter UK-IC 1001.
b. Click Pick Members.
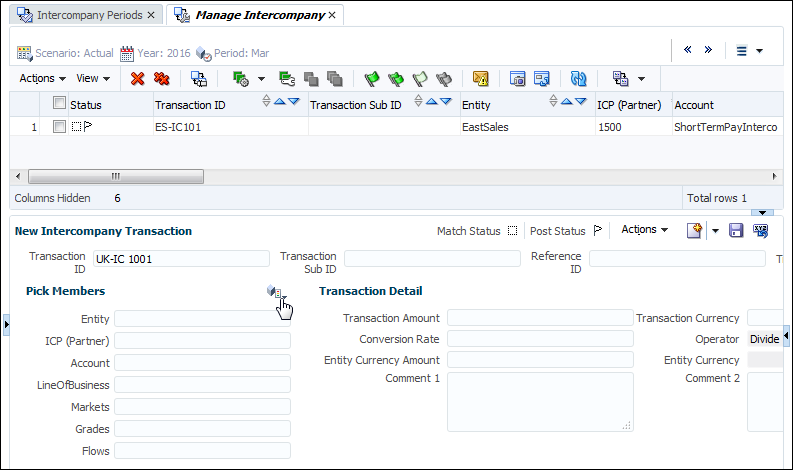
The Member Selection dialog box is displayed.
Perform the following actions:
a. Set the members as follows:
Dimension Value Entity UK.1500 Account ShortTermRecInterco ICP EastSales LineOfBusiness [None] Markets [None] Grades [None] Flows Increases Click OK.
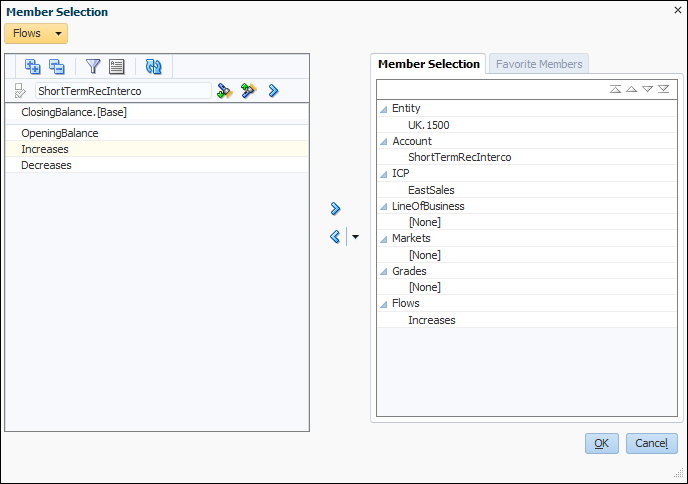
The New Intercompany Transaction pane displays the selected members.
-
Perform the following actions:
a. In the Transaction Amount box, enter 10000.
b. In the Transanction Currency drop-down list, select USD.
c. In the Conversion Rate box, enter 2. (The current exchange rate between the USD and BP)
d. In the Operator box, select Divide.
e. Click Save.
The system displays the message, "Transaction saved successfully. You must refresh the transactions table for changes to be reflected."
g. Click OK.

-
Verify that the UK-IC 1001 transaction is listed on the Intercompany Transactions page.
You successfully entered an intercompany receivables transaction.
Matching and Posting Intercompany Transactions
After entering the transactions, you auto-match the transactions by account. The matching process ensures that all entries are entered, and differences reconciled between the intercompany account balances. Finally, you post the intercompany transactions to include them in an account balance.
-
Select the Intercompany Transactions for matching.
-
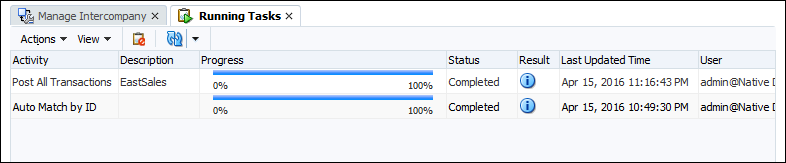
In the Manage Intercompany tab, select Actions > Auto Match > Auto Match.
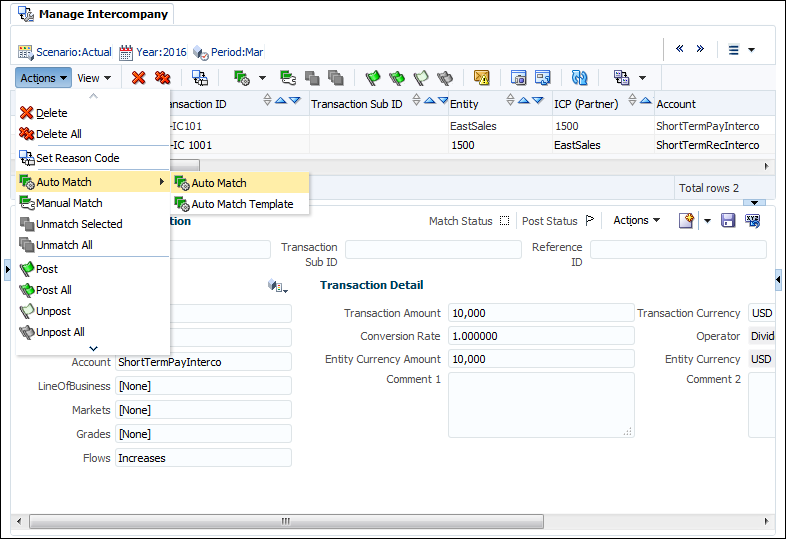
Confirmation message is displayed.
-
Click OK.

The Running Tasks page is opened in a new tab.
-
In the Status column, verify that the Status is Completed, and click X to close the Running Tasks tab.

-
In the Manage Intercompany tab, click Refresh icon and verify the match status of the transactions.
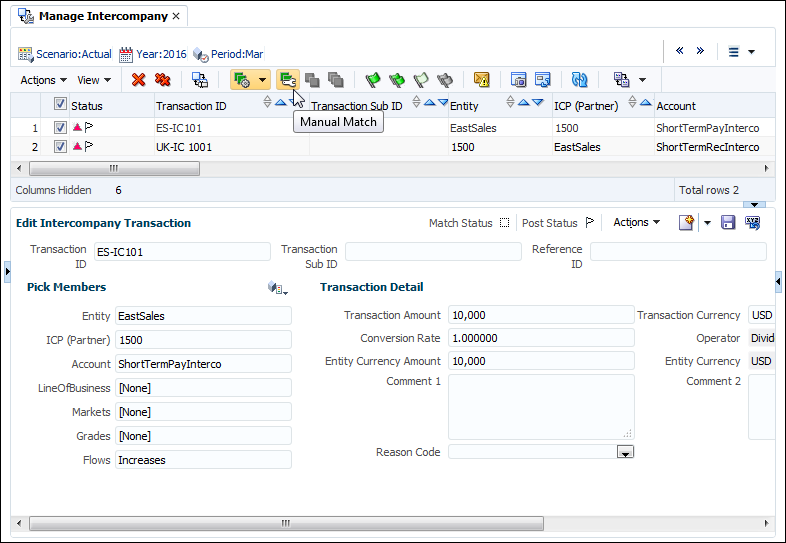
Note: Both the transactions are Mismatched.

-
In the Manage Intercompany tab, select the transactions for matching and click the Manual Match icon.
-
In the Status column, verify that the Status is Matched.
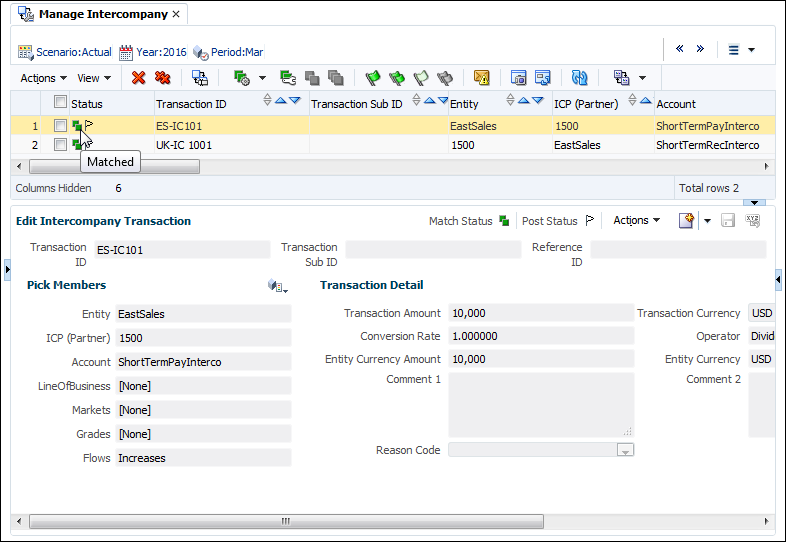
Note: The green squares in the Status column indicates that the transactions are matched.
-
a. In the Manage Intercompany tab, select Actions > Post All.

b. Confirmation message is displayed. Click OK.

The Running Tasks page is opened in a new tab.
-
In the Status column, verify that the status is Completed, and click X to close the Running Tasks tab.
The Manage Intercompany page is displayed.
-
In the Manage Intercompany tab, click Refresh icon and verify the match status of the transactions.
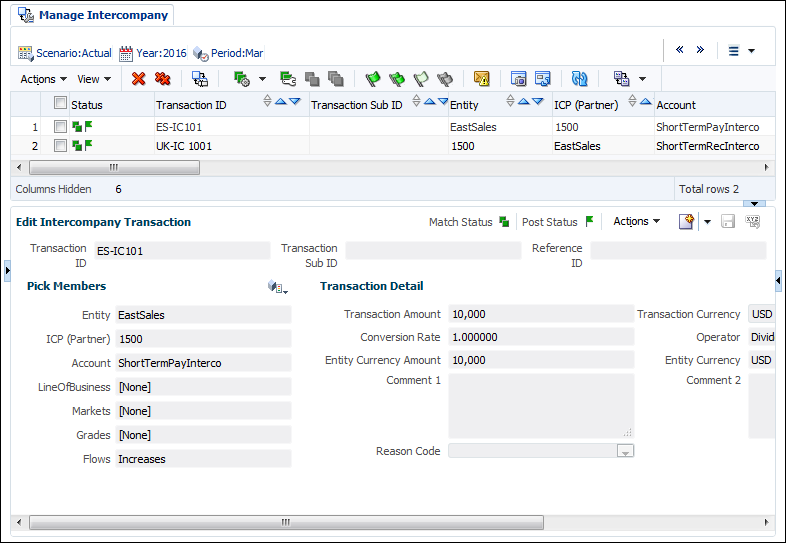
Note: The green flag in the Status column indicates that the transactions were posted.
You successfully matched and posted intercompany transactions between UK.1500 and Connecticut.EastSales.
Verifying Intercompany Transactions
After entering, matching, and posting the intercompany transactions, you can verify and review the transactions in the Transactions Details report.
-
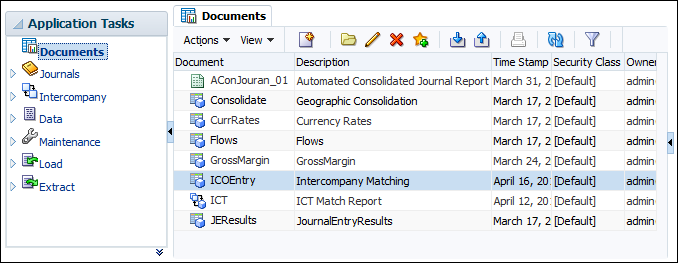
In the Application Tasks pane, double-click Documents.
-
On the Documents tab, double-click the ICOEntry data grid.
-
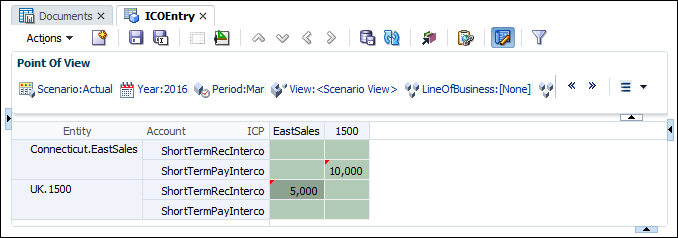
In the ICOEntry POV, select the following:
POV Value Scenario Actual Year 2016 Period Mar View <Scenario View> LIneOfBusiness [None] Markets [None] Grades [None] Flows Increases Value <Entity Currency> 
-
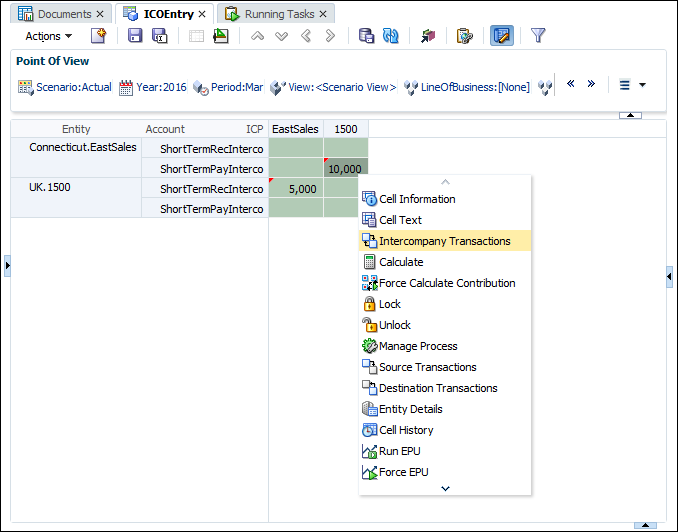
Select the ICP EastSales, ShortTermRecInterco cell.
-
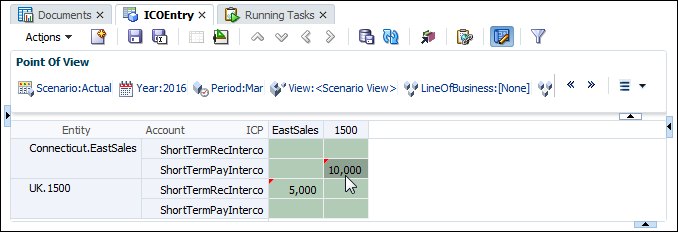
Right-click the cell, and select Intercompany Transactions.

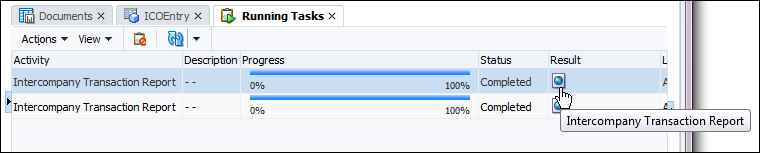
The Running Tasks page is displayed in a new tab.
-
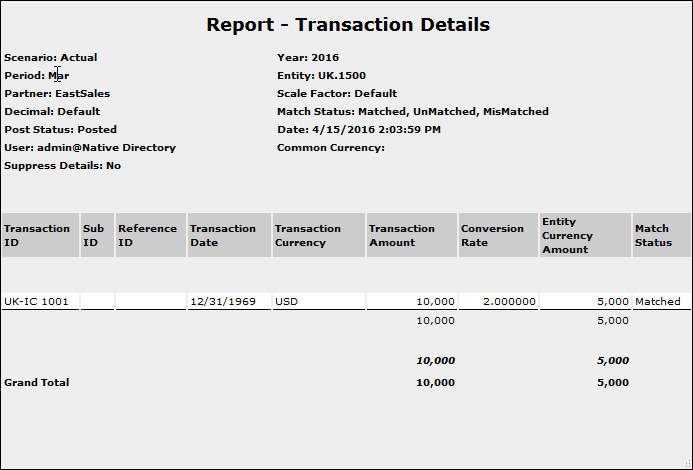
In the Status column, verify that the status is Completed, and click the Intercompany Transaction Report icon.

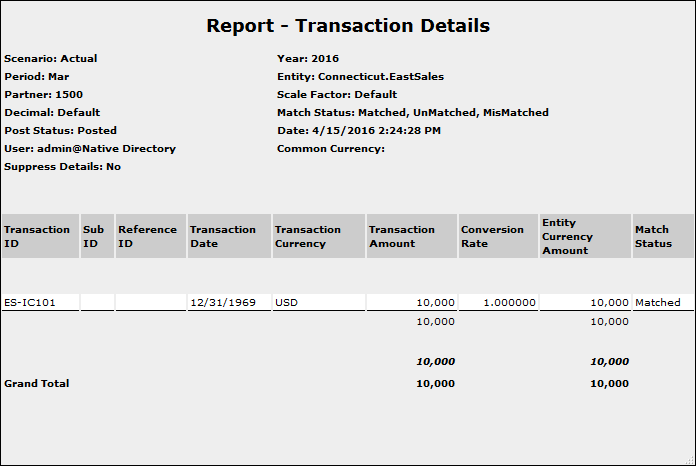
The Transaction Details report is displayed in a new window.
-
Verify that the transaction amount is 10,000, conversion rate is 2, entity currency amount is 5000, and status is Matched.
-
Select the Close ("X") button to close the Transaction Details report window.
-
Select the ICP 1500, ShortTermPayInterco cell.
-
Right-click the cell, and select Intercompany Transactions.
-
In the Status column, verify that the status is Completed, and click the Intercompany Transaction Report icon.
The Transaction Details report is displayed.
-
Verify that the transaction amount and the entity currency amount are 10,000, and that the status is Matched.
The two intercompany transactions are reconciled and matched.