Deploying ADF Applications to Oracle Cloud by Using
JDeveloper, Part 2
Overview
- Have an Oracle.com account
- Have already completed the Oracle by Example tutorial titled Signing Up for a Java Cloud Service
- Have experience developing applications with Oracle JDeveloper and ADF
- Have already completed part 1 of this tutorial, Deploying
an ADF Application to Oracle Cloud Using JDeveloper, Part 1
- Have access to or have installed Oracle JDeveloper 11g (version 11.1.1.6.0 required)
- Have downloaded and unzipped the HRSystem.zip JDeveloper
project into your local JDeveloper project space, for example,
on Windows, C:\JDeveloper\mywork.
- Have access to or have installed the Oracle
Express 11g Release 2 (Oracle XE) database and unlocked
the HR schema.
- This example uses the HR schema included in the Oracle 11g Database. The Oracle Sample Schemas installation guide is part of the Oracle 11g Database documentation set, and is also available online at: http://otn.oracle.com.
Purpose
This tutorial is part 2 of a two-part series. In part one, you
copied the schema for the human resources (HR) database to the
database instance in Oracle Cloud. In part 2, you deploy and run
an HR management application on the Oracle Java Cloud Service
instance running on Oracle Cloud. (The application was developed
by using Oracle JDeveloper and ADF.)
Time to Complete
Approximately 30 minutes
Introduction
Oracle Cloud is a public, enterprise, platform-as-a-service (Paas) offering. Two services provided by Oracle Cloud are particularly interesting to Java applications developers: Oracle Java Cloud Service and Oracle Database Cloud Service. You can configure these services through a web interface, a command-line tool, or an integrated development environment (IDE) such as Oracle JDeveloper. Oracle JDeveloper 11g version 11.1.1.6.0, nicely integrates with Oracle Cloud, and can be configured out-of-the-box to work with Oracle Database Cloud Service and Oracle Java Cloud Service.
Prerequisites
Before starting this tutorial, you should:
Loading and Running the HRSystem Application
JDeveloper is a complete IDE and includes its own copy of
Oracle WebLogic Server 11g (10.3). The HR application
that you unzipped into the project space is a fully functional
ADF application that utilizes the HR database schema provided
with Oracle databases, such as XE. In this section, you load the
application into the IDE and run it against your local Oracle XE
instance.
Select View > Application Navigator to open the
Application Navigator.

Select Open Application.

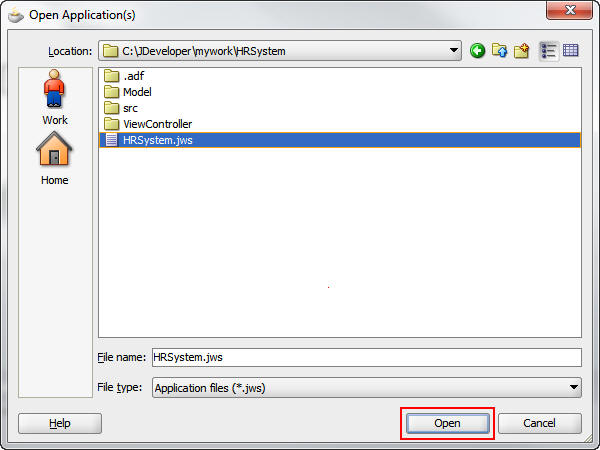
Navigate to the directory where you unzipped the HRSystem project, select the HRSystem.jws file, and click Open.
Select Run > Start Server Instance (IntegratedWebLogicServer).

After a few seconds, a message in the log window indicates that IntegratedWebLogicServer is running.

In the Application Navigator, expand the ViewController and WebContent folders.

Right-click the DeptEmpPage.jspx file and select Run.

Messages in the log window indicate the progress of the
deployment. When the following message appears, the
application was successfully deployed to the server and it
is running: "Application HRSystem deployed to Server
Instance IntegratedWebLogicServer."

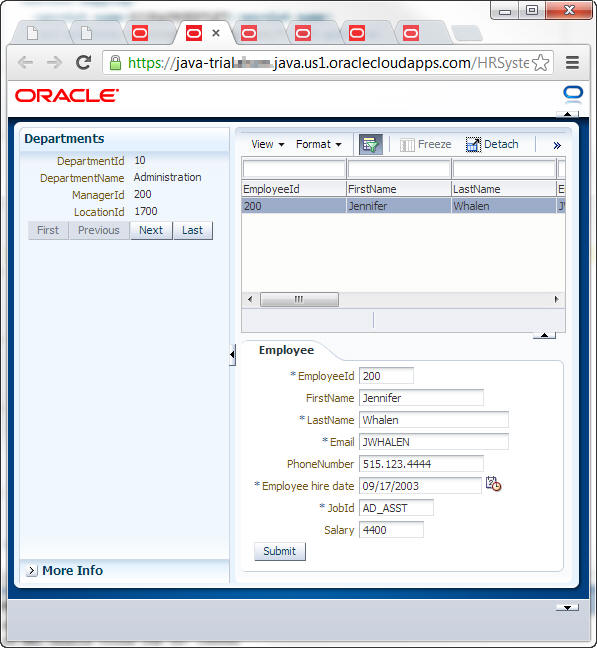
The default browser opens with the HRSystem application.

Experiment with the application by performing the following tasks:
a. Click Next under Departments to advance to the next department.
b. Click Next again to load the Purchasing
Department.
c. Click More Info to see a pie chart of the employee's salaries in the Purchasing Department.
d. Click Departments again to return to the navigation buttons.
e. Click Next twice to load the Shipping Department.
f. Scroll to the bottom of the list. A message appears briefly to indicate that the application is fetching more data.
These activities demonstrate some of the basics of ADF
applications and prove that the data is coming to the
application from the Oracle XE database instance.
Creating a Connection to the Oracle Java Cloud Service
Instance
In this step, you create a connection to your Oracle Java Cloud
Service instance.
Select View > Resource Palette to open the
Resource Palette.

Expand IDE Connections to open the
palette.

Right-click Application Server and select New
Application Server Connection.

Perform the following steps to create the connection:
a. Enter MyCloudServer as the connection name.
b. Select Oracle Cloud from the Connection Type list.
c. Click Next.

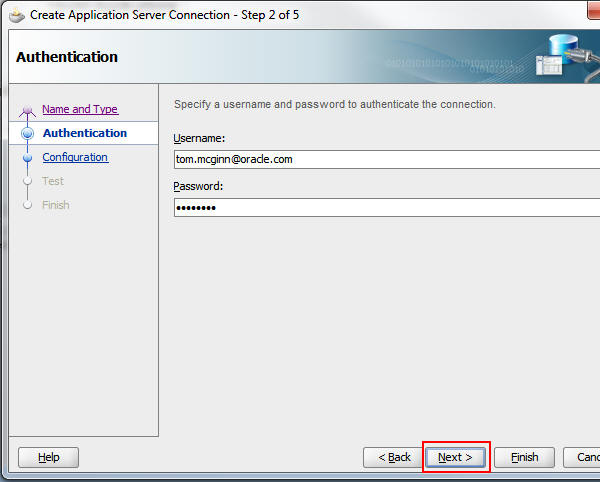
Perform the following steps to authenticate the connection:
a. Enter your Oracle Cloud user name (your Oracle.com user name).
b. Enter your Oracle Cloud password.
c. Click Next.
Using the data provided in the email that you received when your Oracle Cloud account was provisioned, perform the following steps:
a. Select your data center from the list.
b. Enter your Oracle Cloud identity domain.
c. Enter java as the service name.
d. Click Next.

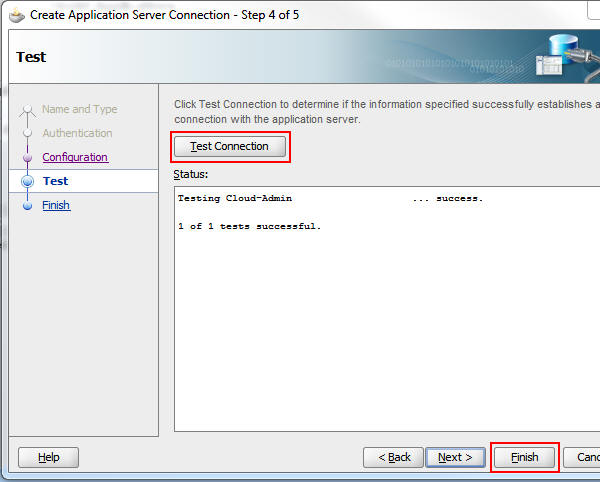
Click Test Connection, wait for a "successful test"
message, and then click Finish.
The new Application Server IDE connection for Oracle Cloud
appears in the Resource Palette.

Preparing the HR Application to Deploy to Oracle Cloud
The application as written communicates with the local Oracle
XE database instance through a Java Database Connectivity (JDBC)
connection. Oracle Cloud does not directly support JDBC
connections, but it does support JDBC data source connections.
In this section, you modify the application to use a JDBC data
source and provide the name of the Oracle Database Cloud Service
instance.
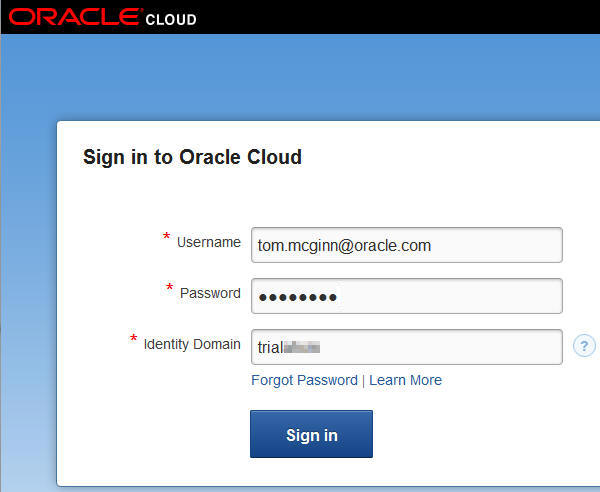
Sign in to your Oracle Cloud account. Note: You will supply the identity domain provided to you in your confirmation email. For more details, see the Oracle by Example tutorial titled Signing Up for a Java Cloud Service.
On the My Services page, click the Details icon for
the database service.

On the Database Details page, take a note of the service
name. You will use this name for the JDBC data source.
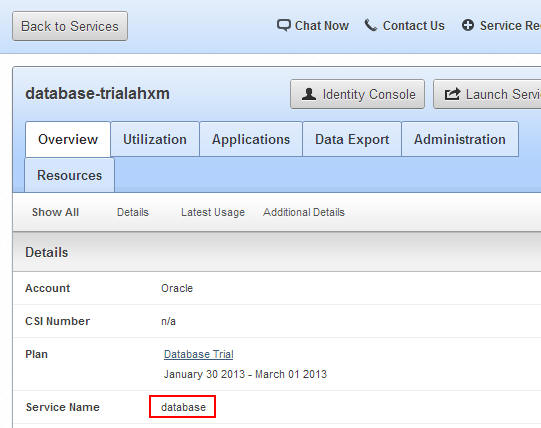
Click Back to Services to return to the My Services
page.

In JDeveloper, expand Model in the Application
Navigator.

Right-click AppModule and select Open AppModule.

Select Configurations on the AppModule.xml page.

Select the AppModuleLocal configuration line, and
click the Edit selected configuration object icon.

Select JDBC DataSource from the Connection Type
list.
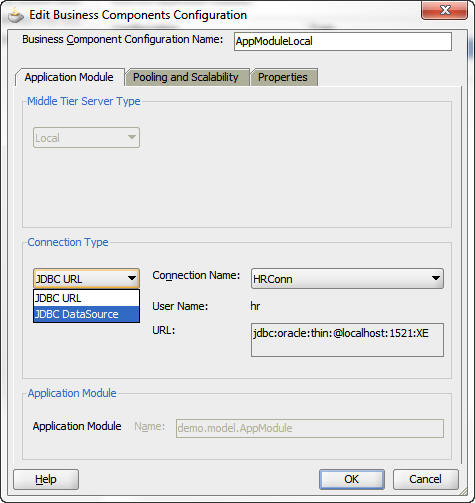
Change the name of the data source to the service name that you noted in step 3 and click OK. Note: For the Oracle Cloud account used in this example. the data source name is "database."

In the Application Navigator, perform the following steps:
a. Expand ViewController and then Web Content.
b. Expand WEB-INF.
c. Double-click web.xml to open the file.

Click the Source tab to see the source code.

Scroll to the bottom of the file and enter the following
lines above the </web-app> tag.
<welcome-file-list>
<welcome-file>faces/DeptEmpPage.jspx</welcome-file>
</welcome-file-list>
Press Ctrl + S to save the web.xml file.
Deploying the HR Application to Oracle Cloud
After configuring the application to look for the database by
using the data source name for the Oracle Database Cloud
Service, you can deploy the application to the cloud.
In the Application Navigator, right-click HRSystem (the
project name in the Application Navigator) and select Deploy
> HRSystem_application1.

Ensure that Deploy to Application Server is
selected and click Next.

Select MyCloudServer as the application server target and click Finish. Note: “Overwrite modules of the same name” is selected by default.

At the bottom of the log window, click Deployment
to open the Deployment log.

After the deployment to the Oracle Cloud server is
completed, the following message appears in the log:
"Deployment finished."

In the browser window where you logged in to your Oracle
Cloud account, click the Service Console button for
your Oracle Java Cloud Service.

On the Services Console page, in the Applications section,
click HRSystem to load the application page.

In the Application URLs section, click the URL to load the
application page (it opens in a new tab).

The application starts on a new tab in the browser. You can
perform the same tests on this application as you did
previously.
Summary
- Add an Oracle Cloud server to JDeveloper as an IDE
connection
- Prepare an ADF application to deploy to Oracle Cloud
- Deploy an application to Oracle Cloud and launch the
application
- Tutorial: Developing RIA Web Applications with Oracle ADF
- Shay Shmeltzer's Blog: Deploying
Oracle ADF Applications on the Oracle Java/Database Cloud
- Oracle Cloud Documentation
- Oracle
XE Documentation
- To learn more about Oracle
Cloud refer to additional OBEs in the Oracle Learning Library
- Lead Curriculum Developer: Tom McGinn
In this tutorial, you learned how to:
Resources
Credits
To help navigate this Oracle by Example, note the following:
- Hiding Header Buttons:
- Click the Title to hide the buttons in the header. To show the buttons again, simply click the Title again.
- Topic List Button:
- A list of all the topics. Click one of the topics to navigate to that section.
- Expand/Collapse All Topics:
- To show/hide all the detail for all the sections. By default, all topics are collapsed
- Show/Hide All Images:
- To show/hide all the screenshots. By default, all images are displayed.
- Print:
- To print the content. The content currently displayed or hidden will be printed.
To navigate to a particular section in this tutorial, select the topic from the list.