Configuring NetBeans for Oracle Cloud
Overview
- Have an Oracle.com account.
- Have already completed the Oracle by Example tutorial titled Signing Up for a Java Cloud Service.
- Have access to or have installed NetBeans 7.2.1 Java EE version or later.
- Have downloaded and installed WebLogic
Server, 11g (to
the
C:\Oracle\wls1036_devdirectory recommended.) - Have downloaded the Oracle
Cloud Software Development Kit (SDK) and unzipped it to
a directory (for example,
C:\Oracle\oracle-javacloud-sdk). - Have downloaded and unzipped the ajaxguessnumber.zip
project.
Purpose
This tutorial covers how to configure NetBeans and deploy applications to Oracle Cloud.
Time to Complete
Approximately 1 hour
Introduction
Oracle Cloud is a public, enterprise platform-as-a-service (Paas) offering. Two services provided by Oracle Cloud are particularly interesting to Java applications developers: Oracle Java Cloud Service and Oracle Database Cloud Service. You can configure these services through a web interface, a command-line tool, or an integrated development environment (IDE) such as NetBeans.
Scenario
In this tutorial, you configure NetBeans with a local instance
of Oracle WebLogic Server 11g
(10.3.6) and with a remote instance of Oracle Cloud. Next, you
deploy a simple Java Platform, Enterprise Edition (Java EE)
application locally, and then you deploy the same application to
Oracle Cloud with a simple change to the project configuration
file.
Prerequisites
Before starting this tutorial, you should:
Adding WebLogic Server 11g to NetBeans
Oracle Java Cloud Service is powered by WebLogic Server 11g
with some specific additions and exclusions (white-listed APIs
and services). As an application developer, you may want to
create and test applications locally before deploying the
application to Oracle Java Cloud Service.
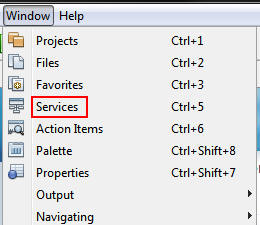
In NetBeans, select Windows > Services to open the Services window.
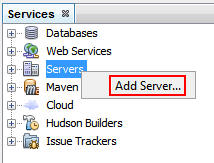
Right-click Servers and select Add Server.
In the Add Server Instance dialog box, perform the following steps:
a. Select Oracle WebLogic Server from the Server list
b. Modify the name of the server to reflect the server version; for example, add 10.3.6 to the name.
c. Click Next.

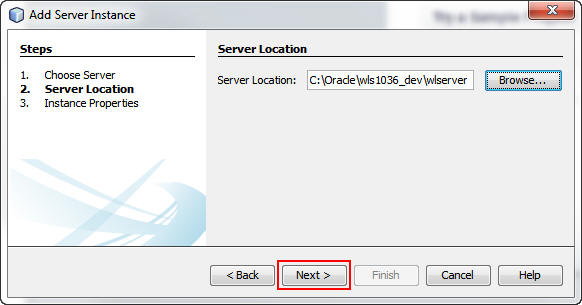
On the next screen, perform the following steps:
a. Click Browse to locate the directory where you installed the WebLogic Server instance. Be sure to include the wlserver directory in the path.
b. Click Next.
On the next screen, perform the following steps to complete the installation:
a. Enter the password for the server.
b. Click Enable JPA 2.0 to add support for the Java Persistence API (JPA) to the WebLogic Server instance.
c. Click Finish.

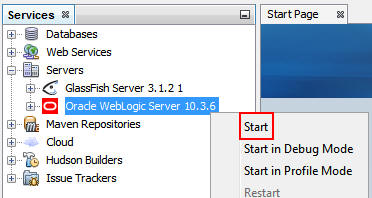
Expand Servers in the Services window.
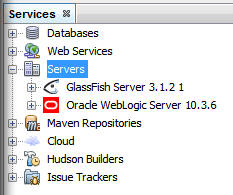
Right-click the Oracle WebLogicServer 10.3.6
instance and select Start.
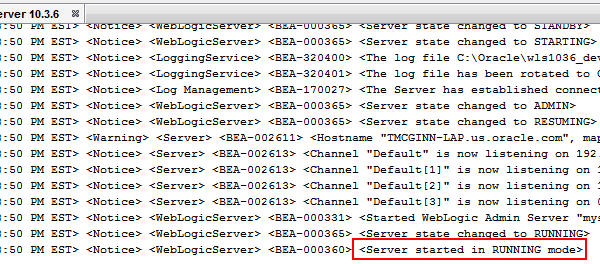
The following message is displayed in the Output window: Server started in RUNNING mode.
You successfully added a WebLogic Server 11g instance to
NetBeans.
(Optional) Configuring NetBeans to Use a Proxy
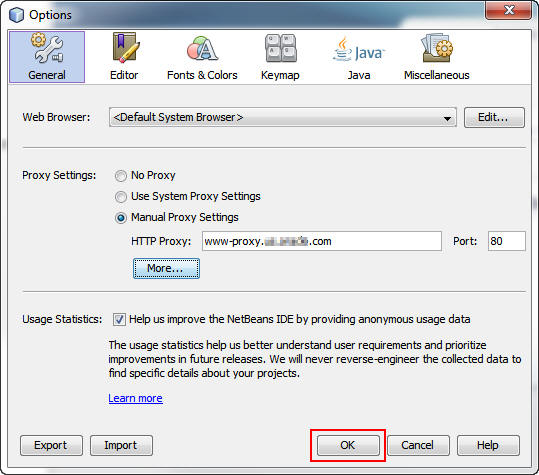
If your machine is configured to use a proxy globally: Select Use System Proxy Settings and skip to step 4. If your machine is not configured to use a proxy globally: Select Manual Proxy Settings, enter your HTTP proxy URL and port number, click More, and proceed to step 3.
This section is optional. If your machine is behind a firewall or inside a corporate network, you must configure NetBeans to communicate to the Internet through a proxy.
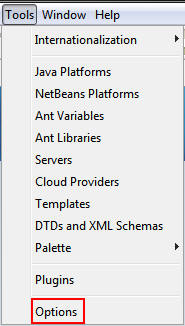
Select Tools > Options to display the Options
dialog box.
On the General tab, perform one of the following steps:
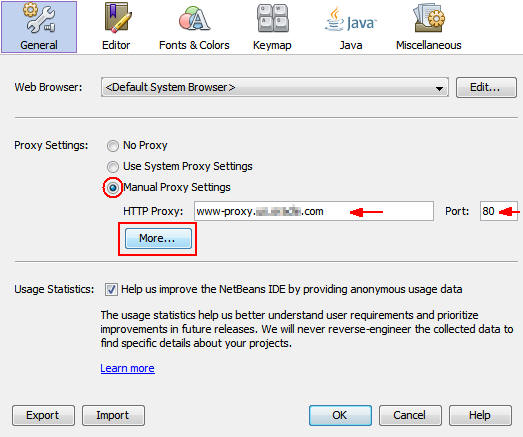
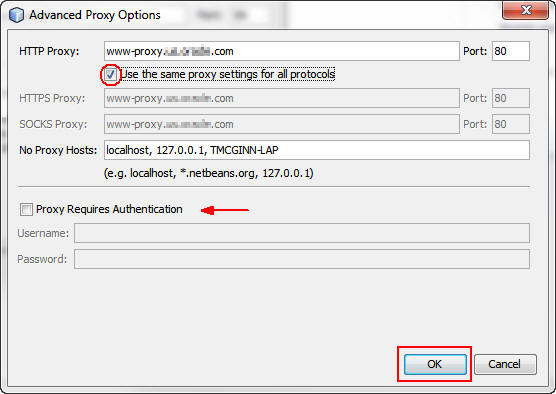
In the Advanced Proxy Options dialog box, perform the following steps:
a. Select the Use the same proxy settings for all protocols check box.
b. If your proxy requires a user name and password, select the Proxy Requires Authentication check box and populate the Username and Password fields appropriately.
c. Click OK.
Click OK to close the Options dialog box.
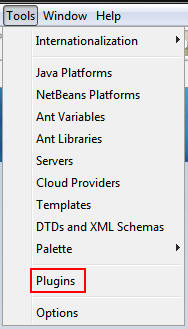
Adding the Oracle Cloud Plugin to NetBeans
In this section, you install a plugin that allows NetBeans to
create a remote connection to your Oracle Cloud account as
though it is a WebLogic Server instance.
Select Tools > Plugins to open the Plugins
dialog box.
Click Available Plugins.
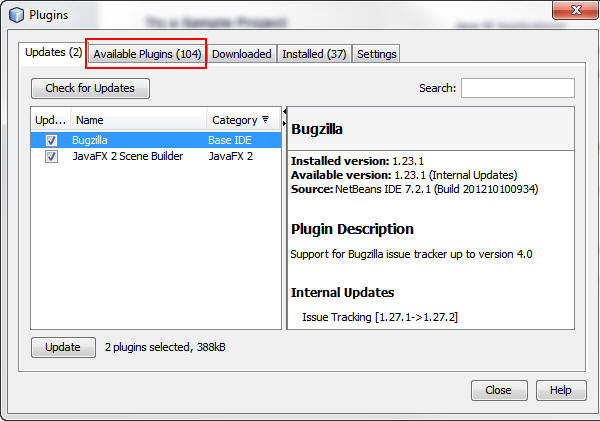
Note: The number of available plugins may be
different in your installation.
Select Name to change the sort order of the table
from Category to Name.

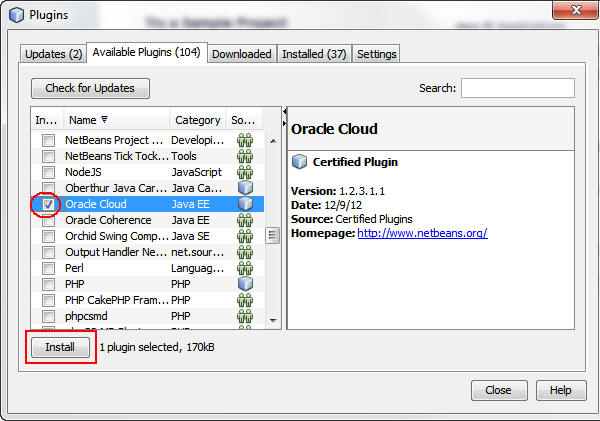
Perform the following steps:
a. Scroll to the Oracle Cloud plugin.
b. Select the Oracle Cloud check box.
c. Click Install.
In the Installer dialog box, click Next.
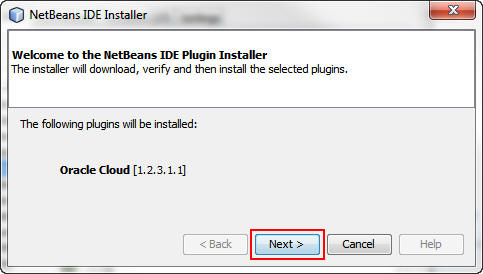
Accept the license and click Install.

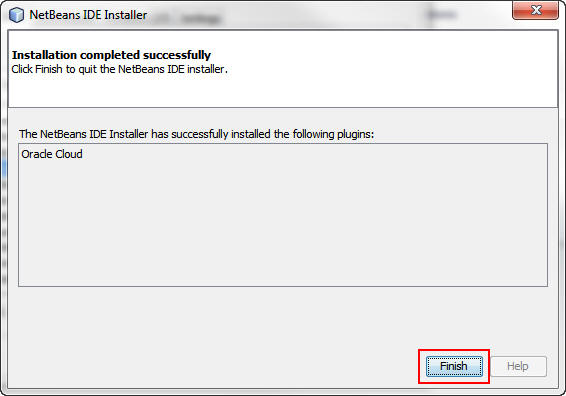
Click Finish to close the Installer dialog box.
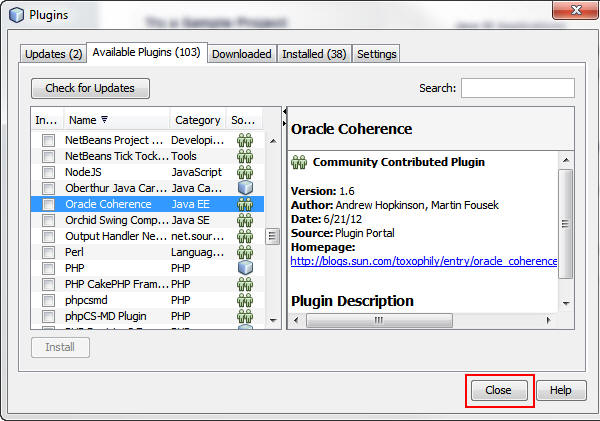
In the Plugins dialog box, click Close.
Adding an Oracle Java Cloud Server Instance to NetBeans
The Oracle Cloud plugin enables NetBeans to recognize Oracle
Java Cloud Server as a server instance that can be added to the
IDE. In this section, you add your Oracle Java Cloud Server
instance to NetBeans.
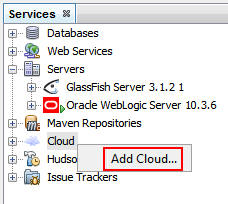
On the Services tab, right-click Cloud and select
Add Cloud.
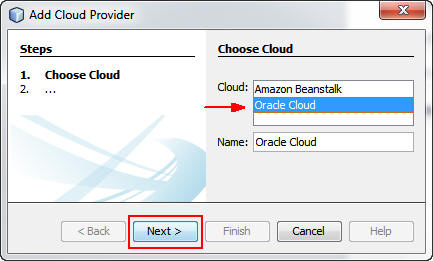
In the Add Cloud Provider dialog box, select Oracle
Cloud and click Next.
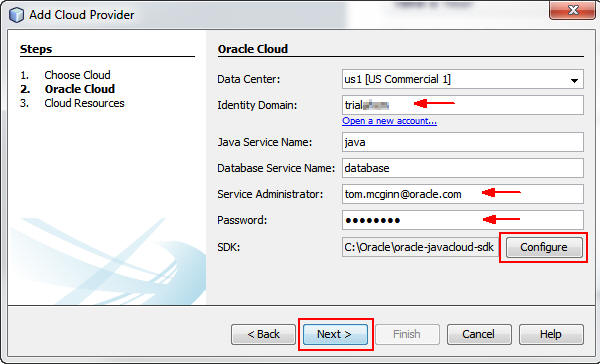
On the next screen, perform the following steps:
a. Enter the name of your Oracle Cloud identity domain in
the Identity Domain field.
b. Enter your Oracle Cloud login name (usually your Oracle.com login) in the Service Administrator field.
c. Enter the password for your Oracle Cloud account.
d. Enter the path to the Oracle Cloud SDK or click Configure to browse to the path.
e. Click Next.
On the next screen, click Finish.
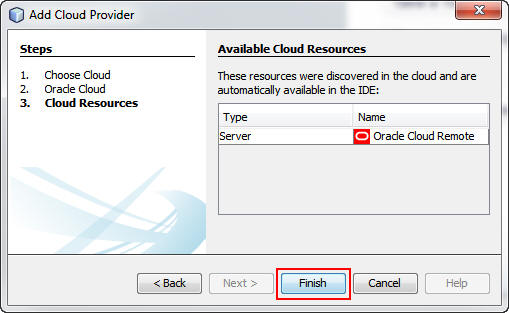
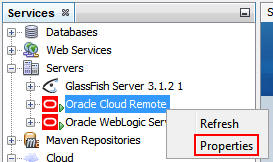
Oracle Cloud Remote is added to the list of servers on the Services tab.

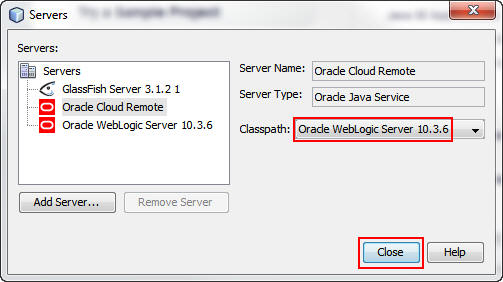
Right-click Oracle Cloud Remote and select Properties.
Make sure that the classpath is set to Oracle WebLogic
Server 10.3.6 and click Close.
Configuring WebLogic Server to Use JSF 2.0 Libraries
You can configure WebLogic Server 11g to use JavaServer
Faces (JSF) 2.0 libraries by creating an application that
requires JSF 2.0 libraries. Going forward, the NetBeans IDE
automatically updates the server libraries to include JSF 2.0
and JavaServer Pages Standard Tag Library (JSTL) 1.2. The key
step is creating a project that requires JSF 2.0 so that
NetBeans configures WebLogic Server.
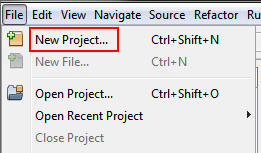
Select File > New Project.
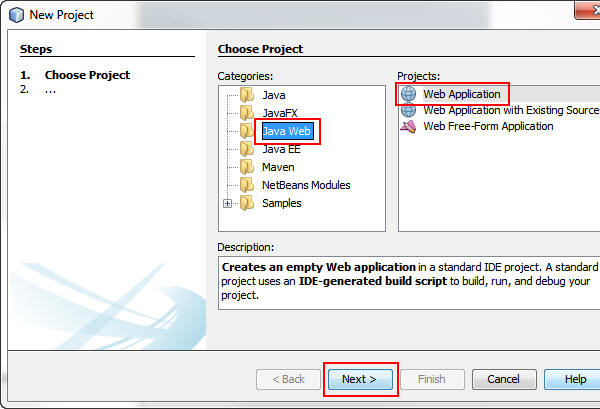
In the New Project dialog box, perform the following steps:
a. Select Java Web from the Categories list.
b. Select Web Application from the Projects list.
c. Click Next.
Enter temp as the project name and click Next.

Select Oracle WebLogic Server 10.3.6 as the Server
and click Next.

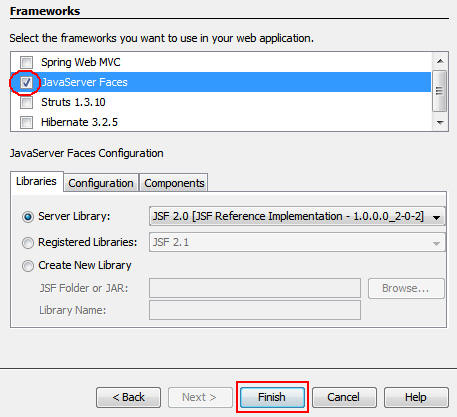
On the next screen, select JavaServer Faces
as the framework and click Finish.
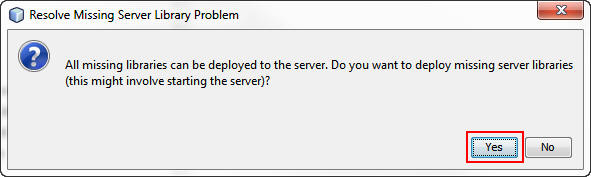
In the Resolve Missing Server Library Problem dialog box,
click Yes to add the necessary missing libraries to
the server.
In the Projects window, right-click the temp project
and select Delete.
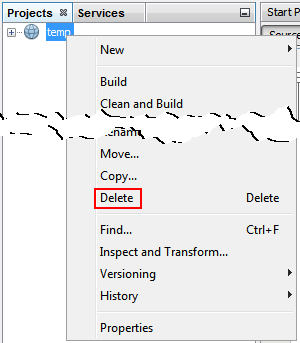
In the Delete Project dialog box, select the check box to
delete the sources and click Yes.

Opening the Sample Application and Testing It Locally
In this section, you open the ajaxguessnumber project provided
in this tutorial and test it with WebLogic Server 11g.
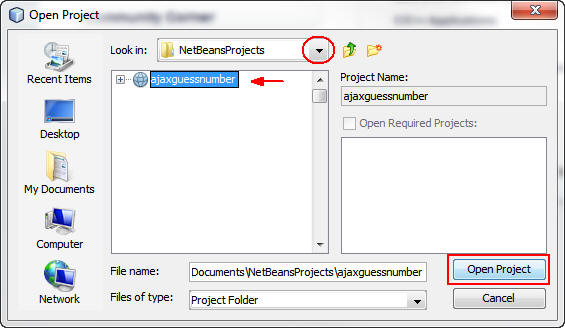
Select File > Open Project.
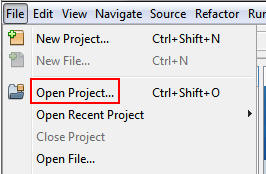
In the Open Project dialog box, perform the following steps:
a. In the “Look in” list, select the directory where you
unzipped the ajaxguessnumber project.
b. Select the ajaxguessnumber project.
c. Click Open Project.
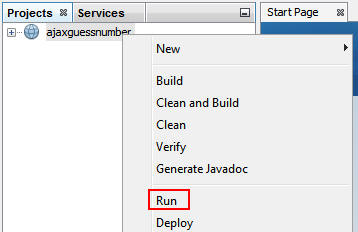
Right-click the project and select Run.

The project is compiled and deployed to WebLogic Server 10.3.6. After deployment, the application opens in a browser window.

Note: The correct number is written to the Oracle WebLogic Server 10.3.6 output window.
Deploying the Sample Application to Your Oracle Cloud
Instance and Testing It
In this section, you modify the NetBeans ajaxguessnumber
project to deploy it to your Oracle Cloud instance.
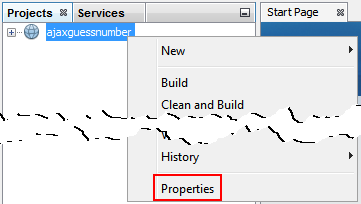
Right-click the project and select Properties to
open the Project Properties dialog box.
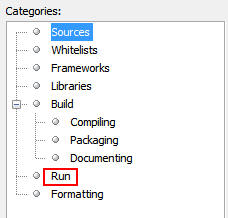
In the Categories section, select Run.
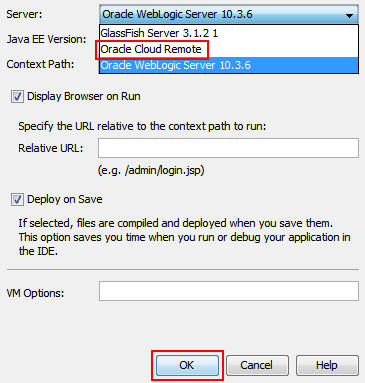
Select Oracle Cloud Remote from the Server list and
click OK.
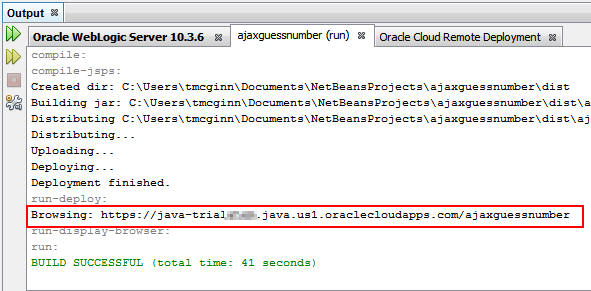
Right-click the project and select Run.
In the Output window, the ajaxguessnumber (run) tab
displays the URL of the application in the Oracle Java Cloud
Service. Because you ran the project, the URL is
automatically sent to your default browser. The application
opens in a browser window, but you must first log in with
your Oracle Cloud credentials.
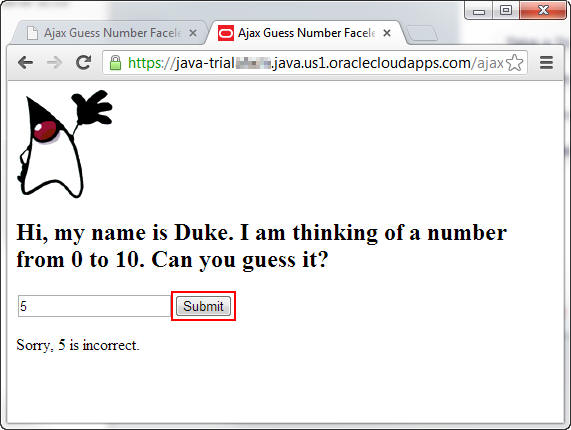
Enter your user name, password, and identity domain and then click Sign in.

Enter a number and click Submit to check your
guess.
Monitoring Deployment Activities and Running Applications
in Oracle Cloud
You can monitor the result of a deployment and any messages
sent to the server log within NetBeans.
On the Services tab, expand the Oracle Cloud Remote Server
instance to see the deployed applications.

When you right-click an application, you can select any of
the following options:
View: Open the application in a browser.
Start: Restart the application if it is currently stopped.
Stop: Stop a running application.
Undeploy: Remove the application from
Oracle Cloud.

Under Cloud in the Services window, right-click Oracle Cloud and select View Jobs and Logs to open the Jobs and Logs window.

The Jobs tab logs the deployment activities to your Oracle Java Cloud Server instance.
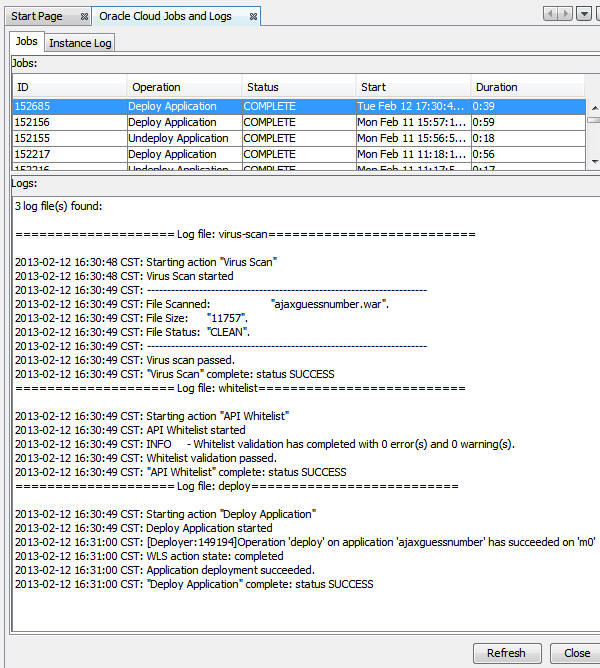
Click Instance Log to see the messages logged by
your Oracle Java Cloud Service instance.
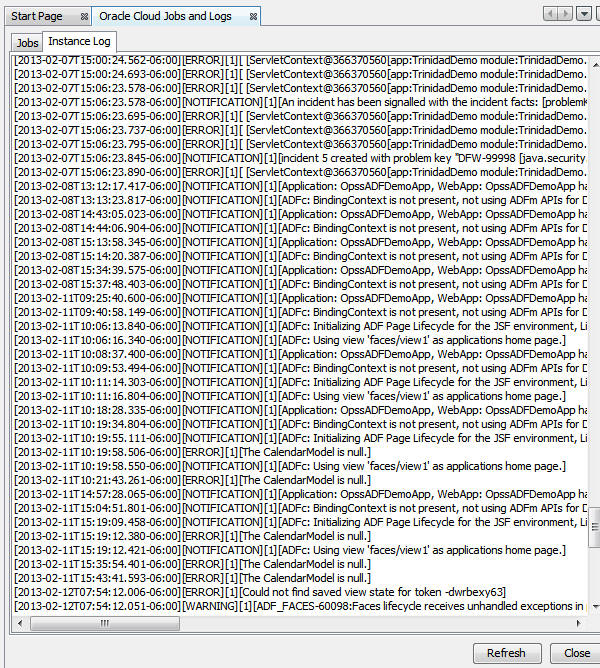
These messages are similar to those recorded in the local log file of your local WebLogic Server instance.
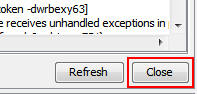
Click Close to close the Oracle Cloud Jobs and Logs
window.
Summary
- Add a local instance of WebLogic Server 11g to your NetBeans installation
- Configure WebLogic Server 11g to provide the support
for JSF 2.0 and JPA 2.0
- Add the Oracle Cloud plugin to NetBeans to enable NetBeans to add an Oracle Cloud instance
- Add an instance of Oracle Cloud to your NetBeans installation as a remote server
- Deploy and run applications locally to your WebLogic Server 11g instance
- Deploy and run applications to your Oracle Cloud instance
- Monitor Oracle Cloud deployments and run applications from
NetBeans
- Oracle Cloud documentation
- NetBeans documentation
- WebLogic
Server 11g documentation
- To learn more about Oracle
Cloud, refer to additional OBEs in the Oracle Learning Library
- Lead Curriculum Developer: Tom McGinn
In this tutorial, you learned how to:
Resources
Credits
To help navigate this Oracle by Example, note the following:
- Hiding Header Buttons:
- Click the Title to hide the buttons in the header. To show the buttons again, simply click the Title again.
- Topic List Button:
- A list of all the topics. Click one of the topics to navigate to that section.
- Expand/Collapse All Topics:
- To show/hide all the detail for all the sections. By default, all topics are collapsed
- Show/Hide All Images:
- To show/hide all the screenshots. By default, all images are displayed.
- Print:
- To print the content. The content currently displayed or hidden will be printed.
To navigate to a particular section in this tutorial, select the topic from the list.