Integrating Servlets with EJB Using CDI in Java EE 6
Overview
- Download and install the Java Platform, Enterprise Edition 6 (Java EE 6) software development kit from http://www.oracle.com/technetwork/java/javaee/downloads/index.html
- Download and install NetBeans integrated development environment (IDE) 7.3.1 from http://www.netbeans.org/downloads/index.html
- Download and install Oracle WebLogic Server Zip Distribution from http://www.oracle.com/technetwork/middleware/weblogic/downloads/index.html
- This tutorial uses NetBeans IDE 7.3.1 and WebLogic Server 12.1.1 as the web server, but you can use any other compliant Java EE web profile server. For more information about such servers, go to http://www.oracle.com/technetwork/java/javaee/overview/compatibility-jsp-136984.html
- To install and configure WebLogic Server 12c in NetBeans, go to: Installing, Configuring, and Testing WebLogic Server 12c Developer Zip Distribution in NetBeans
- Knowledge of the Java programming language.
- Basic knowledge of Java EE 6, specifically servlets and JSP.
- Basic knowledge of HTML.
Purpose
This tutorial shows you how to inject Enterprise JavaBeans (EJB) into a servlet using Contexts and Dependency Injection (CDI). You'll also learn how to create and connect to a database for storing Java beans and to define a persistence unit to allow it to be managed by an EntityManager instance.
Time to Complete
Approximately 1 hour
Scenario
This tutorial involves a book registration application that enables a user to save a book's information to a database. To accomplish this, you create a servlet for handling the HTML form's parameters that the user submitted, you create a Java bean for storing the information in an object, and you create a database for storing the object's content. You also learn how to unify these elements by using EJB, CDI, and servlets.
Software Requirements
The following is a list of software requirements needed to accomplish this tutorial:
Prerequisites
Before starting this tutorial, you should have:
Introduction to Contexts and Dependency Injection and Enterprise JavaBeans
This section gives a brief introduction to CDI, Servlets, and EJB.
Dependency Injection refers to the process of supplying an external dependency to a software component, allowing you to remove hard-coded dependencies. These dependencies can be supplied in a type-safe way and choose which implementation of a particular interface to use.
CDI injects components (such as Java beans) that live in well-defined references or scopes. This makes the use of components from different scopes more natural and convenient, since you can use and inject beans from different scopes. CDI is also integrated with Expression Language (EL), which allows any component to be used directly within a JavaServer Faces (JSF) page or a JavaServer Pages (JSP) page. CDI also helps you design and build loosely coupled systems, since it decouples the server and the client by means of well-defined types and qualifiers.
Creating a Java EE 6 Web Project
In this section, you create a Java EE 6 web application on which you’ll build the book registration application.
Open the NetBeans IDE.
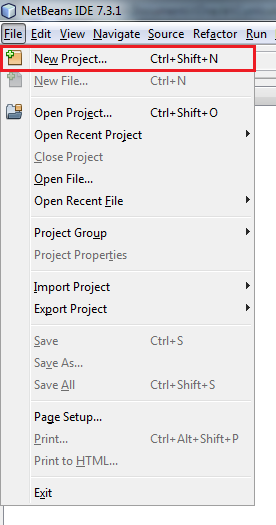
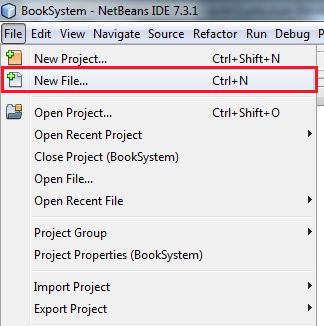
From the File menu, select New Project.
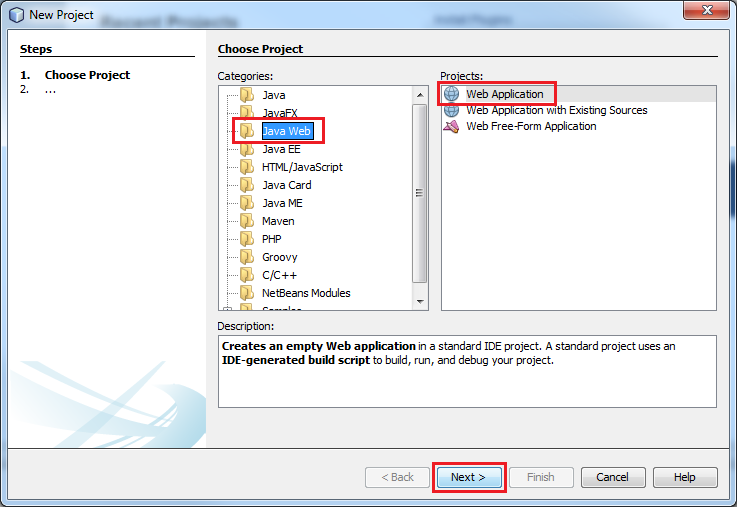
Select Java Web from Categories and Web Application from Projects and click Next.
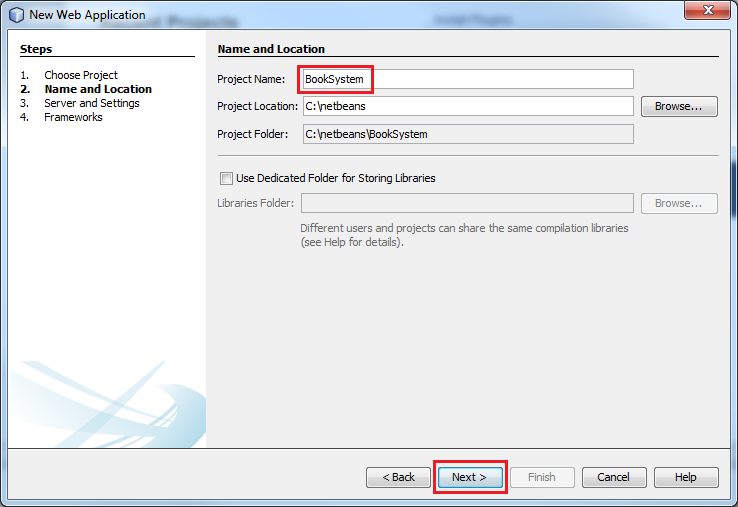
Enter BookSystem as the project name and click Next.
Select Oracle WebLogic Server from the Server list.
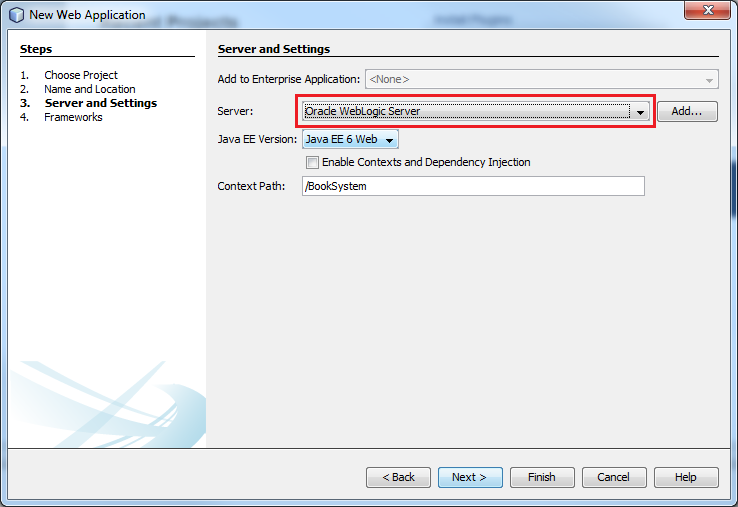
Select the Enable Contexts and Dependency Injection check box.
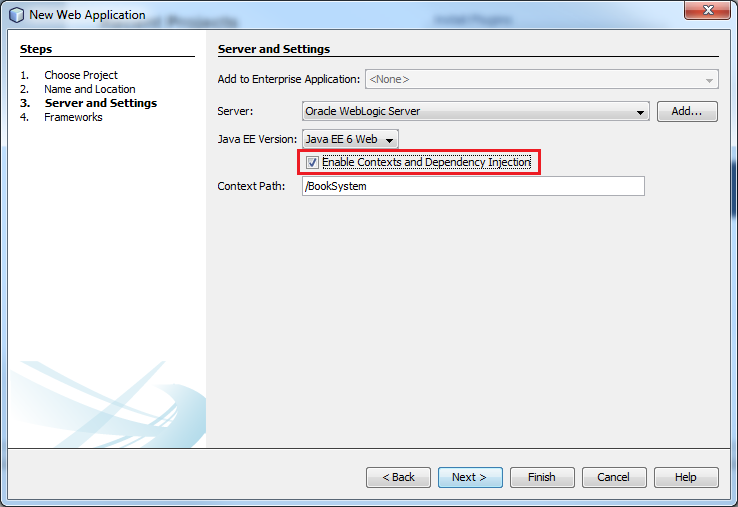
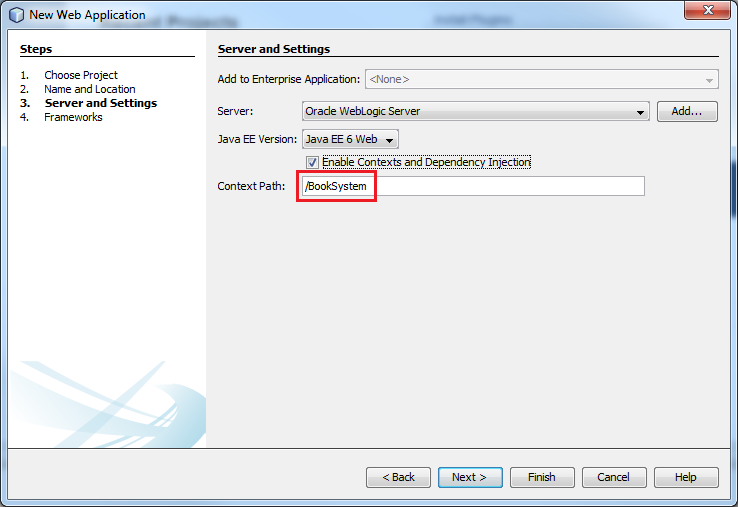
Enter BookSystem as the context path and click Finish.
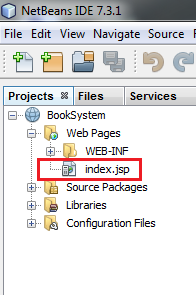
The BookSystem project has been created. The index.jsp is added to the project.
Add the following code to the index.jsp file.
<%@page contentType="text/html" pageEncoding="UTF-8"%>
<!DOCTYPE html>
<html>
    <head>
        <meta http-equiv="Content-Type" content="text/html; charset=UTF-8">
        <title>JSP Page</title>
    </head>
    <body>
        <h1>Book System</h1>
        <a href="addBook.html">Add a book</a>
    </body>
</html>
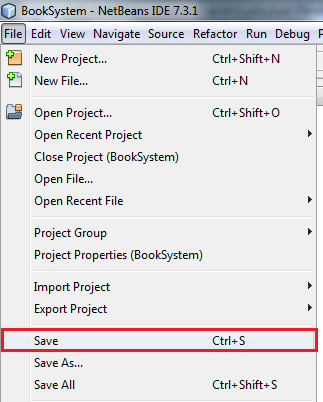
Select File > Save to save the changes.
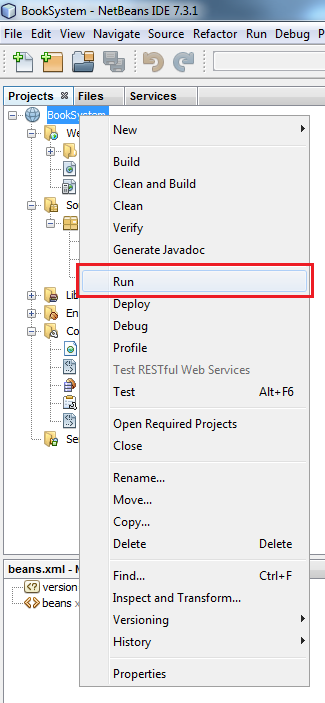
Right-click the BookSystem project and select Run to test your application.
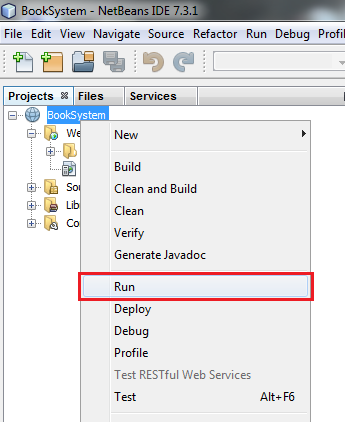
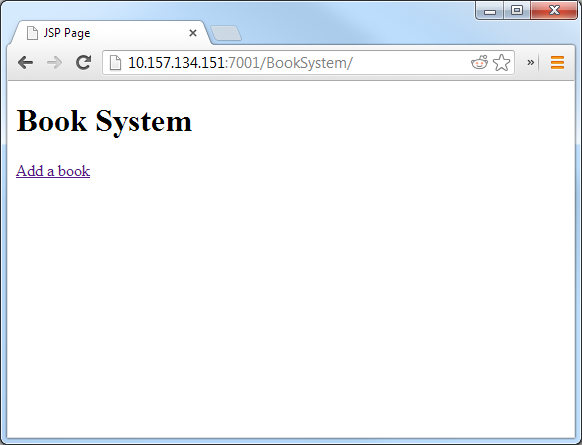
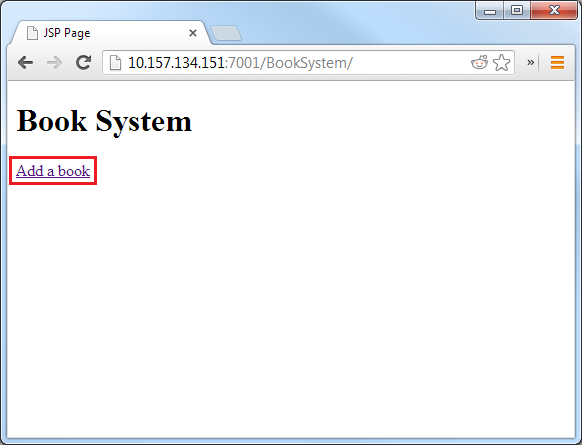
A browser window displays a Book System header. You successfully created a Java EE 6 web application by using Netbeans.
Creating the HTML Book Registration Form
In this section, you create an HTML form for registering a book.
Select File > New File.

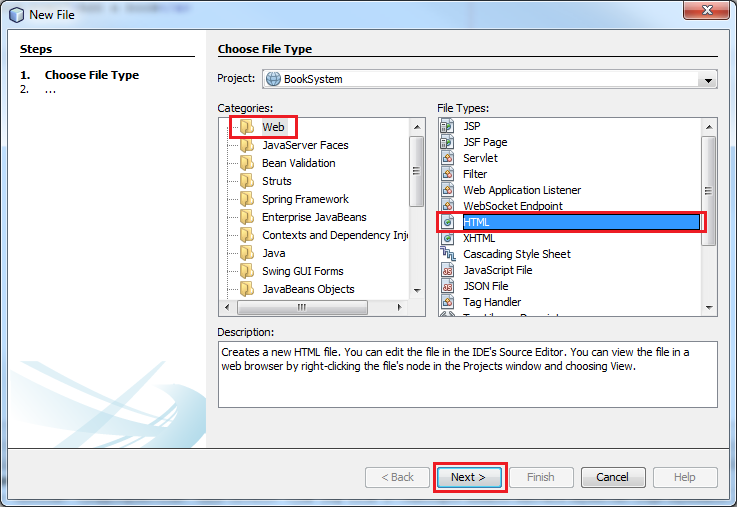
Select Web from Categories and HTML from File Types and click Next.
Enter addBook as the file name and click Finish.
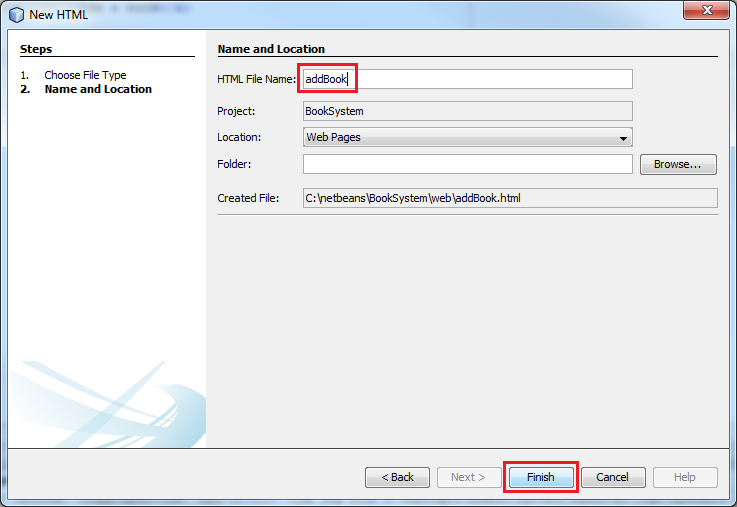
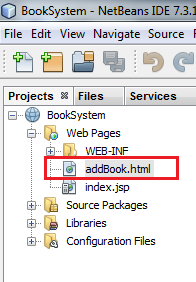
The addBook.html file is added to the project.
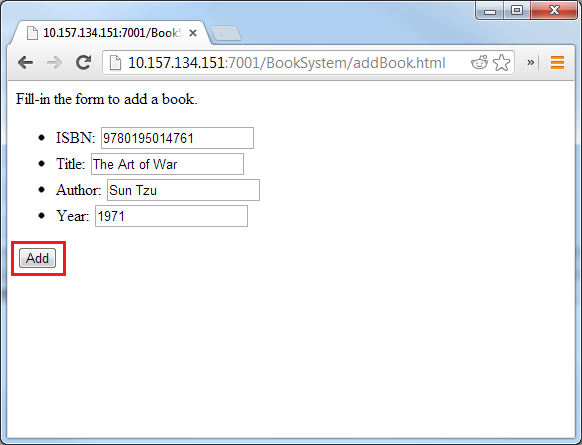
Enter the following code in the addBook.html file to add an HTML form for registering a file in the application:
<!DOCTYPE html>
<html>
    <head>
        <title></title>
        <meta http-equiv="Content-Type" content="text/html; charset=UTF-8">
    </head>
    <body>
		<div>Fill-in the form to add a book.</div>
		<form>
		<ul>
            <li>ISBN: <input type="text" name="isbn"></li>
            <li>Title: <input type="text" name="title"></li>
            <li>Author: <input type="text" name="author"></li>
            <li>Year: <input type="text" name="year"></li>
        </ul>
            <input type="submit" value="Add" />
        </form>
    </body>
</html>
Enter the following code to specify the page for processing the HTML form:
<!DOCTYPE html>
<html>
    <head>
        <title></title>
        <meta http-equiv="Content-Type" content="text/html; charset=UTF-8">
    </head>
    <body>
        <div>Fill-in the form to add a book.</div>
        <form action="AddBookServlet" method="POST">
        <ul>
            <li>ISBN: <input type="text" name="isbn"></li>
            <li>Title: <input type="text" name="title"></li>
            <li>Author: <input type="text" name="author"></li>
            <li>Year: <input type="text" name="year"></li>
        </ul>
            <input type="submit" value="Add" />
        </form>
    </body>
</html>
Note: The AddBookServlet file hasn’t been created yet. You will do this in the next section.
Select File > Save to save the addBook.html file.

Creating a Servlet for Processing the Form Parameters
In this section, you create a Java servlet for processing the form parameters and printing out a server-side response.
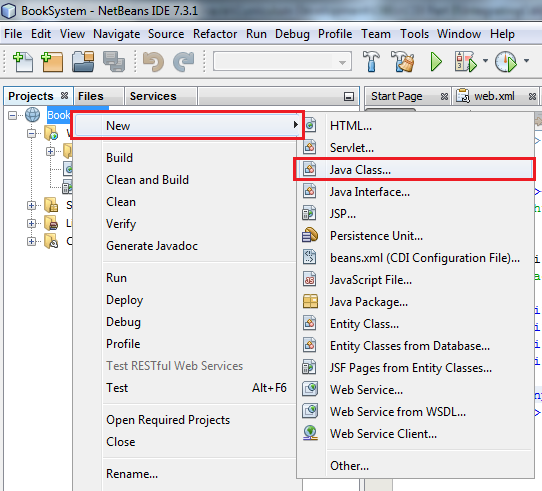
Right-click the BookSystem project and select New > Java Class.
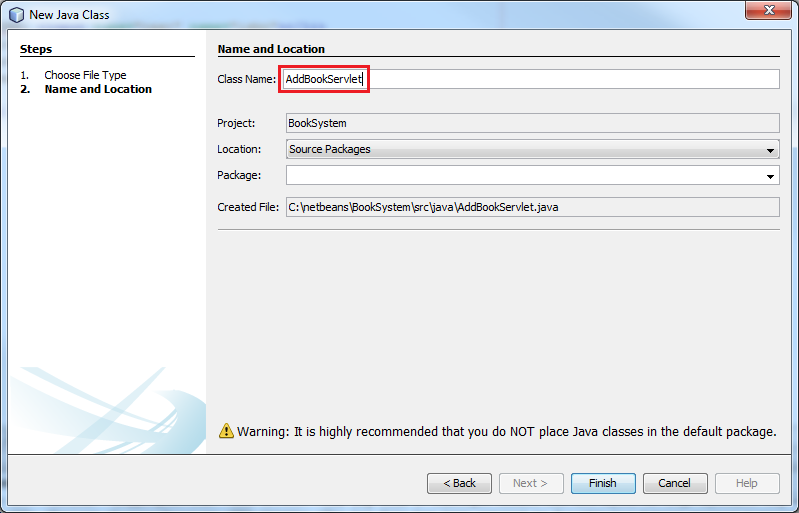
Enter AddBookServlet as the class name.
Enter org.example.book as the package and click Finish.
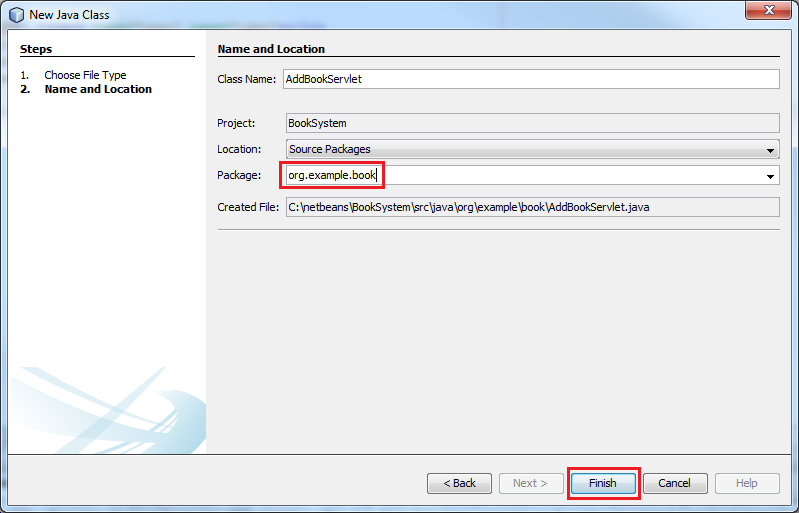
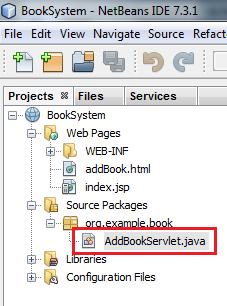
The AddBookServlet.java class has been added to the project.
Define the AddBookServlet.java class as a servlet by adding the @WebServlet annotation and extending the HttpServlet class.
package org.example.book;
import javax.servlet.annotation.WebServlet;

@WebServlet("/AddBookServlet")
public class AddBookServlet extends HttpServlet {

    }
}
Enter the following code to add the doPost method for generating a server response:
package org.example.book;
import java.io.IOException;
import java.io.PrintWriter;
import javax.servlet.ServletException;
import javax.servlet.http.*;
import javax.servlet.annotation.WebServlet;


@WebServlet("/AddBookServlet")
public class AddBookServlet extends HttpServlet {

    @Override
    protected void doPost(HttpServletRequest req, HttpServletResponse resp) throws ServletException, IOException {
        PrintWriter out = resp.getWriter();
        out.println("<html><head></head><body>");
        out.println("Book added successfully.");
        out.println("</body></html>");
    }
}
Select File > Save to save the file.

Creating a Database Connection for Object Persistence
In this section, you create a database for storing a book's information.
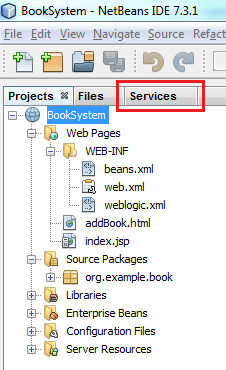
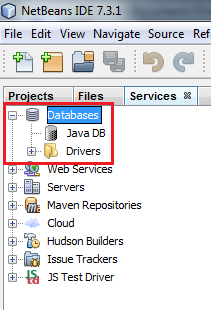
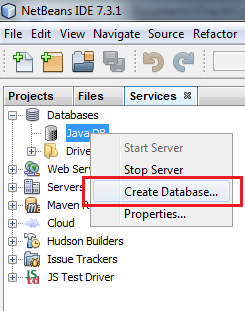
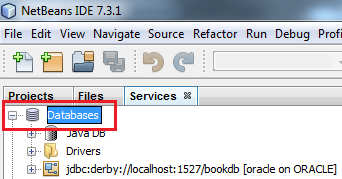
Click the Services tab.
Expand the Databases node to display a list of database servers.
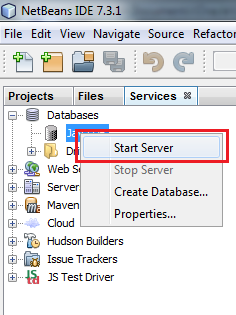
Right-click the Java DB node and select Start Server.
In the Output window, verify that the Java DB database server is listening to the connection.

The Java DB database server is now running in your machine.
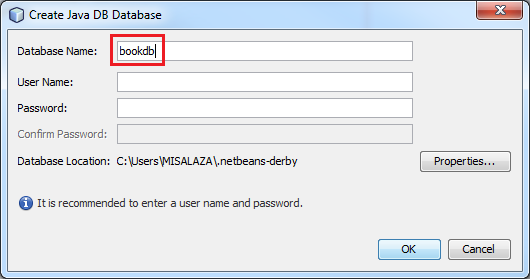
Right-click the Java DB node and select Create Database.
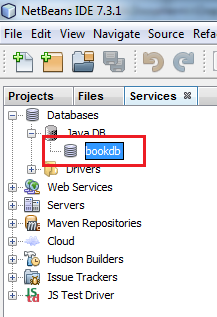
Enter bookdb as the database name.
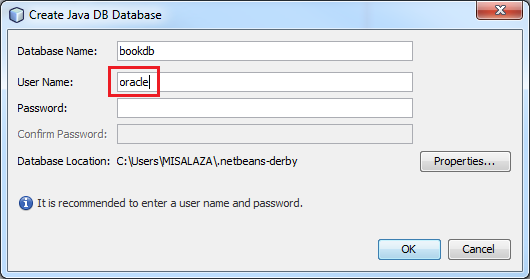
Enter oracle as the username.
Enter welcome1 as the password.
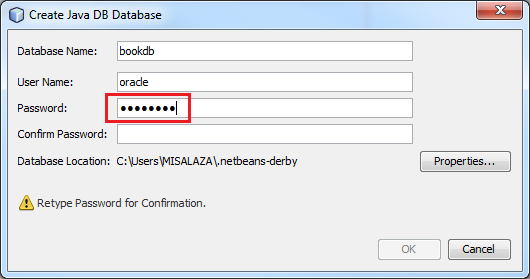
Enter the password again to confirm it and click OK.

Note: It may take a few minutes to create the database.
The bookdb database is added to the list of Java DB databases.
Right-click the bookdb database and select Connect.
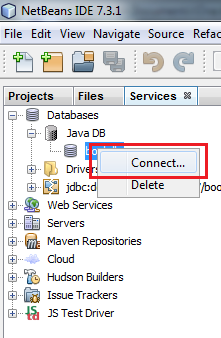
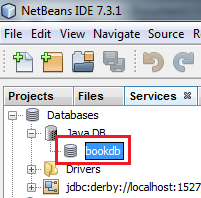
A new node containing the bookdb database connection is added to the Java DB node.
Creating a Persistence Unit
To persist Java objects to a database, you must define a persistence unit. A persistence unit defines a set of all entity classes that are managed by EntityManager instance in an application. This set of entity classes represents the data contained within a single data store. In this section, you create a persistence unit for storing the Book Java object in the database.
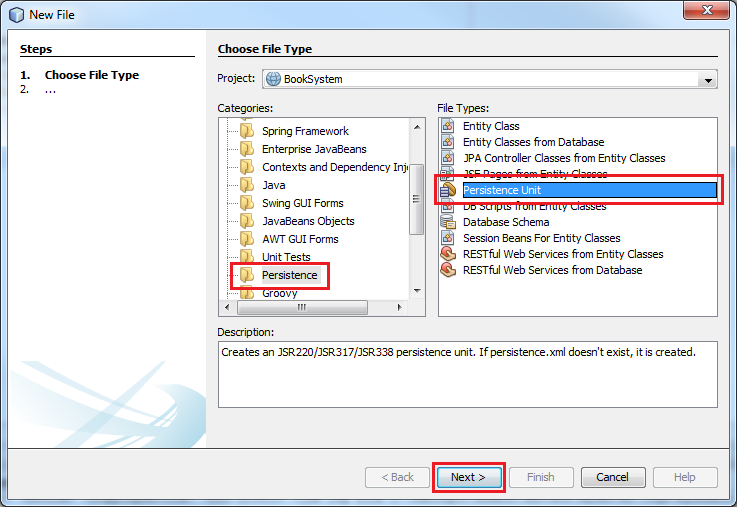
Select File > New File.
Select Persistence from Categories and Persistence Unit from File Types and click Next.
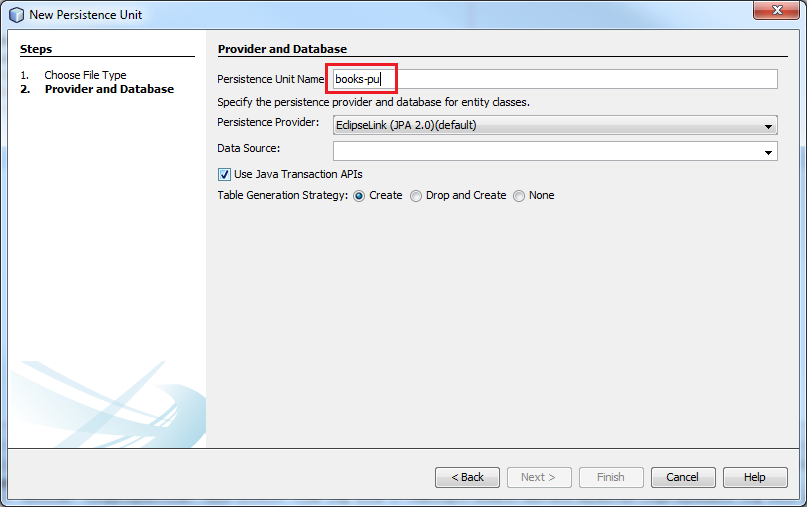
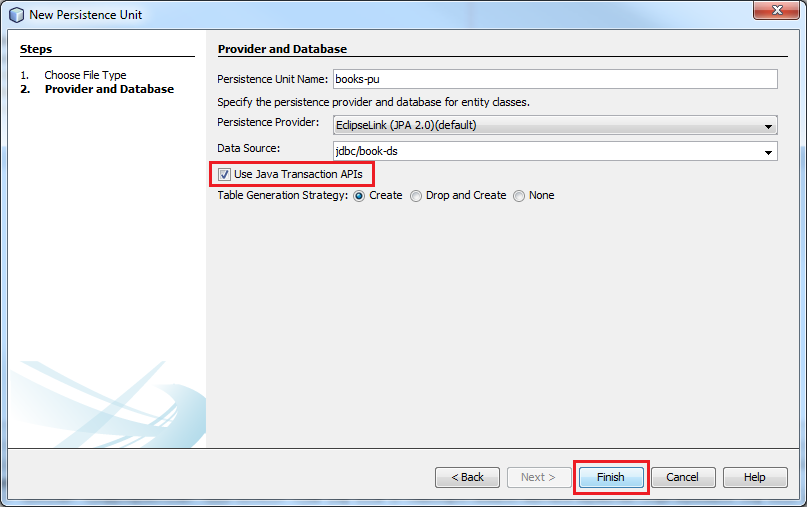
Enter books-pu as the persistence unit name.
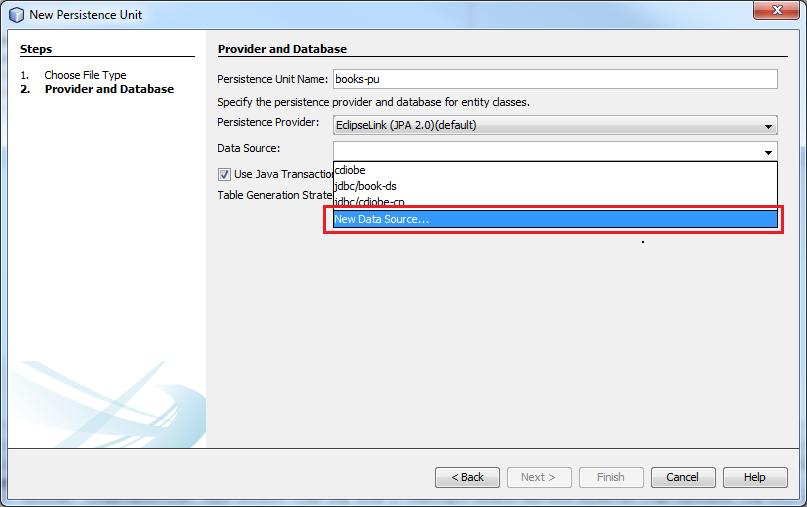
In the Data Source list, select New Data Source.
Enter jdbc/book-ds as the Java Naming and Directory Interface (JDNI) name.
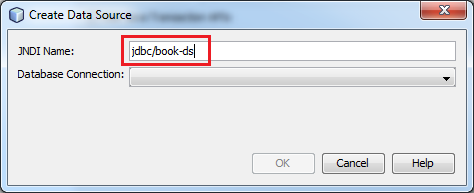
In the Database Connection list, select http://localhost:1527/bookdb [oracle on ORACLE] and click OK.
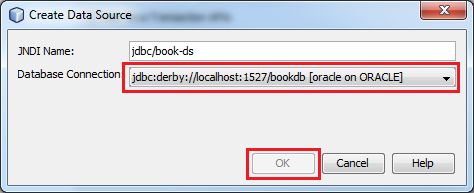
Select the Java Transaction APIs check box and click Finish.
The persistence.xml file has been added to the project. This file contains the list of entities that the database persists.
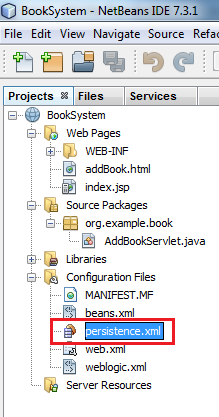
Select File > Save to save the persistence.xml file.

Creating the Book Bean
In this section, you create the Book Java bean for managing a book's information..
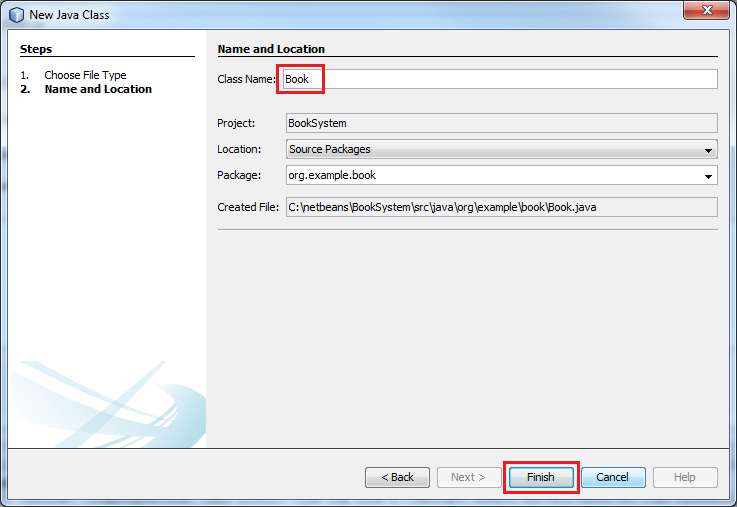
Right-click the org.example.book node and select New > Java Class.

Enter Book as class name and click Finish.
Enter the following code to define the variables used for processing the form’s elements and to create their corresponding getter and setter methods:
package org.example.book;

public class Book {

private String isbn;
    private String author;
    private String title;
	bookyear")
    private int year;

    public String getIsbn() {
        return isbn;
    }

    public void setIsbn(String isbn) {
        this.isbn = isbn;
    }

    public String getAuthor() {
        return author;
    }

    public void setAuthor(String author) {
        this.author = author;
    }

    public String getTitle() {
        return title;
    }

    public void setTitle(String title) {
        this.title = title;
    }

    public int getYear() {
        return year;
    }

    public void setYear(int year) {
        this.year = year;
    }
}
Enter the @Entity annotation and the Serializable class as follows:
package org.example.book;
import java.io.Serializable;
import javax.persistence.Entity;

@Entity
public class Book implements Serializable {

    private String isbn;
    private String author;
    private String title;
    bookyear")
    private int year;

    public String getIsbn() {
        return isbn;
    }

    public void setIsbn(String isbn) {
        this.isbn = isbn;
    }

    public String getAuthor() {
        return author;
    }

    public void setAuthor(String author) {
        this.author = author;
    }

    public String getTitle() {
        return title;
    }

    public void setTitle(String title) {
        this.title = title;
    }

    public int getYear() {
        return year;
    }

    public void setYear(int year) {
        this.year = year;
    }
}
The @Entity annotation specifies that the class is an entity. The Serializable class specifies that the Book class can be obtained from the database and used by the persistence engine.
Specify a column’s identifier (id) in the database by annotating the isbn variable with the @Id annotation.
package org.example.book;
import java.io.Serializable;
import javax.persistence.Entity;
import javax.persistence.Id;

@Entity
public class Book implements Serializable {

    @Id
    private String isbn;
    private String author;
    private String title;
    bookyear")
    private int year;

    public String getIsbn() {
        return isbn;
    }

    public void setIsbn(String isbn) {
        this.isbn = isbn;
    }

    public String getAuthor() {
        return author;
    }

    public void setAuthor(String author) {
        this.author = author;
    }

    public String getTitle() {
        return title;
    }

    public void setTitle(String title) {
        this.title = title;
    }

    public int getYear() {
        return year;
    }

    public void setYear(int year) {
        this.year = year;
    }
}
Enter the following code to add the @Column annotation to the year variable:
package org.example.book;
import java.io.Serializable;
import javax.persistence.Column;
import javax.persistence.Entity;
import javax.persistence.Id;

@Entity
public class Book implements Serializable {

    @Id
    private String isbn;
    private String author;
    private String title;
    @Column(name="bookyear")
    private int year;

    public String getIsbn() {
        return isbn;
    }

    public void setIsbn(String isbn) {
        this.isbn = isbn;
    }

    public String getAuthor() {
        return author;
    }

    public void setAuthor(String author) {
        this.author = author;
    }

    public String getTitle() {
        return title;
    }

    public void setTitle(String title) {
        this.title = title;
    }

    public int getYear() {
        return year;
    }

    public void setYear(int year) {
        this.year = year;
    }
}
Annotating this column makes the database treat this variable with the name specified in the name=”<column>” parameter. This step is not necessary, but is strongly suggested since year is a reserved word in some databases.
Select File > Save to save the file.

Creating the Book EJB Class
In this section, you define a stateless session bean and a persistence context for storing a book's information.
Right-click the org.example.book node and select New > Java Class.
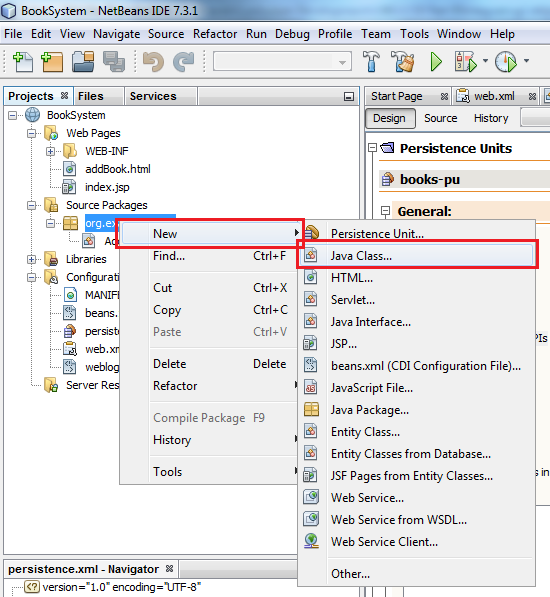
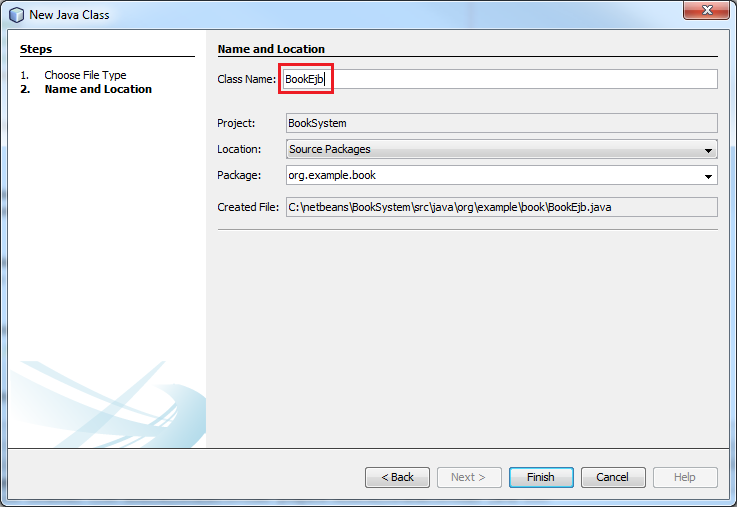
Enter BookEjb as the class name and click Finish.
Enter the following code to define a stateless session bean with the @Stateless annotation:
package org.example.book;
import javax.ejb.Stateless;

@Stateless
public class BookEjb {

    public void addBook() {

    }

}
Note: In this application, you use a stateless session bean because the server does not have a conversational state with the client. To learn more, see the section titled "What Is a Session Bean?" in the Java EE 6 tutorial. Click here to go the tutorial.
Enter the following code to add the addBook method for creating a Book object with the parameters received from the servlet:
package org.example.book;
import javax.ejb.Stateless;

@Stateless
public class BookEjb {

    public void addBook(String isbn, String title, String author, int year) {
        Book book = new Book();
        book.setIsbn(isbn);
        book.setTitle(title);
        book.setAuthor(author);
        book.setYear(year);
    }

}
Enter the @PersistenceContext annotation and an EntityManager instance as follows:
package org.example.book;
import javax.ejb.Stateless;
import javax.persistence.EntityManager;
import javax.persistence.PersistenceContext;

@Stateless
public class BookEjb {

    @PersistenceContext
    private EntityManager em;

    public void addBook(String isbn, String title, String author, int year) {
        Book book = new Book();
        book.setIsbn(isbn);
        book.setTitle(title);
        book.setAuthor(author);
        book.setYear(year);
    }

}
Enter the following code to use the persist() method for saving the Book object in the database:
package org.example.book;
import javax.ejb.Stateless;
import javax.persistence.EntityManager;
import javax.persistence.PersistenceContext;

@Stateless
public class BookEjb {

    @PersistenceContext
    private EntityManager em;

    public void addBook(String isbn, String title, String author, int year) {
        Book book = new Book();
        book.setIsbn(isbn);
        book.setTitle(title);
        book.setAuthor(author);
        book.setYear(year);
        em.persist(book);
    }

}
Select File > Save to save the file.

Integrating the EJB with the Servlet by Using CDI
In this section, you inject the EJB into the servlet by using CDI.
Open the AddBookServlet.java file.
To insert the EJB into the servlet, use the @Inject annotation as specified in the following code:
package org.example.book;
import java.io.IOException;
import java.io.PrintWriter;
import javax.servlet.ServletException;
import javax.servlet.http.*;
import javax.servlet.annotation.WebServlet;

@WebServlet("/AddBookServlet")
public class AddBookServlet extends HttpServlet {
    @Inject
    private BookEjb bookEjb;

    @Override
    protected void doPost(HttpServletRequest req, HttpServletResponse resp) throws ServletException, IOException {
        PrintWriter out = resp.getWriter();
        out.println("<html><head></head><body>");
        out.println("Book added successfully.");

        out.println("</body></html>");
    }
}
The BookEjb has been injected into the AddBookServlet class and can now be accessed through the bookEjb variable.
Enter the following code to import the javax.inject.Inject package:
package org.example.book;
import java.io.IOException;
import java.io.PrintWriter;
import javax.inject.Inject;
import javax.servlet.ServletException;
import javax.servlet.http.*;
import javax.servlet.annotation.WebServlet;

@WebServlet("/AddBookServlet")
public class AddBookServlet extends HttpServlet {
    @Inject
    private BookEjb bookEjb;

    @Override
    protected void doPost(HttpServletRequest req, HttpServletResponse resp) throws ServletException, IOException {
        PrintWriter out = resp.getWriter();
        out.println("<html><head></head><body>");
        out.println("Book added successfully.");

        out.println("</body></html>");
    }
}
Obtain the form’s parameters and call the addBook() method in the BookEjb.java class by adding the following code.
package org.example.book;
import java.io.IOException;
import java.io.PrintWriter;
import javax.inject.Inject;
import javax.servlet.ServletException;
import javax.servlet.http.*;
import javax.servlet.annotation.WebServlet;

@WebServlet("/AddBookServlet")
public class AddBookServlet extends HttpServlet {
    @Inject
    private BookEjb bookEjb;

    @Override
    protected void doPost(HttpServletRequest req, HttpServletResponse resp) throws ServletException, IOException {
        PrintWriter out = resp.getWriter();
        out.println("<html><head></head><body>");
        out.println("Book added successfully.");

        String isbn = req.getParameter("isbn");
        String title = req.getParameter("title");
        String author = req.getParameter("author");
        int year = Integer.parseInt(req.getParameter("year"));

        bookEjb.addBook(isbn, title, author, year);
        out.println("</body></html>");
    }
}
Select File > Save to save the file.

Right-click the BookSystem project and select Run to build and deploy the project.
A web browser displays the Book System page that you created.
Click Add a book.
Enter the book’s ISBN, title, author, and year, and then click Add.
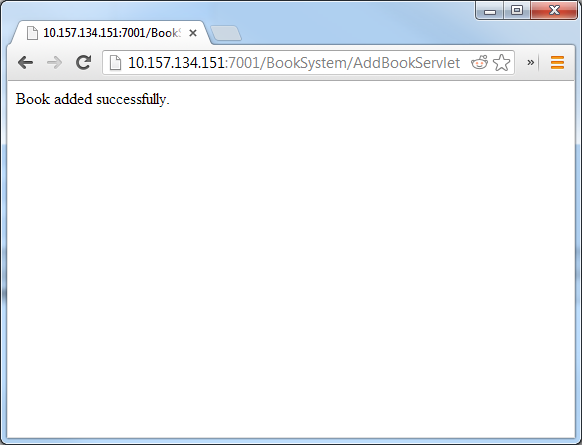
The Book added successfully message is displayed. The book has been added to the bookdb database.
Click the Services tab.

Expand the Databases node.
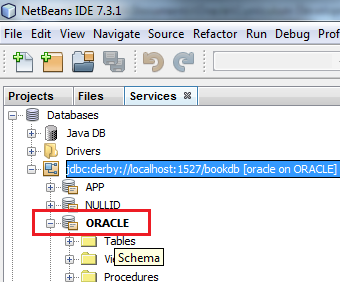
Expand the jdbc:derby://localhost:1527/bookdb [oracle on ORACLE] node.
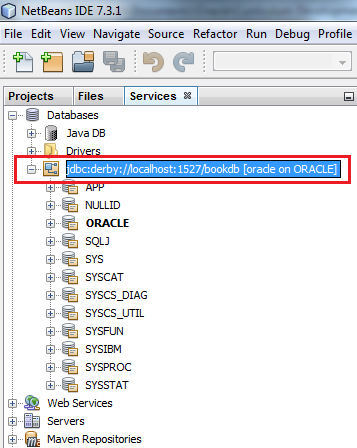
Expand the ORACLE node.
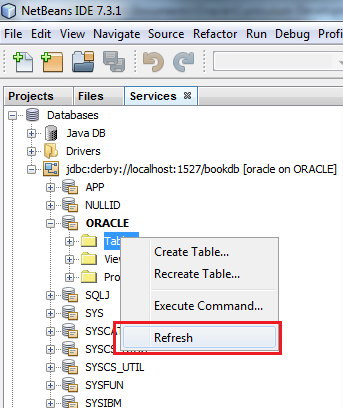
Right-click the Tables node and select Refresh.
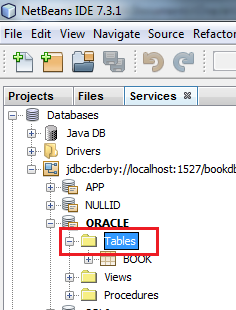
Expand the Tables node.
Right-click the BOOK table and select View Data.
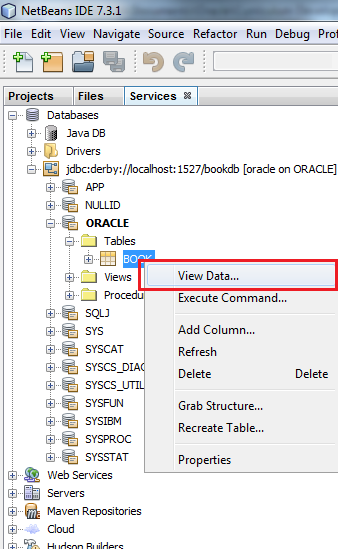
A SQL Command window opens.
Click the Run Project button to execute a query on the database.
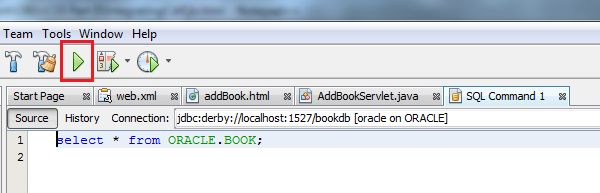
A SQL Command window opens and displays the book information that you submitted in Step 8.

Congratulations! You successfully submitted a book by using the application that you built, and you stored the book in a database that you created.
Summary
- Create a servlet to handle requests made by the client and invoke a server response
- Create a JavaDB database and connect to it by using NetBeans
- Define a persistence unit to represent data that will be stored in a database by using an EntityManager instance
- Create a Java bean and annotate it as an entity for storing it in a database
- Create an EJB, specify its persistence context, and define an EntityManager instance to manage it
- Inject an EJB component into a servlet by using the @Inject CDI annotation
- The Java EE 6 Tutorial chapter on CDI
- Oracle blog on Java EE 6 CDI Qualifiers explained
- Contexts and Dependency Injection in Java EE 6
- JSR 299: Contexts and Dependency Injection for the Java EE platform
- Interfaces on Demand with CDI and EJB 3.1
- Oracle courses and learning paths for Java EE 6.
- JSR 318: Enterprise JavaBeans 3.1
- The Java EE 6 Tutorial chapter on Enterprise Beans
- To learn more about Java EE 6, refer to additional OBEs in the Oracle Learning Library.
- Lead Curriculum Developer: Miguel Salazar
- Other Contributors: Eduardo Moranchel
In this tutorial you learned how to create an application that saves a book information to a database by using injected EJB components in a servlet.
You also learned how to:
Resources
For more information about the topics in this tutorial, see:
Credits
To help navigate this Oracle by Example, note the following:
- Hiding Header Buttons:
- Click the Title to hide the buttons in the header. To show the buttons again, simply click the Title again.
- Topic List Button:
- A list of all the topics. Click one of the topics to navigate to that section.
- Expand/Collapse All Topics:
- To show/hide all the detail for all the sections. By default, all topics are collapsed
- Show/Hide All Images:
- To show/hide all the screenshots. By default, all images are displayed.
- Print:
- To print the content. The content currently displayed or hidden will be printed.
To navigate to a particular section in this tutorial, select the topic from the list.