Developing RESTful Web Services in Java EE 6 Using JAX-RS
Overview
- Download and install Java EE 6 SDK from http://www.oracle.com/technetwork/java/javaee/downloads/index.html
- Download and install NetBeans 7.2 from http://www.netbeans.org/downloads/index.html
- Download and install Oracle WebLogic Server Zip Distribution from http://www.oracle.com/technetwork/middleware/weblogic/downloads/index.html
- This tutorial uses NetBeans IDE 7.2 and WebLogic 12.1.1 as the web server but you may use any other Java EE web profile compliant server. For more information on such servers, refer to http://www.oracle.com/technetwork/java/javaee/overview/compatibility-jsp-136984.html
- To install and configure WebLogic Server 12c in NetBeans, refer to: Installing, Configuring, and Testing WebLogic Server 12c Developer Zip Distribution in NetBeans
- Download and install RESTClient 3.1 GUI from http://code.google.com/p/rest-client/downloads/list
- Have knowledge of the Java 7 Programming Language.
- Have basic knowledge of the Java EE 6 Platform, specifically Servlets and JSP.
- Have basic knowledge of REST architecture, RESTful web services, and HTTP methods.
Purpose
This tutorial shows how to build a simple Representational State Transfer (REST) API server by using the Java API for RESTful web services (JAX-RS).
Time to Complete
Approximately 1 hour
Introduction
REST is an architectural style for stateless client/server communications. Web services that use this architectural style, also called RESTful web services or applications, access services which are identified by URLs. These services are acted upon by a set of methods that describe actions which will be performed on them. REST often relies on HTTP to describe such actions.
JAX-RS simplifies the development of RESTful web services by using Java. JAX-RS uses annotations to map Hyptertext Transfer Protocol (HTTP) methods into Java objects. JAX-RS is part of the Java Platform, Enterprise Edition 6 (Java EE 6).
Scenario
In this tutorial you first learn the basics of RESTful web services and how you can use JAX-RS to build such applications. Later on, you develop a REST API server by using JAX-RS that is capable of responding to the four basic HTTP methods: POST, GET, PUT, and DELETE. Finally, you deploy the REST server and test it by using RESTClient, an application for testing HTTP communications.
Software Requirements
The following is a list of software requirements needed to accomplish this tutorial:
Prerequisites
Before starting this tutorial, you should:
RESTful Web Services and JAX-RS Overview
This section gives a brief introduction to RESTful web services and JAX-RS.
What Are RESTful Web Services?
RESTful web services are applications that work based on the Representational State Transfer (REST) architectural style. In this style, data and functionality are considered resources and accessed by using Uniform Resource Identifier (URIs). These resources are acted upon by using a set of simple, well-defined operations.
RESTful web services use HTTP protocol methods to operate on resources. These methods are typically mapped to create, read, update, and delete operations. The following table shows the HTTP methods and the actions they typically perform.
| HTTP Method | Action Performed |
|---|---|
| POST | Creates a resource |
| GET | Reads a resource |
| PUT | Updates a resource |
| DELETE | Deletes a resource |
What Is JAX-RS?
Java API for RESTful Web Services (JAX-RS, defined in JSR-311) is a specification designed for creating RESTful web services in the Java platform. JAX-RS provides Java programming language annotations to map Plain Old Java Objects (POJO) as web resources.
The following table shows the annotations that are used in this tutorial:
| JAX-RS Annotation | Description |
|---|---|
| @POST | Corresponds to the HTTP POST method. The Java method annotated with this request method designator processes HTTP POST requests. |
| @GET | Corresponds to the HTTP GET method. The Java method annotated with this request method designator processes HTTP GET requests. |
| @PUT | Corresponds to the HTTP PUT method. The Java method annotated with this request method designator processes HTTP PUT requests. |
| @DELETE | Corresponds to the HTTP DELETE method. The Java method annotated with this request method designator processes HTTP DELETE requests. |
| @Path | Specifies the relative URI path where the application is hosted |
| @Produces | Specifies the MIME media types of representations that a resource can consume |
Note: To see a complete list of JAX-RS annotations, see the JAX-RS APIs at: http://docs.oracle.com/javaee/6/api/
Creating a Java EE 6 Web Project
In this section, you create a new Java EE 6 web application on which you’ll build the REST API server on.
Open NetBeans IDE.
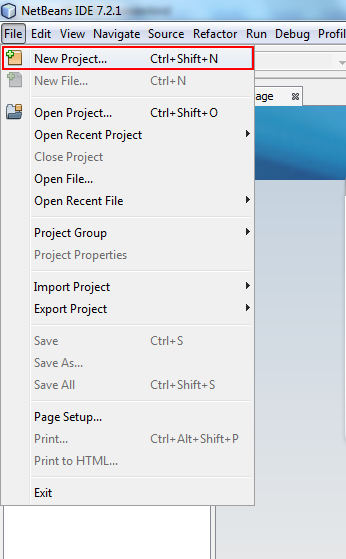
From the File menu, choose New Project.
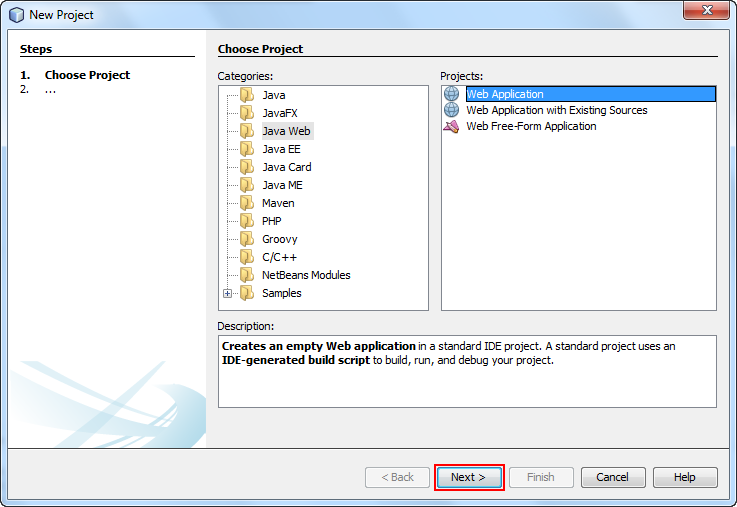
Select Java Web from Categories and Web Application from Projects. Click Next.
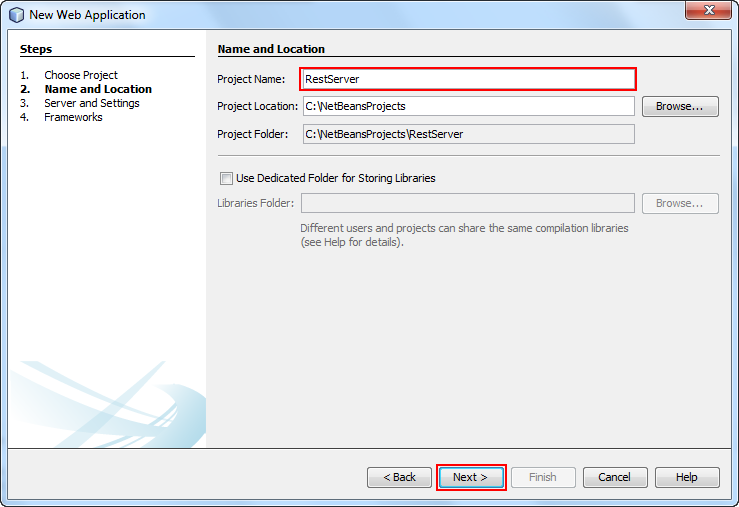
Enter RestServer as the project name and click Next.
Select Oracle WebLogic Server from the Server drop-down menu.
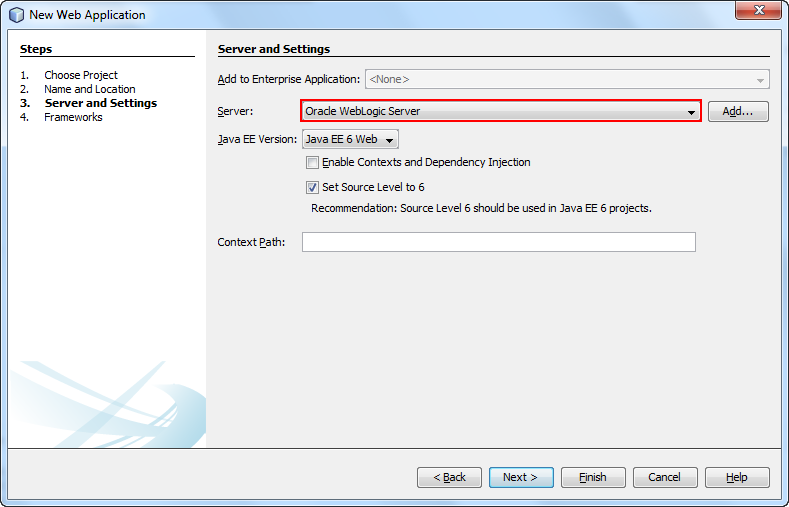
Enter RestServer as the Context Path and click Next.
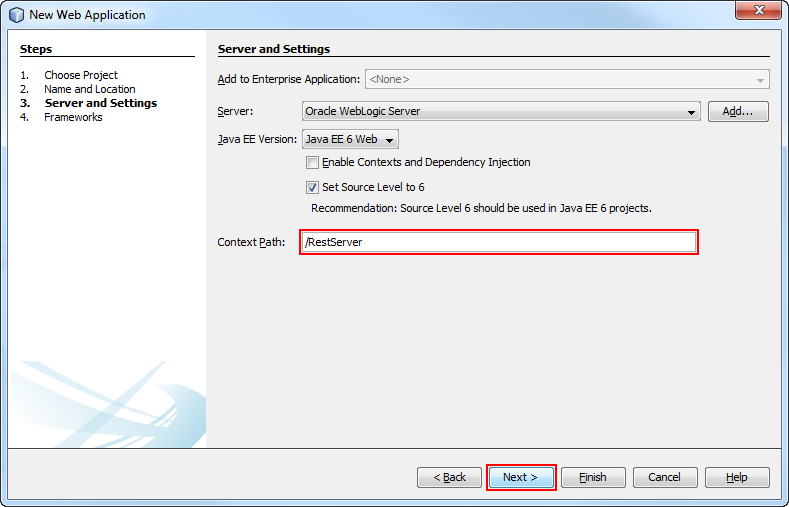
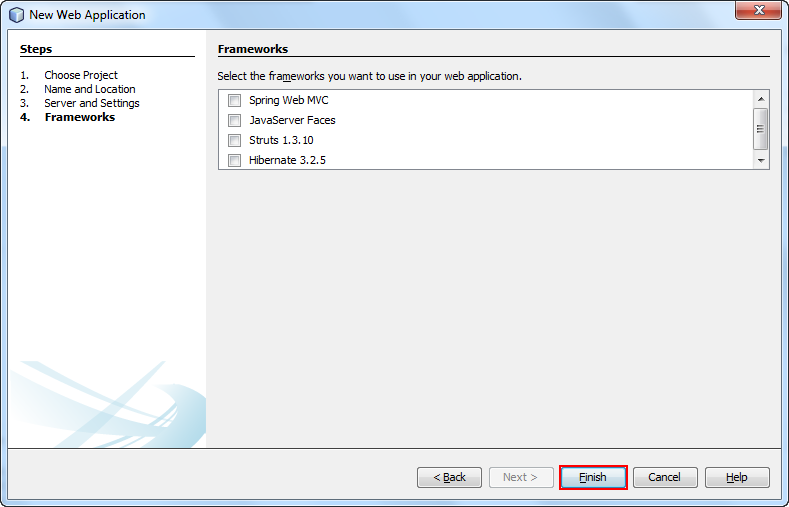
Under Frameworks, leave all options blank, and click Finish.
A new project called RestServer is created. The index.jsp file appears in the Source pane.
Right-click the project and select Run to test your application.
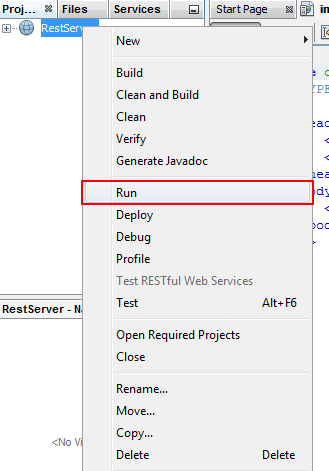
A browser window opens and displays a Hello World! message. You have created a Java EE 6 web application by using NetBeans.
Creating a RESTful Web Service Template
In this section you will create a RESTful web service by using NetBeans.
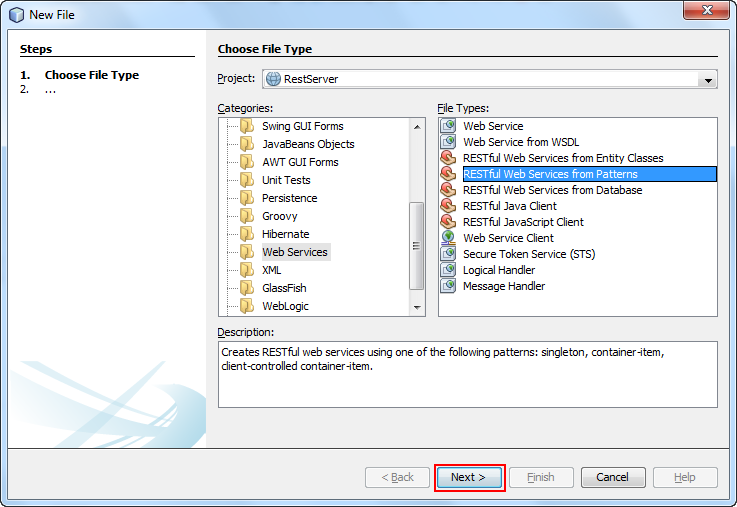
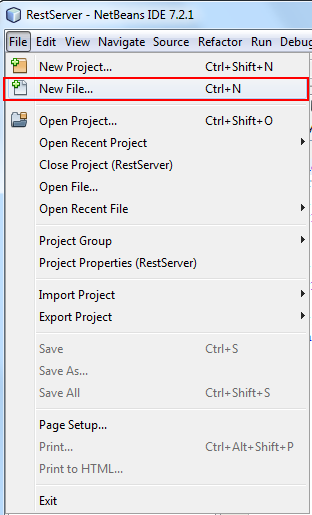
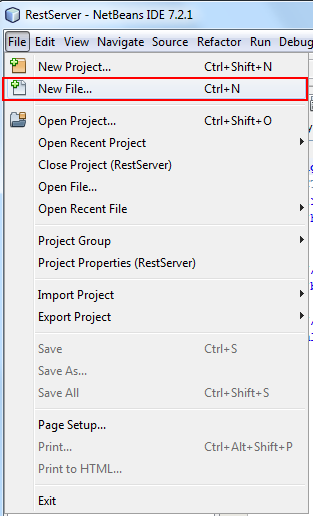
Select File > New File.

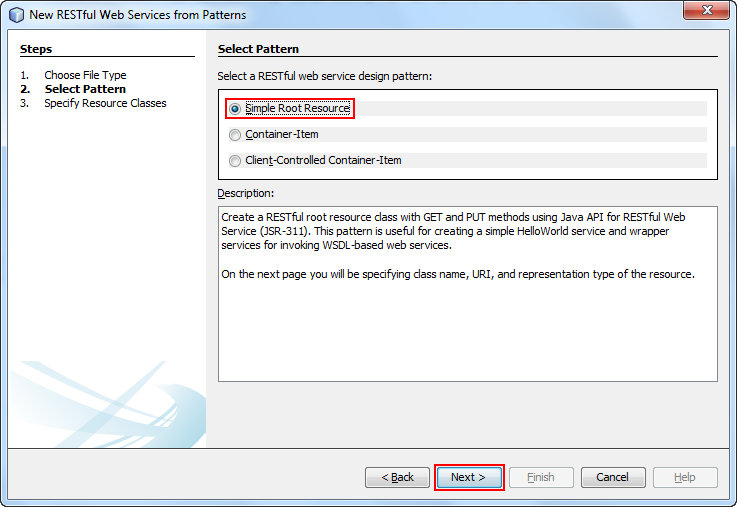
Select Web Services > RESTful Web Services from Patterns and click Next.
Select Simple Root Resource and click Next.
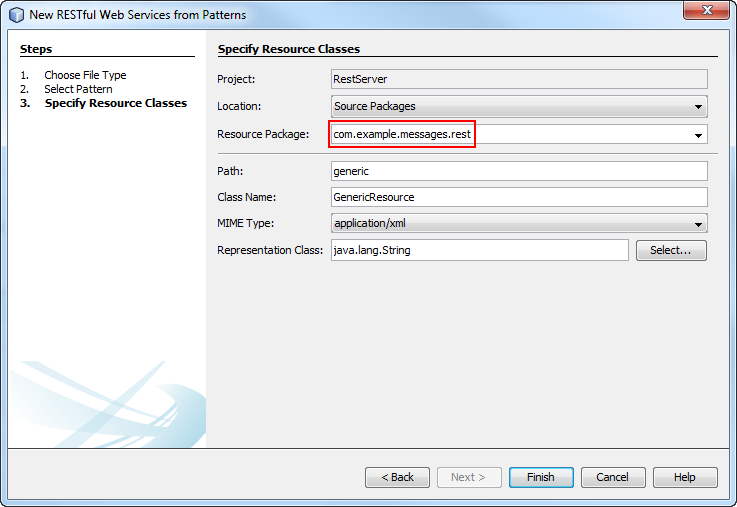
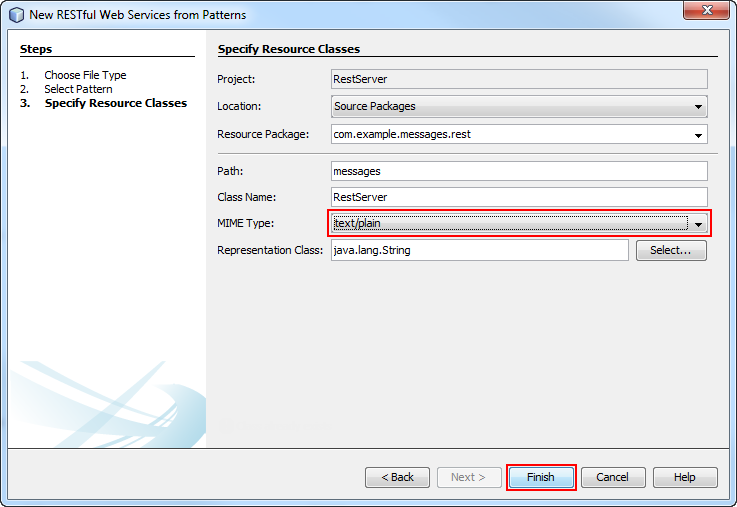
Enter com.example.messages.rest as the resource package.
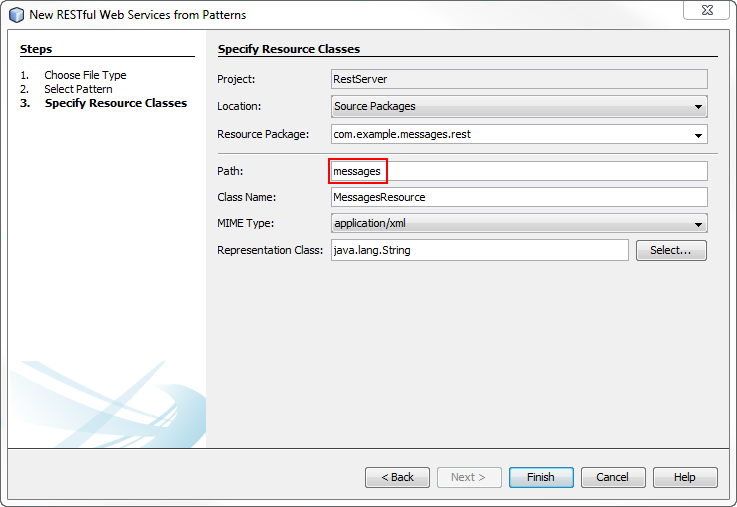
Enter messages as the path.
Enter RestServer as class name.
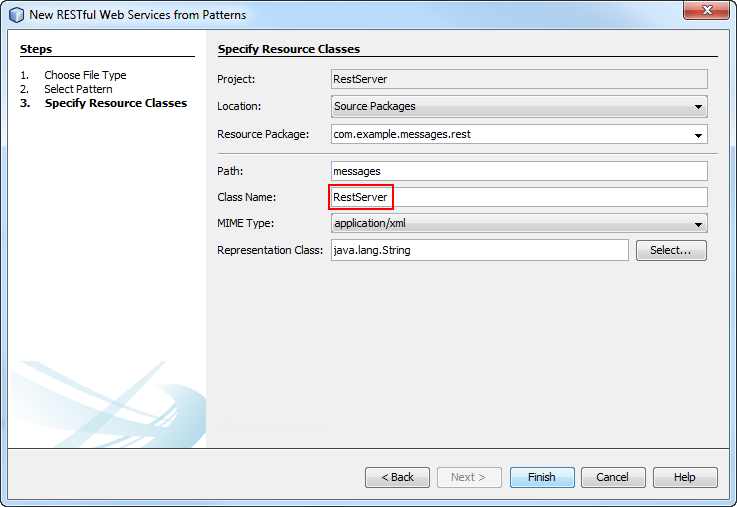
Select text/plain as the MIME type and click Finish.
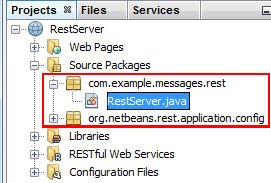
The RestServer.java resource is added to the project. This file provides a template for creating a RESTful web service.
Creating the Messages Backing Bean
In this section, you create a JavaBeans for storing, manipulating, and exposing messages.
Creating an Interface to Define the Message Methods and Manipulate Them
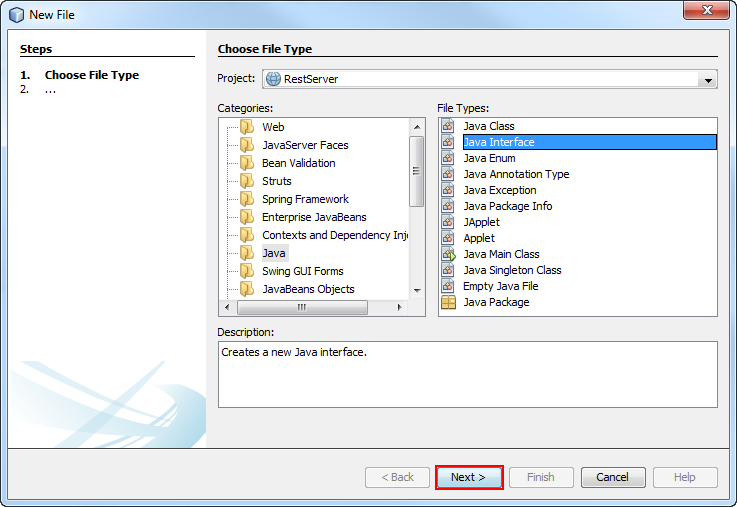
Select File > New File.
Select Java from Categories and Java Interface from File Types. Click Next.
Enter MessageService as the class name.
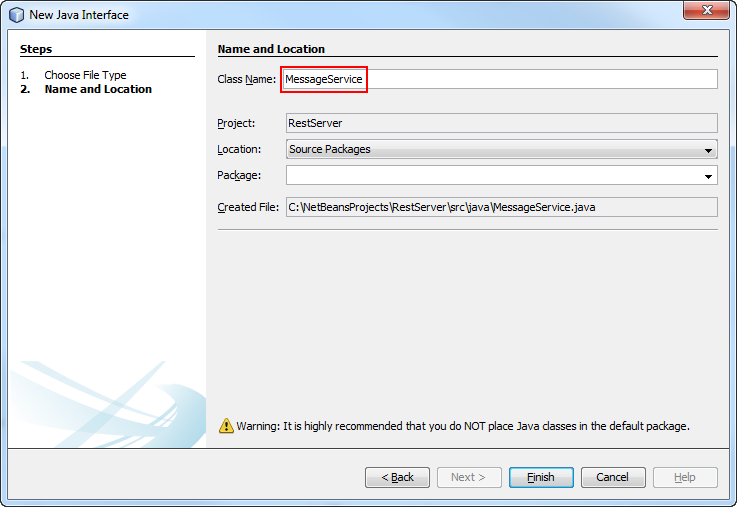
Enter com.example.messages.services as the package and click Finish.
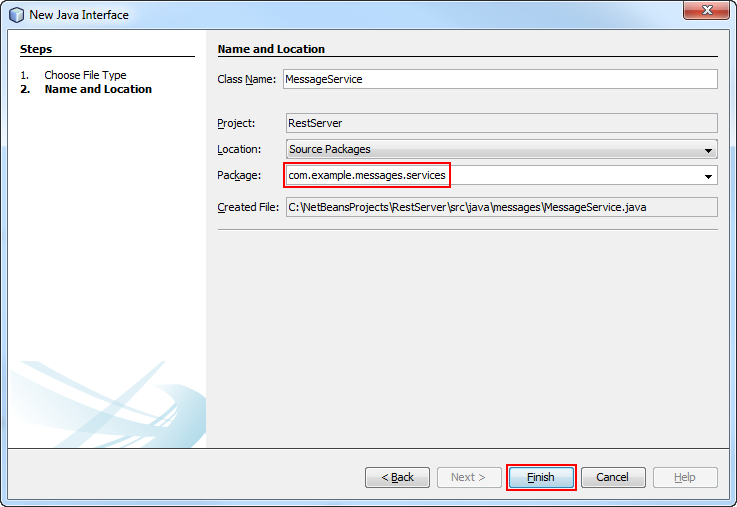
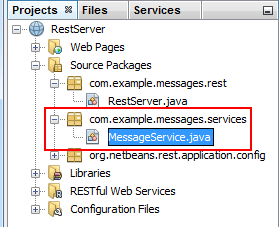
The MessageService.java resource is added to the project.
Add the highlighted code to the interface.
MessageService.java
package com.example.messages.services;

import java.util.List;
import java.util.Map;

public interface MessageService {

  void delete(int id);

  List<Map.Entry<Integer, String>> getAll();

  String get(int id);

  String add(String message);

  void update(int id, String message);
}
Creating the Message Service Implementation
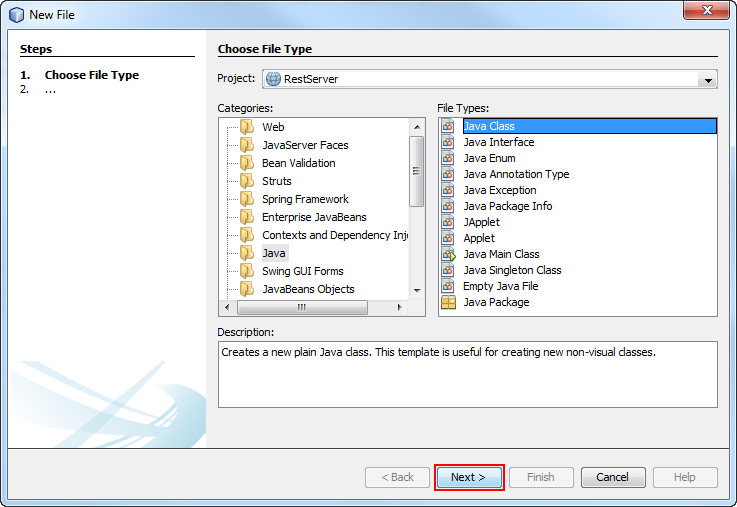
Select File > New File.
Select Java from Categories and Java Class from File Types. Click Next.
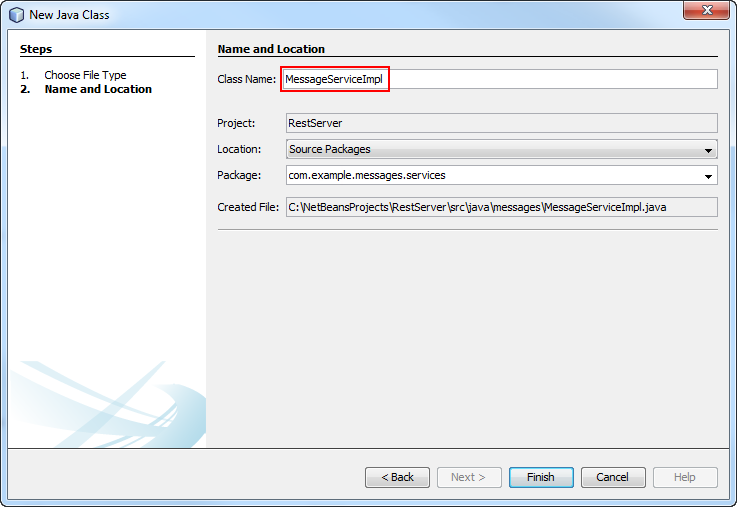
Enter MessageServiceImpl as the class name.
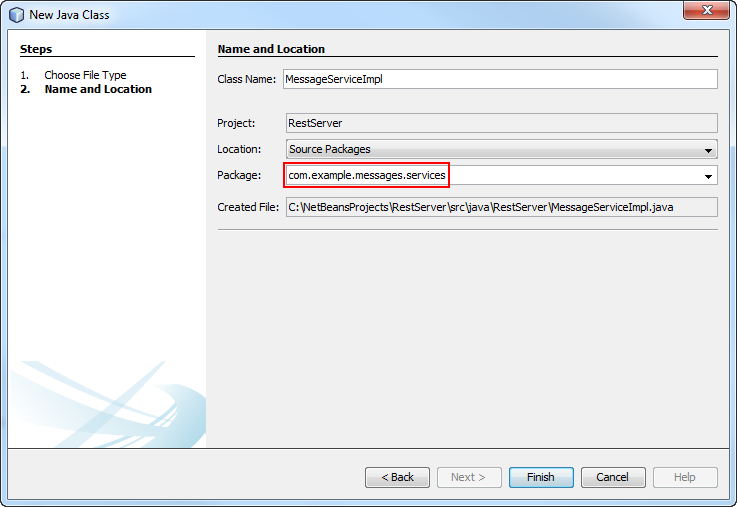
Select com.example.messages.services as the package and click Finish.
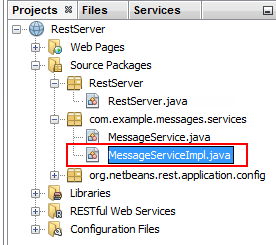
The MessageServiceImpl.java resource has been added to the project.
Add the highlighted code to the MessageServiceImpl.java class.
MessageServiceImpl.java
package com.example.messages.services;

import java.util.ArrayList;
import java.util.Arrays;
import java.util.HashMap;
import java.util.List;
import java.util.Map;
import javax.enterprise.context.ApplicationScoped;

@ApplicationScoped
public class MessageServiceImpl implements MessageService {

  private int currentId;
  private Map<Integer, String> messages = new HashMap<Integer, String>();

  @Override
  public String toString() {
    return Arrays.toString(messages.entrySet().toArray());
  }

  @Override
  public String get(int id) {
    return messages.get(id);
  }

  @Override
  public void update(int id, String message) {
    messages.put(id, message);
  }

  @Override
  public String add(String message) {
    int id = currentId++;
    messages.put(id, message);
    return Integer.toString(id);
  }

  @Override
  public void delete(int id) {
    messages.remove(id);
  }

  @Override
  public List<Map.Entry<Integer, String>> getAll() {
    return new ArrayList<Map.Entry<Integer, String>>(messages.entrySet());
  }
}
The service message implementation is created.
Creating the Messages REST Server by Using JAX-RS
In this section, you will model and build the REST serverby using JAX-RS annotations.
Define the actions that the API will perform. In this case, the Messages REST Server will handle the actions shown in the following table:
| URI | HTTP Method | Body | Action |
|---|---|---|---|
| /messages | GET | |
Retrieves all messages |
| /messages/<id> | GET | |
Retrieves message with the specified ID |
| /messages | POST | Plain text string | Creates a new message. |
| /messages/<id> | PUT | Plain text String | Updates message with the specified ID |
| /messages/<id> | DELETE | |
Deletes message with the specified ID |
Inject the HTTP methods by adding the highlighted code to the RestServer.java class.
RestServer.java - Messages REST Server by Using JAX-RS
package com.example.messages.rest;

import com.example.messages.services.MessageService;
import java.util.Arrays;
import javax.enterprise.context.ApplicationScoped;
import javax.inject.Inject;
import javax.ws.rs.DELETE;
import javax.ws.rs.GET;
import javax.ws.rs.POST;
import javax.ws.rs.PUT;
import javax.ws.rs.Path;
import javax.ws.rs.PathParam;
import javax.ws.rs.Produces;

@Path("messages")
@ApplicationScoped
public class RestServer {

  @Inject
  private MessageService messageService;

  @GET
  @Produces("text/html")
  public String getHtml() {
    return Arrays.toString(messageService.getAll().toArray());
  }

  @GET
  @Path("/{id}")
  public String getMessage(@PathParam("id") int id) {
    return messageService.get(id);
  }

  @PUT
  @Path("/{id}")
  public void putHtml(@PathParam("id") int id, String message) {
    messageService.update(id, message);
  }

  @POST
  public String postHtml(String message) {
    return messageService.add(message);
  }

  @DELETE
  @Path("/{id}")
  public void deleteHtml(@PathParam("id") int id) {
    messageService.delete(id);
  }
}
Testing the REST Server
In this section, you test the REST server that you just built by using RESTClient. RESTClient is an application that sends HTTP requests to a specified server.
On the Project pane, right click the RestServer project and click Deploy.
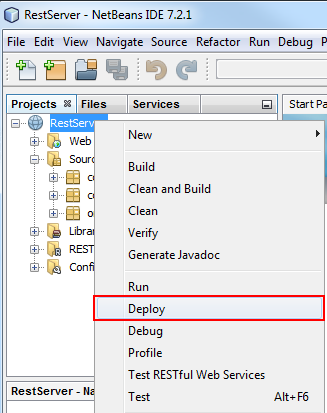
The RestServer project is deployed to Oracle WebLogic Server.
Open RESTClient.
Creating a New Message by Using the POST HTTP Method
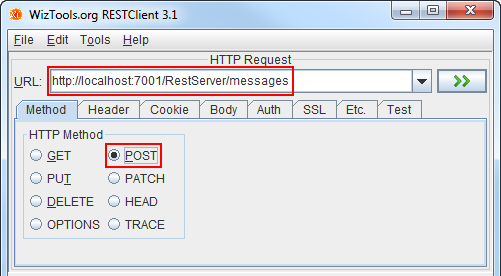
Enter the following URL in the RESTClient URL bar: http://localhost:7001/RestServer/messages and select the POST HTTP Method from the Method tab.
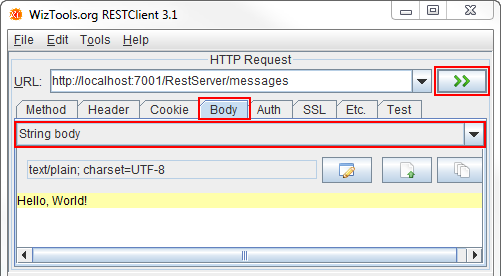
Click the Body tab and select String body from the drop-down menu.
Enter Hello, World! in the text area and click the >> button.
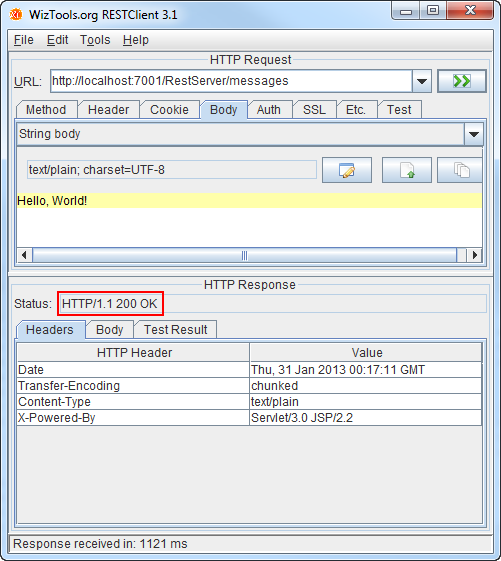
The HTTP Response Status returns an HTTP/1.1 200 OK response.
Retrieving Messages by Using the GET HTTP Method
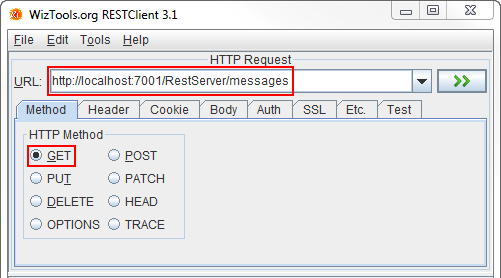
Enter the following URL in the RESTClient URL bar: http://localhost:7001/RestServer/messages and select the GET HTTP Method from the Method tab.
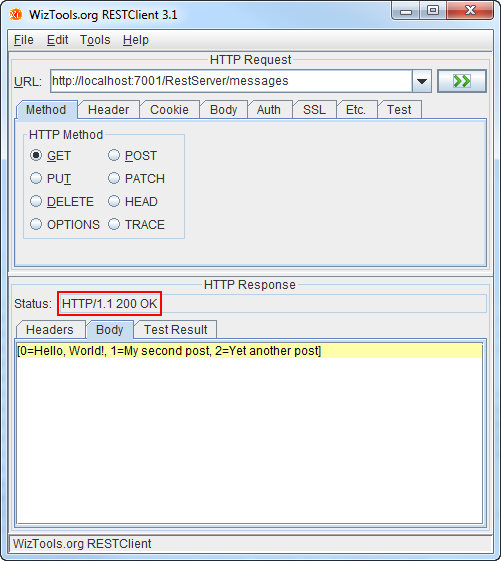
Click the >> button.
The HTTP Response Status returns an HTTP/1.1 200 OK response and a list of all existing messages in the server.
Retrieving a Specific Message by Using the GET HTTP Method
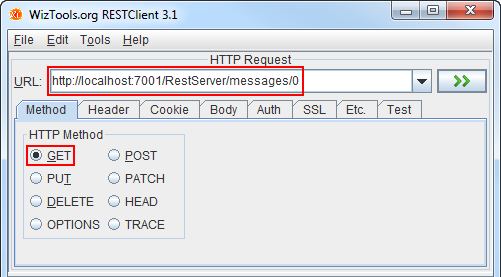
Enter the following URL in the RESTClient URL bar: http://localhost:7001/RestServer/messages/<id> and select the GET HTTP Method from the Method tab.
Click the >> button.
Note: A message with the specified ID number must exist.
The HTTP Response Status returns an HTTP/1.1 200 OK response and the content of the specified message.

Updating Messages by Using the PUT HTTP Method
Enter the following URL in the RESTClient URL bar: http://localhost:7001/RestServer/messages/<id> and select the PUT HTTP Method from the Method tab.
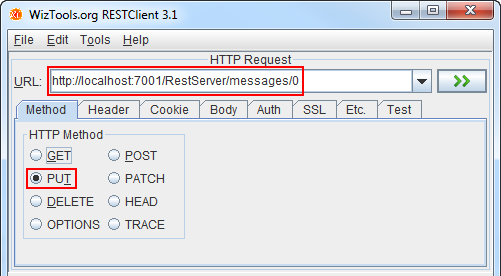
Click the Body tab and select String body from the drop-down menu.
Enter another message in the text area, such as An updated message, and click the >> button.
Note: A message with the specified ID number must exist.
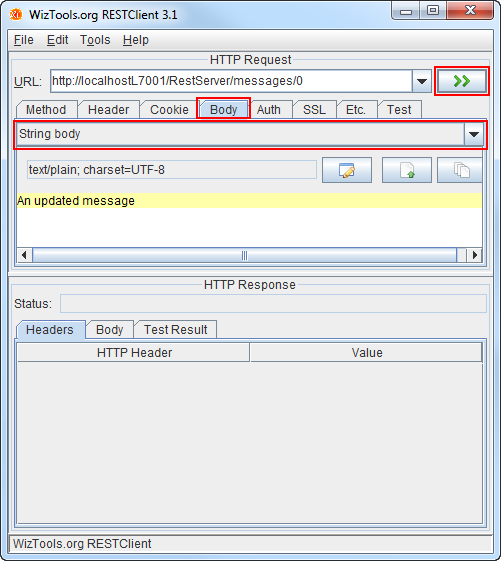
The HTTP Response Status returns an HTTP/1.1 204 No Content response.

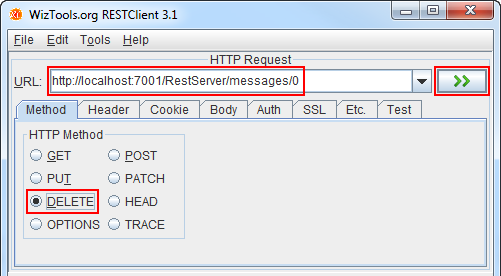
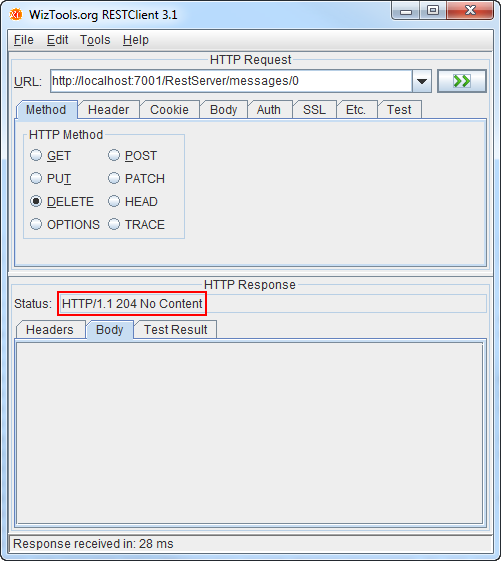
Deleting Messages by Using the DELETE HTTP Method
Enter the following URL in the RESTClient URL bar: http://localhost:7001/RestServer/messages/<id> and select the DELETE HTTP Method from the Method tab.
Click the >> button.
Note: A message with the specified ID number must exist.
The HTTP Response Status returns an HTTP/1.1 200 No Content response.
Summary
- Create a Java RESTful web service project
- Model and build a simple REST API server by using JAX-RS capable of responding to the four basic HTTP methods: POST, GET, PUT, and DELETE
- Deploy and test the REST API server
- The Java EE 6 Tutorial
- Oracle blog on Adding RESTful web services to Oracle Identity Manager 11g
- RESTful Web Services
- The Java API for RESTful Web Services (JAX-RS) -- Rapidly Build Lightweight Web Services
- Oracle courses and learning paths for Java EE 6.
- To learn more about Java EE 6, refer to additional OBEs in the Oracle Learning Library.
- Lead Curriculum Developer: Miguel Salazar
- Other Contributors: Eduardo Moranchel
In this tutorial you learned about the basics of RESTful web services in the Java EE 6 platform. Afterwards, you learned about JAX-RS, the Java API for RESTful web services and how it maps HTTP methods to create. read, update, delete operations by using annotations.
You also learned how to:
Resources
For more information on the topics in this tutorial:
Credits
To help navigate this Oracle by Example, note the following:
- Hiding Header Buttons:
- Click the Title to hide the buttons in the header. To show the buttons again, simply click the Title again.
- Topic List Button:
- A list of all the topics. Click one of the topics to navigate to that section.
- Expand/Collapse All Topics:
- To show/hide all the detail for all the sections. By default, all topics are collapsed
- Show/Hide All Images:
- To show/hide all the screenshots. By default, all images are displayed.
- Print:
- To print the content. The content currently displayed or hidden will be printed.
To navigate to a particular section in this tutorial, select the topic from the list.