Before You Begin
Purpose
This tutorial covers how to deploy a 1x3 Oracle NoSQL cluster by using three Raspberry Pis.
Time to Complete
Approximately 2 hours
Background
The Oracle NoSQL Database is a distributed key-value database. It is designed to provide highly reliable, scalable and available data storage across a configurable set of systems that function as storage nodes. Data is stored as key-value pairs, which are written to particular storage node(s), based on the hashed value of the primary key. Storage nodes are replicated to ensure high availability, rapid failover in the event of a node failure and optimal load balancing of queries. Customer applications are written using an easy-to-use Java/C API to read and write data.
In this tutorial, you prepare three Rasperry Pis to act as three storage nodes and form a 1x3 cluster. All the storage nodes have the same copy of data.
Note: This tutorial is created to illustrate the capability of deploying Oracle NoSQL cluster on Raspberry Pi.
Hardware and Software Requirements
The following is the list of hardware and software requirements:
Windows desktop or laptop computer (with Secure Digital memory card reader)
Three Raspberry Pis Model B or later, Three micro-USB power supply adapter (5v, 1A), Three Ethernet cable
4 GB (or larger) Secure Digital (SD) memory card
HDMI-compatible monitor (or TV screen), HDMI cable and power cable
USB Keyboard
(optional) External Hard Disk/Flash Drive
Raspbian Debian Wheezy Image (2015-05-05 or later)
Oracle NoSQL Database 3.2.5 - Community Edition (Free) or Enterprise Edition
Note: This tutorial is using Raspberry Pi Model B and Oracle NoSQL Database 3.2.5. Use Raspberry Pi Model B+ or Raspberry Pi 2 for Oracle NoSQL Database 3.3.5 and above.
PuTTY Telnet and Secure Shell (SSH) Client (download the putty.exe file)
PSFTP Client (download the psftp.exe file)
What Do You Need?
Before starting this tutorial, you should:
Download the Raspbian Debian Wheezy Image and Oracle NoSQL Database 3.2.5 to your computer.
Download and install the following software to your computer:
SD Association Formatter tool
Win32DiskImager
PuTTY Telnet and Secure Shell (SSH) Client
PSFTP Client
Creating a Bootable Image for the Raspberry Pi
In order to boot, the Raspberry Pi requires a bootable Linux image on an SD memory card. There is no hard drive in the Rasperry Pi. Instead, the SD card stores the image that the Raspbery Pi runs when it is powered on. This SD memory card also acts as the storage for other applications that are loaded onto the card.
Formatting the SD Memory Card with the SD Formatter Tool
Start the SD Formatter tool.
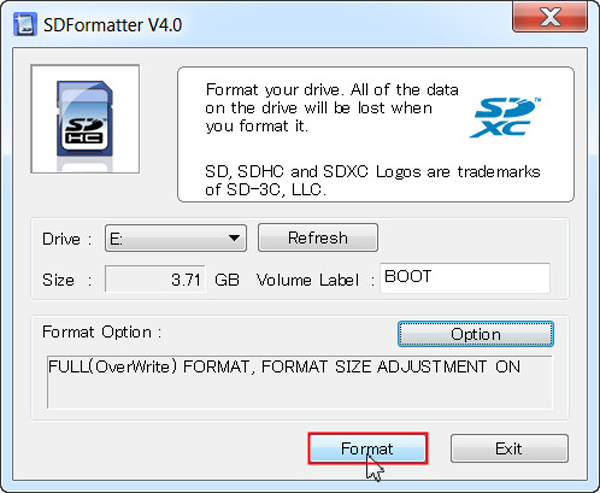
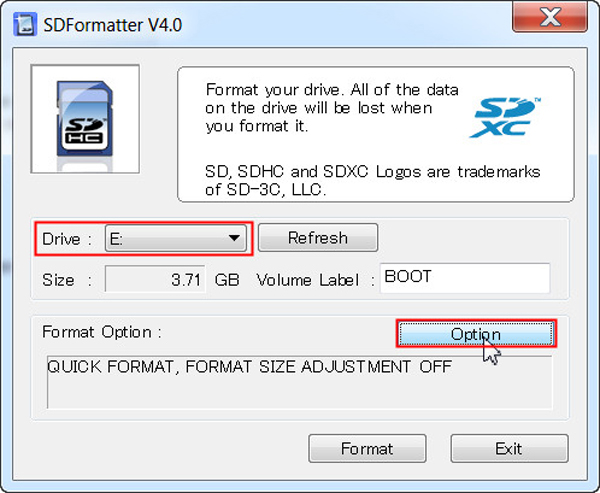
Insert the SD memory card into your computer or connect it to your computer by using an SD card peripheral. Wait until you see the drive letter in the SD Formatter tool, then click Option.
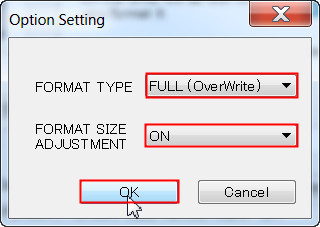
In the Option Setting dialog box, select FULL (Overwrite) for Format Type and ON for Format Size Adjustment, and then click OK.
Click Format to start the SD Formatter tool.
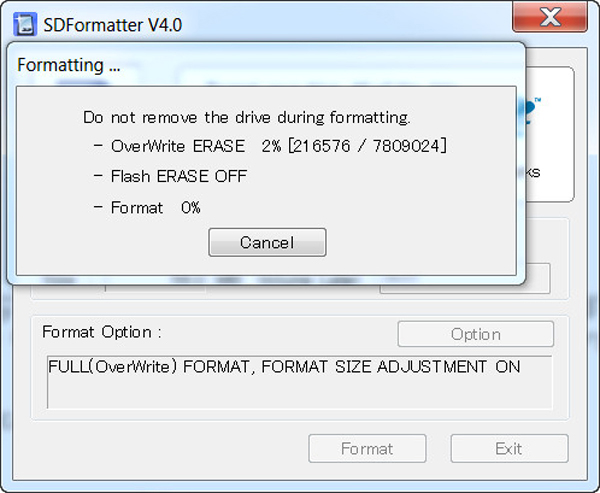
Click OK to format the SD memory card.

A dialog box displays the progress of the format.
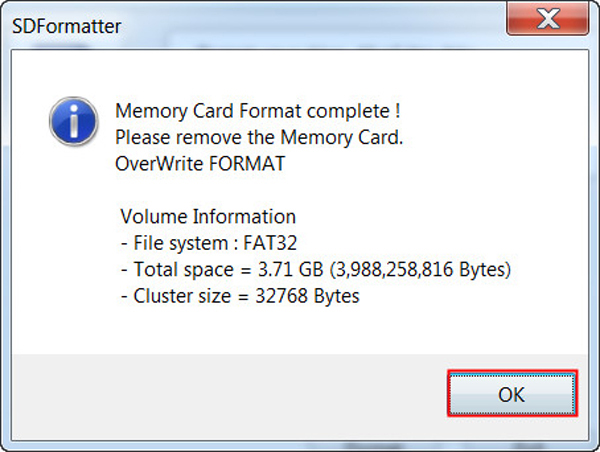
When the format is complete, click OK to close the dialog box.
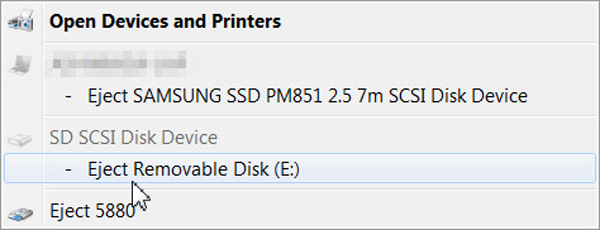
Eject the SD Card. Perform steps 2 through 6 in the other two SD cards.
Perform steps 2 through 7 in the other two SD cards.
Click Exit to close the SD Formatter tool.
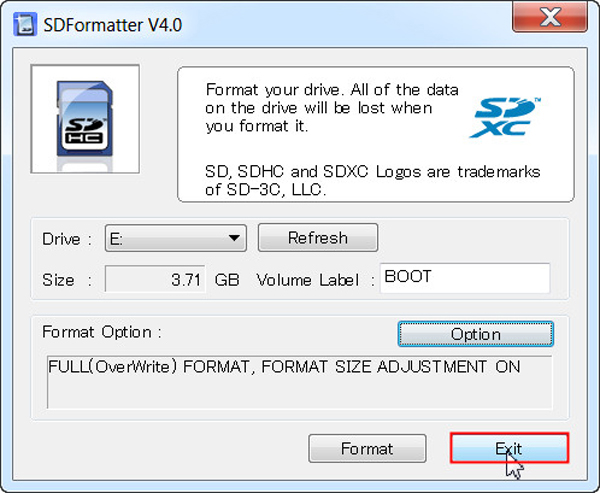
You are now ready to install the Raspbian Wheezy image in the SD memory card.
Writing the Raspbian Wheezy Image to the SD Card
-
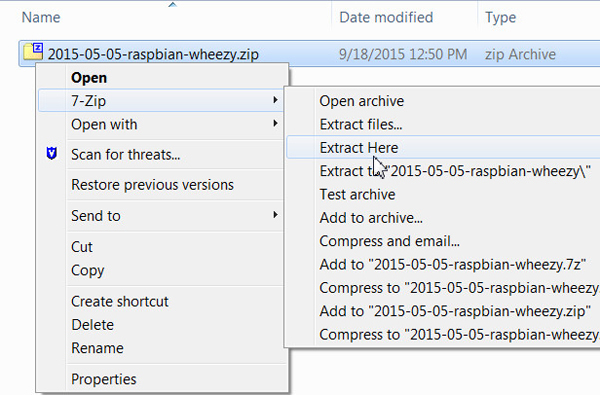
Open an unzip tool and extract the contents of the Raspbian Wheezy zip file 2015-05-05-wheezy-raspbian.zip.
-
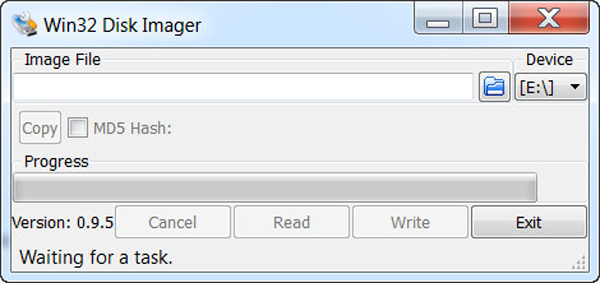
Start the Win32DiskImager application.
-
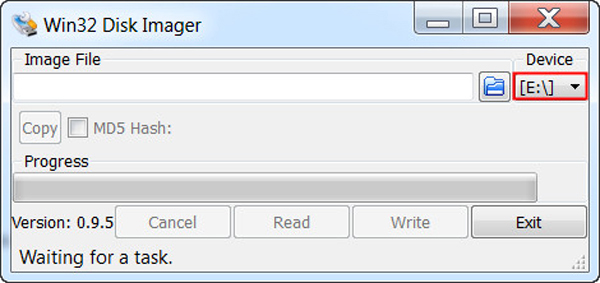
Make sure that the SD card is inserted and the device address is the same as the mount point for the SD memory card.
-
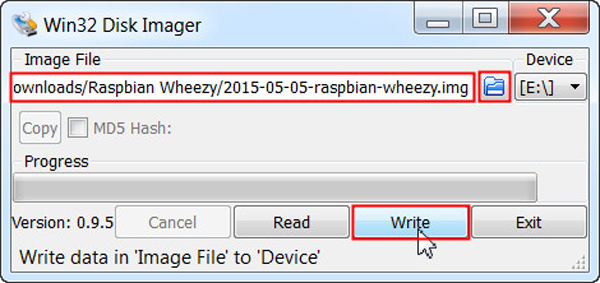
Click the folder button, navigate to the location of the image file, and click Write.
-
Click Yes to confirm that you want to overwrite the contents of the SD memory card.

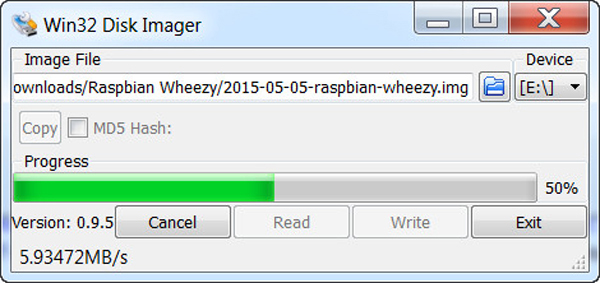
A progress meter is displayed.
-
When the Write Successful message is displayed, click OK.

-
Remove the SD card from the computer or the SD Card peripheral.
-
Perform the write operation in the other two SD cards by following steps 3 through 7 shown above.
-
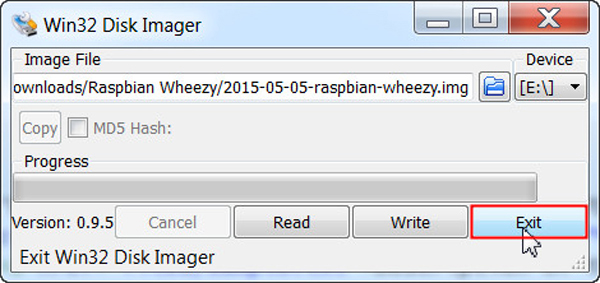
Click Exit to close the Win32 Disk Imager.
You are now ready to setup the Raspberry Pi.
Setting up the Raspberry Pi for Remote Access
To set up the Raspberry Pi for remote access, you configure the Raspberry Pi to use a static IP address so that it possible to access the Raspberry Pi remotely by using the same IP address.
Booting the Raspberry Pi
-
Perform the following steps:
-
Insert the SD memory card into the Raspberry Pi.
-
Connect the USB keyboard.
-
Connect the HDMI display.
-
Connect the Ethernet cable.
-
Plug in the power cable.

After a few moments, the monitor displays text, and the Raspberry Pi raspi-config configuration screen appears.
-
Configuring the Time Zone and Hostname
-
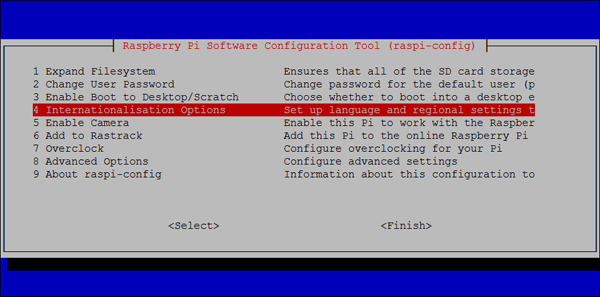
Press the up or down arrow key to select option 4, Internationalisation Options, and press Enter.
-
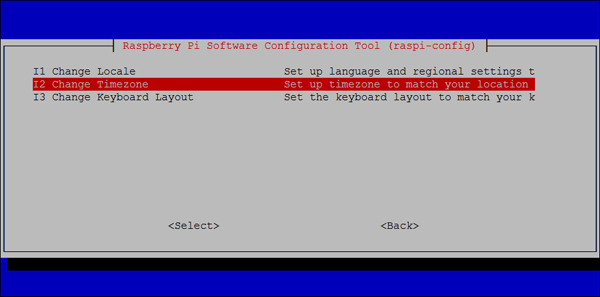
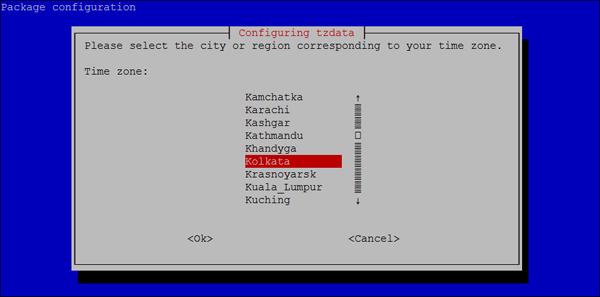
Press the up or down arrow key to select option I2, Change Timezone, and press Enter.
-
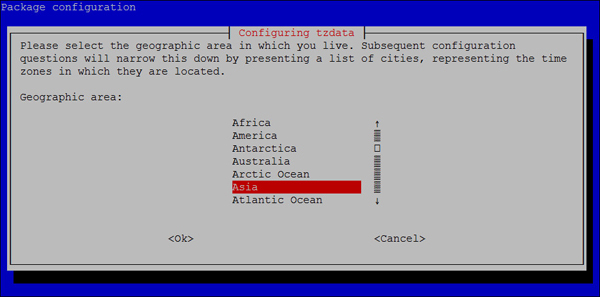
Press the up or down arrow key to select your country and press Enter.
-
Press the up or down arrow key to select the time zone in your country (if applicable) and press Enter.
-
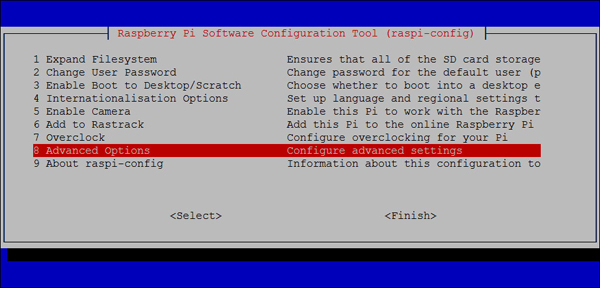
Press the up or down arrow key to select option 8, Advanced Options, and press Enter.
-
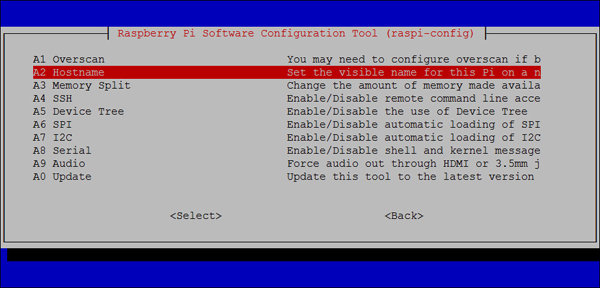
Press the up or down arrow key to select option A2, Hostname, and press Enter.
-
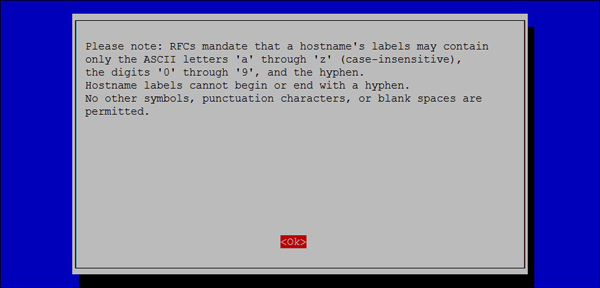
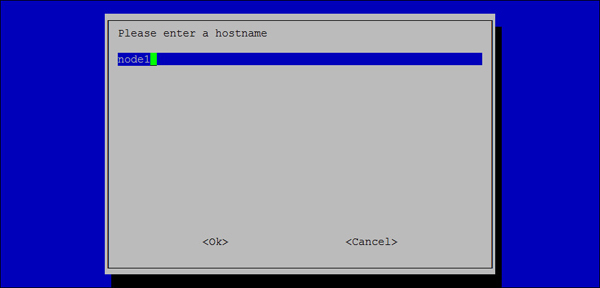
Read the note and press Enter.
-
Enter the hostname as node1, node2, and node3 for the first, second, and third Raspberry Pi respectively and press Enter.
-
Press the left or right arrow key to select Finish and press Enter.

-
Press the left or right arrow key to select Yes and then press Enter to reboot the Raspberry Pi.
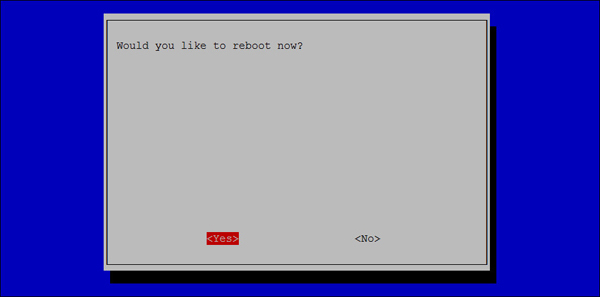
The Raspberry Pi reboots.
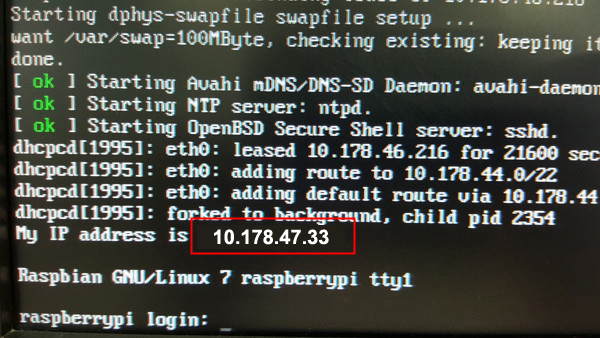
Notice the line that indicates the IP address of the Raspberry Pi.
-
Make a note of the the IP address. Perform the steps under Booting the Raspberry Pi and Configuring the Time Zone and Hostname in the other two Raspberry Pis (connected to the other two SD cards).
At this point, you can disconnect the HDMI monitor and the USB keyboard from the Raspberry Pi that is successfully setup.
Note: Do not disconnect the ethernet cable, power cable, and the SD card.
Connecting to the Raspberry Pi with the Secure Shell
-
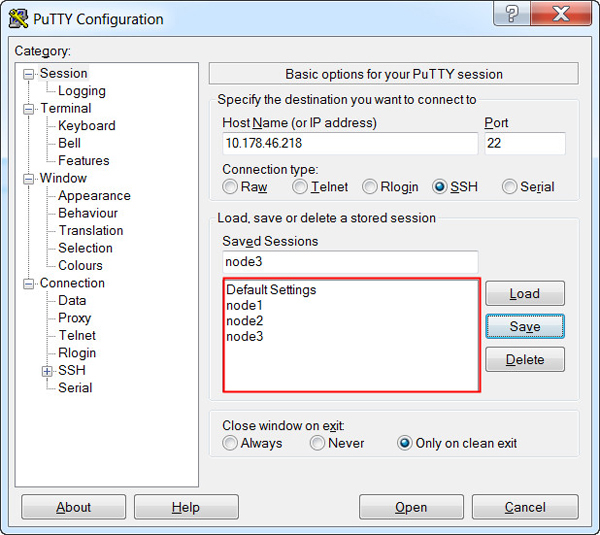
Start putty.exe and perform the following steps:
-
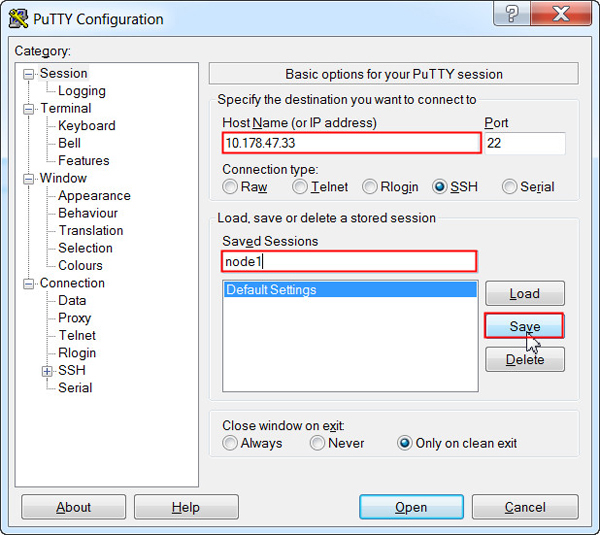
On the boot screen, enter the IP address of the node1 Raspberry Pi in the IP address field.
-
Enter node1 in the Saved Sessions field.
-
Click Save.
-
Perform steps a through c for the node2 and node3 Raspberry Pis.
-
-
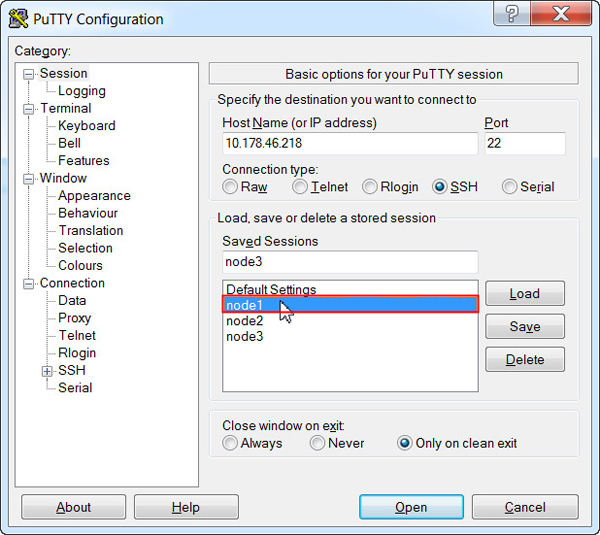
Double-click node1 in the Saved Sessions list to SSH into node1.
-
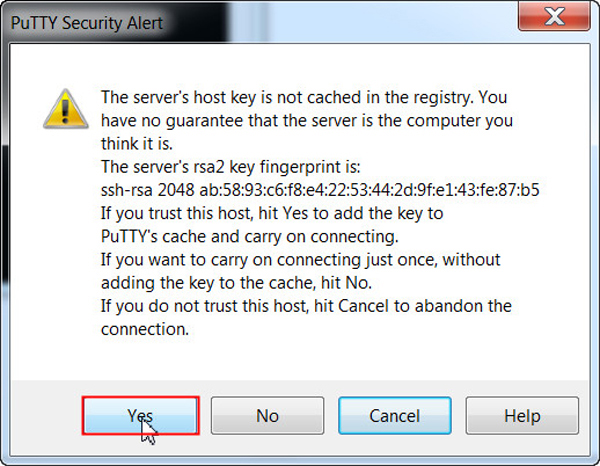
Click Yes to accept the security alert.
-
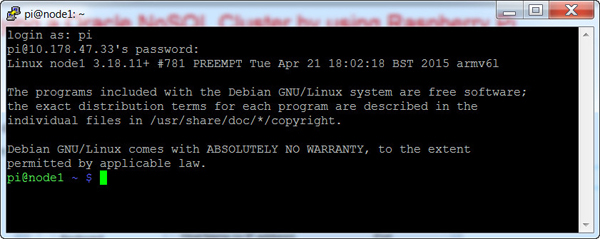
Enter pi as the login name and raspberry as the password.
Setting Up the Raspberry Pi to Use a Fixed Wired IP Address
-
In a separate command-prompt window, enter ipconfig to get the netmask and default gateway for your network.
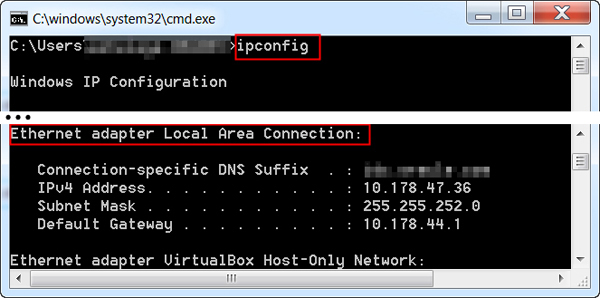
Note: If you are using a wireless connection, the information appears under the Wireless LAN adapter heading.
-
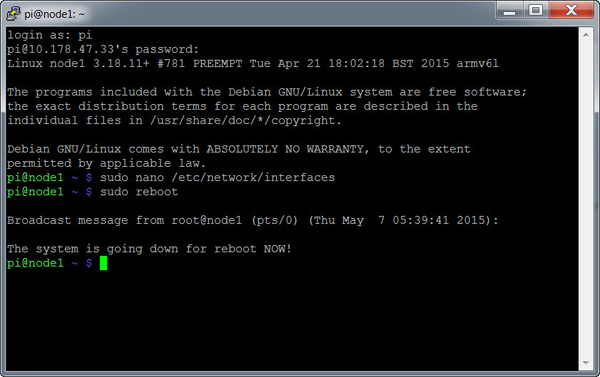
In a PuTTY window, enter sudo nano /etc/network/interfaces and then perform the following steps:
-
Comment out the iface eth0 inet manual line.
-
Below that, add the iface eth0 inet static line.
-
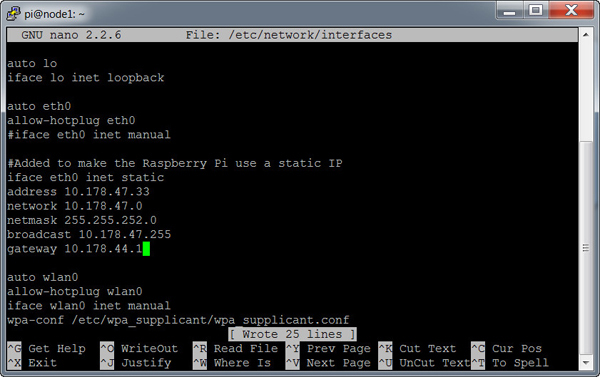
Use your network settings to add the IP, network, netmask, broadcast, and gateway addresses. For example:
address 10.178.47.33 should be the IPv4 address alloted to the Raspberry Pi.
network 10.178.47.0 should be the network prefix and zeroes.
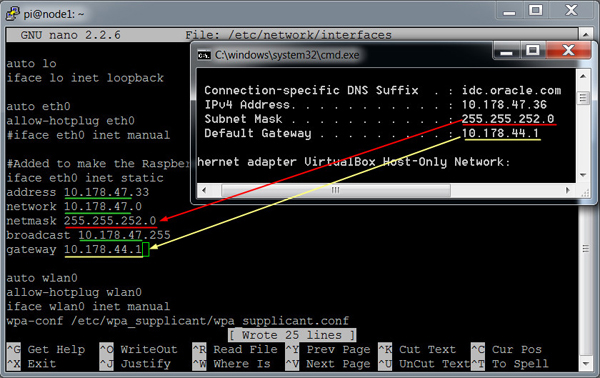
netmask 255.255.252.0 should match the subnet mask.
broadcast 10.178.47.255 should be the network broadcast address.
gateway 10.178.44.1 should match the default gateway.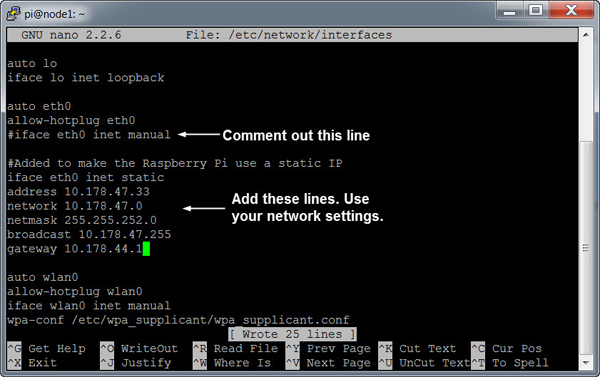
Note: You have to set the network properties to match the network configuration that you are using on your PC.
-
-
Press Ctrl + O and then press Enter to write the file.
-
Press Ctrl + X to close nano and return to the prompt.
-
Enter sudo reboot to reboot the Raspberry Pi and make the changes.
Click OK to dismiss the Fatal Error prompt.

-
Start putty.exe again and connect to the node2 and node3 session. Perform steps 2 through 5 in the terminal for both the sessions.
Note: Do not exit the node1 window.
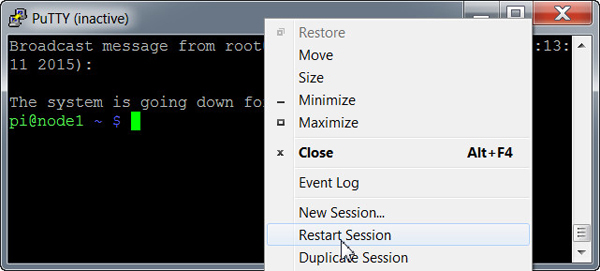
Restarting the PuTTY Connection
You now have three PuTTY windows open and all of these windows have the session terminated due to the reboot command. Perform the following steps on all the nodes:
-
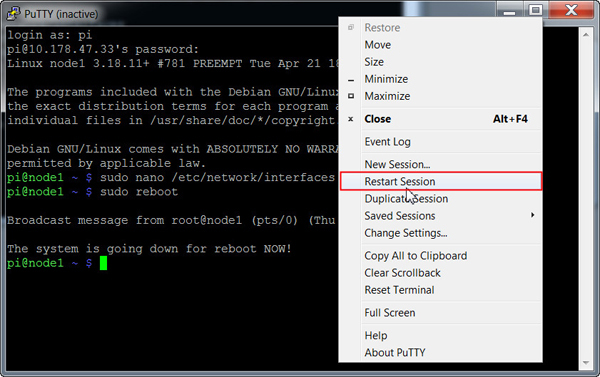
To reconnect to the Raspberry Pi, right-click in the header of the PuTTY window and select Restart Session.
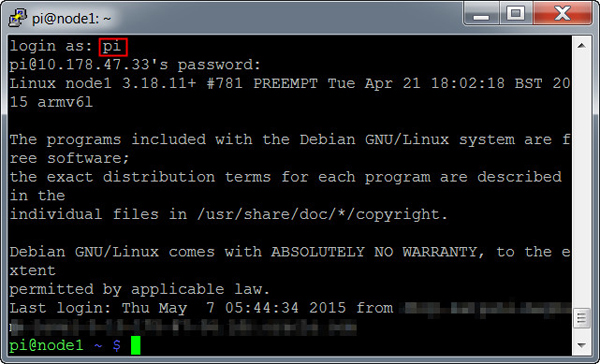
-
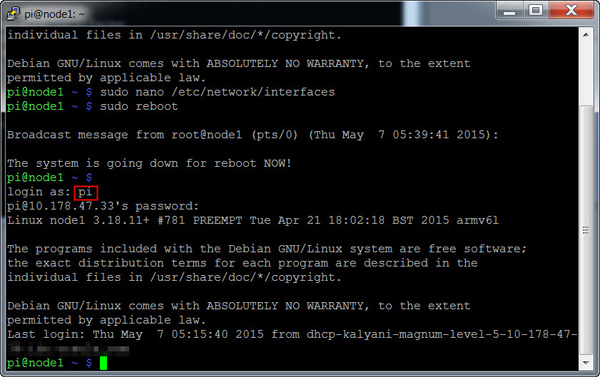
Enter pi as the login name and raspberry as the password.
Installing Oracle NoSQL in the Raspberry Pi
Raspbian comes with an installed version of Java which is a prerequisite for installing Oracle NoSQL Database.
Transferring Oracle NoSQL Database to the Raspberry Pi by using PSFTP
-
Launch the PSFTP tool and then perform the following steps:
-
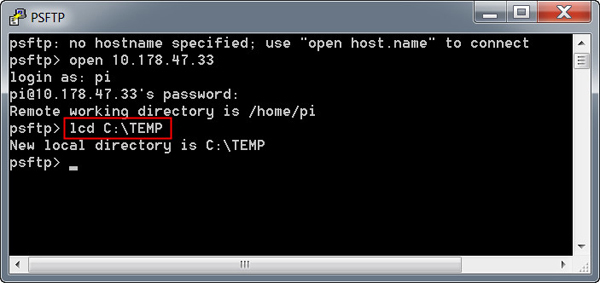
Enter open ipaddress.
-
Enter pi as the login name and raspberry as the password.

If a dialog box about a cached key is displayed, press Y to update the key.
-
-
Enter lcd C:\TEMP to change the local directory to the location of Oracle NoSQL Database.
Note: In this example, the Oracle NoSQL Database is stored in the TEMP directory. You may change the local directory to where you have downloaded Oracle NoSQL Database.
-
Enter put kv-ce-3.2.5.zip.
Note: Change the ZIP file name based on the version of the Oracle NoSQL Database you are using.
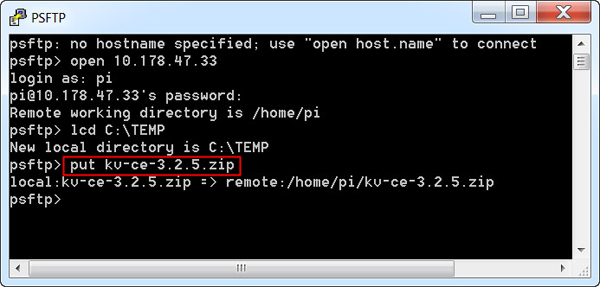
This process may take several minutes because it uploads Oracle NoSQL Database setup file to the Raspberry Pi.
-
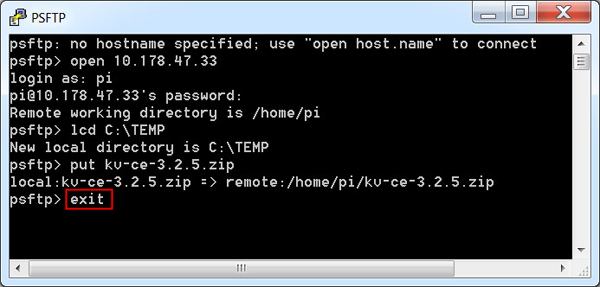
Type exit and press Enter to quit the PSFTP tool.
-
Repeat steps 1 through 4 in the other two nodes.
Installing the Oracle NoSQL Database
Perform the following steps on all the nodes.
Note: The screenshots below displays the output of the node1 only.
-
In the PuTTY window, enter unzip -q kv-ce-3.2.5.zip to extract Oracle NoSQL.

Files are extracted inside the kv-3.2.5 folder. (The process may take several minutes.)
-
Enter mv kv-3.2.5 kvhome to rename the folder to kvhome.

Setting Up Environment Variables
Perform the following steps on ALL the nodes:
-
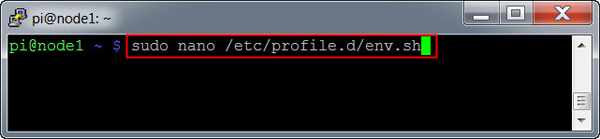
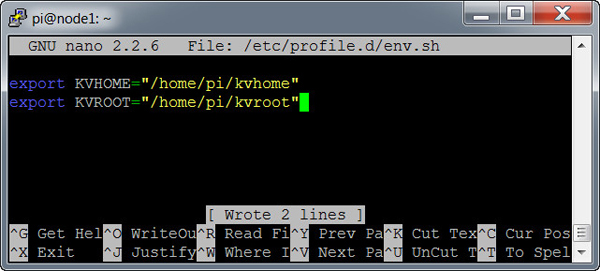
In the PuTTY window, enter sudo nano /etc/profile.d/env.sh. This creates a env.sh file in the /etc/profile.d directory.
-
Add the following content to the file:
export KVHOME="/home/pi/kvhome" Sets the KVHOME variable. This directory holds the Oracle NoSQL Database.
export KVROOT="/home/pi/kvroot" Sets the KVROOT variable. This directory holds the Oracle NoSQL Database data. If you wish to use an external drive for storing data, specify the path to the external drive in the KVROOT variable.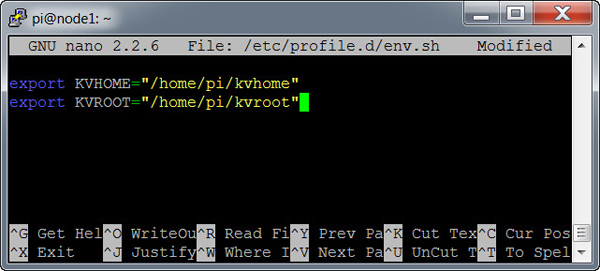
-
Press Ctrl + O and then press Enter to write the file.
-
Press Ctrl + X to close nano and return to the prompt.
-
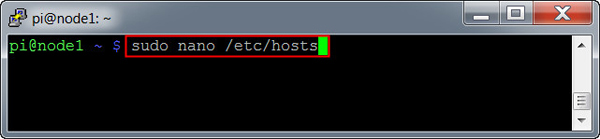
Enter sudo nano /etc/hosts in the PuTTY window.
-
Add the following lines to the end of the file:
<node1_ipaddress> node1 Replace the IP address with your node1 IP address
<node2_ipaddress> node2 Replace the IP address with your node2 IP address
<node3_ipaddress> node3 Replace the IP address with your node3 IP address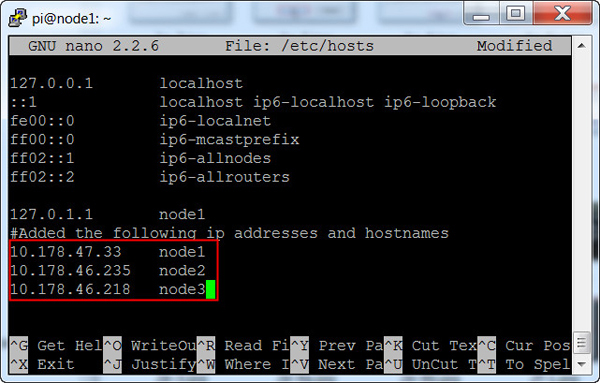
-
Press Ctrl + O and then press Enter to write the file.
-
Press Ctrl + X to close nano and return to the prompt.
-
Enter sudo reboot to reboot the Raspberry Pi and make the changes.
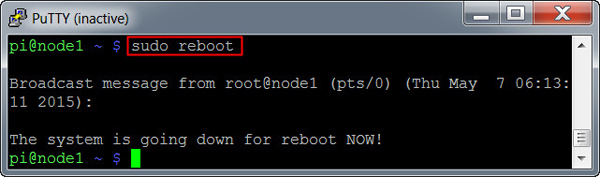
Click OK to dismiss the Fatal Error prompt.
-
Wait for a few minutes and reconnect to the Raspberry Pi. To reconnect to the Raspberry Pi, right-click in the header of the PuTTY window and select Restart Session.
-
Enter pi as the login name and raspberry as the password.
Verifying the Oracle NoSQL Installation
-
Enter the following command to verify that Oracle NoSQL Database installed successfully:
java -jar $KVHOME/lib/kvclient.jar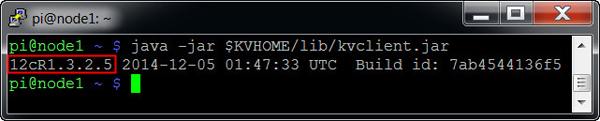
The output displays the version of Oracle NoSQL Database that is installed on the Raspberry Pi. In this example, the 3.2.5 version of Oracle NoSQL Database is installed. You can verify the installation on all the nodes by following the same step.
Deploying the NoSQL Cluster
In the following steps, you will ensure that the time across all the Raspberry Pis are same. After doing that, you will deploy a 1x3 cluster.
Synchronizing Raspberry Pi Time
Perform the following steps on ALL the nodes:
-
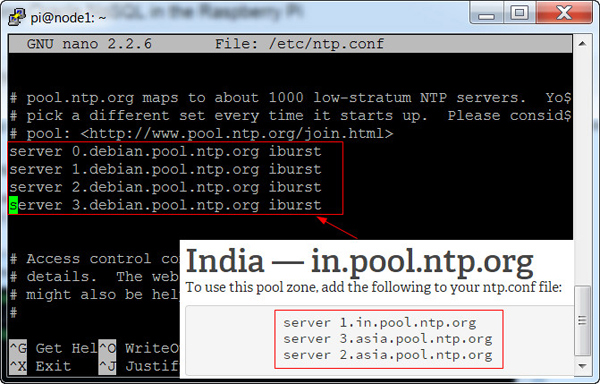
Enter the following command to open the ntp.conf file:
sudo nano /etc/ntp.conf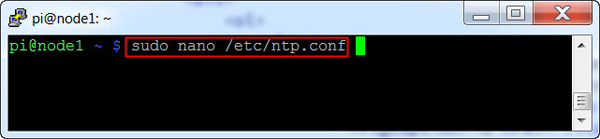
-
Find lines starting with server and replace it with servers from pool.ntp.org, as shown in the screenshot below.
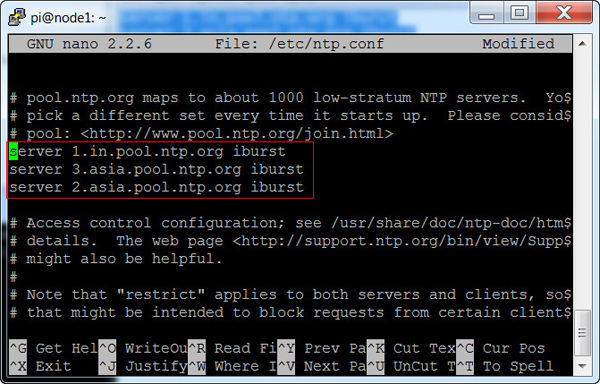
-
Press Ctrl + O and then press Enter to write the file.
-
Press Ctrl + X to close nano and return to the prompt.
-
Run the following command in the terminal to restart the ntp service:
sudo /etc/init.d/ntp restart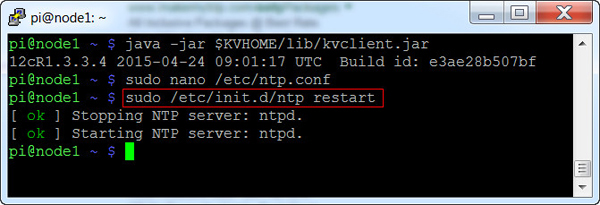
-
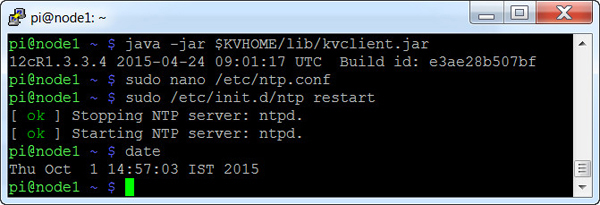
Enter the date command to verify that the date is set as per the NTP server pool.
Creating the Configuration Files
-
Create the KVROOT directory on ALL the hosts.
mkdir $KVROOT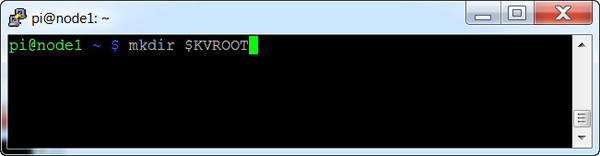
-
Run the makebootconfig command on ALL the hosts to create the configuration files:
java -jar $KVHOME/lib/kvstore.jar makebootconfig \
-host node1 -port 5000 -admin 5001 -root $KVROOT \
-harange 5002,5010 -store-security none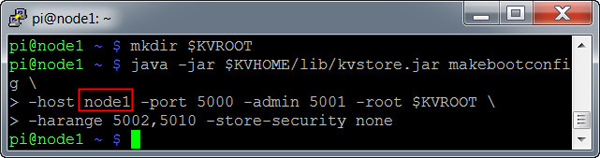
Change the host parameter to node2 and node3 when you run the makebootconfig command in the node2 and node3 terminal (as shown in the screenshot below).


-
Notice that a few configuration files have been created in the $KVROOT directory.
ls $KVROOT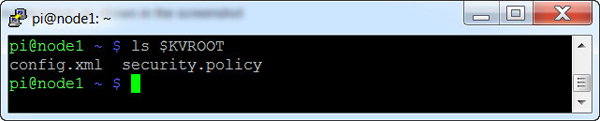
Starting the Storage Node Agents
-
Start the SNA on ALL the hosts by executing the following command in the terminal:
nohup java -jar $KVHOME/lib/kvstore.jar start -root $KVROOT&

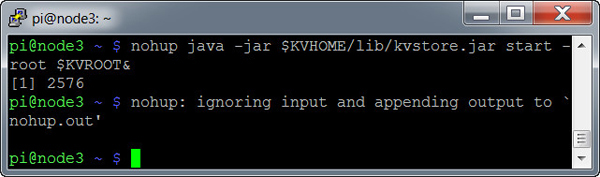
Note: Press Enter to regain control of the terminal.
The SNA doesn't start automatically on boot. If you wish to start the SNA automatically on boot, you can add the nohup command to the /etc/profile.d/env.sh file for all the nodes.
-
Run the jps command to verify that the SNA has started.
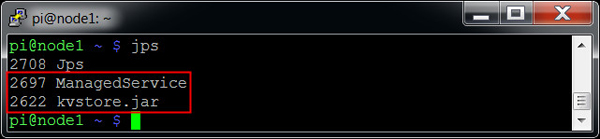
If you see kvstore.jar and ManagedService in the output, it means that the SNA and the Admin service has successfully started.
Pinging the Storage Node Agents
-
You can also verify that the SNA has successfully started, by using the ping command.
java -jar $KVHOME/lib/kvstore.jar ping -host node1 -port 5000
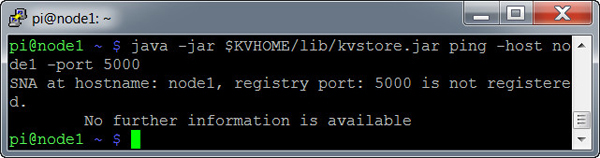
If you receive an output as shown in the screenshot, it means that the SNA is up and running. In this example, the node1 SNA is pinged. You can ping the SNA of other nodes by changing the host parameter.
Deploying the 1x3 KVStore
-
Execute the runadmin utility to deploy the KVStore.
java -jar $KVHOME/lib/kvstore.jar runadmin -port 5000 -host node1
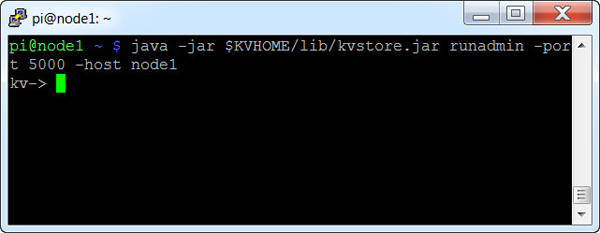
-
The KV prompt opens. Now you will configure the store name. In the KV prompt, enter the following command:
kv-> configure -name orcl
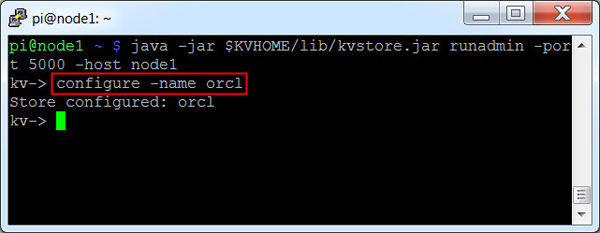
Note: In the above example, the store name is set to orcl.
-
After configuring the store name, deploy a zone in the store. Enter the following command to deploy a zone:
kv-> plan deploy-zone -name India -rf 3 -type primary -wait
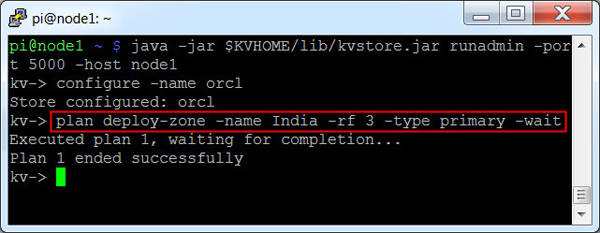
Note: The Replication Factor (RF) for zone India is set as 3 and the zone type is Primary.
-
Deploy the Storage Nodes and the Admin Services for the nodes. Run the following command in the KV prompt:
kv-> plan deploy-sn -znname India -host node1 -port 5000 -wait
kv-> plan deploy-admin -sn sn1 -port 5001 -wait
kv-> plan deploy-sn -znname India -host node2 -port 5000 -wait
kv-> plan deploy-admin -sn sn2 -port 5001 -wait
kv-> plan deploy-sn -znname India -host node3 -port 5000 -wait
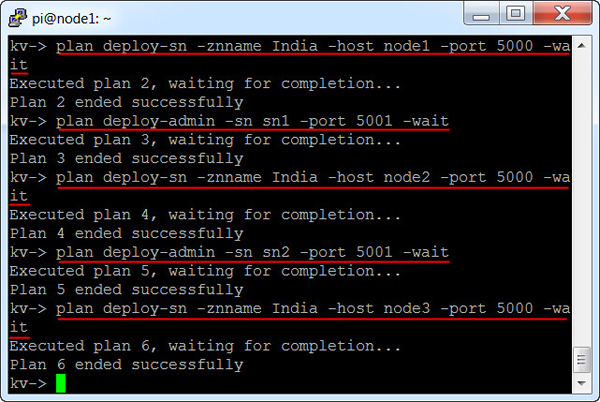
The three Storage Nodes are deployed in the same zone along with the Admin Services. In the example, the SN3 is not configured as admin which means that the runadmin utility cannot be accessed by SN3.
-
Create a topology by using the existing (AllStorageNodes) pool. Enter the following command in the KV prompt:
kv-> topology create -name 1x3 -pool AllStorageNodes -partitions 150

Note: The name of the topology in the above example is 1x3.
-
Deploy the topology.
kv-> plan deploy-topology -name 1x3 -wait

After the command execution completes, you have an operational Oracle NoSQL cluser deployed.