 Before You Begin
This 10-minute tutorial shows you how to:
- create a new cluster with default settings and new network resources
- create a node pool
- set up the kubeconfig file for the cluster
- verify you can access the cluster using kubectl and the Kubernetes Dashboard
Background
Oracle Cloud Infrastructure Container Engine for Kubernetes is a fully-managed, scalable, and highly available service that you can use to deploy your containerized applications to the cloud. Use Container Engine for Kubernetes when your development team wants to reliably build, deploy, and manage cloud-native applications. You specify the compute resources that your applications require, and Container Engine for Kubernetes provisions them on Oracle Cloud Infrastructure in an existing OCI tenancy.
In this tutorial, you use default settings to define a new cluster. When you create the new cluster, new network resources for the cluster are created automatically, along with a node pool and three private worker nodes. You'll then set up the Kubernetes configuration file for the cluster (the cluster's 'kubeconfig' file). The kubeconfig file enables you to access the cluster using kubectl and the Kubernetes Dashboard.
Note that in this tutorial, you set up the kubeconfig file to give access to the cluster from your local development environment. However, you can also set up the kubeconfig file to give access from the Cloud Shell environment (see the Setting Up Cluster Access topic in the Container Engine for Kubernetes documentation.).
What Do You Need?
- An Oracle Cloud Infrastructure username and password.
- Within your tenancy, there must already be a compartment to contain the necessary network resources (VCN, subnets, internet gateway, NAT gateway, route table, security lists). If such a compartment does not exist already, you will have to create it before starting this tutorial.
- At least three compute instances must be available in the tenancy to complete this tutorial as described. Note that if only one compute instance is available, it is possible to create a cluster with a node pool that has a single subnet and a single node in the node pool. However, such a cluster will not be highly available.
- To create and/or manage clusters, you must belong to one of the following:
- The tenancy's Administrators group.
- A group to which a policy grants the appropriate Container Engine for Kubernetes permissions. As you'll be creating and configuring a cluster and associated network resources during the tutorial, policies must also grant the group the appropriate permissions on those resources. For more details and examples, see the Policy Configuration for Cluster Creation and Deployment topic in the Container Engine for Kubernetes documentation.
- Before you set up the kubeconfig file later in the tutorial, you must have already done the following (if you haven't, or you're not sure, see the Setting Up Cluster Access topic in the Container Engine for Kubernetes documentation):
- generated an API signing key pair
- added the public key value of the API signing key pair to the User Settings for your username
- installed and configured the Oracle Cloud Infrastructure CLI (version 2.6.4 or later)
- You must have installed and configured the Kubernetes command line tool kubectl. If you haven't done so already, see the kubectl documentation.
 Starting OCI
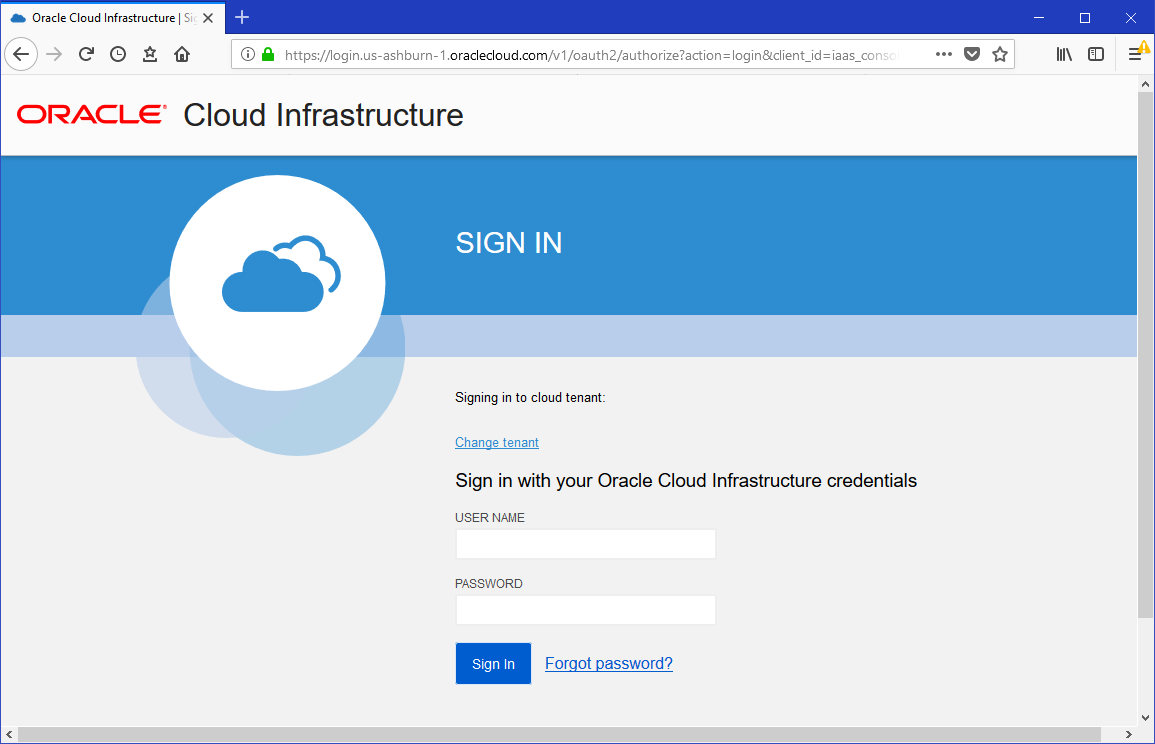
- In a browser, go to the url you've been given to log in to Oracle Cloud Infrastructure.
- Specify a tenant in which you have the appropriate permissions to create clusters. You inherit these permissions in one of the following ways:
- By belonging to the tenancy's Administrators group.
- By belonging to another group to which a policy grants the appropriate Container Engine for Kubernetes permissions. As you'll be creating and configuring a cluster and associated network resources during the tutorial, policies must also grant the group the permissions listed in the What Do You Need? section.
- Enter your username and password.
 Define Cluster Details
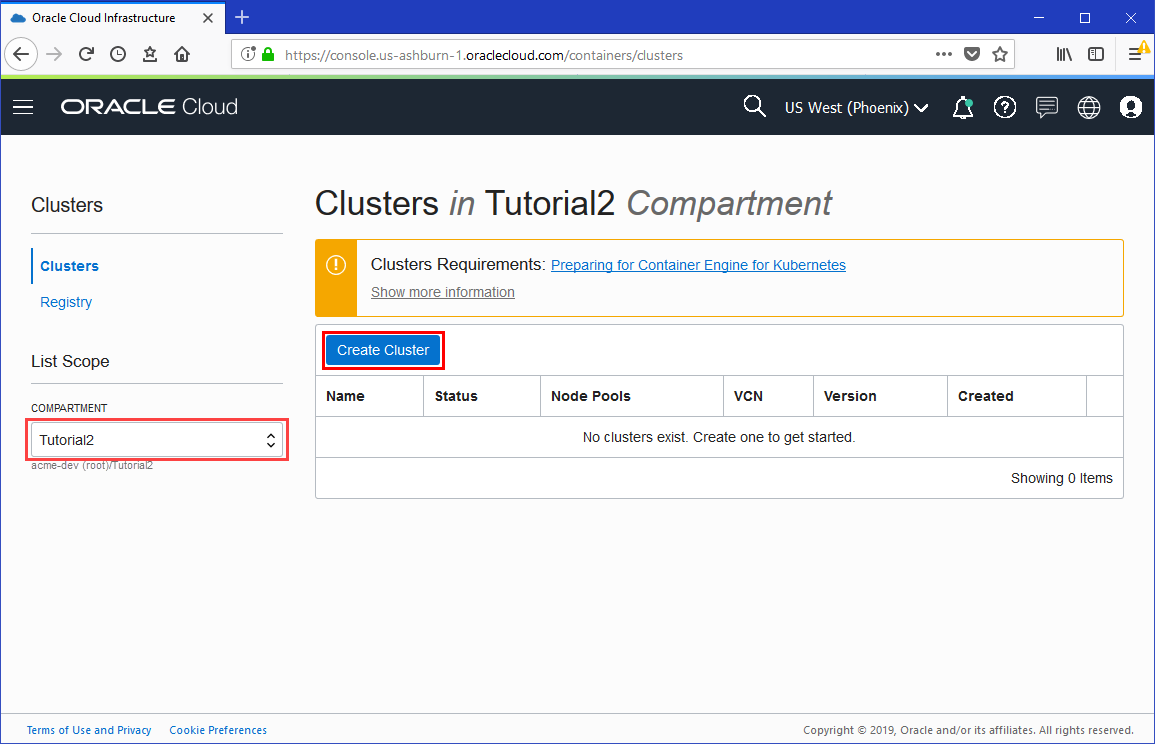
- In the Console, open the navigation menu. Under Solutions and Platform, go to Developer Services and click Kubernetes Clusters.
- Choose a Compartment that you have permission to work in, and in which you want to create both the new cluster and the associated network resources.
- On the Clusters page, click Create Cluster.
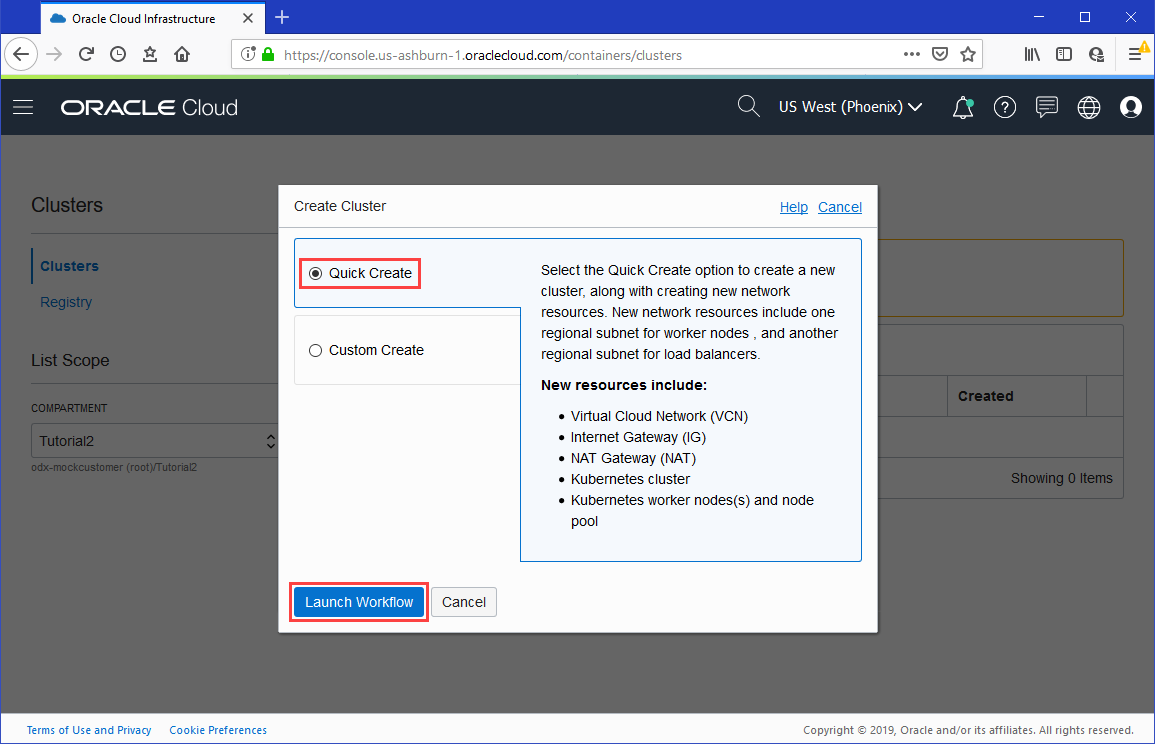
- In the Create Cluster dialog box, click Quick Create and click Launch Workflow.
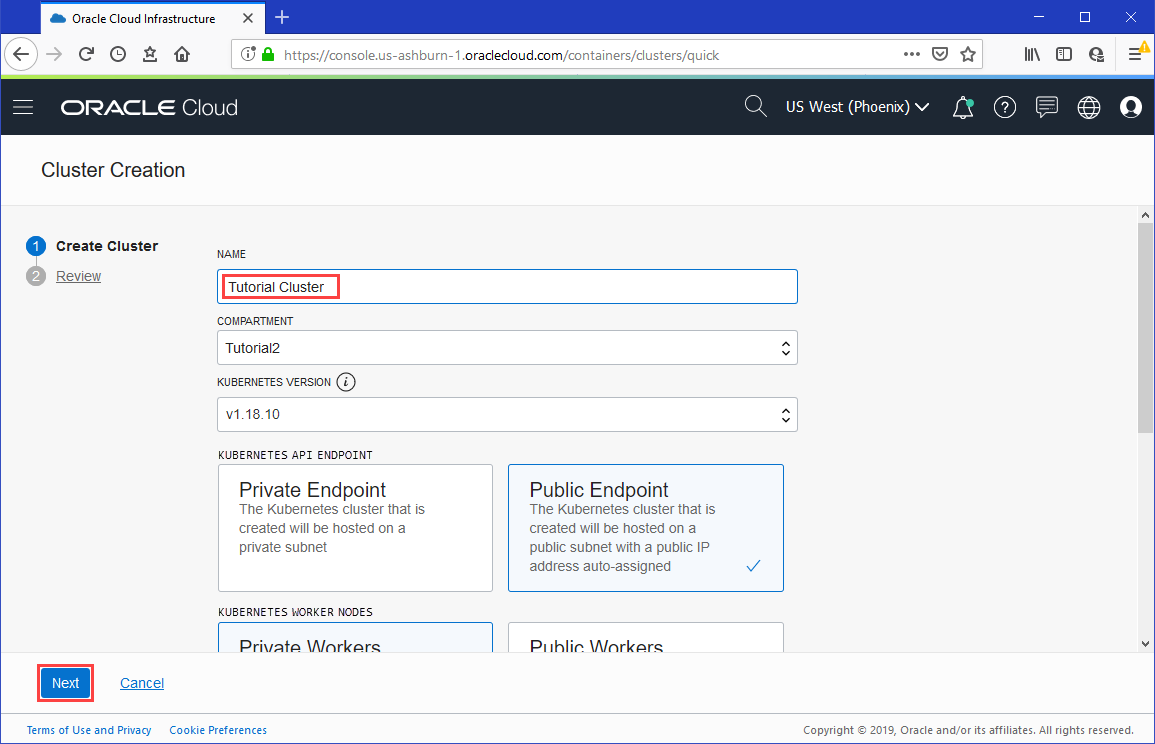
- On the Create Cluster page, change the placeholder value in the Name field and enter
Tutorial Clusterinstead. - Click Next to review the details you entered for the new cluster.
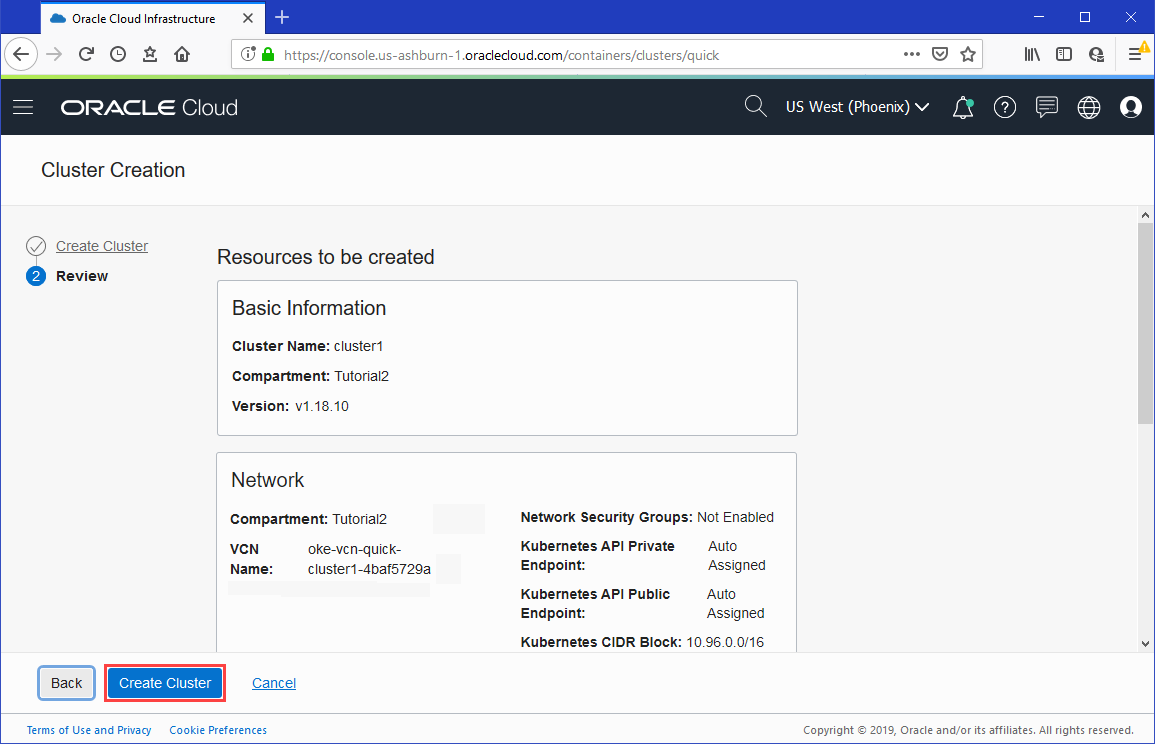
- On the Review page, click Create Cluster to create the new network resources and the new cluster.
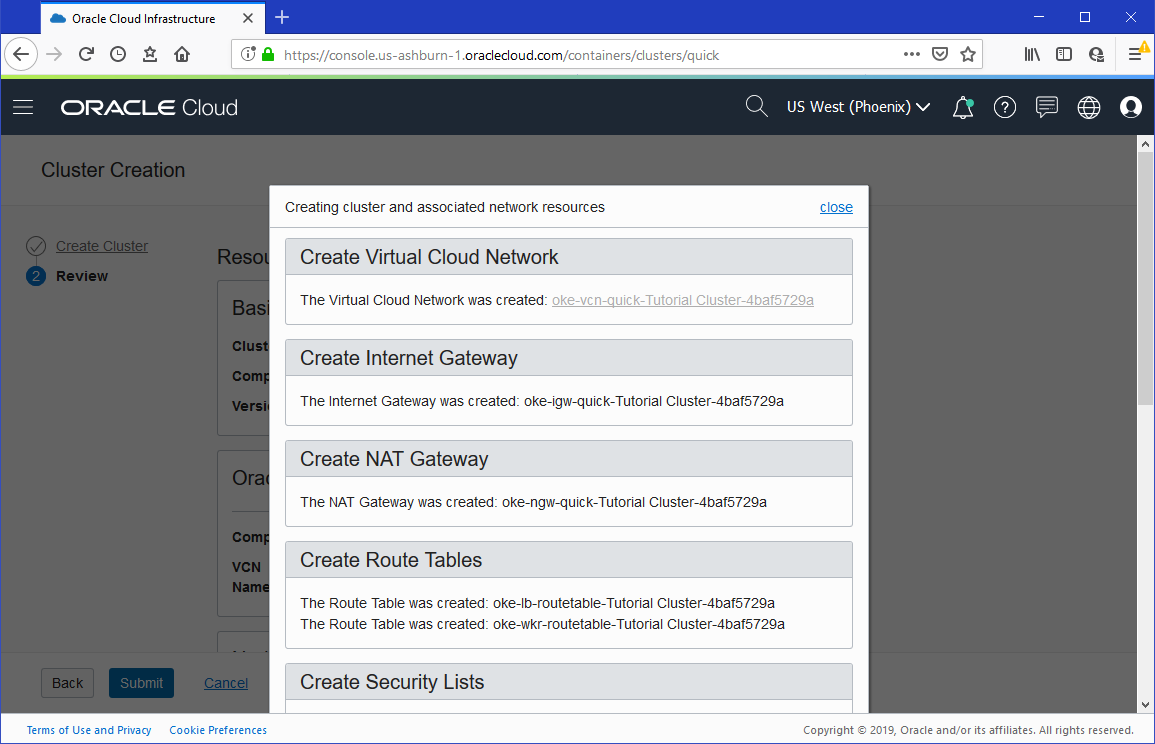
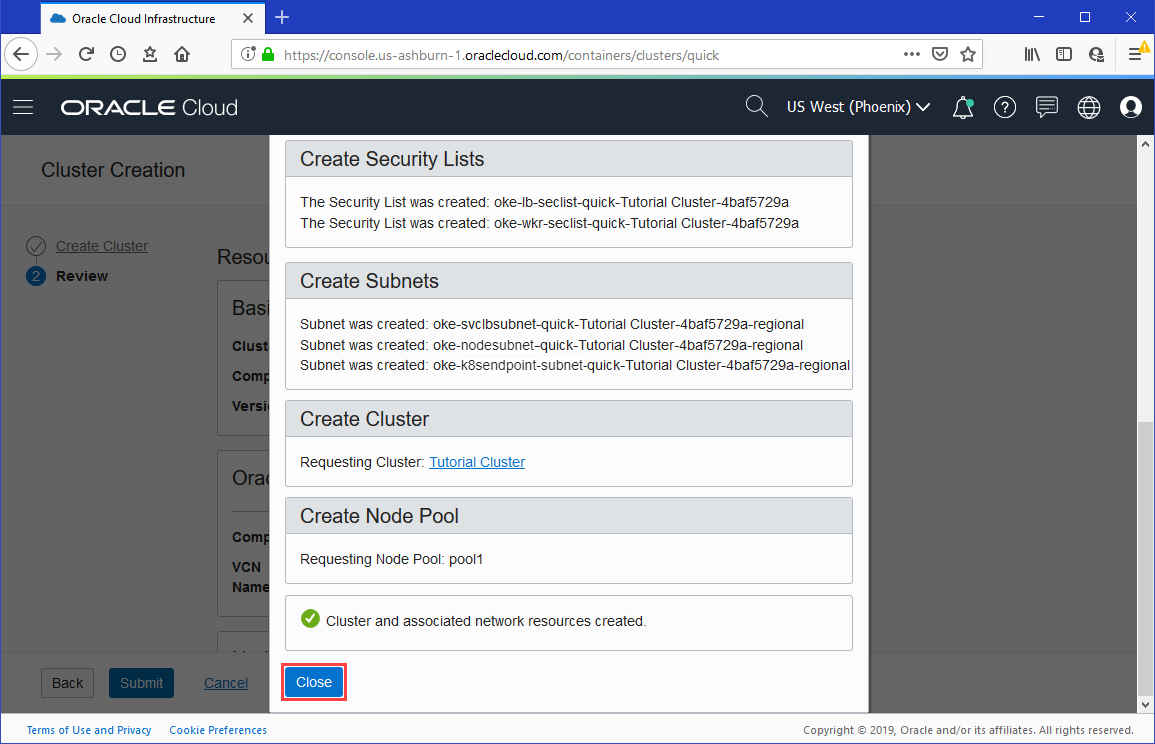
You see the different network resources being created for you.
- Click Close to return to the Console.
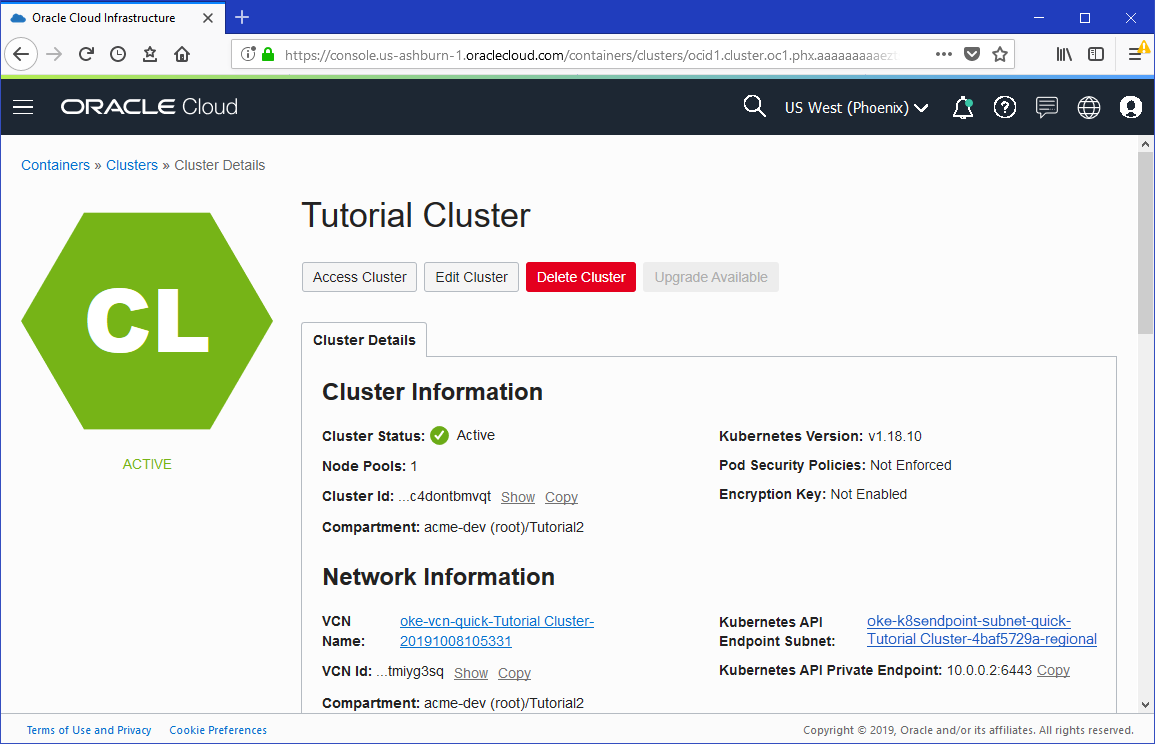
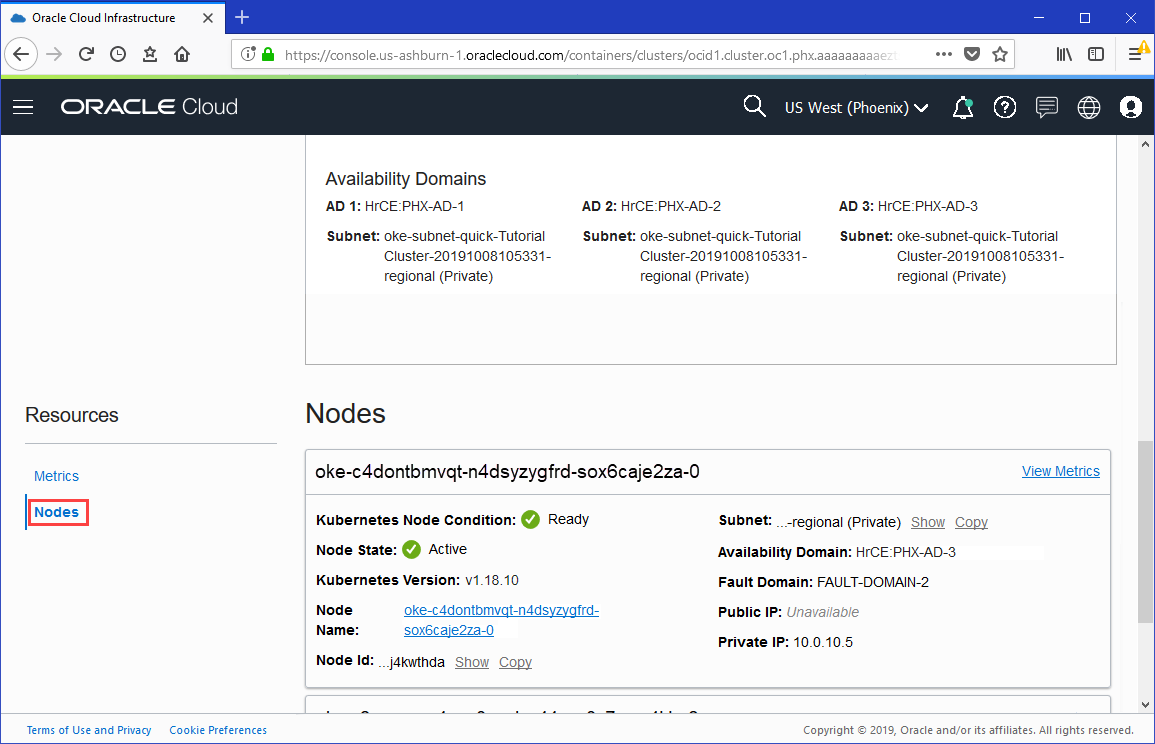
- Under Resources, select Node Pools and click the name of the node pool in the cluster you just created (pool1). Under Resources, select Nodes and scroll down to see details of the new worker nodes (compute instances) in the node pool.
 Set Up the kubeconfig File for the Cluster
- Confirm that you've already done the following:
- Generated an API signing key pair.
- Added the public key value of the API signing key pair to the User Settings for your username.
- Installed and configured the Oracle Cloud Infrastructure CLI (version 2.6.4 or later).
If you haven't done one or more of the above, or you're not sure, see the Setting Up Cluster Access topic in the Container Engine for Kubernetes documentation.
- With the Node Pools page showing details of pool1, click Cluster Details in the navigation path. Click Access Cluster to display the Access Your Cluster dialog box, and then click Local Access.

Description of the illustration - In a terminal window, create a directory to contain the kubeconfig file, giving the directory the expected default name and location of
$HOME/.kube. For example, on Linux, enter the following command (or copy and paste it from the Access Your Cluster dialog box): - Run the Oracle Cloud Infrastructure CLI command to set up the kubeconfig file and save it with the expected default name and location of
$HOME/.kube/config. This name and location ensures the kubeconfig file is accessible to kubectl and the Kubernetes Dashboard whenever you run them from a terminal window. For example, on Linux, enter the following command (or copy and paste it from the Access Your Cluster dialog box):$ oci ce cluster create-kubeconfig --cluster-id ocid1.cluster.oc1.phx.aaaaaaaaae... --file $HOME/.kube/config --region us-phoenix-1 --token-version 2.0.0
where ocid1.cluster.oc1.phx.aaaaaaaaae... is the OCID of the current cluster. For convenience, the command in the Access Your Cluster dialog box already includes the cluster's OCID. - Set the value of the KUBECONFIG environment variable to the name and location of the kubeconfig file. For example, on Linux, enter the following command (or copy and paste it from the Access Your Cluster dialog box):
$ export KUBECONFIG=$HOME/.kube/config
- Click Close to close the Access Your Cluster dialog.
$ mkdir -p $HOME/.kube
 Verify kubectl and Kubernetes Dashboard Access to the Cluster
- Confirm that you've already installed kubectl. If you haven't done so already, see the kubectl documentation.
- Verify that you can use kubectl to connect to the new cluster you've created. In a terminal window, enter the following command:
$ kubectl get nodes
You see details of the nodes running in the cluster. For example:NAME STATUS ROLES AGE VERSION 10.0.10.2 Ready node 1d v1.18.10 10.0.11.2 Ready node 1d v1.18.10 10.0.12.2 Ready node 1d v1.18.10
- Deploy the Kubernetes Dashboard on the new cluster you've created. In a terminal window, enter the following command:
$ kubectl apply -f https://raw.githubusercontent.com/kubernetes/dashboard/v2.0.3/aio/deploy/recommended.yaml
- Verify that you can use the Kubernetes Dashboard to connect to the cluster:
- In a text editor, create a file called oke-admin-service-account.yaml with the following content:
apiVersion: v1
kind: ServiceAccount
metadata:
  name: oke-admin
  namespace: kube-system
---
apiVersion: rbac.authorization.k8s.io/v1
kind: ClusterRoleBinding
metadata:
  name: oke-admin
roleRef:
  apiGroup: rbac.authorization.k8s.io
  kind: ClusterRole
  name: cluster-admin
subjects:
  - kind: ServiceAccount
    name: oke-admin
    namespace: kube-system
The file defines an administrator service account and a clusterrolebinding, both called oke-admin. - Create the service account and the clusterrolebinding in the cluster by entering:
$ kubectl apply -f oke-admin-service-account.yaml
The output from the above command confirms the creation of the service account and the clusterrolebinding:serviceaccount "oke-admin" created clusterrolebinding.rbac.authorization.k8s.io "oke-admin" created
You can now use the oke-admin service account to view and control the cluster, and to connect to the Kubernetes dashboard. - Obtain an authentication token for the oke-admin service account by entering:
$ kubectl -n kube-system describe secret $(kubectl -n kube-system get secret | grep oke-admin |
awk '{print $1}')
The output from the above command includes an authentication token (a long alphanumeric string) as the value of thetoken:element, as shown below:Name: oke-admin-token-gwbp2 Namespace: kube-system Labels: <none> Annotations: kubernetes.io/service-account.name: oke-admin kubernetes.io/service-account.uid: 3a7fcd8e-e123-11e9-81ca-0a580aed8570 Type: kubernetes.io/service-account-token Data ==== ca.crt: 1289 bytes namespace: 11 bytes token: eyJh______px1Q
In the example above,eyJh______px1Q(abbreviated for readability) is the authentication token. - Copy the value of the
token:element from the output. You will use this token to
connect to the dashboard.
- In a terminal window, enter the following command:
$ kubectl proxy
- Open a new browser window and go to http://localhost:8001/api/v1/namespaces/kube-system/services/https:kubernetes-dashboard:/proxy/#!/login to display the Kubernetes Dashboard.

Description of the illustration - Select the Token option, and paste the value of the
token:element you copied earlier into the Token field. - Click Sign In.
- Click Overview to see that Kubernetes is the only service running in the cluster.

Description of the illustration
Congratulations! You've successfully created a new cluster, and confirmed that the new cluster is up and running as expected.
- In a text editor, create a file called oke-admin-service-account.yaml with the following content:
 Housekeeping (optional)
Having completed the tutorial, if you want to free up Oracle Cloud Infrastructure resources, you can now delete the VCN and the cluster that you created. On the other hand, it's a good idea to retain them (especially the VCN) for your own testing purposes. If you intend to follow the Pulling an Image from Oracle Cloud Infrastructure Registry when Deploying a Load-Balanced Application to a Cluster tutorial, definitely don't delete the VCN and the cluster because you will use them in that tutorial.
- (optional) Go back to the browser window with the Cluster Details page showing the Tutorial Cluster, click Delete Cluster and confirm that you want to delete the Tutorial Cluster you created.

Description of the illustration - (optional) Delete the VCN created during the tutorial:
- In the Console, open the navigation menu. Under Core Infrastructure, go to Networking and click Virtual Cloud Networks.
- Click the name of the VCN you created during this tutorial, and then click Terminate on the Details page.
- Confirm that you want to terminate the VCN.
 Create a Cluster with Oracle Cloud Infrastructure Container Engine for Kubernetes