
This document will continue to evolve as existing sections change and new information is added. All updates appear in the following table:
| Date | Feature | Notes |
|---|---|---|
| 30 APR 2020 | Created initial document. |
This guide outlines the information you need to know about new or improved functionality in Oracle B2C Service Agent Browser UI and describes any tasks you might need to perform for the update. Each section includes a brief description of the feature, the steps you need to take to enable to begin using the feature, any tips or considerations that you should keep in mind, and the resources available to help you.
For a listing of hardware and software requirements for Oracle products, log in to our support site and access Answer ID 31.
Give Us Feedback
We welcome your comments and suggestions to improve the content. Please send us your feedback.
Column Definitions:
Features Delivered Enabled
Report = New or modified, Oracle-delivered, ready to run reports.
UI or Process-Based: Small Scale = These UI or process-based features are typically comprised of minor field, validation, or program changes. Therefore, the potential impact to users is minimal.
UI or Process-Based: Larger Scale* = These UI or process-based features have more complex designs. Therefore, the potential impact to users is higher.
Features Delivered Disabled = Action is needed BEFORE these features can be used by END USERS. These features are delivered disabled and you choose if and when to enable them. For example, a) new or expanded BI subject areas need to first be incorporated into reports, b) Integration is required to utilize new web services, or c) features must be assigned to user roles before they can be accessed.
| Ready for Use by End Users Reports plus Small Scale UI or Process-Based new features will have minimal user impact after an update. Therefore, customer acceptance testing should focus on the Larger Scale UI or Process-Based* new features. |
Action is Needed BEFORE Use by End Users Not disruptive as action is required to make these features ready to use. As you selectively choose to leverage, you set your test and roll out timing. |
|||||
|---|---|---|---|---|---|---|
| Feature |
Report |
UI or |
UI or |
|
||
Background Image for Agent Browser UI
Administrators can customize Agent Browser UI by placing an image in the background of the application.
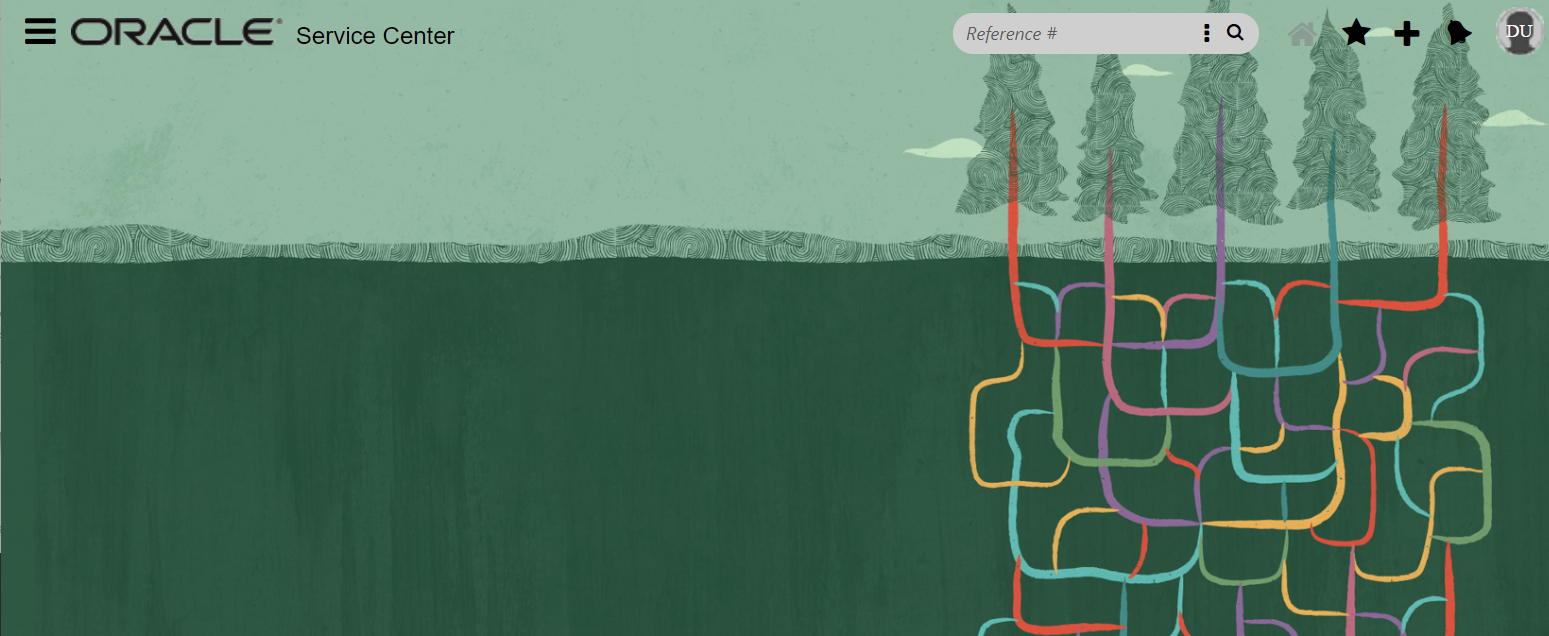
Example Custom Background Image
Steps to Enable
Adding a background image to Browser UI requires a administrator to create and deploy a custom text type configuration setting with a specific name (key). Once deployed, a URL pointing to a hosted image is entered into the configuration verb.
- Create and deploy a custom configuration setting. Instructions on creating and deploying custom configuration settings can be found here.
- Key names and descriptions:
CUSTOM_CFG_BUI_BACKGROUND_IMAGE_URL: enter a URL for a hosted image that will display when the user's preference is set to 'vanilla' or 'light blue'
CUSTOM_CFG_BUI_BACKGROUND_ALT_IMAGE_URL: enter a URL for a hosted image that will display when the user's preference is set to 'dark grey' or 'dark blue'
- Once the configuration setting(s) has been created and deployed, the image can be seen by logging into Browser UI for the associated interface(s).
Tips And Considerations
- Configuration settings can be associated with one or more site interfaces.
- Images will be scaled to fit the allotted space. URLs that cannot be resolved will display broken image icons.
- File size of hosted images should be minimized in order to maximize display performance.
Key Resources
- Instructions for other branding customization options can be found here.
Browser Agent UI users will now be able to manage navigation sets within the Browser Agent console by adding, removing and ordering reports, folders and components. These changes will be persistent saving personalized navigation set for subsequent logins. Previously Agents using Browser UI with "Customize Nav Set" profile permission enabled would need to make Nav Set changes in .NET.
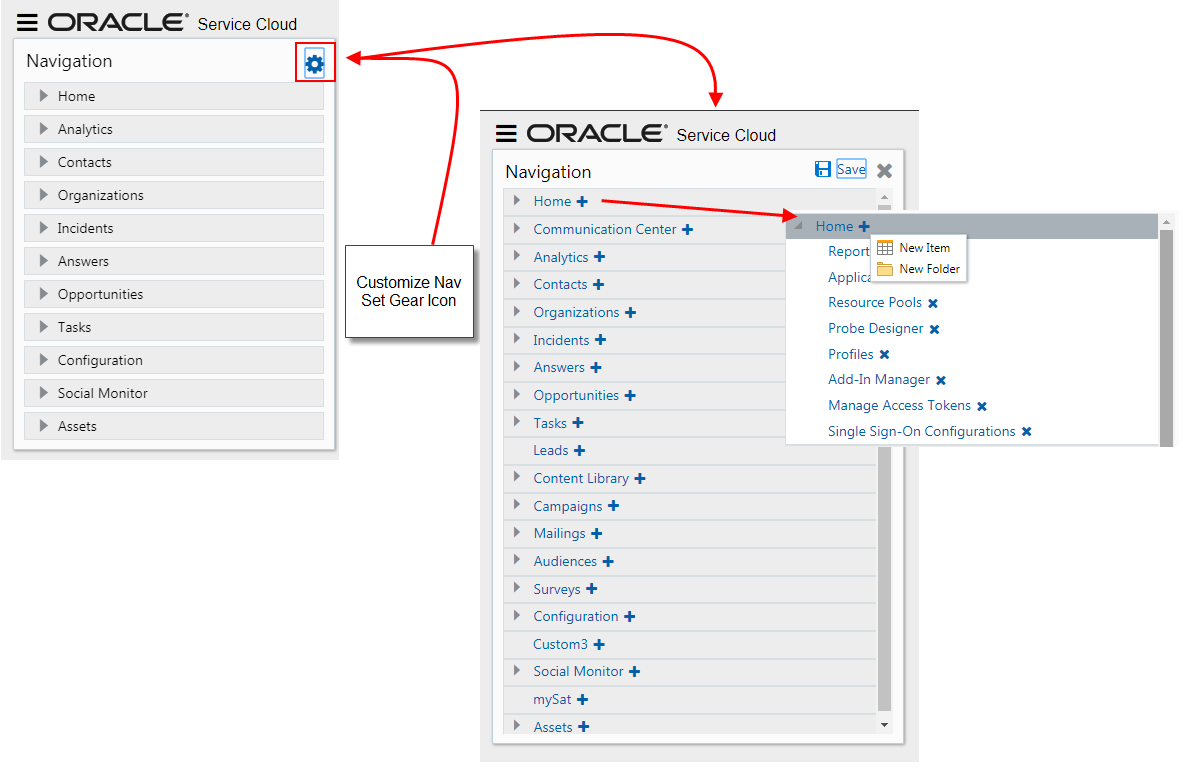
Customize Navigation Set
This innovative design will increase agent productivity by allowing them to personalize their navigation set according to their preferences.
Steps to Enable
Staff can only customize the list of reports for each navigation button if their staff profile has the Customize Navigation Set box enabled under the Interfaces options, above the listing of navigation sets for each interface.
Administrators can navigate to Configuration>Staff Management>Profiles and select the Customize Navigation Set option in the interfaces tab. This option enables the functionality for both the Browser Agent console and the Agent Desktop console (.NET).
Role Information
An administration role will be required to enable this functionality for the agent profiles. This functionality is applicable to all roles.
Knowledge Foundation: Learned Links Answer Relationship
Service can automatically link answers based on customer activity. Relationships between answers are established when customers view answers during the same visit.
The Learned Links section of the Relationships tab consists of a toolbar and a list of learned link answers. The toolbar is located above the learned links answer list.
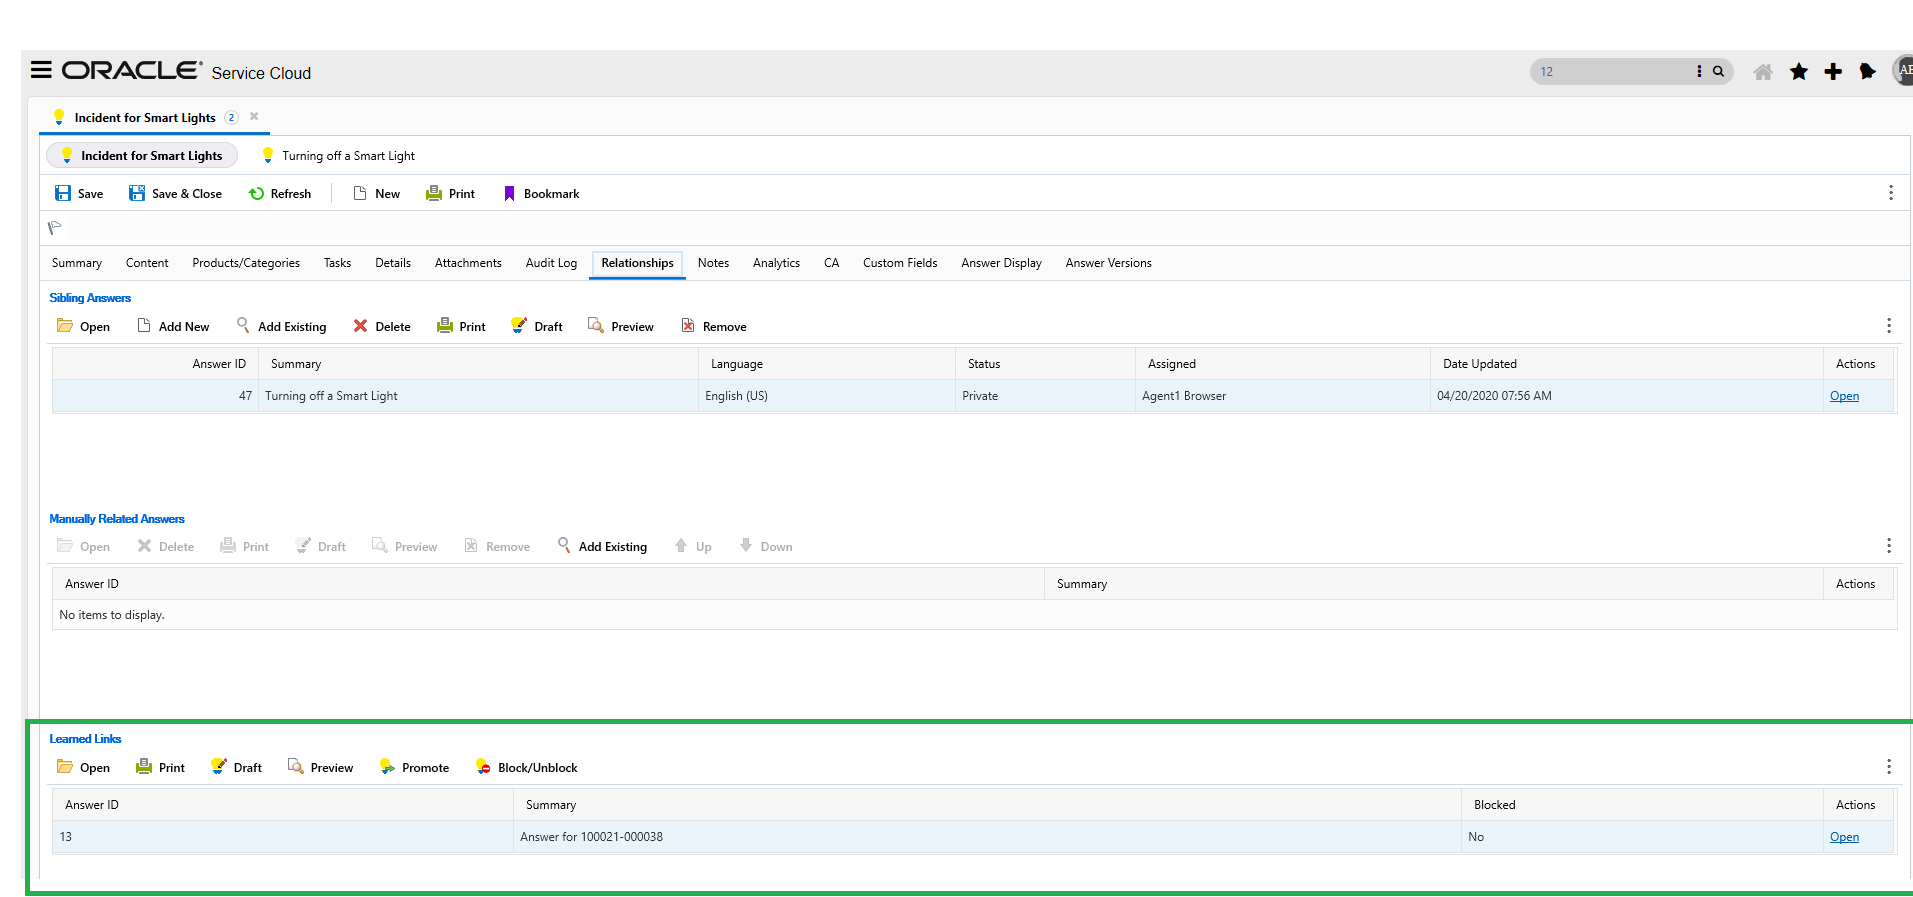
Learned Links Section on the Answer WS Under the Relationship Tab
Steps to Enable
You don't need to do anything to enable this feature.
Knowledge Foundation: Sibling Answer Relationship
The Sibling Answers feature allows the user to connect answers that have similar products, categories and file attachments.
To add a Sibling Answer:
- Open the existing answer and click the Relationships tab.
- In Siblings Answer section, click Add > Add New or Add Existing. If adding a new answer, add content and click OK. If adding an existing answer, search for the answer you want to add as a sibling (by Answer ID or by text) and click Select. In the Move Siblings pop-up specify which answer should be moved to the other answers sibling set. If both answers are stand-alone answers, it does not matter which answer actually moves.
- When the sibling answer displays on the Relationships tab, save the original answer.
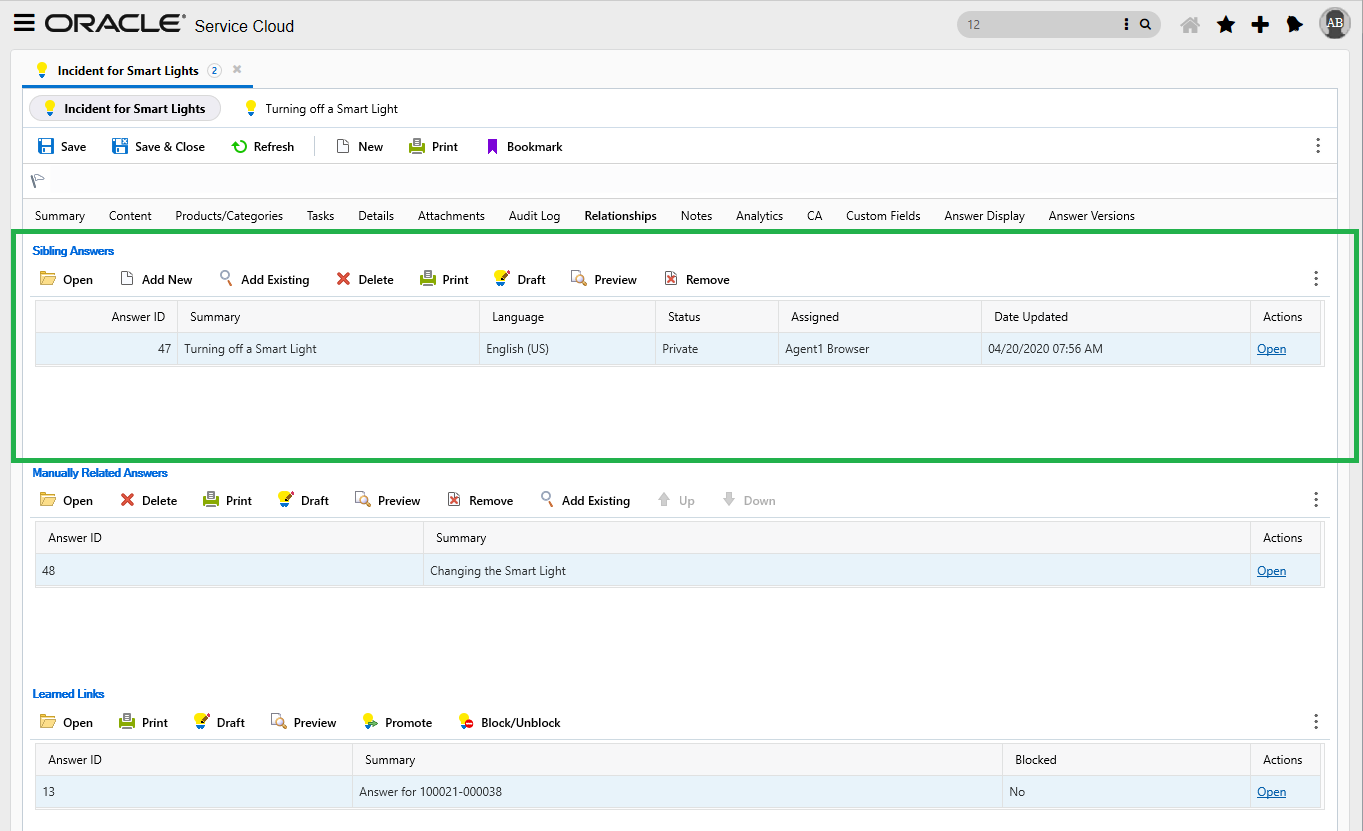
Sibling Answer Section on the Answer WS Under the Relationship Tab
Steps to Enable
You don't need to do anything to enable this feature.
Key Resources
Role Information
Admins and agents with proper permissions are able to edit the Relationship tab on the Answer Workspace.
Knowledge Foundation: Manually Related Answer Relationship
Manually related answers are two or more answers that might contain related information. Manually relating answers provides customers with additional options for finding accurate information.
When editing an answer, the Manually Related Answers section on the Relationships tab allows you to select specific answers to display at the bottom of the end-user page when the answer is viewed. On the end-user pages, manually related answers are listed under the heading Answers others found helpful.
The list of answers in the Manually Related Answers section is not subject to automatic updates based on end-user activity or link data within the application. The answers listed in this section are maintained manually by adding or removing answers or promoting answers from the Learned Link section.
The Manually Related Answers section of the Relationships tab consists of a toolbar and a list of manually related answers. The toolbar is located above the manually related answer list.
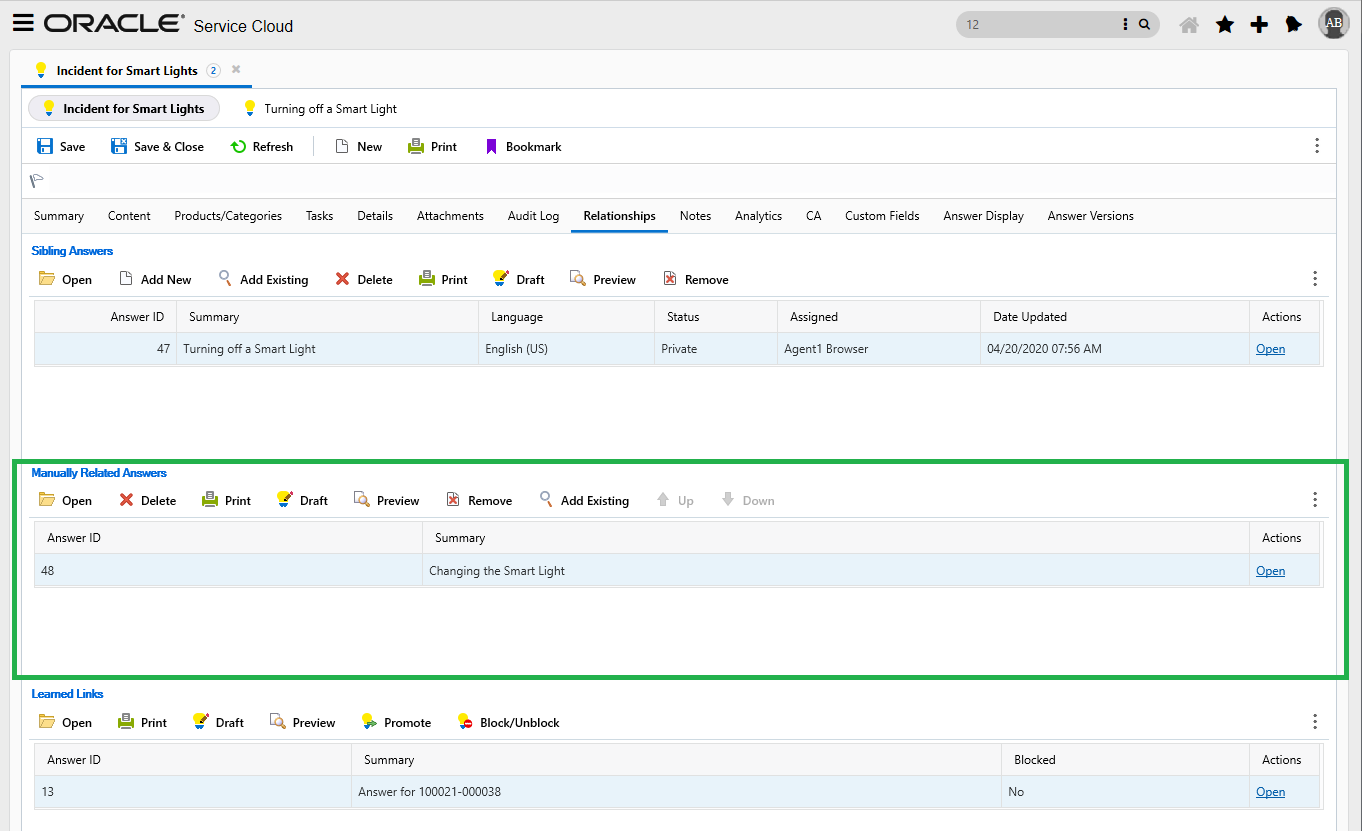
Manually Related Answers Section on the Answer WS Under the Relationship Tab
Steps to Enable
You don't need to do anything to enable this feature.
Key Resources
Role Information
Admins and agents with proper permissions are able to edit the Relationship tab on the Answer Workspace.
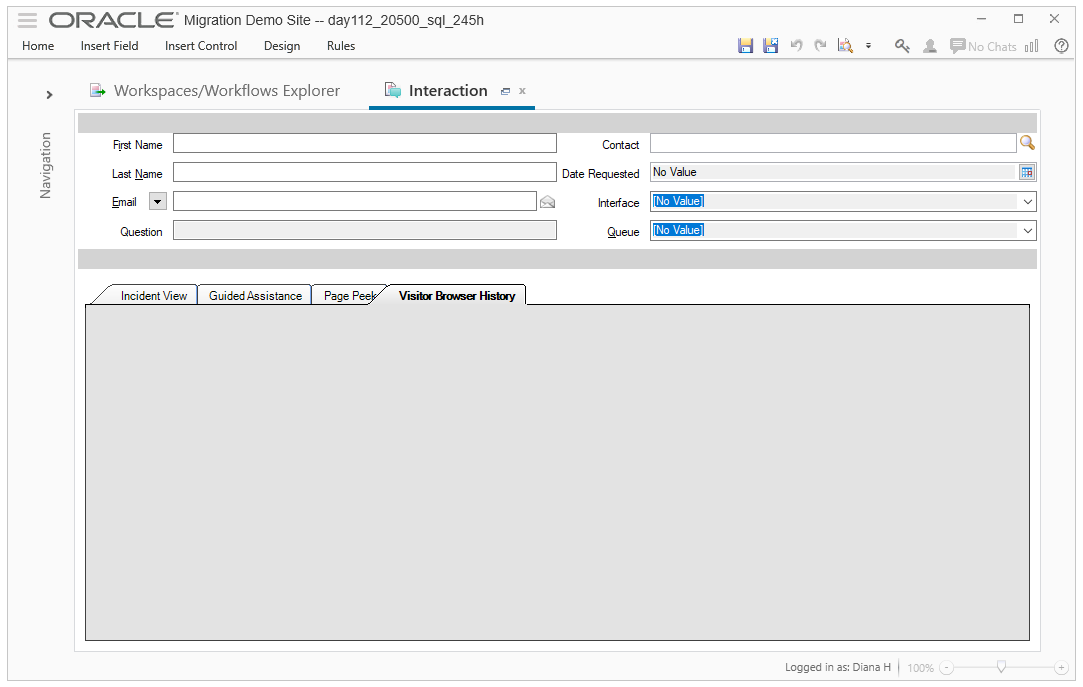
Interaction Workspace Visitor Browser History
The Visitor Browser History control is now supported on the Interaction WS for chat in Agent Browser.
If the Engagement Engine is enabled, the Visitor Browser History control can be added to the Interaction WS through the .NET Designer.
To add the Visitor Browser History control:
- Add a Tab Set control to the Interaction WS in the Designer. Tip: Delete the Incident View control when editing a standard workspace and then add the Tab Set. Then add the Incident View control to the first tab and rename the tab.
- Add a Tab to the Tab Set and rename it to Visitor Browser History. Drop the Visitor Browser History control under the new tab.
Steps to Enable
- Engagement Engine needs to be enabled
Please see Answer ID 6537 Getting Started Guide for Visitor Browser History and Page Peek
- While the Interaction WS is open in the .NET Workspace Designer, Add the Visitor Browser History control to a new tab
To add the Visitor Browser History control:
- Add a Tab Set control to the Interaction WS in the Designer. Tip: Delete the Incident View control when editing a standard workspace and then add the Tab Set. Then add the Incident View control to the first tab and rename the tab)
- Add a Tab to the Tab Set and rename it to Visitor Browser History. Drop the Visitor Browser History control under the new tab.
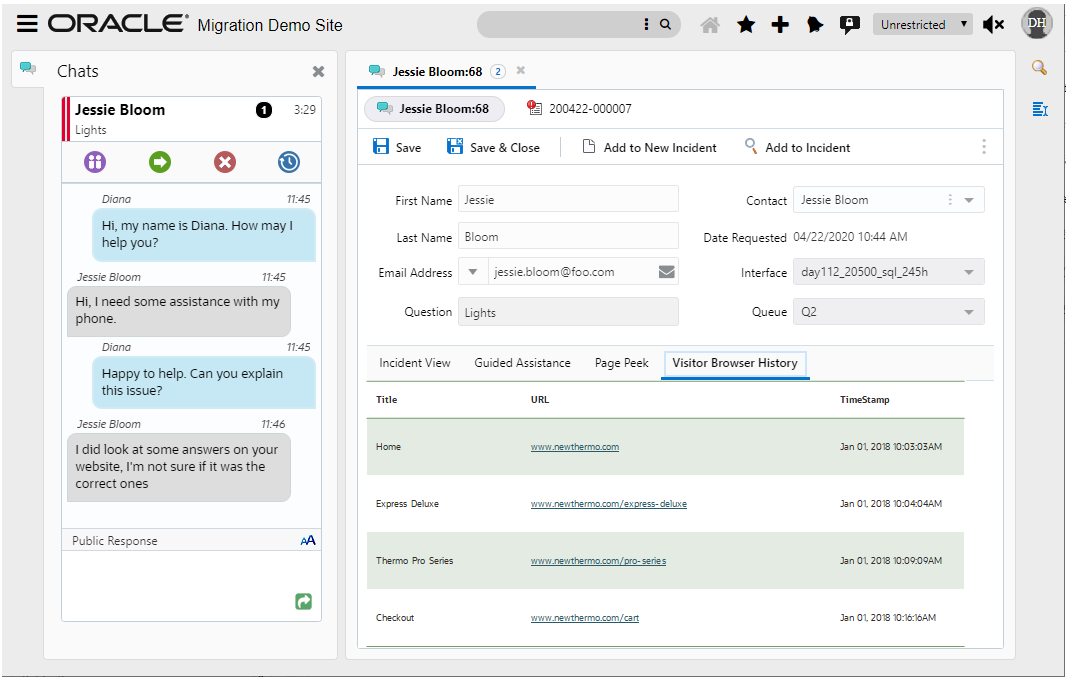
- In Agent Browser UI runtime, the agent will be able to access and utilize Visitor Browser History
Key Resources
Agent Browser now supports the total Record Count in reports. You can quickly see how many records are returned on your report.
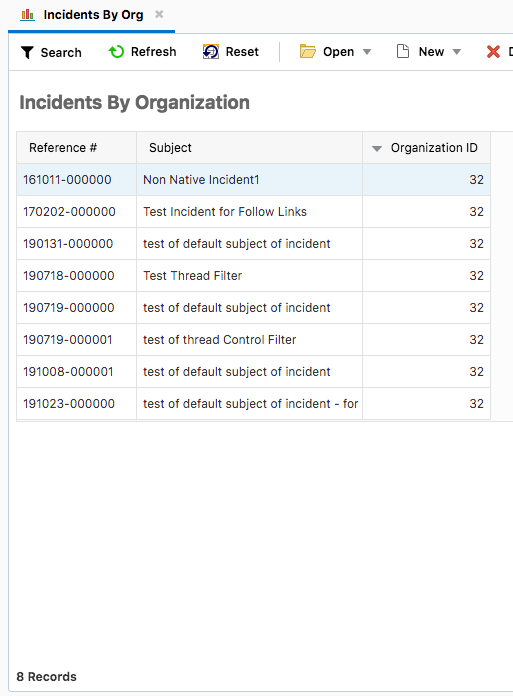
Record Count Example
Steps to Enable
You don't need to do anything to enable this feature.
Role Information
- Report Users