
This document will continue to evolve as existing sections change and new information is added. All updates appear in the following table:
| Date | Module | Feature | Notes |
|---|---|---|---|
| 31 MAR 2023 | Plugin Framework | Redwood Design for Debriefing Plug-In | Added the link to OTN. |
| 17 FEB 2023 | Integration | Updated some of the images and changed 'recipe' to 'accelerator'. | |
| 23 JAN 2023 | Created initial document. |
 HAVE AN IDEA?
We’re here and we’re listening. If you have a suggestion on how to make our cloud services even better then go ahead and tell us. There are several ways to submit your ideas, for example, through the Ideas Lab on Oracle Customer Connect. Wherever you see this icon after the feature name it means we delivered one of your ideas.
GIVE US FEEDBACK
We welcome your comments and suggestions to improve the content. Please send us your feedback at oracle_fusion_applications_help_ww_grp@oracle.com.
DISCLAIMER
The information contained in this document may include statements about Oracle’s product development plans. Many factors can materially affect Oracle’s product development plans and the nature and timing of future product releases. Accordingly, this Information is provided to you solely for information only, is not a commitment to deliver any material, code, or functionality, and should not be relied upon in making purchasing decisions. The development, release, and timing of any features or functionality described remains at the sole discretion of Oracle.
This information may not be incorporated into any contractual agreement with Oracle or its subsidiaries or affiliates. Oracle specifically disclaims any liability with respect to this information. Refer to the Legal Notices and Terms of Use for further information.
Column Definitions:
Report = New or modified, Oracle-delivered, ready to run reports.
UI or Process-Based: Small Scale = These UI or process-based features are typically comprised of minor field, validation, or program changes. Therefore, the potential impact to users is minimal.
UI or Process-Based: Larger Scale* = These UI or process-based features have more complex designs. Therefore, the potential impact to users is higher.
Features Delivered Disabled = Action is needed BEFORE these features can be used by END USERS. These features are delivered disabled and you choose if and when to enable them. For example, a) new or expanded BI subject areas need to first be incorporated into reports, b) Integration is required to utilize new web services, or c) features must be assigned to user roles before they can be accessed.
| Ready for Use by End Users Reports plus Small Scale UI or Process-Based new features will have minimal user impact after an update. Therefore, customer acceptance testing should focus on the Larger Scale UI or Process-Based* new features. |
Customer Must Take Action before Use by End Users Not disruptive as action is required to make these features ready to use. As you selectively choose to leverage, you set your test and roll out timing. |
|||||
|---|---|---|---|---|---|---|
| Feature |
Report |
UI or |
UI or |
|
||
Redwood Style for Filters, Capacity Categories, and Link Templates Configuration Pages |
||||||
Book Appointment and Assign Activity Using Siebel CRM and Oracle Field Service |
||||||
Prioritize Earlier Start of Most Important Activities in Bulk Routing |
||||||
Redwood Styles in Statistics Configuration
Overview
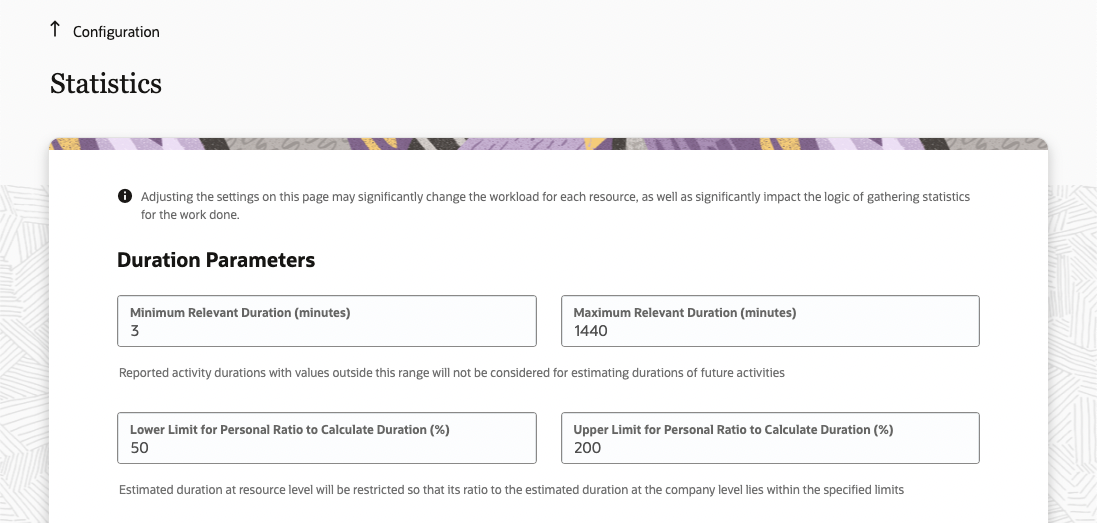
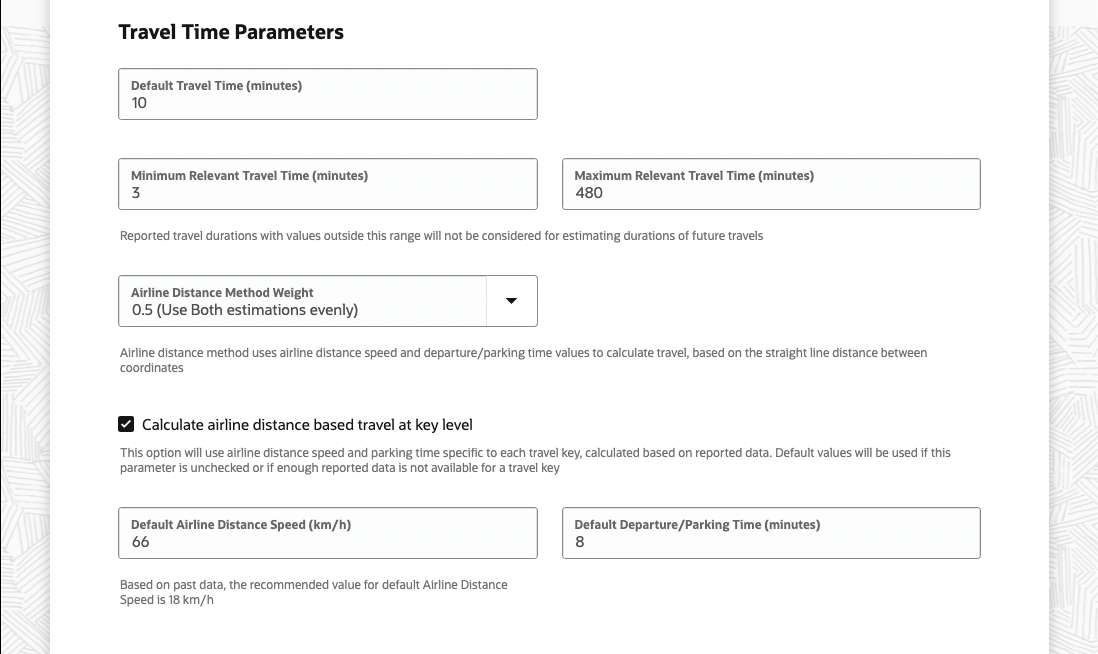
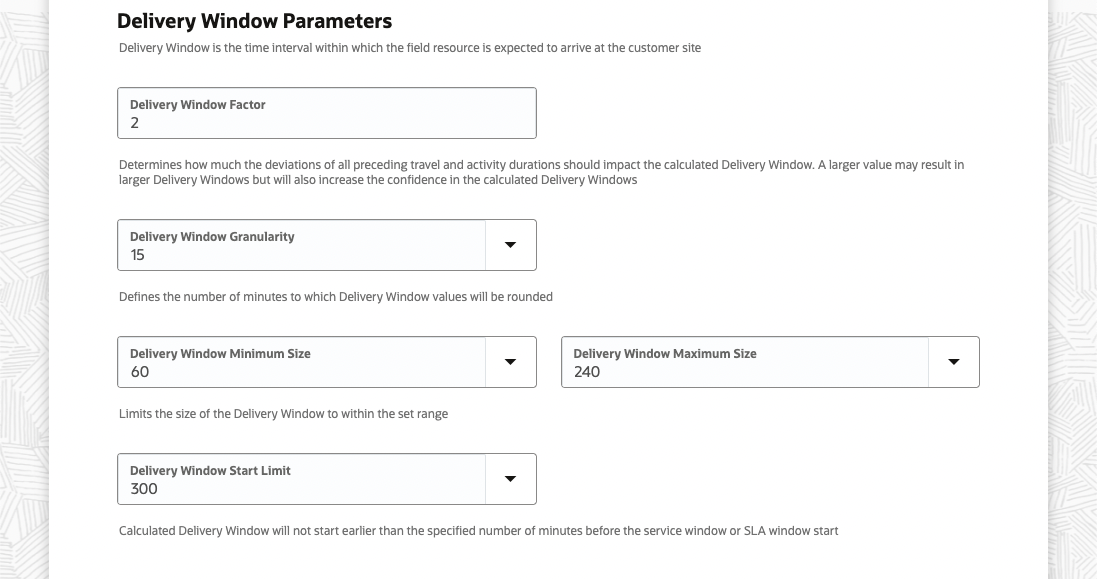
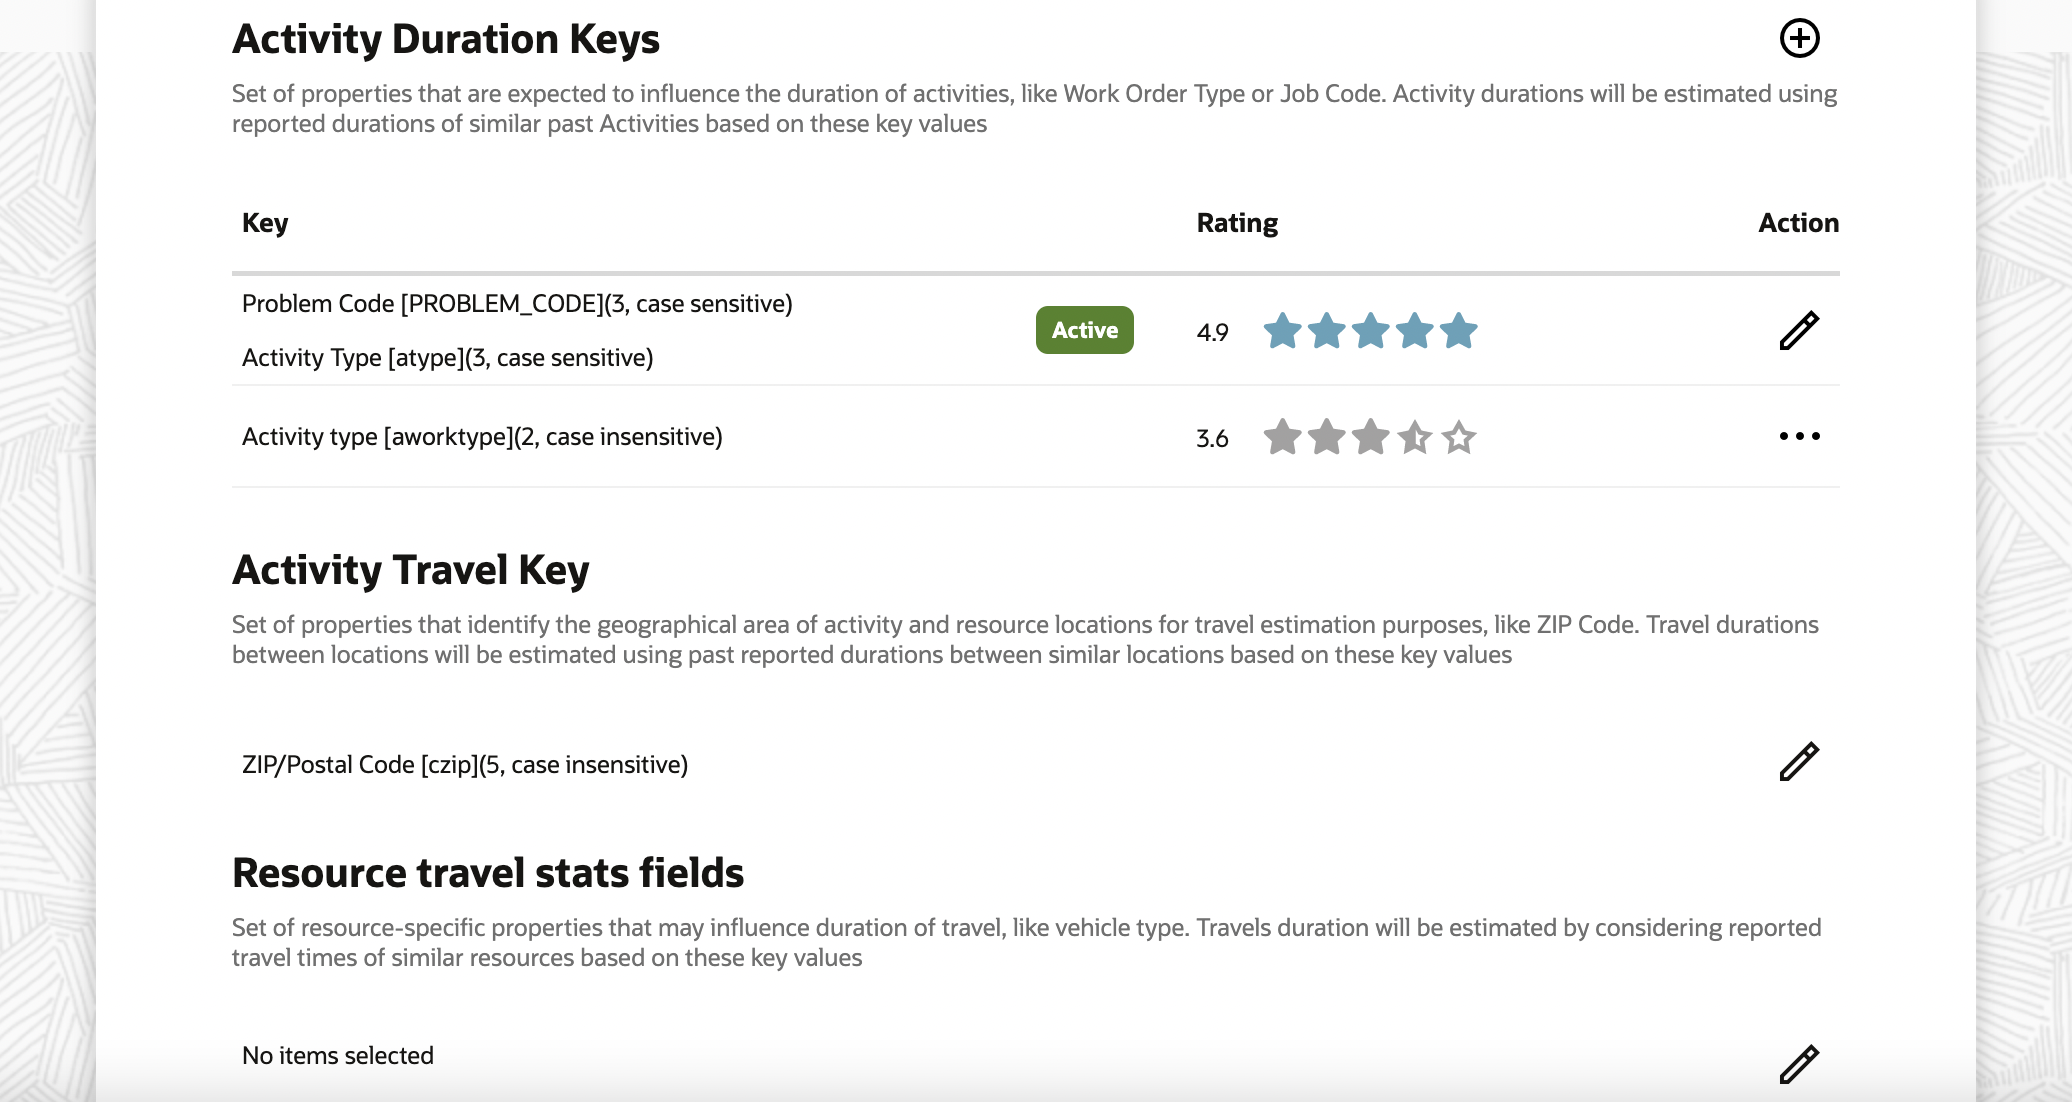
The Statistics Configuration screen has been redesigned based on Redwood styles. The changes impact the way all input fields are displayed to make them consistent with the rest of the application.
The following changes have been made in addition to the screen redesign:
Check boxes for 'Delivery Window Maximum Size' and 'Delivery Window Start Limit' have been removed. If you had them unchecked earlier, you will have both those fields set to 300 minutes post upgrade to Update 23A. These screenshots show the Statistics page in Redwood style:
When an input box is selected, a text describing the expected value will be displayed just below it, as shown in this screenshot:

In case of an incorrect entry, an error message is displayed, as shown in this screenshot:

Help texts are included to explain the impact of most parameters, as shown in this screenshot:

The 'Apply Changes' button has been moved to the bottom of the page to make it consistent with other pages.
The updated the look and feel of the Statistics configuration pages corresponding to the Redwood style provides a consistent user experience with other Oracle products.
Steps to Enable
You don't need to do anything to enable this feature.
Key Resources
Administering Oracle Field Service: https://docs.oracle.com/en/cloud/saas/field-service/faadu/index.html
This link will be available after Update 23A GA release.
Quota Recalculation Performance Improvements
Overview
Quota recalculations can sometimes require significant time consumption, depending on the configuration complexity. This is observed by the delay in time from some change happening in the system to seeing its impact on the Quota values.
What Might be Observed
- In most cases, a decreased recalculation time after changes to activities (adding, moving, and so on) and after changes in configurations (work skills, work zones, resource calendars and so on).
- For configurations that use temporarily assigned resources, some changes previously required two cycles of recalculations to ensure that all changes were reflected in all related capacity areas. With the redesign, there is no need for the second recalculation anymore; all impacted capacity areas get updated within one cycle. For example, after changes to resource work zones, the "Max available" and "Used quota" parameters are updated after the nearest recalculation period, while previously that required at least two.
- Some changes that previously required the recalculation cycle now will be reflected immediately. For example, changes to attributes of activities that influence quota values no longer require waiting for the next recalculation cycle.
With Update 23A, the Quota recalculation process has been significantly redesigned and as a result, better performance may become evident for some configurations, especially those that use the temporarily assigned resources feature.
Steps to Enable
You don't need to do anything to enable this feature.
Key Resources
- Using Capacity Service: https://docs.oracle.com/en/cloud/saas/field-service/faccu/index.html. This link will be available after Update 23A GA release.
Ad hoc Filters in Dispatch Console
Overview
Oracle Field Service provides the ability to filter activities based on different criteria. But these filters need to be preconfigured by those people who are responsible for the configuration and they are shared by all the users of the system (with permissions applied).
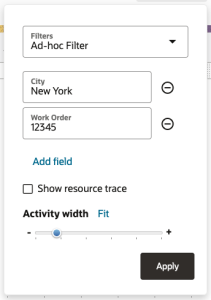
In order to use ad hoc filtering, open the Dispatch Console and click on the "View" button. Then select "Ad hoc Filter" from the "Filters" drop-down list. You can add a new field to a filter by clicking the "Add field" button and then selecting a desired field from the list. After the field is selected, you can provide a value for it. If the field contains an enumeration property, then a drop-down list will be provided. If the value is not provided, then the field doesn't participate in the filtering. If the field is not required anymore you can delete it by clicking on the "-" button next to the field.
All values provided in the filter should match in order for the activity to be shown. Technically it uses an "AND" condition. For enumeration properties, the exact value is used. For string properties, the substring is used. All filters are case sensitive.
You can provide several values for the same field. For enumeration properties, just select several values from the drop-down list. For string properties, provide several values each separated by comma. If several values are provided then the filter matches if an activity contains at least one value. In these cases, technically it uses an "OR" condition.
All fields added to the ad hoc filter are preserved between sessions. When you open the Dispatch Console after logging out, the initial filter is "*". When you select "Ad hoc filter", all fields configured previously will be there.
An example of the ad hoc filter is provided below:
Limitations
- Only the fields that are available to you on the "Dispatch Console" ? "List view" can be added to the filter.
- Only 10 fields can be added to ad hoc filter at one time.
This feature helps you have full control of what can be accessed by end users. It also helps when dispatchers have to filter on two or three fields without having to save the filter or share it with other users.
Steps to Enable
You don't need to do anything to enable this feature.
Key Resources
- Using Core Application: https://docs.oracle.com/en/cloud/saas/field-service/faaca/index.html. This link will be available after Update 23A GA release.
Finish Started Activities After Overnight End Time
Overview
Currently you may be facing issues when dealing with activities that were not completed at the point of the Overnight end time. Even though technicians ultimately finished such activities, this fact was not reflected in Oracle Field Service; therefore all the data related to these activities was absent within the application.
Comparison to Earlier Versions
Before Update 23A: Performing actions on activities and inventory were not possible for those activities that extended beyond the Overnight end time. Only limited modifications to activity property and field values were allowed.
New with Update 23A: For activities still in 'started' status beyond the Overnight end time it's now possible to:
- Change activity status to Completed/Suspended/Not done
- Perform actions with inventory such as 'Install', 'Deinstall' etc.
How it Works
Configuration
The ability to complete activities after the Overnight end time is controlled by the 'Allow update activities and offline sync after overnight within the following number of hours' setting located on the Business Rules page. Respective links and buttons will be displayed in the UI during the period of time configured for this setting.
How it Works within the Oracle Field Service User Interface
Activity and inventory-related links and buttons will be displayed just for activities that remain in 'Started' status beyond the 'Overnight' end time. You'll be able to perform actions using 'My Route' and 'Activity details' pages as well as from activity hints available within the 'Manage' and 'Dispatch Console' pages. Data will be collected by the application and synchronized to the server.
The new functionality is introduced for single activities as well as segmentable activities and their segments.
NOTE: It will not be possible to start new activities once the Overnight work ends or manage inventory for activities in any other statuses.
Changing Activity Status
The following 'status change' actions are available for started activities when the Overnight period ends:
- 'End activity'
- 'Not done activity'
- 'Suspend activity'
The logic for 'Suspend activity' is adjusted to the new working conditions as described below:
- When performing the 'Suspend activity' action for a single activity, the application
- creates a 'Suspended' activity in the route of the original activity
- moves the original activity to the non-scheduled pool, changes its status to 'Pending' and defines its position in route as 'not-ordered'
- When suspending a segment of a multi-day activity, the application
- creates a 'Suspended' segment in the route of the original segment
- respectively increases the 'time to complete' for the master segmentable activity by the time of the suspended segment
NOTE: You must enable the 'Allow access to non-scheduled pool' setting for the appropriate user type(s) to make the 'Suspend activity' operation work as described above.
Adjusting Activity Duration
The ability to adjust the activity duration is preserved both for single activities and for segments of segmentable activities.
Selection of Next Activity and Changes of Action Time
The ability to select a next activity or set an activity's action time will not be available in the UI for the last activity on a given day.
Inventory Actions
The following inventory actions are available for inventories related to 'Started' activities after 'Overnight' end time:
- Add to Customer
- Add to Required
- Delete Inventory
- Install Inventory
- Deinstall Inventory
- Create Installed Inventory
- Create Deinstalled Inventory
- Undo Install
- Undo Deinstall
- Exchange Inventory
- Install Required Inventory
- Delete Required Inventory
- Edit Required Inventory
- Create Installed Required Inventory
Apart from that, users will be able to update values of any fields/properties using the 'Inventory details' page and any forms connected to this page. Changes to field values on the 'Required Inventory' page are also supported.
IMPORTANT: Limitations, inventory actions from an activity of a team holder are not available for an assistant while working in teamwork.
API support
Updates for activities that are still in 'Started' status after the Overnight end time and any inventory items related to these activities could be received using the following API calls:
- Events
- Get Activity
- Get Activities
- Get Inventory
The Daily Extract for a given day won't contain any actions performed after the Overnight end time. You must either wait for the automatic generation of their Daily Extract for the following day or run the Daily Extract manually once all activities are completed. Then it will be required to merge the results from two Daily Extract files to get the complete data set.
NOTE: Messages from the Outbound API remain blocked after the configured Overnight period.
The new feature provides you with the ability to complete activities being worked on after the Overnight end time. With this improvement, you can switch 'Started' activities to a final status and work with inventory belonging to these activities. This achieves several goals:
- Technicians can continue reporting for 'started' activities past the Overnight time
- The application provides consistent data through both the user interface and APIs
- You don't have to build processes outside of Oracle Field Service to collect data for activities that continue after the Overnight period
Steps to Enable
You don't need to do anything to enable this feature.
Key Resources
- Using Core Application: https://docs.oracle.com/en/cloud/saas/field-service/faaca/index.html. This link will be available after Update 23A GA release.
Improved Nearby Activities Workflow
Overview
Using the 'Nearby activities' tool from the Route map, users can quickly identify and assign required nearby activities. It allows users to:
- Observe 'available for assignment' activities in the Map view, along with details about them in the list
- Focus on activities with higher priorities, as they are displayed at the top of list:
- Business priorities
- SLA compliance
- Activity duration
- Filter out activities in the required area by focusing the map
- Observe more details within the activity hint
- Call a customer right from within the Map view
- Utilize the power of the Assignment Assistant tool to understand how other activities in the route are affected
How to Use the Feature
User can enable a Nearby activities workflow by selecting the 'Nearby activities' checkbox from the map layer switcher. After enabling this option:
- Nearby activities are plotted on the route map. These include bucket and non-scheduled activities assigned to current resource and buckets visible to current user.
- The panel with route activities is replaced with the Nearby Activities panel.
- Nearby activities from the Map view are reflected in the panel. After dragging the map to some area or zooming in, then the activities in panel are updated accordingly.
Activities that meet the following criteria are displayed in both Map and List views:
- They have X/Y coordinates, either from being sent with the activity or from a resolved address
- Their work zones and work skills must match those of the resource (or the permission 'Ignore work zones / work skills mismatch on activity move' must be configured for the user)
- They are either:
- in the non-scheduled pool of current resource
- in the non-scheduled pool of buckets visible to the current user
- scheduled for the date selected in route map page to buckets that are visible for current user
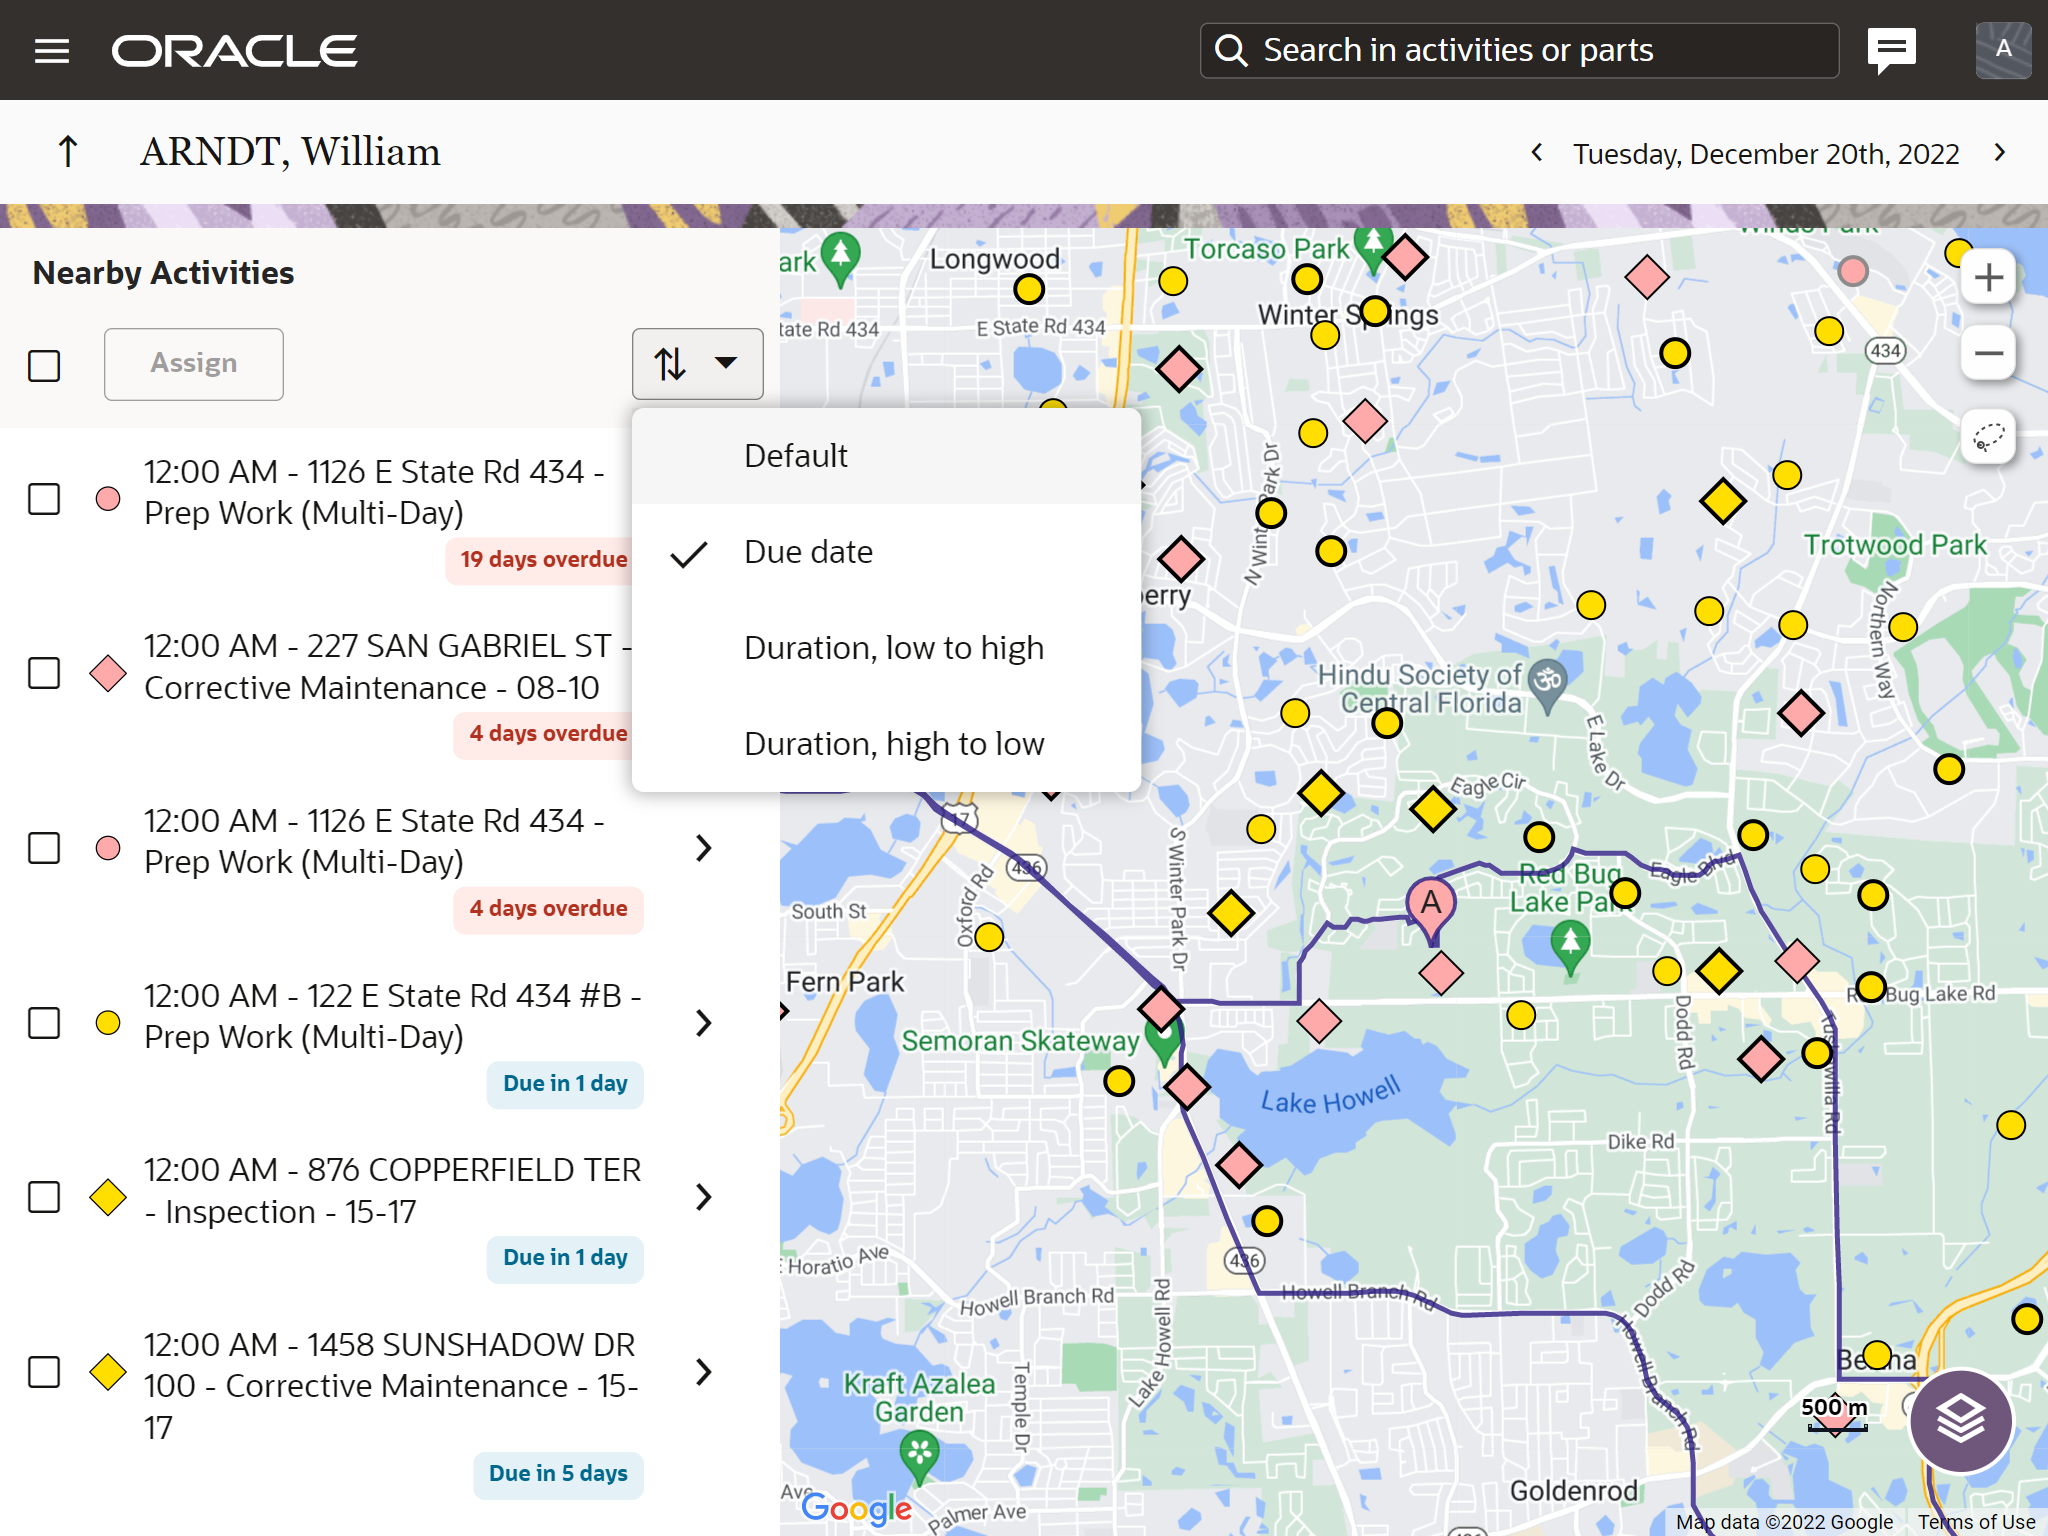
When at least one activity is selected from the Nearby Activities panel, then an Assign button at the top of the panel becomes available. The Assignment Assistant tool is opened for moving selected activities after clicking the Assign button. This screenshot shows the Nearby Activities panel and the Nearby activities check box on the map:

Nearby Activities Panel
Activities in the panel contain:
- A checkbox. When activity is selected from the panel, then it becomes highlighted on the map with a bubble marker. The number of selected activities along with their combined duration is displayed at the top of the panel when at least one activity is selected.
- The activity map marker as configured in "Business Rules ? Non-scheduled and Not assigned activities map markers".
- The activity identifier as configured for the current user type.
- The Due Date label shows how many days until the activity SLA end are left or if the SLA end has passed. The label is displayed when the activity property 'SLA End' is populated.
- The Details icon '>' opens the activity hint.
Up to 100 activities can be displayed in the panel at once.
Sorting in the Nearby Activities Panel
A Sorting button is available in the Nearby Activities panel. Activities from the Map view are ordered in the selected way and the top 100 of them are displayed in the panel.
Available options are:
- Default - The priority defined by business requirements in "Business Rules ? Non-scheduled and Not assigned activities map markers"
- Due Date - Activities with smaller values of the activity property 'SLA End' are displayed at the top. When the 'SLA End' activity property is empty then they are displayed at the bottom of the list.
- Duration, low to high - based on activity duration
- Duration, high to low - based on activity duration
This screenshot shows the options to sort the activities in the Nearby Activities panel:
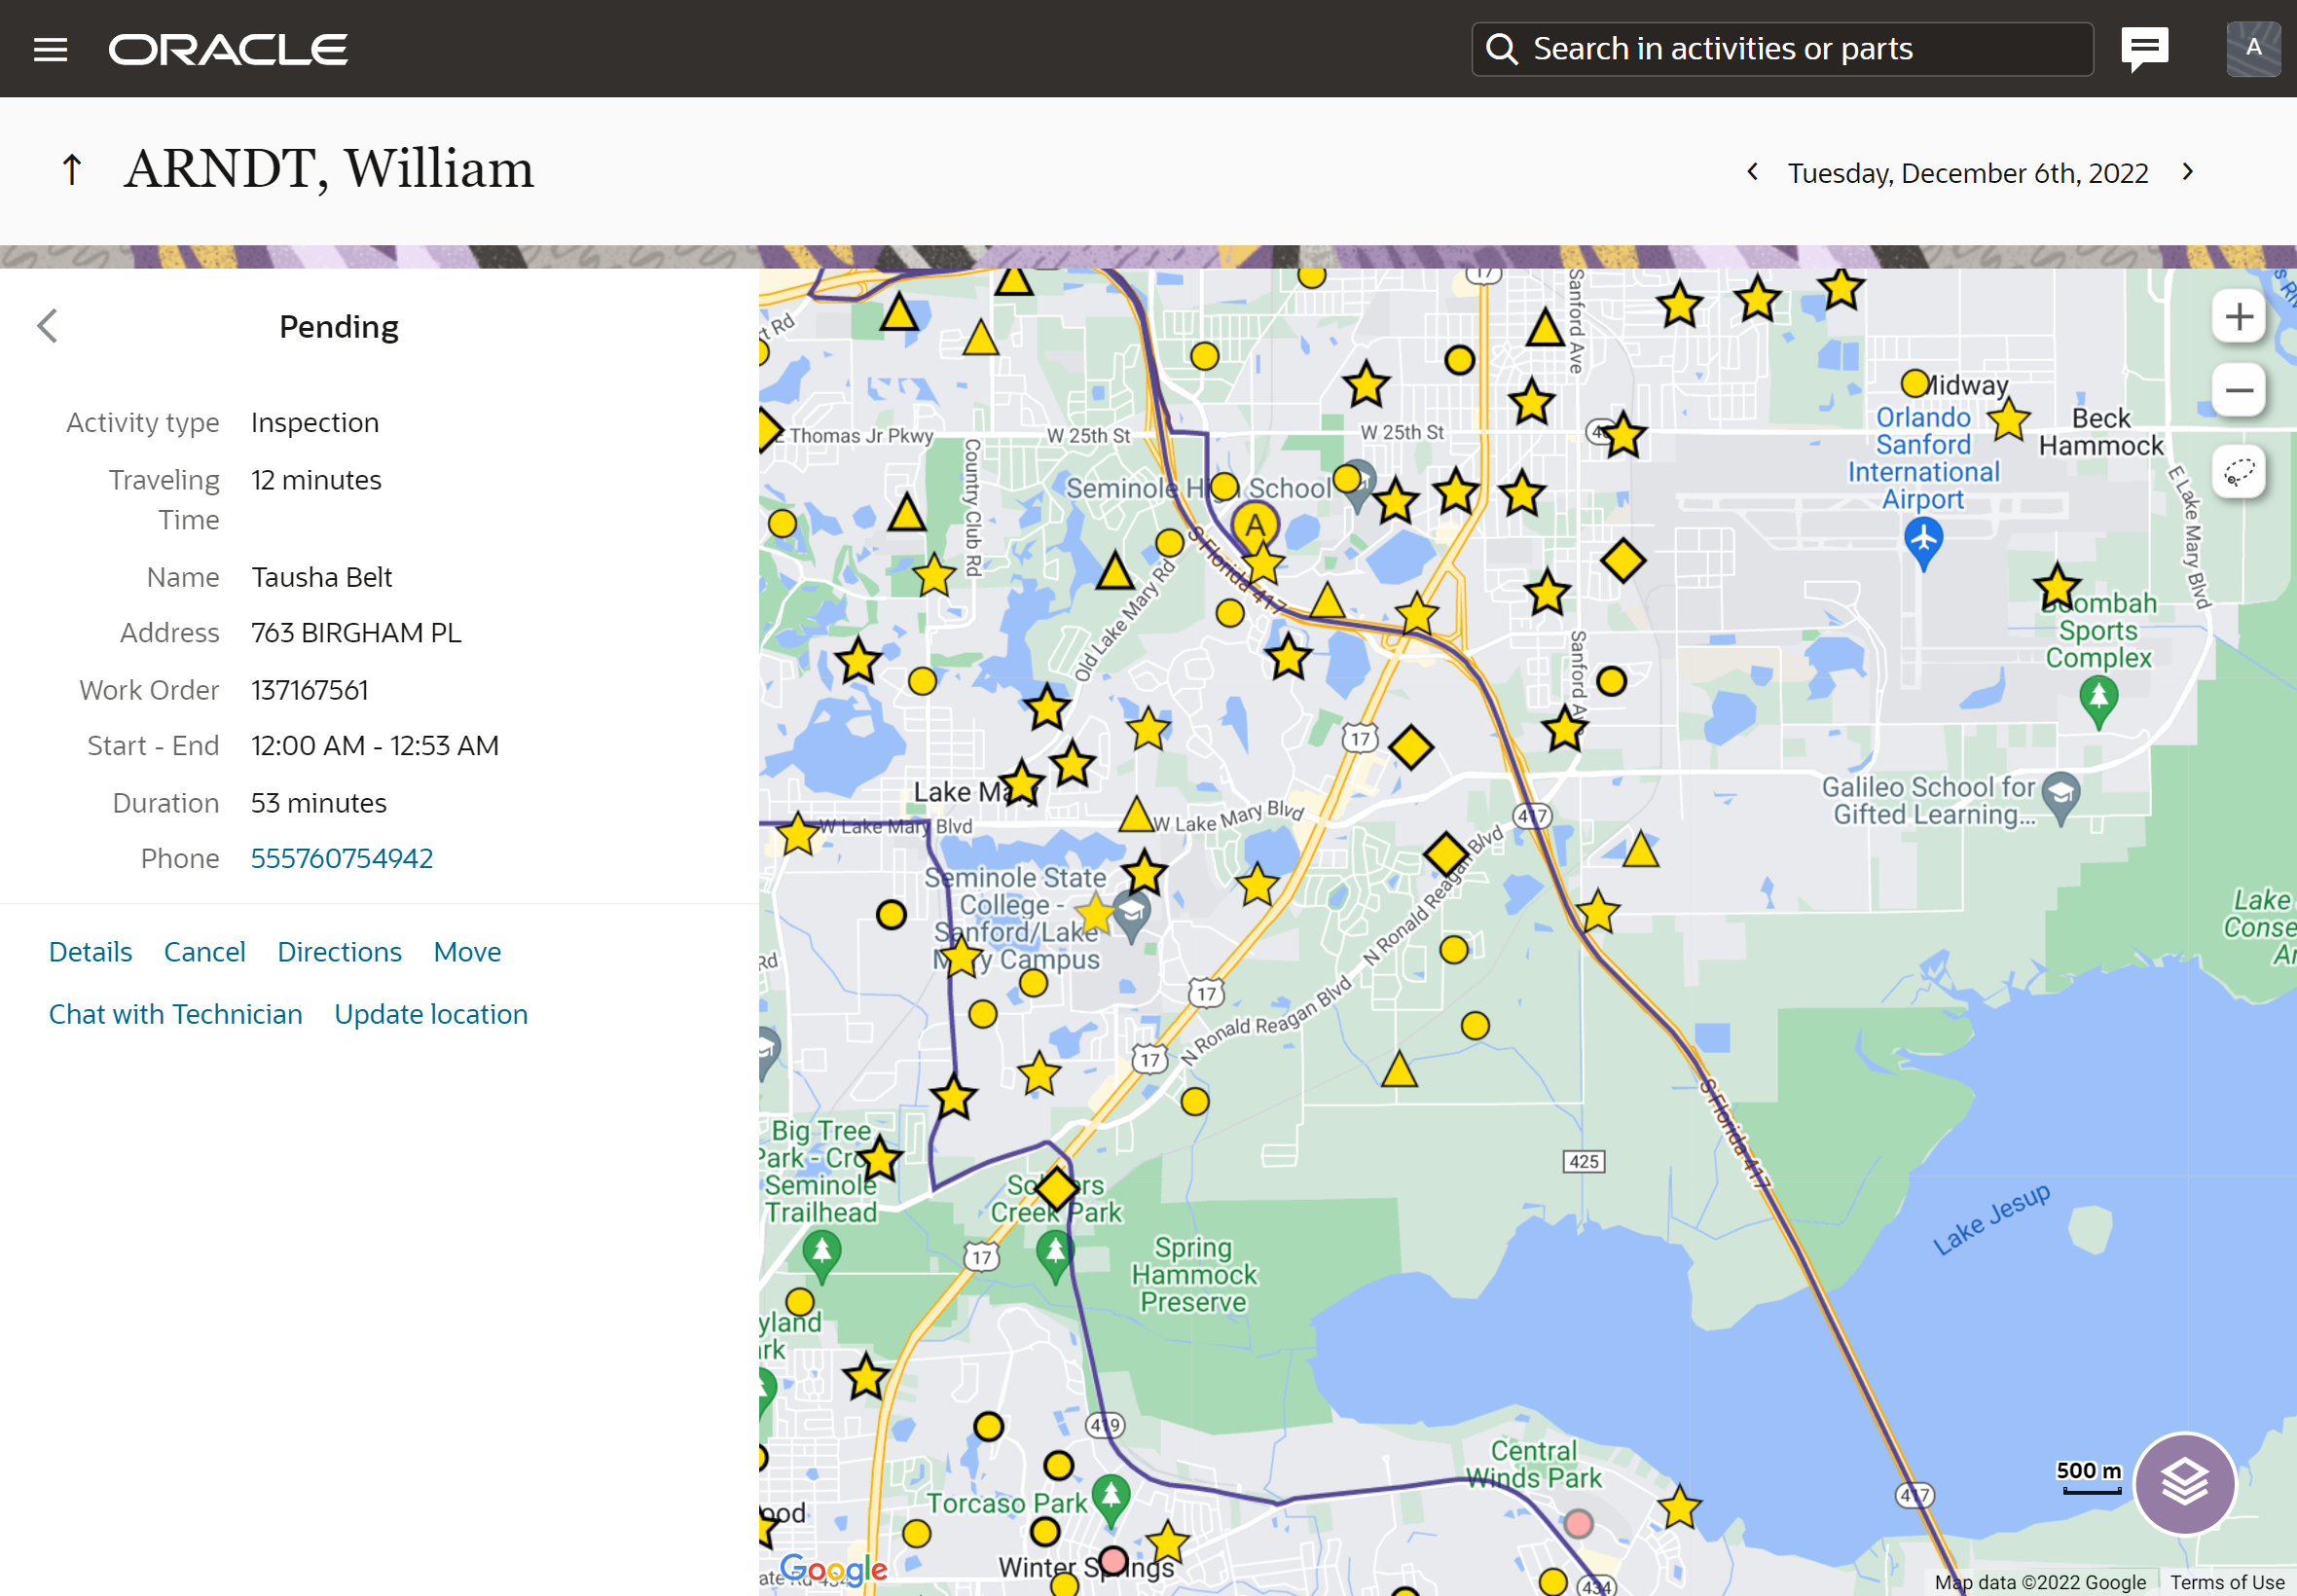
Activity Hint
User can see more information about the activity in the hint by clicking on the '>' icon. It is available for both Route and Nearby activities. Buttons configured for the activity hint are also available.
User can perform a quick call to the customer by tapping on the phone field from the activity hint. The phone field should be configured for this purpose. This screenshot shows the activity hint in the Nearby Activities panel:
Combine with the Nearby Activities Page
The Nearby activities button is displayed on the My Route page when configured for the Activity List context layout for the current user type. This button navigates the user to the Route Map with the following applied:
- Nearby activities checkbox in the layer switcher is enabled
- Sorting by 'Due Date' is enabled
What's New Section
The Nearby activities page is combined with Route Map. Now you can use improved the Nearby activities workflow from within the Route Map. ‘The Scheduling’ option in the map layer switcher on the Route map is renamed to ‘Nearby activities’.
Parameters 'Nearby Radius' and 'Nearby SLA' from the Business Rules page are removed and do not take part in Nearby activities workflow.
Due date badges are displayed for Nearby activities in the panel. They relate to the activity's SLA End field.
Hint on Route map is unified with other pages and contains action buttons.
When configured, the Nearby activities button is displayed on My Route page.
If you are using the old Nearby activities map, the transition to the Route map is simplified. Now a preconfigured Nearby activities button navigates users to the Route Map with the 'Nearby activities' option and sorting by Due Date applied. Users have a similar experience as before:
Before and After Experience
| Before 23A | 23A |
|---|---|
| Functions available in old Nearby activities screen |
Functions provided within the Nearby activities flow on the route map. |
| Set point on map and see activities from defined radius |
Focus the map to the required area and see activities from this area only in the list. |
| See separate panel with activities sorted by SLA ending |
Use Sort by Due date in the panel. Activities containing due date badge are based on the SLA End property. |
You can identify the near by activities quickly and assign them to the desired resources.
Steps to Enable
You don't need to do anything to enable this feature.
Key Resources
- Using Core Application: https://docs.oracle.com/en/cloud/saas/field-service/faaca/index.html. This link will be available after Update 23A GA release.
Redwood Style for Filters, Capacity Categories, and Link Templates Configuration Pages
Overview
The feature unifies the visual look and feel of the configuration pages for Filters, Capacity Categories, and Link Templates by updating them to the most recent Redwood UI experience. Users who configure the application have the same user experience as they do with other Fusion pages. Sales engineers who conduct demo sessions for prospects and existing customers can include these pages in demo scenarios that show the various capabilities of Oracle Field Service.
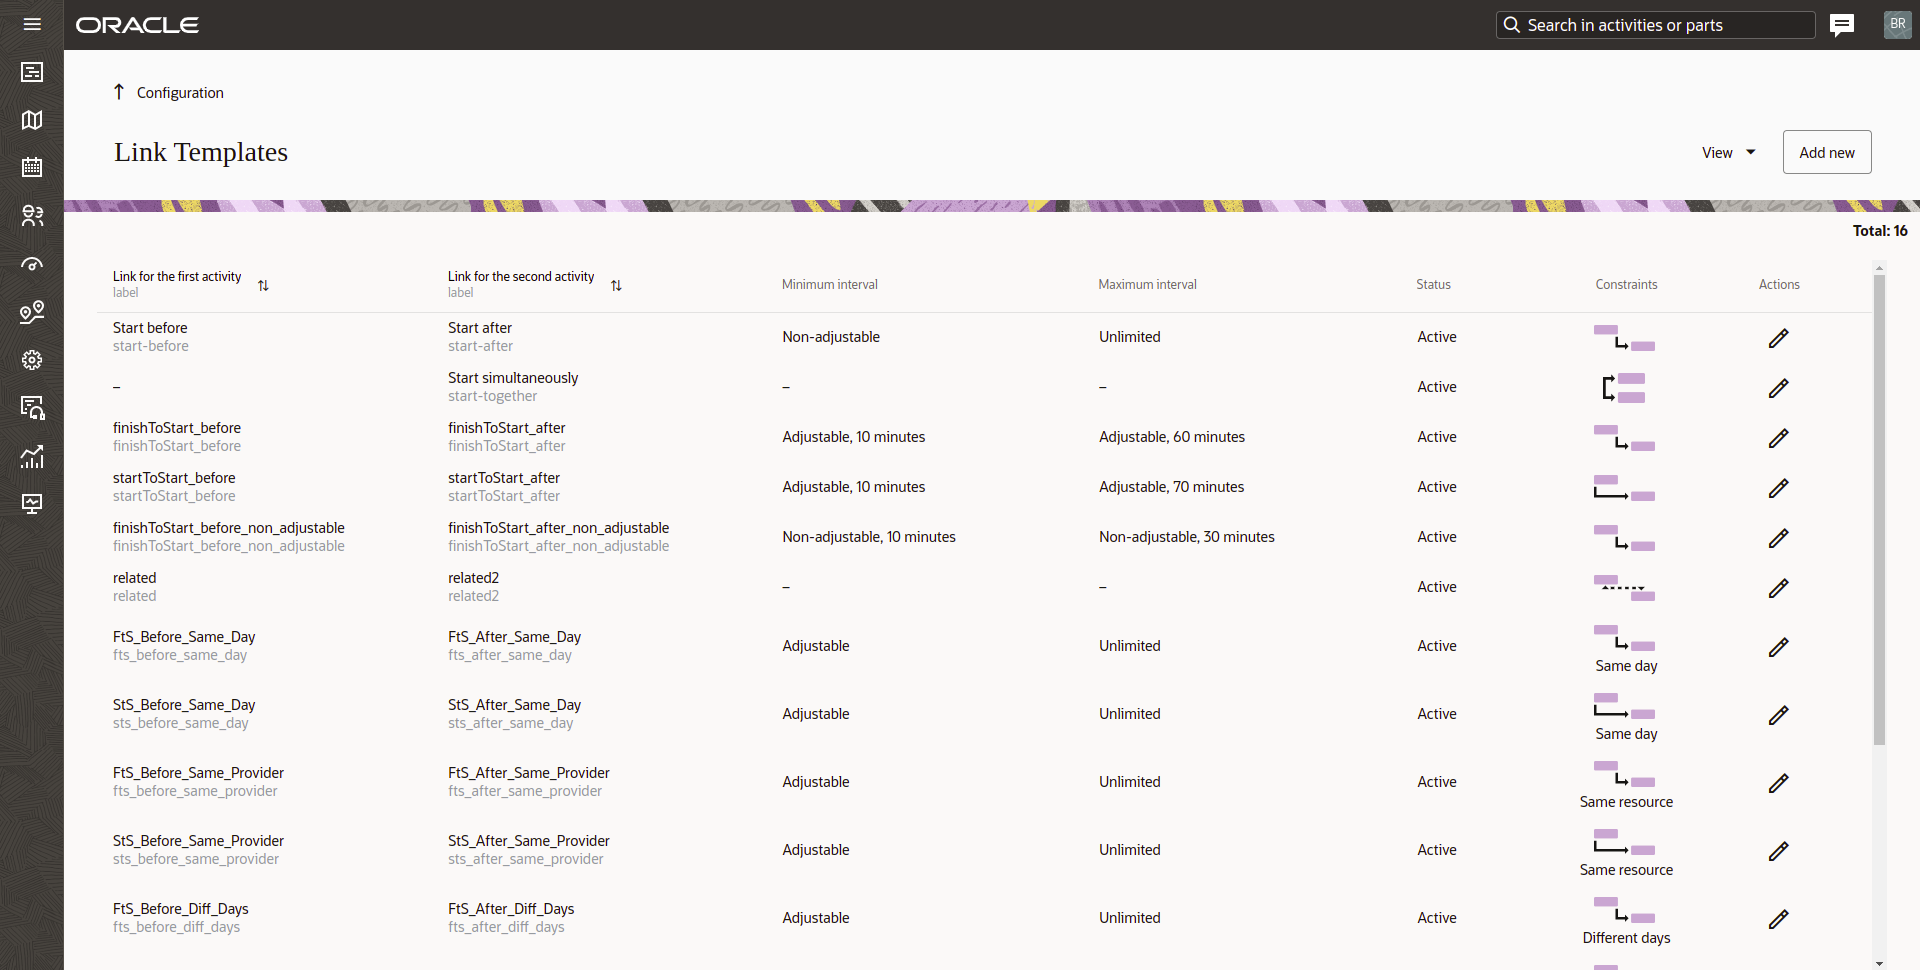
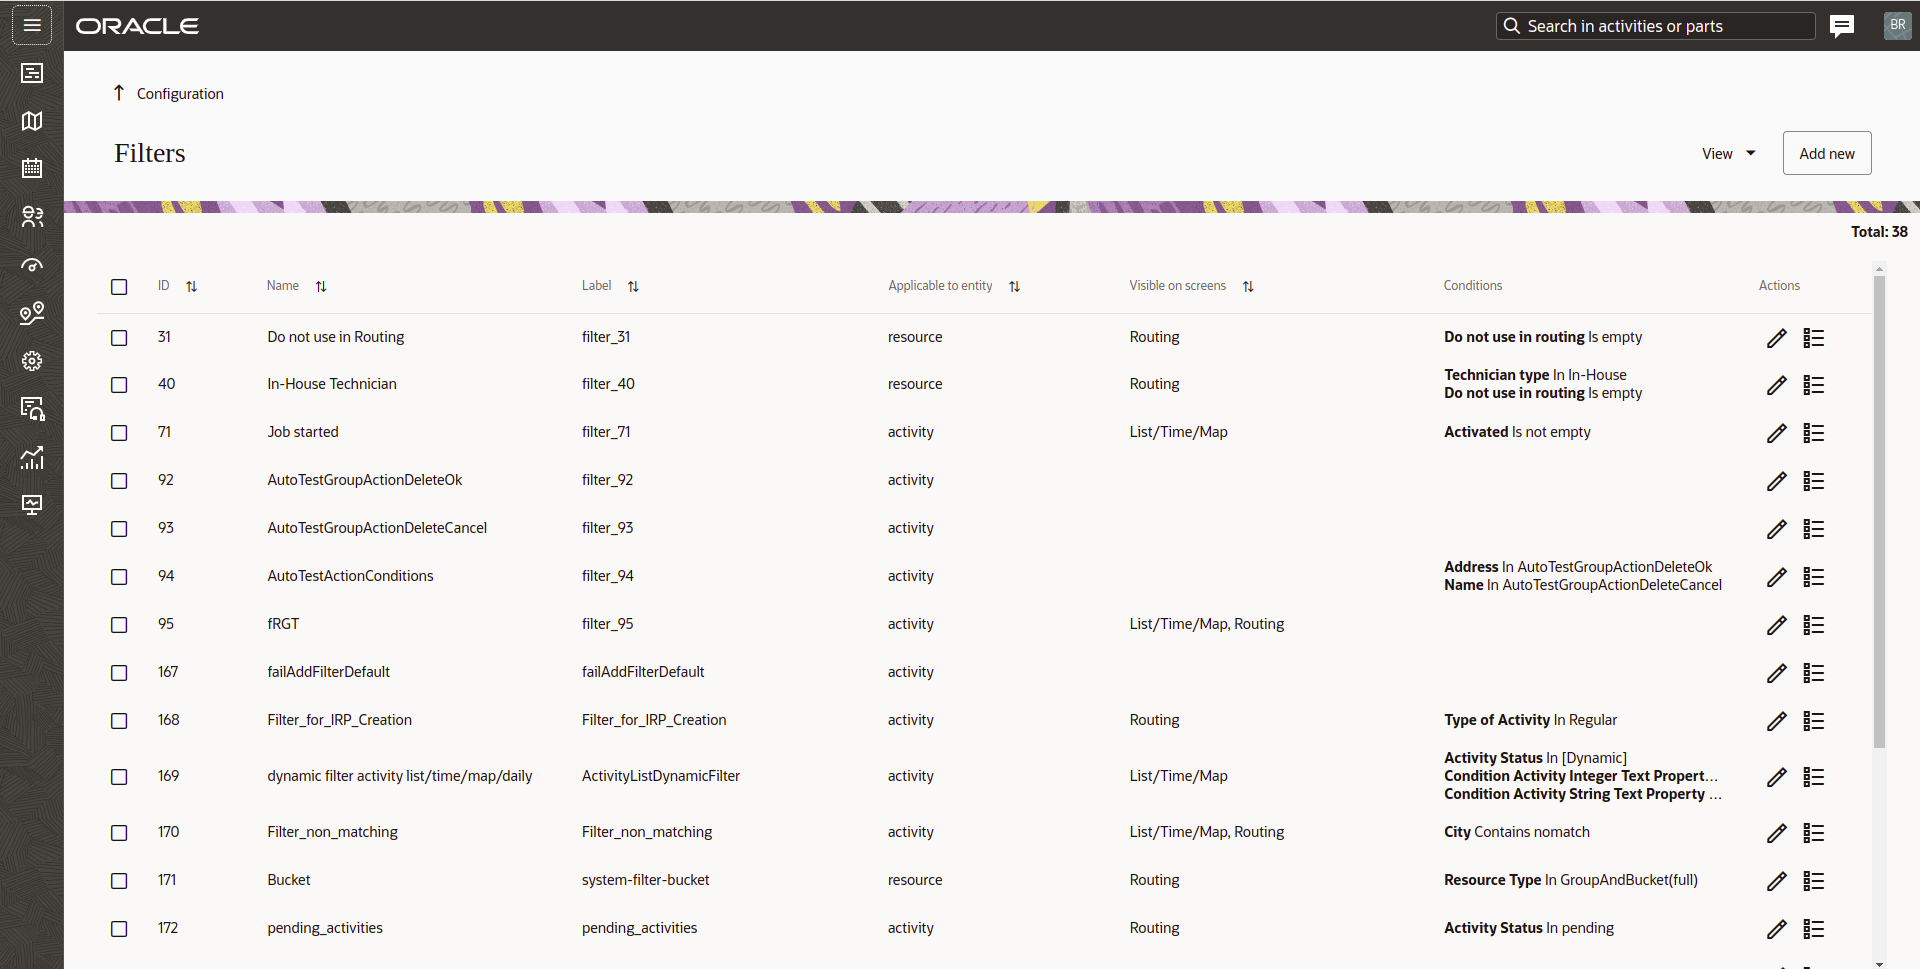
Main pages of Filters, Capacity Categories and Link Templates
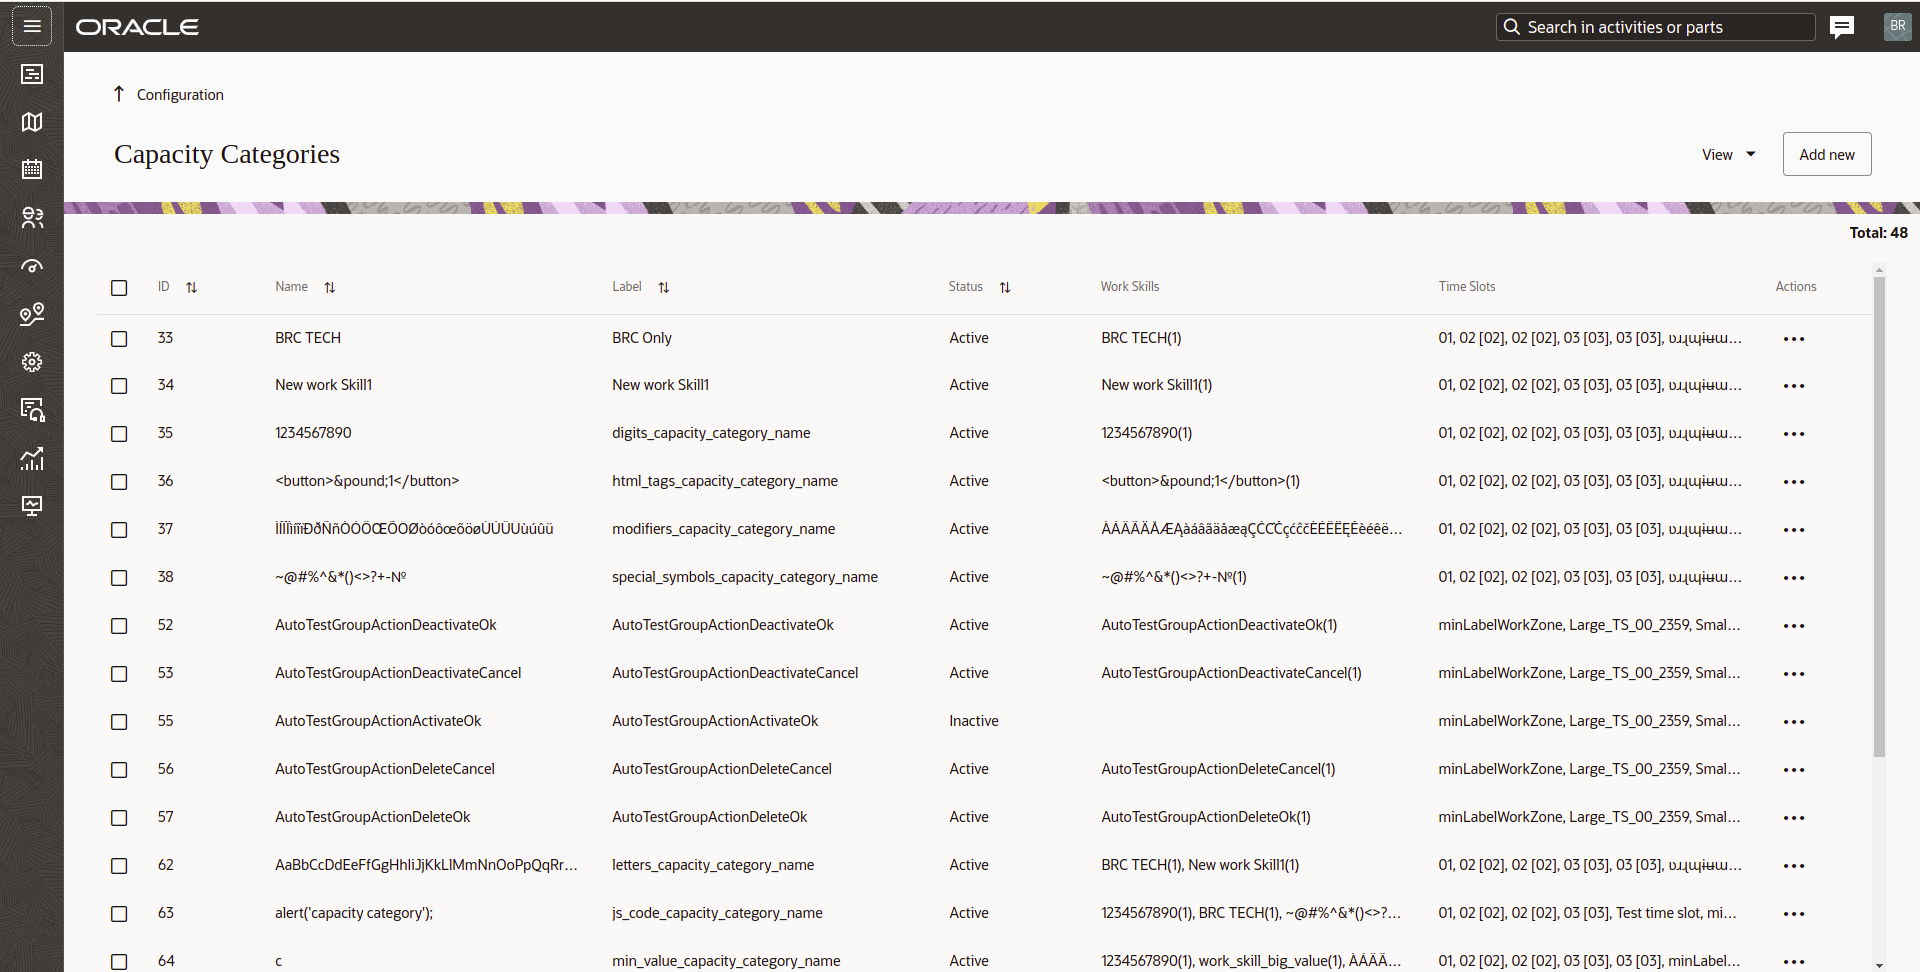
The main configuration pages for Filters, Capacity Categories, and Link Templates now appear as Redwood tables to provide better visibility of the content. Redwood tables use 'progressive loading,' which improves page loading time by initially displaying a partial list of items, and then loading additional items while scrolling down the list.
A counter showing total quantity of items in the list is displayed in the top right corner above the table. This works for all table-like pages including Filters, Capacity Categories, Link Templates, Properties, Calendars, and Work Zones. Here are the screenshots for Capacity Categories, Link Templates, and Filters pages:
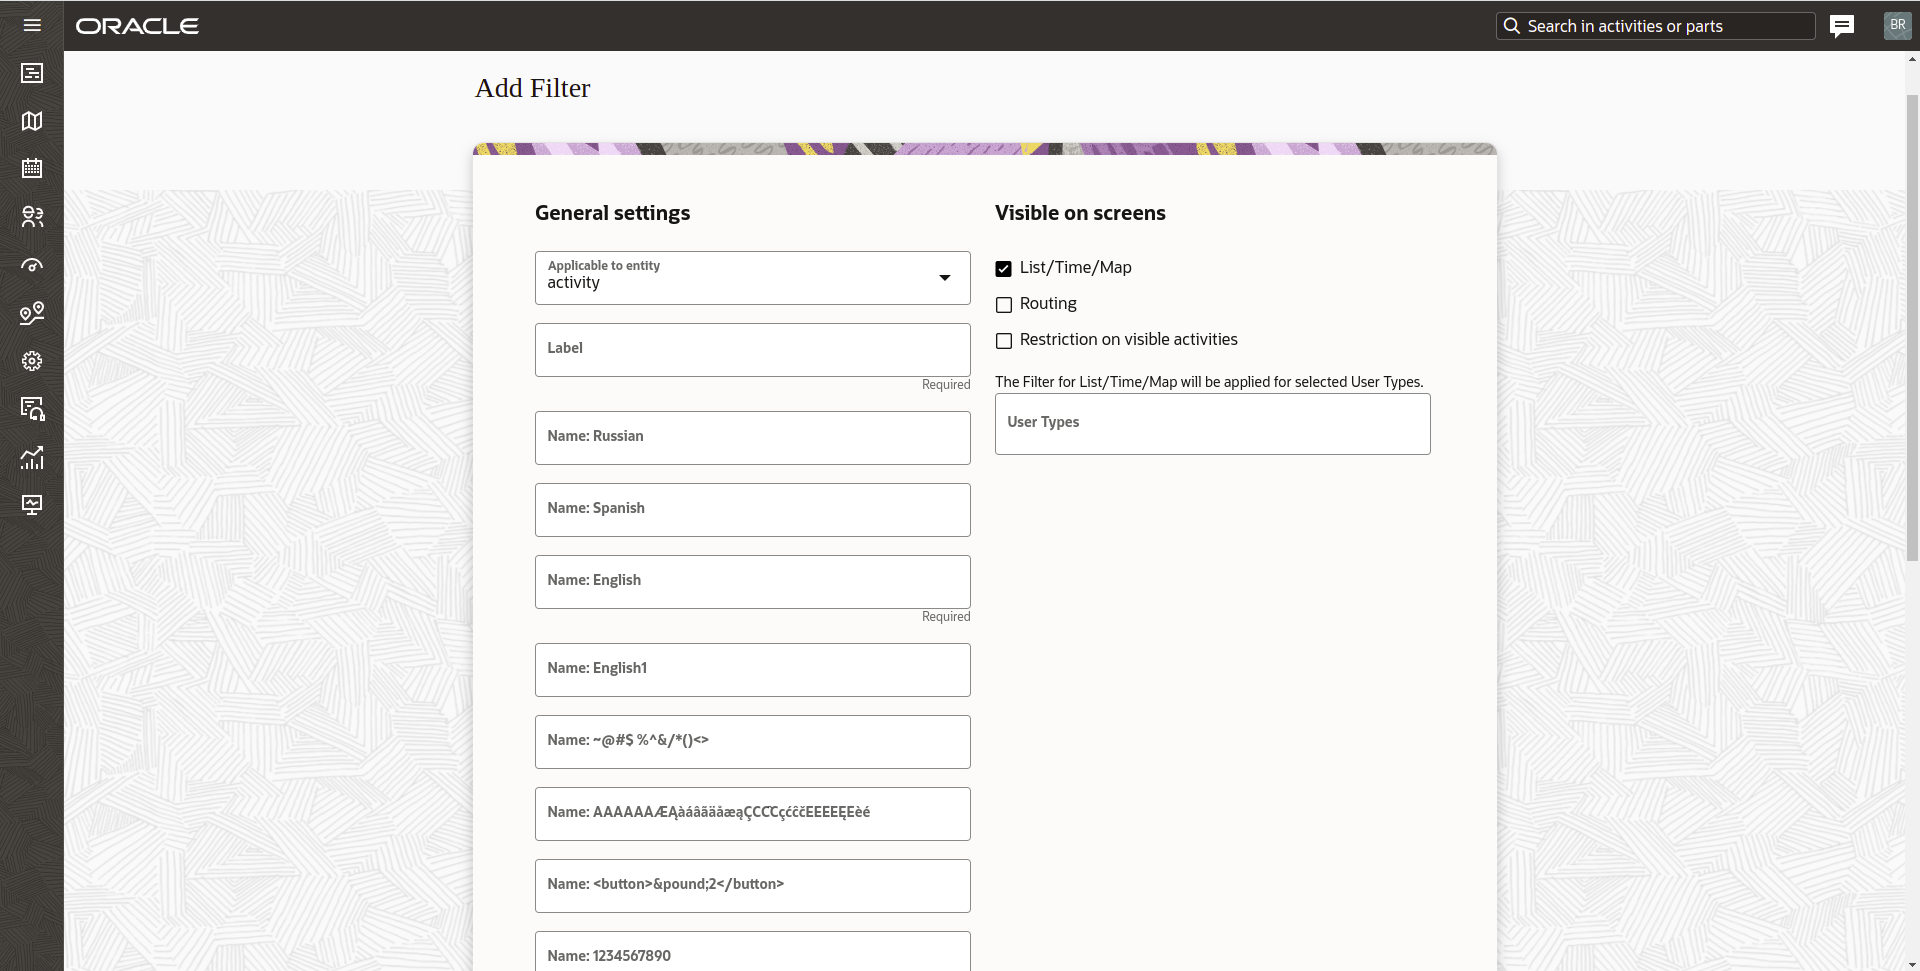
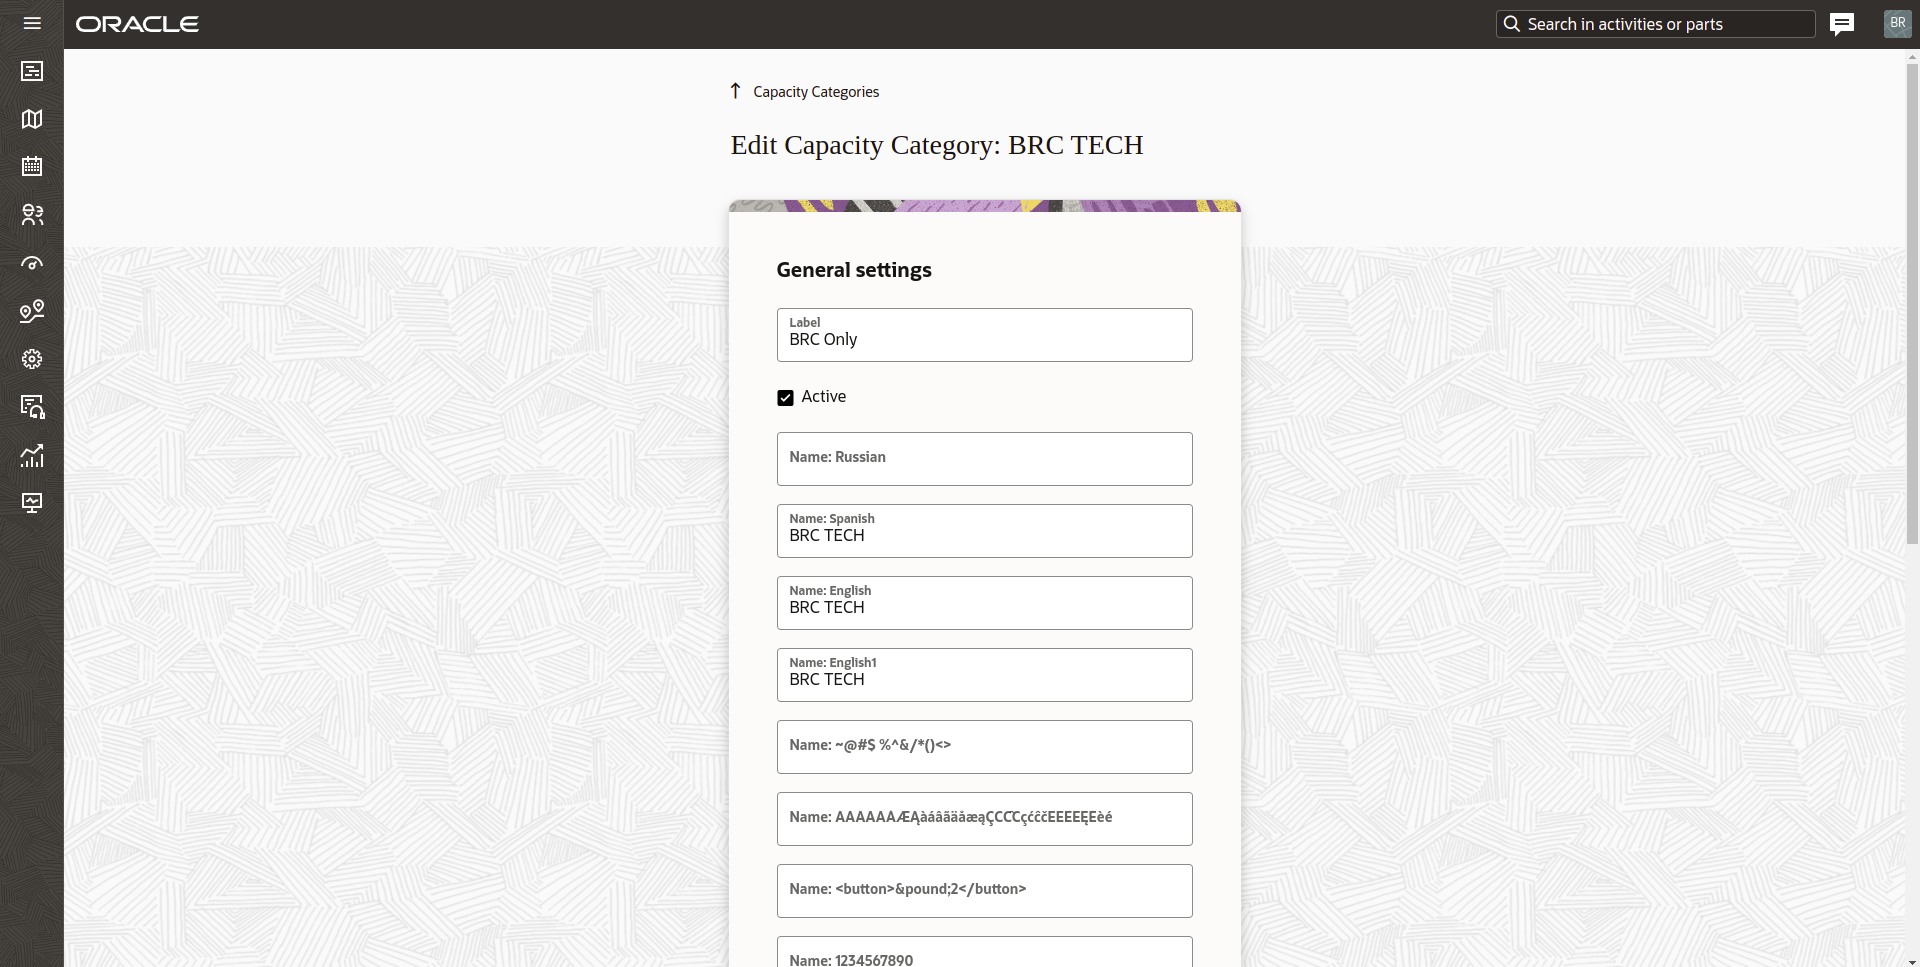
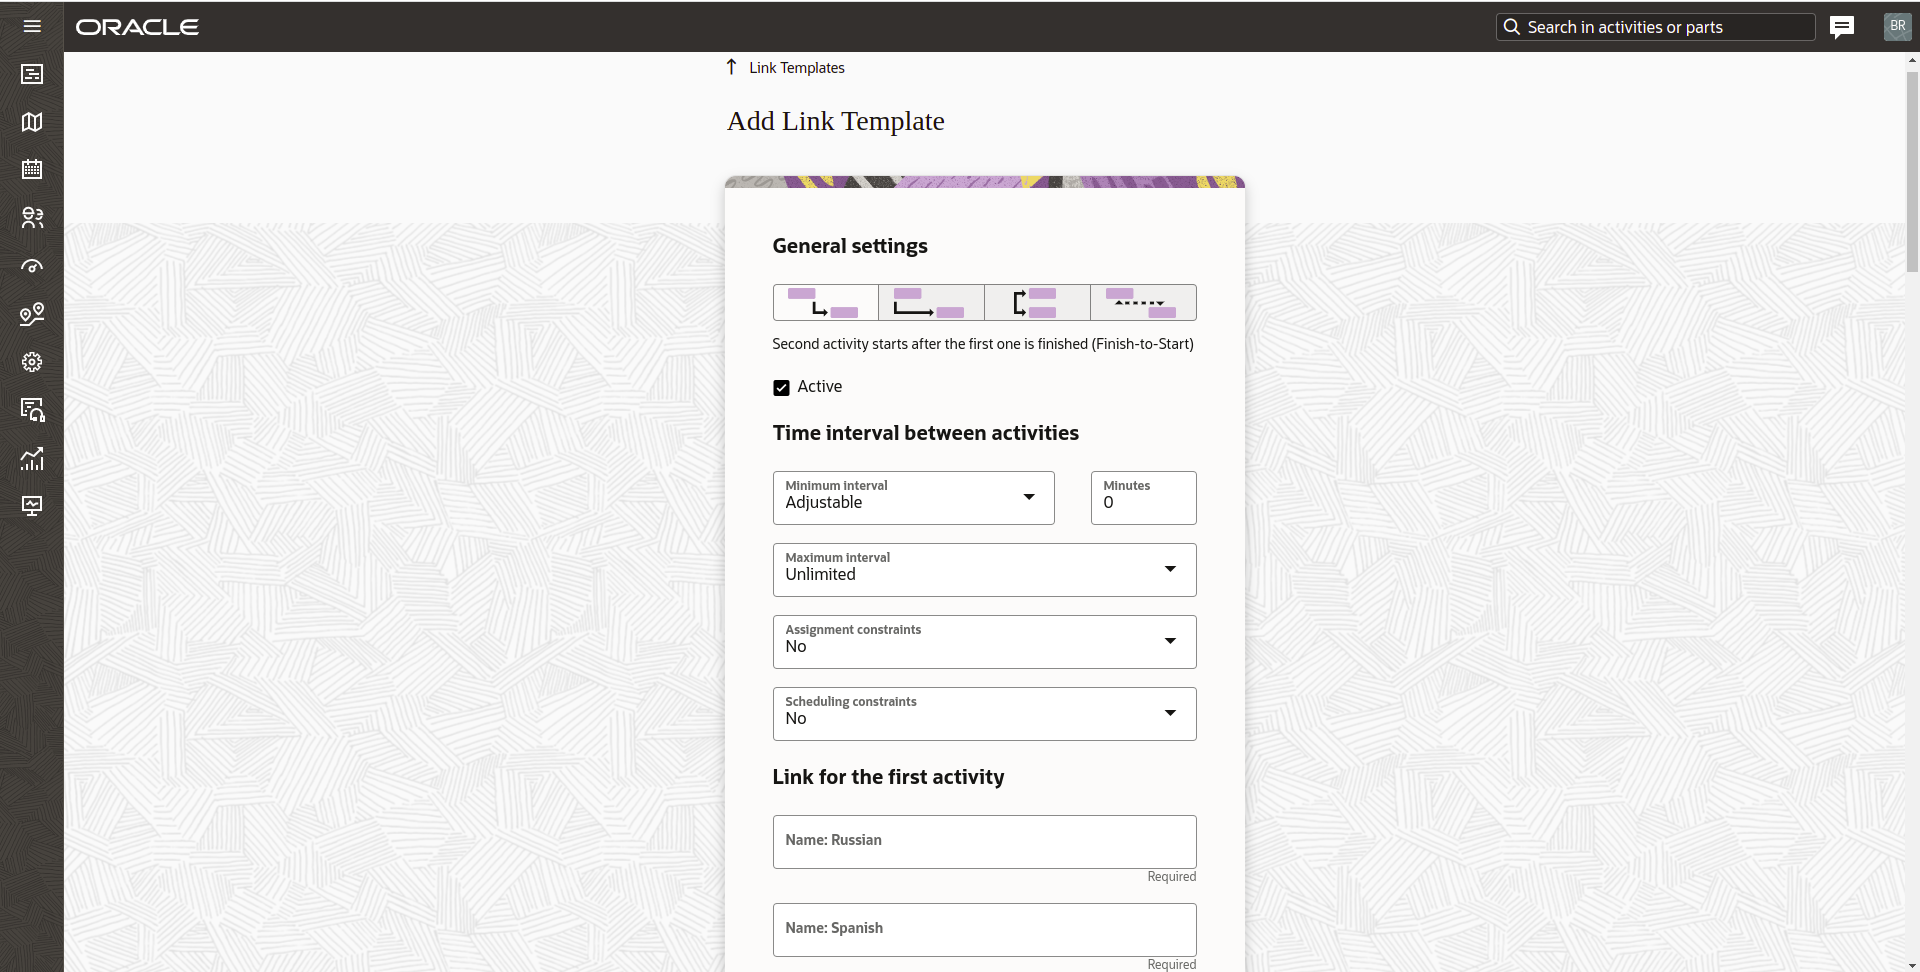
Changes for Add/Edit Pages
The pages for creating and modifying Filters, Capacity Categories, and Link Templates now appear as standard forms with Redwood-styled components, including text inputs, drop-down menus, and check boxes. These screenshots show the Add Filter, Edit Capacity Category, and Add Link Template pages:
Changes for Filter conditions
The layout of the 'Filter conditions' page displays as a table view with the ability to edit data directly from the filter condition row. By minimizing the number of clicks, the process of modifying filter conditions is now more efficient. This screenshot shows the Filter Conditions page:

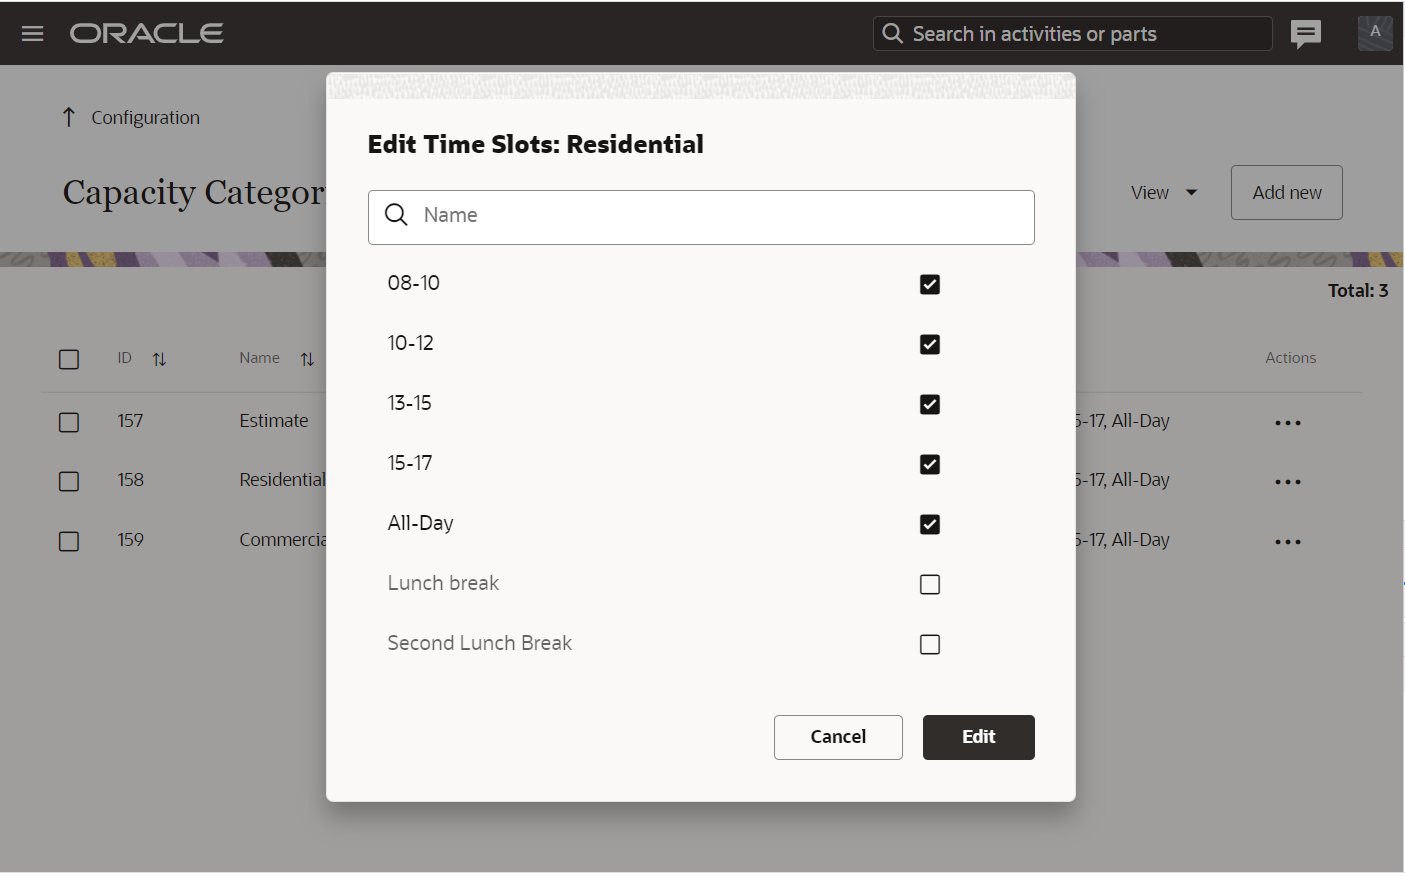
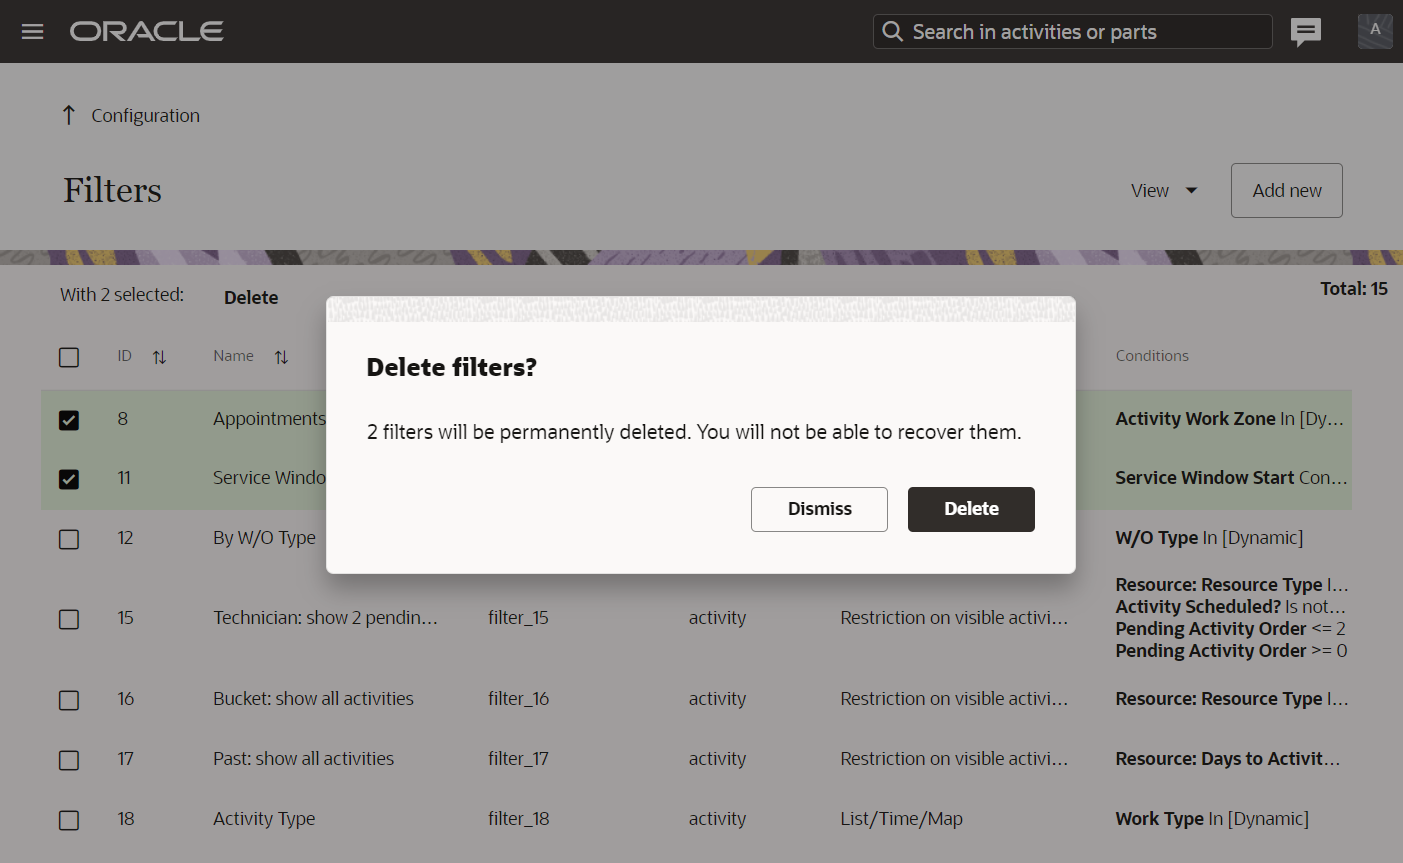
Changes for Dialog Boxes
All dialog boxes on the Capacity Categories and Filters configuration pages now use the Redwood style, including the dialog boxes for configuring Work Skills and Time Slots for capacity categories as well as those that confirm group actions. These screenshots show the Edit Work Skills, Edit Time Slots, and Delete Filters dialog boxes:

The updated the look and feel of the Filters, Capacity Categories, and Link Templates corresponding to the Redwood style provides a consistent user experience with other Oracle products.
Steps to Enable
You don't need to do anything to enable this feature.
Key Resources
- Using Core Application: https://docs.oracle.com/en/cloud/saas/field-service/faaca/index.html. This link will be available after Update 23A GA release.
Unification of Resource Location Page
Starting with Update 23A, you may modify the addresses on the Resource Location page similar to the Update Activity Location option within an activity record.
A unified Resource Location page opens as a separate page for each resource and with the following changes:
- The page is divided into two sides: fields on the left side and map on the right side
- Field 'Label' and address fields ('Address', 'City', 'Postal Code', 'State' and 'Country') remain unchanged. Activity travel stats fields configured on the Statistics page are displayed after the 'Label' field.
- New button titled 'Resolve' is added. After clicking the this button, the address gets geocoded the same way as with updating an activity's location.
- The 'Resolve' button is enabled after the user changes any address component on the page. Once it's clicked, it then becomes disabled.
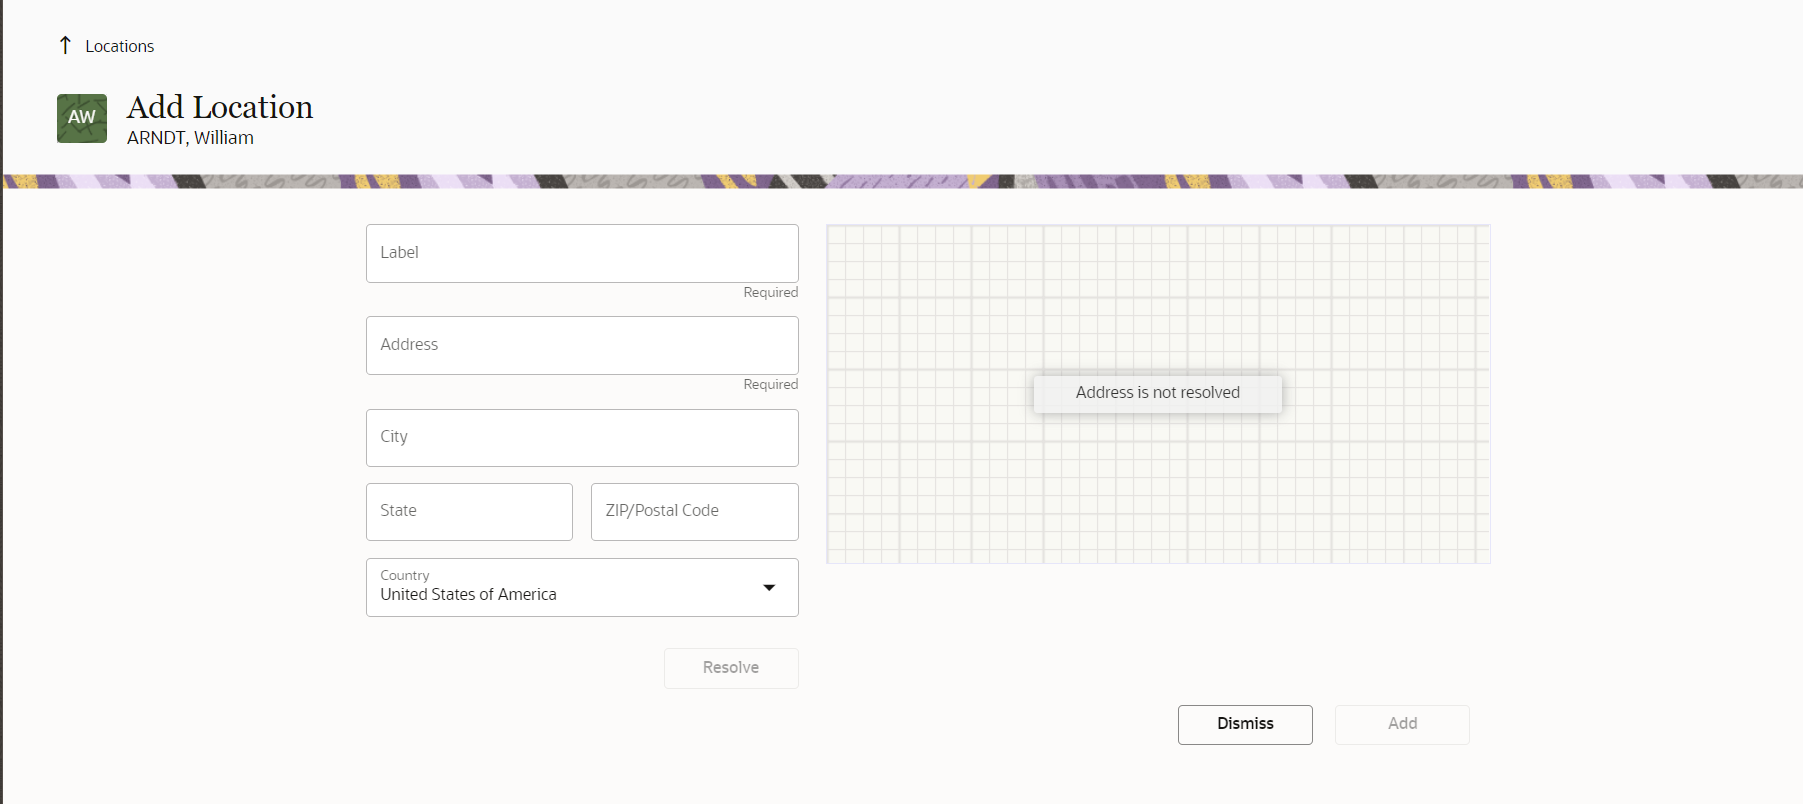
- Map displays the activity location if the address is resolved. When the address is not resolved, then a corresponding message "Address is not resolved" is displayed instead.
- Coordinates are displayed below the map on the left side when they are available.
- The 'Dismiss' button closes the page with no actions taken.
- The 'Add' and 'Update' buttons update the location address fields and coordinates that were obtained after clicking the 'Resolve' button.
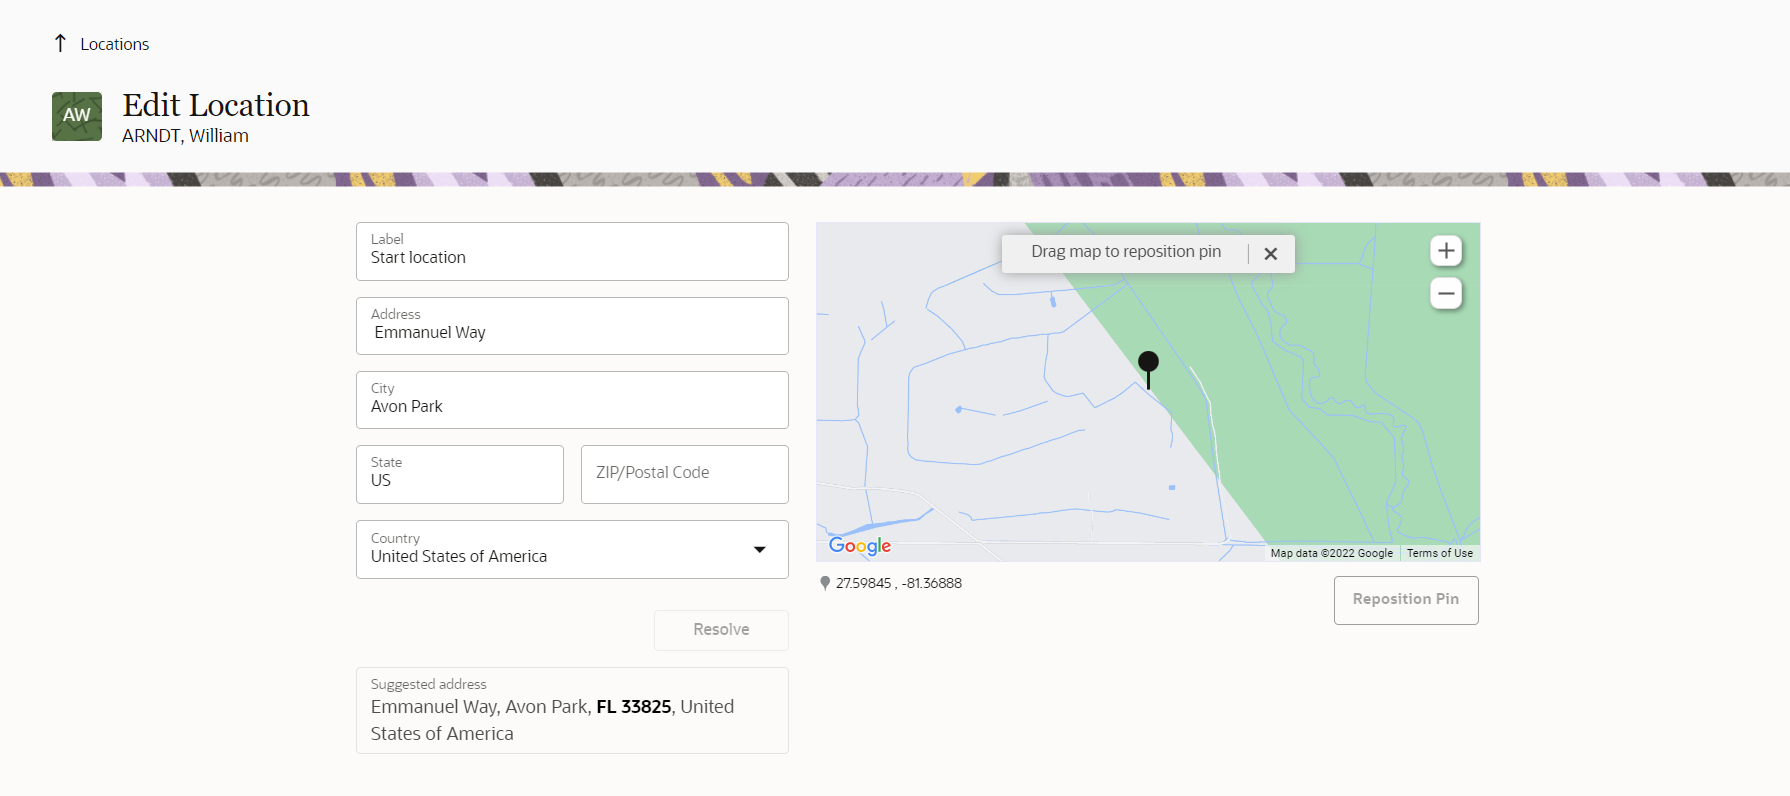
- The 'Suggested address' section (available only to customers using Google Maps) contains suggestions provided by Google's geocoding service, based on the 'Address', 'City', 'Postal Code', 'State' and 'Country' field values. When possible, parts of the alternative address that differ from the original 'Address', 'City', 'Postal Code', 'State' and 'Country' field values are highlighted in bold. Users can copy any part of the alternative address from this section and paste it into one of the editable fields: 'Address', 'City', 'Postal Code', 'State'. The address section gets updated after the page is opened and also after clicking the 'Resolve' button. If there is no alternative address provided by the geoprovider, then the 'Suggested address' section is not displayed.
- A button titled 'Reposition pin' is located under the Map. It is available in the following cases:
- When the address is resolved with high accuracy
- When the address is resolved but accuracy is not high
- When the address could not be resolved but an approximate location is available
- After adjusting the pin position to the proper location, a user can update the resource location with coordinates using the Add/Update button. The activity is updated as follows:
- If a user modified the address fields only and clicked the Resolve button, then the address fields and coordinates are updated.
- If a user repositioned the pin without modifying the address, then only the coordinates will be updated.
- If high location accuracy could not be achieved after address resolving, then the user should change the pin position on the map to update the resource location. When a location is manually updated on the map then coordinate accuracy is considered as high.
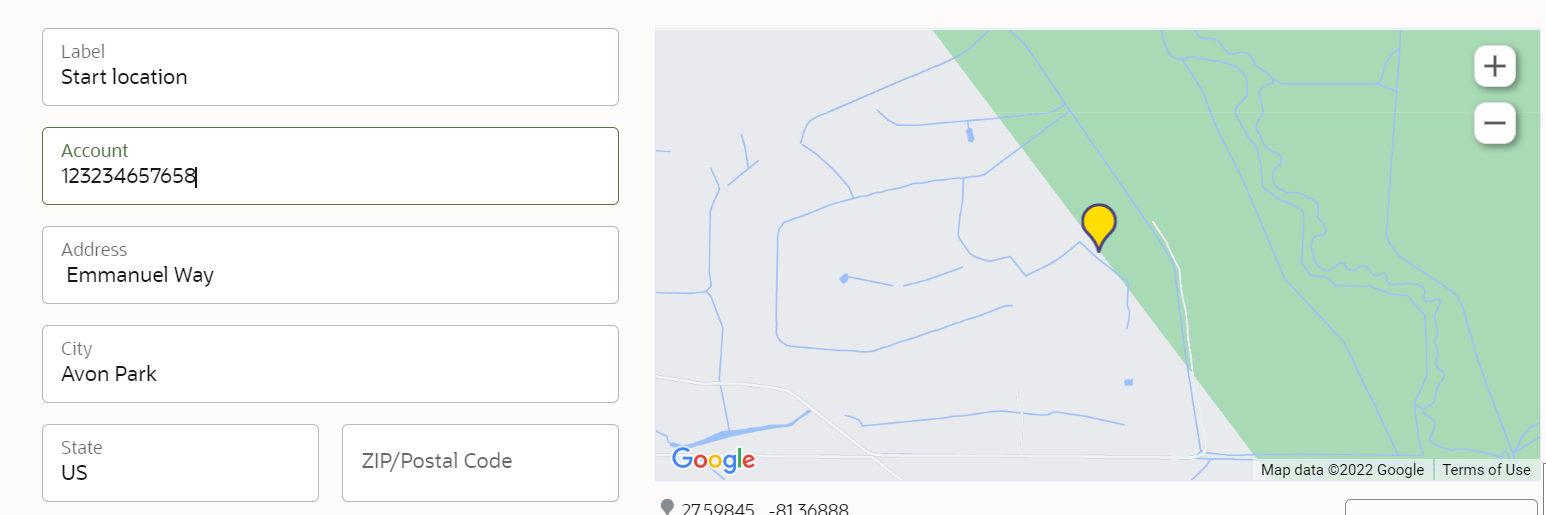
Screenshot of Add Resource Location:
Screenshot of Edit Resource Location. Address is resolved:

Screenshot of adjusting the position manually using the reposition pin:
The benefits of this feature include:
- See the alternative addresses provided by Google.
- Modify the address components and check an option when the address gets resolved.
- Check the resource location on the map.
- Set an updated address and coordinates for the selected location.
- Adjust a location manually, if it is resolved with less than high accuracy.
Steps to Enable
You don't need to do anything to enable this feature.
Key Resources
- Using Core Application: https://docs.oracle.com/en/cloud/saas/field-service/faaca/index.html. This link will be available after Update 23A GA release.
Book Appointment and Assign Activity Using Siebel CRM and Oracle Field Service
Overview
This feature integrates Siebel CRM with Oracle Field Service by creating an Oracle Integration (OIC) accelerator. This accelerator supports the following key functional capabilities:
- Book a field service appointment via Siebel CRM and assign the activity to a field technician in Oracle Field Service.
- Siebel CRM remains as the primary service application, while scheduling information such as booking time slots and finding the matching resources with the required skills and availability will come from Oracle Field Service. Based on this information, a field service activity will get created in Siebel, and then it will be directly assigned to a field technician in Oracle Field Service. Dispatchers or field technicians can view the activity details using the Oracle Field Service application.
- Transfer employee (field technician) information from Siebel CRM to Oracle Field Service.
- Create/update a field resource in Oracle Field Service by fetching basic employee contact information from Siebel.
- Create/update field resource skills, locations, workzones and work schedules.
Key scenarios supported in the integration
- Book and confirm an appointment
- Update, reschedule and cancel activity
- Transfer of service region information from Siebel CRM to Oracle Field Service
- Employee data transfer from Siebel CRM to Oracle Field Service
1. Book and Confirm Appointment
In a typical appointment booking scenario, a customer contacts a company and requests service. The customer contact reviews the request and creates a service request. If this request requires a site visit by a field service technician, an activity will be created in Siebel and corresponding activity will be assigned to a technician in Oracle Field Service. The customer service representative looks for an appointment window for the customer in Siebel. Oracle Field Service provides the appointment slots by considering the skill required for the activity and the service region (zip codes) associated with that activity. The customer service representative confirms the appointment with the customer which will create a new activity for a technician in Oracle Field Service.
This integration supports the following key scenarios as part of booking and confirming an appointment:
- Book and confirm appointment with a wider time window
- Book and confirm appointment with a preferred resource (Lock assignment)
- Book an appointment with a preferred time window (Lock schedule)
- Book and confirm appointment with a preferred resource and preferred time slot (Lock assignment + Lock schedule)
- Insert Activity: Priority-based booking based on earliest available time slot, based on SLA
Book and confirm an appointment with a wider time window
Service agent will check with the customer for a time window on a particular date (for example, Monday morning at 9AM through Tuesday evening at 5PM) during which a technician can visit the site and do the job. Based on this input, the service agent will assign an activity for the best available date and time slot.
As a first step, the service agent will create an activity with the following details within Siebel:
- Earliest start time and latest start time. This is a wider time window (for example, Monday morning at 9AM till Tuesday evening at 5PM).
- Activity duration (for example, 30 minutes)
- Service region time zone
- Service zip code
- Skills
- Lock assignment and lock schedule option will be unchecked from Siebel
Once the activity is created, the agent will look for an appropriate time slot for scheduling this activity and will click the "Book Appointment" option within Siebel. Oracle Field Service will provide all available time slots and resources in the requested time window by considering all the inputs received from Siebel. If there is no matching resource available in the requested time slot, a warning message "No resource found in the requested time slot" will be displayed in Siebel.
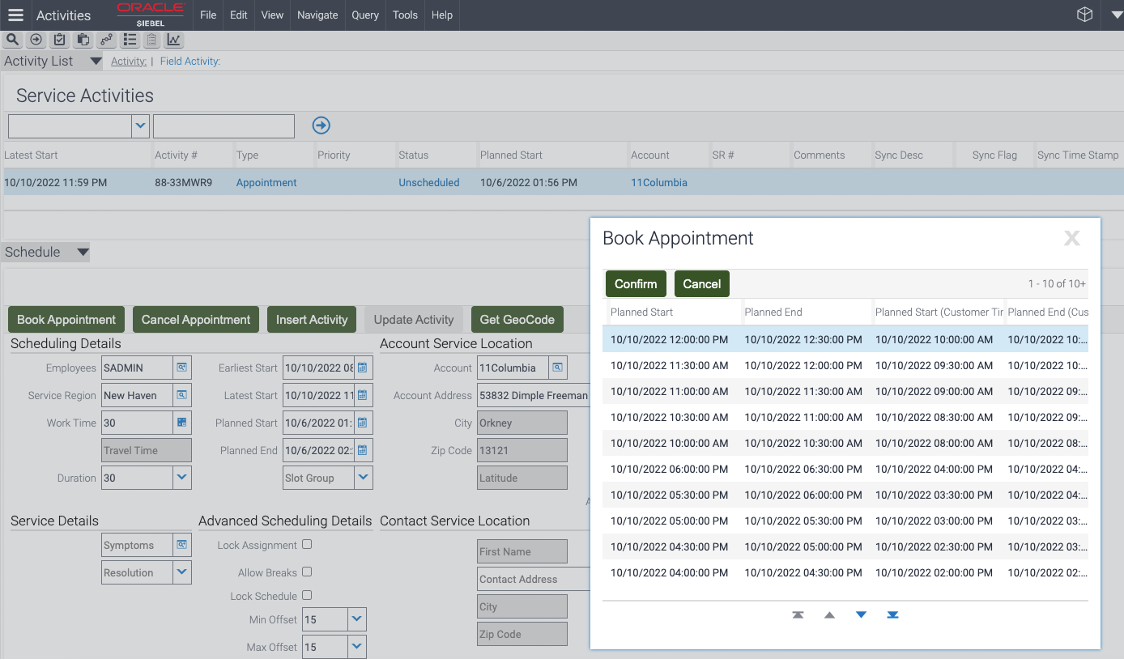
Confirm appointment
A CSR can select a time slot and an employee (a resource within Oracle Field Service) from the "Book Appointment" pop-up window and then click the "Confirm" button. A new activity will be assigned to the selected resource in Oracle Field Service with following details:
- Work Order as the Appointment ID from Siebel
- External ID as the selected Employee ID from Siebel
- Service Window Start and Service Window End as the Planned Start and Planned End times selected from Siebel
- Address will be updated as the address from Siebel
- City, State province and Zip/Postal code will be updated with corresponding data from Siebel
- Activity duration will be updated as the duration provided by the service agent while booking an appointment
The following details will be updated in the Siebel appointment:
- Status will be set to “Not Started”
- Planned Start/Planned End fields will be updated with the selected time slots
- The selected resource will be updated in the "Employee" field of Scheduling Details
Book an appointment with a preferred resource (Lock assignment)
Service agent will check the available time slots for a specific resource during a given time window, and assign the activity to that resource in that time window.
Input from Siebel includes:
- Employee ID
- Earliest start time and latest start time (for example, Monday morning at 9AM till Tuesday evening at 5PM)
- Activity duration (for example, 30 minutes)
- Service region time zone
- Service zip code
- Skills
- Lock assignment is checked and Lock schedule is unchecked
Output expected from Oracle Field Service:
- All available slots for the specific resource in the time window. If no slots are present, then an error will be returned.
- An activity will be created in Oracle Field Service within the time specified. If there is no matching resource available in the requested time slot, a warning message "No resource found in the requested time slot" will be displayed in Siebel.
Book an appointment with a preferred time window (Lock schedule)
In this case, a service agent will check the available resources during specific time slots and assign the activity for that time slot to any matching resource.
The input provided while creating an activity in Siebel includes:
- Earliest start time and latest start time (for example, Monday morning at 9AM till Tuesday evening at 5PM)
- Activity duration (for example, 30 minutes)
- Service region time zone
- Service zip code
- Skills
- Planned Start
- Planned End
- Lock assignment is unchecked and Lock schedule is checked.
Output expected from Oracle Field Service:
- Oracle Field Service will provide the available resource and time based on the planned start time and planned completion time provided by service agent.
- An activity will be created in Oracle Field Service with the time slot specified in the Planned Start and Planned Completion time. If there is no matching resource available in the requested time slot, a warning message "No resource found in the requested time slot" will be displayed in Siebel.
Book and confirm appointment with a preferred resource and preferred time slot (Lock assignment + Lock schedule)
A service agent will check the availability of a specific resource in a specific time slot, and assign the activity to that resource in that time window.
Input from Siebel:
- Resource
- Earliest start time and latest start time (for example, Monday morning at 9AM till Tuesday evening at 5PM)
- Activity duration (for example, 30 minutes)
- Service region time zone
- Service zip code
- Skills
- Planned Start
- Planned End
- Lock assignment is checked and Lock schedule is checked.
Output expected from Oracle Field Service:
- An activity will be created in Oracle Field Service during the time specified by the Planned Start and Planned Completion time. If there is no matching resource available in the requested time slot, a warning message "No resource found in the requested time slot" will be displayed in Siebel..
Insert Activity: Priority based booking based on earliest available time slot, based on SLA
Service agent needs to create an appointment for an earliest available time slot based on the schedule shared by the customer. The integration will directly create the activity in the exact slot (for a matching resource).
Input from Siebel:
- Resource
- Earliest start time and latest start time (for example, Monday morning at 9AM till Tuesday evening at 5PM)
- Activity duration (for example, 30 minutes)
- Service region time zone
- Service zip code
- Skills
Output expected from Oracle Field Service:
- An activity will be created in Oracle Field Service for the time specified with an available resource. If there is no matching resource available in the requested time slot, a warning message "No resource found in the requested time slot" will be displayed in Siebel.
2. Activity Update, Reschedule, and Cancel
Update an activity
Service agent can update an activity's skill requirements after creating the activity in Siebel. This will result in reassigning the activity to a different resource with the required skill.
Input expected from Siebel:
- Resource
- Earliest start time and latest start time (for example, Monday morning at 9AM till Tuesday evening at 5PM)
- Activity duration (for example, 30 minutes)
- Service region time zone
- Service zip code
- Skills
Output expected from Oracle Field Service:
- Reassign the activity to a new resource that has the updated skill in the request.
These actions by a field technician or dispatcher from Oracle Field Service will update the activity details in Siebel:
- Activity completion: Activity status "Completed" in Oracle Field Service will update the activity status in Siebel as "Completed"
- Activity is updated as 'not done': Activity status "not done" in Oracle Field Service will update the activity status in Siebel as "not done"
- Activity is moved from one field technician to another: New resource External ID will be updated in Siebel as the "Employee primary owner ID " for the activity
- Activity is moved to another date for the same field technician: New Activity start date will be updated in Siebel as the "Planned Start" and "Planned Completion"
- When an activity is cancelled: Activity status "Cancelled" in Oracle Field Service will update the activity status in Siebel as "Cancelled"
Cancel the activity
A CSR can cancel an already-scheduled activity by clicking the “Cancel Activity” button within Siebel. This will cancel the corresponding activity in Oracle Field Service.
Reschedule the activity
A CSR can reschedule an activity from the current date to another date from within Siebel. The activity will be updated in Oracle Field Service based on the new date provided.
3. Transfer of Siebel service region to Oracle Field Service
A service region is a grouping of field service technicians in a geographical area for a purpose, such as supporting a certain set of activities related to a product. Service regions ease the administrative burden by allowing service managers to set consistent schedules, constraints and costs for a large number of employees. A service region in Siebel CRM maps to an Oracle Field Service bucket .
The transfer of service region information from Siebel CRM to Oracle Field Service is initiated by the service region administrators in Siebel. This will trigger the initial migration of service regions and employee (coming under that service region) information to Oracle Field Service.
Prerequisites for this integration
- Administrator must first set up the service region with Engine=iLog in Siebel as well as the schedule for the service region, exception schedules for the service region, employees and zip codes under the service region.
- A schedule with same name should be created in Oracle Field Service as well.
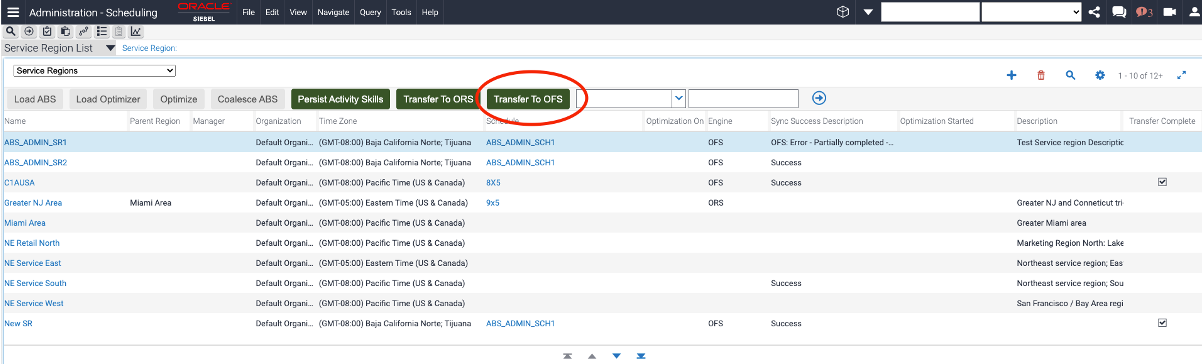
- Once ready, the service region can be migrated to Oracle Field Service by clicking the “Transfer to OFS” button via the service region's List view. The 'Engine' field for the service region will be set to “Oracle Field Service".
- This will create a new bucket in Oracle Field Service with the same name as the Siebel service region and all the related data will be updated for that bucket.
Field-level mapping between between the service region and bucket
| Siebel - Service Region | Oracle Field Service - Resource (Type: Bucket) |
|---|---|
| Service Region ID |
External ID |
| Name |
Bucket name |
| NA |
Resource Type (defaulted to "BK") |
| Language Code |
Language |
| Service Region Time Zone Name |
Time zone (Lookup in Oracle Integration) |
| NA |
Parent External ID (defaulted to "SUNRISE") |
| NA |
Status (defaulted to "active" for field resource) |
- Resource type - Resource type will be configured with a default value of "BK" referring to the Oracle Field Service 'bucket' resource type, but as this is configured as a lookup value in Oracle Integration Cloud, you can update the same based on your business requirements.
- Time zone - Time zone will be configured with a default value of "Eastern", but as this is configured as a lookup value in Oracle Integration Cloud, you can update the same based on your business requirements.
- Parent External ID - Parent External ID defaults to a value of "SUNRISE", but as this is configured as a lookup value in Oracle Integration Cloud, you can update the same based on your business requirements.
- https://docs.oracle.com/en/cloud/paas/integration-cloud/integrations-user/managing-lookups.html
Along with the service region transfer, the following events will also occur:
- Transfer of employee information (employees within this service region) to Oracle Field Service as field technicians.
- Transfer of employee work skill, work schedule, exceptions on the work schedule and location information to Oracle Field Service.
Exception hours
Exceptions represent special non working days or working days. Different exception records can define exceptions for different sites, for example, U.S. holidays for a site and Canadian holidays for another site. You can define a day or continuous blocks of days as an exception to a schedule. In some cases, exception hours can define non-working periods, for example, no work on Sundays from 6:00 A.M. to 12:00 A.M. in a 7x12 schedule. In other cases, exception hours can define work periods on days that are not normal work days, for example, Saturday mornings in a 5x8 schedule.
To associate an exception with a schedule, define the exception and include this exception in the definition of a schedule.
You can also use exception hours to block the scheduled time slot for the owner of an activity to allow for another employee assignment to the activity in the same time slot. If the defined exception hours block a time slot when an activity is scheduled for the owner of the activity, then the activity is rescheduled when you reload the service region.
Please refer https://docs.oracle.com/cd/E14004_01/books/FieldServ/FieldServScheduling29.html on how to setup exception hours in Siebel.
Service region zip codes from Siebel will get mapped as work zones in Oracle Field Service. As such, in order for the integration to work, the work zone key in Oracle Field Service must be set to 'zip/postal code'.
Troubleshooting Integration Errors
| Sr. No. | Scenario | Error Message | How to Troubleshoot? |
|---|---|---|---|
| 1 | Get Service Region API fails |
Siebel: Error getting Service Region details |
Check with Siebel team to see if the Siebel instance is working |
| 2 | Create/Update Workzone API fails |
OFS: Error Mapping Zipcode to multiple Service Region or updating Workzone |
Check if any of the Zipcode was already associated to an another service region |
| 3 | Create/Update Workzone API fails |
Siebel: No Zipcode for the Service Region. OFS: Error updating Workzone |
Add Zipcode to the service region and Sync again |
| 4 | If Schedule Id not present in the Get Service Region Response |
Siebel: Error - No Shifts Associated to Service Region |
Associate schedule to service region |
| 5 | Get Exception Hours API fails |
Siebel: Error - No Exception Hours associated or Error getting the Exception Hours |
Check if the Holiday Exceptions are associated correctly to the schedule of the service region |
| 6 | If Schedule name is not matching with the Work Schedule created in OFS |
OFS: Work Schedule not defined, Misspelled or Error setting Work Schedule |
Create a Work Schedule in OFS with the Siebel schedule name |
| 7 | Get Employees API fails |
Siebel: Error getting Employees |
Check with Siebel team if the Siebel API is working |
Transfer of field service employees from Siebel CRM to Oracle Field Service
- This workflow in Oracle Integration will transfer the employees within a service region to Oracle Field Service along with the service region transfer process. In Siebel, employees with the 'engine' attribute value of "Oracle Field Service" will be treated as field service resources; the integration will transfer only those employees to Oracle Field Service.
- Along with the employee record, its address (home or depot), skills, exception hours (leave, meetings and so on) will also be transferred to Oracle Field Service as resource locations, resource skills and schedules.
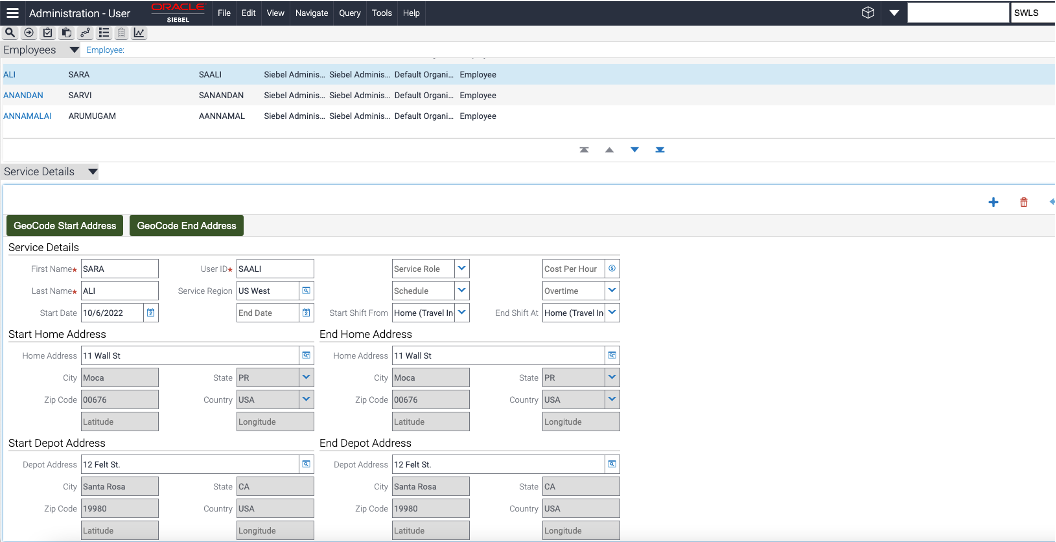
Transfer of Siebel employee address to resource location
- The work start and work end location of an Oracle Field Service resource will get updated based on the start and end home addresses or depot address.
- The integration will update the resource start location as the start depot address if the employees shift start is configured as a depot or if it's blank. In all other conditions, the start location will be the location associated with start home address.
- Similarly, the end location will be the end depot address if the employees end of shift is configured as depot or if it's blank. In all other conditions, the end location will be the location associated with the end home address.
Transfer of Siebel employee skill to resource skill
- The employee skill will be updated as a resource skill in Oracle Field Service as part of the employee skill integration.
Transfer of Siebel employee work schedule to resource schedule
- As a prerequisite of this integration, an Oracle Field Service admin user will have to create a schedule as an Oracle Field Service calendar configuration with the same name as the Siebel schedule name. As part of the employee data transfer workflow, Siebel will share the schedule name associated with the employee and it will be updated as a schedule in the Oracle Field Service resource's calendar. In cases where there is no matching schedule in Oracle Field Service that corresponds to the Siebel schedule, a resource will be created in Oracle Field Service without a schedule and an error message will be updated in Siebel.
Transfer of Siebel employee exception hours
- This integration treats holidays, working exceptions (for example, meetings, trainings), in some scenarios Field technicians may have to work on a non-working days for example, no work on Sunday from 6:00 A.M. to 12:00 A.M. in a 7x12 schedule, in Siebel this can be configured as exception to normal work schedule.
- Exception hours (holidays) - If the schedule in Siebel contains any holiday exception, the integration will apply this holiday to the Oracle Field Service resource calendar as a non-working day.
- Working exception hours - If the employee in Siebel contains any working exception hours (for example, meetings, trainings), an internal activity will be created during this period so that the field technician's availability can be updated accordingly.
- Overtime on a non-working day - If the employee in Siebel contains any overtime exception, the integration will apply it as a schedule in the Oracle Field Service resource's calendar for that non-working day.
Troubleshooting Integration Errors
| Sr. No. | Scenario | Error Message | How to Troubleshoot? |
|---|---|---|---|
| 1 | Create Service Region Resource API fails |
OFS: Error in creating Service Region Bucket |
Check if the OFS Resource API is down or update the missing info on the service region |
| 2 | Create Employee Resource API fails |
OFS: Error in creating Employee |
Check if the OFS Resource API is down or update the missing info on the employee |
| 3 | Get Employee Locations API fails |
Siebel - Error getting Employee Locations |
Check if the OFS Resource Locations API is down |
| 4 | Get Employee Shifts API fails |
Siebel: Error - No Shifts associated or Error getting Shifts |
Check if the Siebel Shifts API is down or correct the shift data in Siebel |
| 5 | Set Holiday Exceptions API fails |
OFS: Error setting Exception to Employee |
Check if the OFS Resource Work Schedule API is down or correct the exception data in Siebel |
| 6 | Get Employee Skills API fails |
Siebel: No Employee Skills associated or Error in Get Employee Skills |
Check if the Siebel Skill API is down or correct the skills data in Siebel |
| 7 | Get Employee Skill Items API fails |
Siebel: Error getting Employee Skill Items |
Check if the Siebel Skill Items API is down or correct the skills item data in Siebel |
| 8 | Create Work Skill API fails |
OFS: Error creating Work Skill |
Check if the OFS Create Skill API is down or correct the skills data in Siebel |
| 9 | Get Employee Exceptions API fails |
OFS: Error getting Exceptions |
Check if the Siebel Employee Exception API is down or correct the employee exceptions data in Siebel |
Service region zip code
Once basic information is updated in the bucket, the integration will migrate the zip code from the Siebel service region to Oracle Field Service. While migrating a new service region, the integration will check if there is already a work zone available with the same name in Oracle Field Service. If there is a work zone available, then that work zone will be updated for the bucket. If this is a new work zone, then the integration will create a new work zone in Oracle Field Service. The zip codes will be mapped as the work zone key in Oracle Field Service.
Incremental update of service region and employee
- Apart from the initial migration of the service region, when a business administrator updates the zip code or holiday exception associated with the service region, that too will get updated in Oracle Field Service.
- Similarly, when a business administrator updates the following information associated with an employee, that then will get updated in Oracle Field Service in an incremental manner:
- Employee basic information
- Employee location
- Service region associated with that employee
- Work skill associated with that employee
- Working exception and Non-working exception hours associated with that employee
3. Field Level Mapping Between Siebel CRM & Oracle Field Service
Field Level Mapping: Siebel and Oracle Field Service
| Siebel |
Oracle Field Service |
|---|---|
| Service Region |
Resource (Type bucket) |
| Service Region Id |
Resource External ID |
| Name |
Resource Name |
| Resource Type (defaulted to "BK") |
|
| Language Code |
Language |
| Service Region Time Zone Name |
Time zone (Look up in Oracle Integration) |
| Parent Resource ID (defaulted to "SUNRISE") |
|
| Status (defaulted to "active" for field resource) |
|
| Service Region ZIP Codes |
WorkZone |
| Service Region Name |
WorkZone Name |
| Service Region Name |
WorkZone Label |
| Status (defaulted to "active") |
|
| Travel Area (defaulted to "sunrise_enterprise") |
|
| ZIP Codes |
Keys (array) |
| ZIP Codes |
Shapes (array) |
| Start Date (default to current date) |
|
| Service Region Shifts |
Work Schedule |
| Shift Name |
scheduleLabel |
| Start Date (default to current date) |
|
| Is Working (defaulted to 'true') |
|
| Service Region Exception Hours |
Work Schedule |
| Exception Hour Name |
comments |
| Exception Hour Start Date |
Start Date |
| Is Working (defaulted to false) |
|
| Exception Hour End Date |
End Date |
| nonWorkingReason (defaulted to "HOLIDAY") |
|
| recurEvery (defaulted to "1") |
|
| recurrenceType (defaulted to "daily") |
|
| recordType (defaulted to "non-working") |
|
| shiftType(defaulted to "regular") |
|
| Employee |
Resource |
| Employee row Id |
Resource ID |
| Party Name |
Resource Name |
| Resource Type (defaulted to "PR") |
|
| Language Code |
Language |
| Service Region Time Zone Name/Time Zone Name |
Time zone (Look up in OIC) |
| Service Region Id |
Parent ResourceId |
| Status (defaulted to "active" for field resource) |
|
| Work Phone Number |
phone |
| Employee Locations |
Resource Locations |
| Employee row Id |
ResourceId |
| Label(default to "Work Location") |
|
| Start Depot Address |
address |
| Start Depot Country |
Country |
| Start Depot City |
City |
| Start Depot State |
State |
| Start Depot ZIP Code |
postalCode |
| Label(default to "Home Address") |
|
| Primary Start Home Address |
address |
| Primary Start Home Country |
Country |
| Primary Start Home City |
City |
| Primary Start Home State |
State |
| Primary Start Home ZIP Code |
postalcode |
| Label(default to "Work Location") |
|
| End Depot Address |
address |
| End Depot Country |
Country |
| End Depot City |
City |
| End Depot State |
State |
| End Depot ZIP Code |
postalcode |
| Label(default to "Home Address") |
|
| Primary End Home Address |
address |
| Primary End Home Country |
Country |
| Primary End Home City |
City |
| Primary End Home State |
State |
| Primary End Home ZIP Code |
postalcode |
| Primary Start Home ZIP Code |
postalCode |
| Label(default to "Work Location") |
|
| End Depot Address |
address |
| End Depot Country |
Country |
| End Depot City |
City |
| End Depot State |
State |
| End Depot ZIP Code |
postalcode |
| Label(default to "Home Address") |
|
| Primary End Home Address |
address |
| Primary End Home Country |
Country |
| Primary End Home City |
City |
| Primary End Home State |
State |
| Primary End Home ZIP Code |
postalcode |
| Employee Exception Hours (Continued) |
Work Schedule (Continued) |
| Exception Hour End Date |
End Date |
| nonWorkingReason (defaulted to "HOLIDAY") |
|
| recurEvery (defaulted to 1) |
|
| recurrenceType (defaulted to "daily") |
|
| recordType (defaulted to "non-working") |
|
| shiftType (defaulted to "regular") |
|
| Employee Skills |
Work Skills |
| Employee row Id |
Resource Id |
| Employee Skill Item |
Work skill Name |
| Proficiency |
Ratio |
| Employee Exception Hours (Continued) |
Work Schedule (Continued) |
| Exception Hour End Date |
End Date |
| nonWorkingReason (defaulted to "HOLIDAY") |
|
| recurEvery (defaulted to 1) |
|
| recurrenceType (defaulted to "daily") |
|
| recordType (defaulted to "non-working") |
|
| shiftType (defaulted to "regular") |
|
| Employee Skills |
Work Skills |
| Employee row Id |
ResourceId |
| Employee Skill Item |
Work Skill Name |
| Proficiency |
Ratio |
Oracle Integration Configurations:
Below are the Oracle Integration configurations for the various entities:
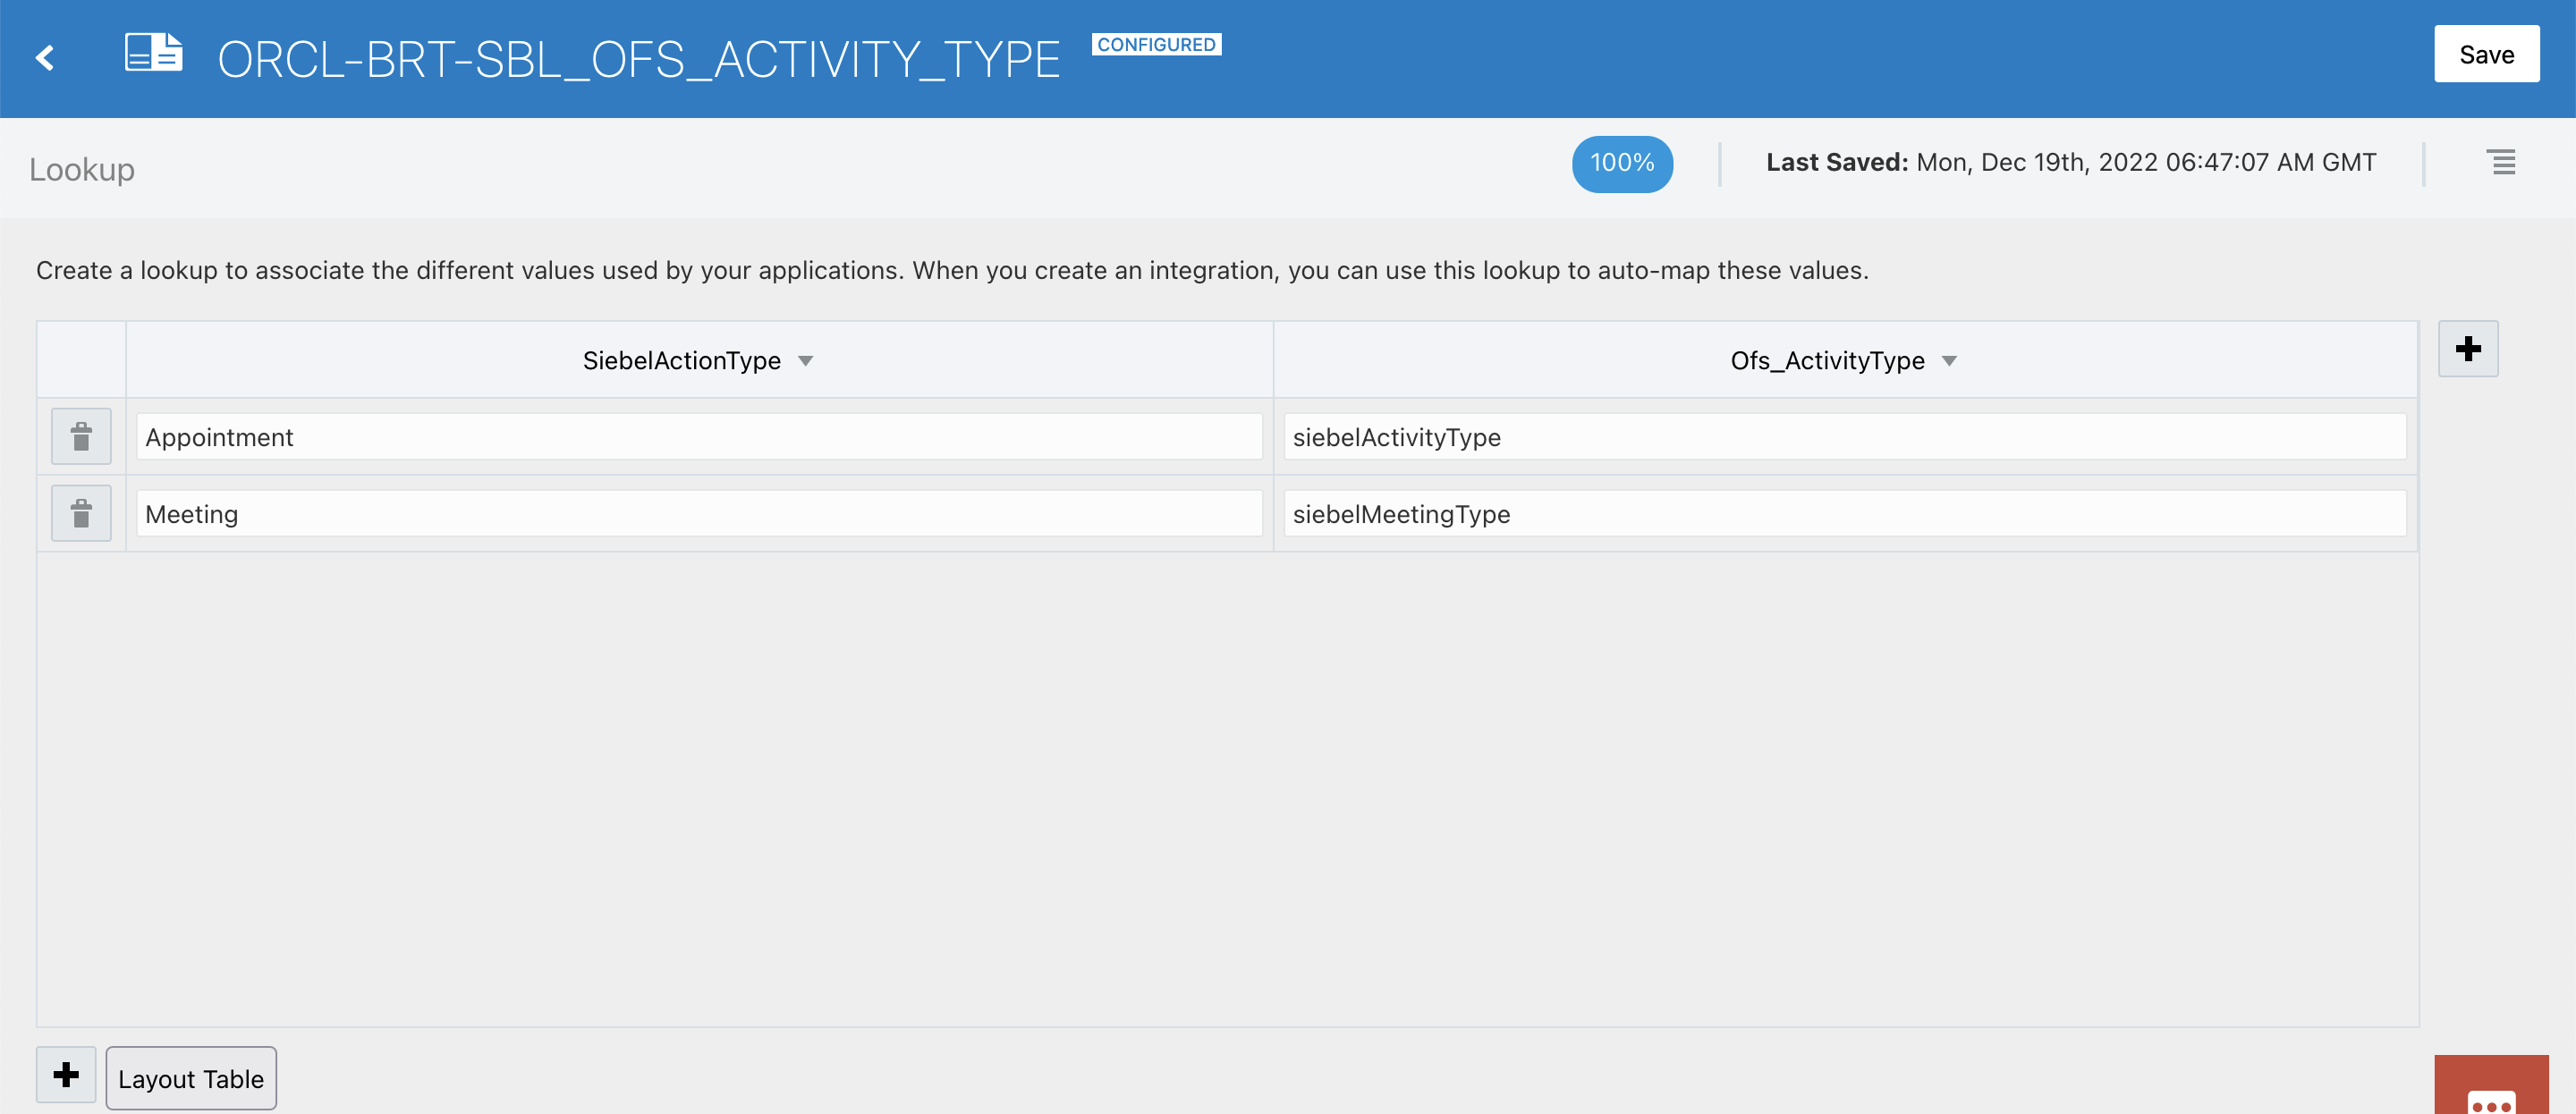
Lookups
Lookup configuration helps a customer to map similar entities of Oracle Field Service and Siebel having different values, for example, the "Service Region Id" can be treated as a "Resource Id" in Oracle Field Service.
Based on the nature of the customer business, the values can be different. A customer can configure these lookup tables according to their business requirements and execute the same integration in Oracle Integration.
The lookups used in this recipe will be listed under Home ? Integrations ? Lookups in Oracle Integration. Click the name of the Lookup you want to configure and click on the "+" icon to add more values.
Oracle Integration Lookups
| Oracle Integration Lookup | Siebel Value Example | Oracle Field Service Value Example | Description |
|---|---|---|---|
| ORCL-BRT-SBL_OFS_ACTIVITY_STATUS |
Not Started |
Pending |
Map the OFS activity status with Siebel appointment status |
| ORCL-BRT-SBL_OFS_TIMEZONE |
(GMT-08:00) Baja California Norte; Tijuana |
Eastern |
Map the Siebel time value with OFS time zone value. |
| ORCL-BRT-SBL_OFS_LANGUAGE_CODE |
ENU | en | Map the Siebel language code value with OFS language code value. |
| ORCL-BRT-SBL_OFS_WEEKDAY |
Sunday |
Sun |
Map the Siebel week day value with OFS week day value. |
| ORCL-BRT-SBL_OFS_GLOBAL_CONFIG |
BK |
BK |
Map the Siebel global config value with OFS global config value. |
| ORCL-BRT-SBL_OFS_NONWORKING_REASON |
Sick Time |
ILLNESS |
Map the Siebel global config value with OFS global config value. |
| ORCL-BRT-SBL_OFS_ACTIVITY_TYPE |
Appointment |
siebelActivityType |
Map the Siebel activity type value with OFS activity type value. |
| ORCL-BRT-SBL_OFS_FMR_LIMIT |
Ofs_FMR_Limit |
25 |
Default value for limit field for Find Matching Resource |
| ORCL-BRT-SBL_OFS_SKILL |
Expert |
100 |
Map the Siebel skill value with OFS skill value. |
| ORCL-BRT-SBL_OFS_EMPLOYEE_TYPE |
Employee |
technician |
Map the Siebel employee type value with OFS user type value |
| ORCL-BRT-SBL_COUNTRY_CODE |
USA |
US |
Map the Siebel country code with OFS country code value. |
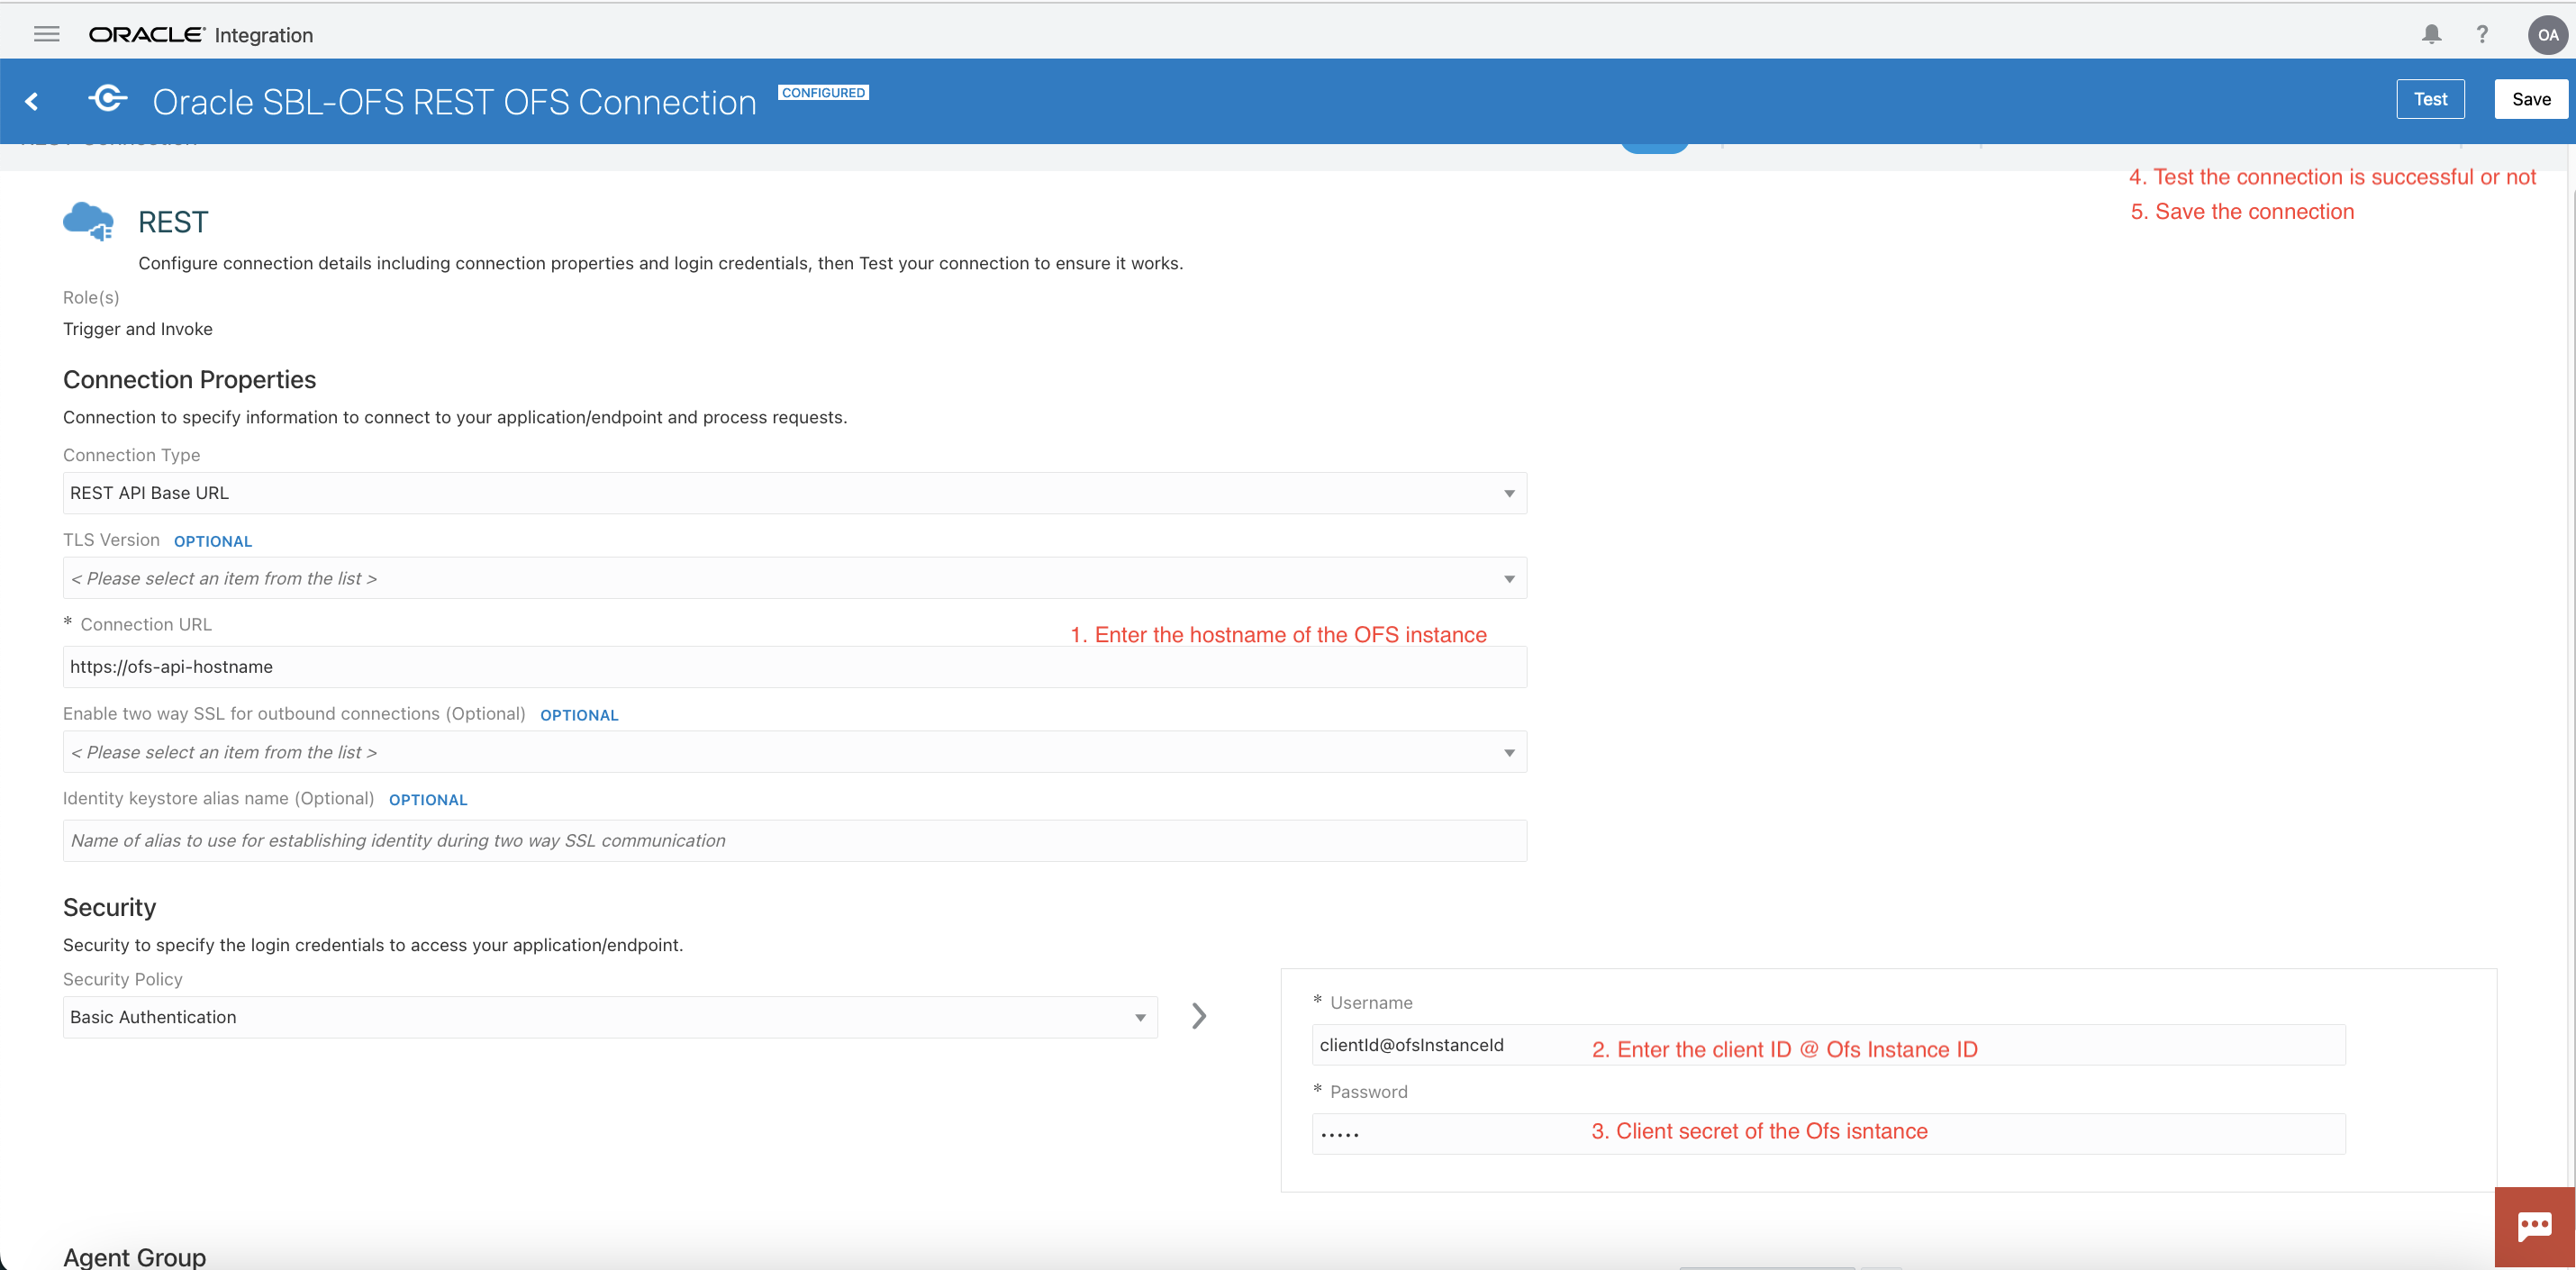
Connection Configuration
- Go to the Connections page by navigating to Integrations?Packages from the home page through the navigation sidebar. You will see the list of installed packages. Search for the package with the name "orcl.ba.sbl_ofs_sync" and scroll down to the Connections section.
- Click the Connection Name - Oracle SBL-OFS REST OFS Connection and configure the connection by following steps 1-5 in the image below.
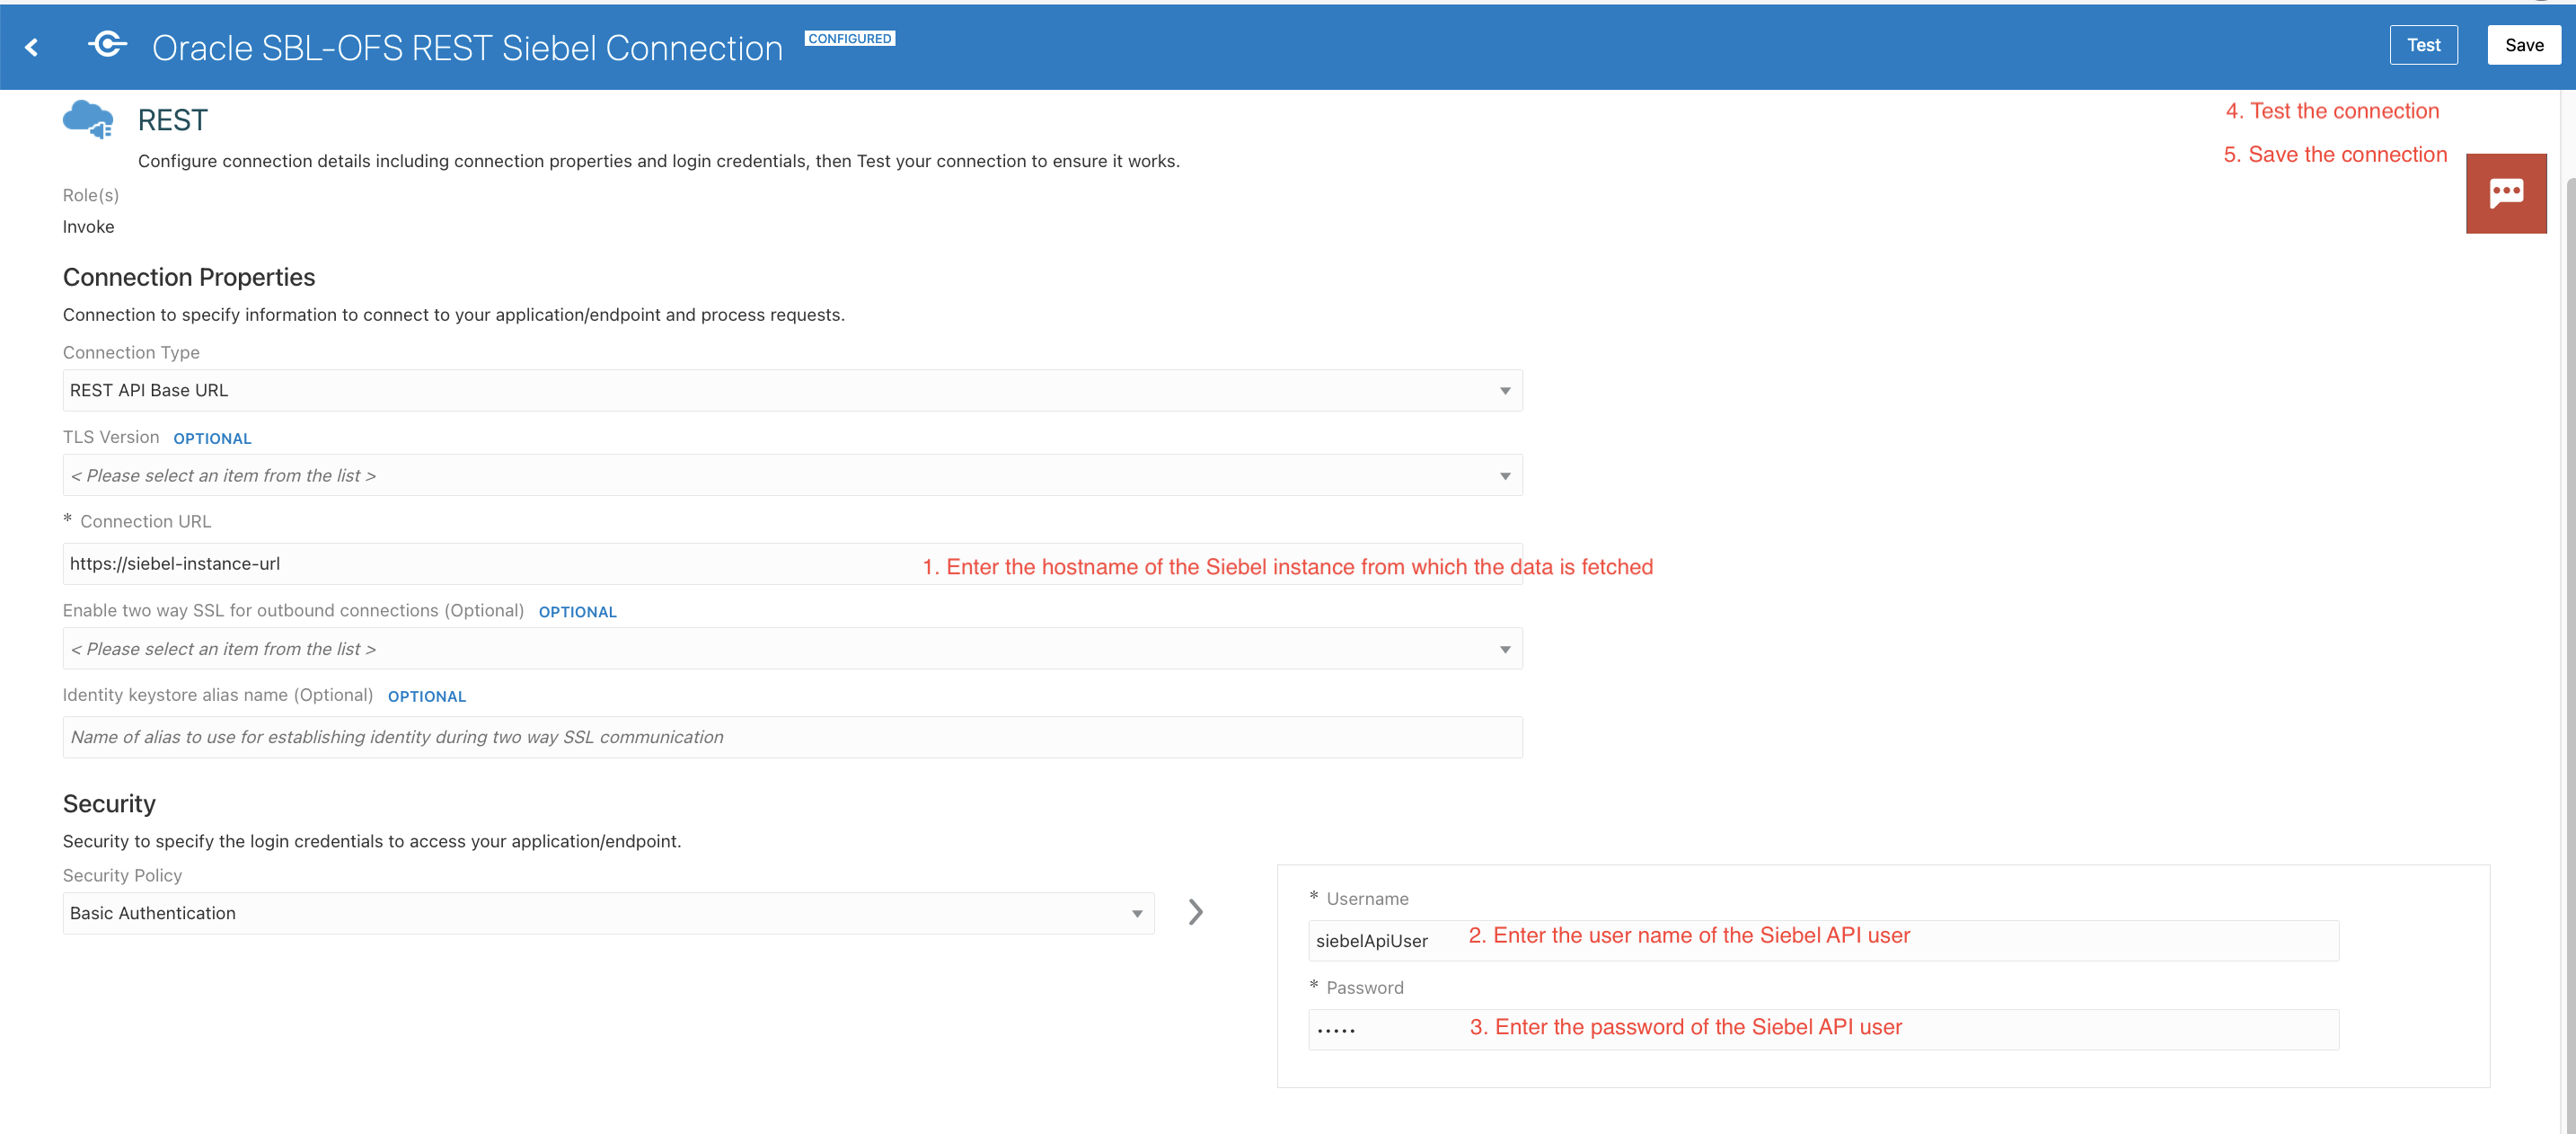
- Click on the Connection Name - Oracle SBL-OFS REST Siebel Connection and configure the connection by following steps 1-5 in the image below:
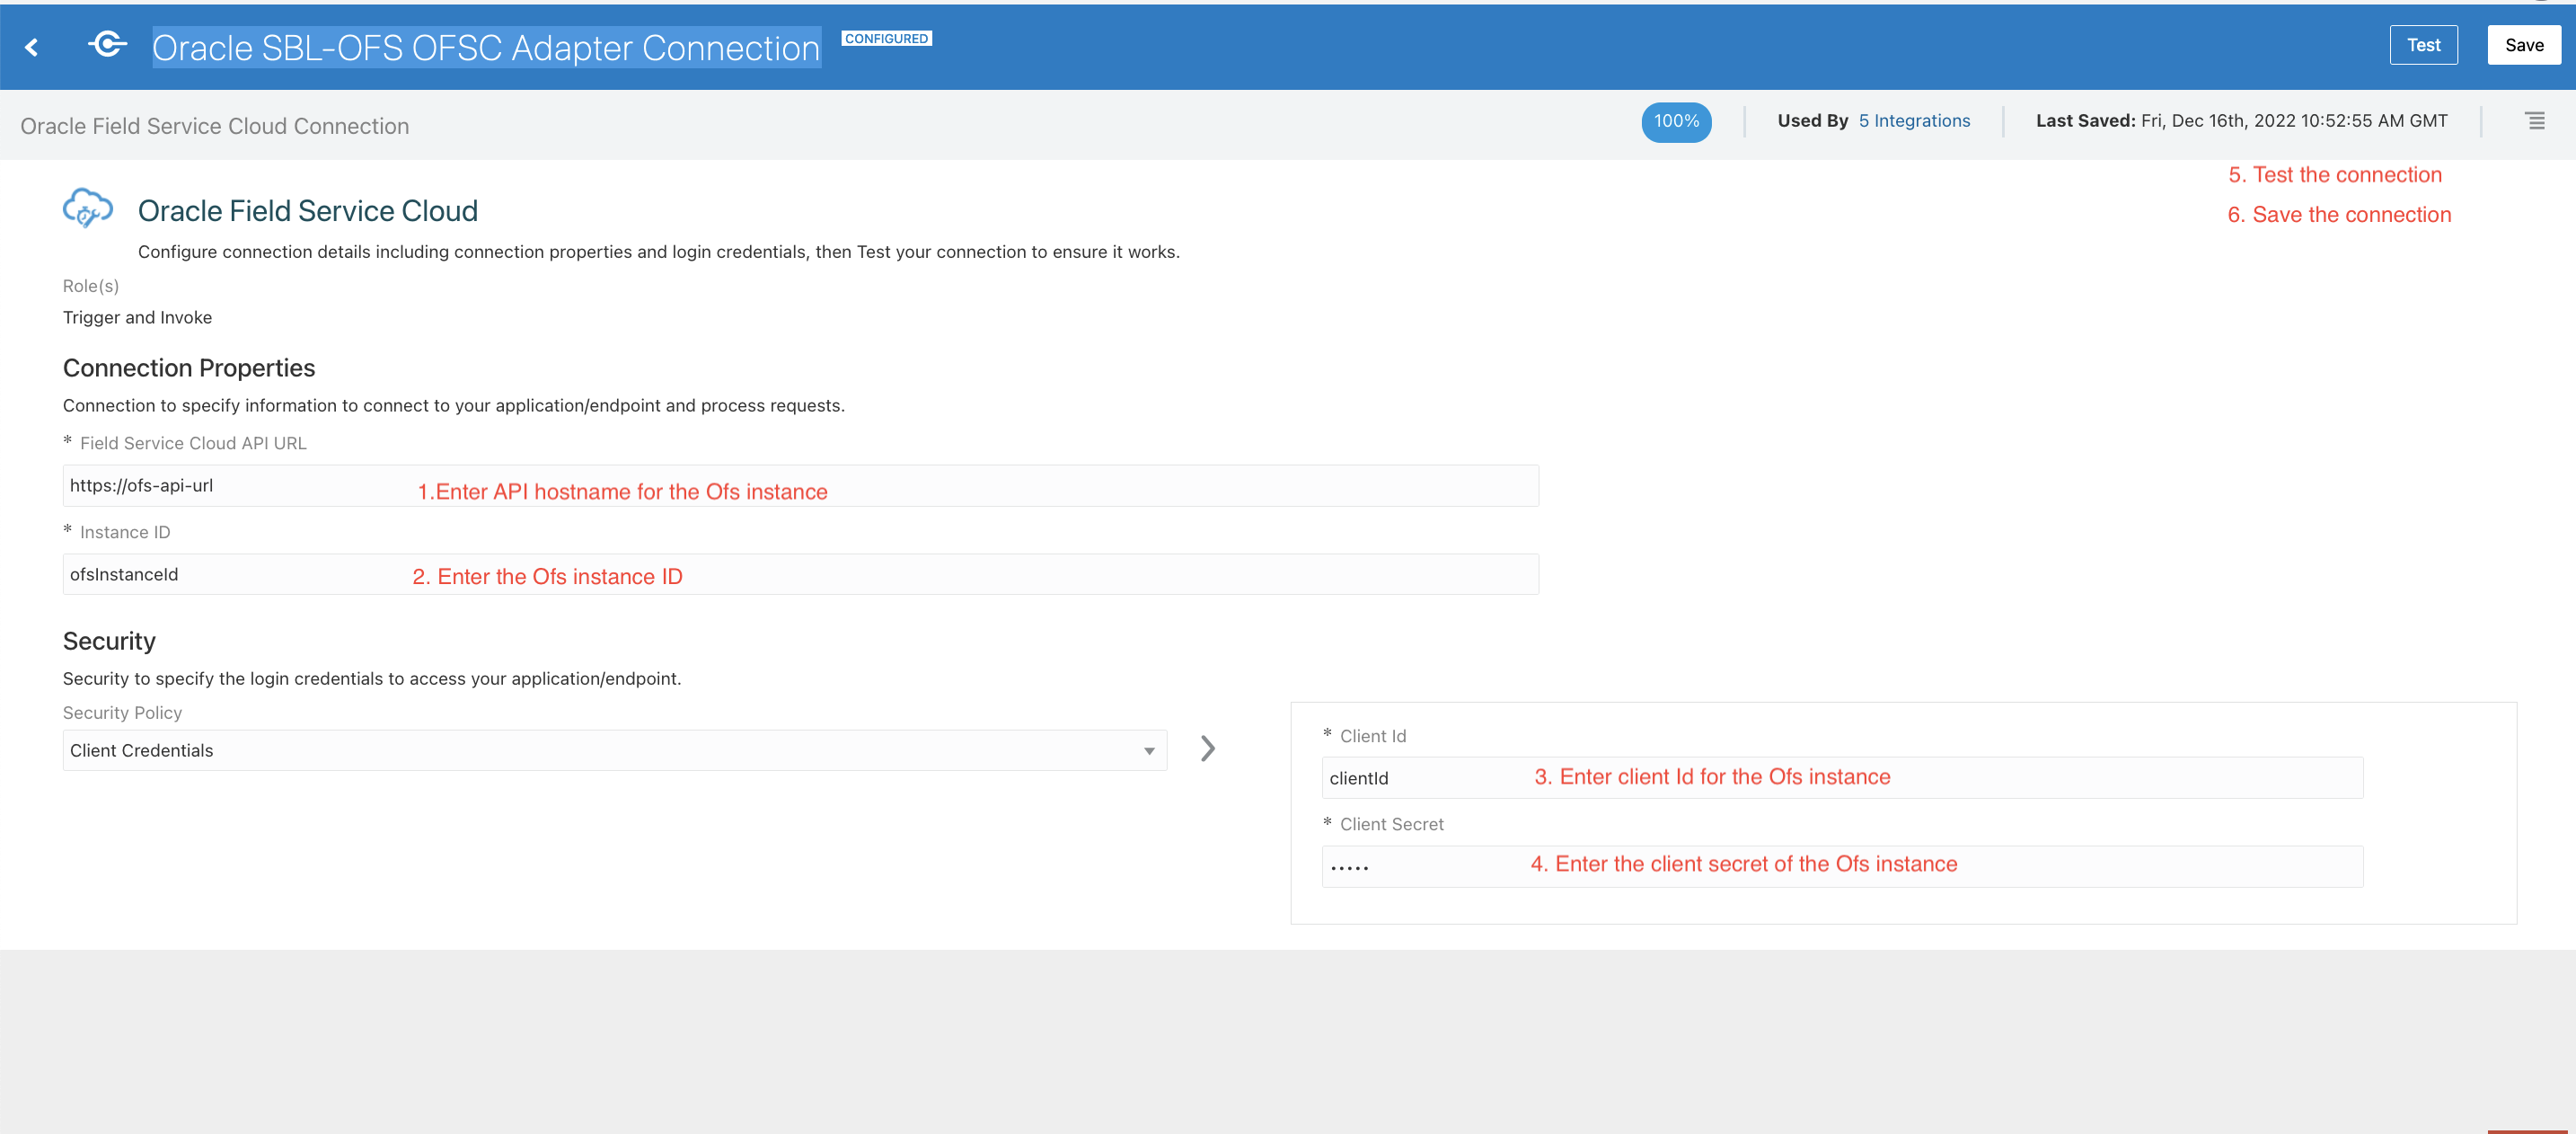
- Click on the Connection Name - Oracle SBL-OFS OFSC Adapter Connection and configure the connection by following steps 1-6 in the image below:
Troubleshooting steps for Oracle Integration flows
1) Book Appointment failures
Symptom: Book Appointment returns blank slots
Reason: No slots are returned for scheduling the activity. A possibility could be that no resources are available during the specified timeframe.
Solution: Ensure that the Account Address details are provided.
Change the earlier start date and latest start date to some other date/time range.
2) Book Appointment failures
Symptom: Oracle Integration flow throws 401 error
Reason: No slots are returned for scheduling the activity. A possibility could be that no resources are available during the specified timeframe.
Solution: Check that the Username and Password credentials provided in the business service user property of ‘ORCLROFSSBLBOOKAPPOINTMENT' are correct.
3) Book Appointment failures
Symptom: Cancel Appointment returns error "OFS: Appointment not found or not satisfied the cancel criteria”
Reason: The activity selected for cancelling the appointment is not scheduled.
Solution: Only Activities in a status of ‘Scheduled’ can be cancelled.
This feature provides the following benefits:
- You can book a field service appointment using Siebel CRM and assign the activity to a field technician in Oracle Field Service.
- You can transfer employee (field technician) information from Siebel CRM to Oracle Field Service.
Steps to Enable
You don't need to do anything to enable this feature.
Tips And Considerations
Although the feature is available by default, you must configure the integration before you can use it.
Key Resources
- Configuring Applications: https://docs.oracle.com/en/cloud/saas/field-service/faded/index.html. This link will be available after Update 23A GA release.
Resource Work Availability, Absence Management and Update Party ID Against a Resource Using OFS-HCM Accelerator
Overview
In Update 23A, a new Oracle Field Service - HCM accelerator is available in the Oracle Integration store that provides all of the existing functionalities of the ‘Oracle HCM - Oracle Field Service | Create and manage OFS resources’ accelerator and it has been enhanced with the following improvements:
- The accelerator will start making use of 'partyID' for transferring employee data from Oracle HCM Cloud to Oracle Field Service.
- Accelerator will update the resource's work availability from Oracle HCM Cloud to Oracle Field Service by considering the resource's work schedule, absences, work exceptions and holidays.
Employee transfer using 'partyID'
Fusion applications such as Fusion Service and Service Logistics use 'partyID' as a unique identifier for syncing employee information across the application. This accelerator will update 'partyID' as the Oracle Field Service resource external identifier, so that all synchronizations of employee information can be performed based on this ID.
Pre-requisites
- This accelerator syncs employee data only if the TCA 'partyID' is generated. The partyID will be generated instantaneously for the employees with current and past hire dates in the Oracle HCM Cloud New Hire Screen. For future-dated employees the partyID will be generated after running the ESS job "Maintain Party and Location Current Record Information". As such, it's very important that that particular job is scheduled.
- The partyID is used as the external ID of the Oracle Field Service resource.
- In Oracle Field Service, a custom property needs to be created for the Resource entity. The property name should be "HCM_Person_Id". The Person Id from Oracle HCM Cloud will be persisted in Oracle Field Service to map the data between Oracle HCM Cloud and Oracle Field Service.
- In OFS, buckets need to be created under which you are planning to add the resources from Oracle HCM Cloud. Also, the same bucket ID should be updated in the Oracle Integration lookup table - "Oracle_HCM_OFS_Resource_Bucket_Lookup". In cases where there is no data available in the above lookup configuration, it will create all the employees under the business units configured as part of the integration.
Employee work availability from Oracle HCM Cloud to Oracle Field Service
The integration extracts the resource availability per day including the resource work schedule, absences, holidays and exceptions. This integration gets the availability of a resource for a period of time and syncs the record to Oracle Field Service. This is a scheduled integration that is recommended to be run once per day. The availability of a resource is calculated by accounting for absences, exceptions, holidays and work schedules.
Some of the key use cases supported by the integration using resource availability are:
- Handling resource work schedules - A work schedule defines an employee's availability for work, which includes work patterns, shifts, etc. You can configure this in Oracle HCM Cloud by referring to this link for more details about work schedule configuration in Oracle HCM Cloud. The integration will look for all of the work schedule configurations and will update the availability of a resource as a custom work schedule in the OFS resource's calendar .
- Handling resource exceptions in between work schedules - A 'resource exception' is a deviation in their availability from a work schedule or schedule assignment. A resource exception defines when a resource is unavailable. For example, a worker may be attending training or on a lunch break, and therefore unavailable within a specific time interval of a day.
- Resource exception example #1 - employee is not available for working on activities within a particular time interval (e.g. trainings/breaks). A customer can configure exceptions like these against a work schedule in Oracle HCM Cloud. The integration will update these exceptions as internal activities in Oracle Field Service.
The internal activity type "ResourceExceptions" will be used as the default activity type for all the internal activities. This activity type will be created automatically as part of the scheduled data transfer from Oracle HCM Cloud to OFS. The default activity type is configured in the lookup table, Oracle_HCM_OFS_IntegrationVariablesLookup as OFS_DefaultActivityType.
- Resource exception example #2 - An employee is working on a non-working day. A customer can configure an exception for an employee working on a non-working day under a work schedule in Oracle HCM Cloud. The integration will update these exceptions as custom work schedules, against the selected resource for the selected date and time in Oracle Field Service.
- Handling holidays - Holidays are created as calendar events in Oracle HCM Cloud. The integration will look for all the calendar events defined in Oracle HCM Cloud that will be transferred to Oracle Field Service. These will be created as non-working days at the resource level.
- Handling absences - Integration will support half day/full day absences of an employee in Oracle Field Service. The integration will look for all absences configured in Oracle HCM Cloud. All of the half-day absences will be defined as internal activities in Oracle Field Service. Full-day absences will be treated as non-working days at the resource level.
Oracle Integration Flows
Oracle Integration Flows
| Sl. No. | Use Case | Input | Scheduled Integration | Recommended Scheduling Frequency |
|---|---|---|---|---|
| 1 | Upload employee details from Oracle HCM Cloud to Oracle Field Service - Bulk Extract One Time |
HCM Extract |
Oracle HCM OFS Employee Extract Child Integrations:
|
RUN ONLY ONCE * It will sync all matching technicians to Oracle Field Service for the first time |
| 2 | Data transfer of newly-hired employees |
Public Worker Rest API |
Oracle HCM OFS Party Sync Child Integrations:
|
Every Hour * To be scheduled more frequently to sync the new hires to Oracle Field Service |
| 3 | Updating resource details in Oracle Field Service when employee details are updated in Oracle HCM Cloud |
ATOM feed |
Oracle HCM OFS Employee Update Child Integrations:
|
Twice a day * Can be scheduled twice per day |
| 4 | Suspending resource in Oracle Field Service when an employee is terminated in HCM |
ATOM feed |
Oracle HCM OFS Employee Terminate Child Integrations:
|
Every Hour * To be scheduled more frequently to sync the terminations in Oracle Field Service |
| 5 | Sync worker availability - full mode |
Public Worker Rest API, Worker Availability REST API |
Oracle HCM OFS Worker Availability Child Integrations:
|
Once a day * Can be scheduled once per day |
NOTE: The scheduling frequency is just a recommendation and can be changed based on the requirement.
"Oracle HCM OFS Employee Extract" - Upload employee details from HCM to OFS using HCM extract
The accelerator uses the Oracle HCM Cloud extract to upload employee details from Oracle HCM Cloud to Oracle Field Service. Details about the employee extract and setup configurations are explained here.
The accelerator extracts the following employee information as part of the integration flow "Oracle HCM OFS Employee Extract":
- Employee basic details - these are basic details of the employee like person number, first name, last name, person email address, phone number and home address.
- Employee assignment details - these are employee assignment details like assigned business unit, job code, department, user details and location.
Extract Flow
- The extract process will filter all employee with a job code corresponding to field technician, business unit and assignment status as "active".
- The extracted employee details will be created in OFS if a corresponding resource is not available in Oracle Field Service. Otherwise it will update the resource details in Oracle Field Service based on the mapping and lookup configurations in Oracle Integration.
- The "Oracle HCM OFS Employee Extract" scheduled integration reads the extract files and filters out the employees with a given business units, given job codes and status as "active". Then it triggers the child integration "Oracle HCM OFS Extract Helper" for each person.
- The "Oracle HCM OFS Extract Helper" checks if the partyID is generated or not. If the partyID is not available, it terminates the integration. Otherwise, it will prepare the data required for the Oracle Field Service resource creation and trigger the helper integration "Oracle HCM OFS Employee Sync Helper".
- The Oracle HCM OFS Employee Sync Helper is a common helper integration that will take care of the resource creation, user creation, resource locations and assignment location creations.
- The resource and user are mapped under a bucket (the bucket is defined in the lookup; if there is no mapping available, then the resources are placed under the organization unit that has the same name as the business unit). The resource is also populated with resource locations which correspond to the employees home address and employee assignment locations.
If any Oracle Field Service resource is available with the same external ID as the HCM Person Number, then the external ID will be updated with 'partyID'.
"Oracle HCM OFS Party Sync" - Data transfer of newly-hired employees
When a new employee is added to HCM, a corresponding resource can be created in Oracle Field Service. Whenever a new employee is hired, and if the partyID is created, then those resources will be sync'd to Oracle Field Service.
Whenever a new employee is hired with a current or past hire date, then the TCA partyID is created. And for any future hires, the partyID is created after the ESS job "Maintain Party and Location Current Record Information" has been run. The latest versions of Oracle HCM Cloud integrations will create the employees in Oracle Field Service only if a partyID is generated for the employee.
- The Oracle HCM OFS Party Sync calls the Public Worker API to fetch all the ACTIVE employees in the given business units, given job codes and whose effective date is >= the current date - 2 days [the 'days' parameter is an integration property that can be modified]. And the sub integration, Oracle HCM OFS Party Sync Helper is triggered for each person.
- The Oracle HCM OFS Party Sync Helper checks if the partyID is available for the employee. If the partyID is not available, the integration terminates. If the partyID is available, it validates the resource bucket and prepares the data for resource creation in OFS and triggers the integration Oracle HCM OFS Employee Sync Helper.
- The Oracle HCM OFS Employee Sync Helper is a common helper integration that will take care of the resource creation, user creation, resource locations and assignment location creations.
- The resource and user are mapped under a bucket (the bucket is defined in the lookup; if there is no mapping available then the resources are placed under the organization unit with the name as the business unit name). The resource is also populated with locations that correspond to the employee's home address and assignment location.
"Oracle HCM OFS Employee Update" - Updating a resource in Oracle Field Service when employee details are updated in HCM
Employee update flow
The "Oracle HCM OFS Employee Update" integration passes employees updates from HCM to Oracle Field Service in near-real time. This accelerator uses the HCM Atom Feed - “Employee Update” to get the employee updates from Oracle HCM Cloud. The details about how to subscribe to the HCM Atom Feed is available here.
- The "Oracle HCM OFS Employee Update" scheduled integration filters out the required employee assignment according the job code, business unit name and assignment status of "ACTIVE". For each employee, it triggers the "Oracle HCM OFS AtomFeed Helper" child integration.
- The "Oracle HCM OFS AtomFeed Helper" calls the Public Worker API to get the necessary details to create the resource and calls the "Oracle HCM OFS Employee Sync Helper" helper integration.
- The "Oracle HCM OFS Employee Sync Helper" integration maps the data passed from Oracle HCM Cloud to Oracle Field Service as mentioned in the mapping table. Thus corresponding resource details will be updated in OFS.
"Oracle HCM OFS Employee Terminate" - Suspending a resource in Oracle Field Service when an employee is terminated in HCM
- The Oracle HCM OFS Employee Terminate integration passes terminated employees details from Oracle HCM Cloud to Oracle Field Service in a scheduled manner.
- As a next step, this will invoke the sub-integration "Oracle HCM OFS AtomFeed Helper" which will update the Oracle Field Service user and set the resource status to 'inactive'.
This integration subscribes to updates via the Atom Feed - “Employee Terminate”. The details about how to subscribe to the HCM Atom Feeds is available here.
"Oracle HCM OFS Worker Availability"- Update resource availability from Oracle HCM Cloud to Oracle Field Service
The "Oracle HCM OFS Worker Availability" integration updates the calendar availability of resources from Oracle HCM Cloud to Oracle Field Service. The availability of the resource is calculated based on public holidays, resource exceptions in between the assigned work schedules and absences.
Integration flow
- The Oracle HCM OFS Worker Availability invokes the HCM Public Worker API to fetch all the ACTIVE employees in the given business units and given job codes.
- The Oracle HCM OFS Worker Availability Activity Type, sub integration, checks if the activity type configured in the lookup, Oracle_HCM_OFS_IntegrationVariablesLookup, is already present in Oracle Field Service. If not present, it will create a new activity type with name and label as configured in the lookup table.
- The Oracle HCM OFS Worker Availability Helper invokes the API to fetch the partyID for all the eligible employees with valid job codes. If the partyID exist, then this integration will invoke the Worker Availability API to get the resource calendar availability from Oracle HCM Cloud. If the Worker Availability API returns the schedules, then Oracle HCM OFS Worker Availability Activity Delete and Oracle HCM OFS Worker Availability WS Delete are invoked to clear the activities and schedules in Oracle Field Service.
- The Oracle HCM OFS Worker Availability Activity Delete, sub-integration, is invoked to clear all the existing internal activites with apptNumber equal to the Person ID, start date of the activity equal to or greater than the current date and end date of the activity is equal to current date + 'noOfDays' [Intgeration property in Oracle HCM OFS Worker Availability Helper].
- The Oracle HCM OFS Worker Availability WS Delete sub-integration is invoked to clear all the existing schedules for a resource in Oracle Field Service for the date range for which the Worker Availability API is invoked.
- The Oracle HCM OFS Worker Availability Sync Helper iterates and processes each record from the Worker Availability API.
- The Oracle HCM OFS Worker Availability WS Creator sub-integration is invoked to create custom work schedules in Oracle Field Service.
- The Oracle HCM OFS Worker Availability Activity Create sub-integration is invoked to create internal activities in Oracle Field Service for resource exceptions (breaks in between the work schedules) and half-day leaves from Oracle HCM Cloud.
Setup Configurations in Oracle Integration
Lookups
Lookup configuration helps you map similar entities of Oracle Field Service and Oracle HCM Cloud having different values, for example the job code with "Field tech" can be treated as a "Technician" in Oracle Field Service.
There are six lookups as part of the Oracle HCM Cloud to Oracle Field Service integration. Based on the nature of customer businesses, the values can be different. Customers can configure these lookup tables according to their business needs and execute the same integration in Oracle Integration.
The lookups used in this accelerator will be listed under Home > Integrations > Lookups in Oracle Integration. Click the name of the lookup you want to configure and click on the '+' icon to add more values.
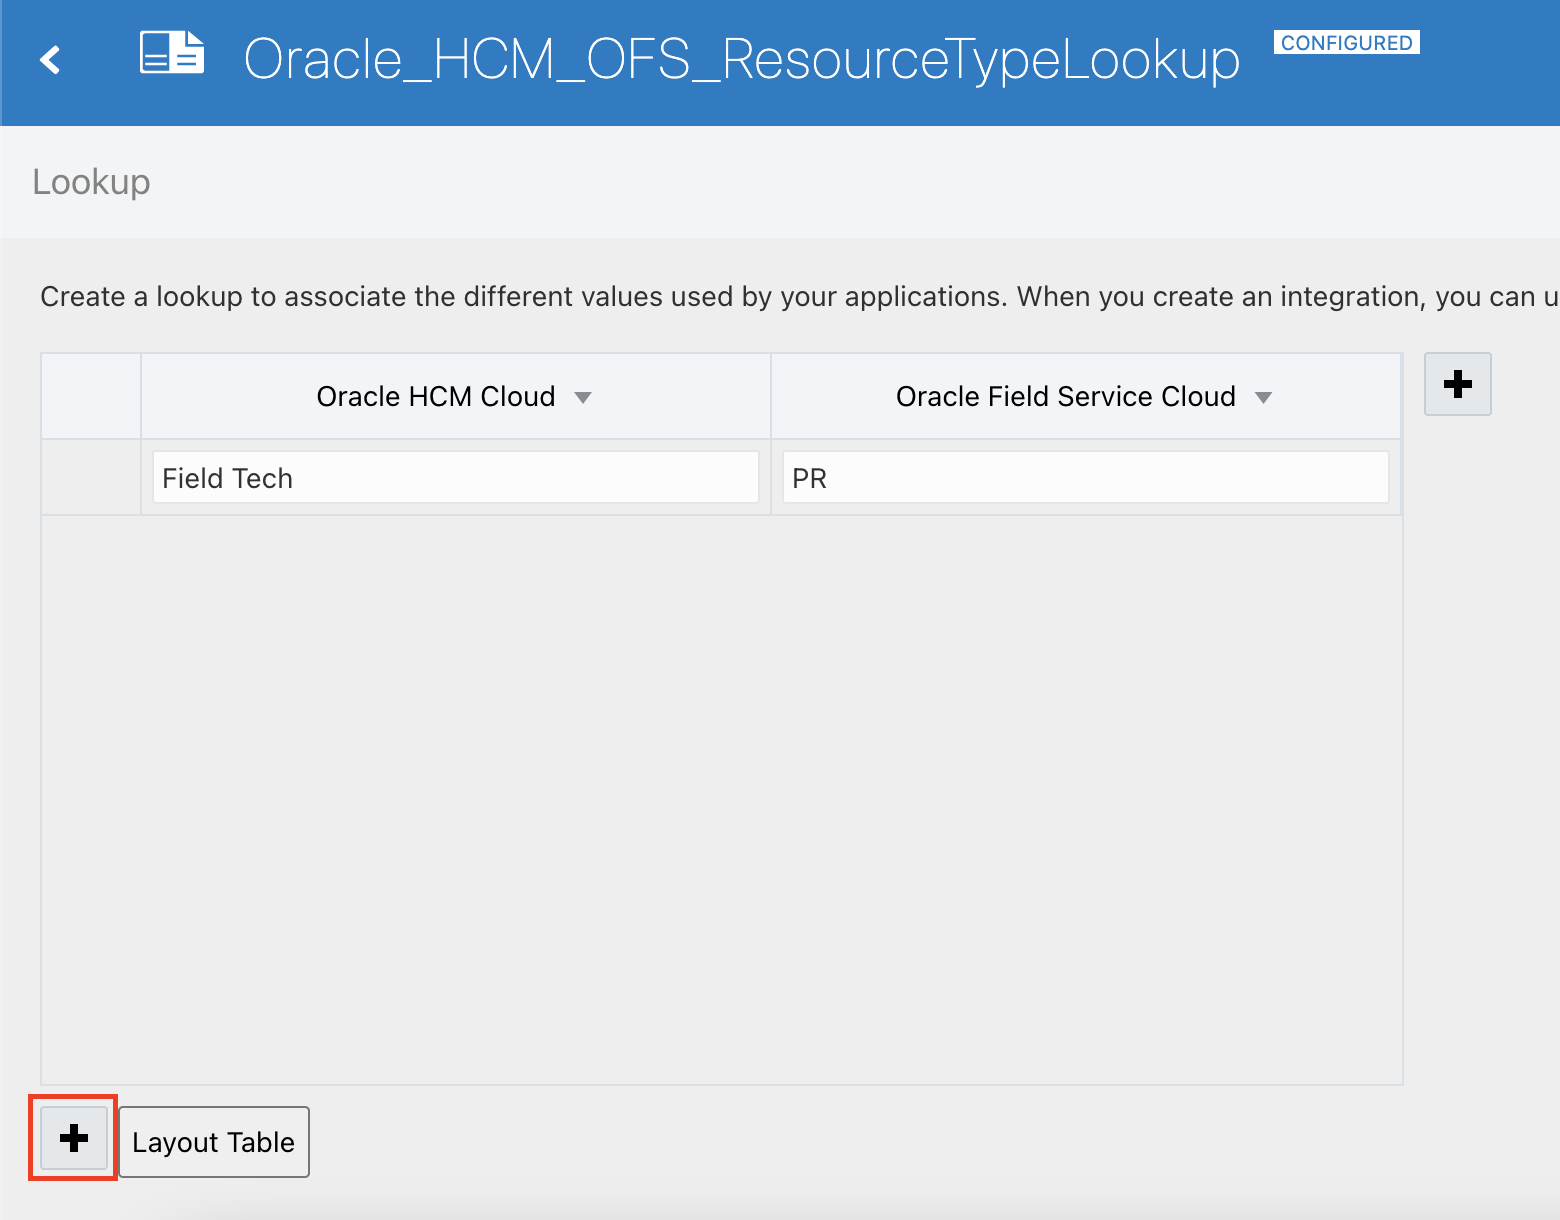
Lookups
| Oracle Integration Lookup | HCM Value Example | Oracle Field Service Value Example |
Description |
|---|---|---|---|
| Oracle_HCM_OFS_UserTypeLookup |
Technician |
Technician |
Map the Oracle HCM Cloud job code with the Oracle Field Service user type |
| Oracle_HCM_OFS_ResourceTypeLookup |
Field Tech |
PR |
Map the Oracle HCM Cloud job code with the Oracle Field Service resource type |
| Oracle_HCM_OFS_Nonworking_Reason |
Sick |
Illness |
Map the Oracle HCM Cloud absence type such as Sick Leave, Earned Leave, Casual Leave etc. with Oracle Field Service non-working reasons. For calendar events/holidays from Oracle HCM Cloud, the Oracle HCM Cloud value to be configured in the lookup is 'CAL' and the corresponding Oracle Field Service non-working reason can be mapped. |
| Oracle_HCM_OFS_ResourceRoleLookup |
Field Tech |
Field resource |
Map the job code with the Oracle Field Service resource role. The current integration handles only the 'Field resource' resource type role. |
| Oracle_HCM_OFS_Resource_Bucket_Lookup |
Format: BusinessUnit#DepartmentName Sample: Supremo US Business Unit#JOB001 |
ServiceBucket [The Oracle Field Service bucket Id] |
Map the Oracle HCM Cloud BusinessUnit#DepartmentName [ business unit name and the department name concatenated with a delimiter #] to the resource ID of the Oracle Field Service bucket. The prerequisite for this lookup is that the OFS bucket mentioned in the lookup should be available in Oracle Field Service with the given resource ID. If there is no match available in the lookup then an organization unit will be created with the resource ID as the Oracle HCM Cloud business unit ID and name as Oracle HCM Cloud business unit name. And all resources will be placed under that organization unit. For example, the Oracle HCM Cloud business unit name is "Supremo Business Unit" and the job code for the technicians is "JOB0001". If those technicians need to be sync'd to an Oracle Field Service bucket with resource ID "ServiceBucket", then the configuration will look like: HCM Value > Supremo US Business Unit#JOB0001 Oracle Field Service > ServiceBucket |
| Oracle_HCM_OFS_IntegrationVariablesLookup |
This lookup holds the criteria and default values used in Oracle HCM Cloud to Oracle Field Service integrations. |
Mapping Table
The following table lists the mapping between Oracle HCM Cloud entities/properties to their corresponding Oracle Field Service counterparts as configured in the accelerator.
For example, a business unit in Oracle HCM Cloud can be treated as an organization unit in Oracle Field Service since both are functionally designed to manage the resource reporting structure.
Mapping Table
| HCM Property | Oracle Field Service Property | Comments |
|---|---|---|
| Business Unit |
Organization Unit |
Organization unit is a resource type in Oracle Field Service |
| Department |
Bucket |
Bucket is a resource type in OFSOracle Field Service |
| Person Id |
HCM_Person_Id |
Custom property which hold the Person ID of the resource. |
| User Name |
Login |
|
| Person Address |
Resource Location |
|
| Person Assignment address |
Resource Location |
|
| partyID |
External ID |
It is the External ID of the resource. |
| Absence Type |
Non-Working Reason |
Absence Types such as 'sick leave' and 'earned leave' will be mapped to Oracle Field Service non-working reasons such as 'illness,' 'vacation' etc. In the case of holidays, the Oracle HCM Cloud absence type expected to be configured in the lookup is 'CAL' and the corresponding Oracle Field Service non-working reason such as 'Holiday' can be mapped. |
NOTE: In the accelerator, a business unit from Oracle HCM Cloud is mapped as an organizational unit in Oracle Field Service. The customer can configure the Oracle_HCM_OFS_Resource_Bucket_Lookup to define under which bucket the technician resource needs to be created. The lookup expects the source value in the format 'Business Unit#Department'. If there is no match found in the lookup, the technicians are created under the business unit.
Integration Properties
Integration Properties
| Integration | Property Name | Default Value | Purpose |
|---|---|---|---|
| Oracle HCM OFS Party Sync |
noOfPastDays |
2 |
New hires with start date >= current date - 'noOfPastDays' will be synced to OFS. |
| Oracle HCM OFS Worker Availability Helper |
noOfDays |
10 |
Resource availability from current date to current date + 'noOfDays' will be synced to OFS. |
How to modify the integration properties
Integration properties can be modified by following the navigation shown in the following screenshots:
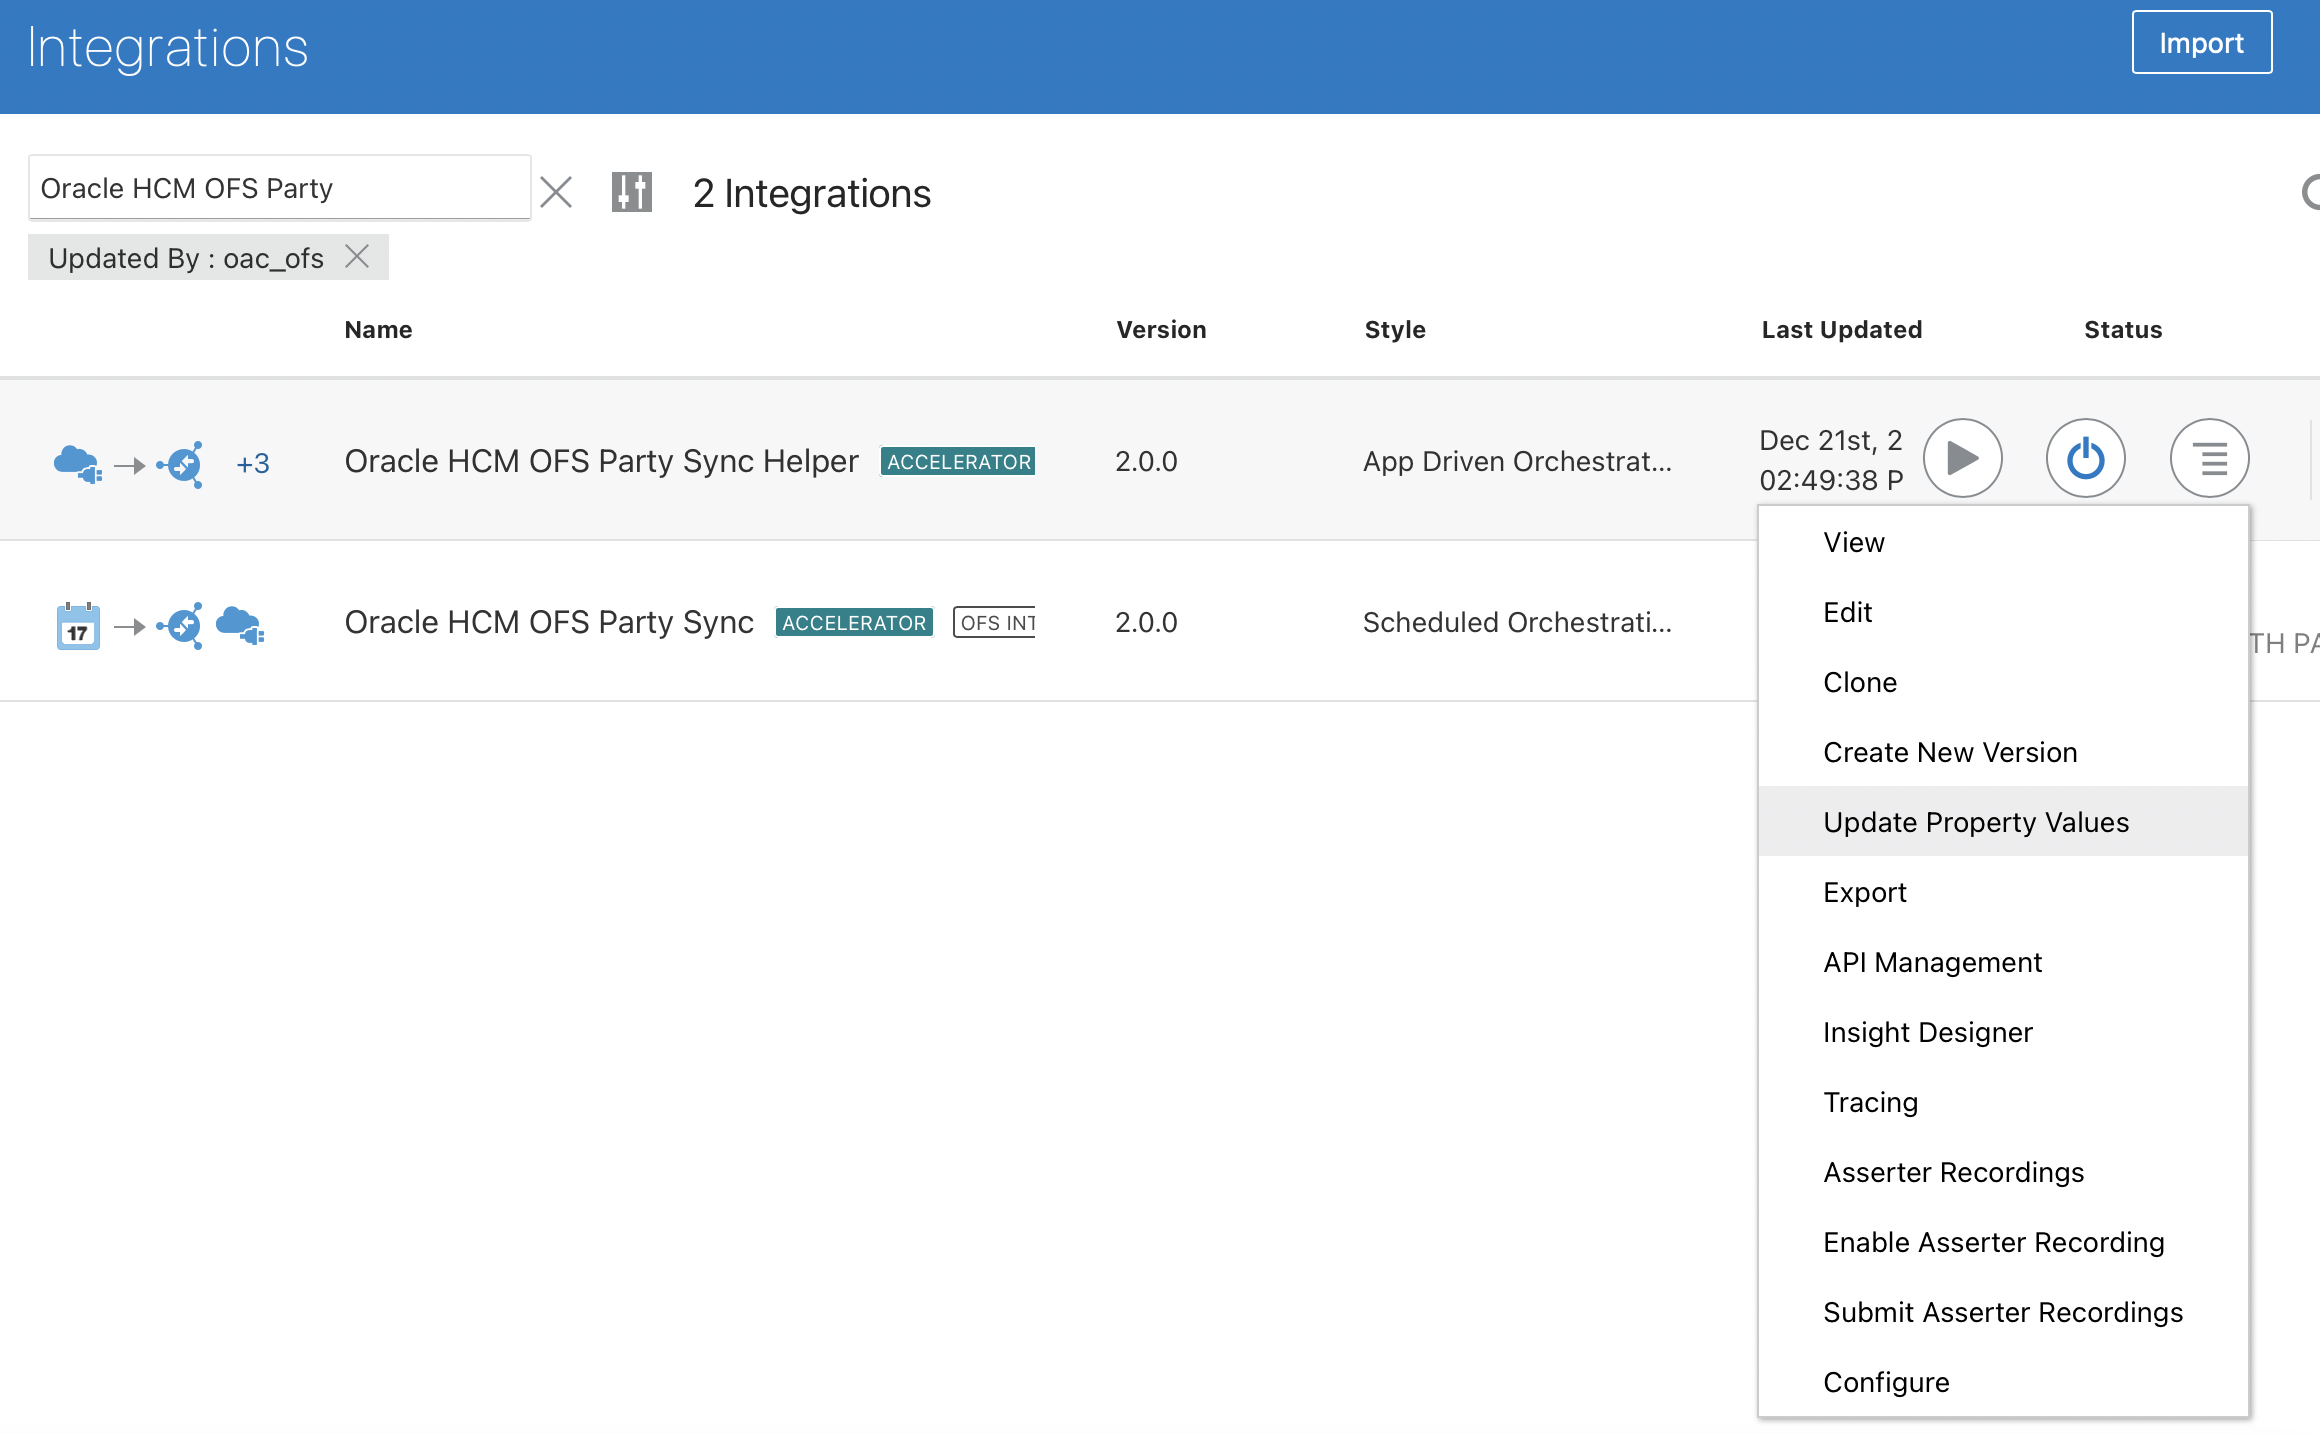
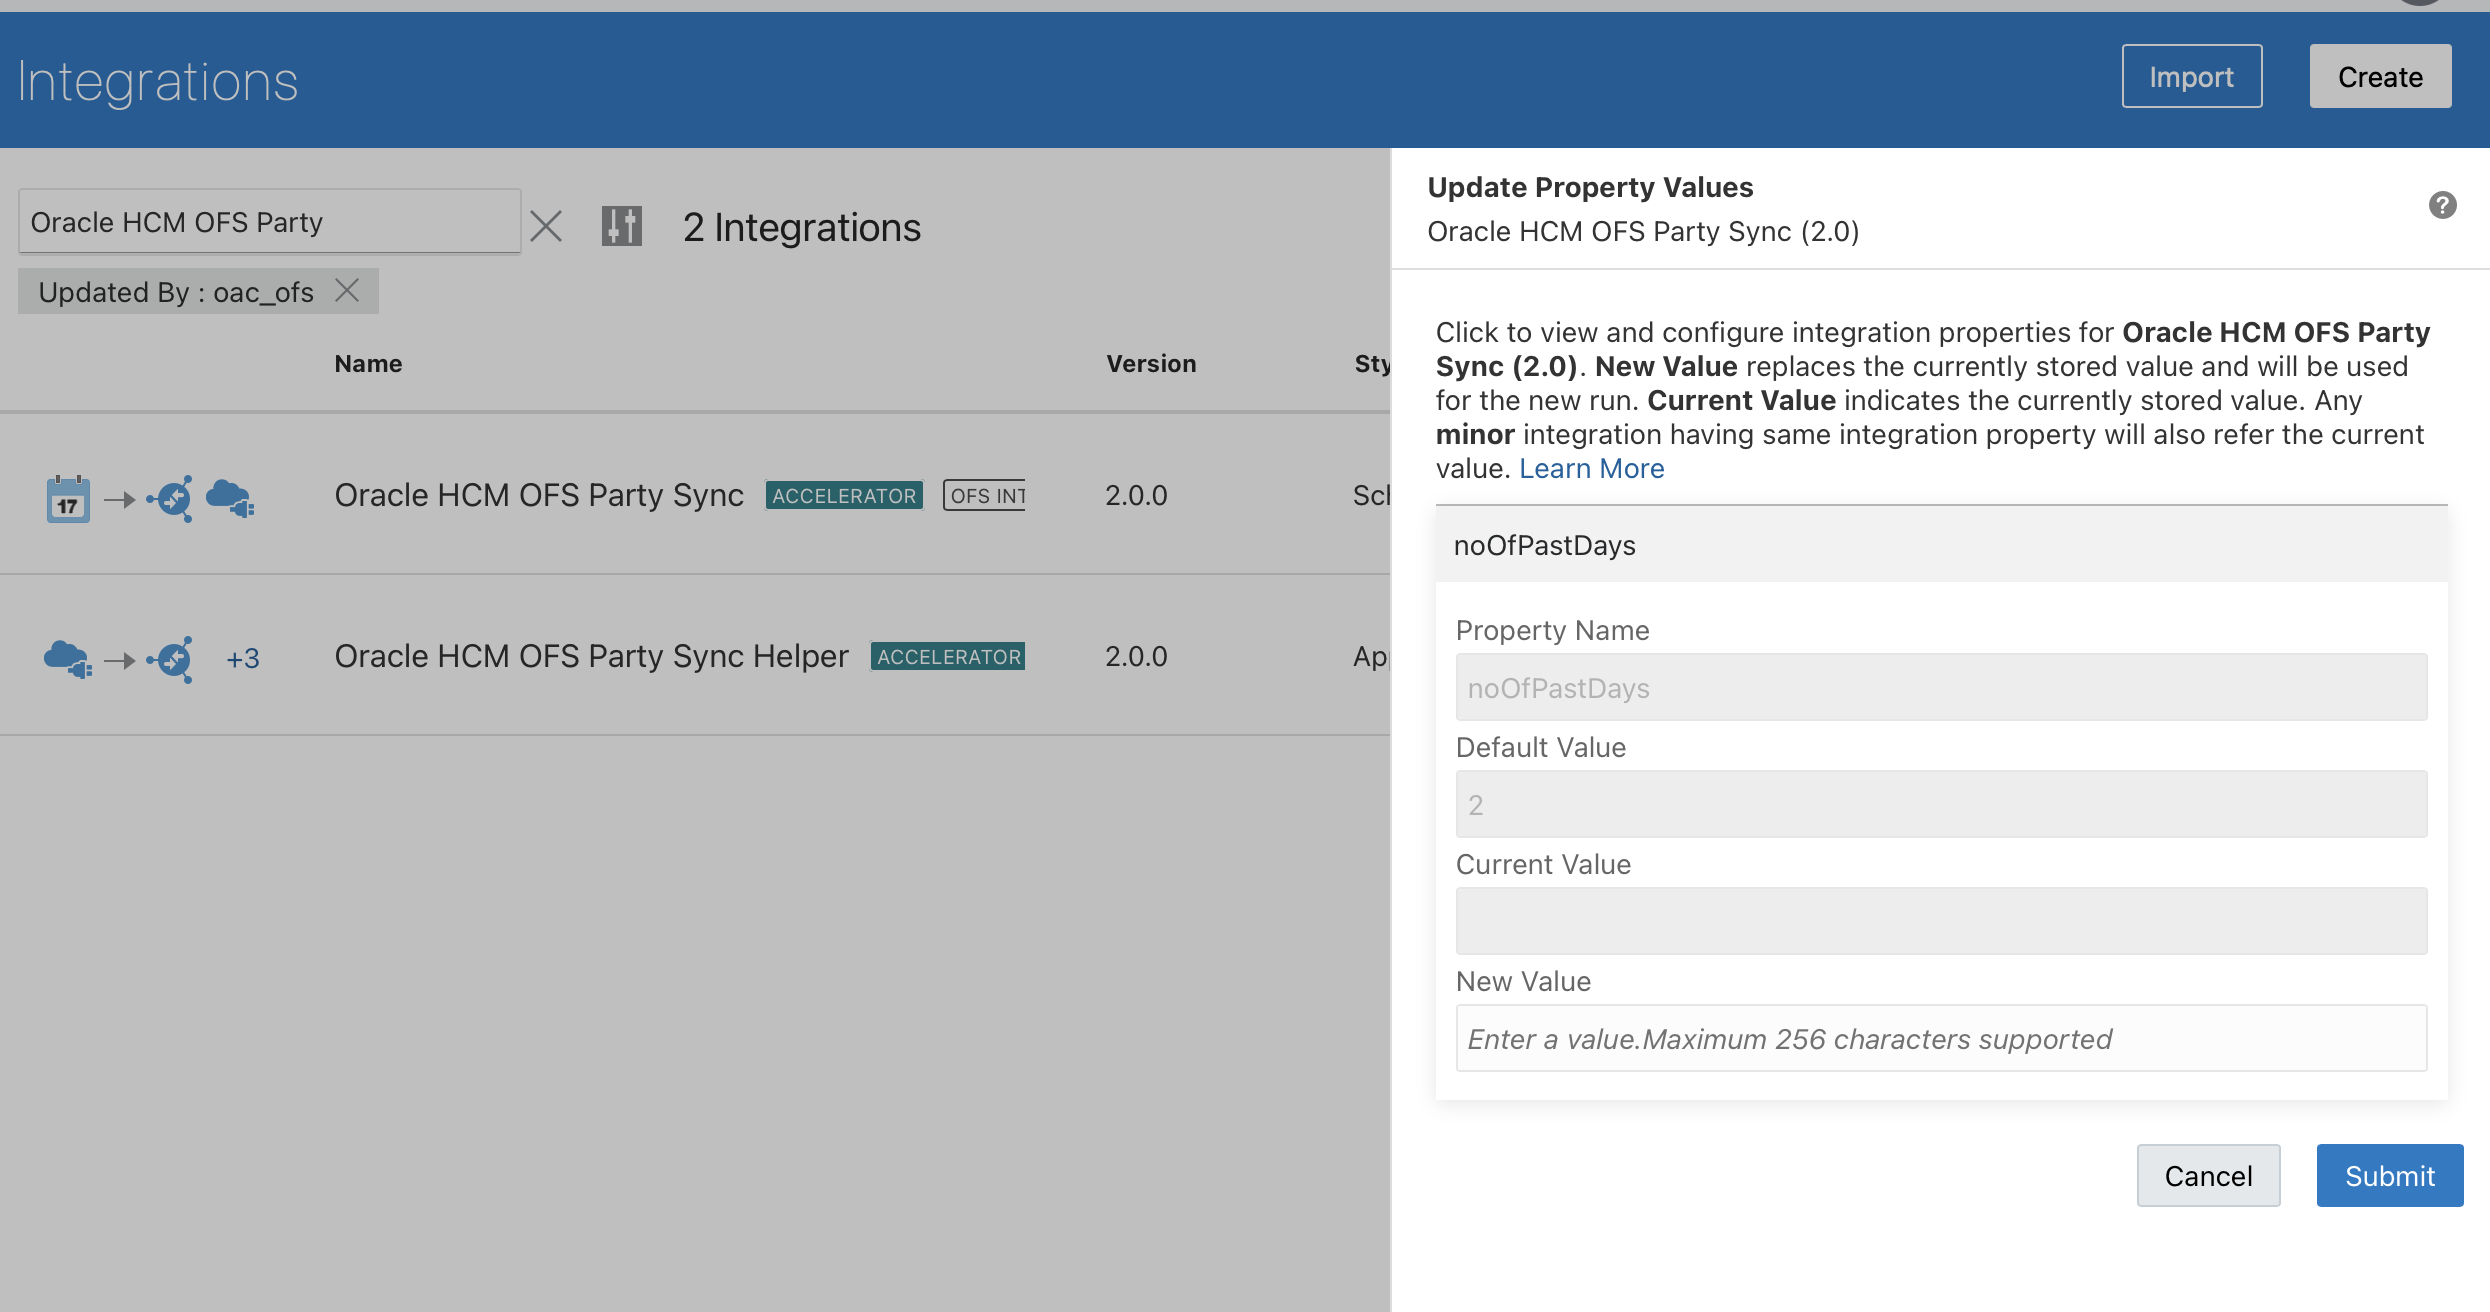
Creation of custom property in OFS - HCM_Person_Id
The accelerator uses the following administrator-defined property in Oracle Field Service as a prerequisite.
Prerequisite for Creating a Custom Property
| Property Name | Property Label | Property Type | Entity | GUI |
|---|---|---|---|---|
| HCM Person Id |
HCM_Person_Id |
String |
Resource |
Text Element |
Details on how to create a property is mentioned here: Create a File Property.
NOTE: The property label and type must be exact or the integration flows will error out when trying to activate due to mapping to a property that doesn't exist.
Connection Configuration
Go to the Connections page by navigating to Integrations > Connections from the home page through the navigation sidebar. You will see the list of connections used by the accelerator as well as any other existing integrations in your Oracle Integration instance.
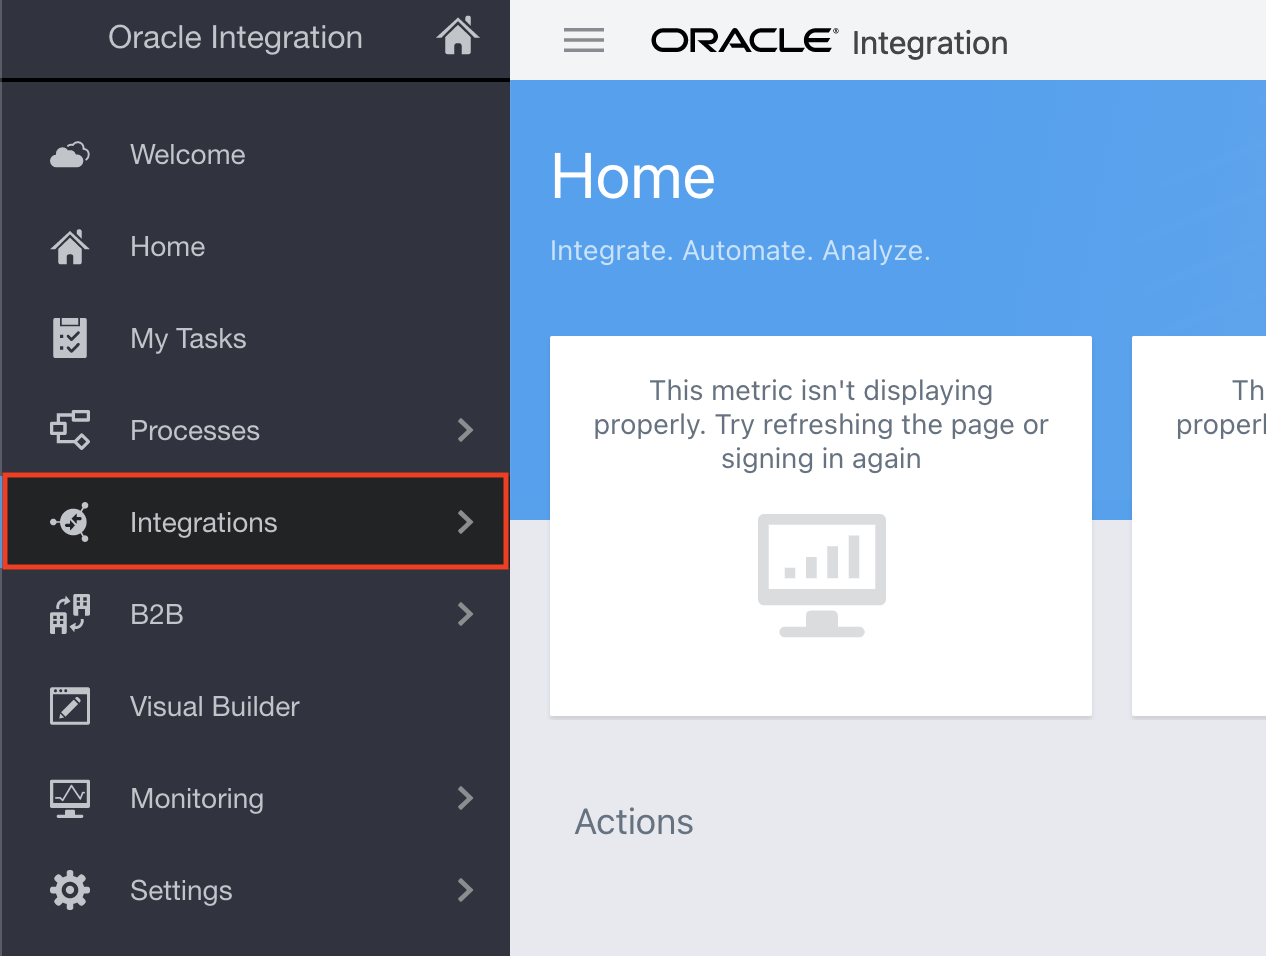
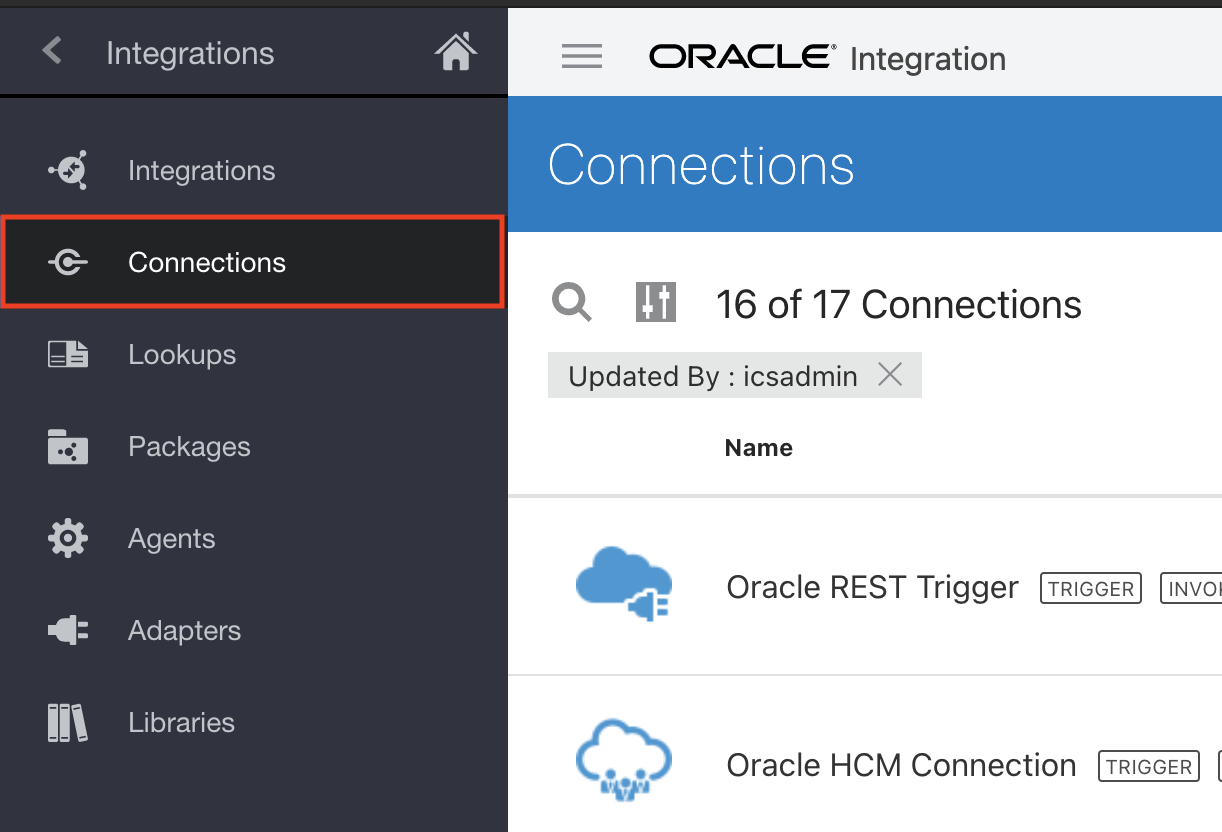
Click the Connection Name - Oracle REST Trigger and configure the connection by following steps 1-5 in the image.
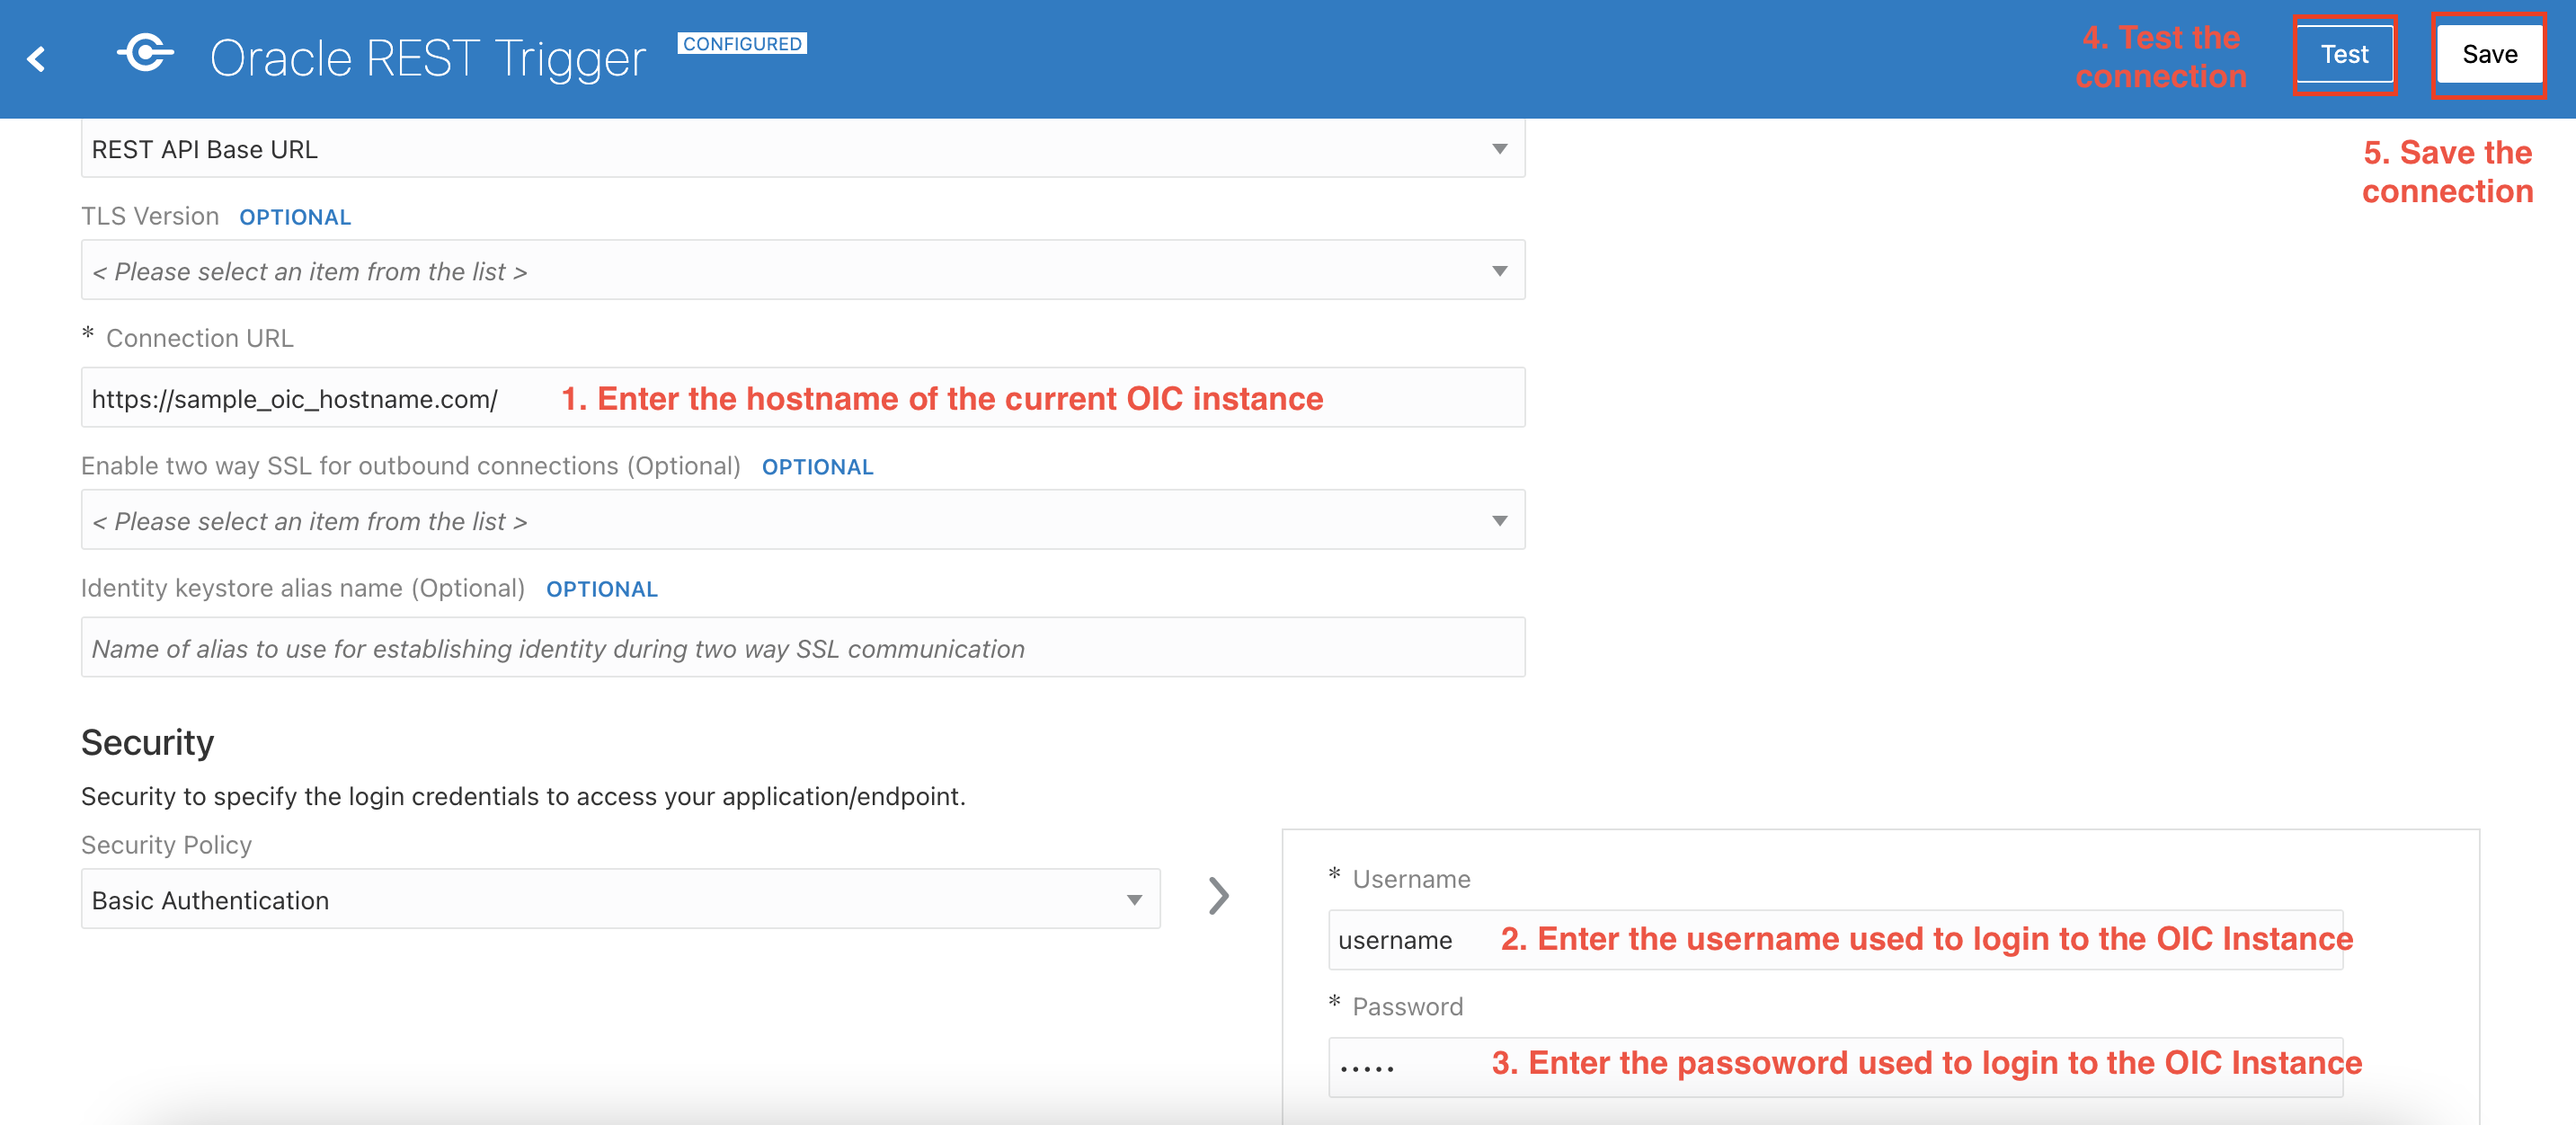
Click the Connection Name - Oracle HCM Cloud Adapter Connection and configure the connection by following steps 1-5 in the image.
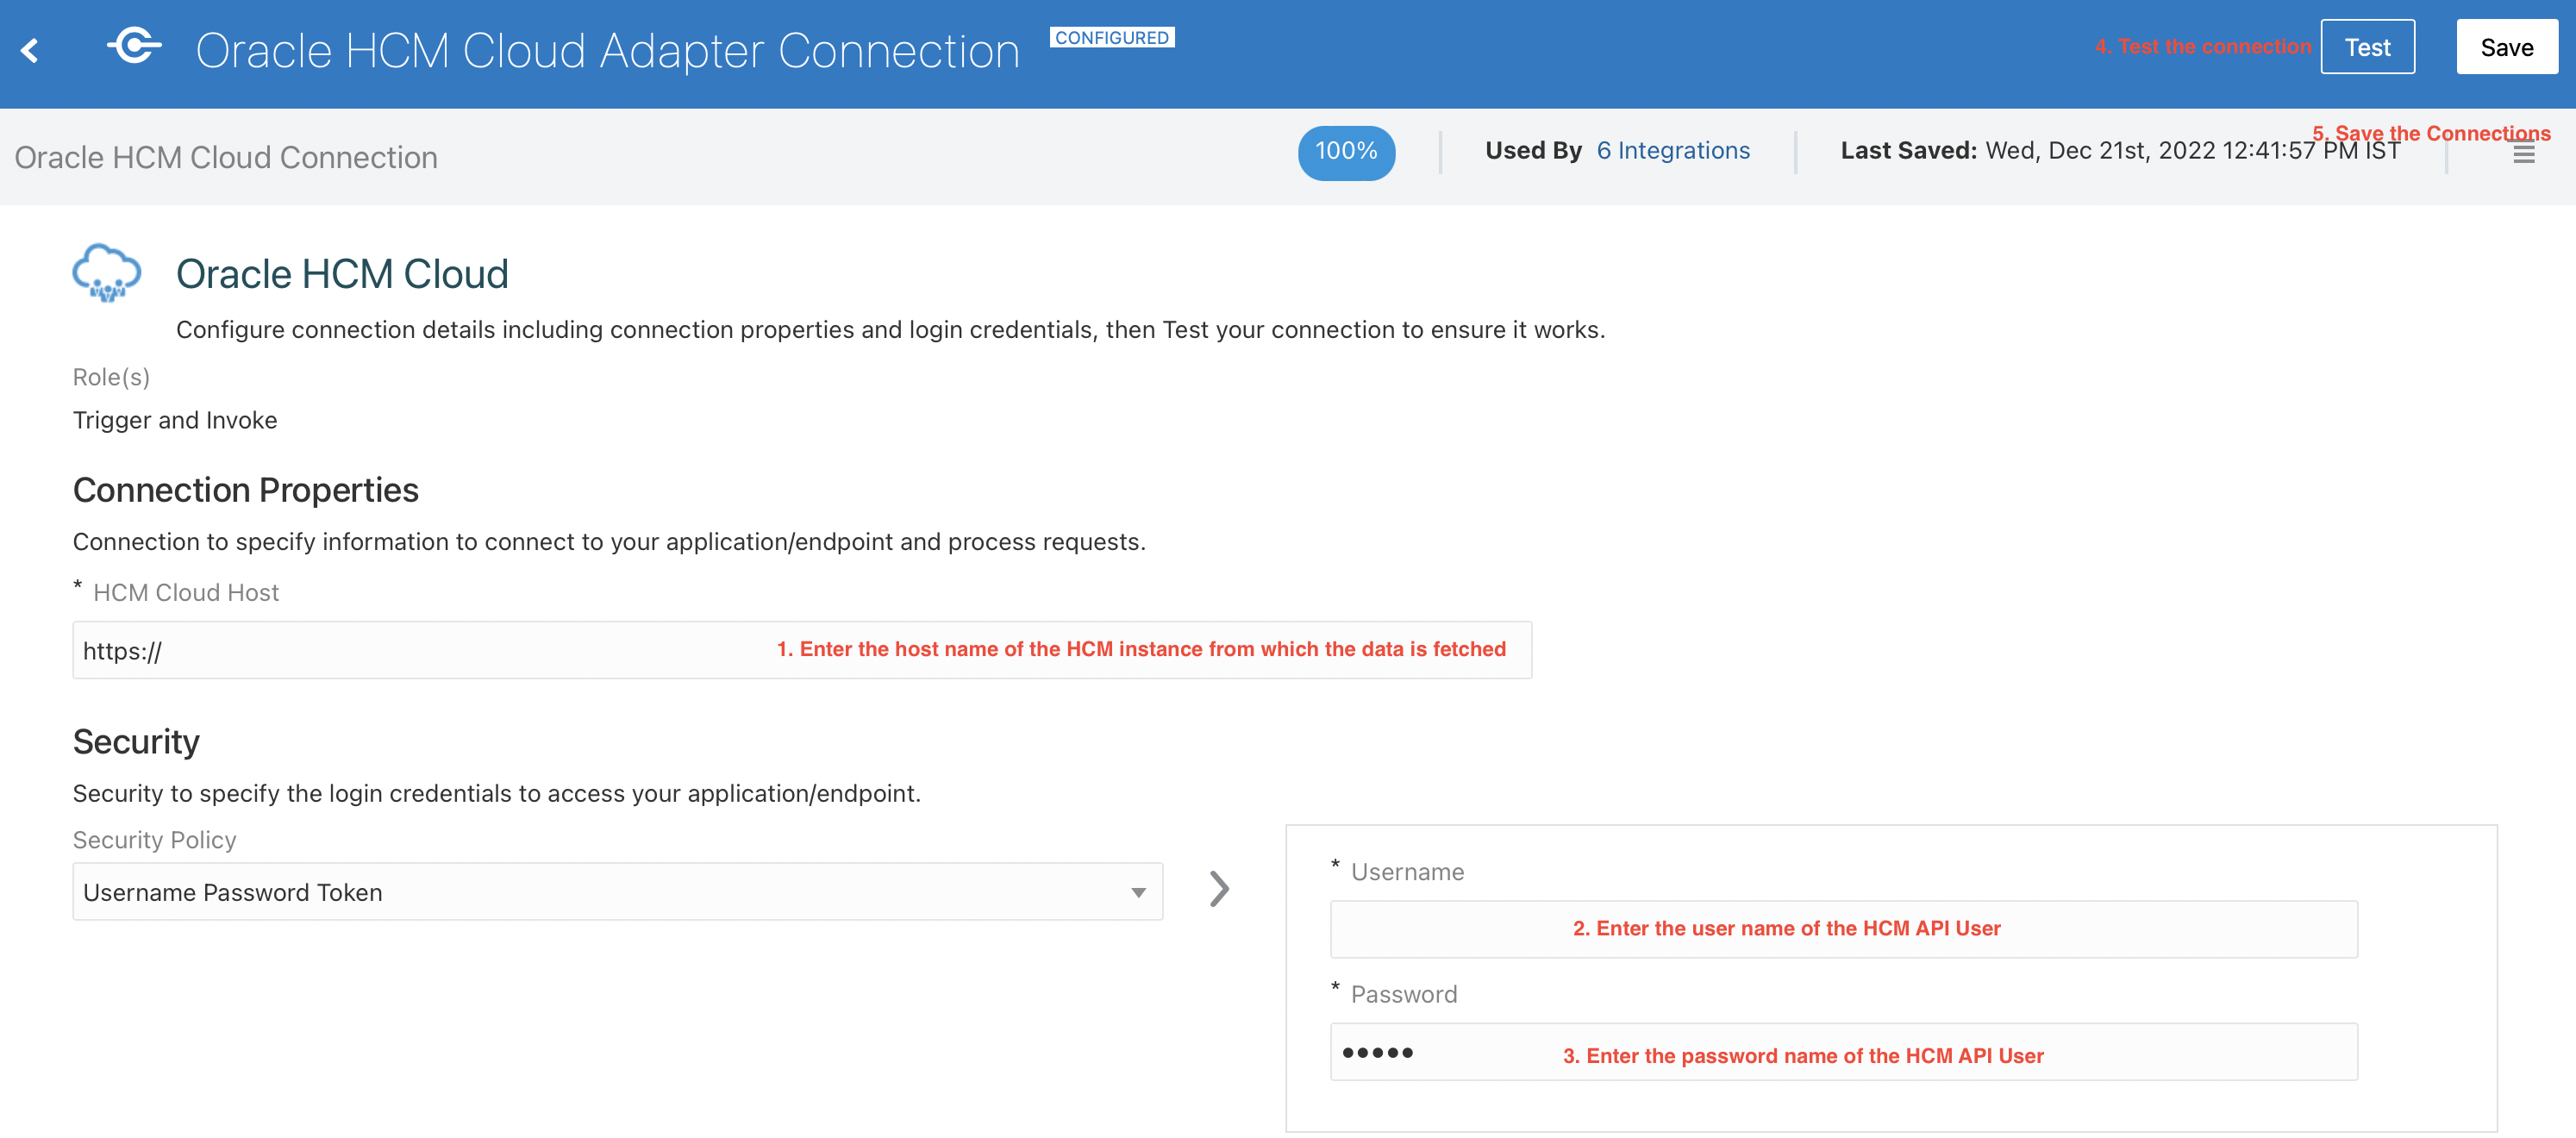
Click the Connection Name - Oracle Field Service Connection and configure the connection by following steps 1-6 in the image.
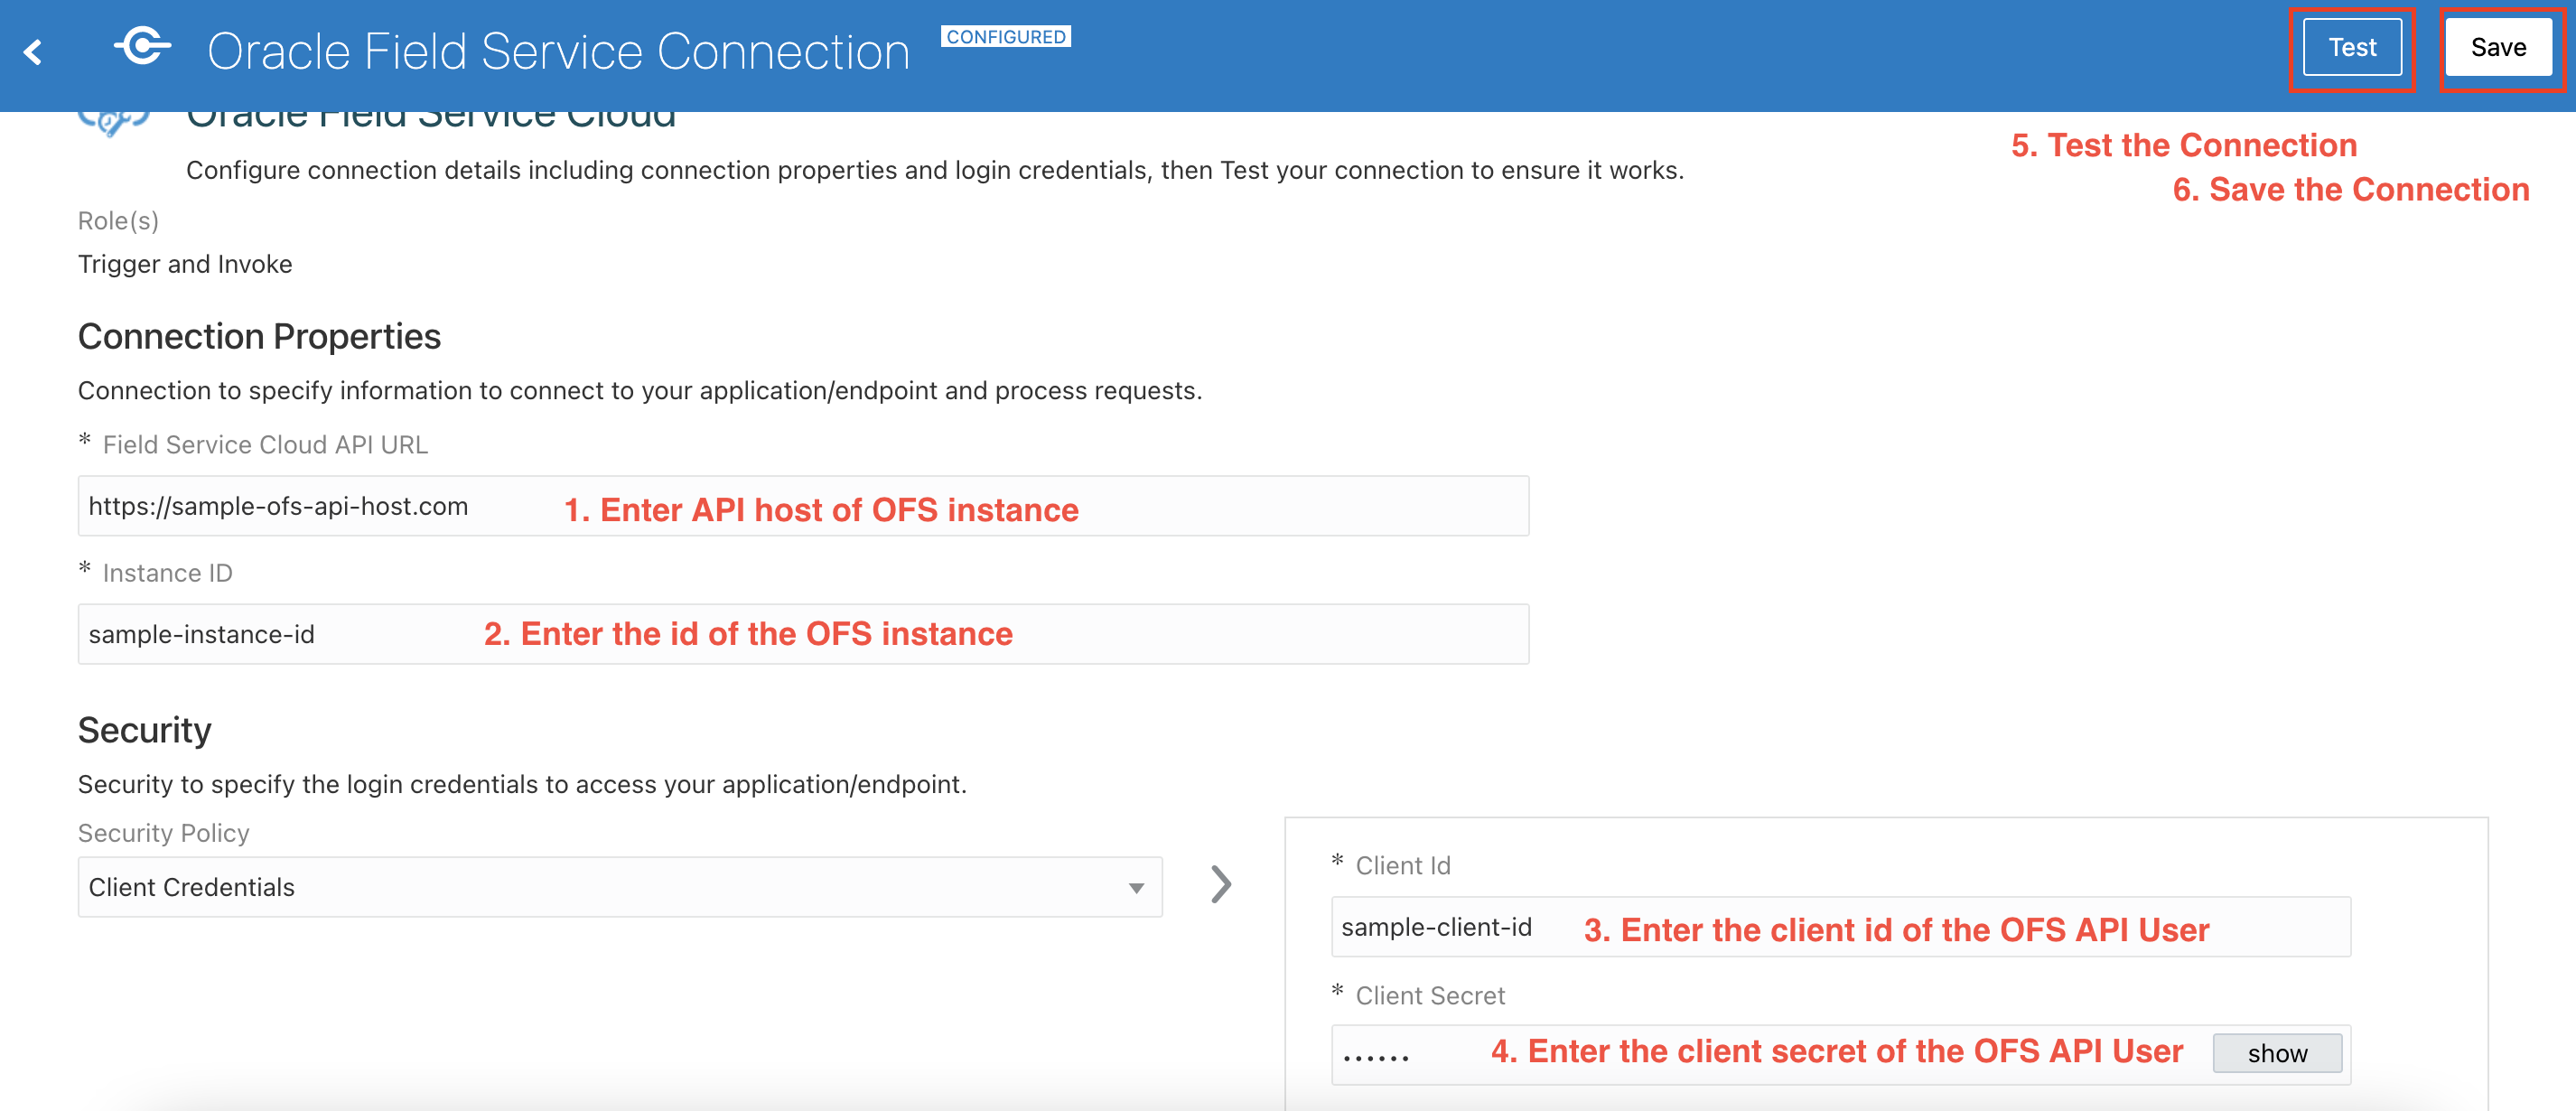
Click the Connection Name - Oracle Rest HCM Connection and configure the connection by following steps 1-5 in the image.
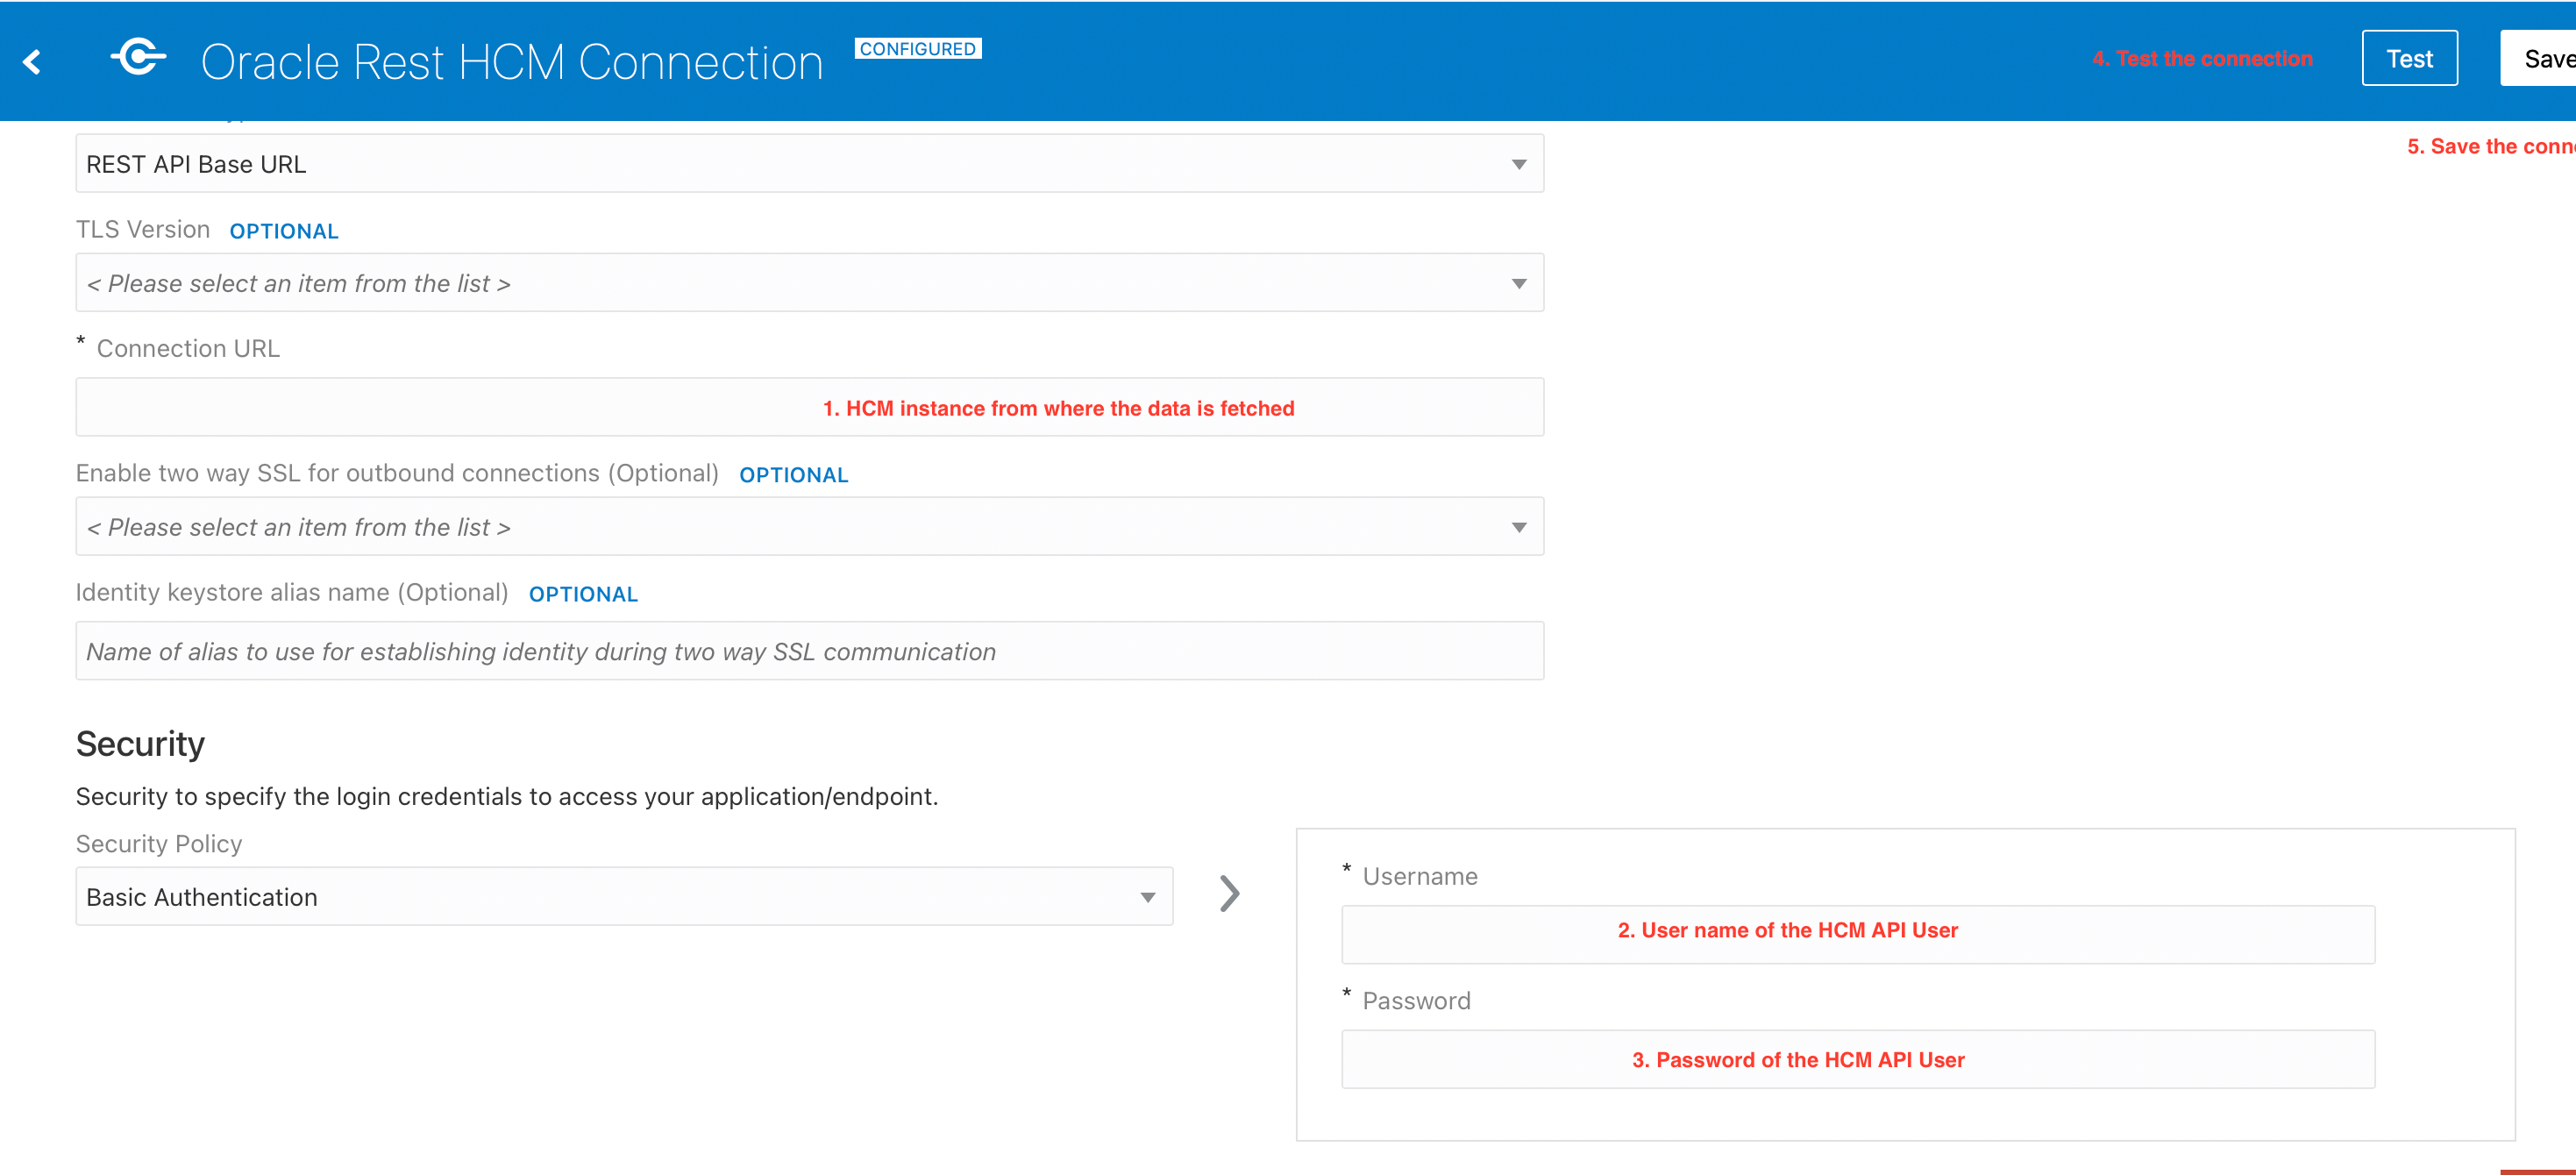
Click the Connection Name - Oracle Rest OFS Connection and configure the connection by following steps 1-5 in the image.

Configuring Integration Variables
You must edit the integration variables lookup based on the Instance Configuration. The "Oracle_HCM_OFS_IntegrationVariablesLookup" contains the following variables:
Integration Variables
| Integration Variable | Sample Value | Purpose |
|---|---|---|
| HCM_BusinessUnitName |
Supremo US Business Unit |
The business unit used to filter out the employees. Supports multiple business units separated by commas. |
| HCM_JobCode |
JOB0001 |
The job code used to filter out the technicians. Supports multiple job codes separated by commas. |
| OFS_Timezone |
Eastern |
TimeZone value from OFS that needs to be associated with the resources. (e.g. "America/New_York"). |
| OFS_OrganisationTypeLabel |
OU |
The organization type. |
| OFS_OrganisationID |
SUNRISE |
Resource ID of the legal entity in OFS. |
| OFS_DefaultLanguage |
en |
The default language for the resource. |
| OFS_DefaultActivityType |
ResourceExceptions |
A new activity type will be created if the value configured is not already present in OFS. Resource exceptions and half-day leaves from Oracle HCM Cloud are created as internal activities of type mapped under OFS_DefaultActivityType. |
Setup Configurations for the HCM Extract
Refer to Configure HCM Extract and Submit Extract for details.
Fusion APIs and Usage in Accelerator
The following APIs are used to get data from the Fusion side:
APIs that are used to get data
| Sl. No. | API Name | Security Role | Fields Used from API | Integrations that is Using this API |
|---|---|---|---|---|
| 1 | hubSourceSystemReferences | HZ_VIEW_TRADING_COMMUNITY_PERSON_PRIV HZ_VIEW_TRADING_COMMUNITY_ORGANIZATION_PRIV |
|
Oracle HCM OFS Party Sync Oracle HCM OFS Extract Helper Oracle HCM OFS AtomFeed Helper Oracle HCM OFS Worker Availability Helper |
| 2 | publicWorker | ORA_PER_REST_SERVICE_ACCESS_PUBLIC_WORKERS_RO |
|
Oracle HCM OFS Party Sync Oracle HCM OFS Extract Helper Oracle HCM OFS AtomFeed Helper Oracle HCM OFS Worker Availability |
| 3 | worker | PER_REST_SERVICE_ACCESS_WORKERS_RO_PRIV |
|
Oracle HCM OFS Party Sync Oracle HCM OFS AtomFeed Helper |
| 4 | workerAvailability | function privilege - Use REST Service - Worker Availability Read Only - ANC_REST_SERVICE_ACCESS_WORKER_AVAILABILITY_RO Data privilege - View Worker Availability Data - ANC_VIEW_WORKER_AVAILABILITY_DATA New role 'Use REST Service - Worker Availability Read Only' - this will get a new DSP and privilege grant - at ASSIGNMENT level The role is granted to Human Capital Management Integration Specialist. |
|
Oracle HCM OFS Worker Availability Helper |
Troubleshooting Steps for Oracle Integration Flows
The following section describes how to activate and/or schedule different flows within Oracle Integration.
Oracle HCM OFS Employee Extract
- Make sure the following Integrations are activated - Oracle HCM OFS Employee Extract, Oracle HCM OFS Extract Helper and Oracle HCM OFS Employee Sync Helper.
- Submit the extract from Oracle HCM Cloud. Make sure there is at least one submitted extract result available for the extract - HCM_EmployeeExtract.
- Submit the Integration from Oracle Integration. Click on the Submit Button > Submit.
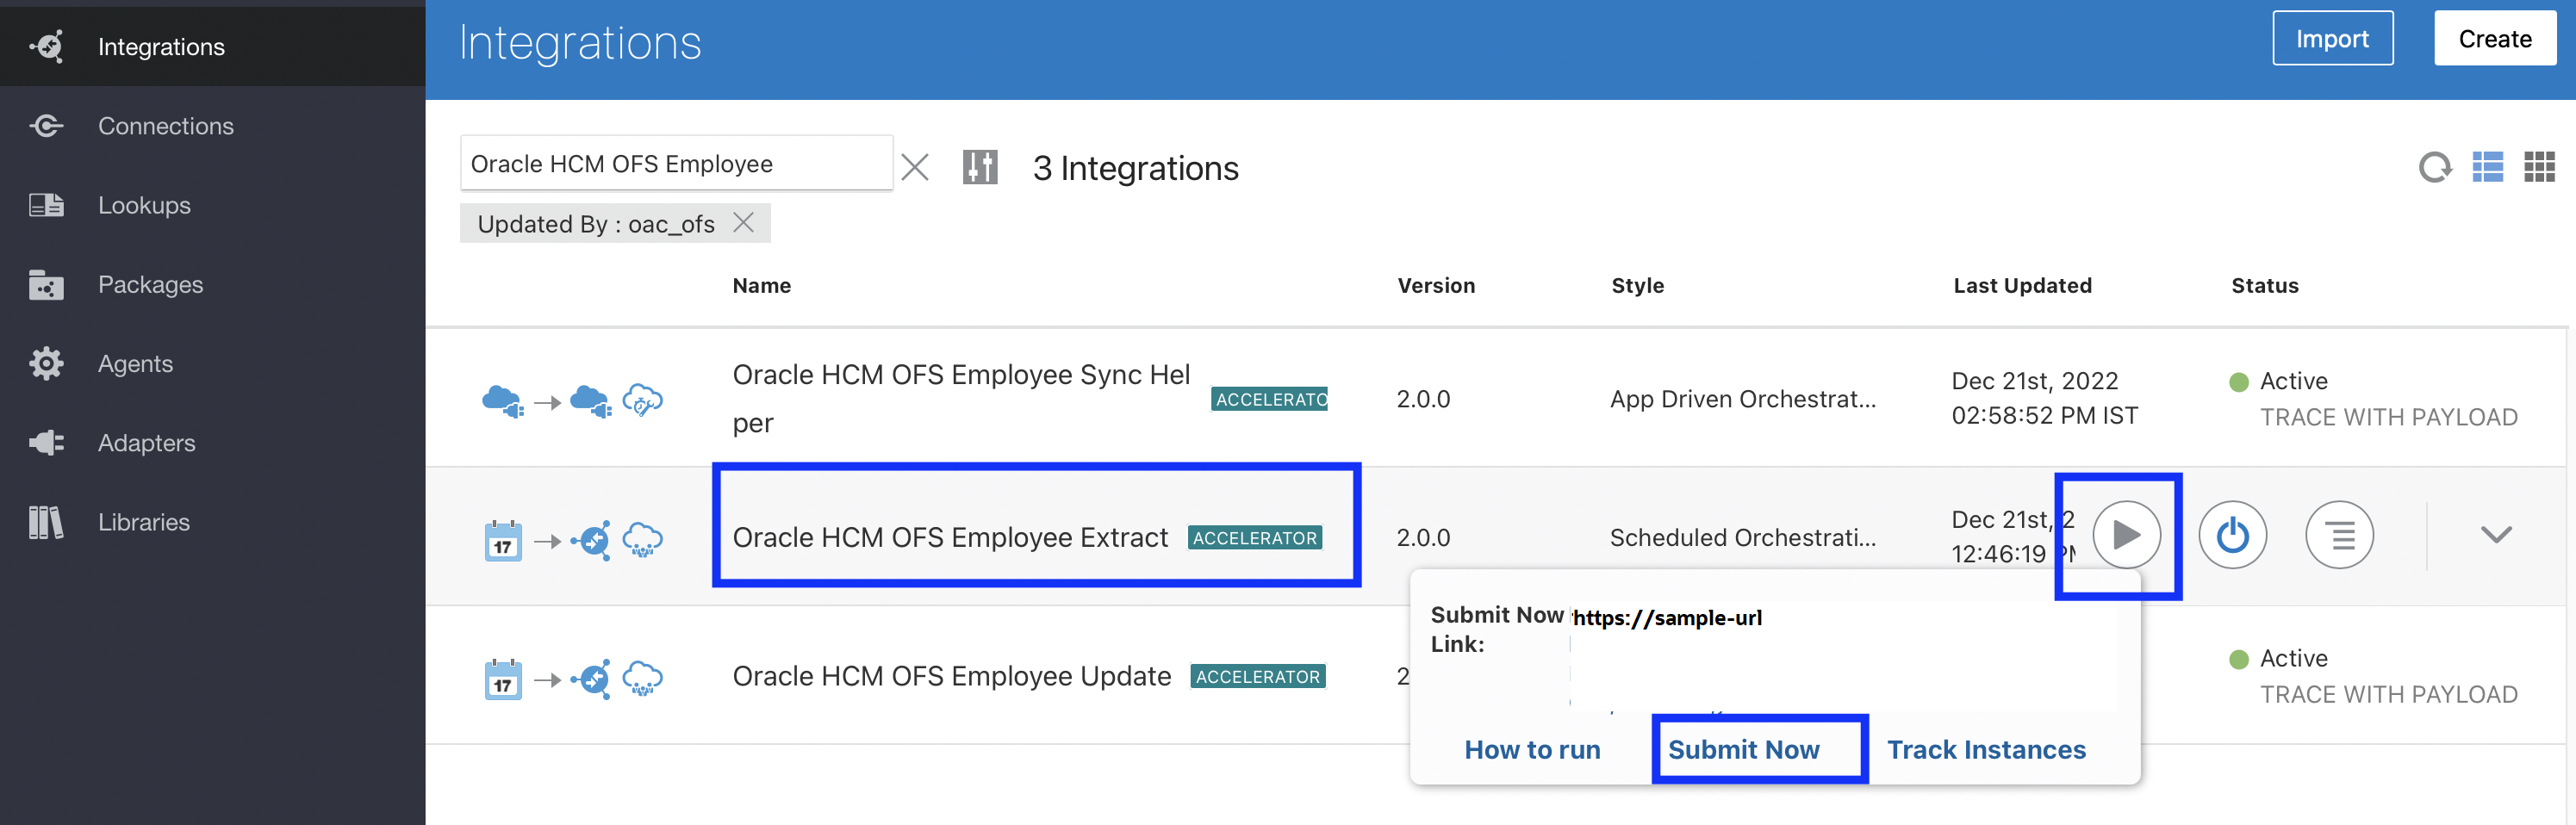
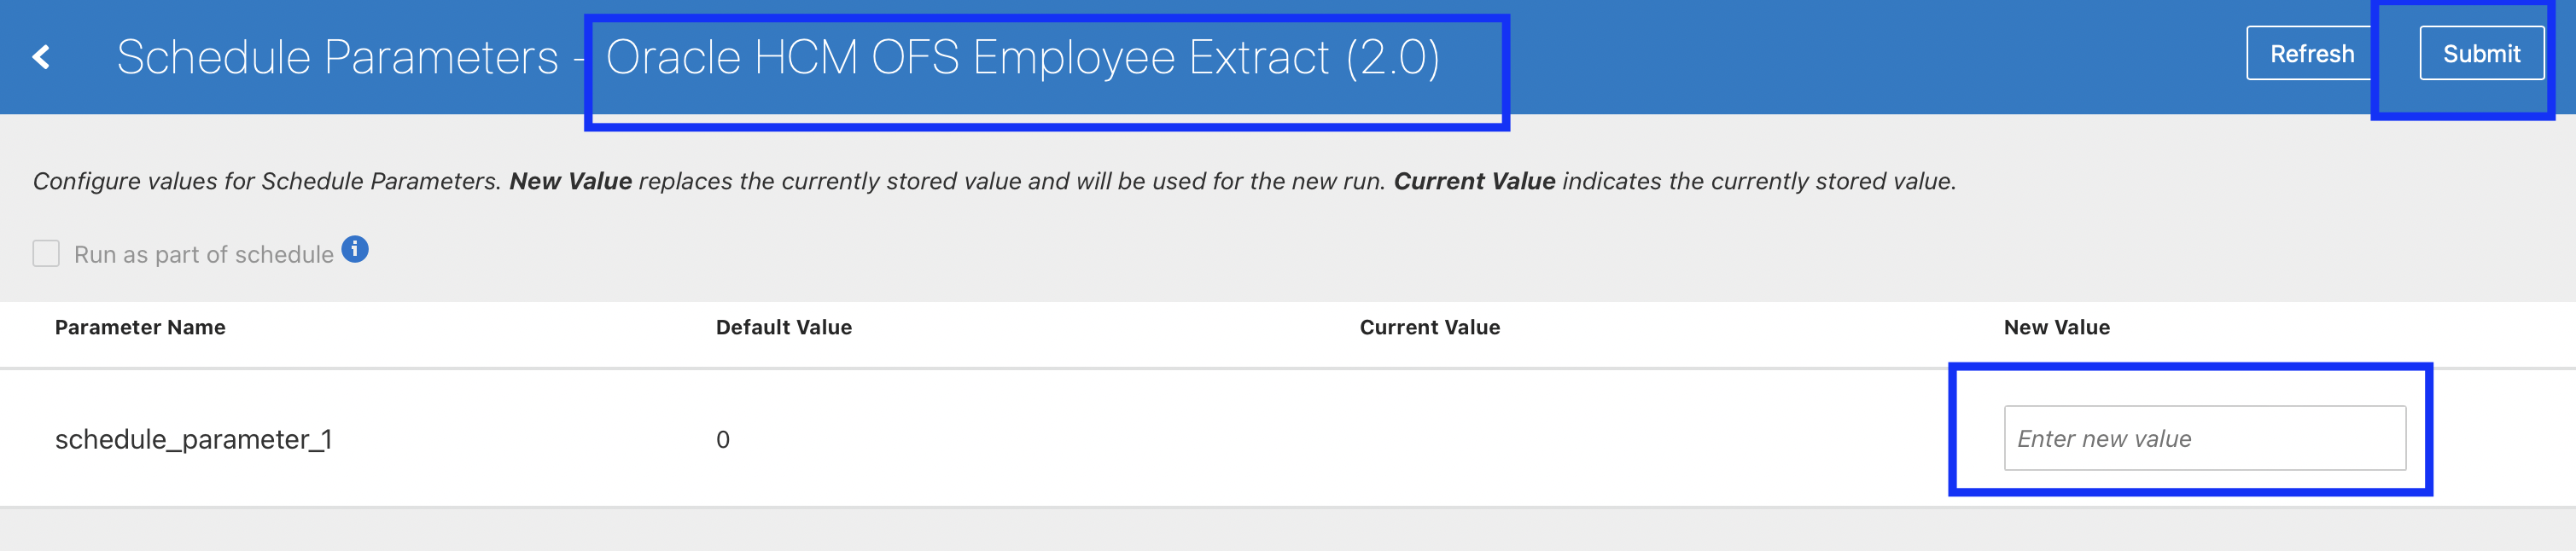
How to verify this integration flow
The employee with matching filter criteria from the extract will be created in Oracle Field Service under the corresponding organization unit and department.
HCM Data with Filter Criteria: (My Client Groups > Person Management)
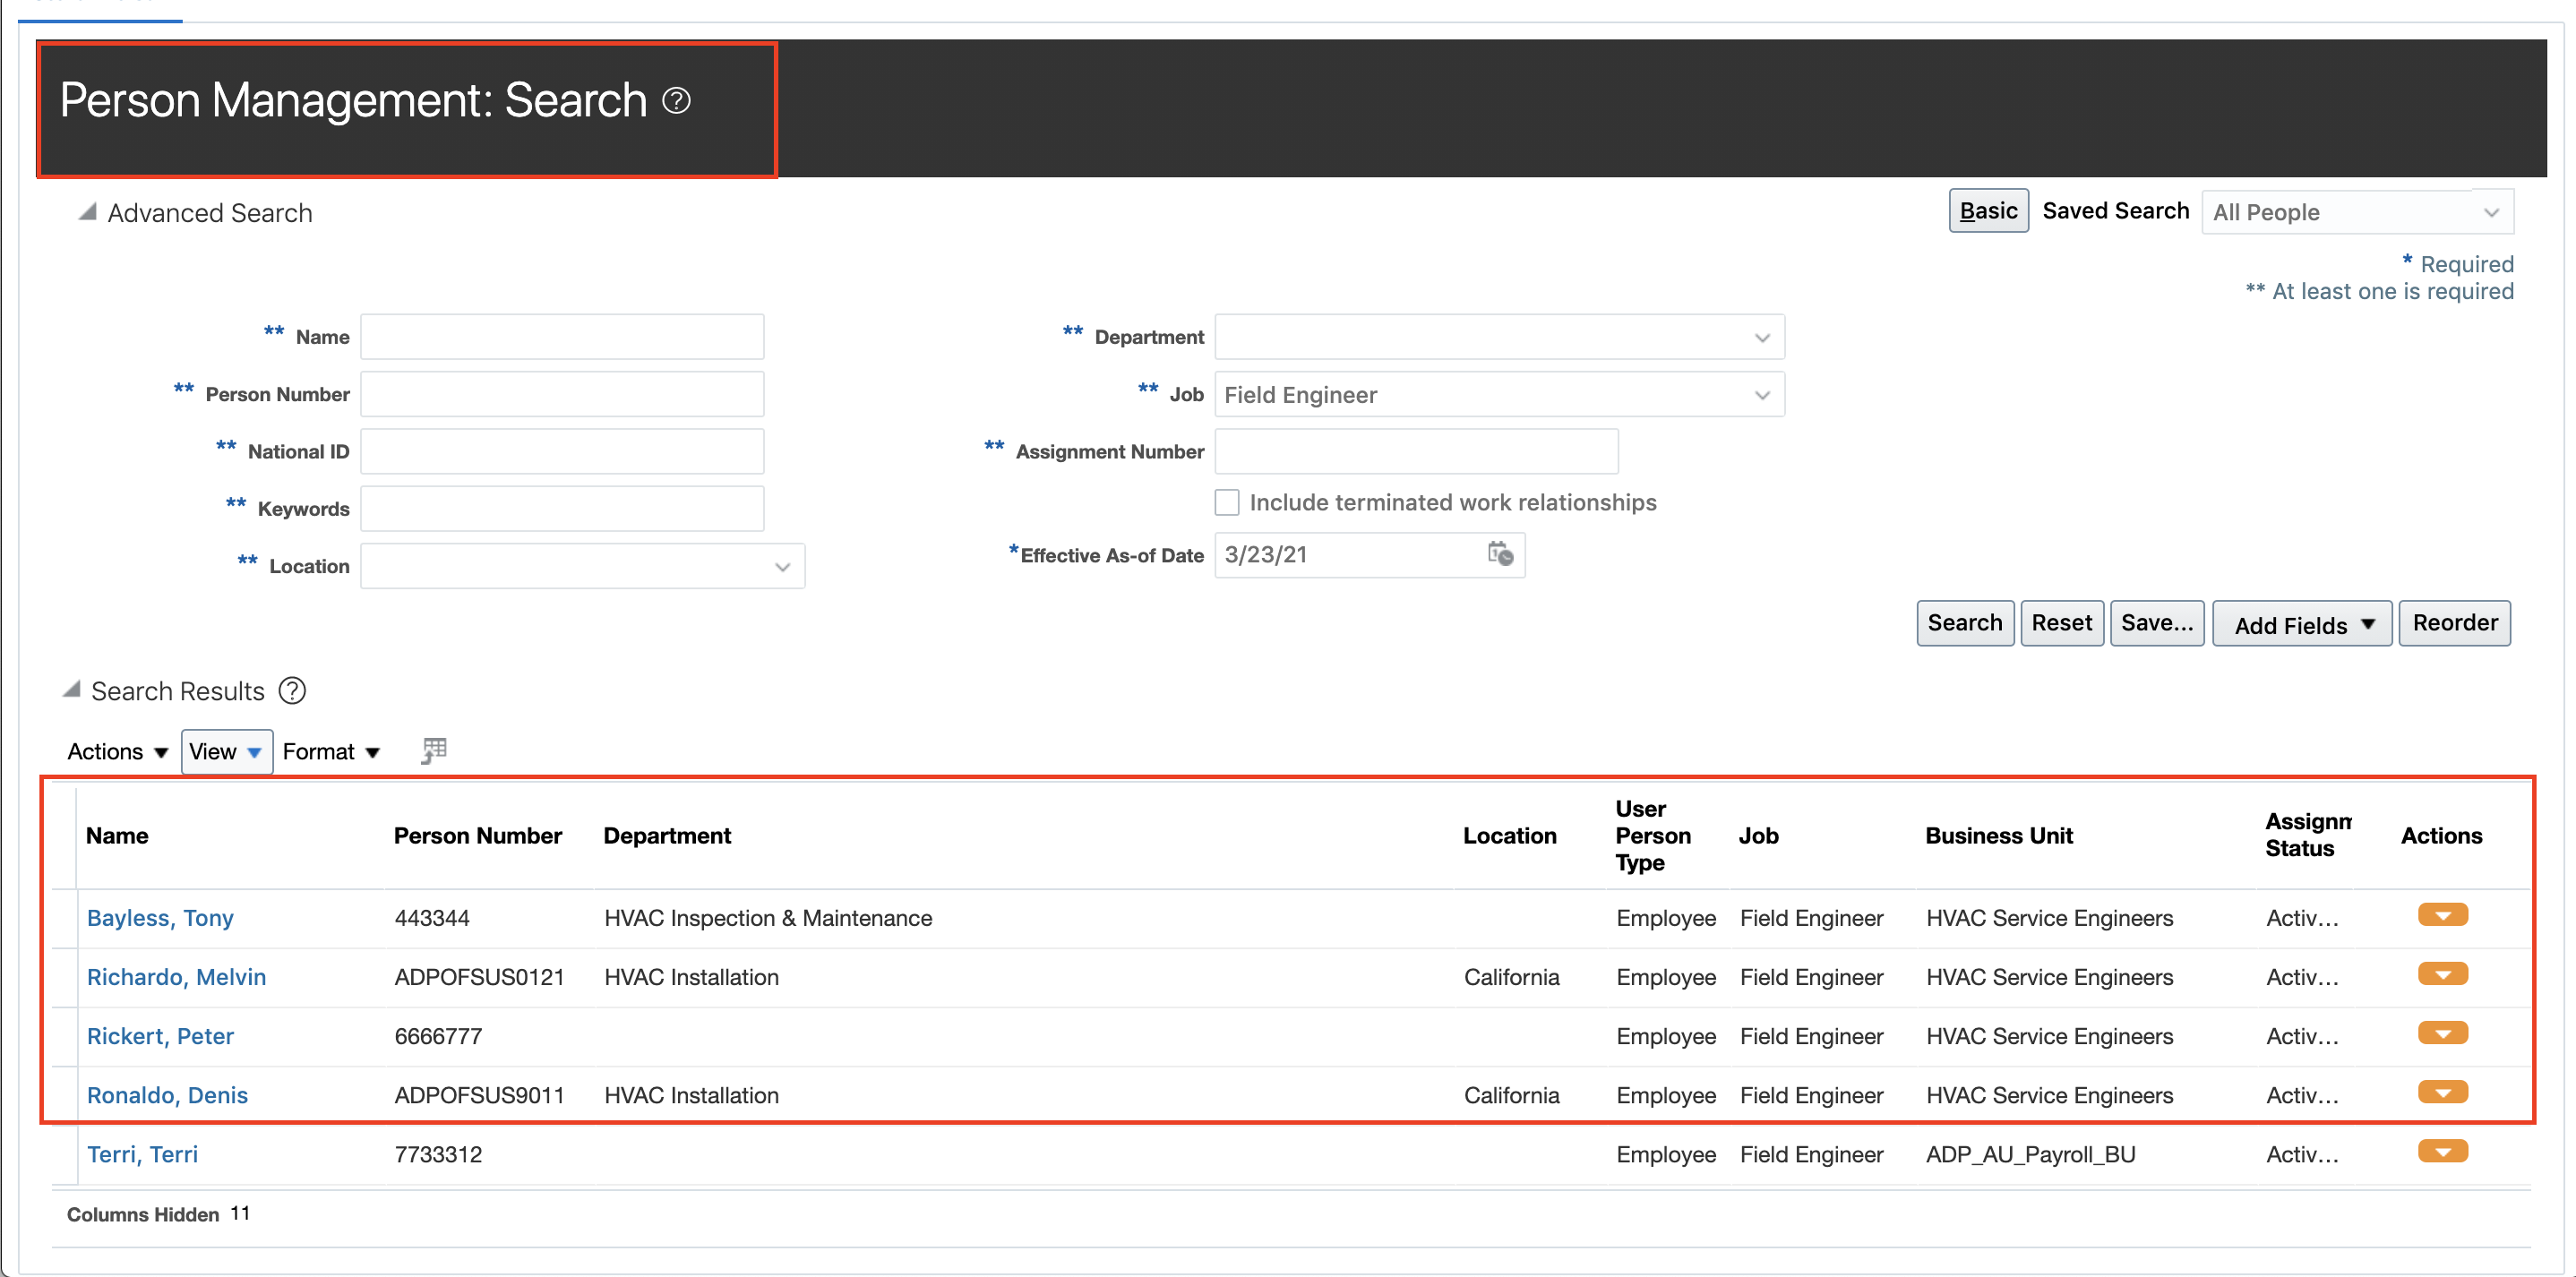
Oracle Field Service instance - Dispatch Console - resource details updated
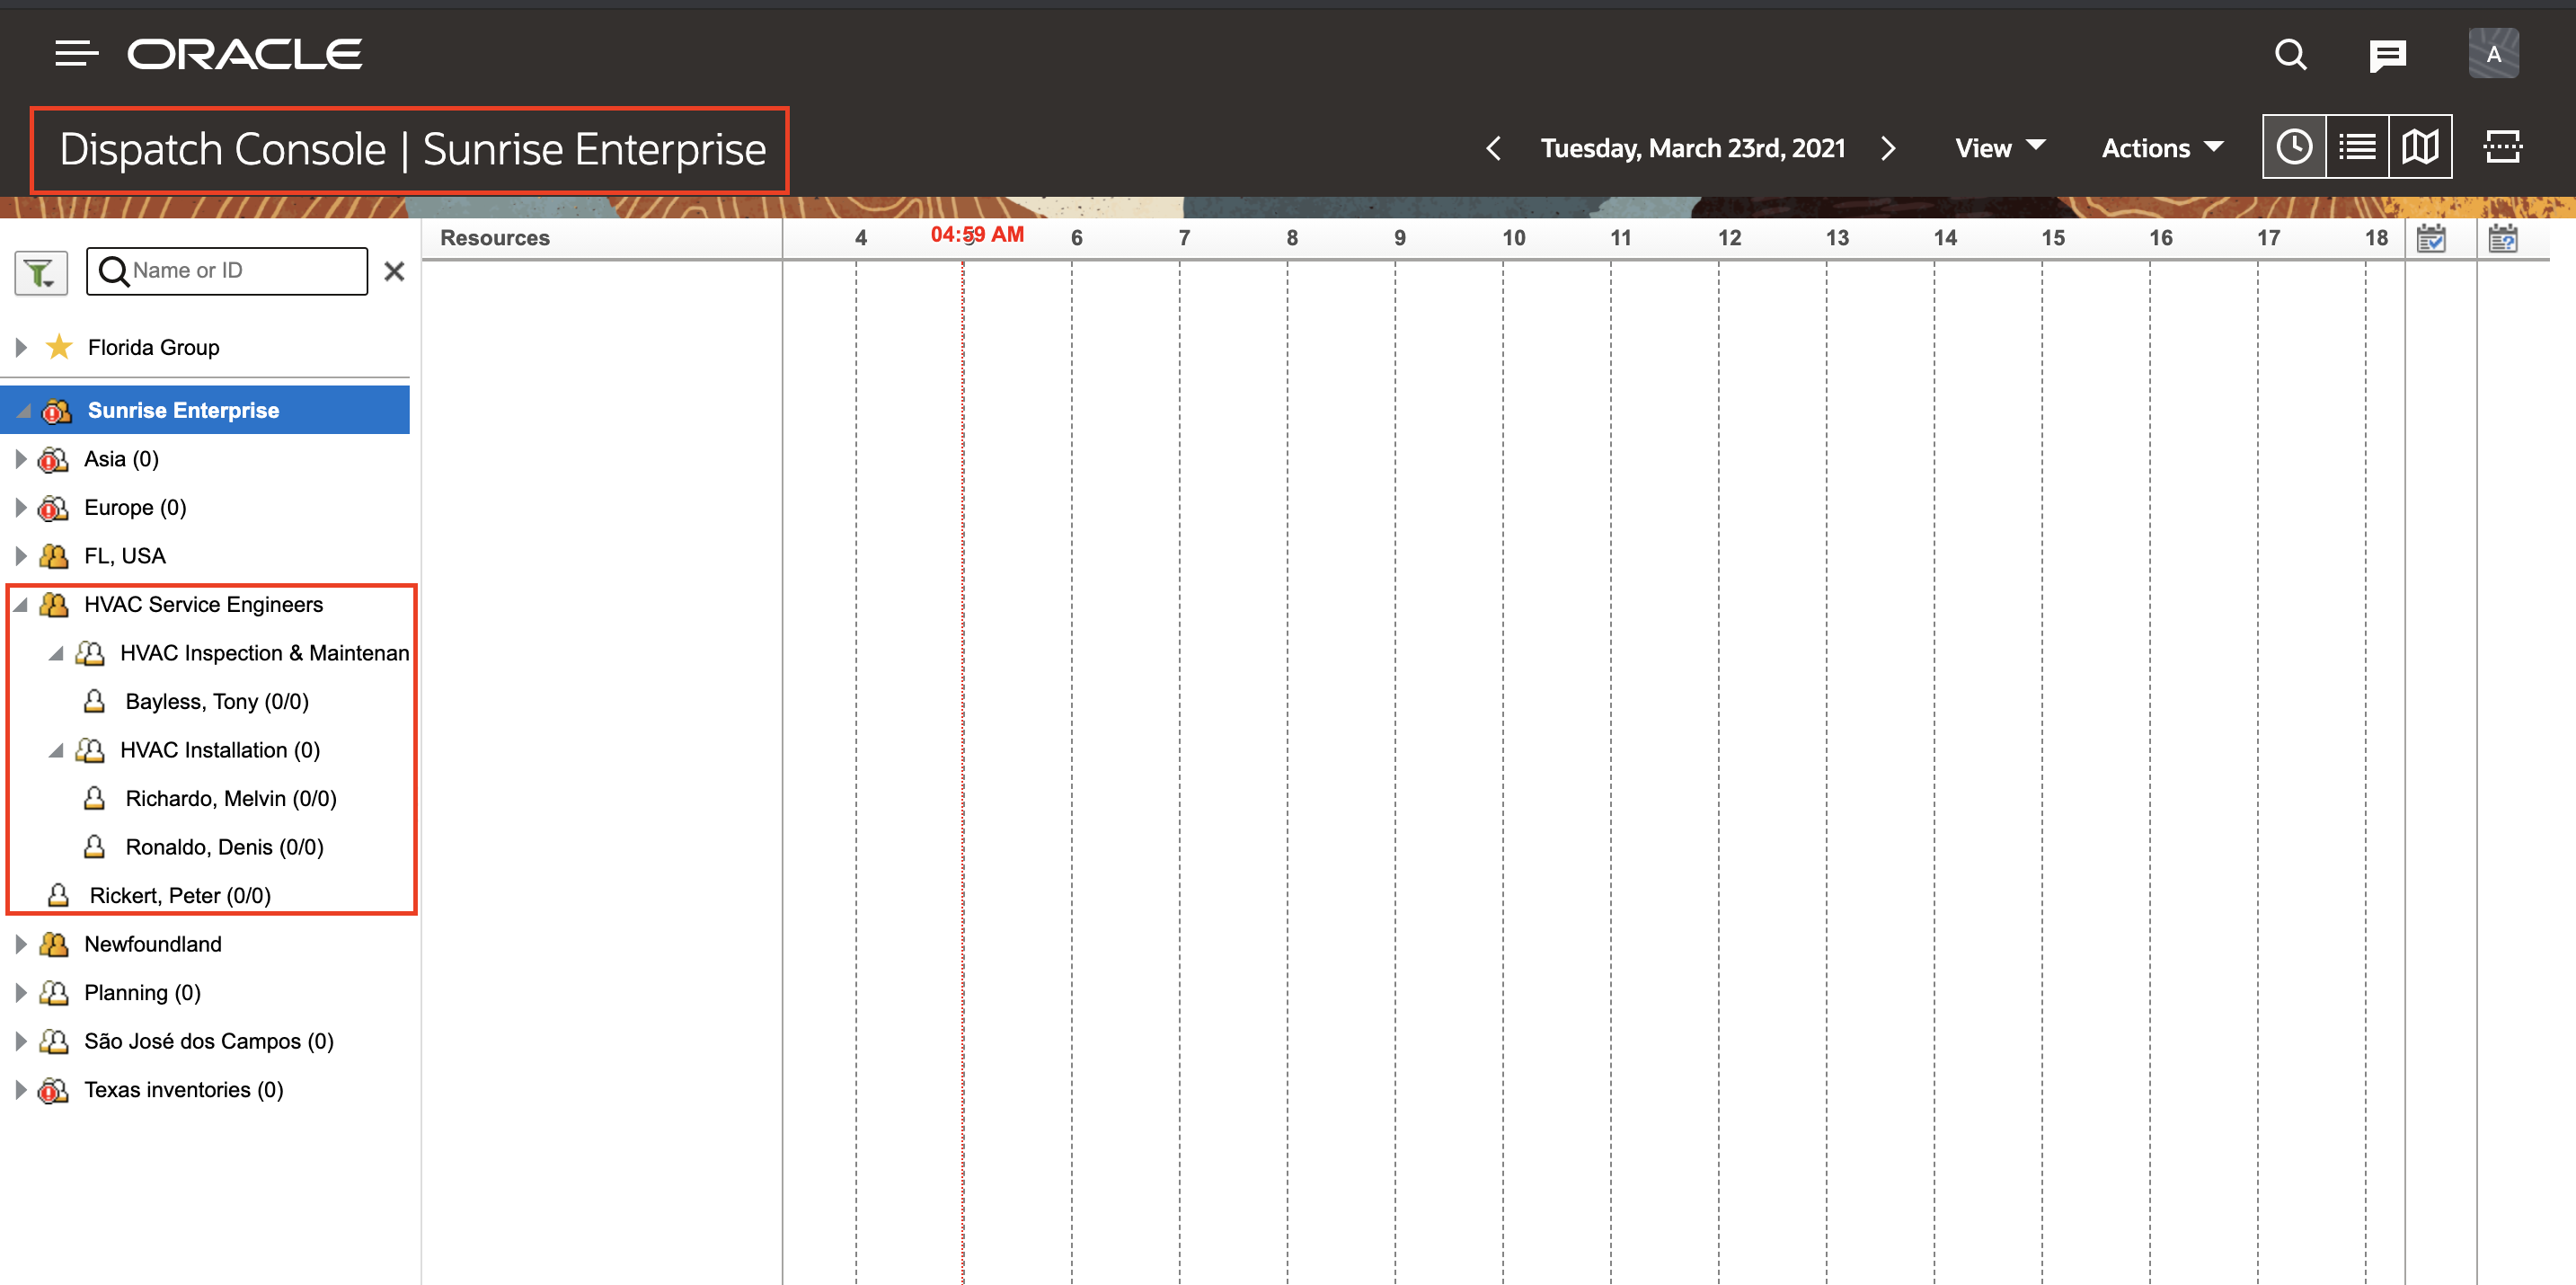
Oracle HCM OFS Party Sync
- Make sure the following integrations are activated - Oracle HCM OFS Employee Sync Helper, Oracle HCM OFS Party Sync Helper and Oracle HCM OFS Party Sync
- Schedule the Integration. Click Integrations > Actions button next to the integration - Oracle HCM OFS Party Sync > Add Schedule menu > Enter the schedule details like Frequency, Start Date, End Date and TimeZone.
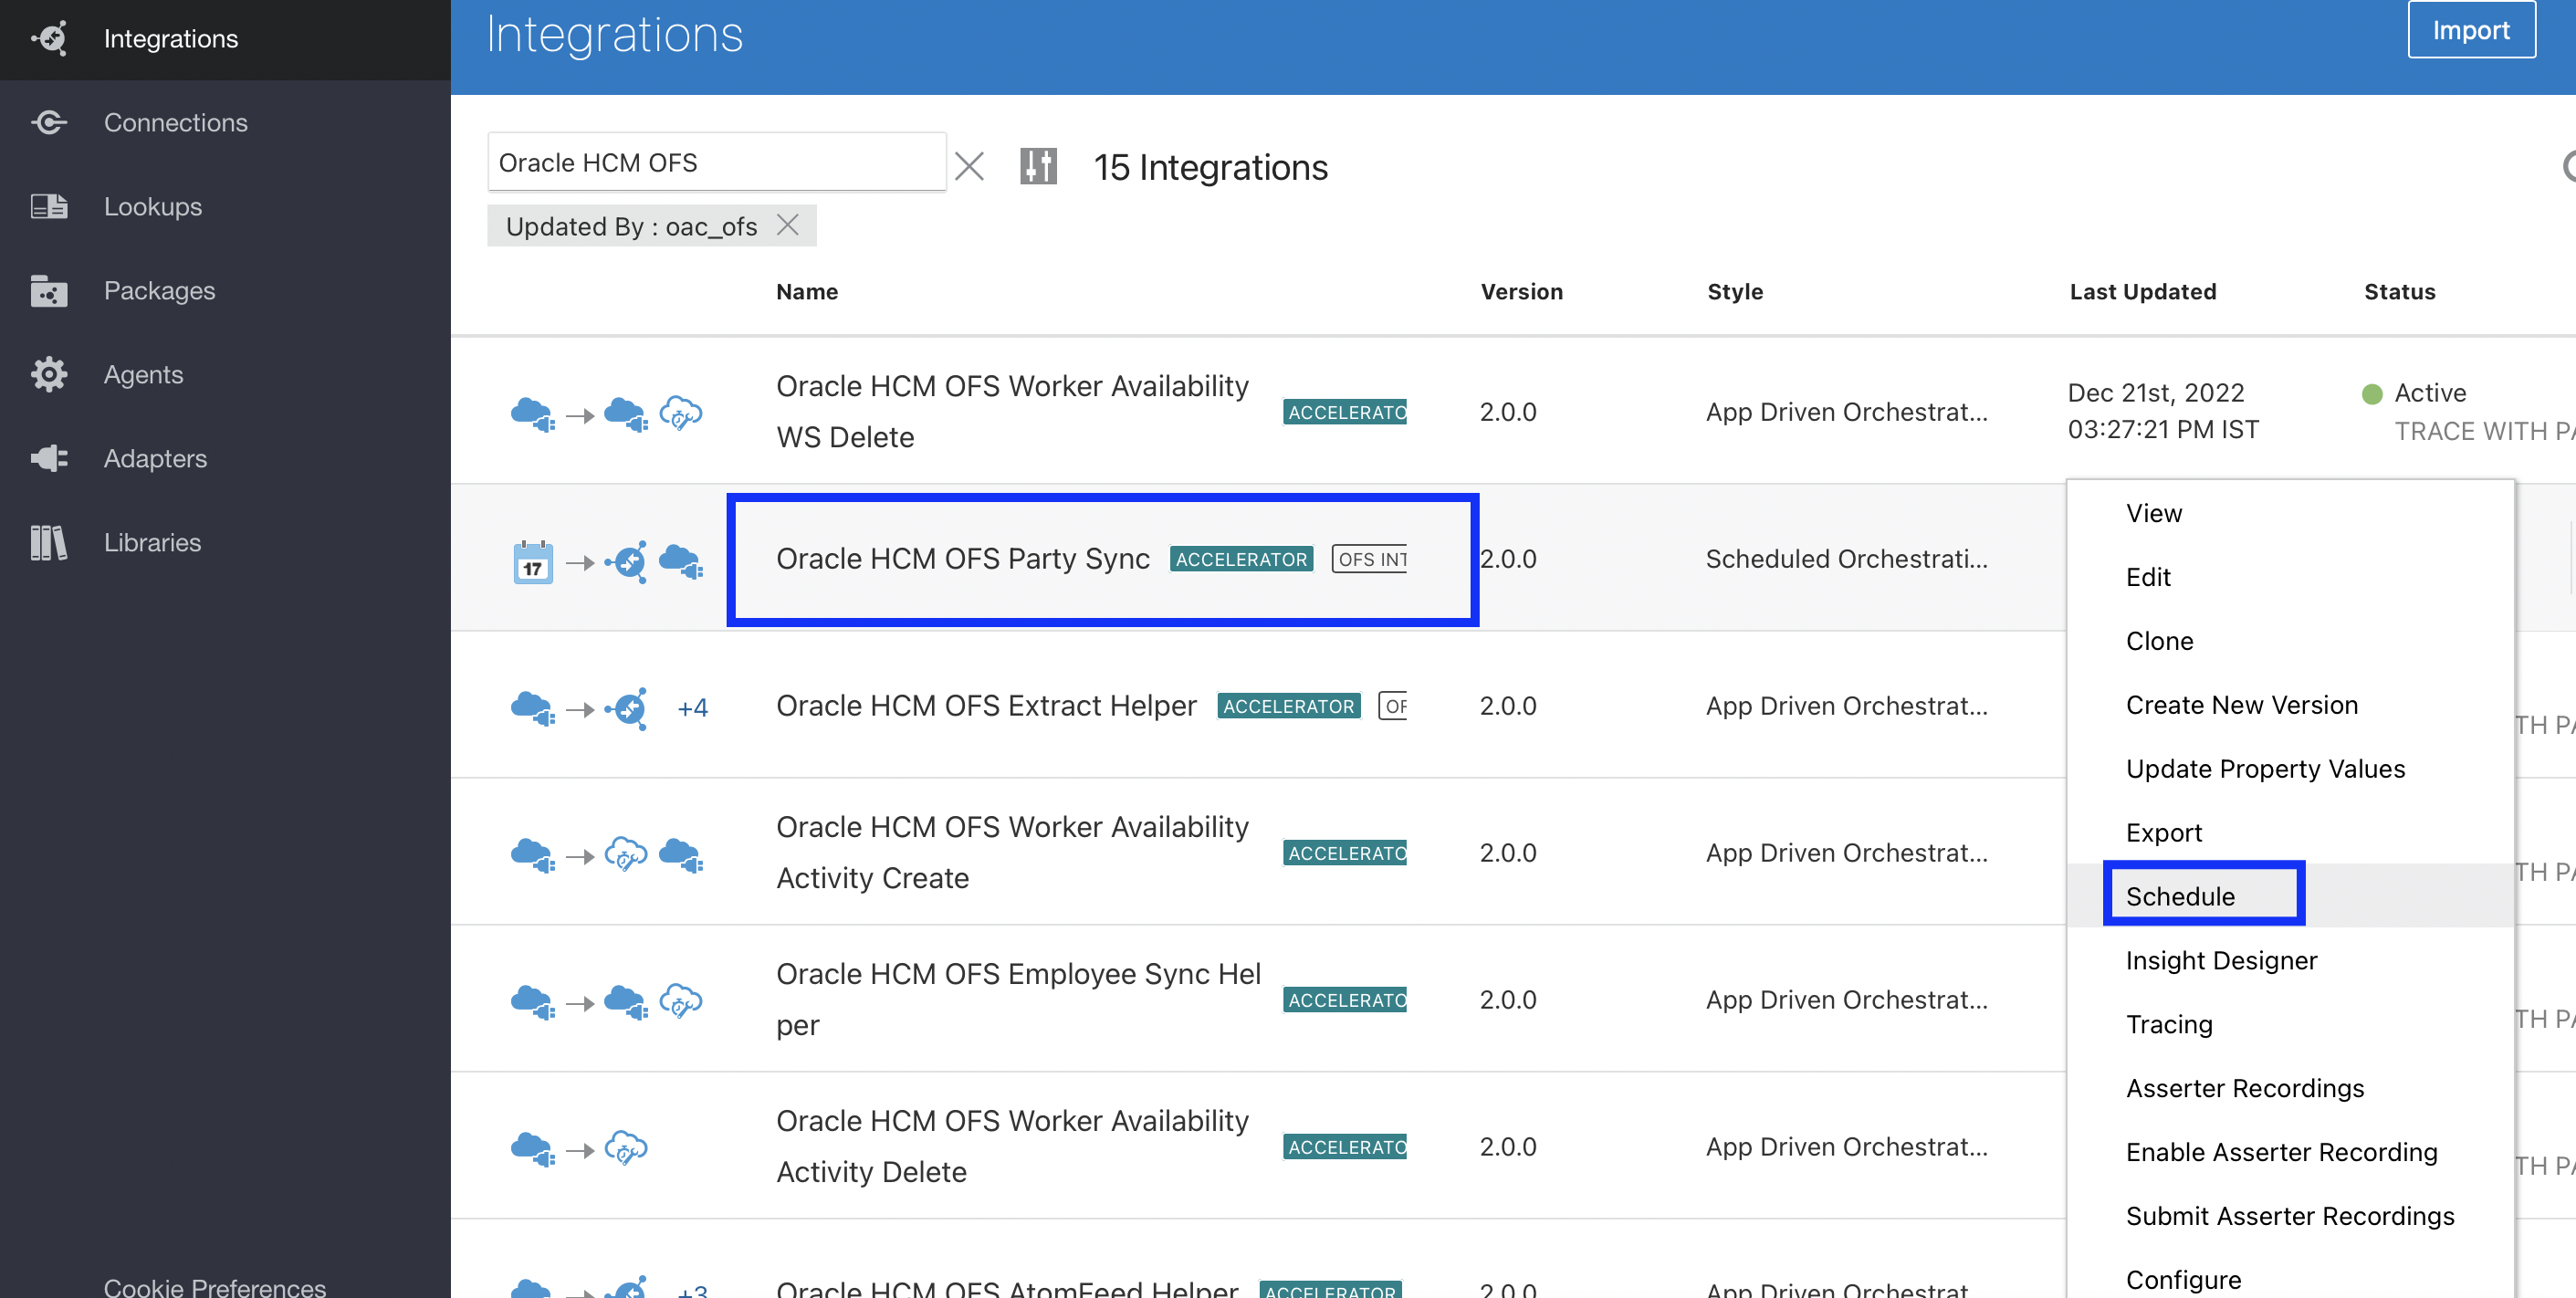
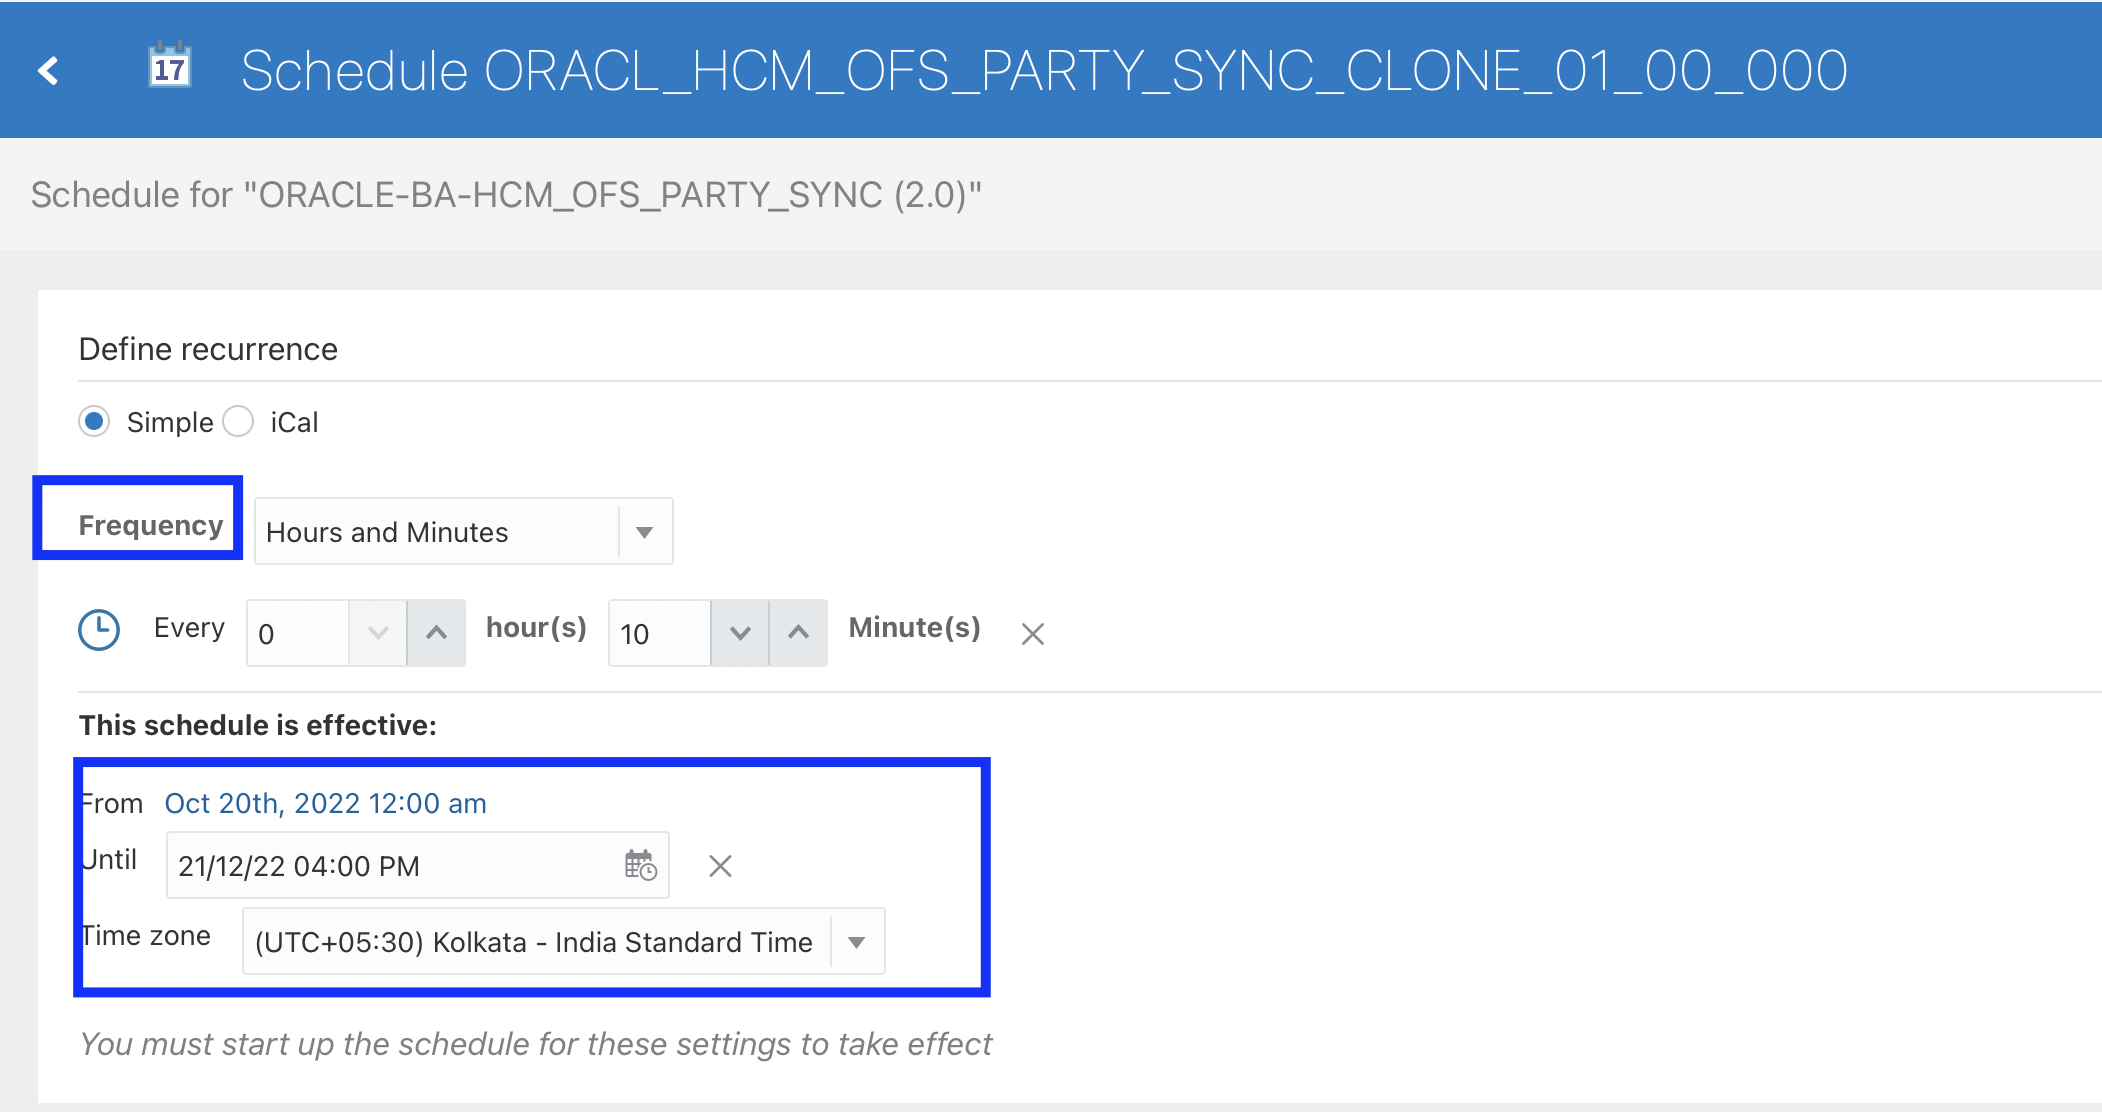
How to verify this integration flow
- Create a new hire in Oracle HCM Cloud. Go to Login > My Client Groups > New Person > Hire an Employee.
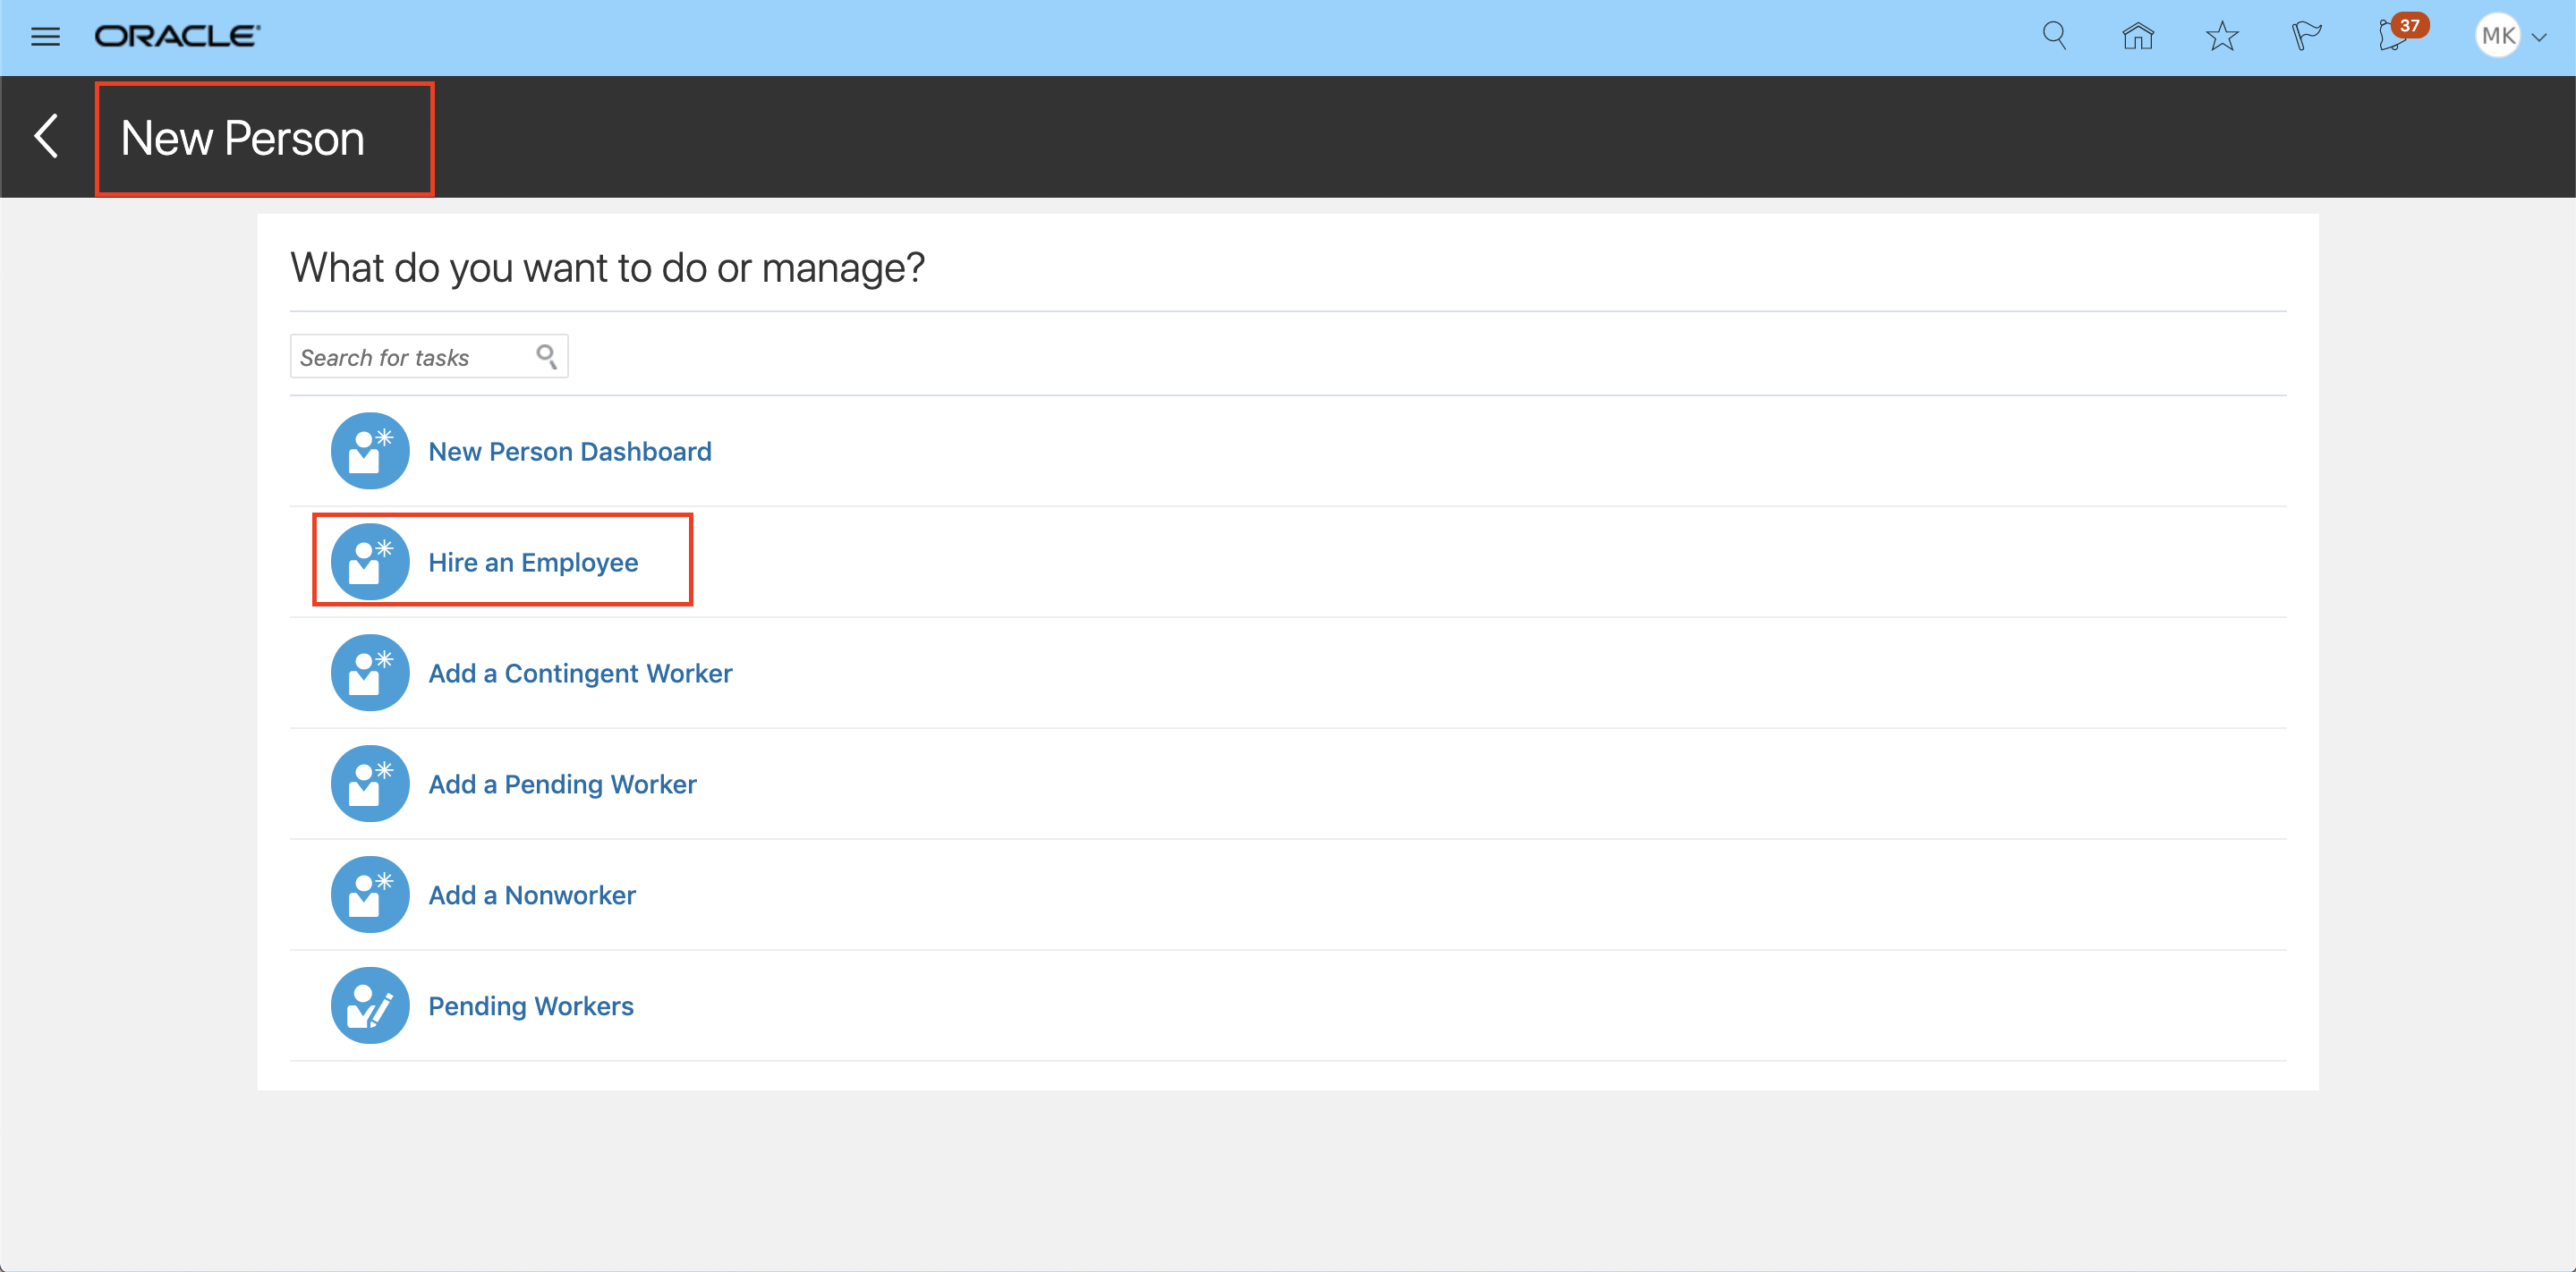
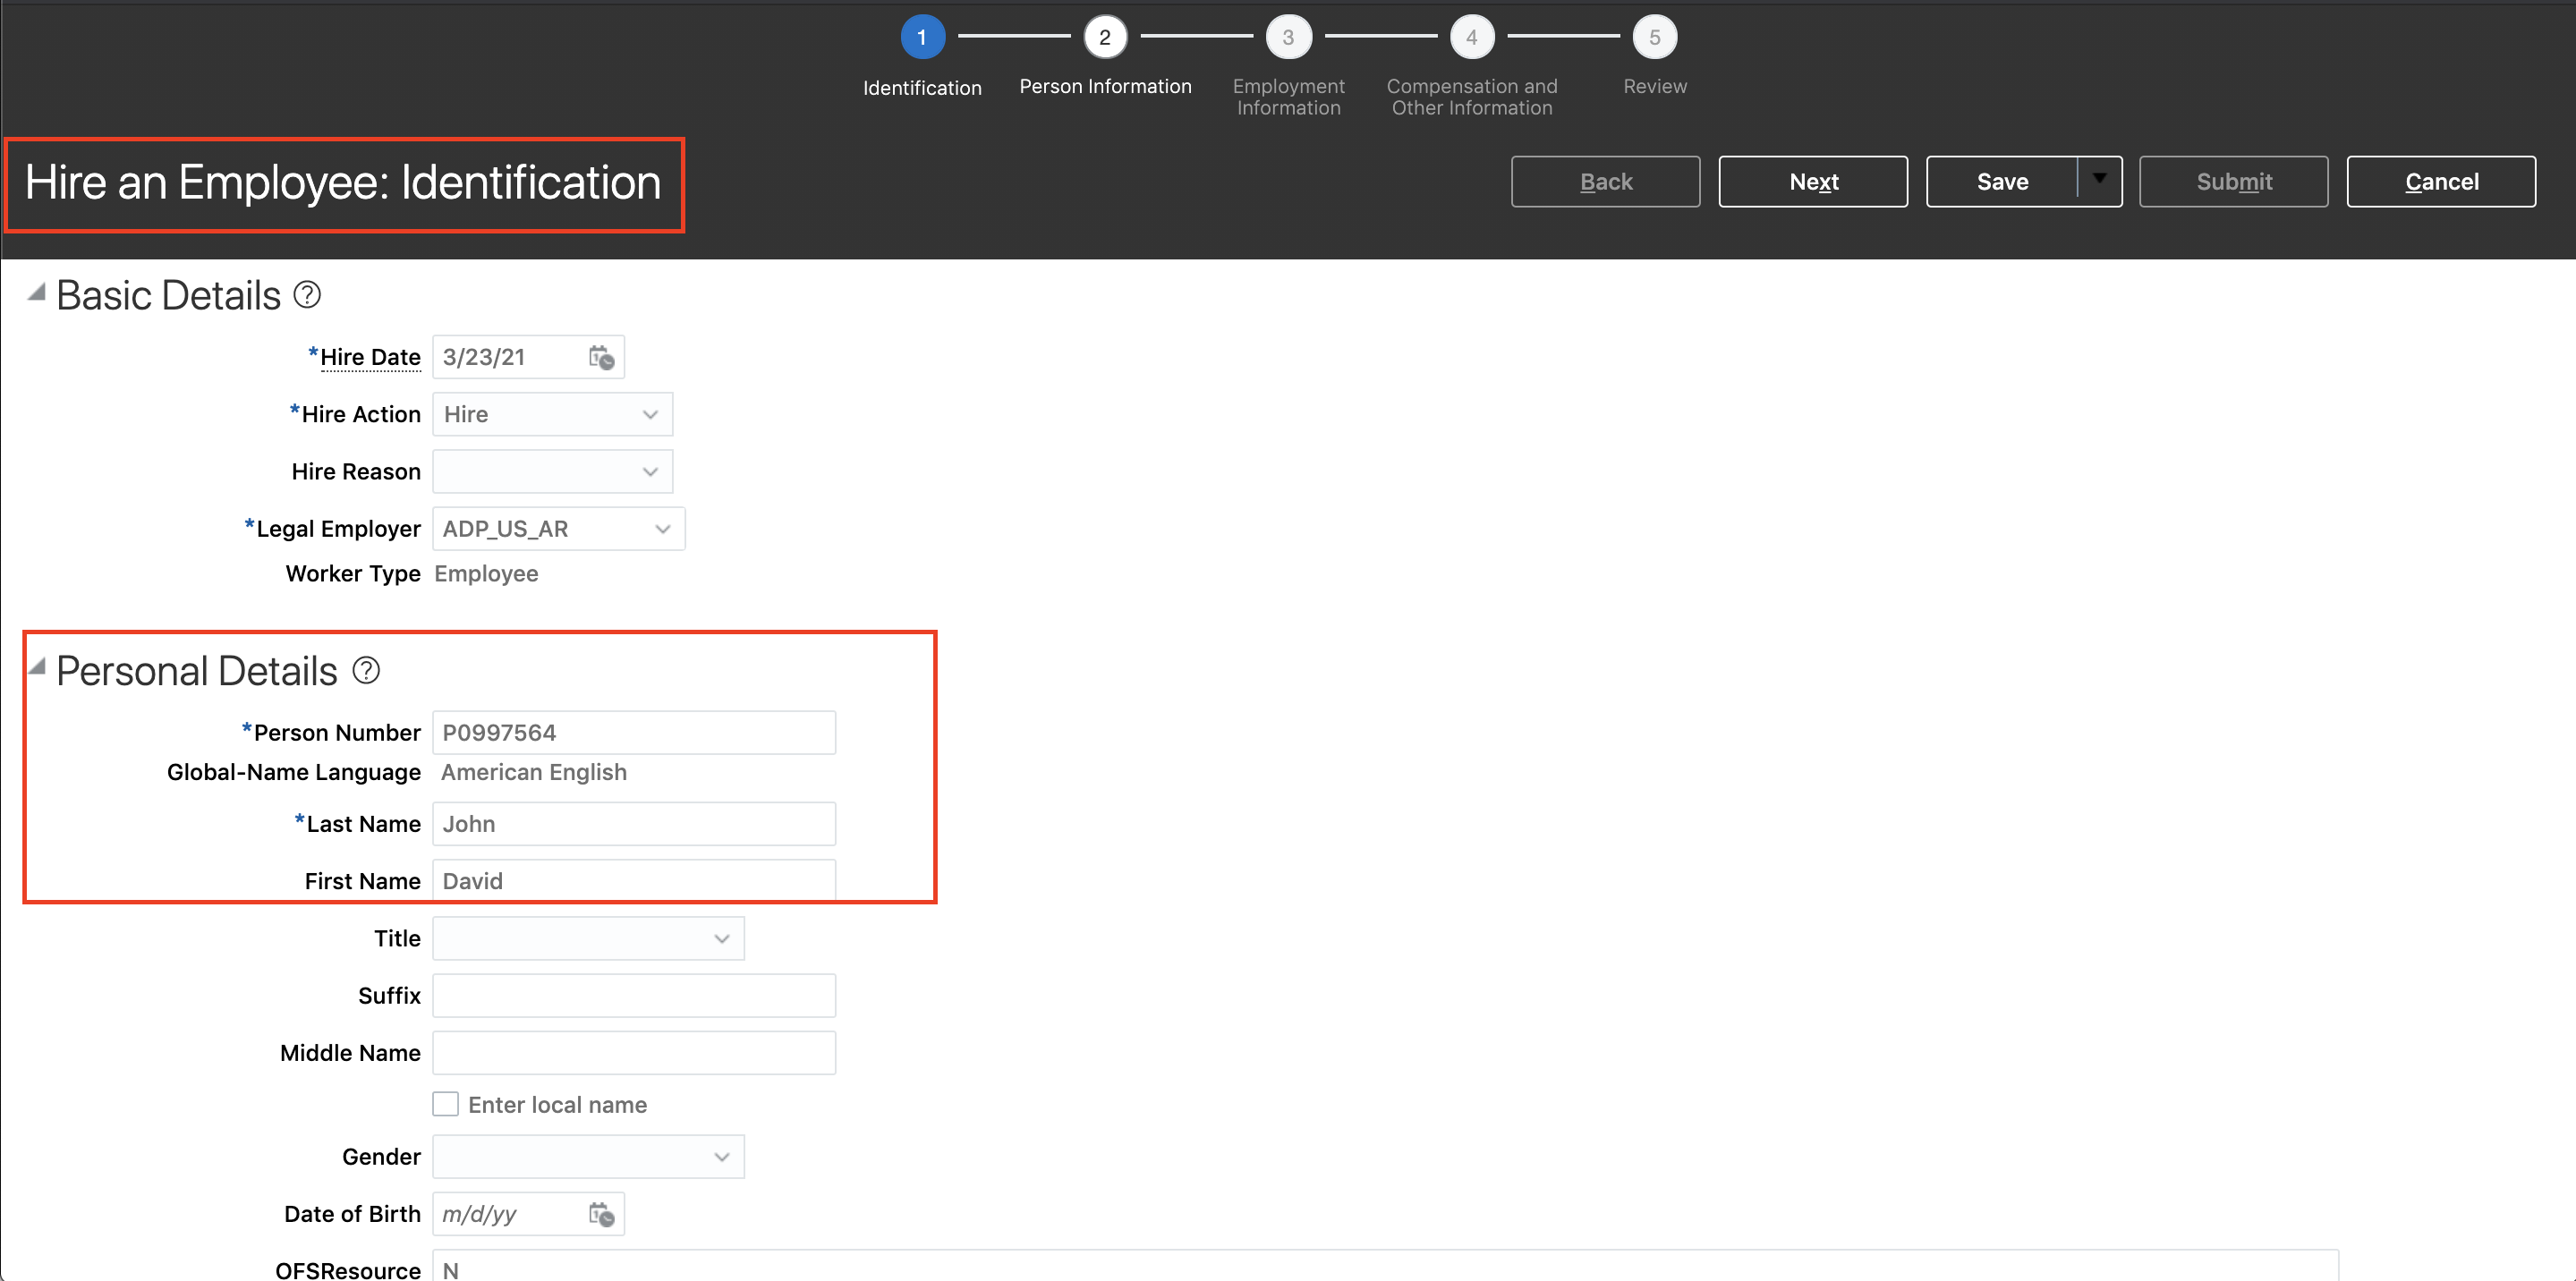
- Fill all the required fields in each screen and submit the added details. Make sure the newly-created employee is listed under the Person Management screen.
- Wait for next Submit as per the schedule. A corresponding resource is created in Oracle Field Service with the new hire's basic info and location information.
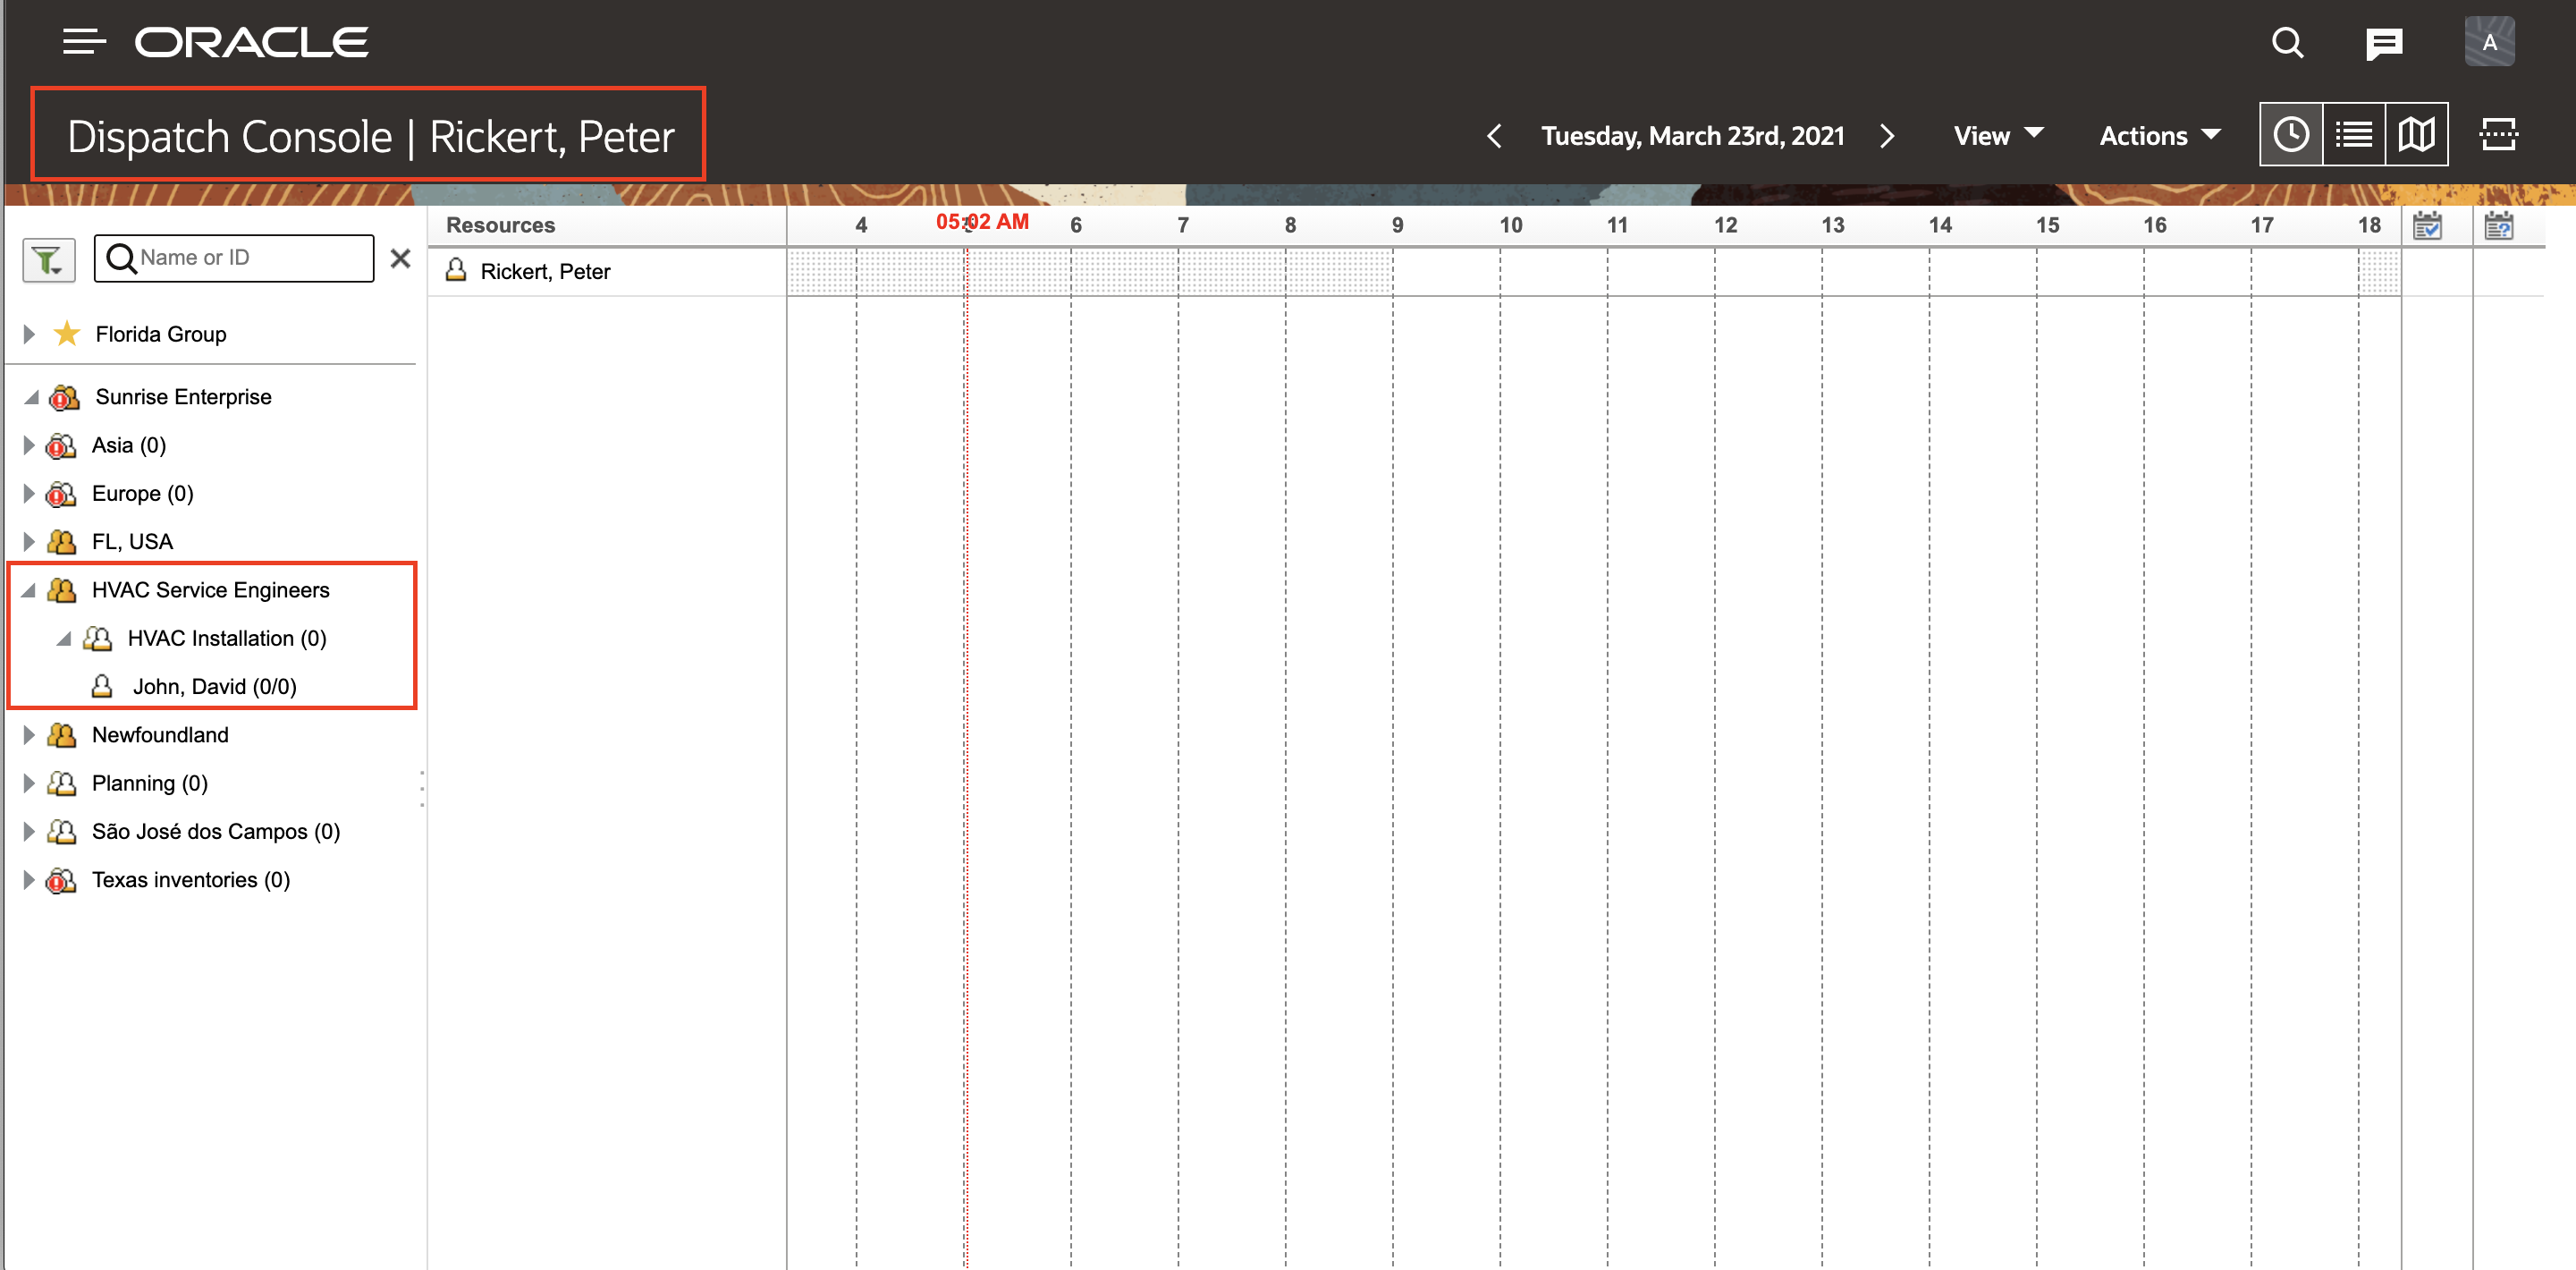
Oracle HCM-OFS Employee Update
- Make sure the following integrations are activated - Oracle HCM OFS Employee Sync Helper, Oracle HCM OFS Extract Helper and Oracle HCM OFS Employee Update
- Schedule the integration. Click Integrations > Actions button next to the integration - Oracle HCM OFS Employee Update > Add Schedule menu > Enter the schedule details like Frequency, Start Date, End Date and TimeZone.
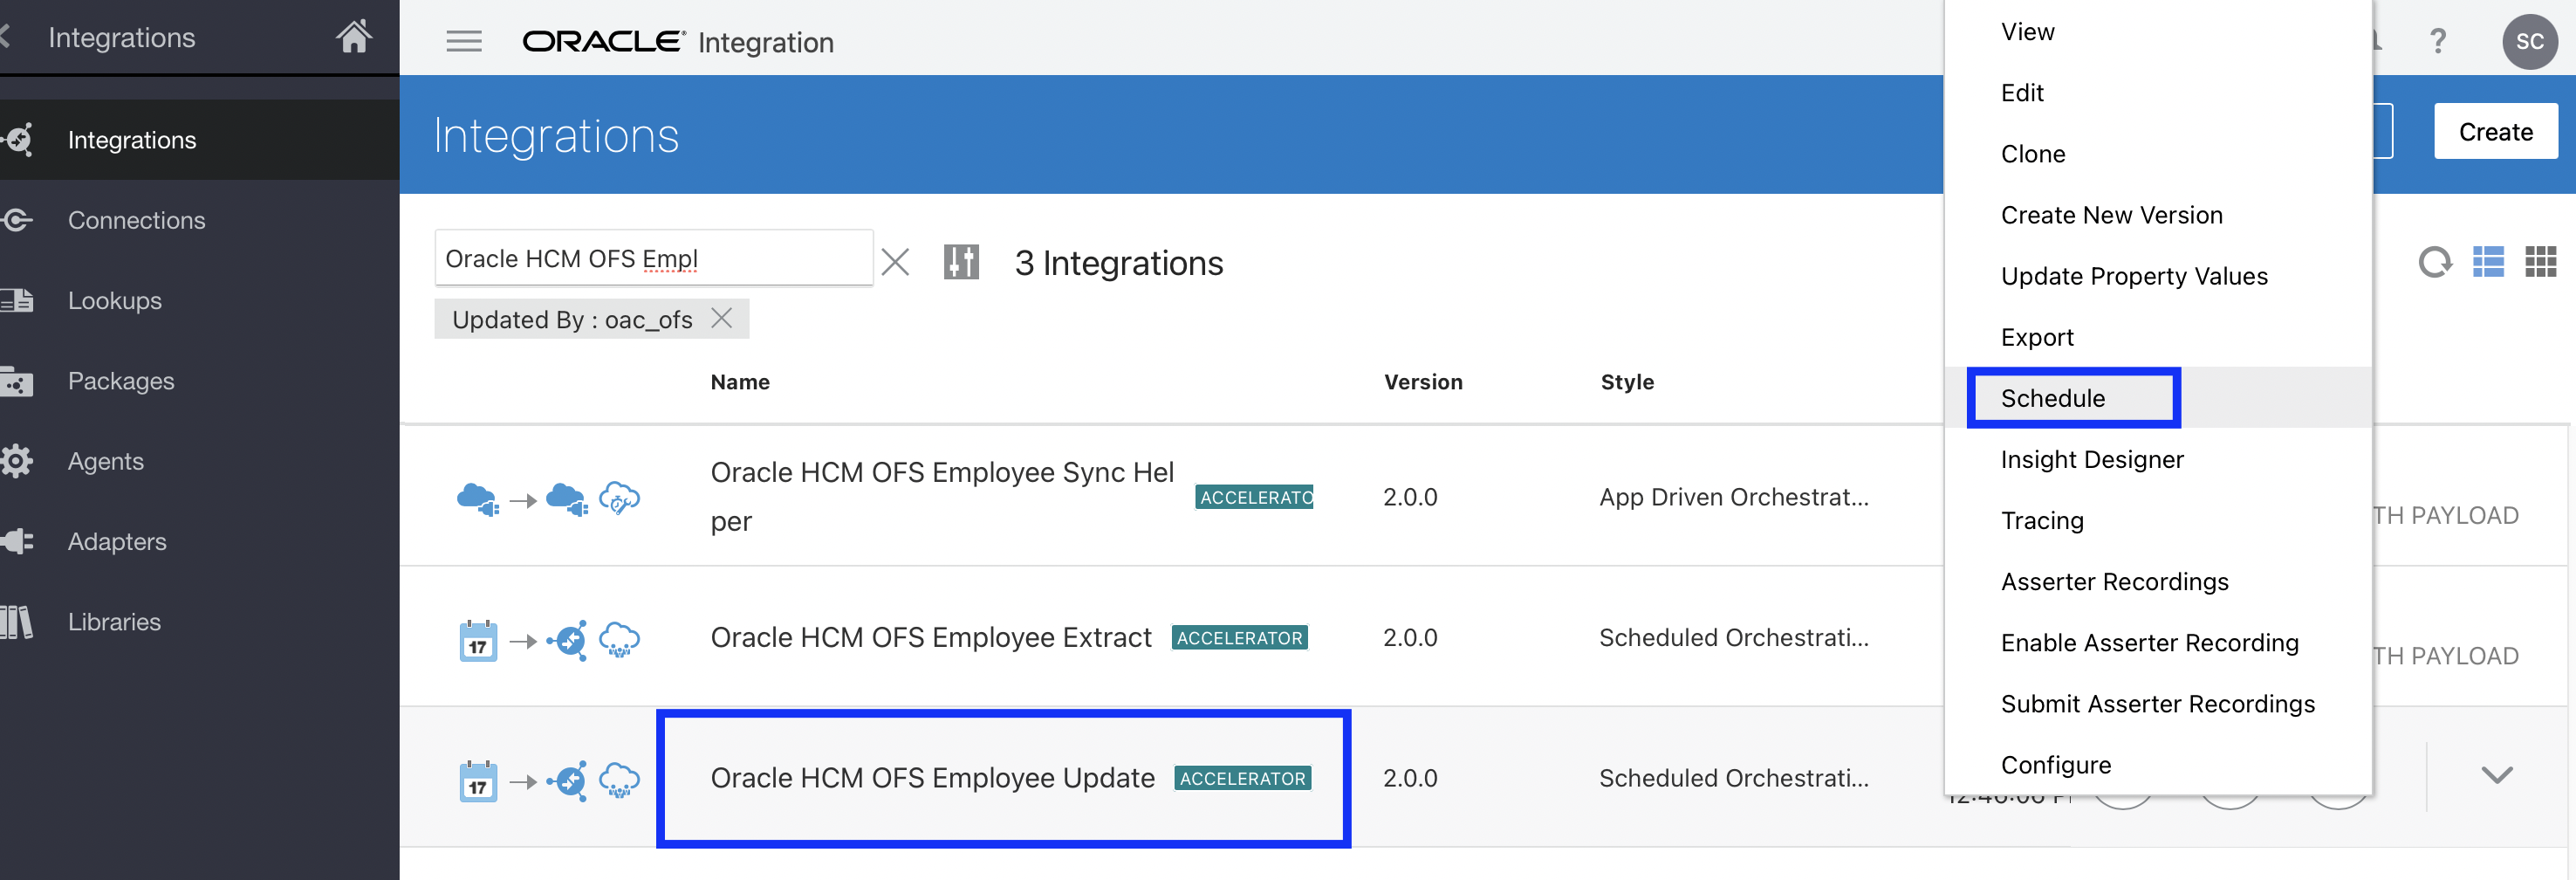
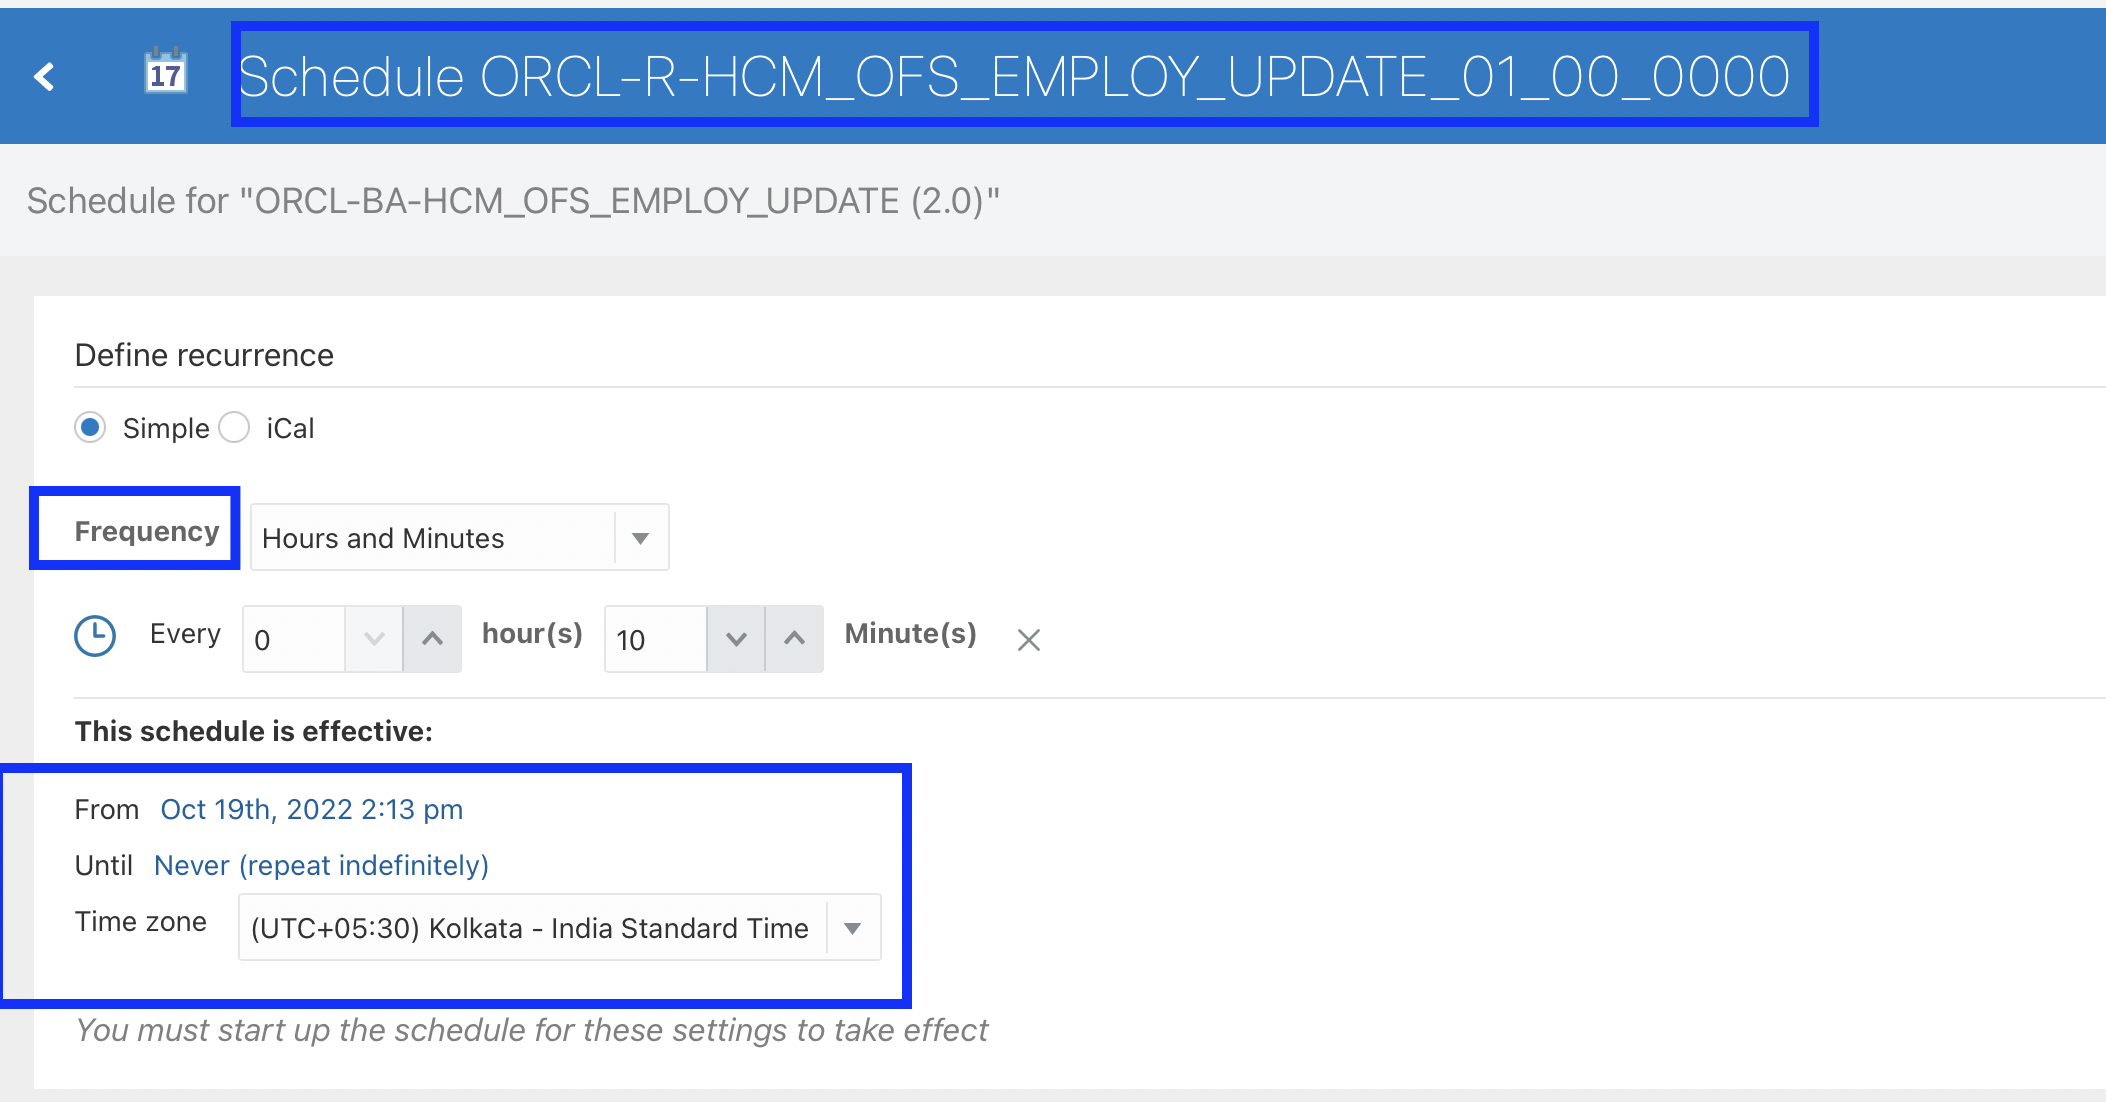
Fill in all the required fields in each screen and submit the added details. Make sure the newly-created employee is listed under the Person Management screen.
How to verify this integration flow
- Update an employee/worker in Oracle HCM Cloud.
- Wait for next Submit as per the schedule. The corresponding resource in Oracle Field Service is updated with the corresponding information.
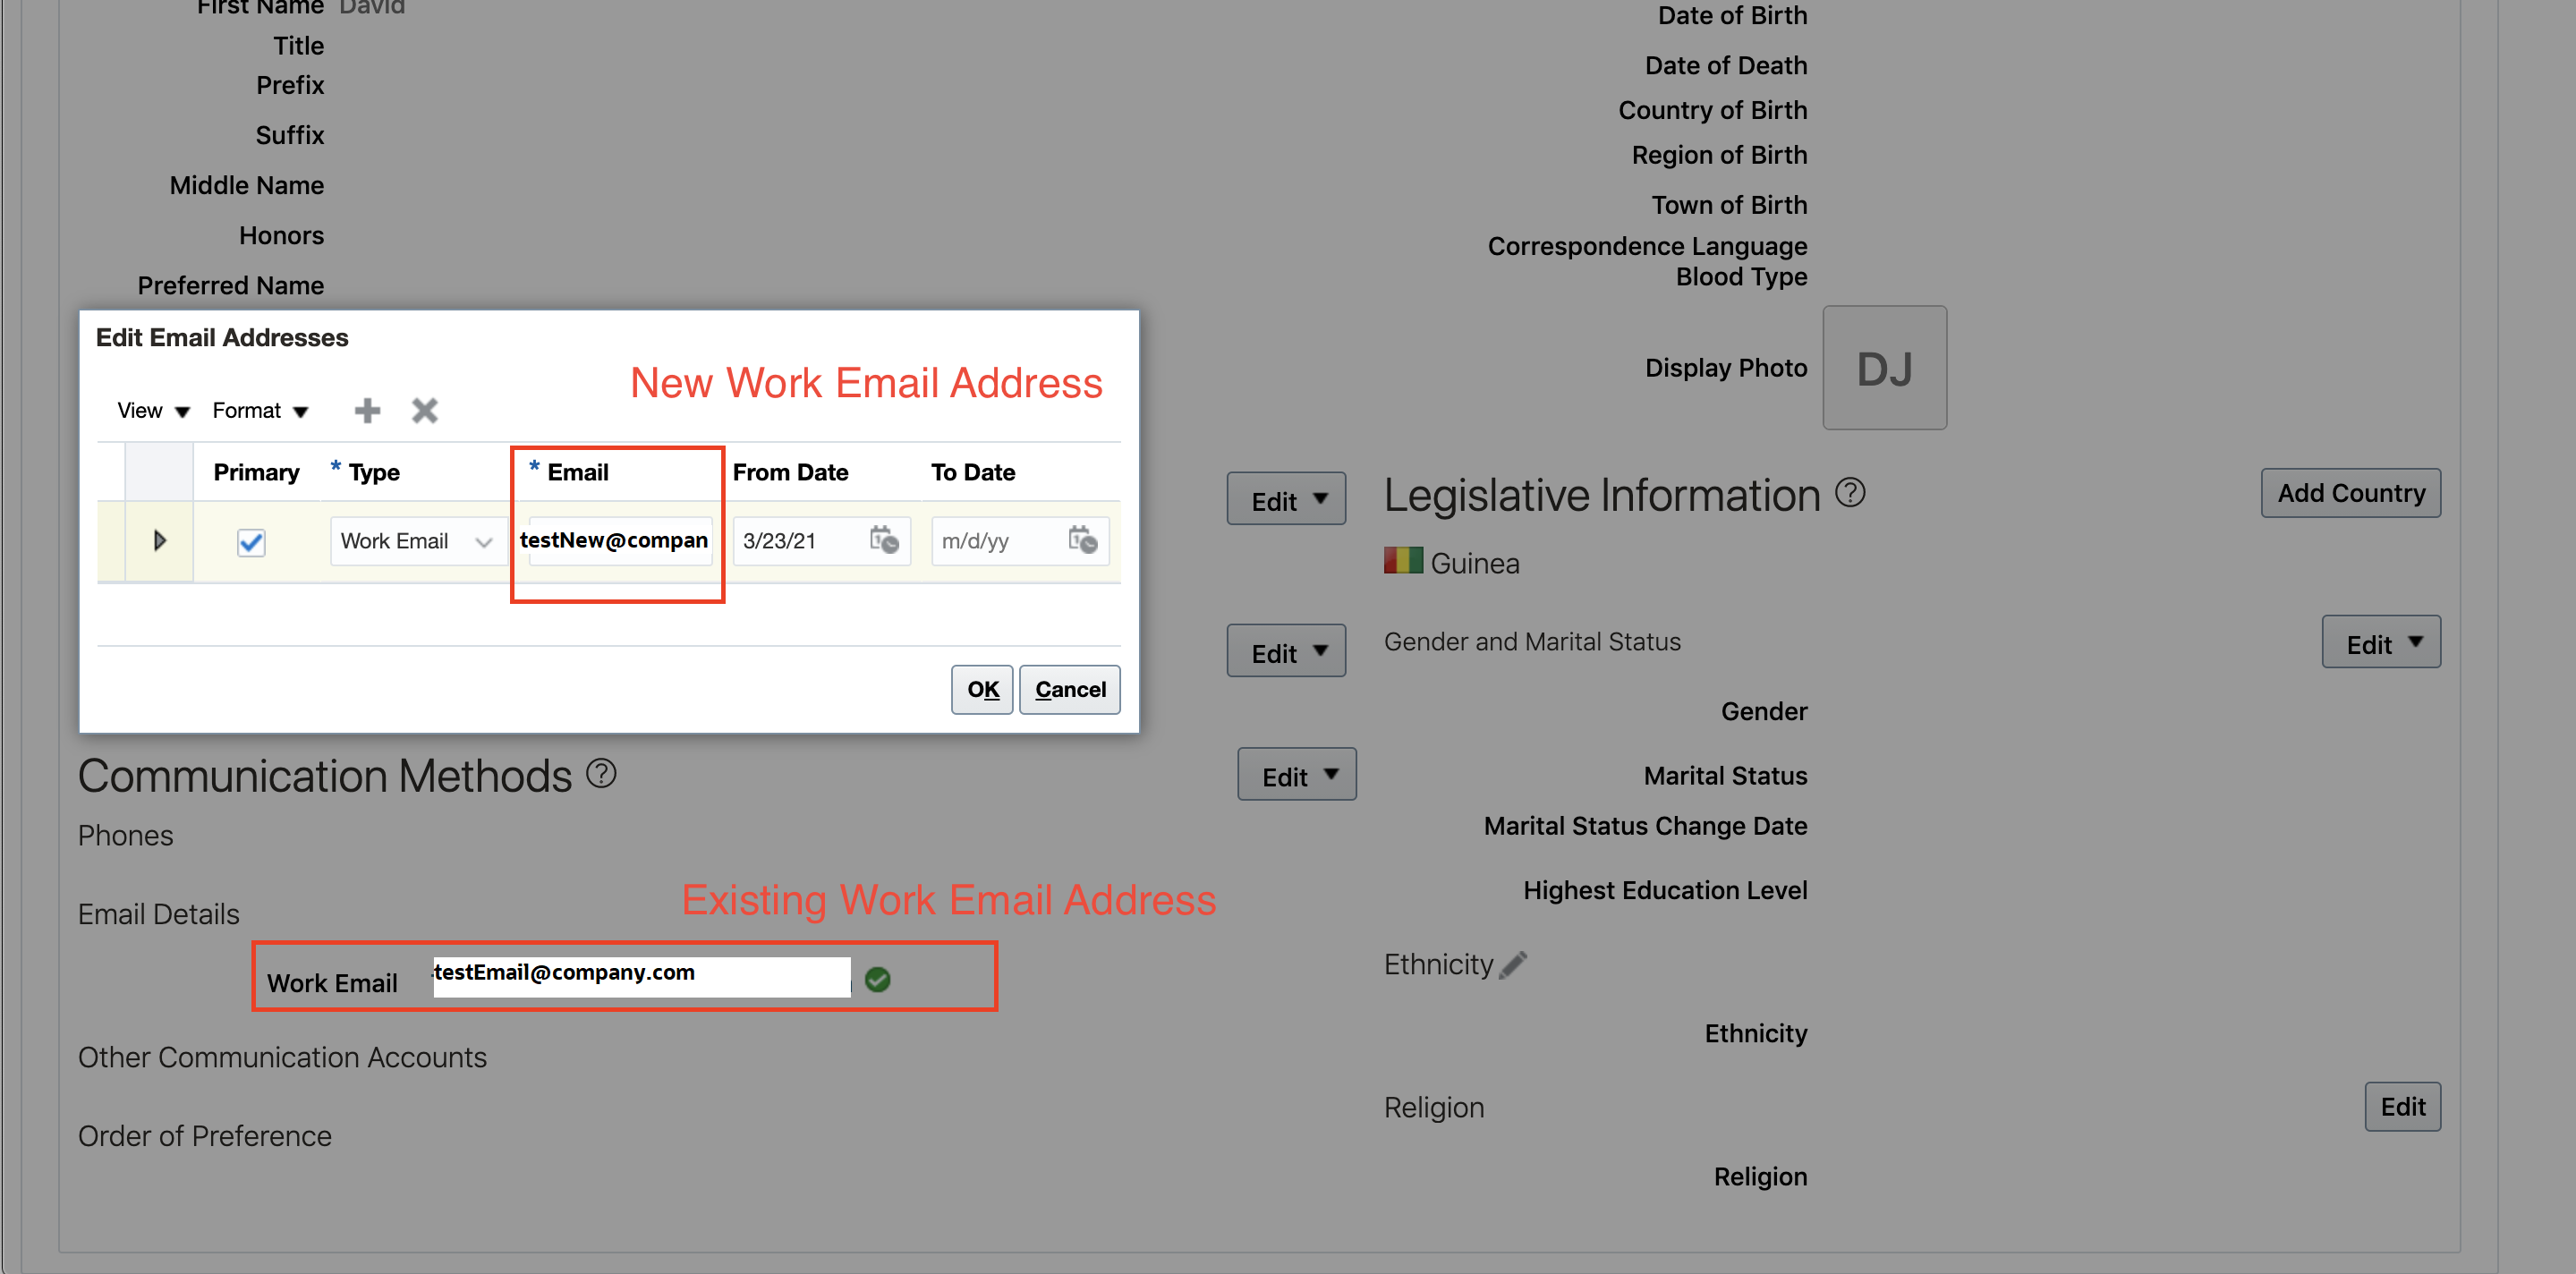
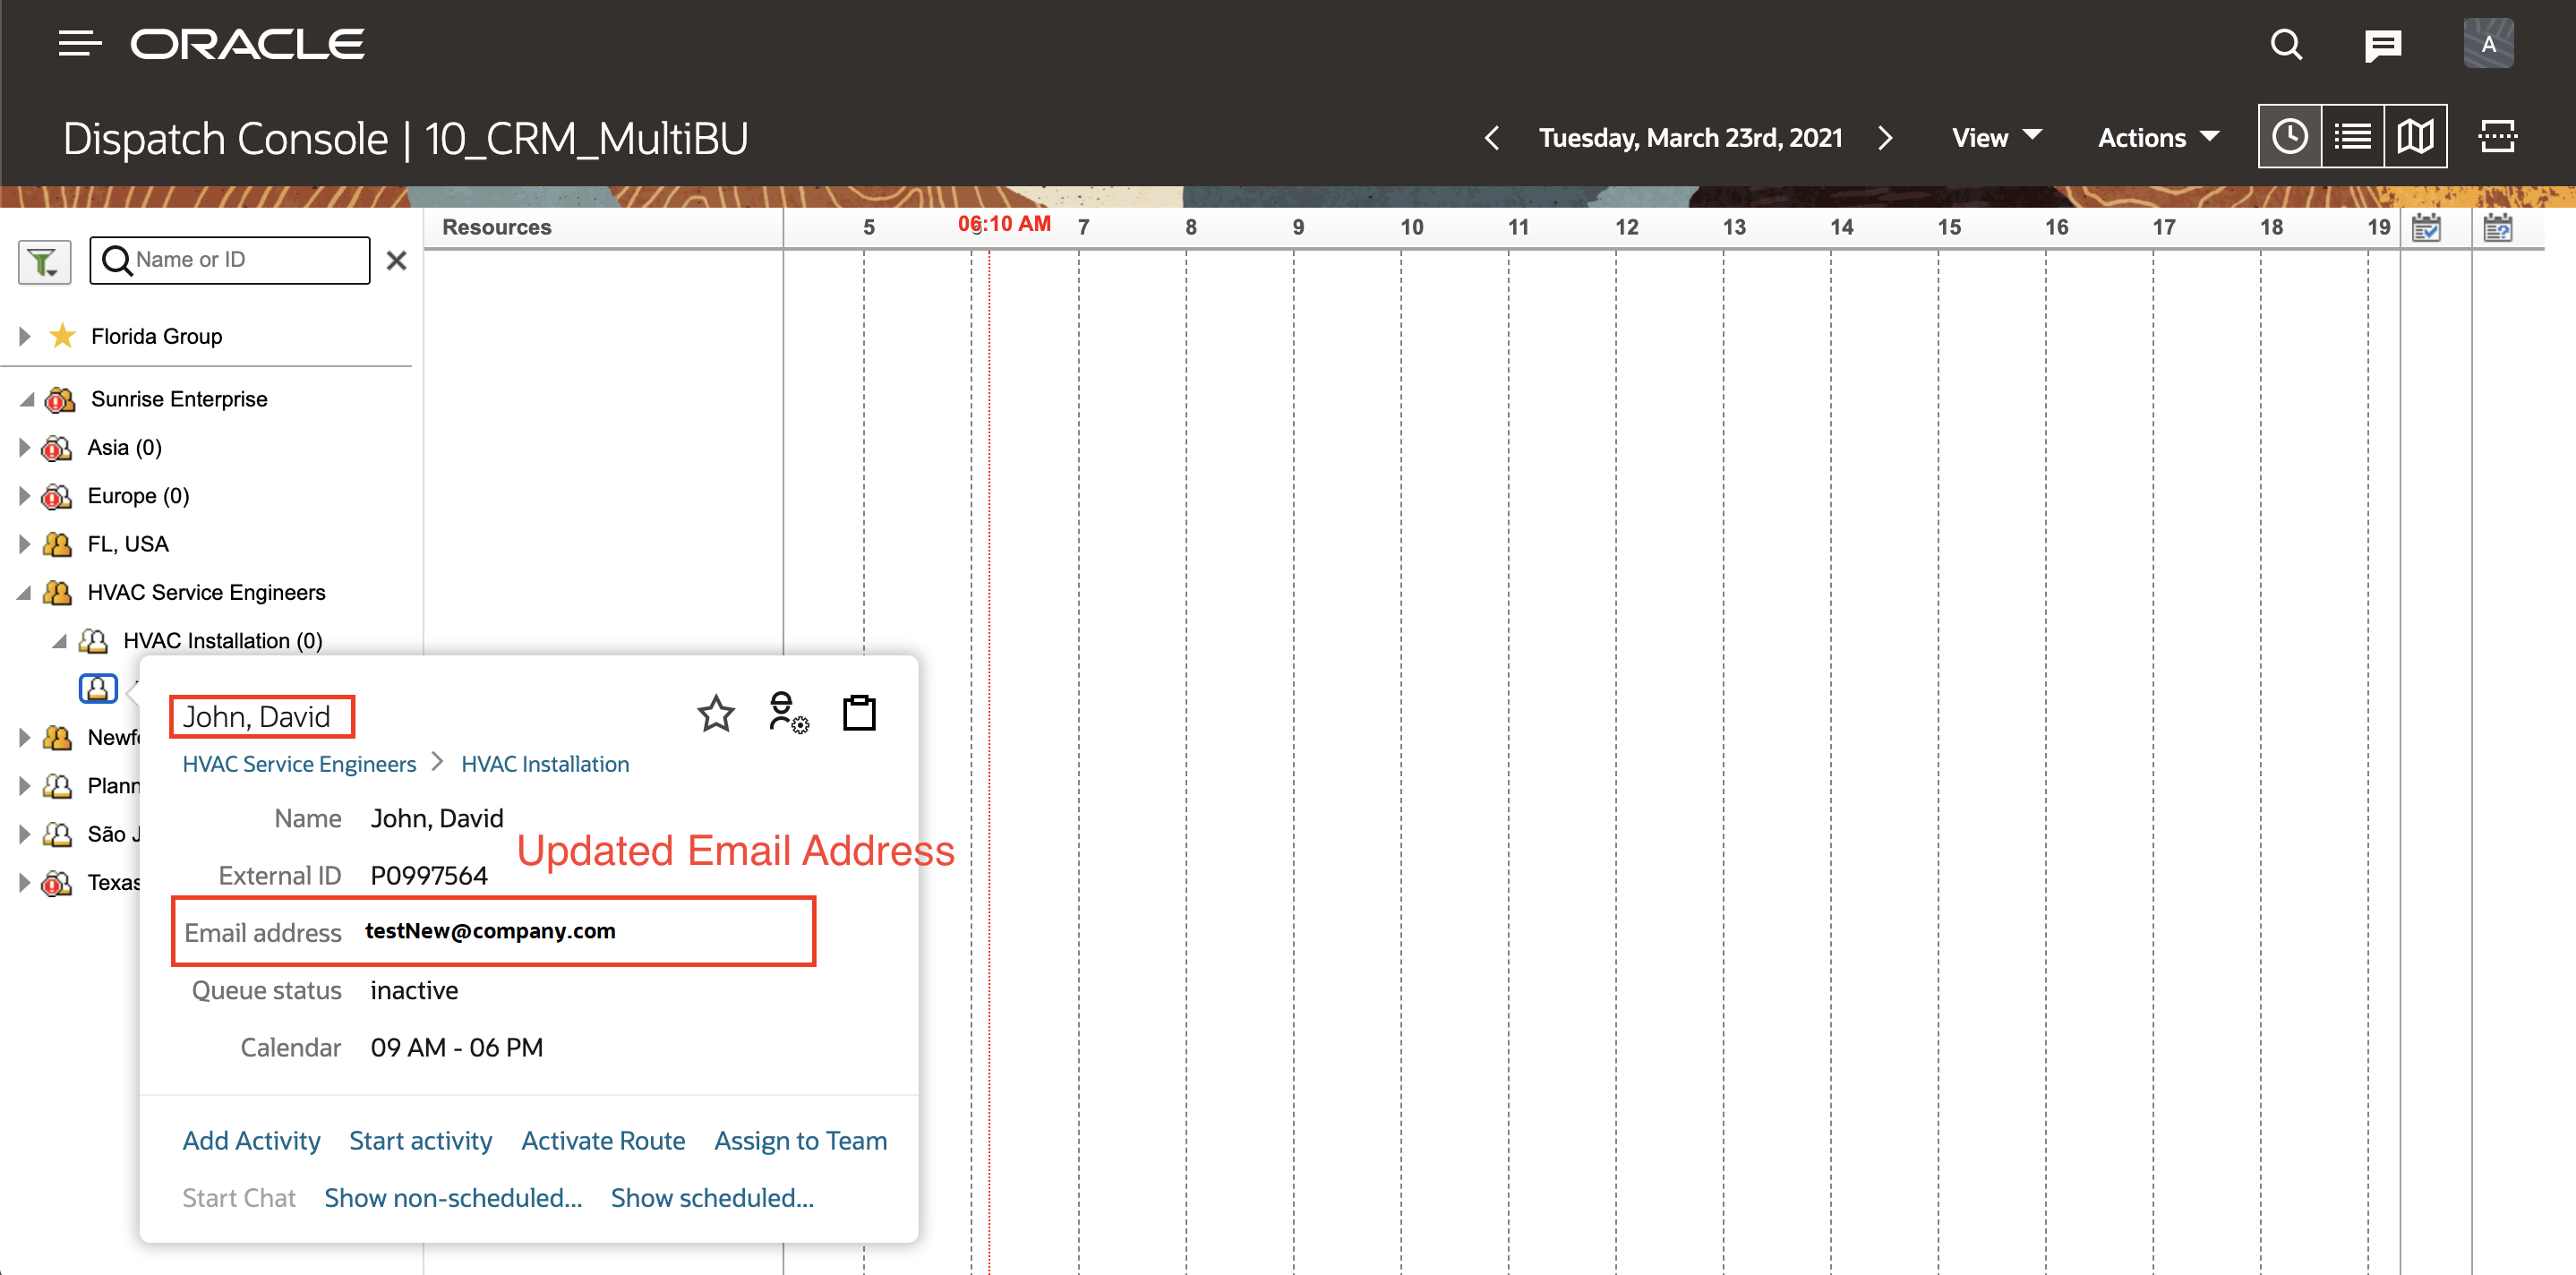
Oracle HCM OFS Terminate Employee
- Make sure the following integrations are activated - Oracle HCM OFS Extract Helper and Oracle HCM OFS Terminate Employee
- Schedule the integration. Integrations > Actions button next to the integration - Oracle HCM OFS Terminate Employee > Add Schedule menu > Enter the schedule details like Frequency, Start Date, End Date and TimeZone.
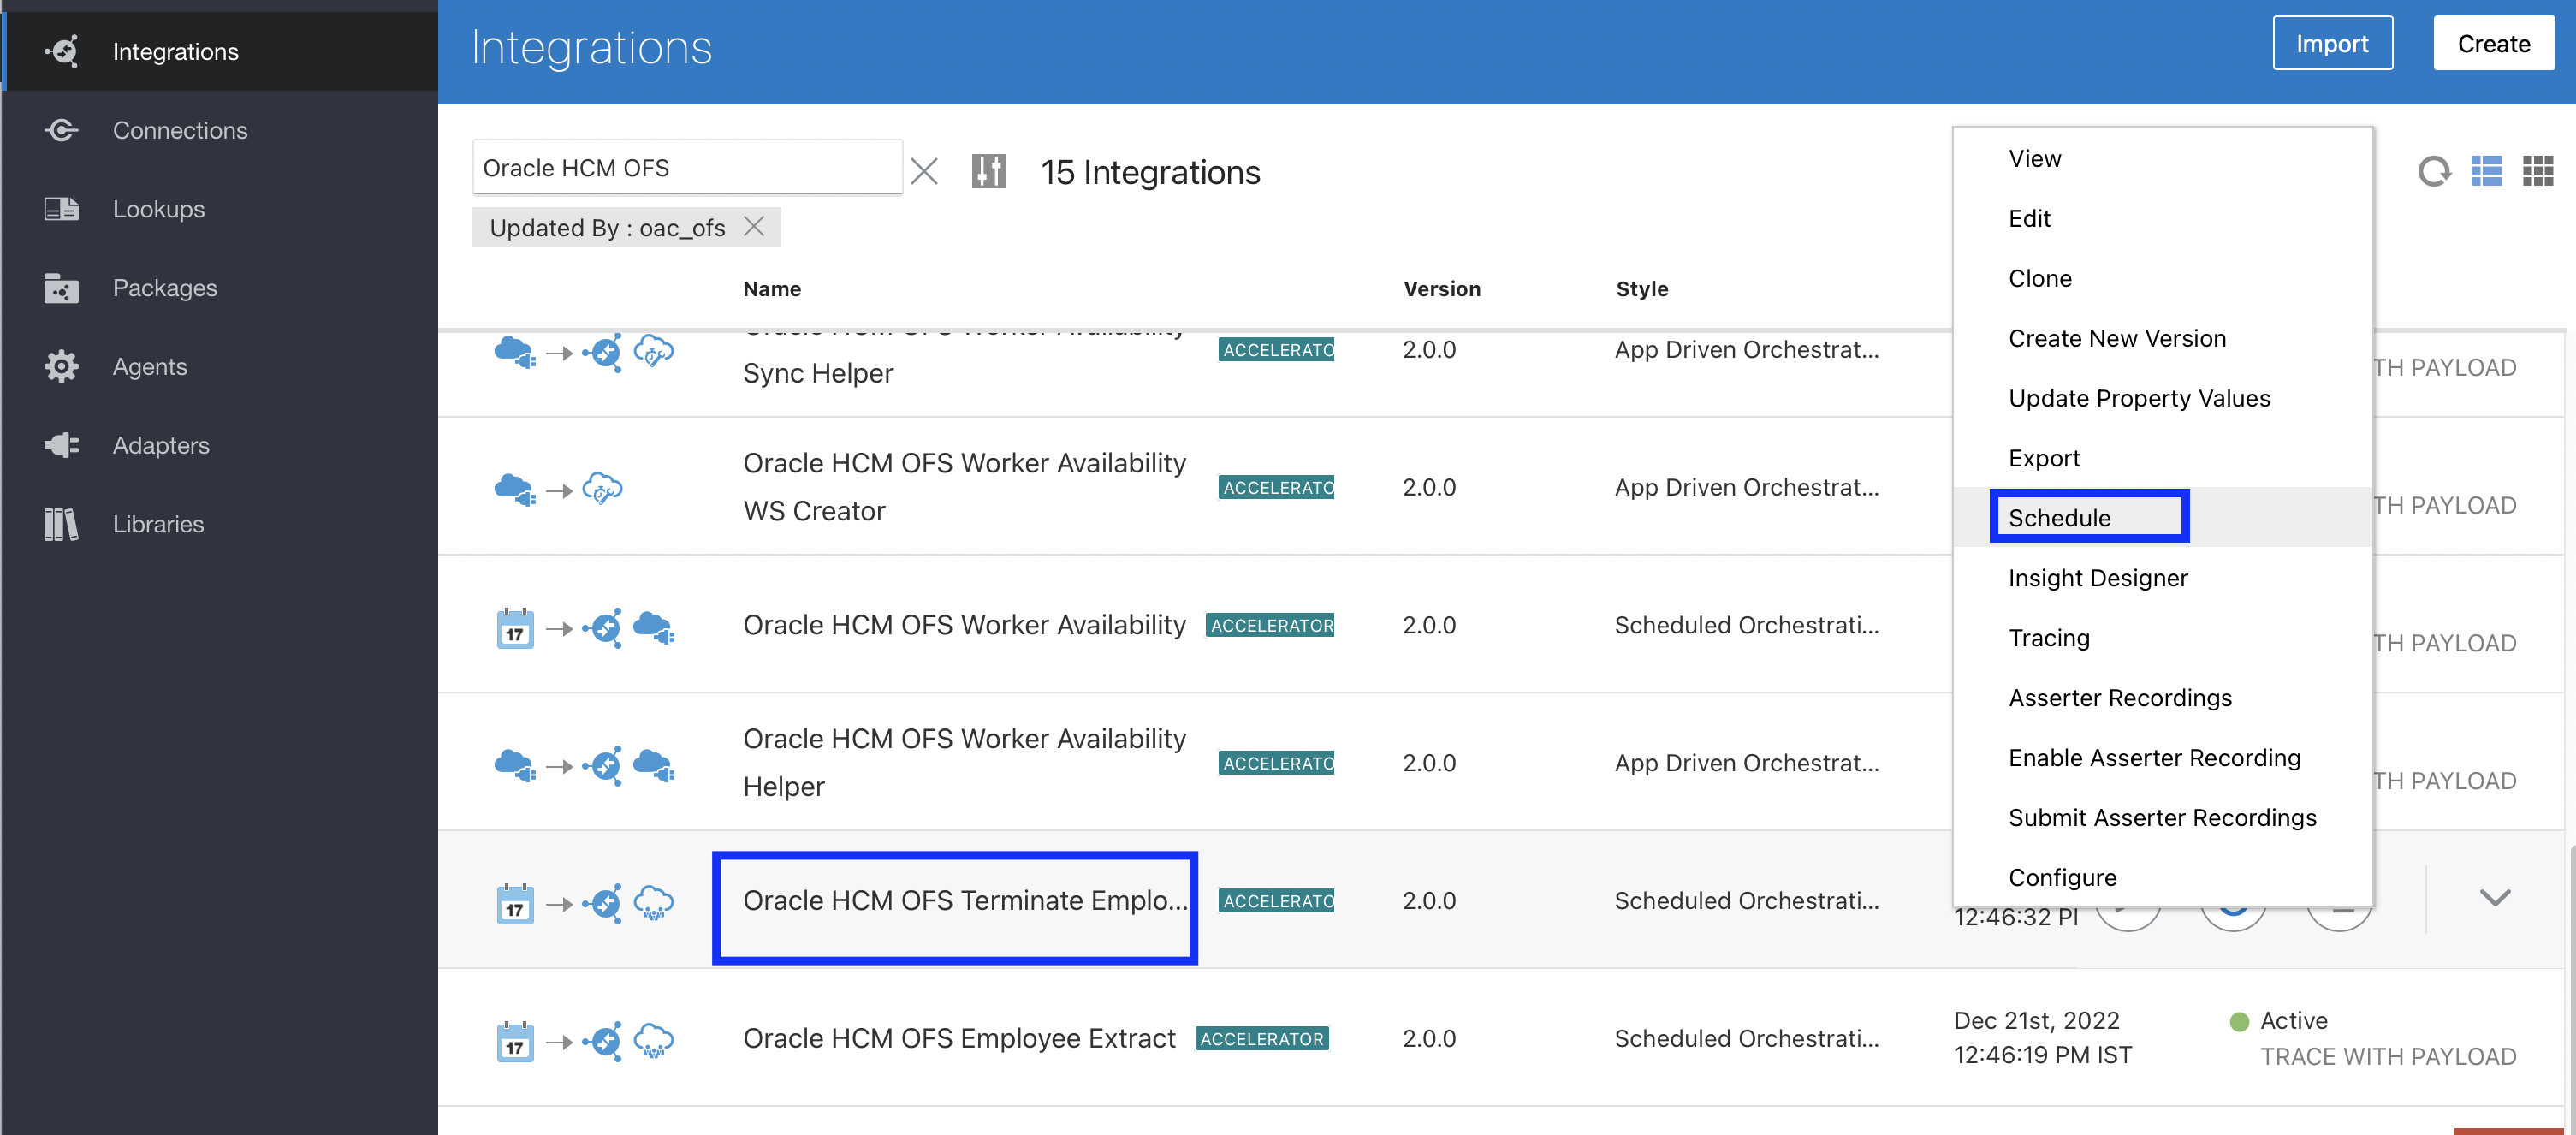
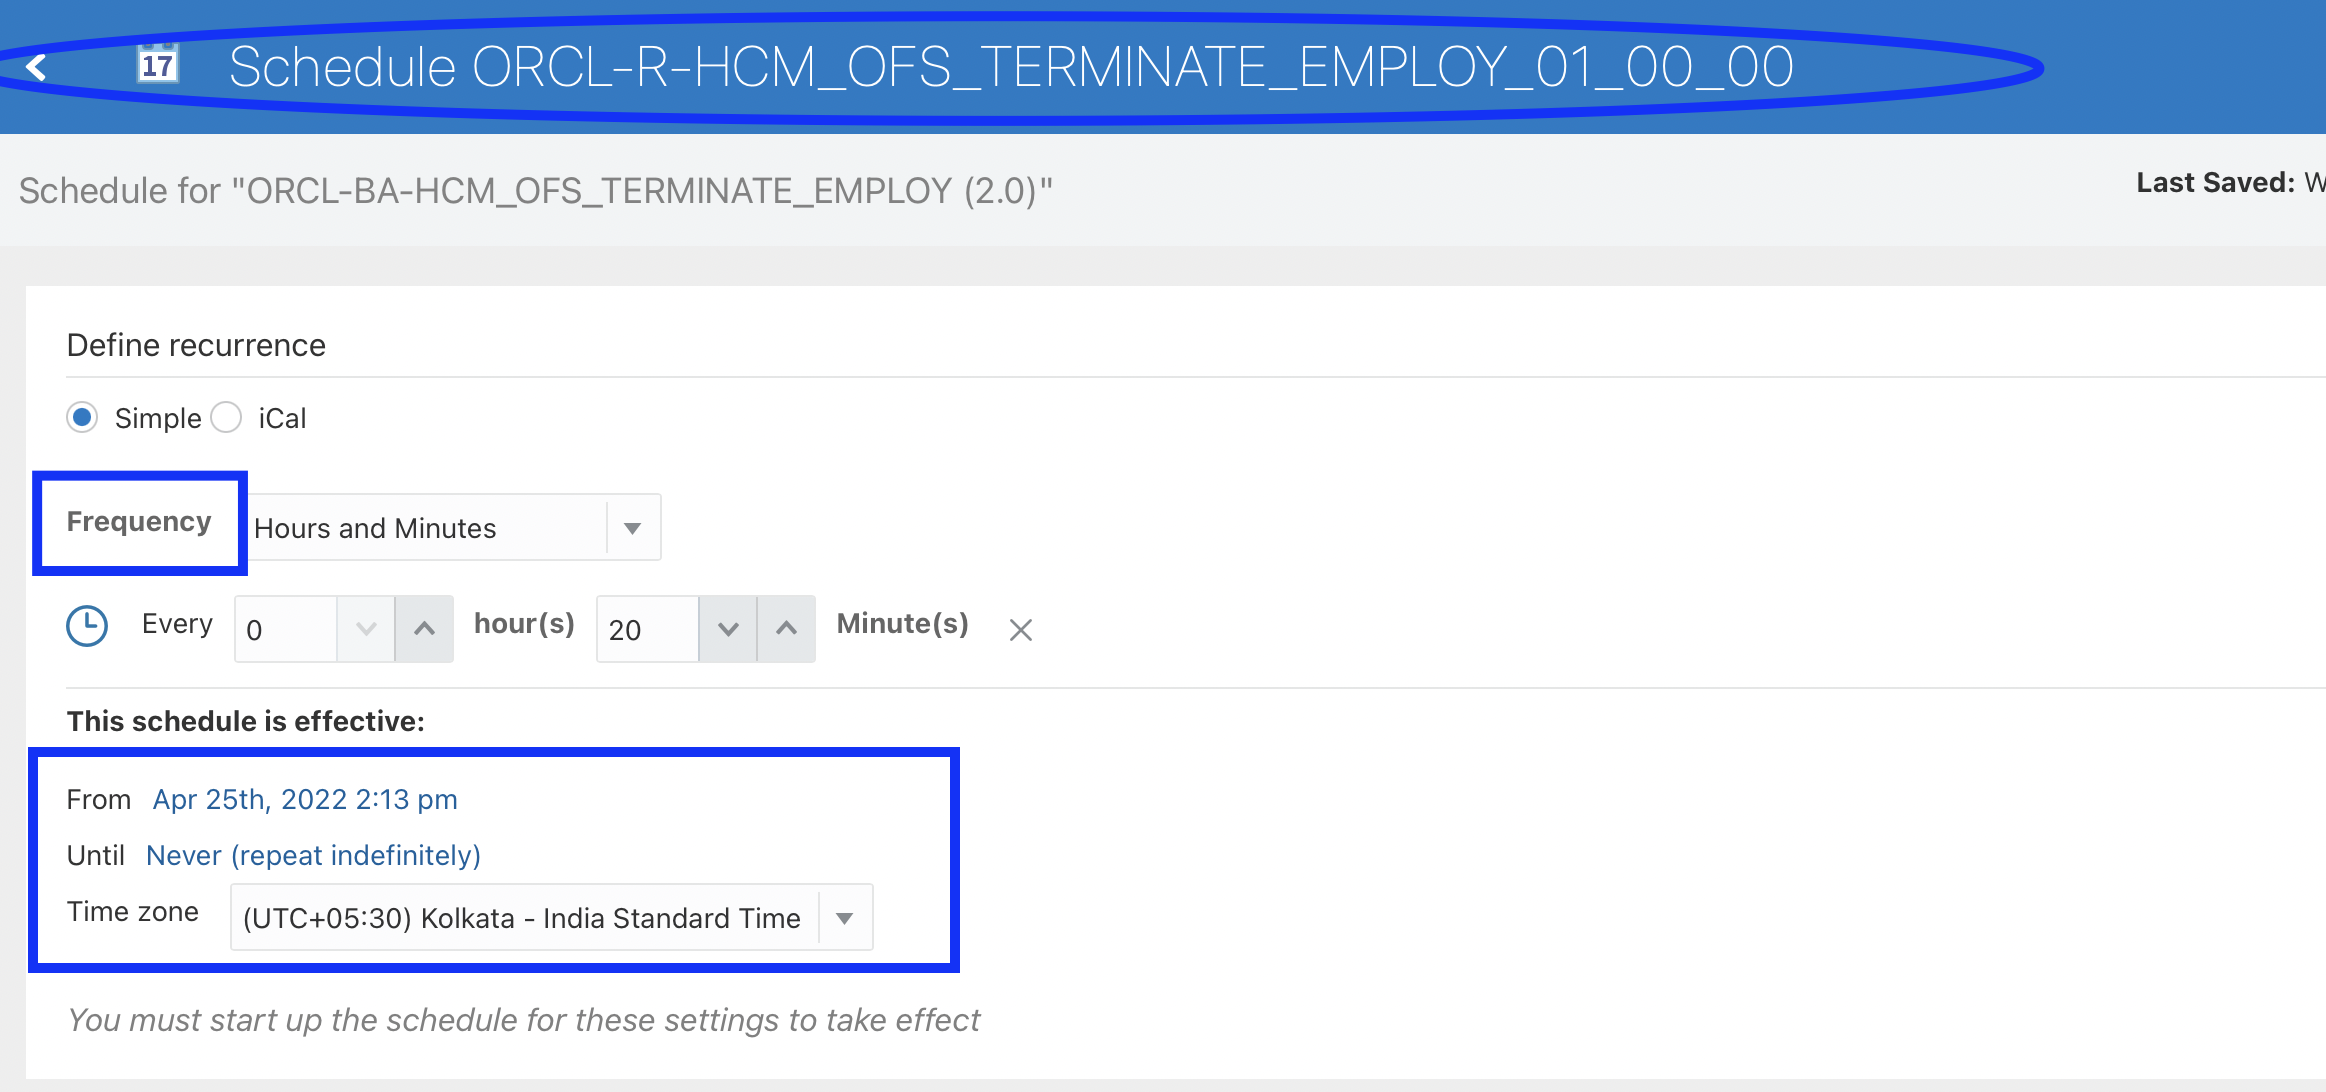
Fill in all the required fields in each screen and Submit the added details. Make sure the newly-created employee is listed under the Person Management screen.
How to verify integration flow
- Terminate an employee in Oracle HCM Cloud.
- Wait for next Submit as per the schedule. The corresponding resource and user records in Oracle Field Service are made Inactive.
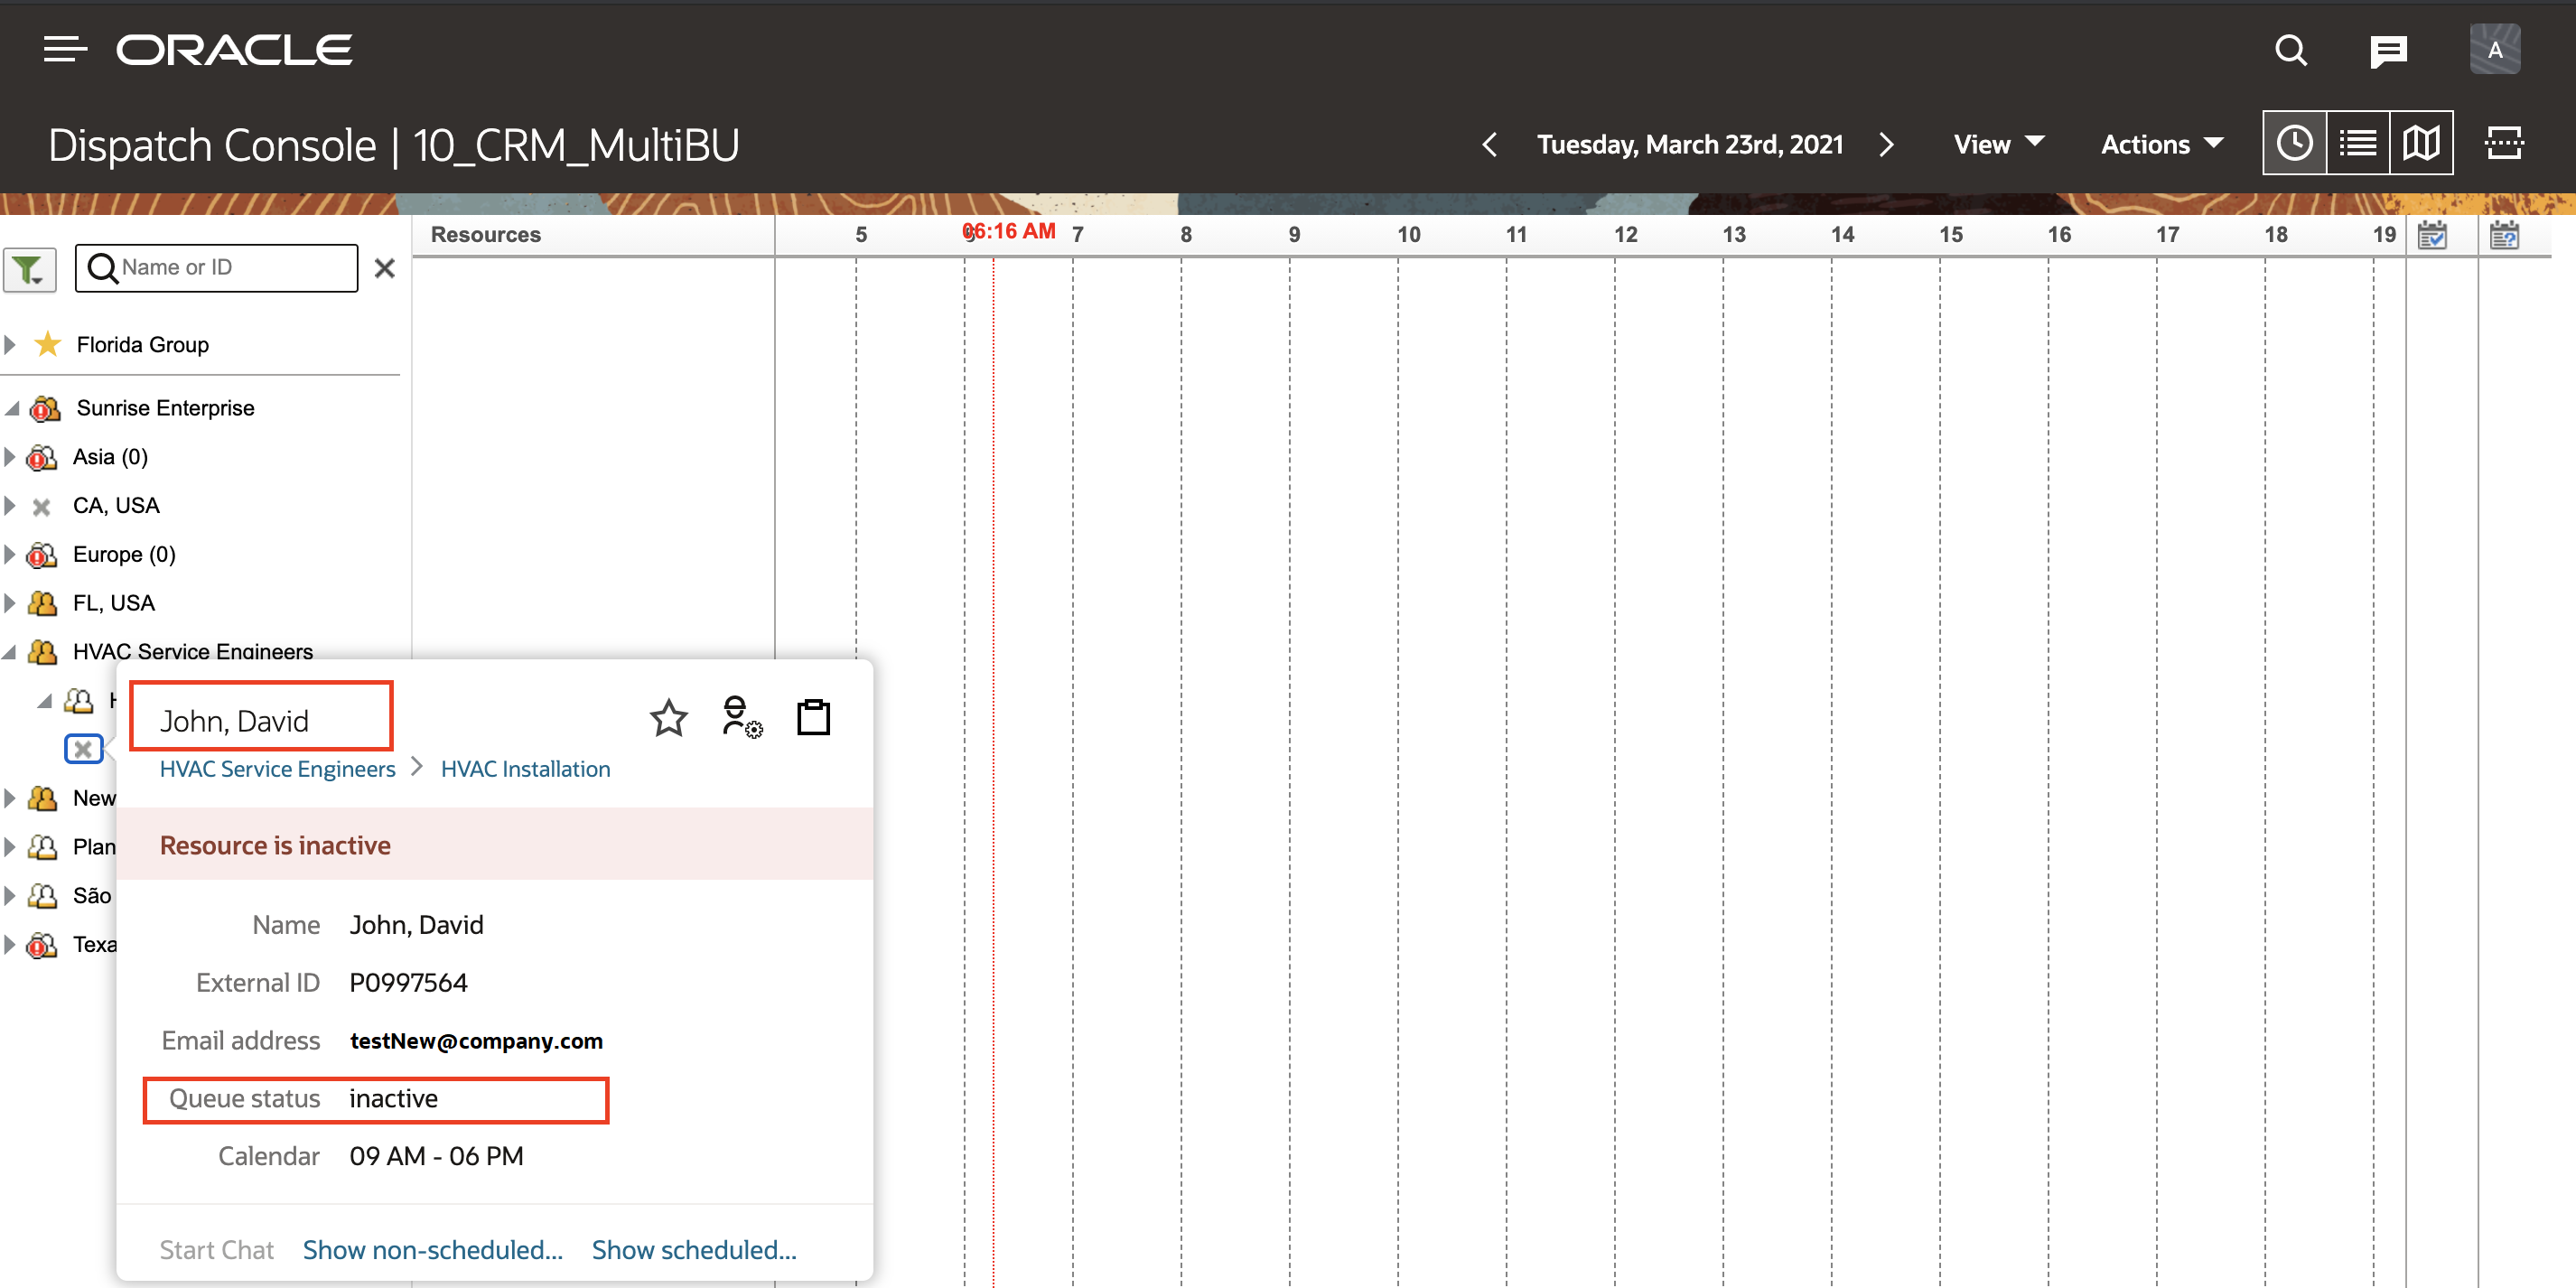
Oracle HCM-OFS Worker Availability
- Make sure the following integrations are activated - Oracle HCM OFS Worker Availability, Oracle HCM OFS Worker Availability Activity Type, Oracle HCM OFS Worker Availability Helper, Oracle HCM OFS Worker Availability Activity Delete, Oracle HCM OFS Worker Availability WS Delete, Oracle HCM OFS Worker Availability Sync Helper, Oracle HCM OFS Worker Availability WS Creator, Oracle HCM OFS Worker Availability Activity Create.
- Schedule the integration. Click Integrations > Actions button next to the integration - Oracle HCM OFS Worker Availability > Add Schedule menu > Enter the schedule details like Frequency, Start Date, End Date and TimeZone.
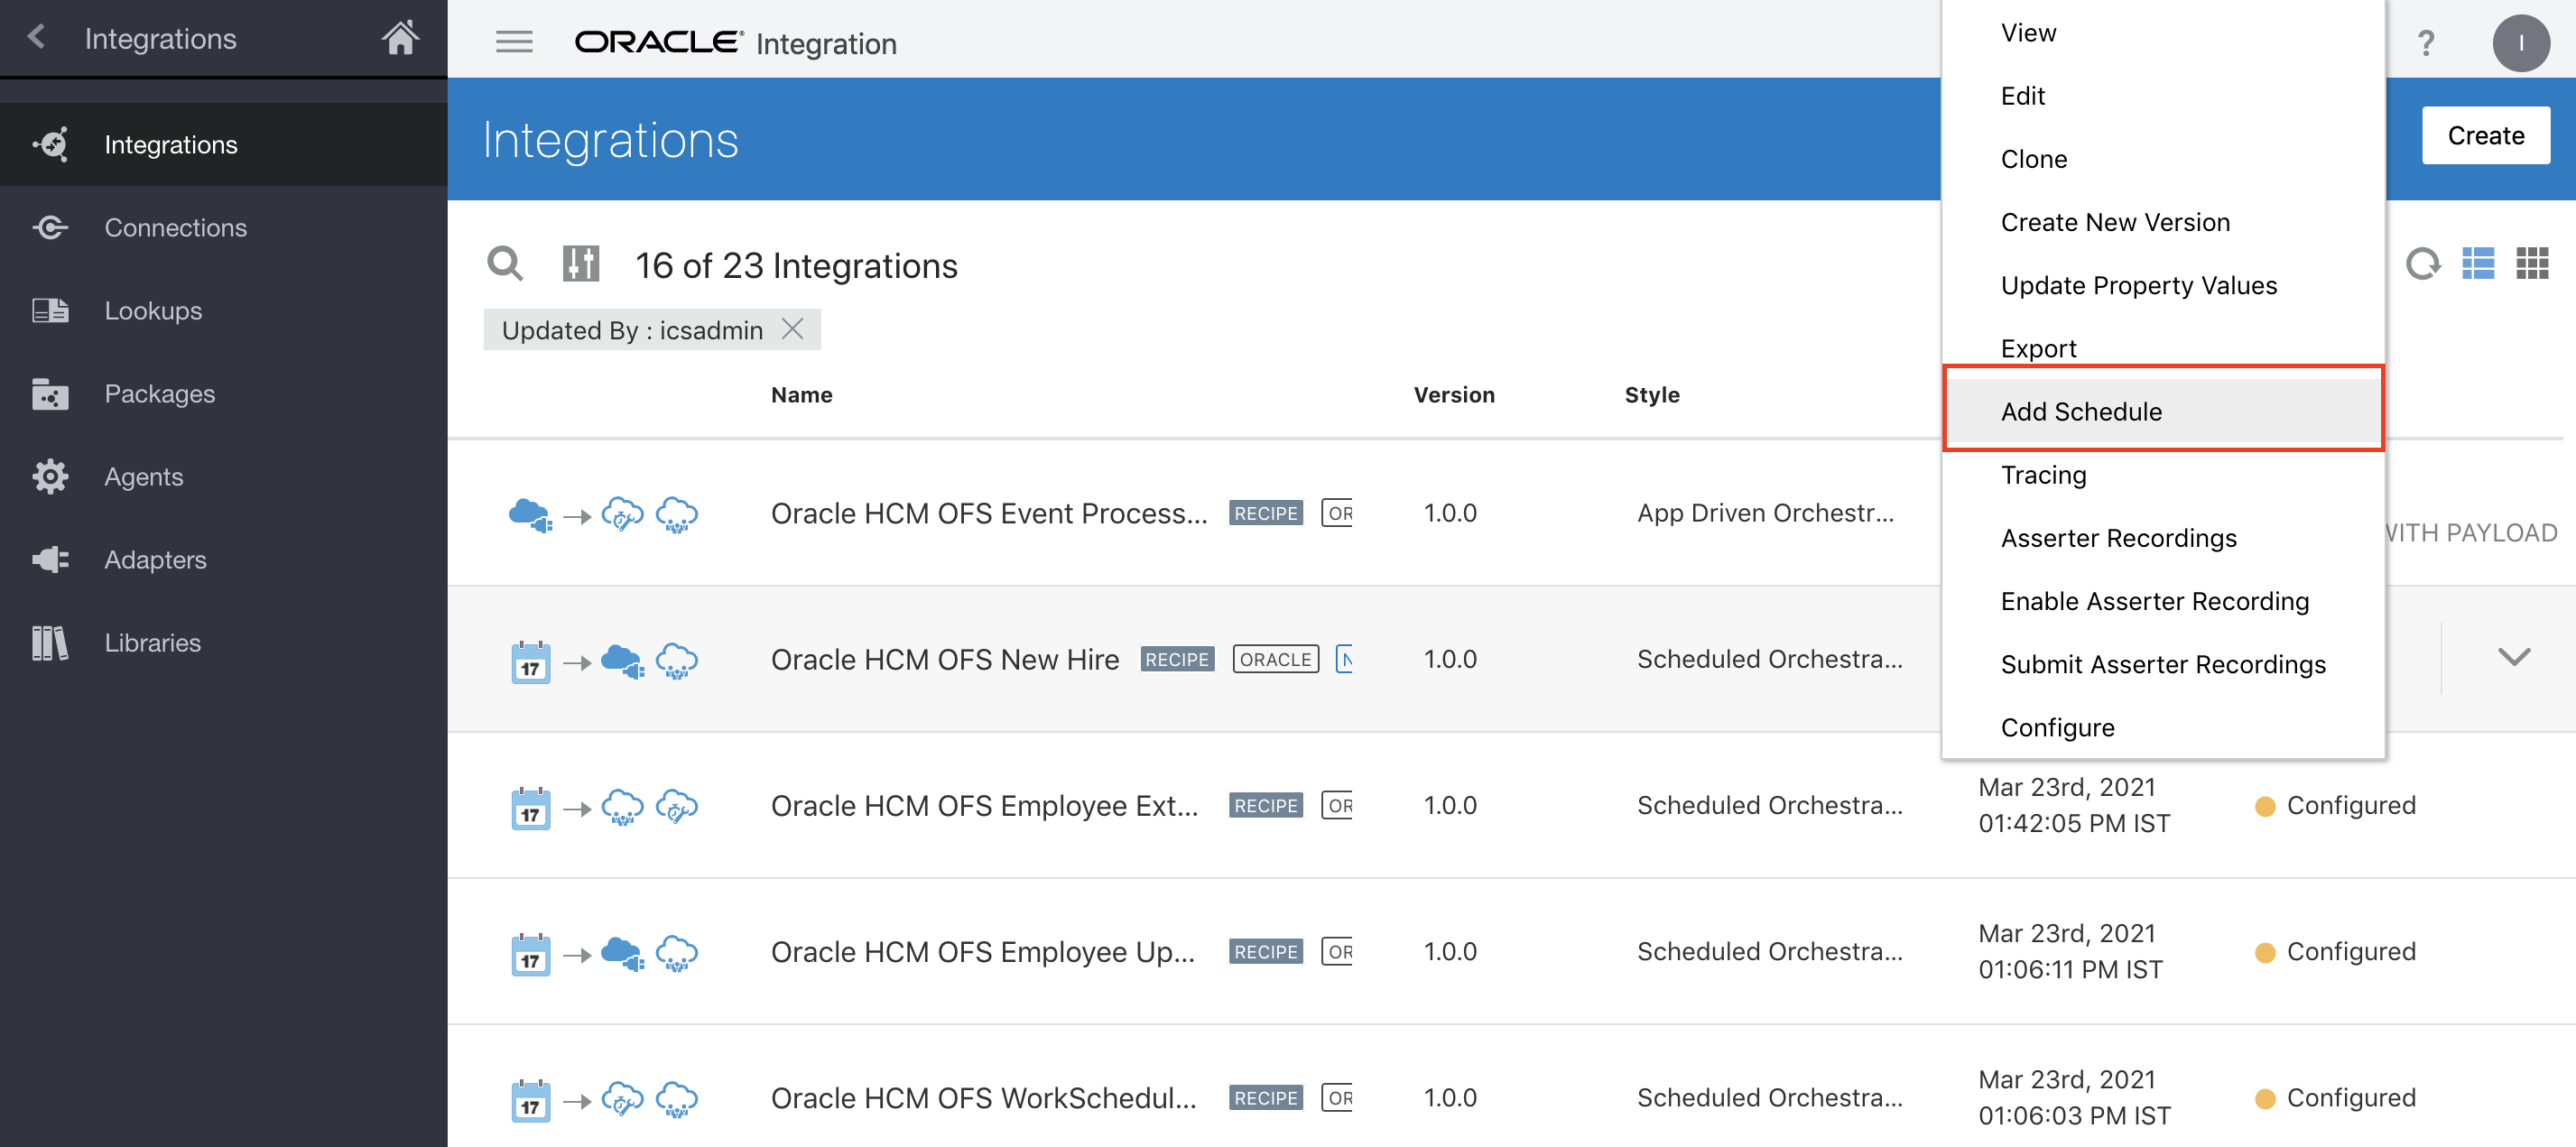
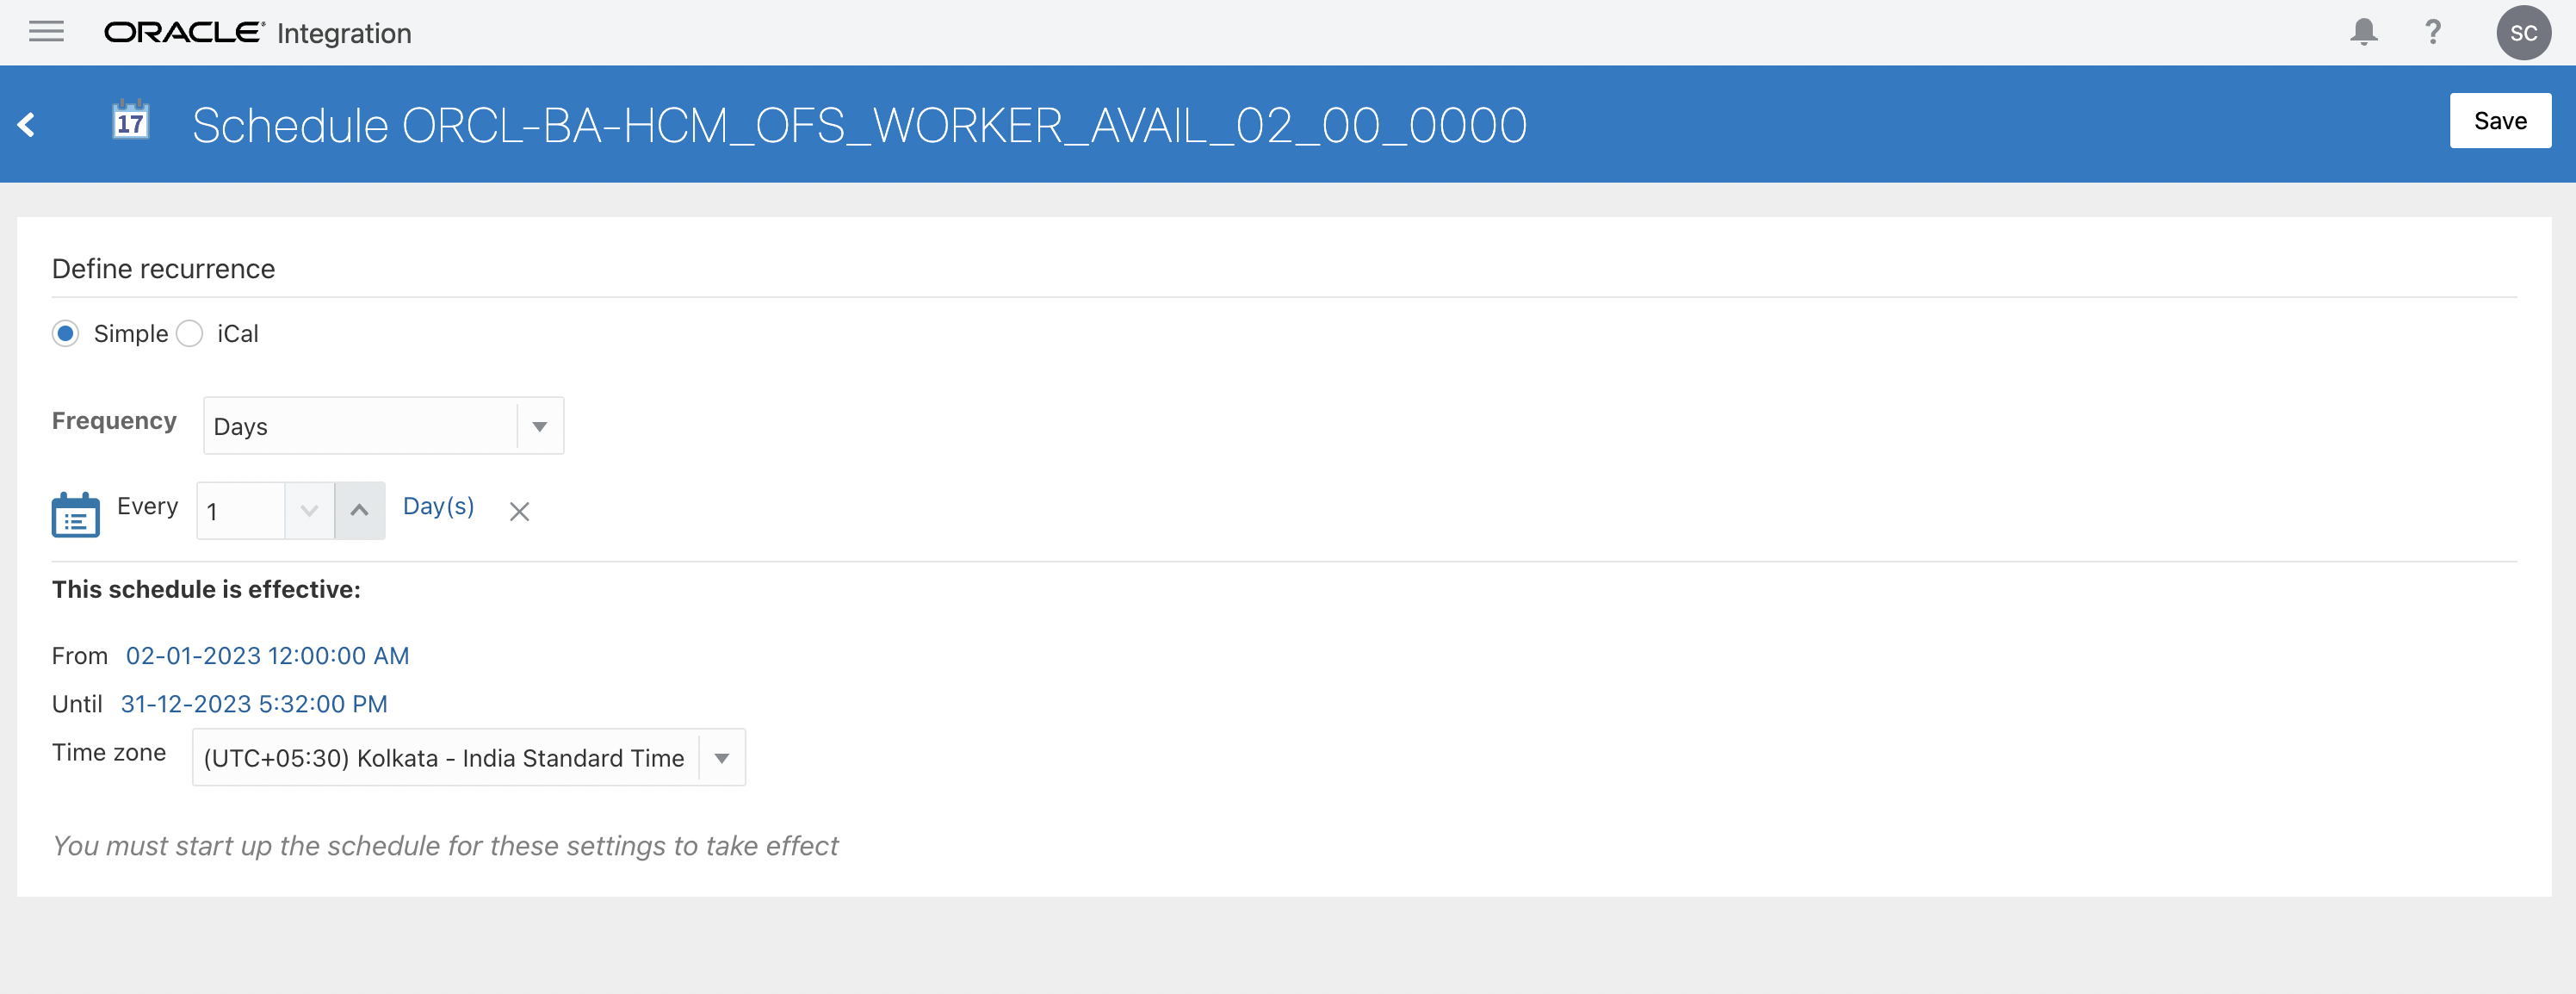
Fill in all the required fields in each screen and Submit the added details.
How to verify integration flow
- Update the work schedule details of the person in Oracle HCM Cloud.
- Wait for next integration and submit as per the schedule. The corresponding resource in Oracle Field Service is updated with the corresponding work schedule updates.
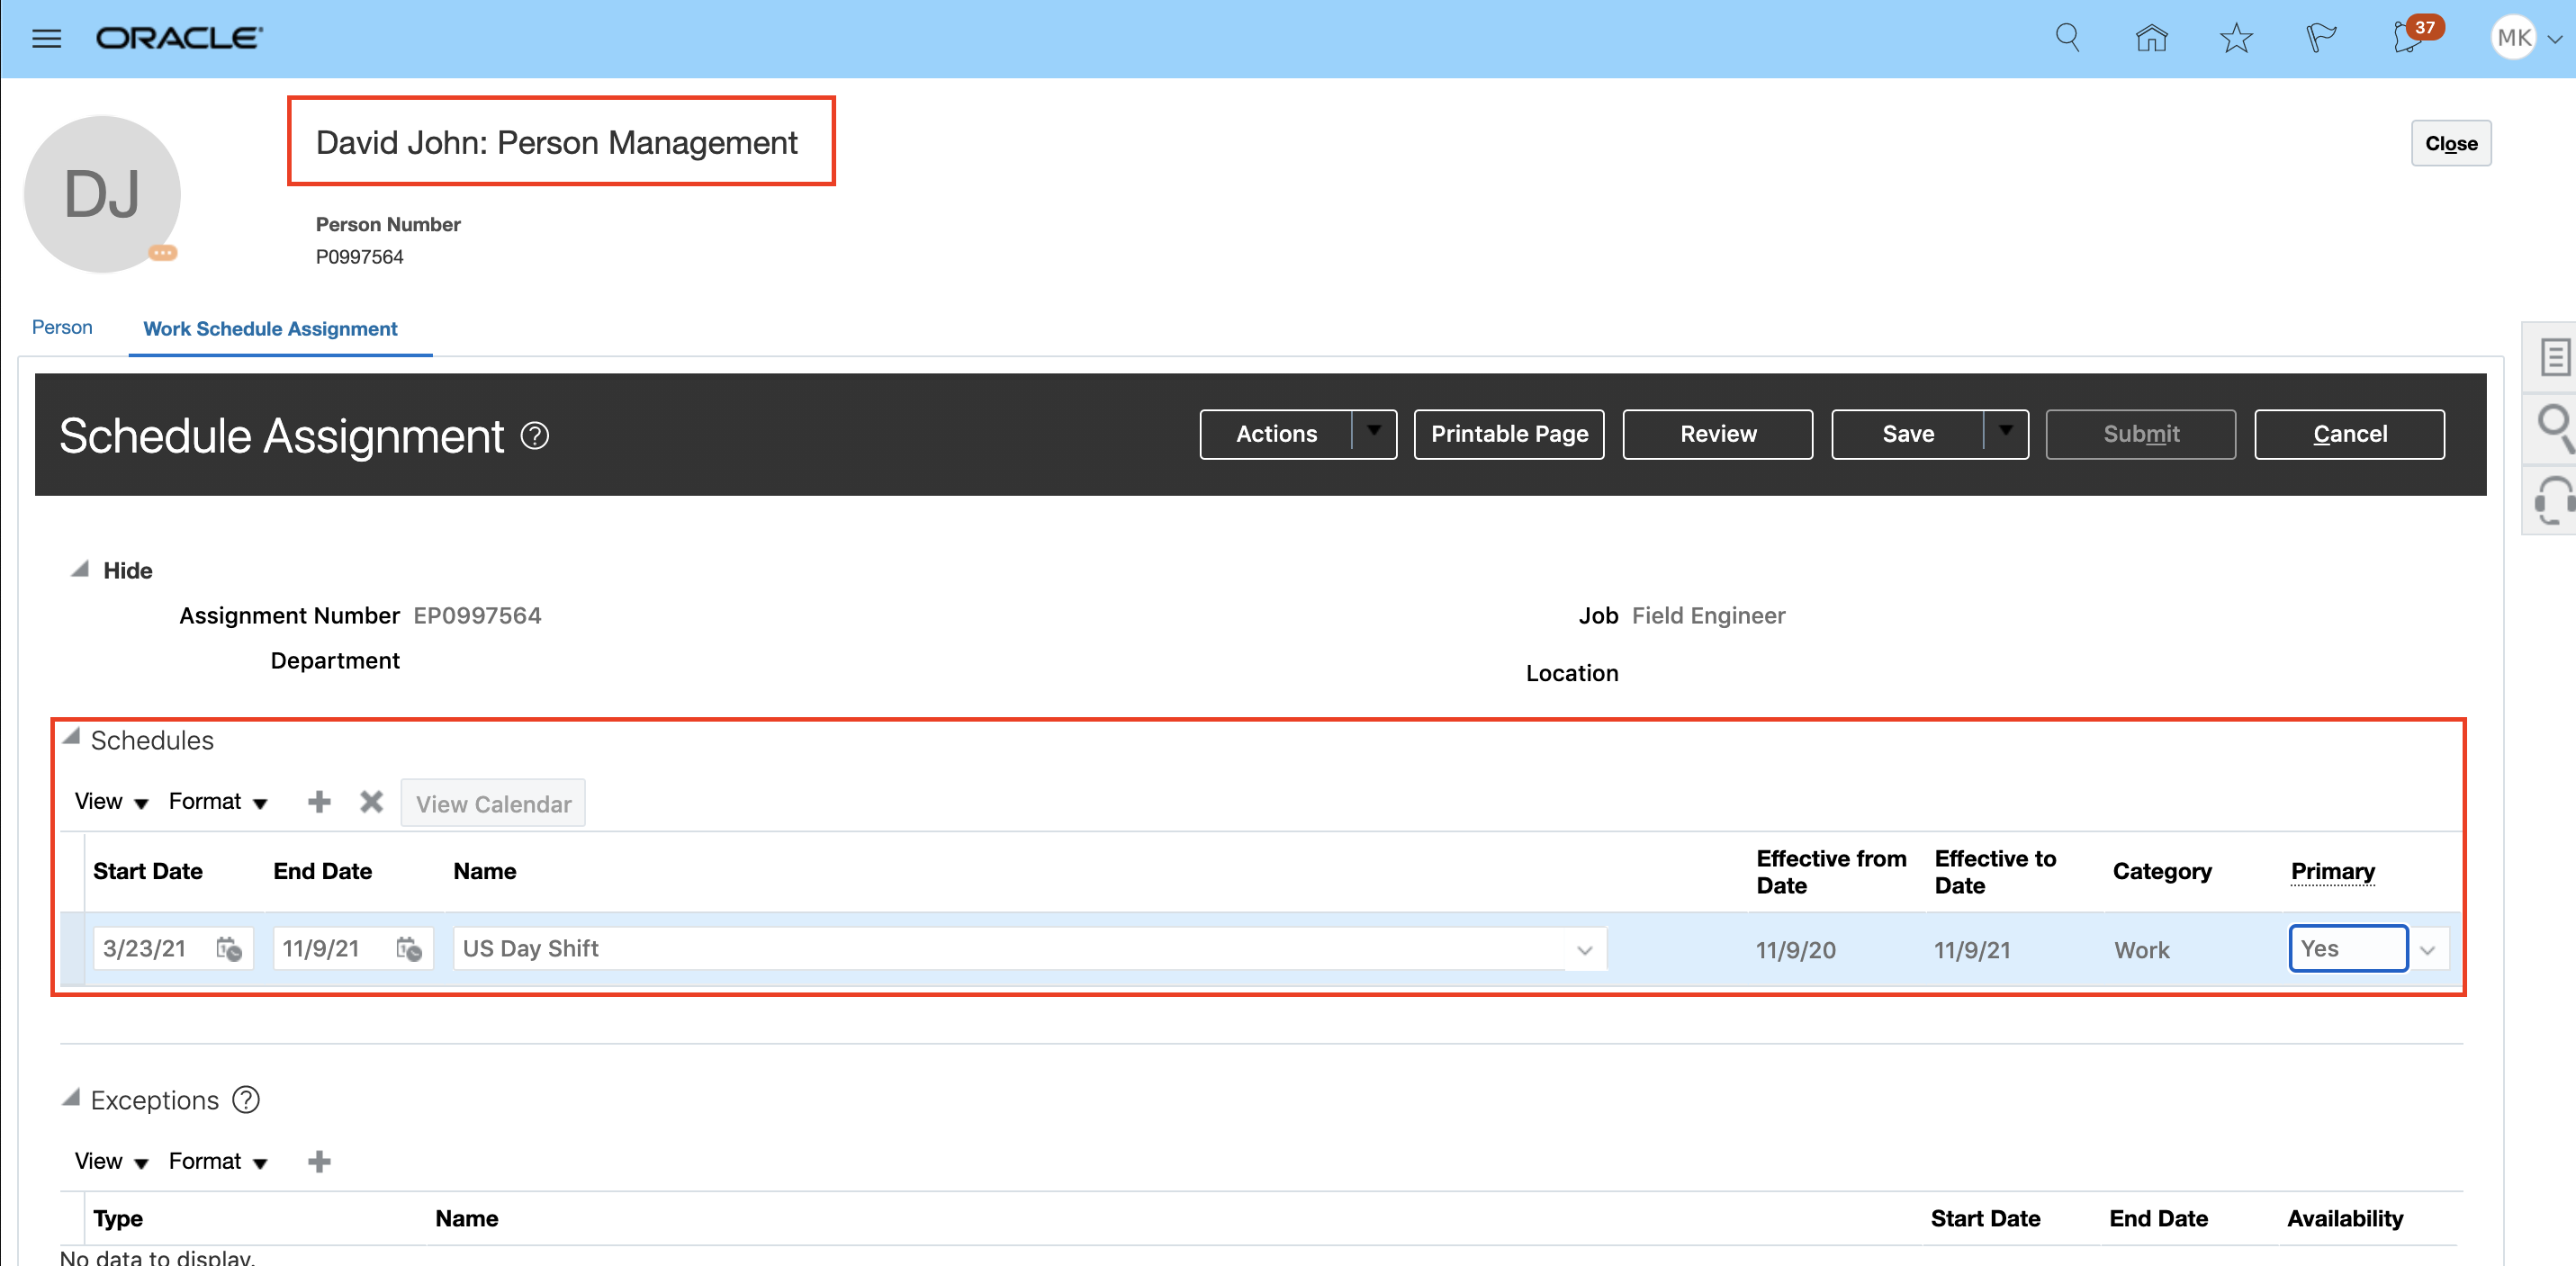
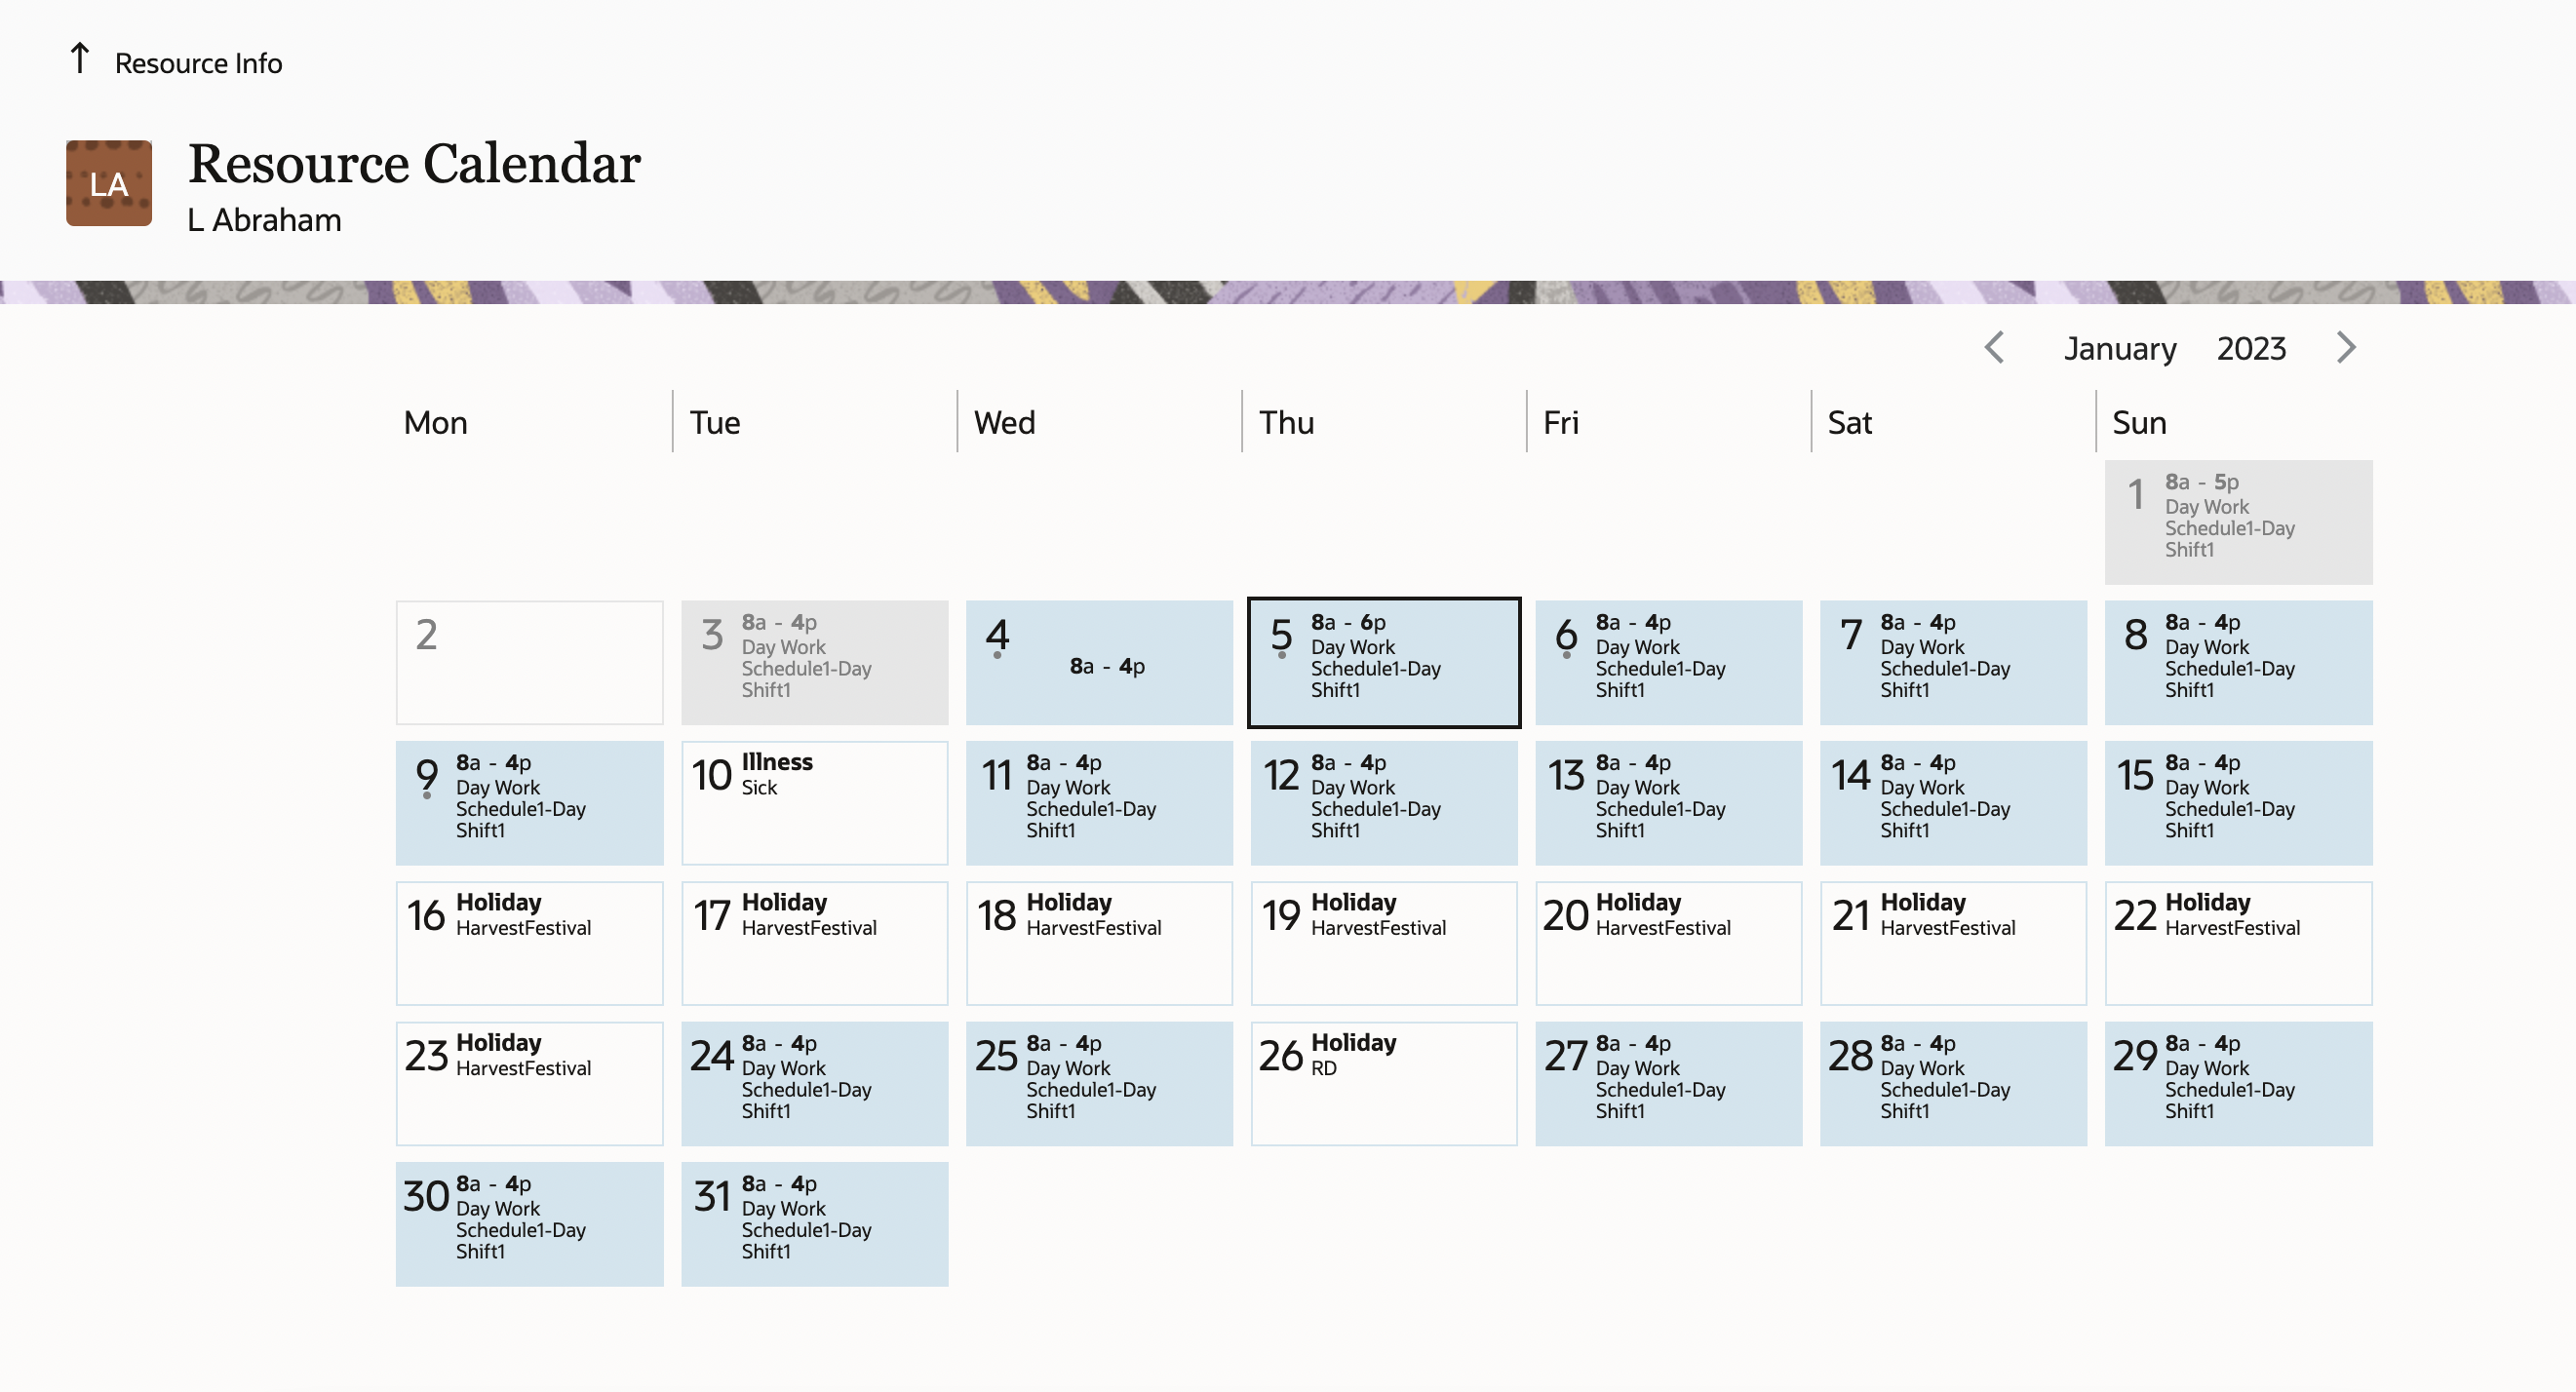
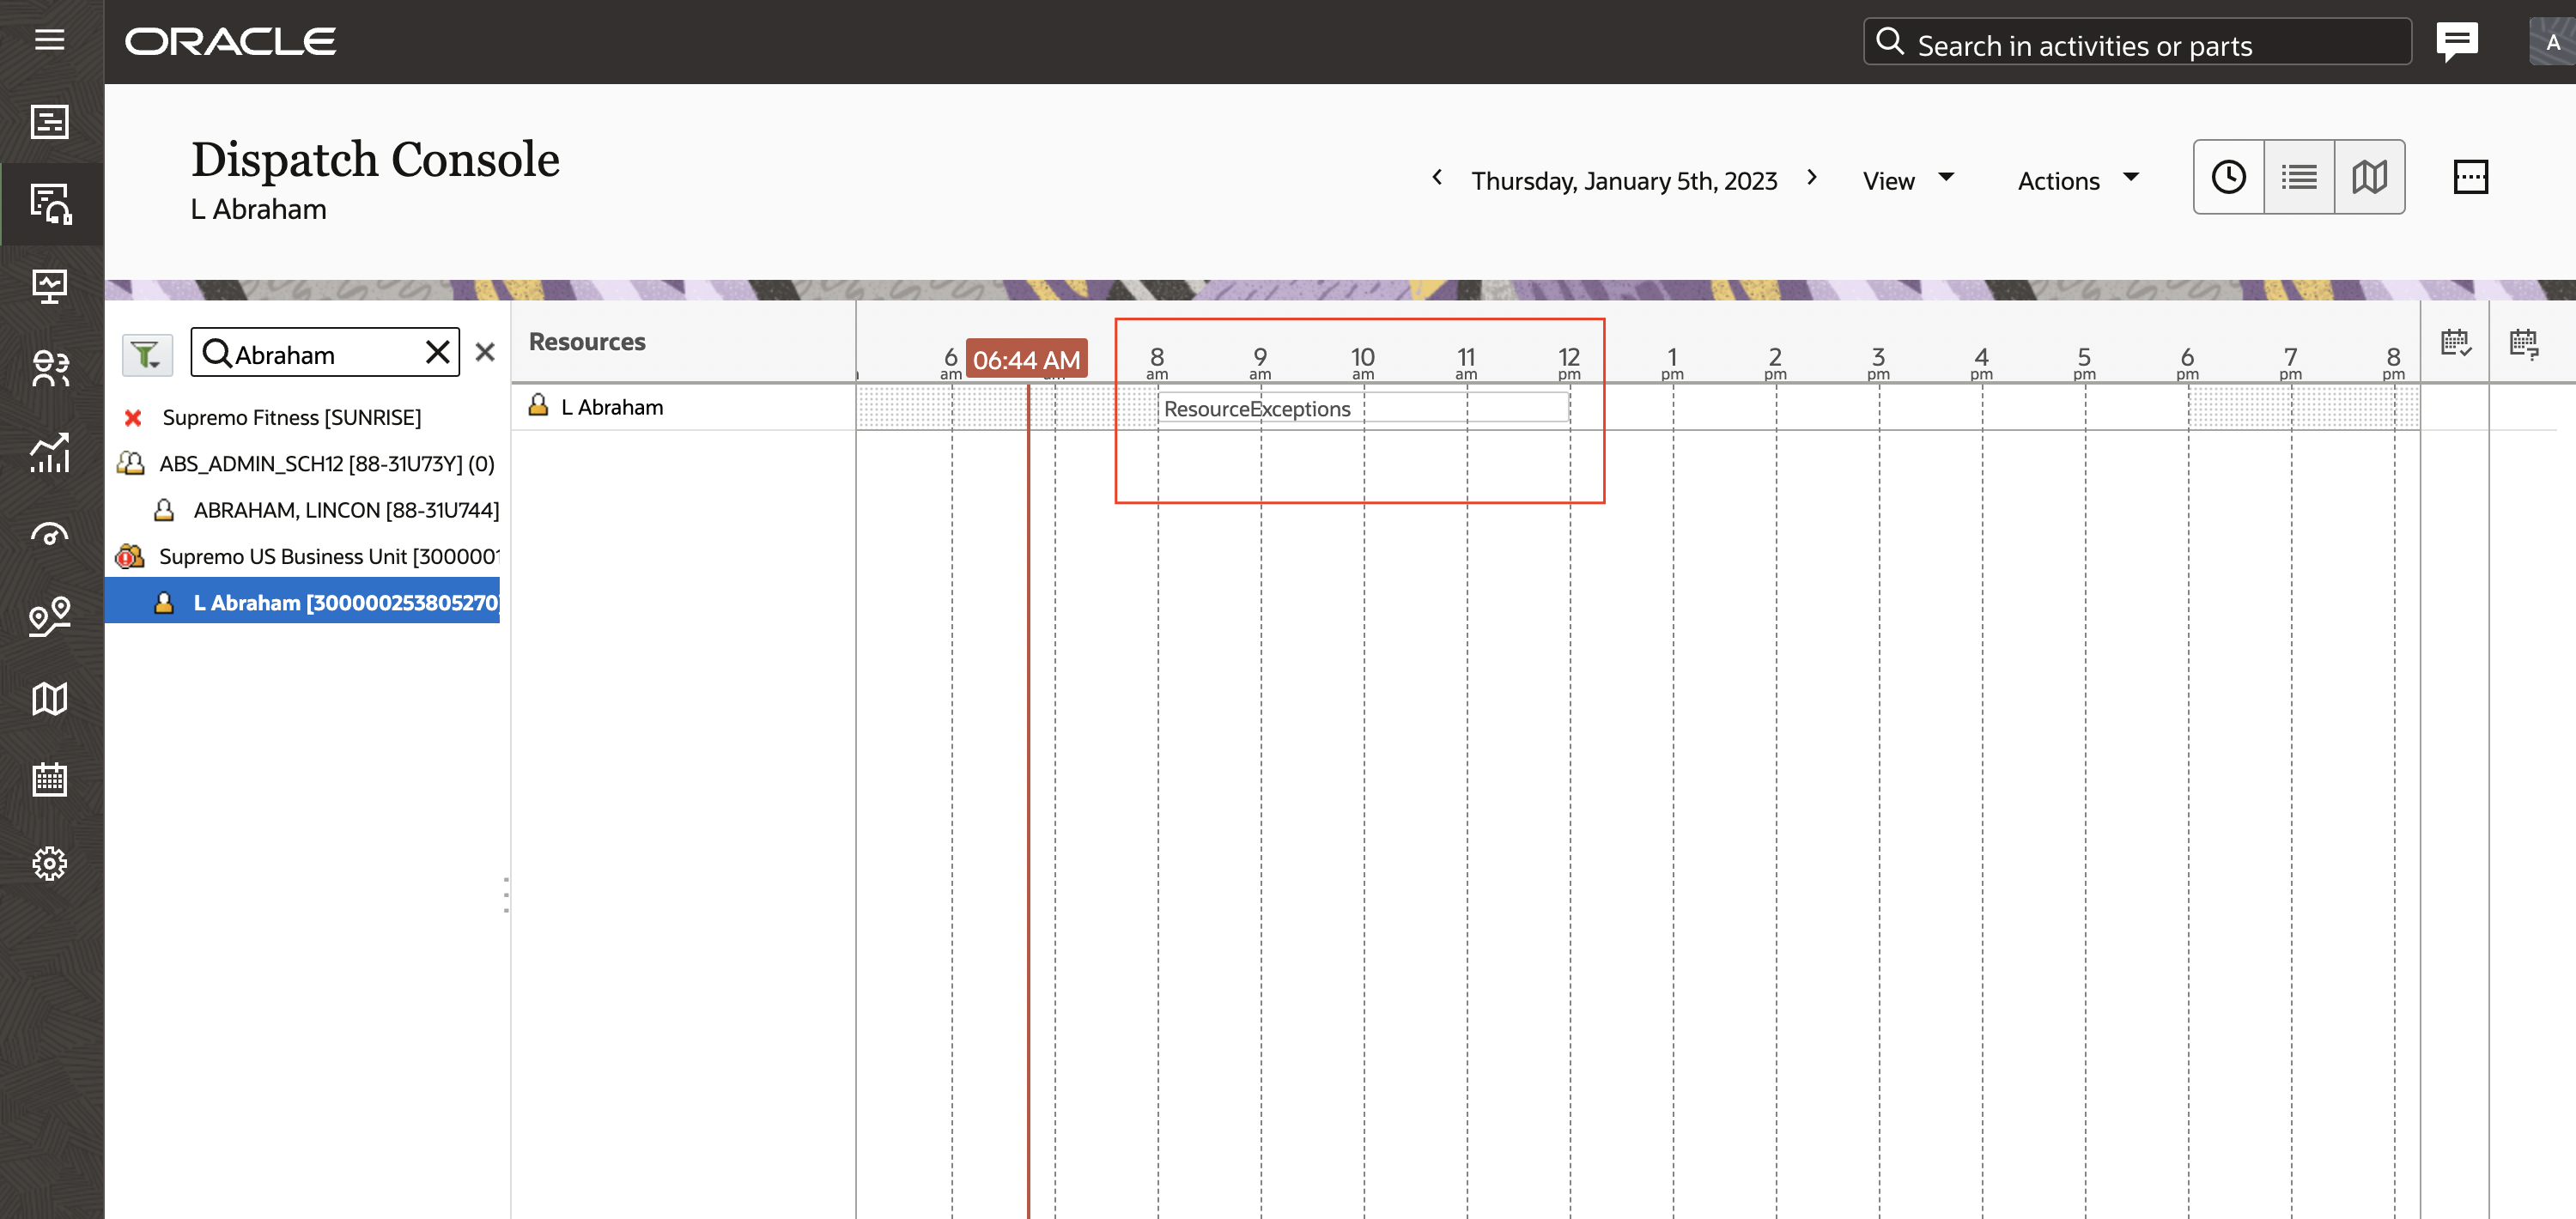
Error or warning messages from the integrations
Error and Warning Messages
| Integration Error Message | Explanation | Remediation |
|---|---|---|
| Person Resource is not Found Or resource Id update is failed. |
This means the attempt to update the External ID of the Oracle Field Service resource who has already been created by the previous version of the integration has failed. Or there is no resource in Oracle Field Service with the person number as the resource ID. |
|
| Party is not created for the person : <Person id> |
No Person Party is generated for the technician in Oracle HCM Cloud. So the technician won't be sync'd to Oracle Field Service. |
Make sure the ESS job is scheduled to run in Oracle HCM Cloud. |
| A user is already Present for the Party <OFS resource Id> OR Unable to create a default User Account [Go to OFS UI to create a user account manually] |
This message is printed in either of these scenarios: While syncing technician details, if there is already a user account available for the technician in Oracle Field Service, it wont be created again. OR There is no user account available for the technician in Oracle HCM Cloud and while trying to create a default user account with firstName.lastName, the first name is not available for the technician in Oracle HCM Cloud. |
The user account should be created or updated through Oracle Field Service user interface. |
Limitations in Oracle HCM Cloud Integrations
Oracle HCM-OFS Worker Availability
The following scenarios are not handled in this integration for this release:
Scenario 1
Multiple partial leaves on the same day within the work schedule is not supported. Only half-day leaves are supported in this release.
Example:
The work schedule of an employee for a day is from 8 AM to 5 PM. The employee goes to Oracle HCM Cloud and applies for partial leave from 10 AM to 11 AM and then from 3 PM to 4 PM on the same day.
When the integration runs, it will sync only the last partial leave applied for the day. In this example, an internal activity will be created in OFS from 3 PM to 4 PM.
A workaround to handle this scenario is to use resource exceptions instead of absences to indicate multiple non-available time slots on the same day.
Scenario 2
Let's assume that the work schedule of an employee is from 8 AM to 5 PM. Now he decides to perform overtime work from 7 PM to 10 PM on the same day. This scenario is not handled in the current worker availability integration. This setup will create a single working schedule from 8 AM to 10 PM in Oracle Field Service. In the actual scenario, the resource is not available for work from 5 PM to 7 PM. This information is not tracked in Oracle Field Service.
Scenario 3
Schedules with more than one shift for a day with a time gap in between will be represented as a single shift in Oracle Field Service.
Example:
In HCM, create a work schedule with 2 shifts for a day:
Shift 1 - 7 AM to 11 AM
Shift 2 - 12 PM to 3 PM
When the integration runs, this will be represented as a single shift from 7 AM to 3 PM in Oracle Field Service.
In the actual case, the resource is not available for work from 11 AM to 12 PM.
Scenario 4
Let's assume that an employee has an overnight work schedule from 7 PM to 3 AM on the next day and he is on this schedule from the 1st of Jan 2023 to the 31st of Dec 2023. If we run the scheduled integration for ten days from the 10th of Jan 2023 to the 20th of Jan 2023, we would see the schedule for each day being updated as 7 PM to 3 AM in Oracle Field Service. On the last day, the 20th of Jan, the schedule will be updated as 7 PM to 11:55 PM. The schedule for the next day, the 21st of Jan from 12 AM to 3 AM will not be updated in Oracle Field Service, as we have scheduled the integration to pull data from Oracle HCM Cloud for 10 days only which in this example would be from the 10th of Jan to the 20th of Jan.
This feature provides the following benefits:
- Resolves duplicate synchronization of technicians and manages the same record between Oracle HCM and Oracle Field Service using PartyId
- Synchronize the availability of workers such as absence records, employee schedules, and holidays.
Steps to Enable
You don't need to do anything to enable this feature.
Tips And Considerations
Although this recipe is available in Oracle Integration, you must configure the integration before you can use it.
Key Resources
- Configuring Applications: https://docs.oracle.com/en/cloud/saas/field-service/faded/index.html.This link will be available after Update 23A GA release.
Run Daily Extract from "Applications" Page
Overview
This new feature address the case when a customer wants to regenerate Daily Extract files for previous dates. Now customers can regenerate files by themselves from the Configuration | Applications screen.
Additionally, now it is possible on this screen to view the history of both automatic and manual Daily Extract runs.
Who can use the feature?
The feature is available to all customers.
How it Works
Manual Daily Extract Run
After updating to Update 23A you can navigate to the Configuration > Applications page and press ':' on the bottom right of the Daily Extract application. A new 'Manual Run' menu option has been added to the list, as shown in this screenshot:
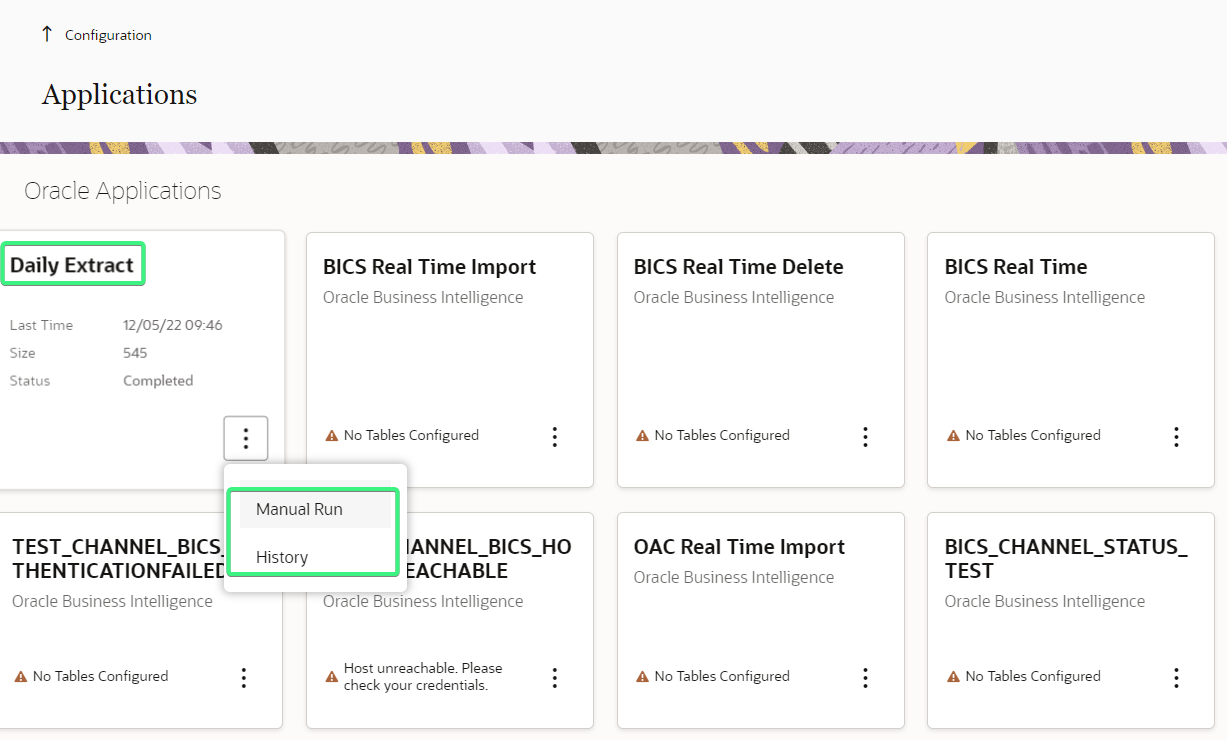
After clicking 'Manual Run', a page appears where you can select the Daily Extract manual run extraction date:
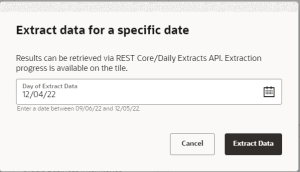
The date is selected from the following date range: from today to (today - 90 days). The default value is 'yesterday'. A hint under the date shows the manual run date range.
You can select the extraction date and press Extract Data. The page validates that the manual run can be started. This screenshot shows a validation error:
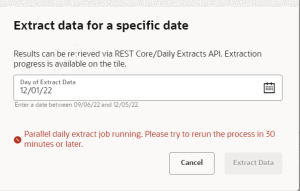
Only a single day may be selected for the Manual Daily Extract. If there's a need to extract data for several days or for a date range, then several Manual Daily Extract runs may be initiated one by one.
Only one simultaneous Daily Extract process (either automatic or manual) can be triggered per instance. Therefore, the Manual Run button will not display if the instance is already running a Daily Extract task.
Possible Errors on the Page
Possible Errors on the Daily Extract Page
| Error | Description |
|---|---|
| Unable to start Manual Run. Please try to rerun the process in 30 minutes or later. |
Daily Extract module did not accept the request. |
| Parallel Daily Extract job. Please try to rerun the process in 30 minutes or later. |
Automatic Daily Extract job is in progress. |
If there is a need to perform a Daily Extract export for multiple days, then Manual Run should run for each day after the previous manual run finishes.
The Daily Extract Manual run generates files in the same format and location as the automatic Daily Extract. Therefore, files from automatic Daily Extract will be overridden.
Two new statuses are displayed at the bottom part of the Daily Extract application:
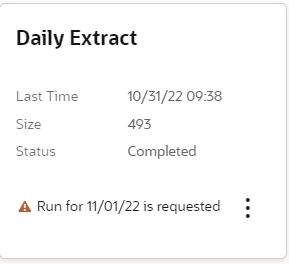
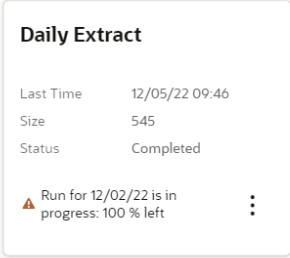
Status of Daily Extract
| Status | Description |
|---|---|
| Run for 'YYYY-DD-MM' is requested |
Manual Run is requested by user and it is waiting to be processed. |
| Run for 'YYYY-DD-MM' is in progress: % left |
Manual Run or Automatic run are in progress. |
View Daily Extract Run History
After updating to Update 23A, you can navigate to the Configuration > Applications page and press ':' on the bottom right of the Daily Extract application tile. A new 'History' button has been added to the list:
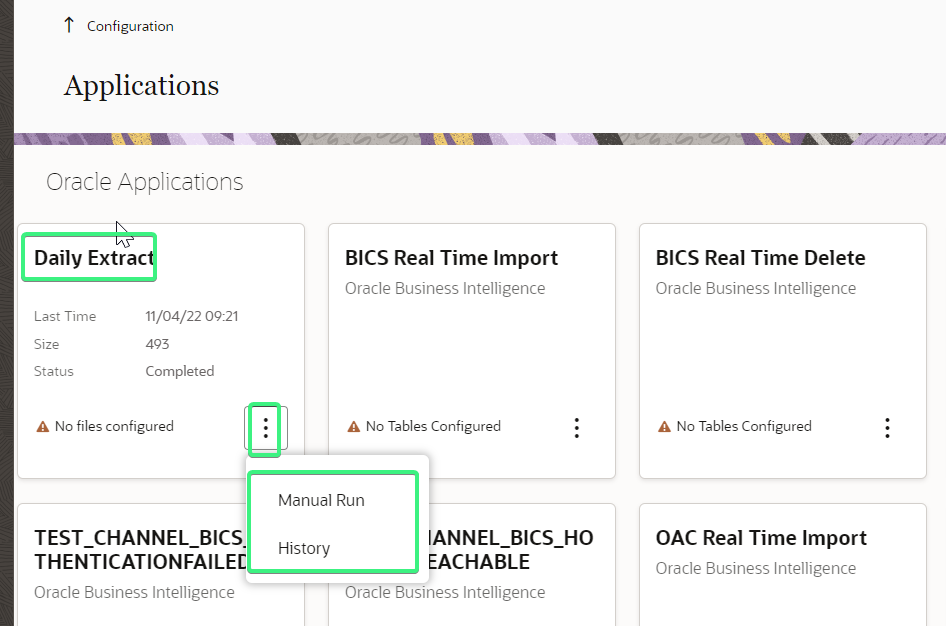
After pressing the 'History' button, the following page appears where you can see the history of the last 20 Daily Extract runs (both automatic and manual) for this instance:
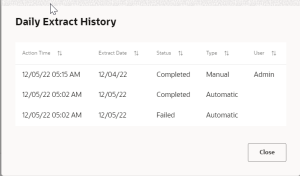
This feature helps customers generate the Daily Extract files for past dates by themselves. They can also view the history of both automatic and manual Daily Extract runs.
Steps to Enable
You don't need to do anything to enable this feature.
Key Resources
- Configuring Applications: https://docs.oracle.com/en/cloud/saas/field-service/faded/index.html. This link will be available after Update 23A GA release.
Redwood Design for Debriefing Plug-In
Overview of Debriefing and Proforma Plug-Ins
Debriefing is a process of reporting time and materials used while performing an activity. The field resource uses this plug-in sample to report the following information in the context of the activity he is working on:
- Labor: includes travel time and working time (measured in hours)
- Parts: parts and materials used while performing the activity
- Charges: any extra charges such as tolls or parking fees (measured in money spent)
All parts, labor, and expense items are stored in the inventory entity. Also, a PDF invoice is generated and saved in a file property of the activity.
NOTE: This sample plug-in requires the Oracle Field Service 19B update or later release.
Plug-In Configuration
With the Update 23A, the Debrief plug-in will be available as a Standard plug-in out of the box within Oracle Field Service. You can easily select and install standard plug-ins in a couple clicks without the need for any special technical skills. Steps mentioned below are to be followed if you are manually downloading the plug-in from the OTN (https://www-sites.oracle.com/downloads/samplecode/ofsc-samplecode-downloads.html) store. The recommendation is to download the standard plug-in from the Oracle Field Service application in order to avoid these manual steps.
The process to configure the plug-in is as follows:
- Download the sample code collection from OTN (https://www-sites.oracle.com/downloads/samplecode/ofsc-samplecode-downloads.html). The sample collection contains the files mentioned in the content describe below: (that is, plugindebriefing_properties_v1.xml, plugin-debriefing-plugins_v1.xml and plugin-debriefing-source-v1.zip).
- Import properties.xml (for example, plugin-debriefing_properties_v1.xml).
- Add three Inventory Types.
- Import plugins.xml (or example, plugin-debriefing-plugins_v1.xml).
- Configure User Types.
- Upload the Parts Catalog.
Import Debriefing Plug-In Properties
Plug-in properties are required for configuring different application screens and entities. Therefore, you should download the properties.xml file from the OTN website (https://www-sites.oracle.com/downloads/samplecode/ofsc-samplecode-downloads.html) so that the plug-in properties are automatically associated with the entities.
You can either retain the default properties or change the name and values of some properties in the properties.xml file.
- Extract the properties.xml file from the collection (that is, plugin-debriefing-properties_v1.xml).
- Log in to the application as an administrator.
- Navigate to Configuration > Properties and then click Import.
- Click Browse, and then click Import.
The following table describes the plug-in properties imported from the properties.xml file:
Resource Entity Properties
| Name |
Label |
Type |
GUI |
Description |
|---|---|---|---|---|
| ID |
pid |
Internal ID of the resource |
||
| Name |
pname |
Name of the resource |
Activity Entity Properties
| Name | Label | Type | GUI | Description |
|---|---|---|---|---|
| Invoice |
invoice |
File |
File |
PDF file of the generated invoice. For example, mime_types=”application/pdf” |
| Company name |
ccompany |
String |
Text |
Customer’s company name displayed as the title of the invoice. |
| Activity ID |
aid |
Internal ID of the activity. |
||
| Name |
cname |
Name of activity's customer referenced in the PDF invoice. |
||
| Address |
caddress |
Activity address used in the invoice. |
||
| City |
ccity |
Activity city used in the invoice. |
||
| State |
cstate |
Activity state used in the invoice. |
||
| ZIP/Postal Code |
czip |
Postal code used in the invoice. |
||
| Work Order |
appt_number |
Work order used in the invoice. |
||
| Signature |
csign |
Customer signature required prior to saving invoice as PDF. |
Inventory Entity Properties
| Name | Label | Type | GUI | Description |
|---|---|---|---|---|
| Expense |
expense_amount |
String |
Text |
Amount of expense |
| Expense Currency |
expense_currency_code |
Enumeration |
Combobox |
Value of each enumeration item is separated with the “|” character. Index Value USD $|US Dollars EUR €|Euro |
| Part Disposition |
part_disposition_code |
Enumeration |
Combobox |
The value that identifies whether the inventory is consumable by the customer and there is no need to track it anymore, or whether the inventory is returnable. If the inventory is returnable, the Inventory Management system of Oracle SCM Cloud should track the part until it is returned by the customer. Index Value N No Return S Slow Return M Fast Return |
| Part Unit of Measure |
part_uom_code |
Enumeration |
Combobox |
The unit of measurement (UOM) of parts (inventories). For example: Index Value ea ea m m in in |
| Part Item Description |
part_item_desc |
String |
Text |
The description of the part. For example, Magnetic hard drive. It is used to search for inventory in the catalog. |
| Part Item Number |
part_item_number |
String |
Text |
The number of the part that has been installed or taken from the customer. It is specified as a code. For example, FS908765. |
| Part Item Revision |
part_item_revision |
String |
Text |
A single-letter code, for example, "A" or "B". Also, it is possible to have a single digit like "1" or "2". Usually, the inventory is identified by Part Item + Part Item Revision, but Item Revision is optional. |
| Part Item Number + Revision |
part_item_number_rev |
String |
Text |
The Part Item number concatenated with the Part Item Revision. For example, FS908765A, where "FS908765" is a Part Item Number and "A" is a Part Item Revision. It is used to search for inventory in the catalog. |
| Expense Activity |
expense_service_activity |
Enumeration |
Combobox |
Type of expense. For example: Index Value trv Travel msc Miscellaneous |
| Expense Item |
expense_item_number |
Enumeration |
Combobox |
The subtype of expense. For example: Index Value tol Toll Charges prk Parking |
| Expense Item Description |
expense_item_desc |
Enumeration |
Combobox |
The description of expense subtypes. The indices should be the same as in the expense_item_number property. The values should describe the corresponding expense_item_number element. For example: Index Value tol: Toll Charges for Service prk: Parking Charges for Service |
| Labor End Time |
labor_end_time |
String |
Text |
The time when a field resource stops working on particular service activity. It should be not later than the end time of the work order (Oracle Field Service Cloud activity). Also, there should be no overlap between the items in the labor list. The format is T24:59:59. |
| Labor Start Time |
labor_start_time |
String |
Text |
The time when a field resource starts working on a particular service activity. It should be not be earlier than the start time of the work order (Oracle Field Service Cloud activity). Also, there should be no overlap between the items in the labor list. The format is T24:59:59. |
| Labor Activity |
labor_service_activity |
Enumeration |
Combobox |
The type of labor. For example: Index Value com: Commute drp: Diagnose and Repair |
| Labor Item |
labor_item_number |
Enumeration |
Combobox |
The subtype of labor. For example: Index Value trv Travel Time reg FS Regular Labor ovr FS Overtime Labor |
| Labor Item Description |
labor_item_desc |
Enumeration |
Combobox |
The description of labor subtype. The indices should be the same as in labor_item_number property. The values should describe the corresponding labor_item_number element. For example: Index Value trv FS Tech Actual Travel reg Regular Labor Time ovr Overtime Labor Time |
| Inventory ID |
invid |
Internal ID of the inventory. |
||
| Activity ID |
inv_aid |
Internal ID of the activity to which the inventory is assigned. |
||
| Resource ID |
inv_pid |
Internal ID of the resource to which the inventory is assigned. |
||
| Inventory Pool |
invpool |
The inventory pool (Resource, Customer, Installed, De-installed) |
||
| Inventory Type |
invtype |
Type of inventory. See Add Inventory Types for the Plug-In. |
||
| Quantity |
quantity |
The installed parts or the parts taken from the customer. It can be either counted or specified in inches, feet, and so on. The quantity is defined as an integer number. |
||
| Serial Number |
invsn |
Field |
Text |
The serial number of the inventory |
Optional Configuration
To configure additional properties, see the Properties section in the Administering Oracle Field Service Cloud Guide.
Add Inventory Types for the Plug-In
You must add inventory types (expense, labor, part, and part_sn) to capture information about the time and materials used during the activity. The plug-in stores the reported information about time and expenses in the installed pool of the activity. However, the materials - the parts used and parts returned are stored in the resource and customer pools, respectively.
- Log in to the application as an administrator.
- Navigate to Configuration > Inventory Types and click Add.
- Add the Expense inventory type as follows:
- Enter 'expense' as the label.
- Enter 'Expense' as the name.
- Select Expense_item (unique identifier for the Expense Item field) from the Model Property drop-down list.
- Click Save.
- Add the Labor inventory type as follows:
- Enter 'labor' as the Label.
- Enter 'Labor' as the Name.
- Select Labor_Item (unique identifier for the Labor Item field) from the Model Property drop-down list.
- Click Save.
- Add the Part inventory type as follows:
- Enter 'part' as the Label.
- Enter 'Part' as the Name.
- Select Part_Item+Revision (unique identifier for the Part Item field) from the Model Property dropdown list.
- Click Save.
- Add the Part SN inventory type as follows:
- Enter 'part_sn' in the Label field.
- Enter 'Serialized Part' in the Name field.
- Select Part_Item+Revision (unique identifier for the Part SN Item field) from the Model Property drop-down list.
- Click Save.
Import plugin.xml into Oracle Field Service
You must download the plugin.xml file from the OTN website and import it into the Oracle Field Service Cloud application in order to use it. See the Configure and Use Plug-Ins section in the Mobile Plug-In Framework Guide.
- Log in to the application as an administrator.
- Navigate to Configuration > Forms & Plugins.
- Click Import Plugin.
- Click Save.
- Locate the plugins.xml (for example, plugin-debriefing-plugins_v1.xml) and then click Add.
- Click Save.
The plug-in is imported, and you can now click the Debriefing plugin to view its details. By default, the following settings are enabled:
- ‘debriefing_plugin’ is displayed in the Label field.
- HTML5 application is selected in the Type field.
- The Use Plug-in API checkbox is selected.
Configure User Types for the Plug-In
You can make the plug-in accessible to multiple user types by associating it with an application screen for those user types. Since debriefing is only done for started activities, let’s add the Debrief button that is visible only for Started activities to the Edit/View Activity page.
- Log in to the application as an administrator.
- Navigate to Configuration > User Types.
- Click Screen Configuration.
- Under Application Screens, click Edit/View Activity.
- Drag and drop the Button element to the top of the Visual Form Editor.
- Click the pencil icon, select Plugins from the drop-down list, and select Debrief from the Screen list, and then click OK.
- Click Add.
- Click the plus (+) icon, select 'activity status' and in (equal) from the respective drop-downs.
- Click Select Value, select the 'Started' check box, and then click Save to close the window.
- Click Save.
Upload Parts Catalog to Oracle Field Service
You can search for the parts used or returned from the catalog and then add these parts to an invoice. To view the parts within the catalog, you must create the catalog using the create_catalog method of the SOAP API and upload the catalog with the following configuration:
- Inventory_type field of type_schema must equal "part"
- Field schemas must contain the following field_schema elements:
field_schema Elements
| Catalog Label | Property Label | Searchable |
|---|---|---|
| part_uom_code |
part_uom_code |
0 |
| part_item_revision |
part_item_revision |
0 |
| part_item_number |
part_item_number |
0 |
| part_item_desc |
part_item_desc |
1 |
| part_disposition_code |
part_disposition_code |
0 |
- The label field of each item element for an upload_catalog request must contain the Part Item Number concatenated with the Part Item Revision without any separators. For example, "FS54888A", where "FS54888" is the Part Item Number and "A" is a Part Item Revision. If Part Item Revision is empty, then the label must contain only the Part Item.
How to Use the Plug-In
The Debrief button that is displayed for a started activity allows you to add time, expense, or material information to an invoice report, save this information, and obtain the customer’s signature.
Initial landing page when there are no charges added by the technician:
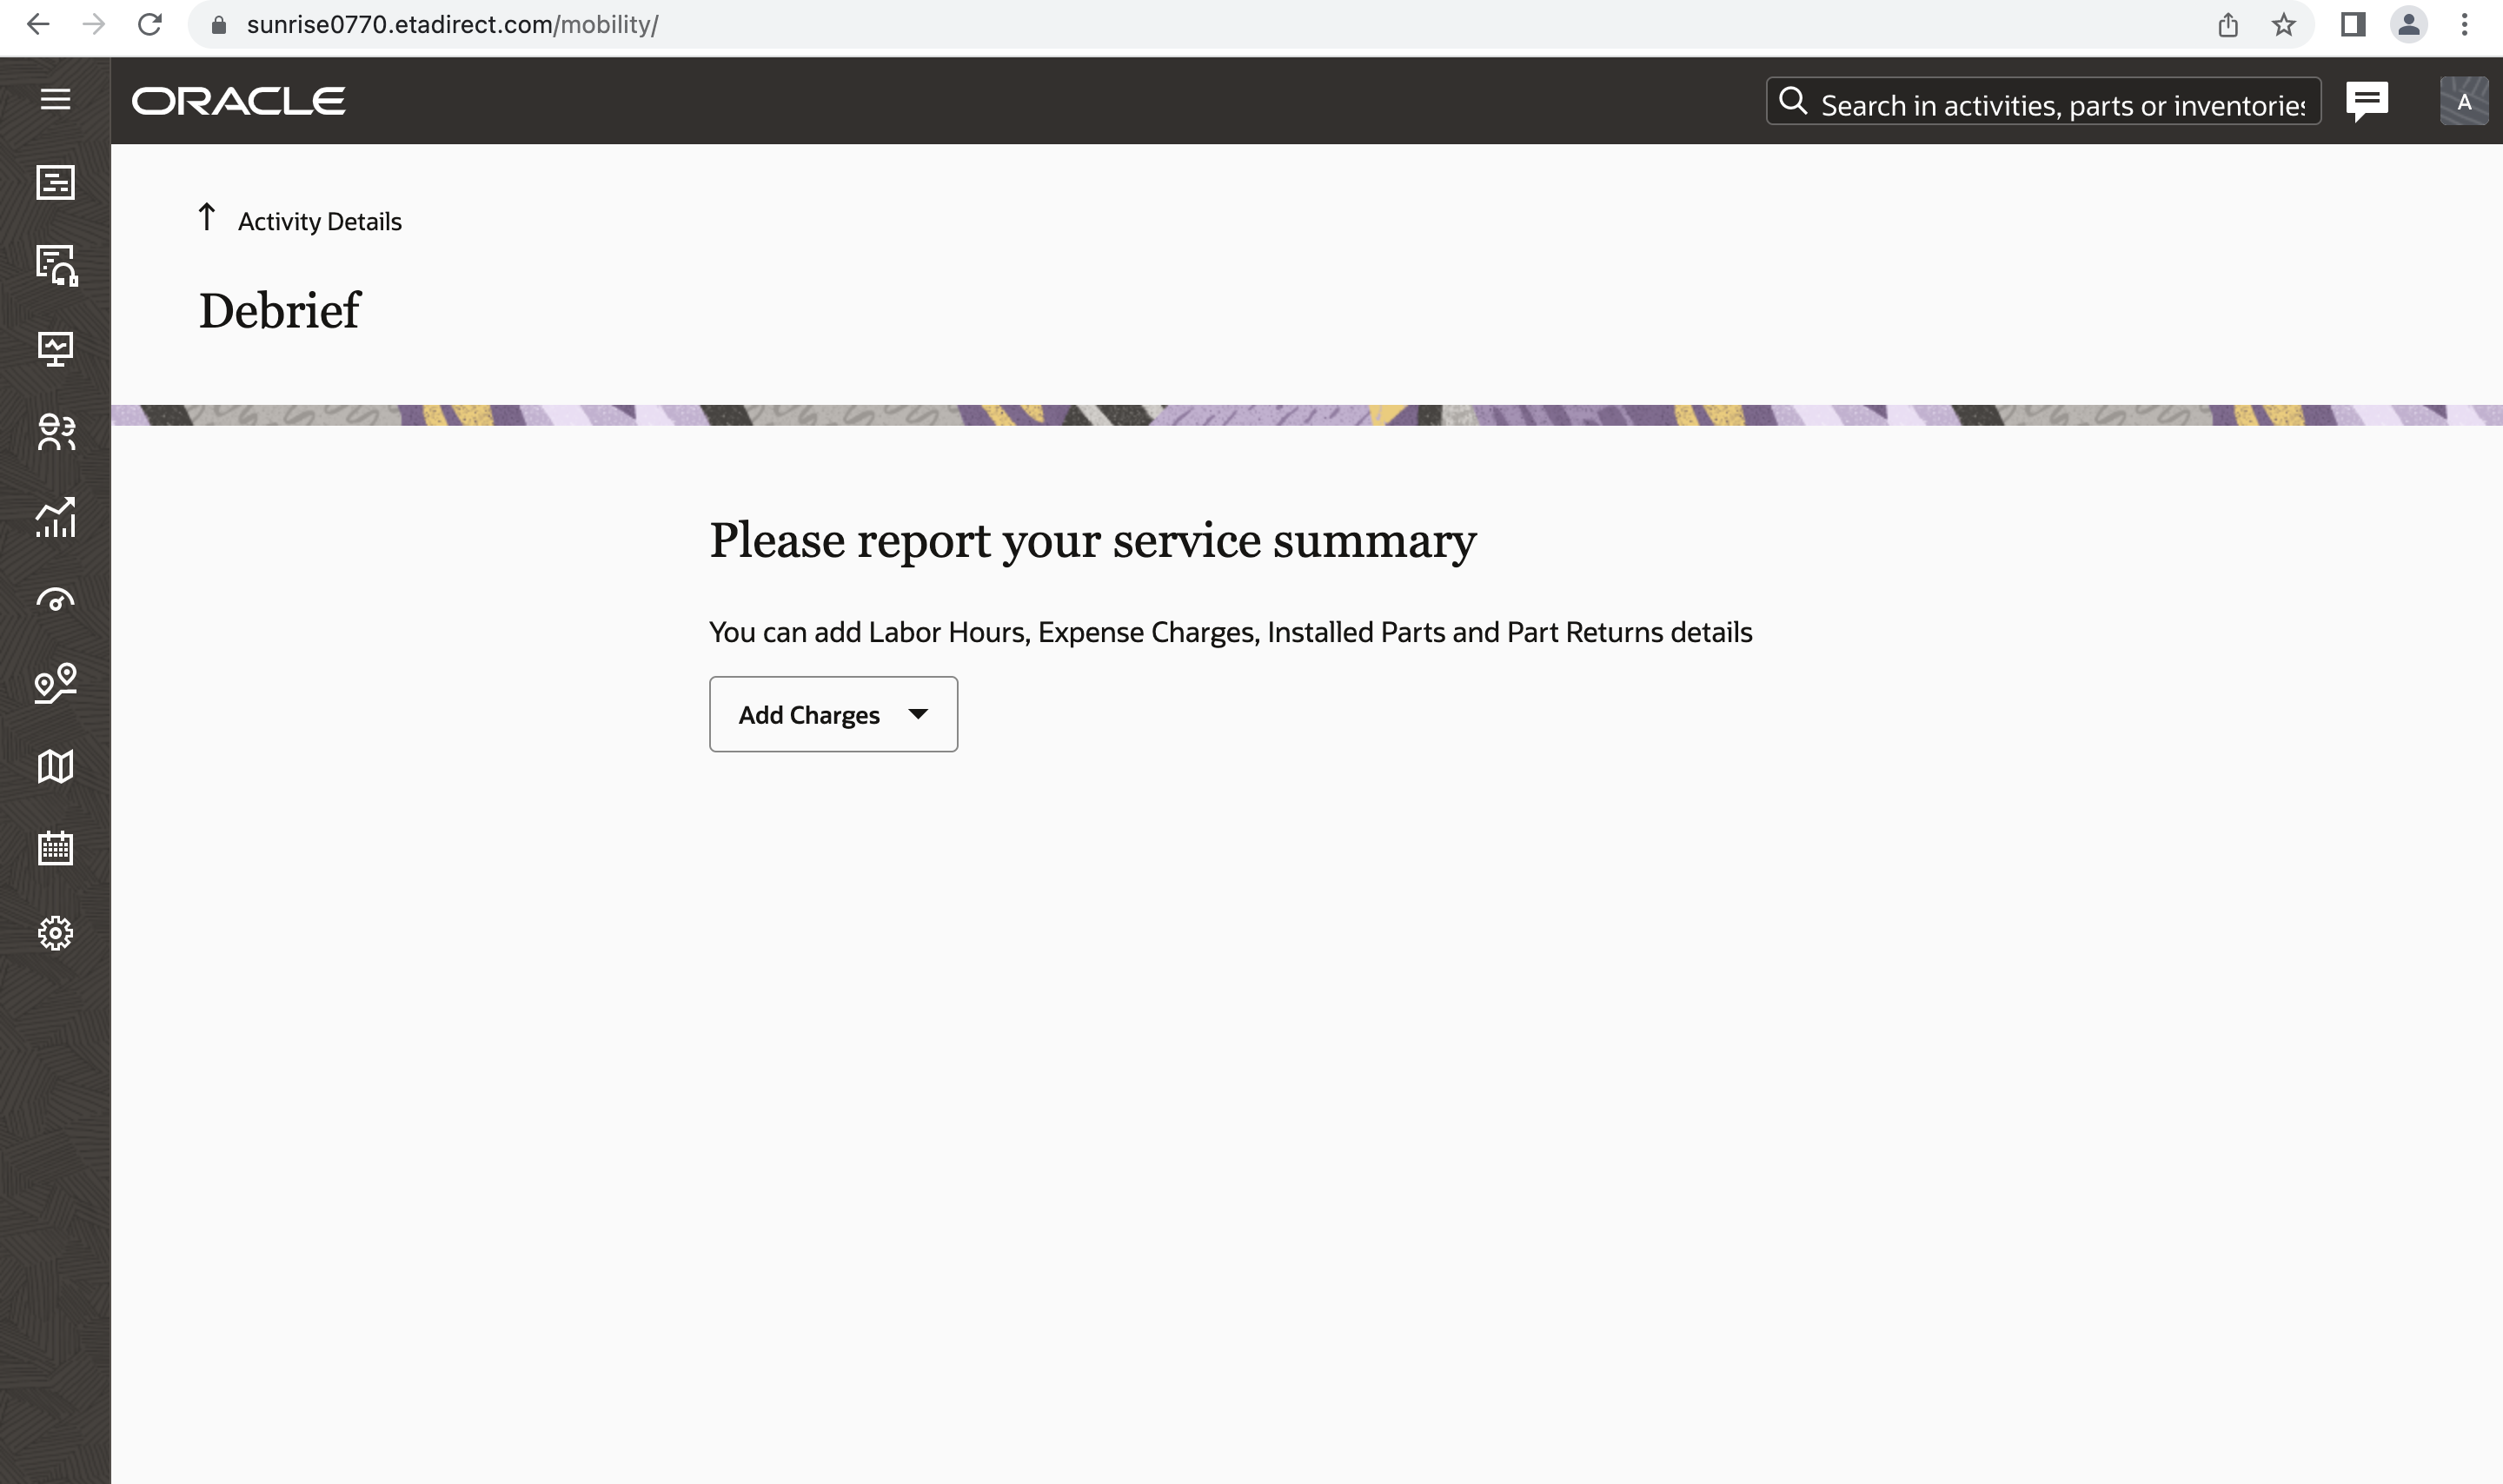
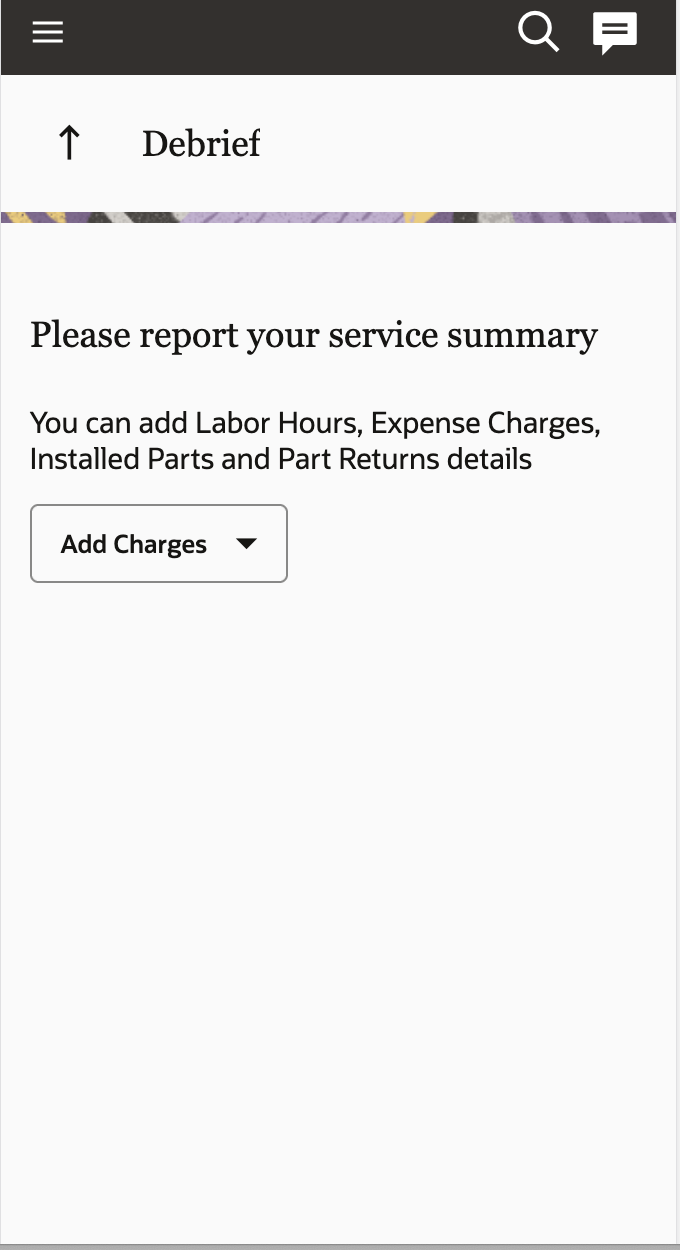
Upon clicking the menu button Add Charges, the following options appear, within which the technician can report the time and materials used while performing the activity:
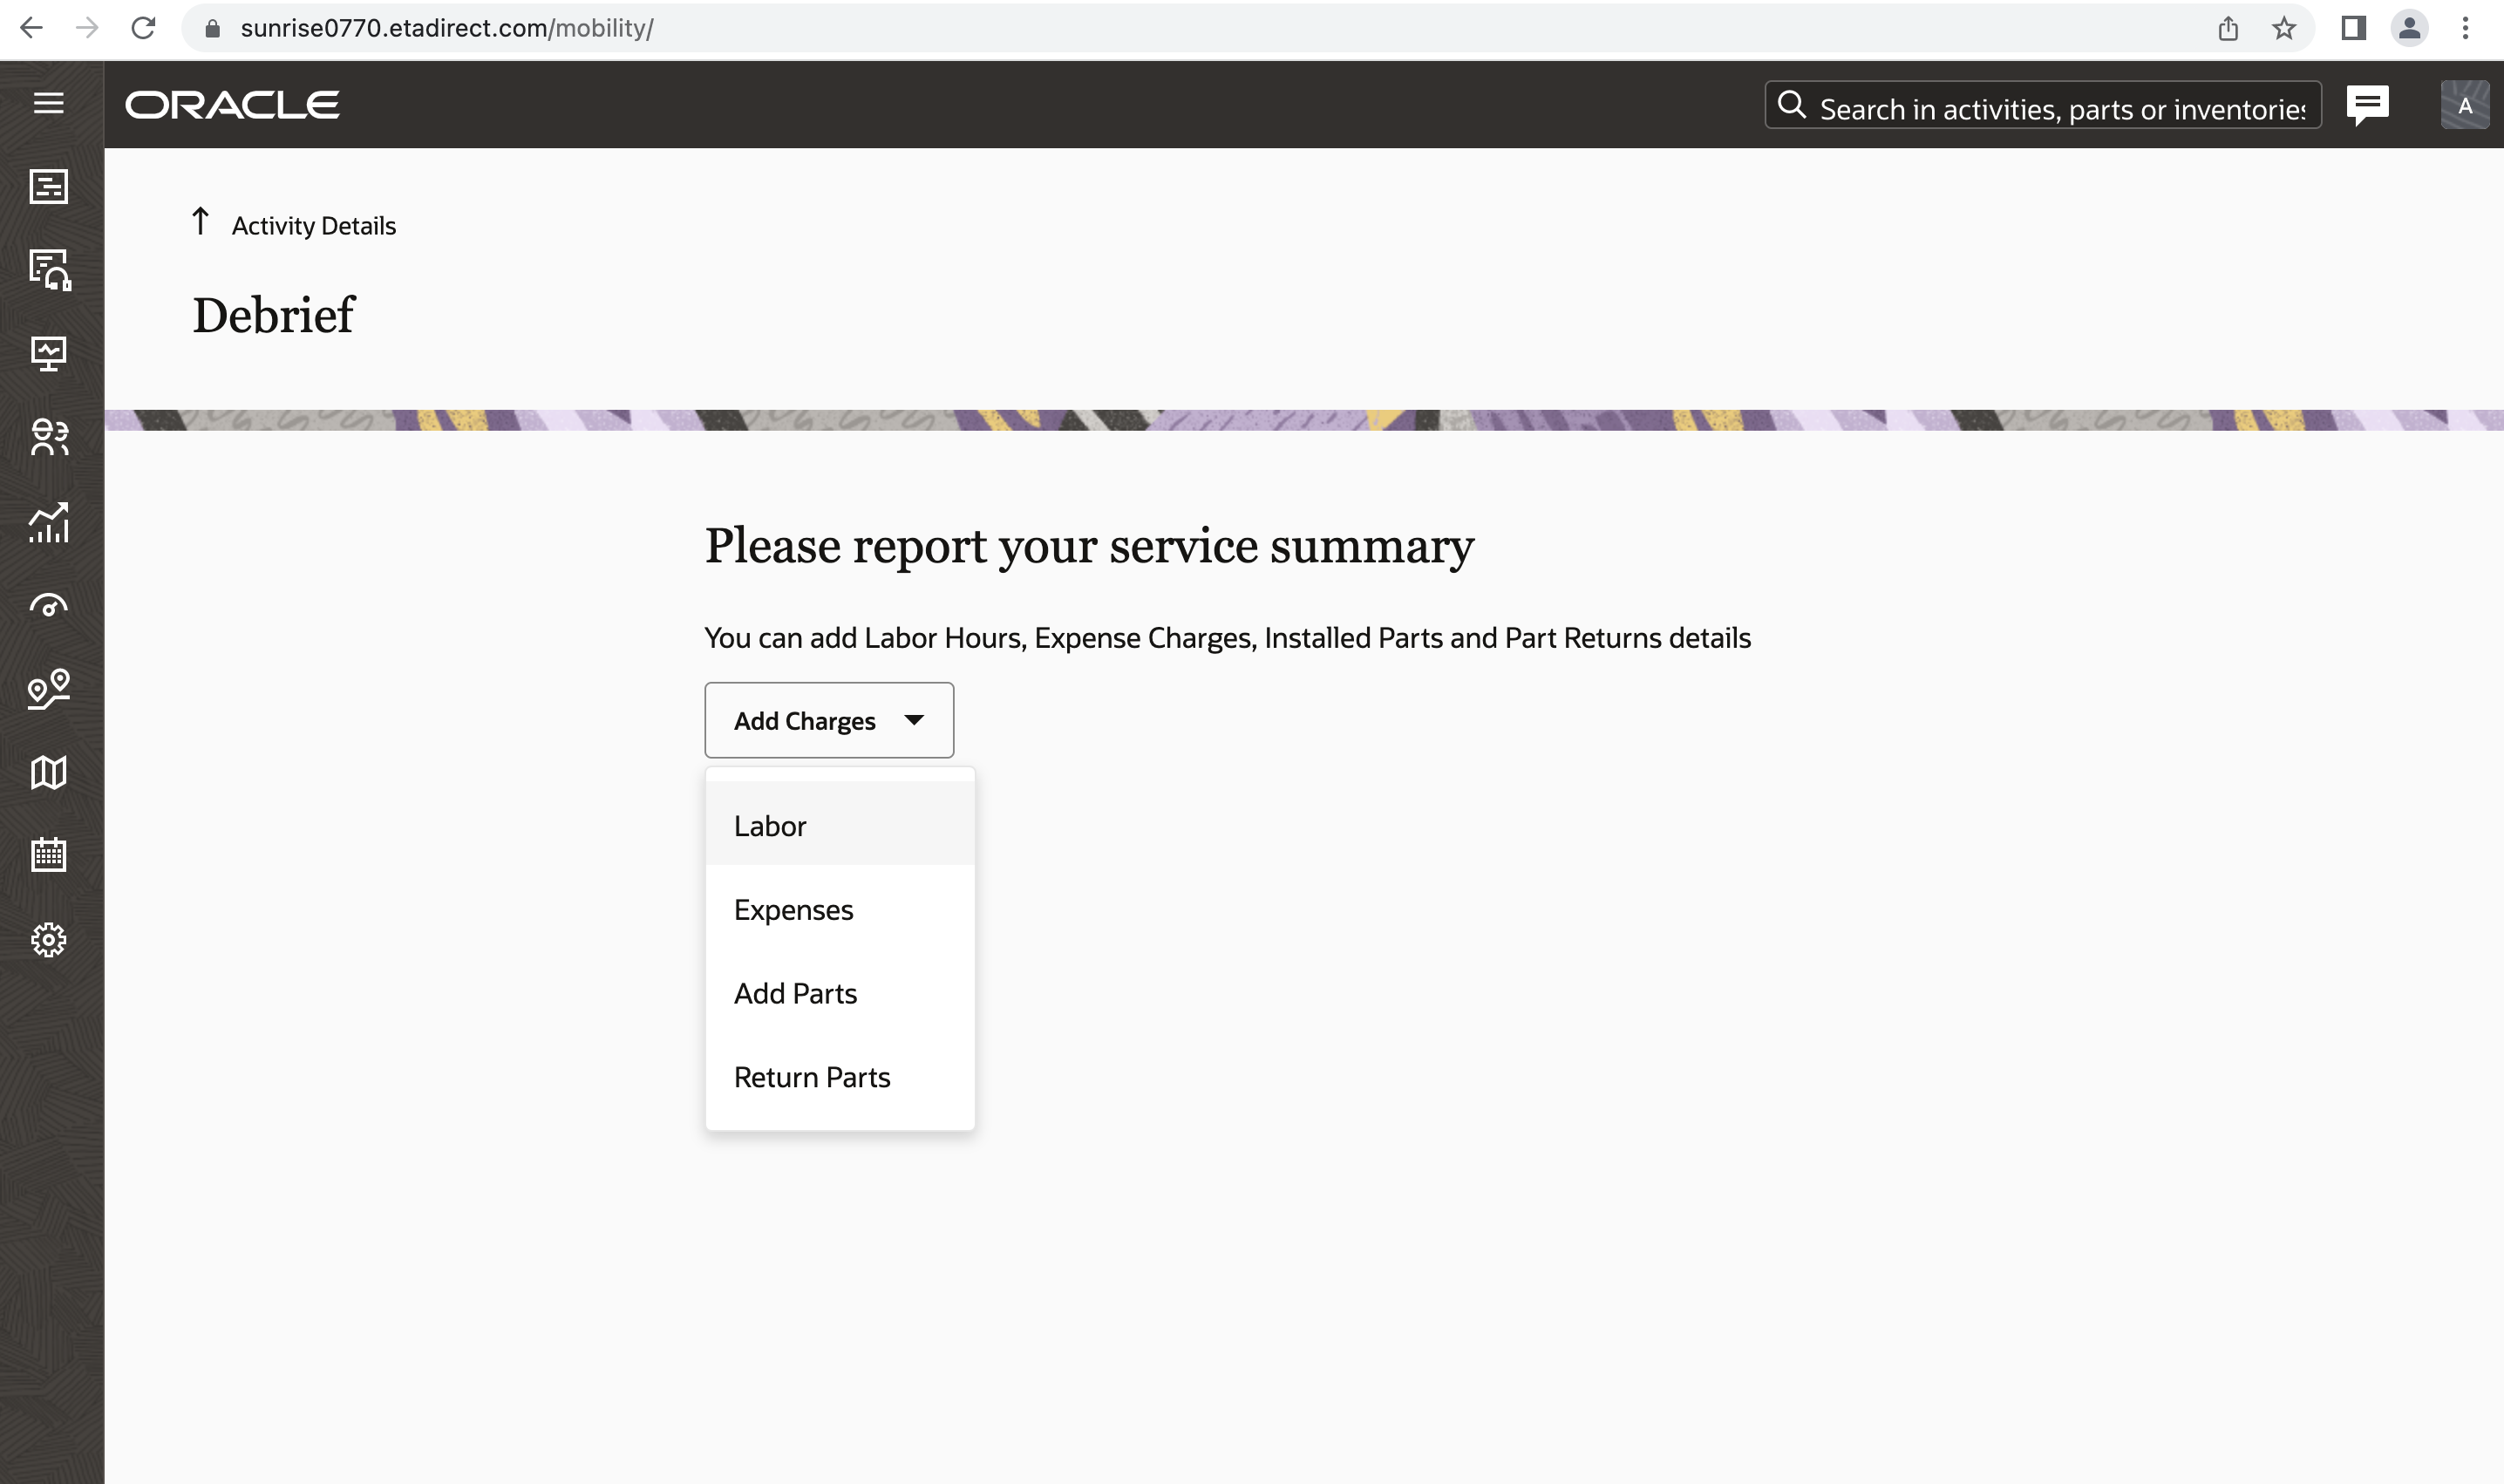
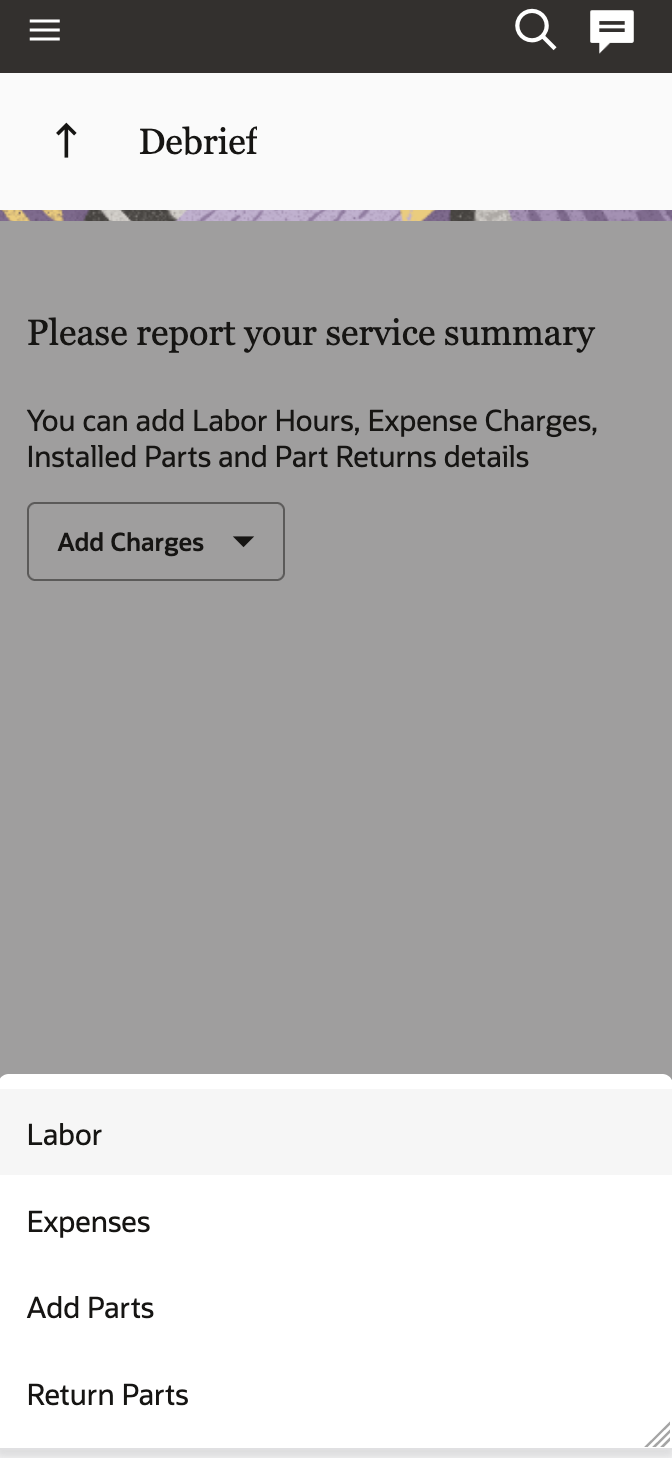
Add Labor
This includes travel time and working time (measured in hours). Once the required fields like Start Time and End Time are added, the Submit button will become enabled and the data can be saved.


Add Expenses
This includes all the expenses - travel and miscellaneous - incurred, like any parking and toll charges.
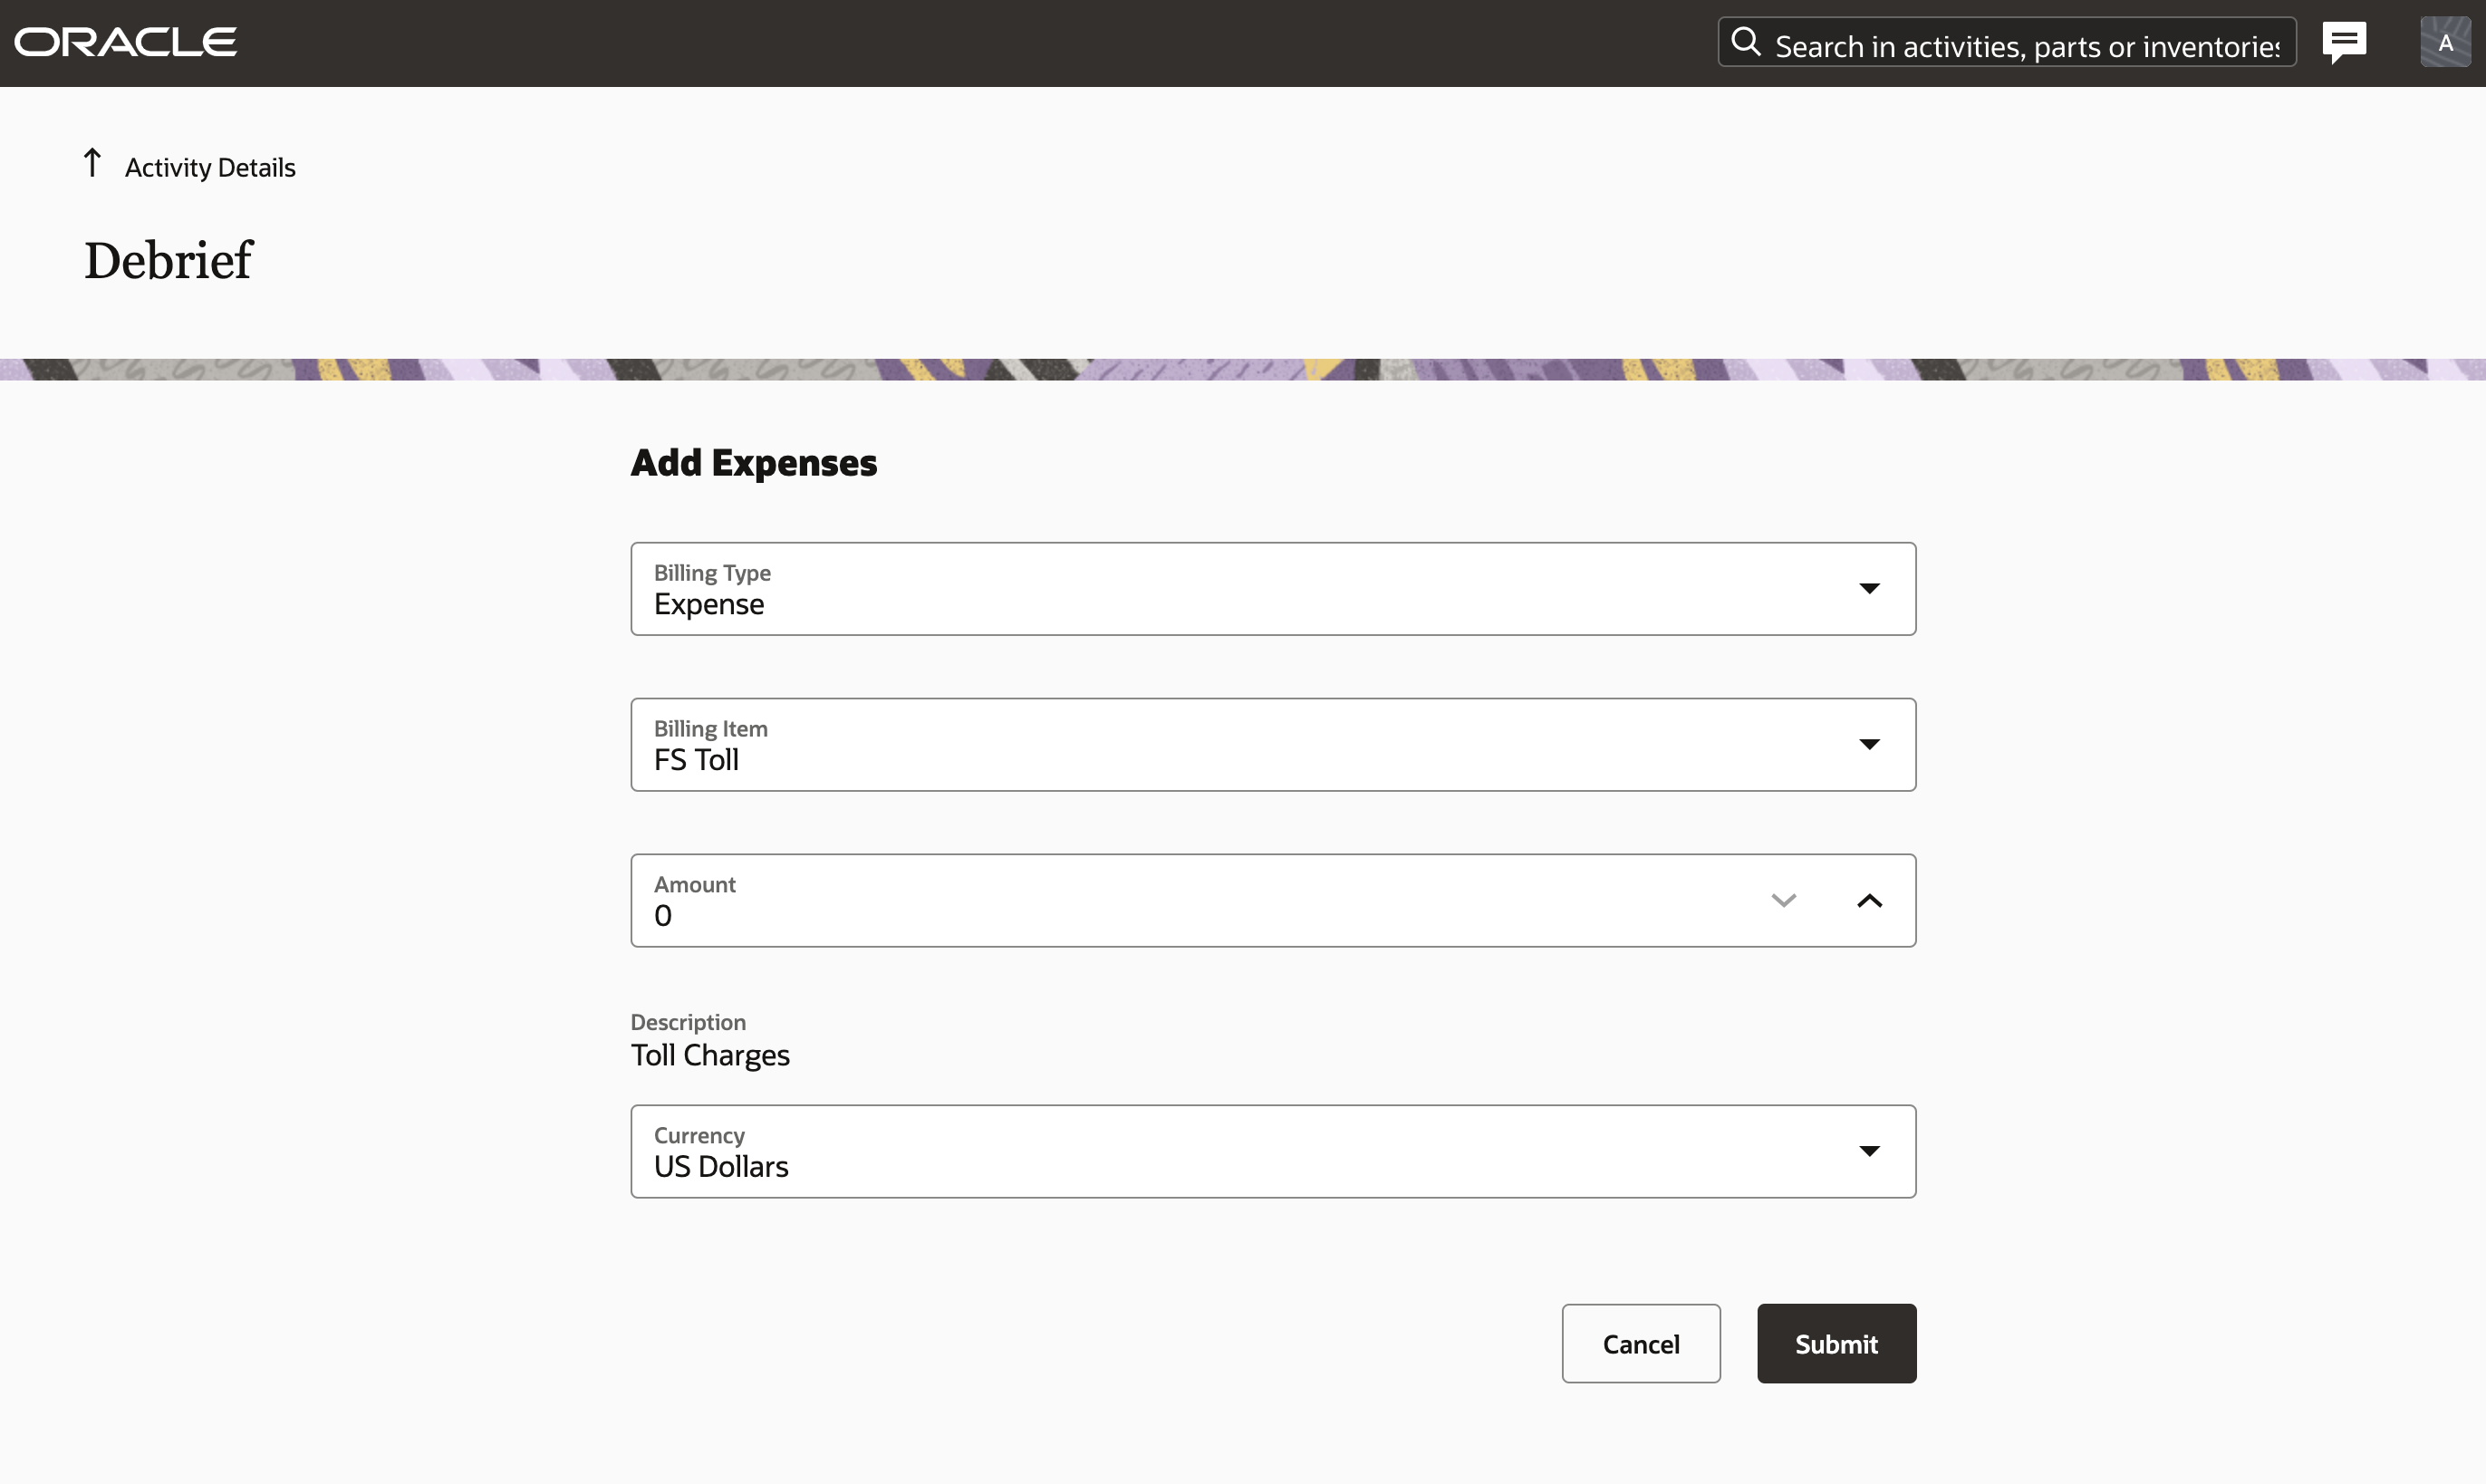
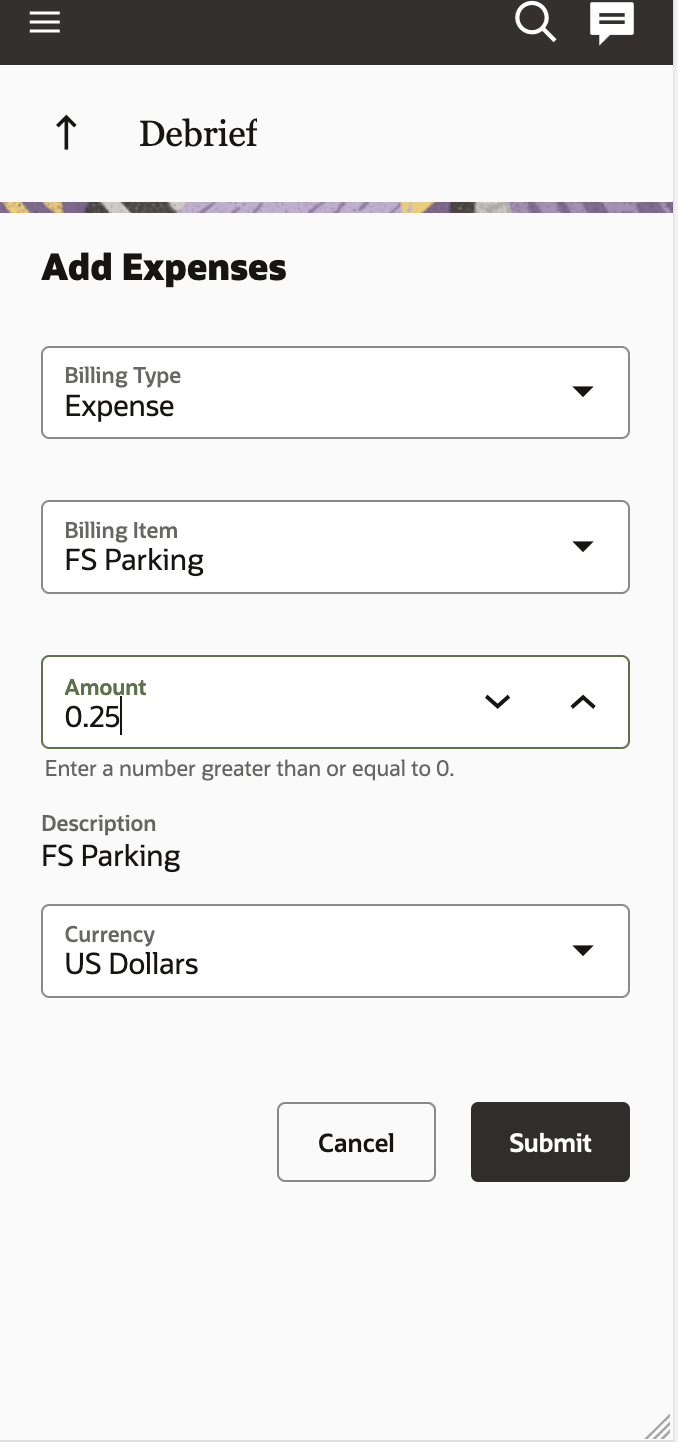
Add Part
This is used to report the materials used during the activity (stored within the resource pool).
Non-serialized part
For non-serialized items, select the part, specify the quantity, and click Add.
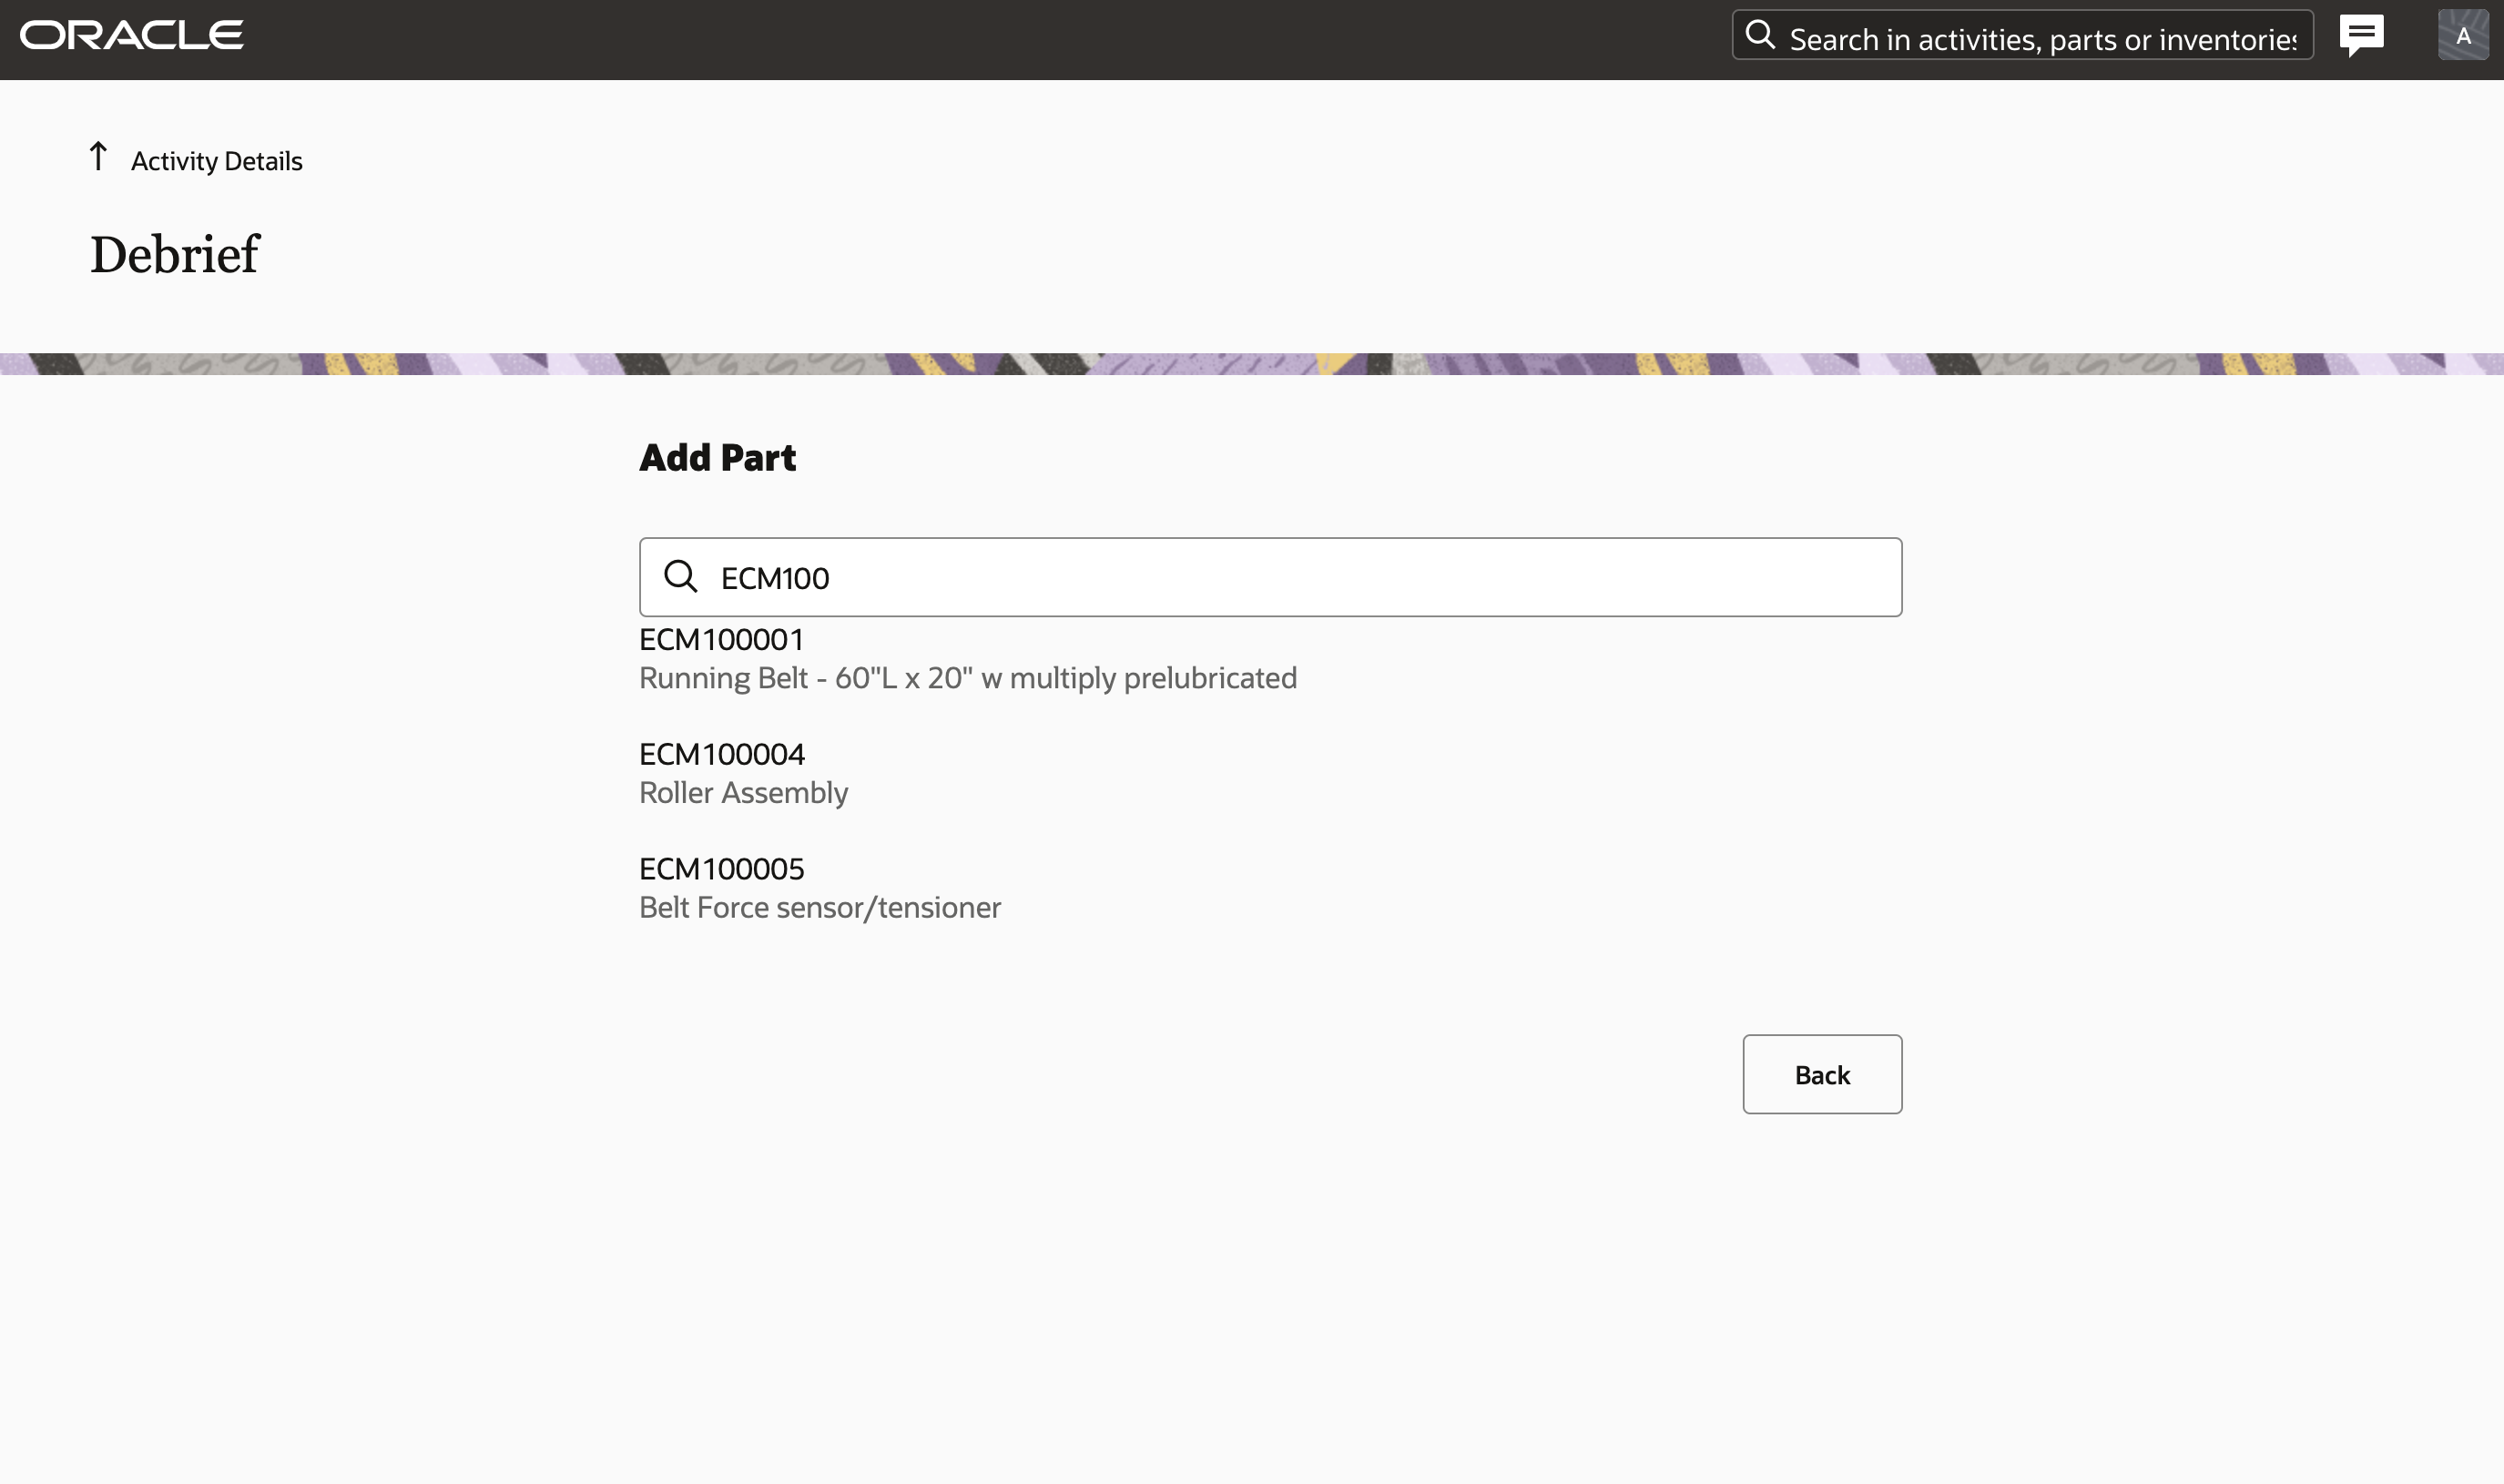
Once the non-serialized part is selected, information related to the installation (that is, new / warranty) along with the quantity can be added.
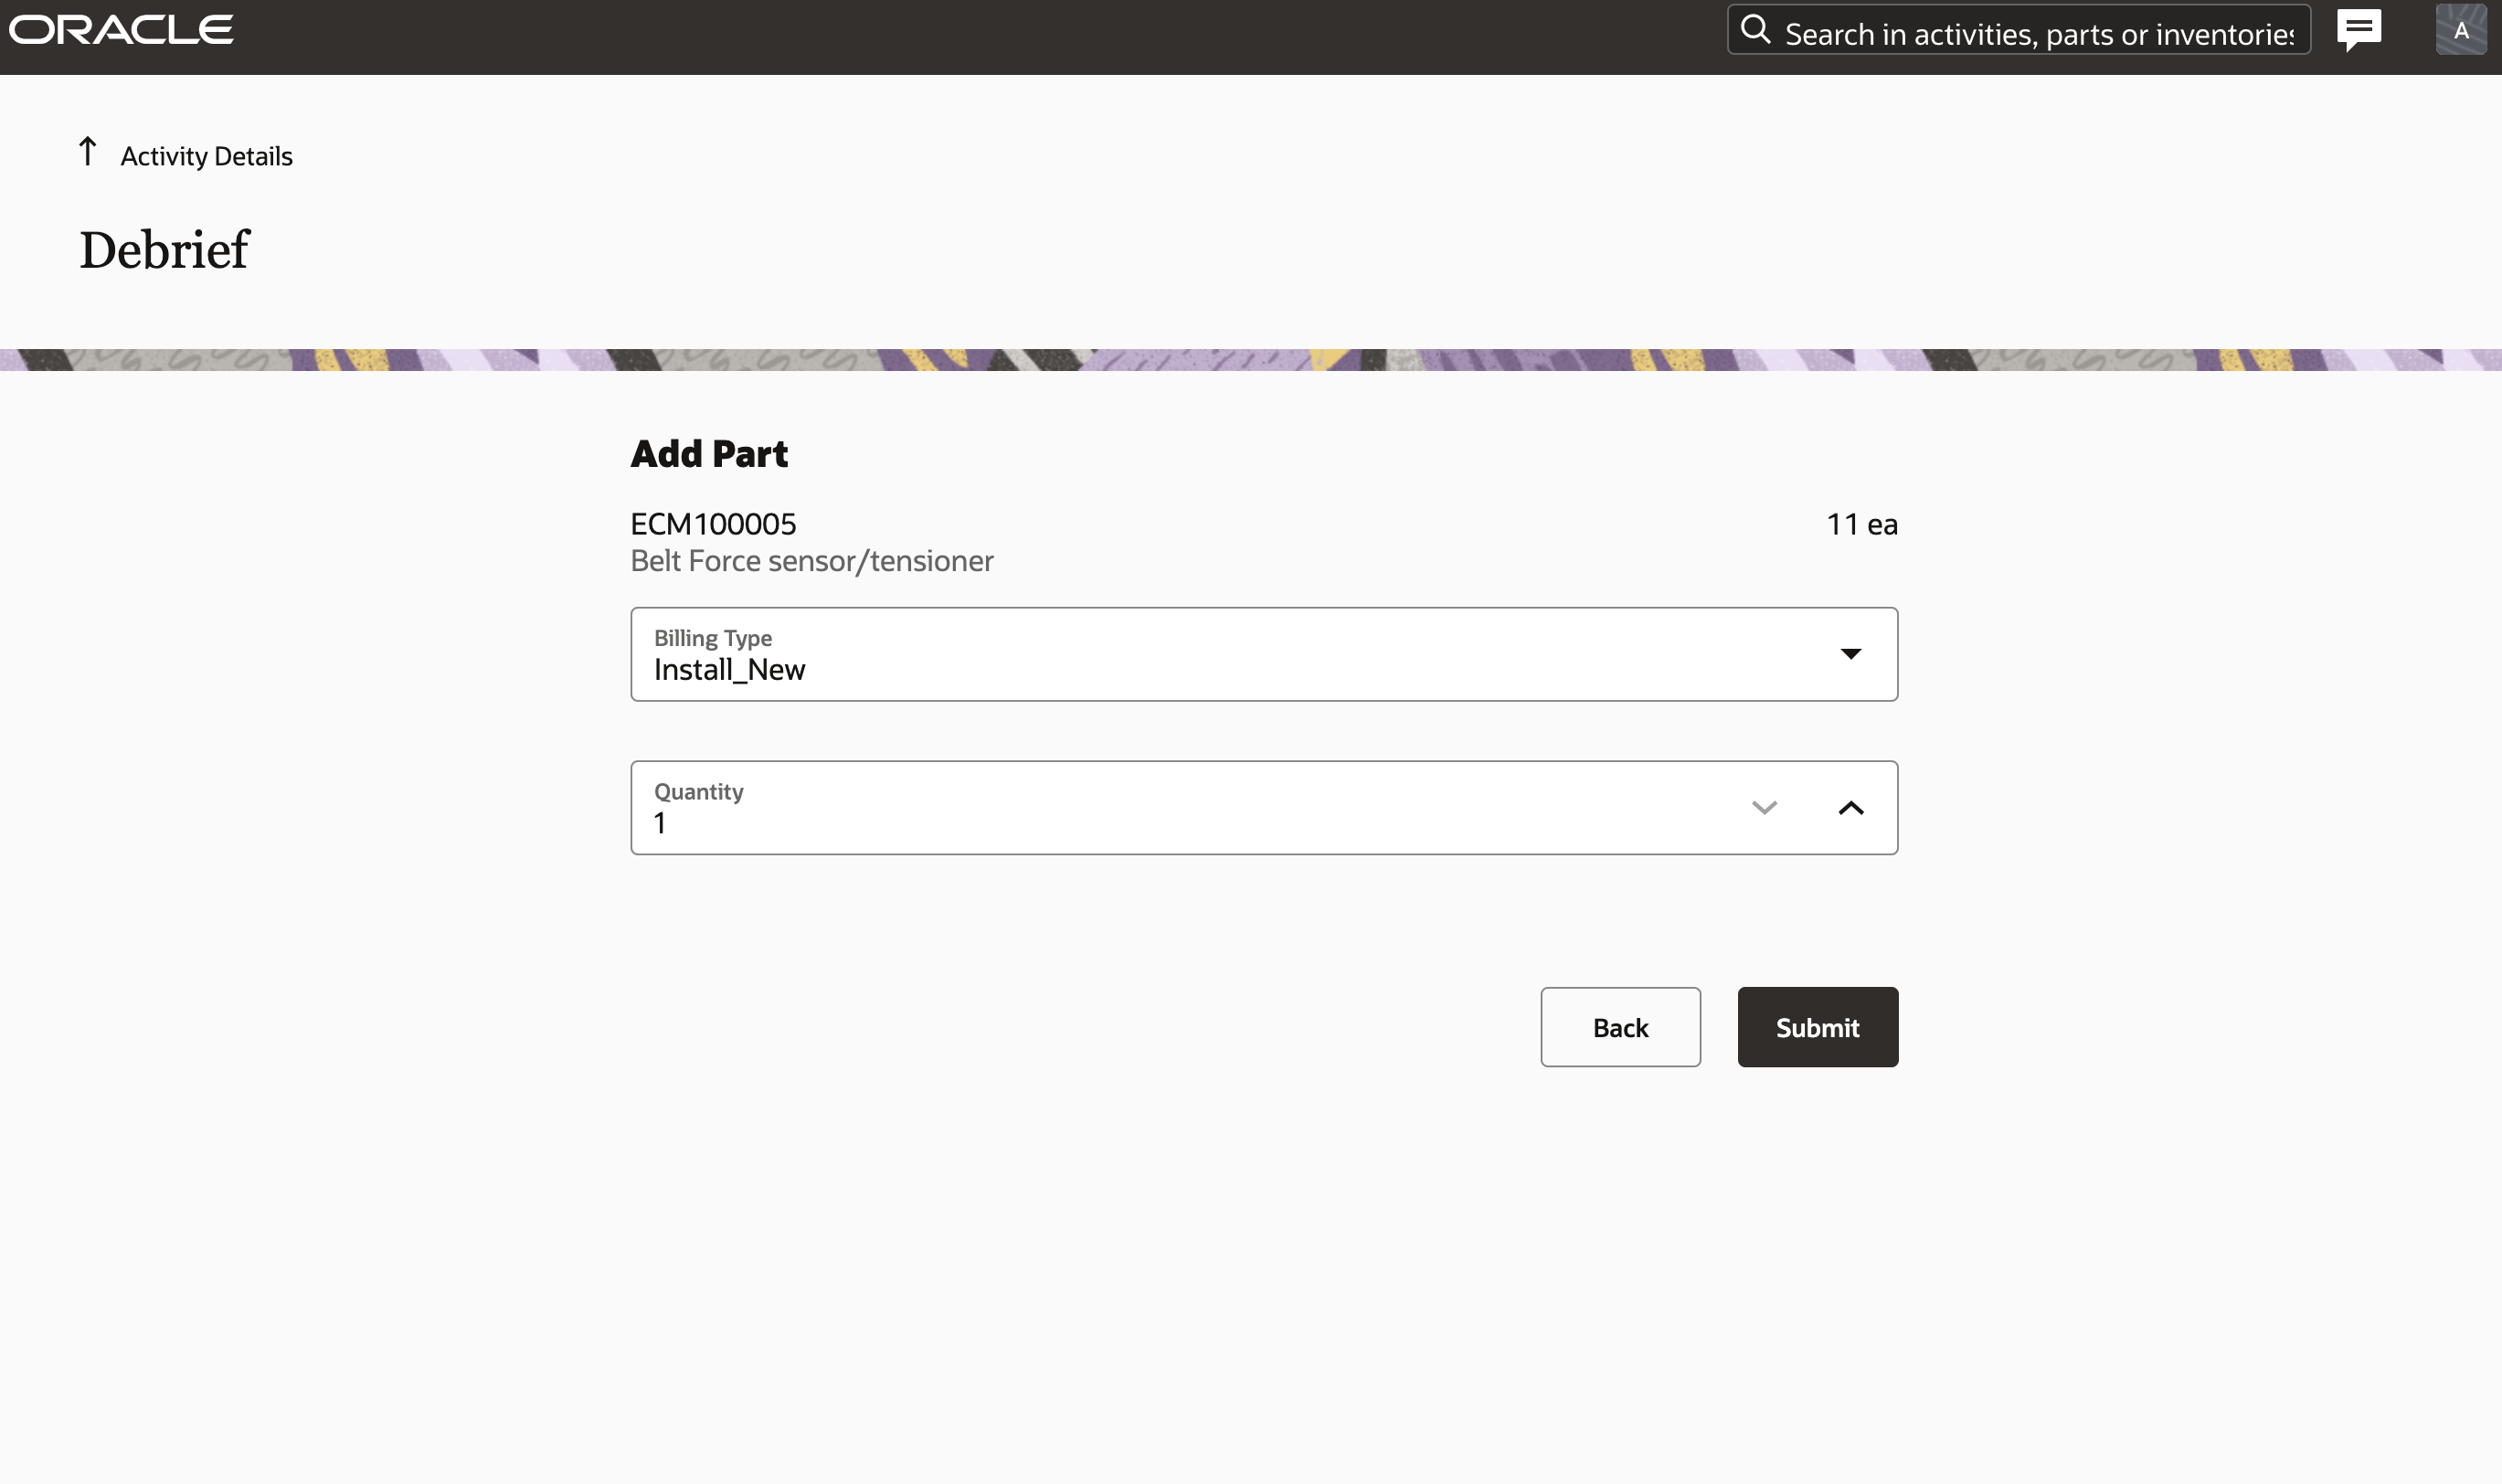
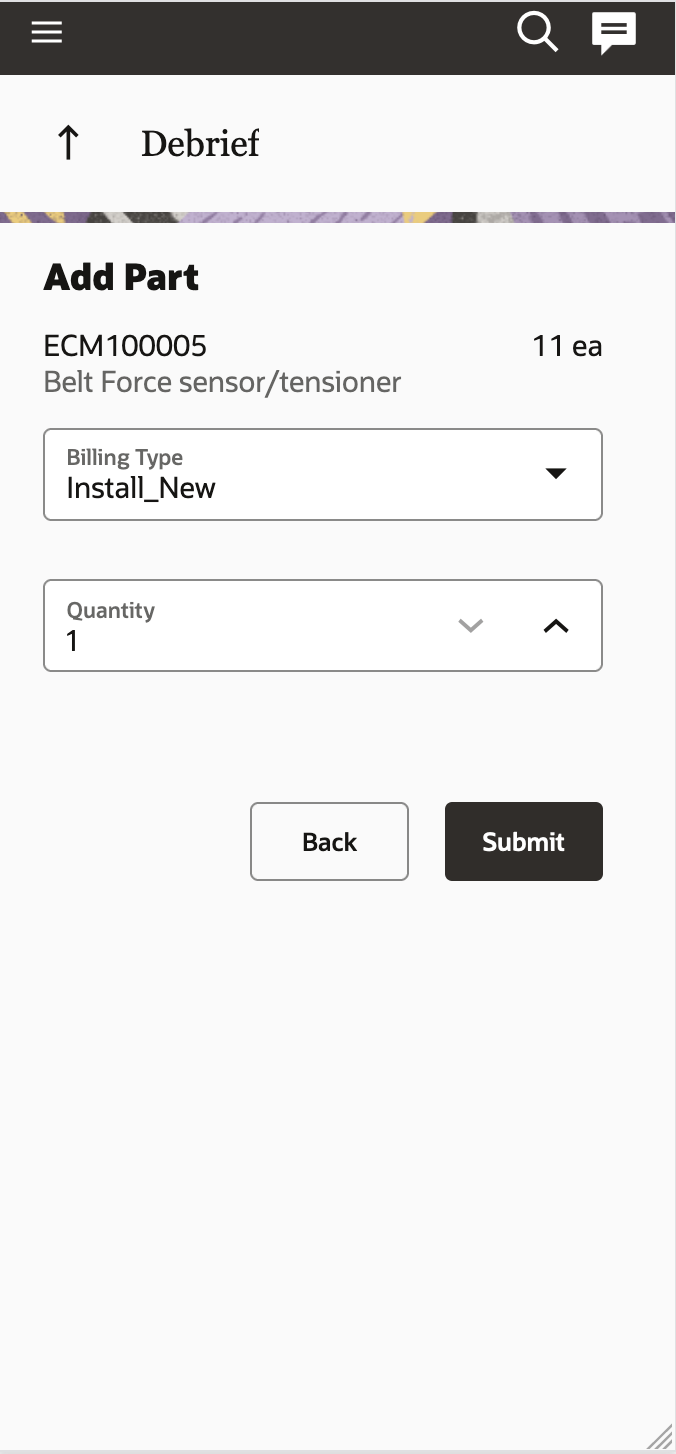
Serialized part
For serialized items, all the parts along with their serial numbers appear as separate line items. The appropriate part can be selected.
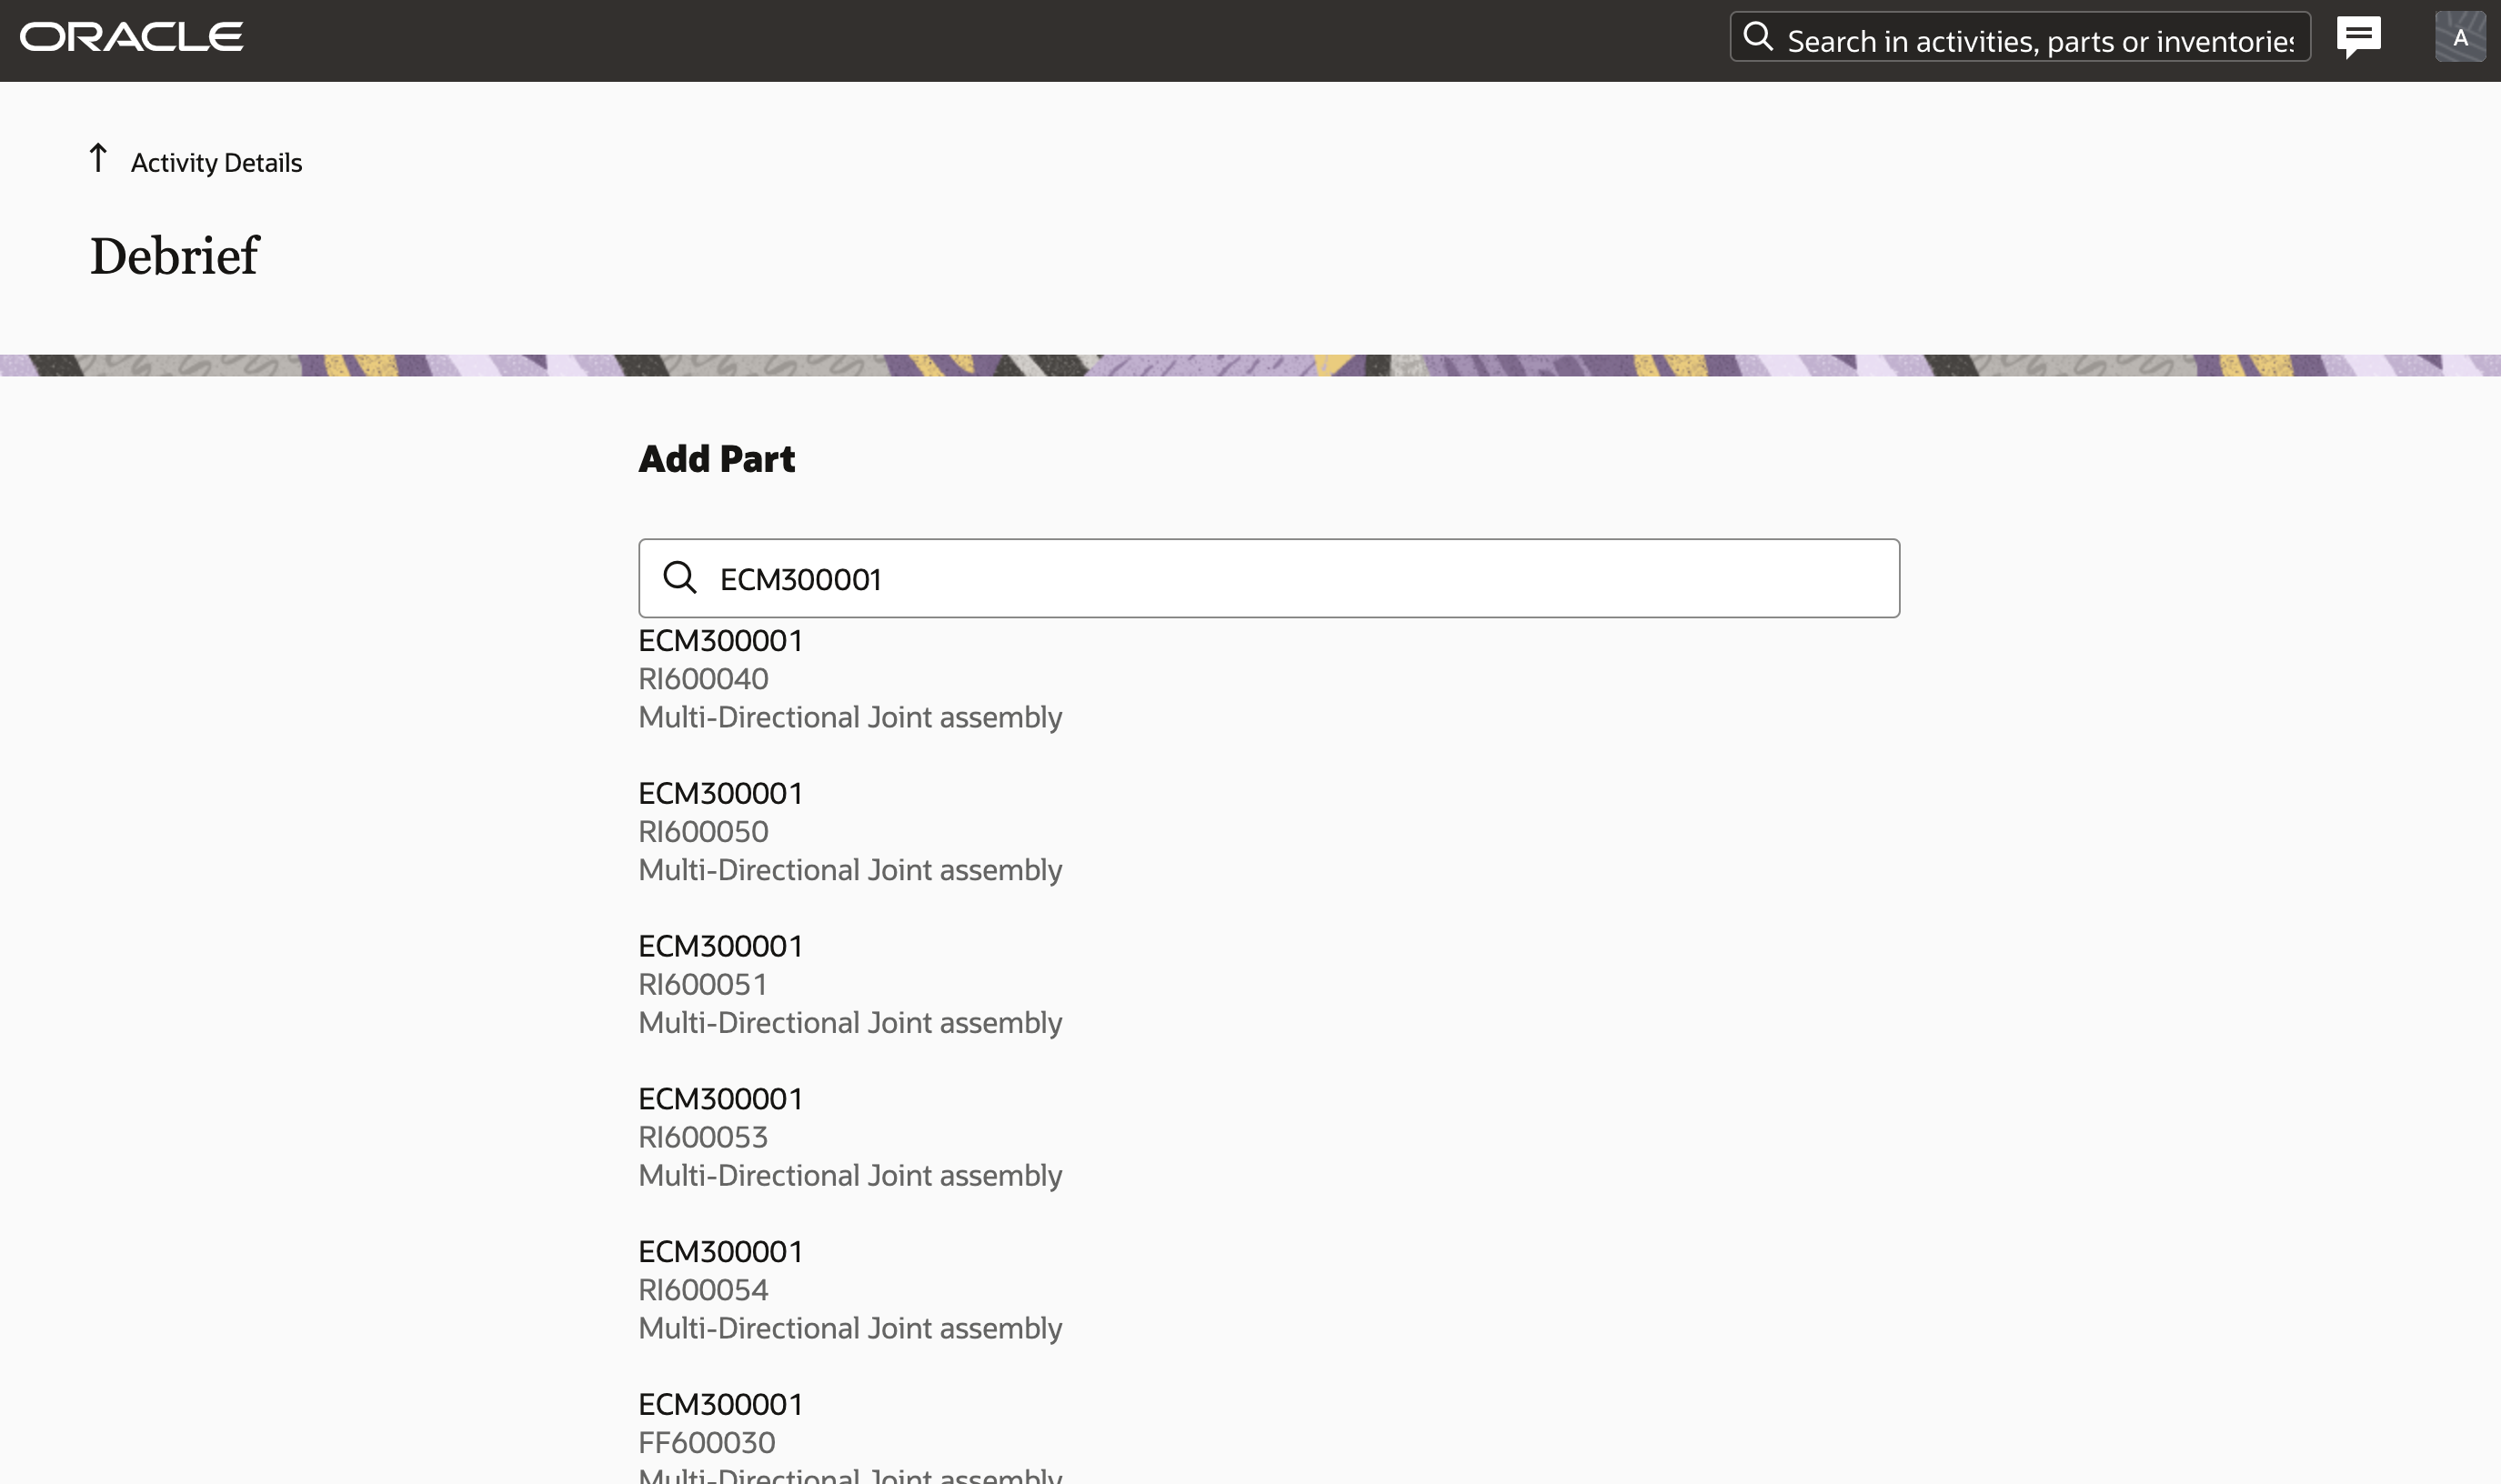
Once the part is selected, information related to the installation (that is, new / warranty) along with the quantity can be added.
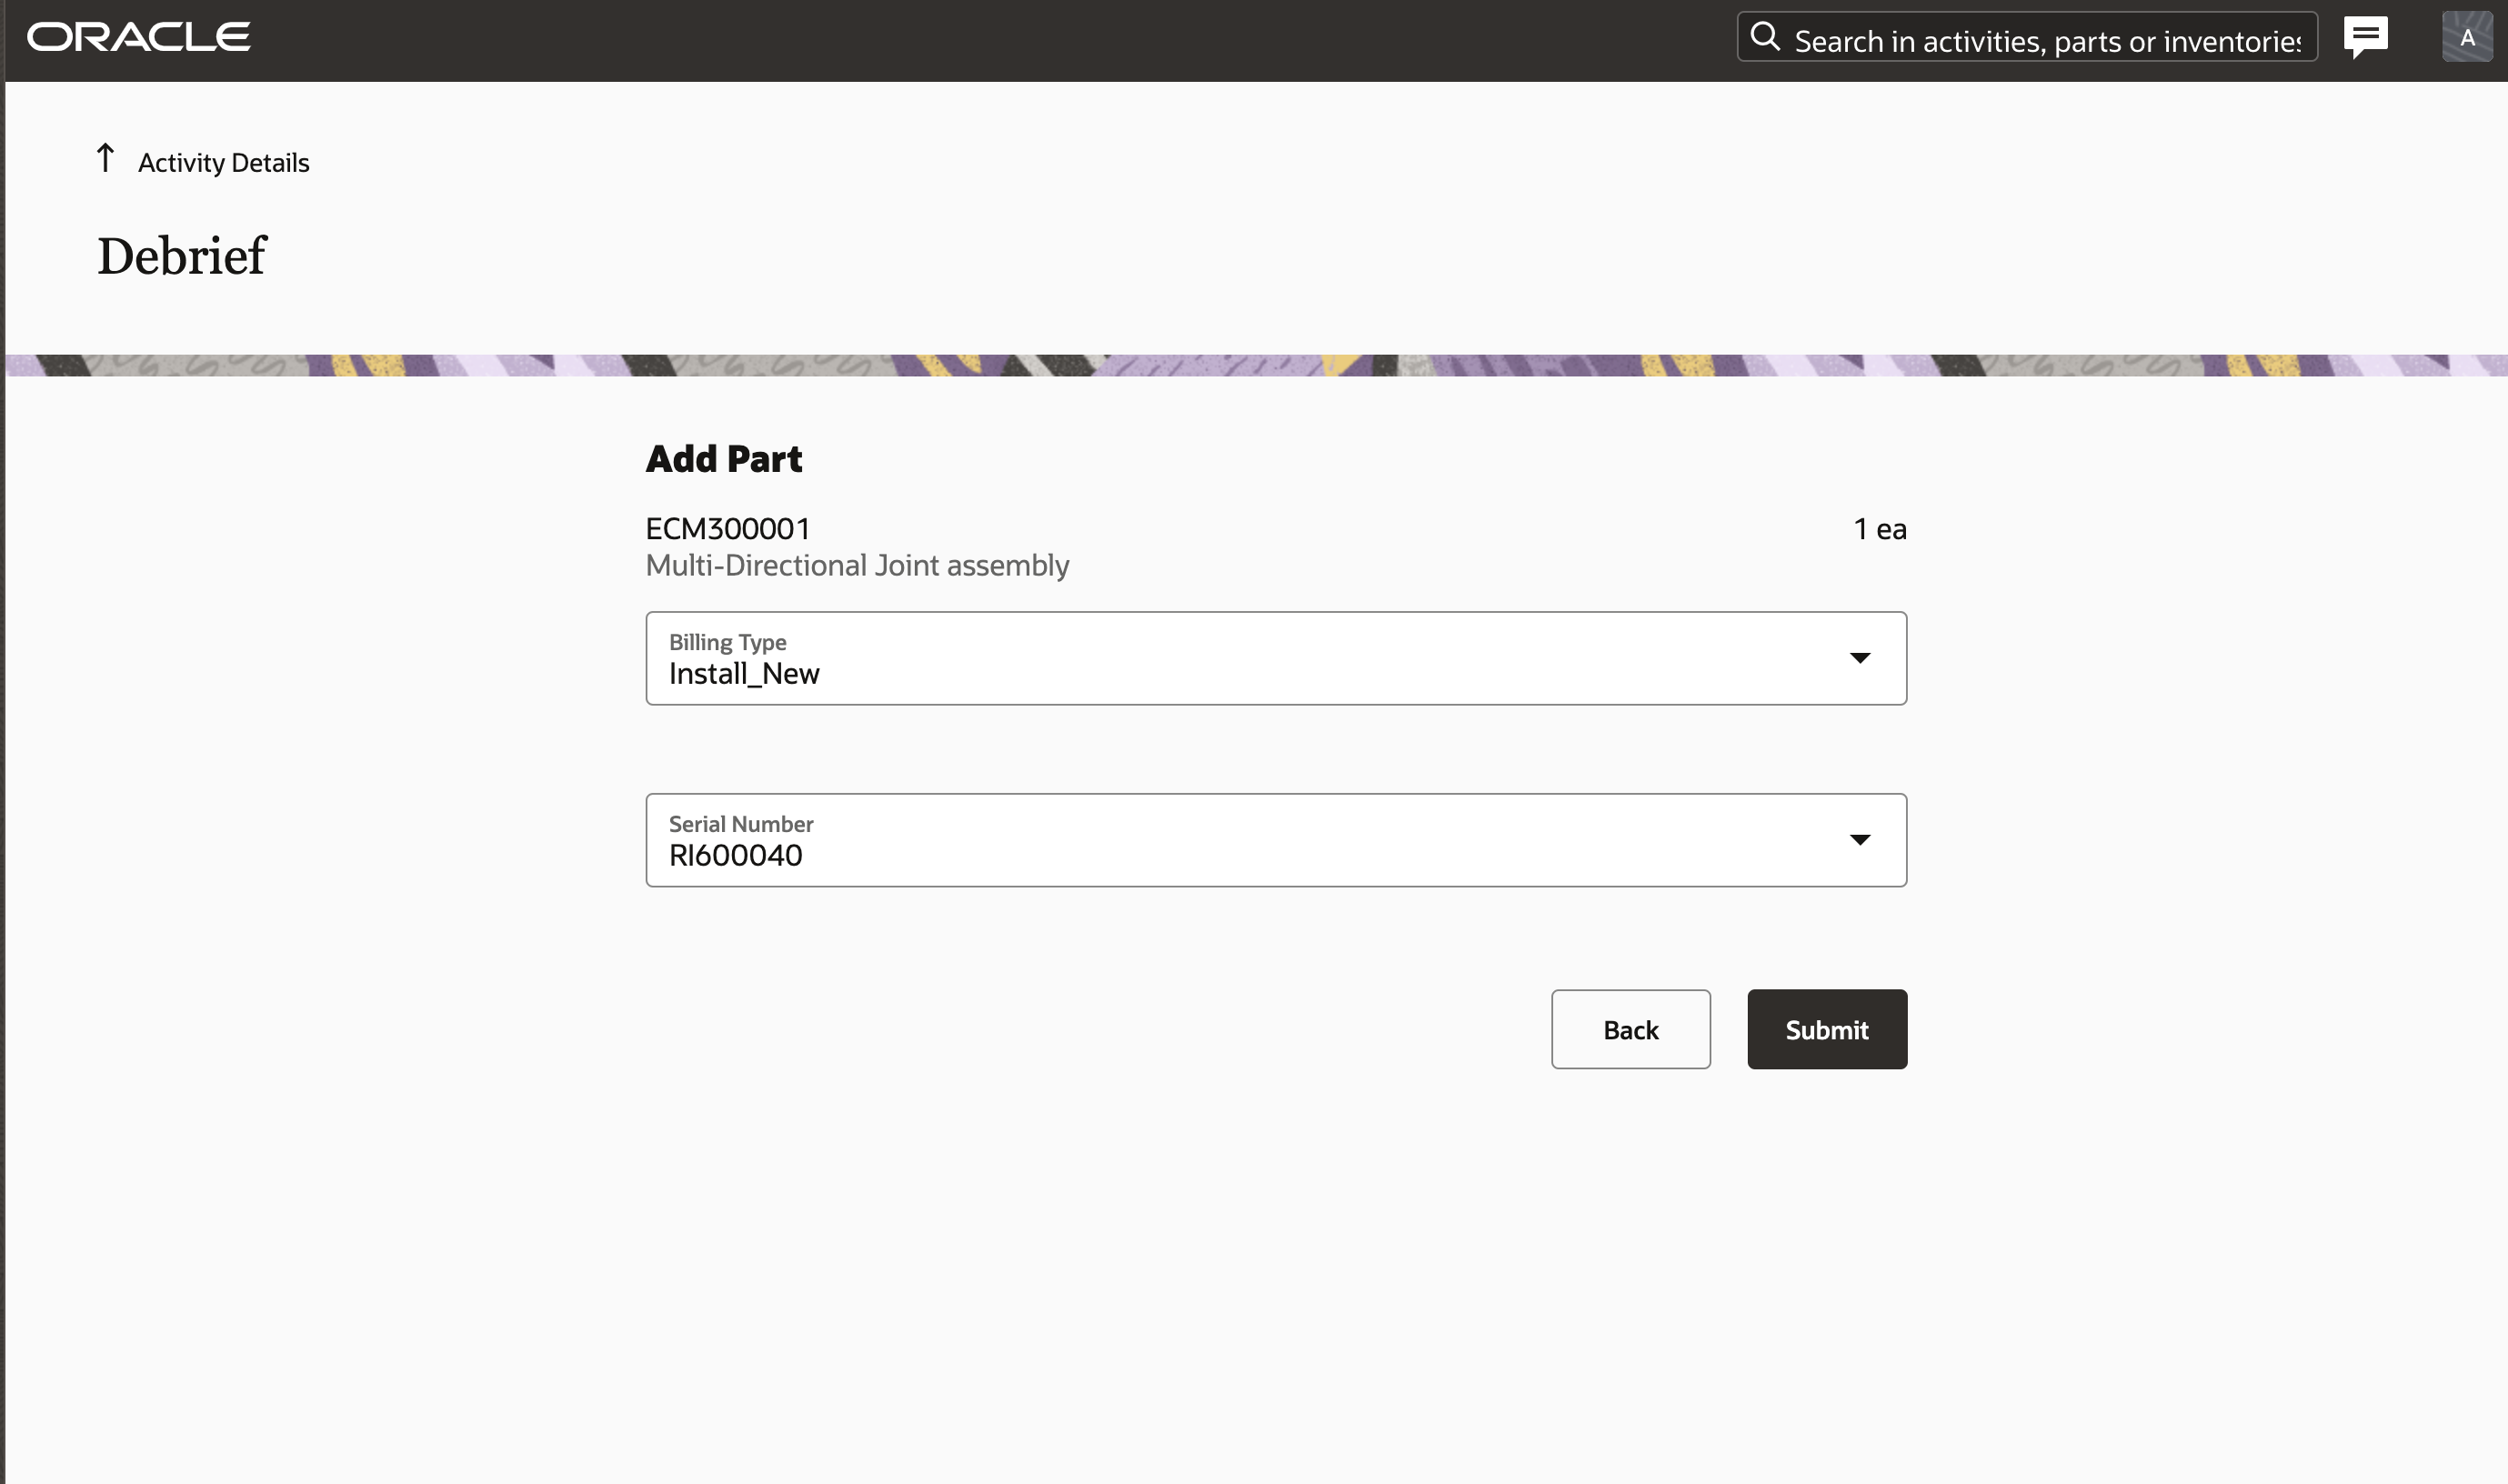
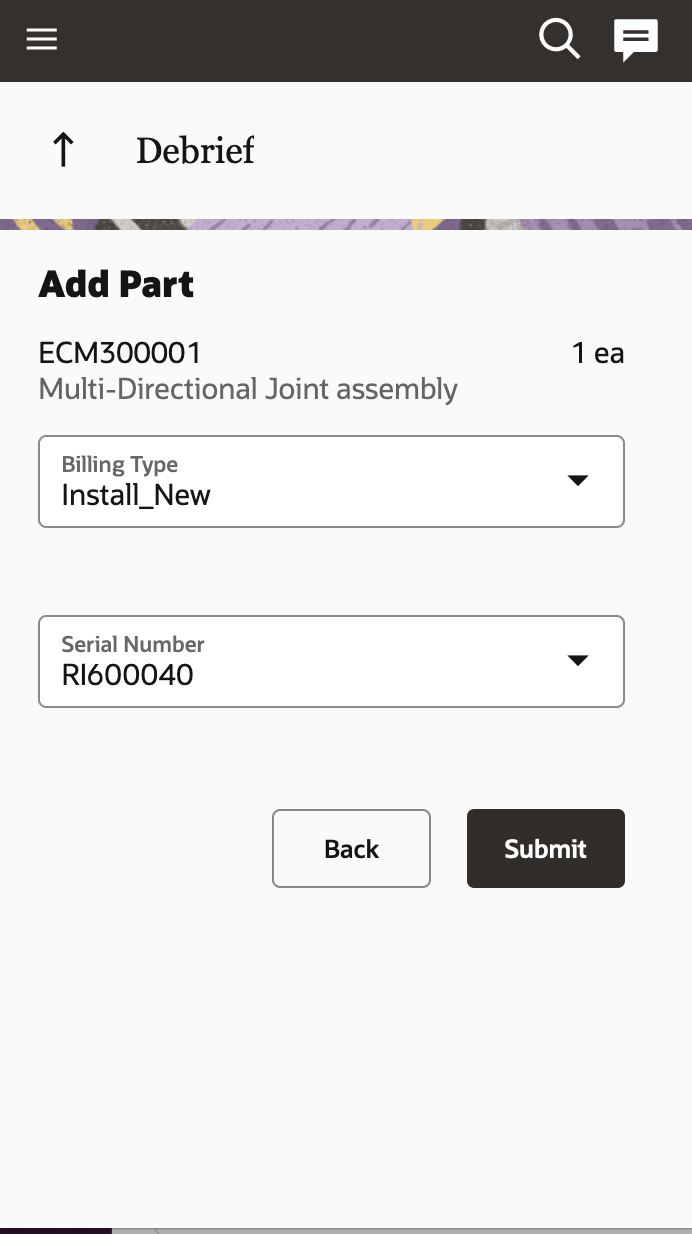
Return Part
Use the search field to lookup the part to be returned.
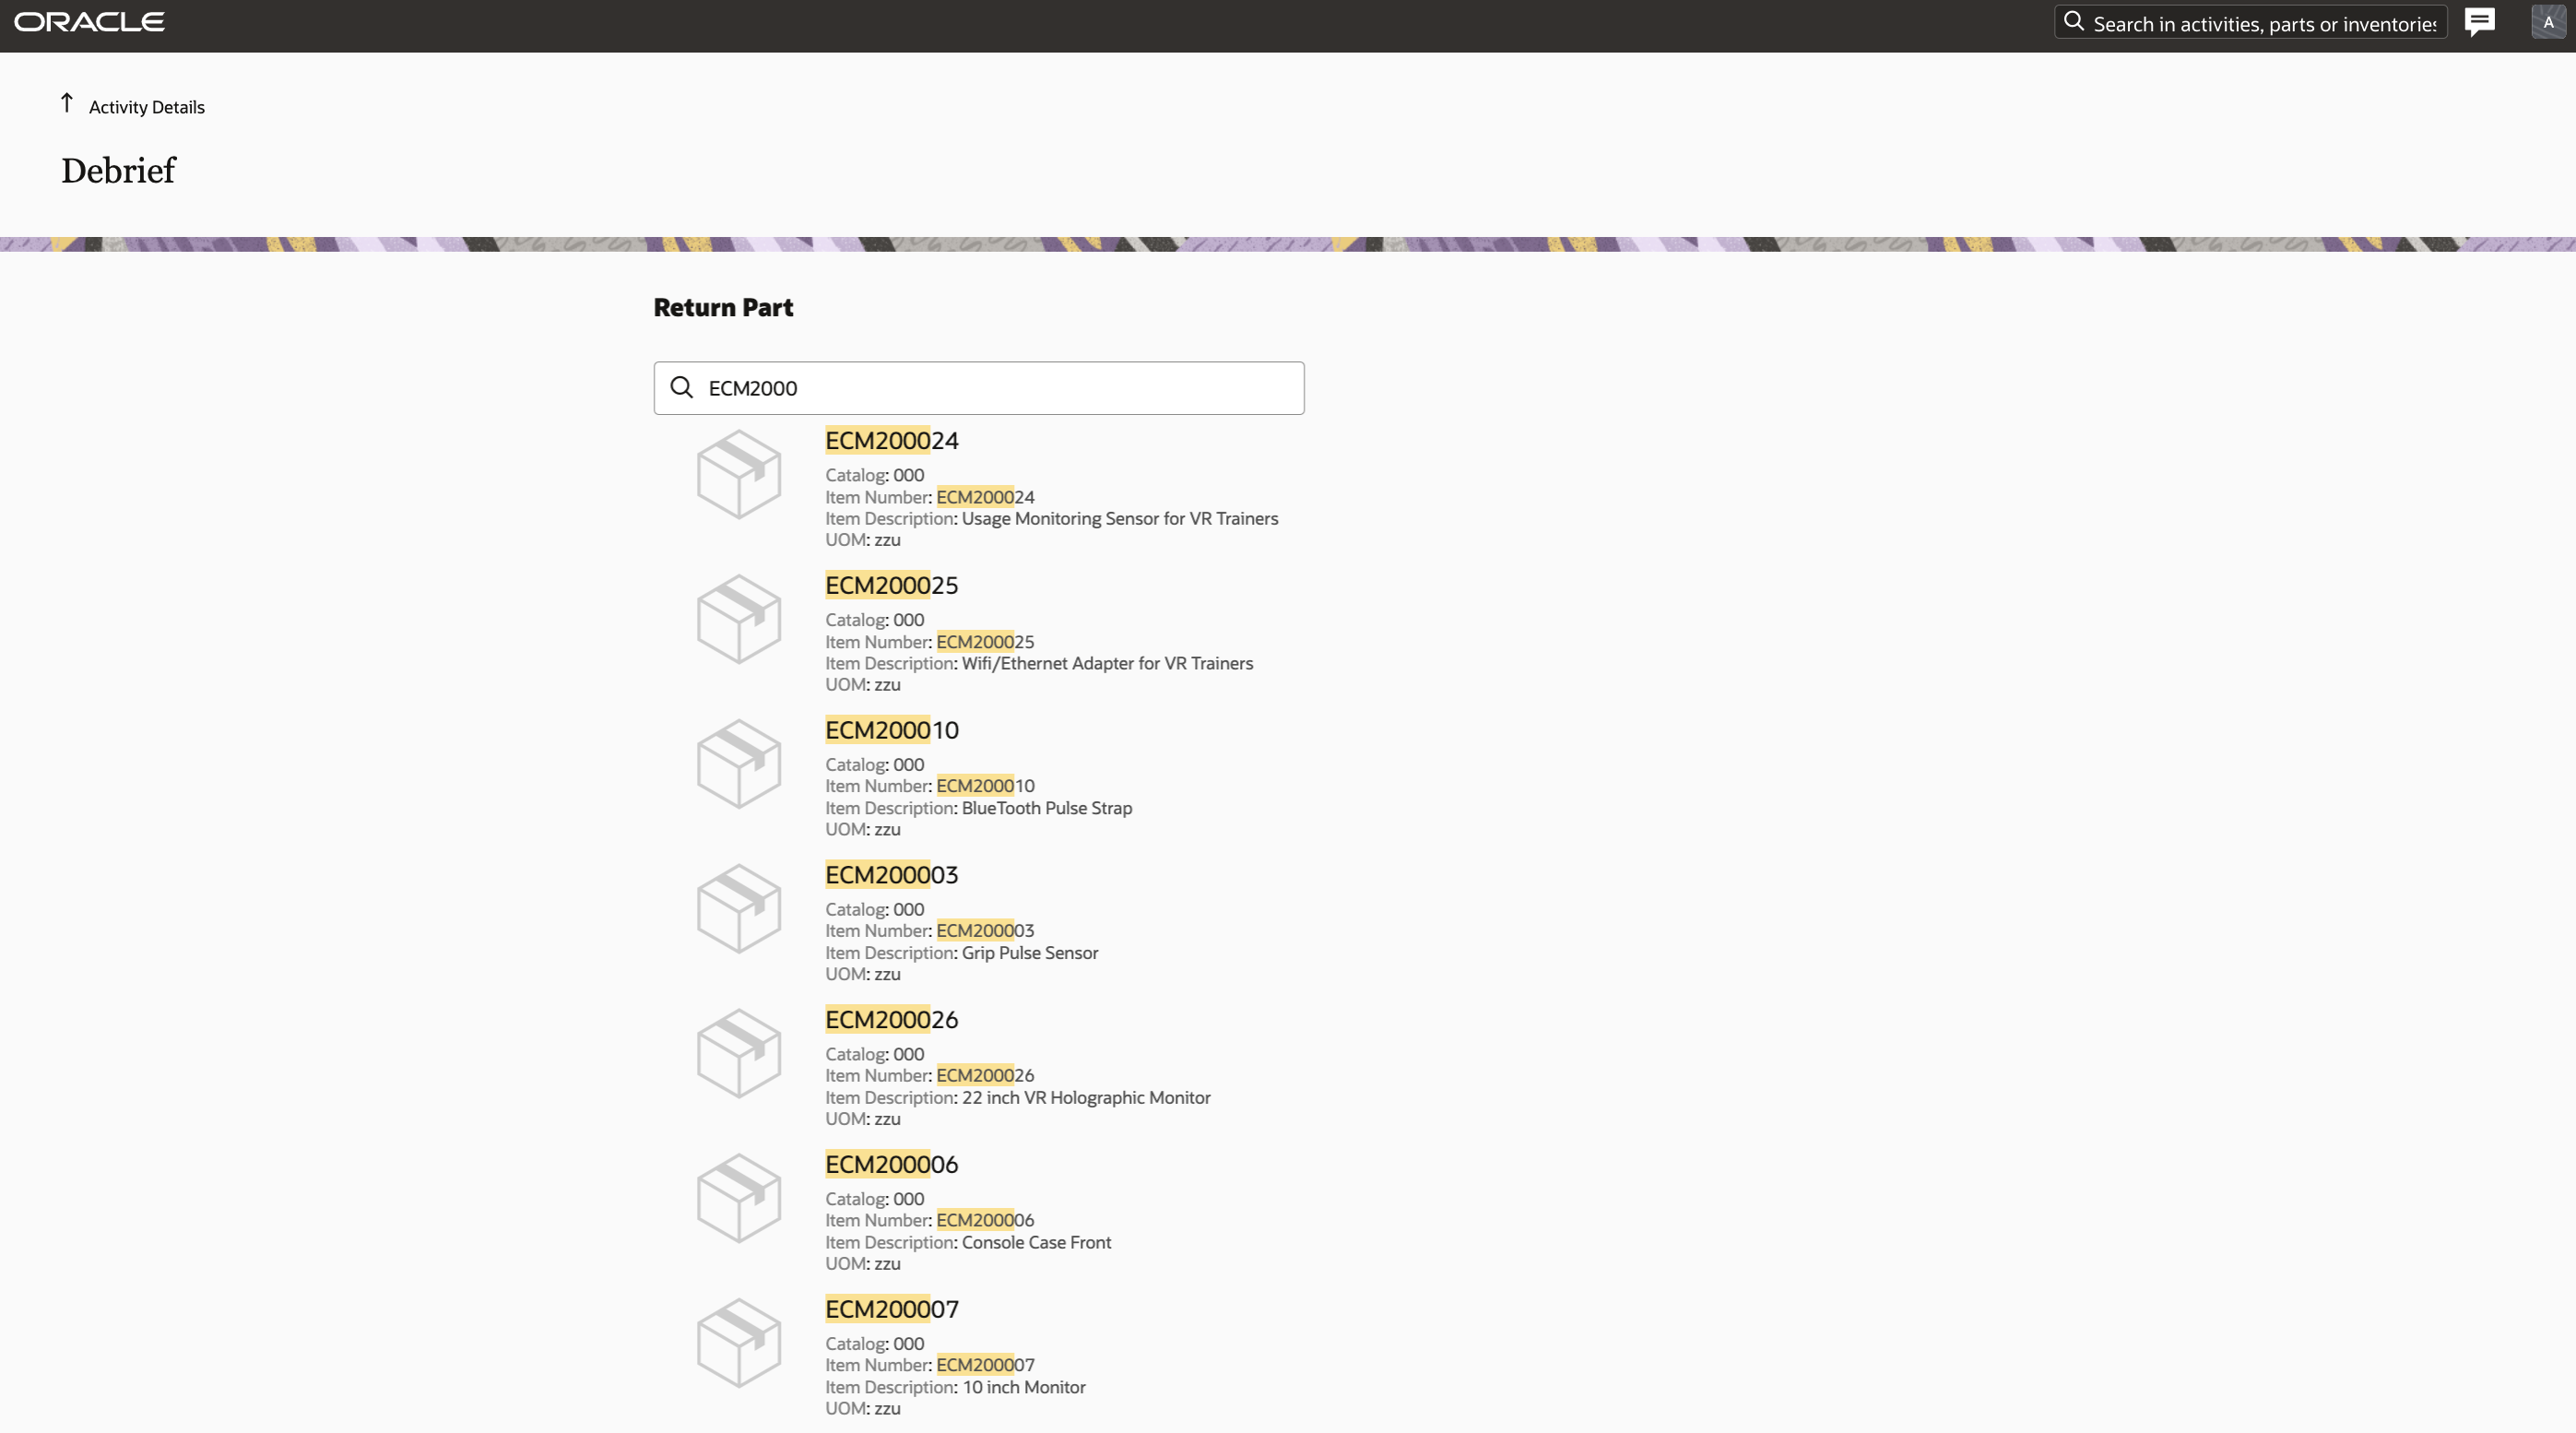
The More button can be used to scroll through all the parts.
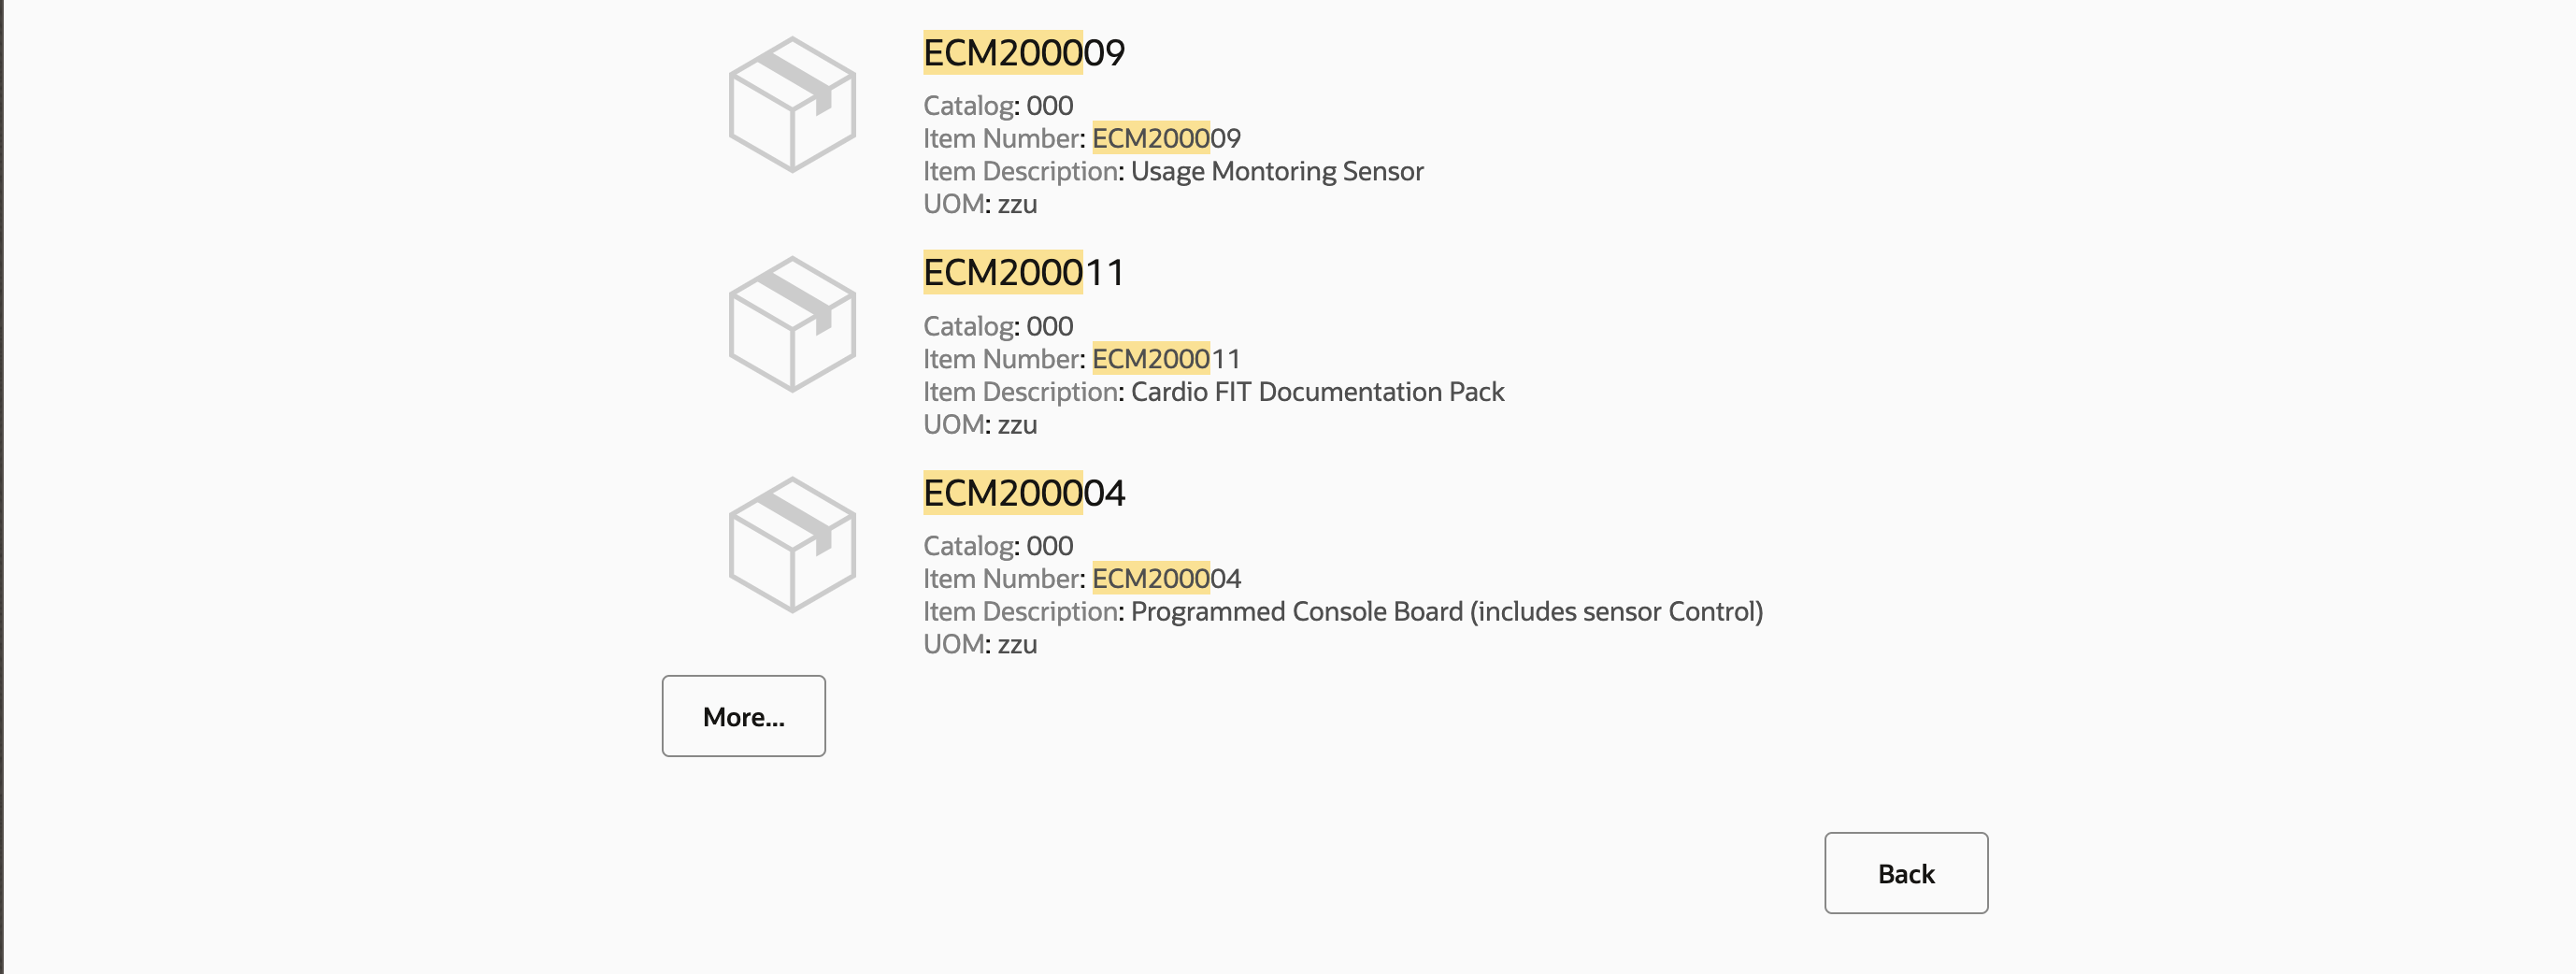
For serialized parts, the serial number can be entered. The quantity for the serialized part must be 1.
For non-serialized parts, the serial number must be left blank and the quantity can be adjusted accordingly.
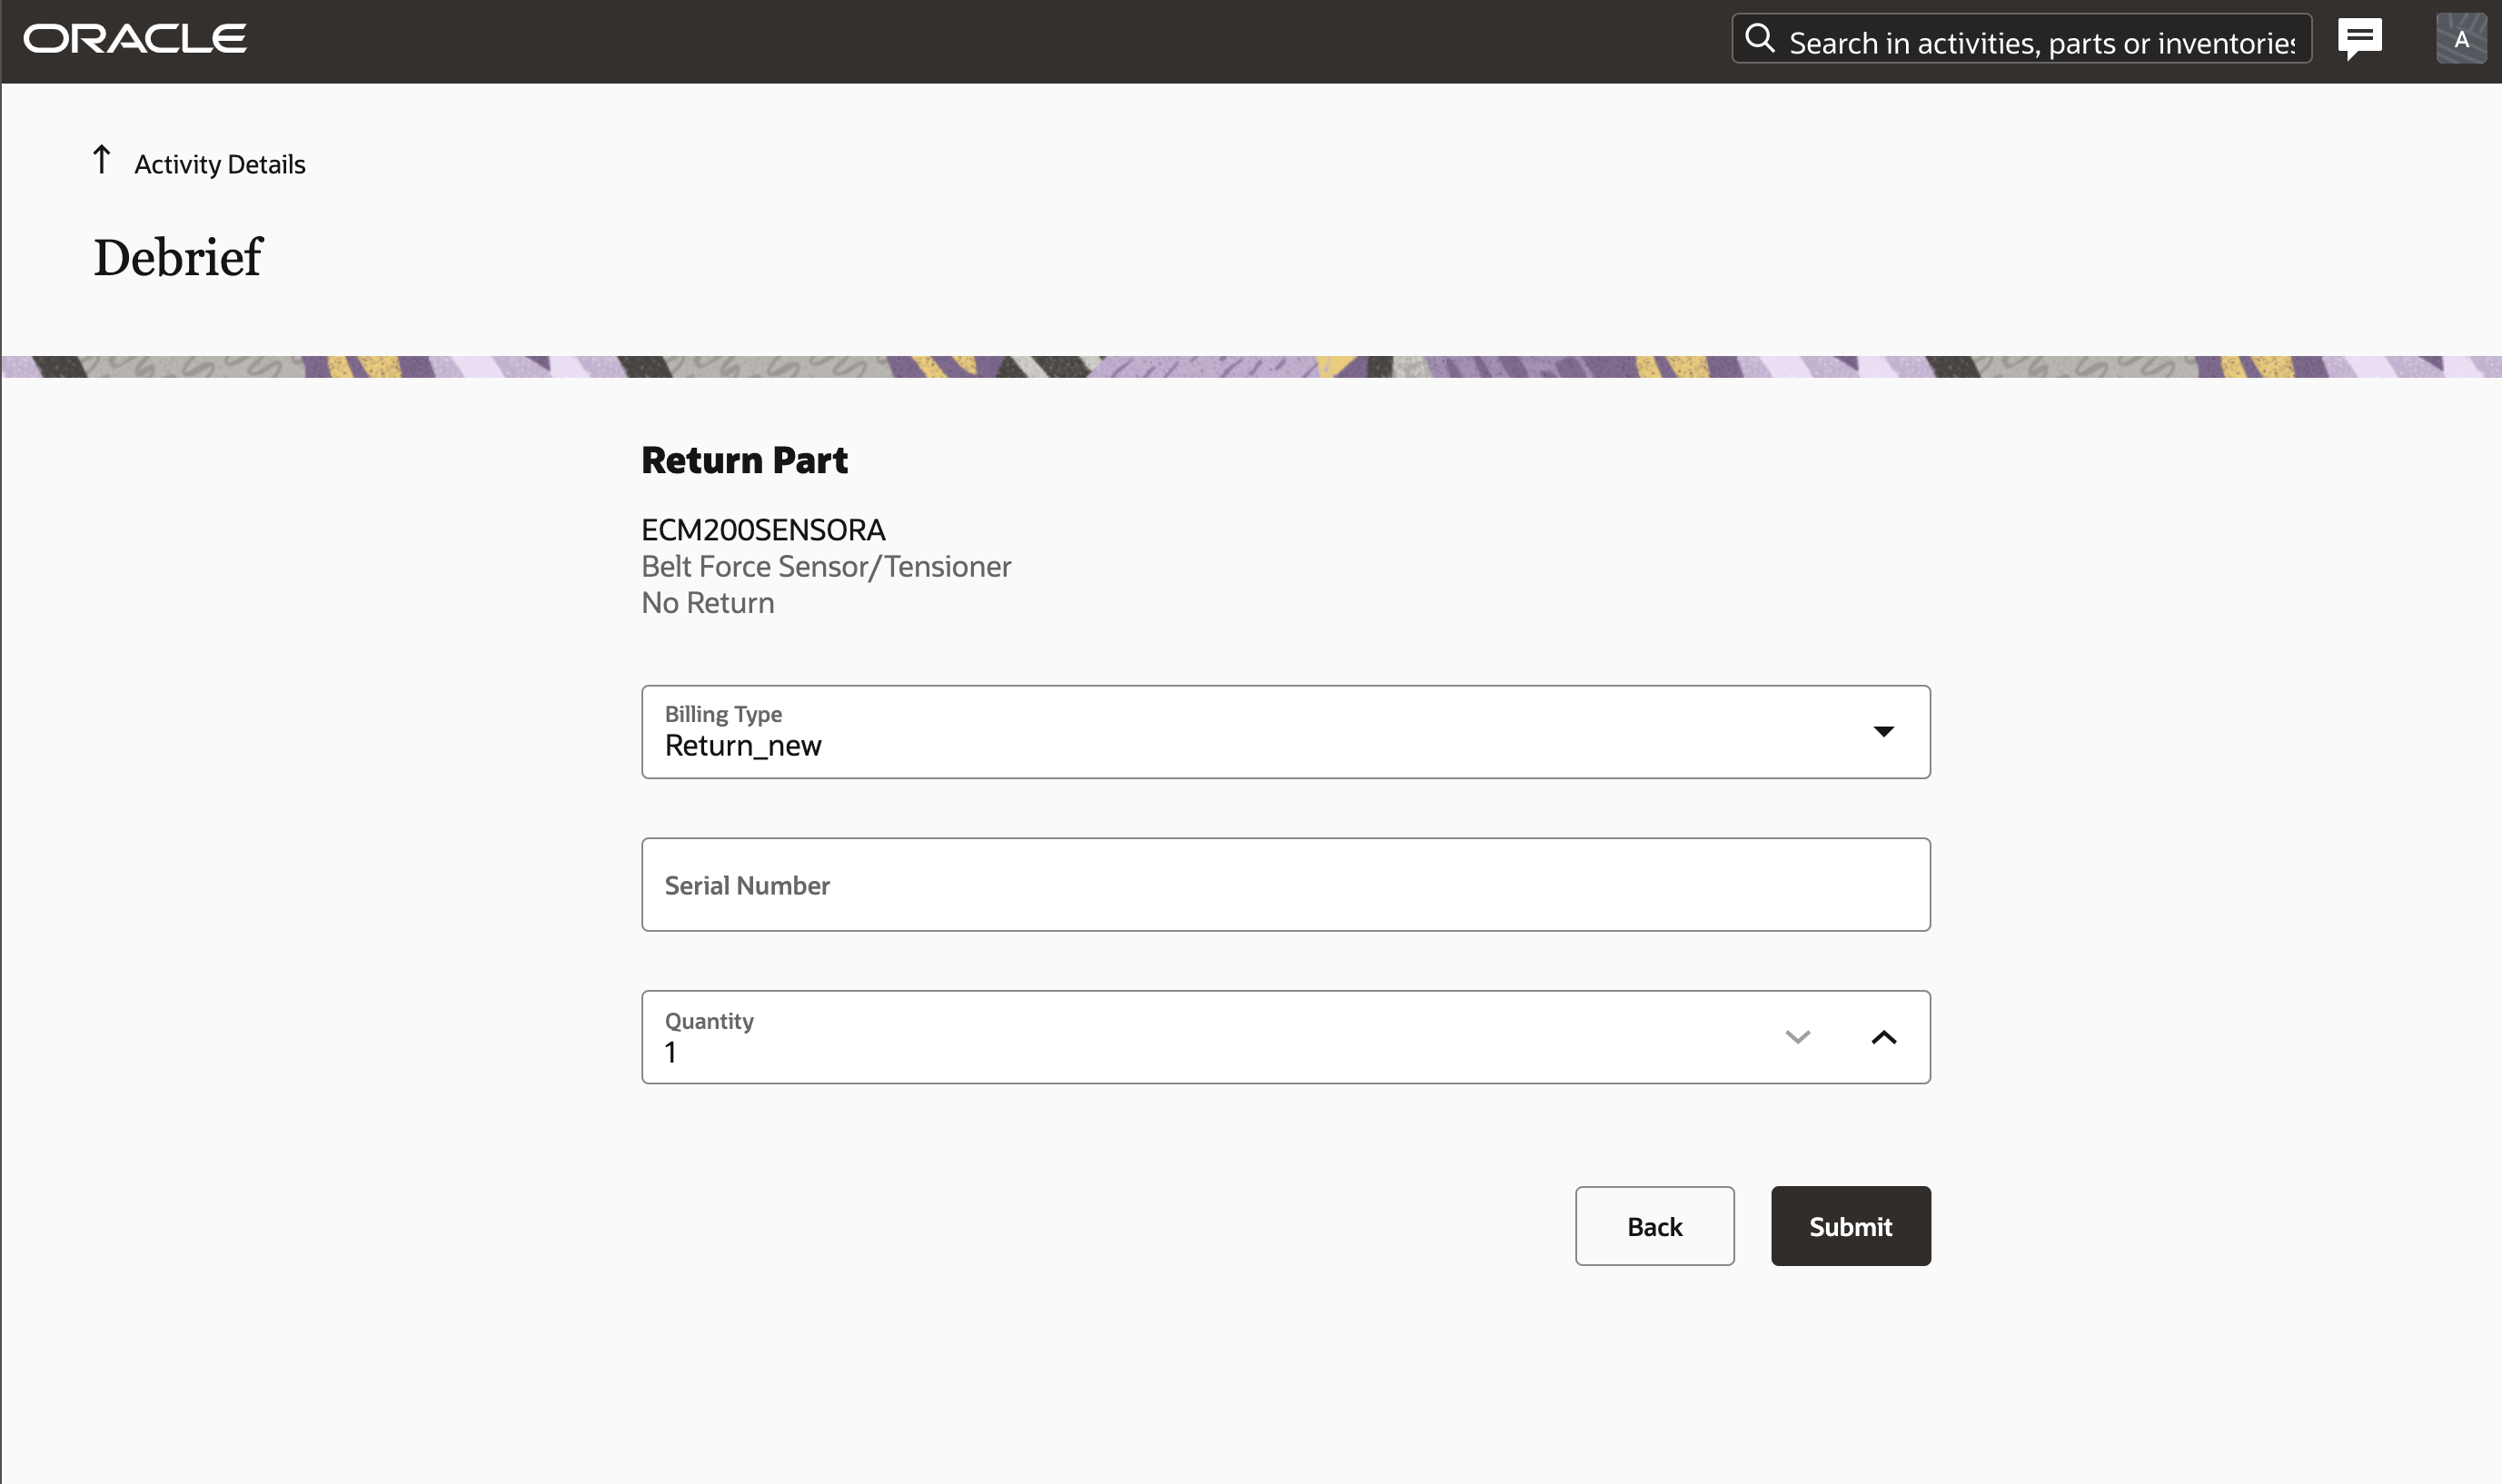
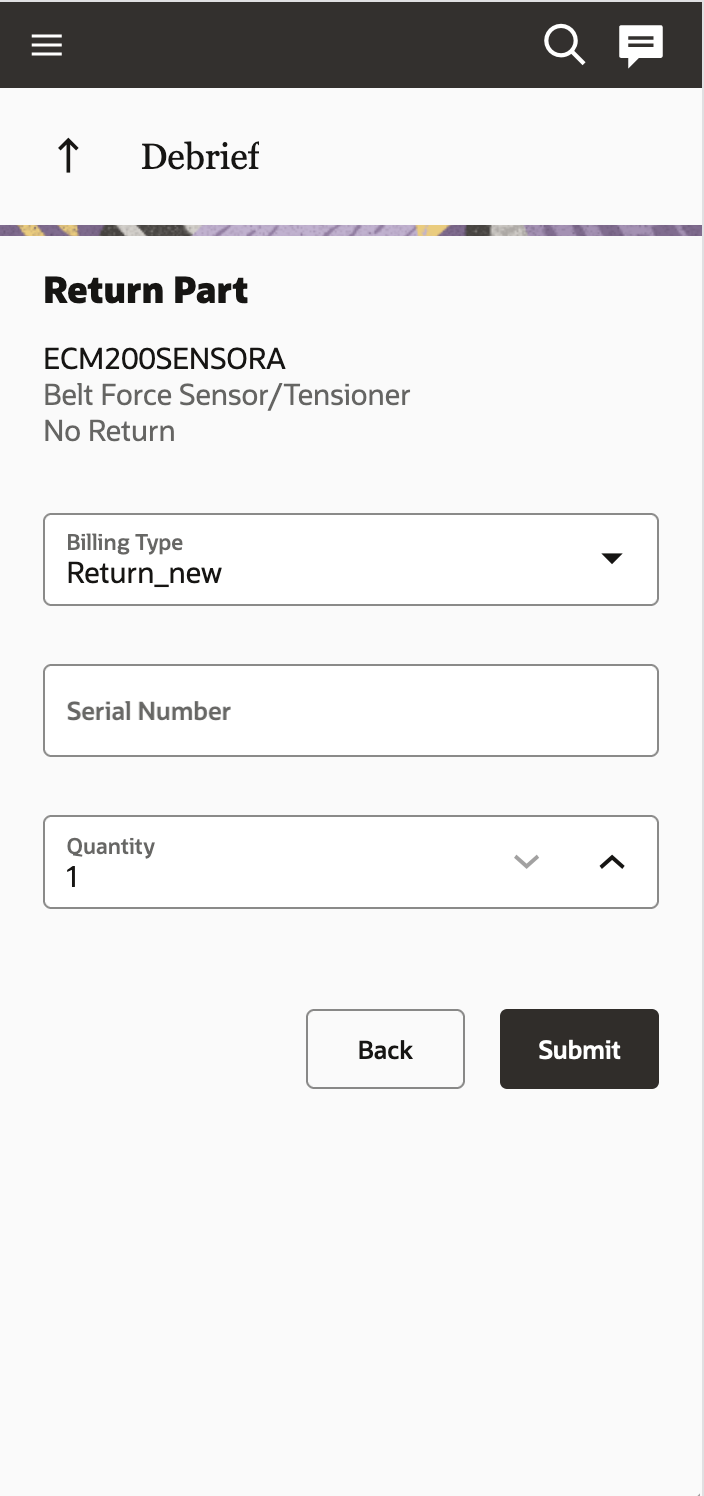
Once all the charges are added, the summary can be seen in the page as below:
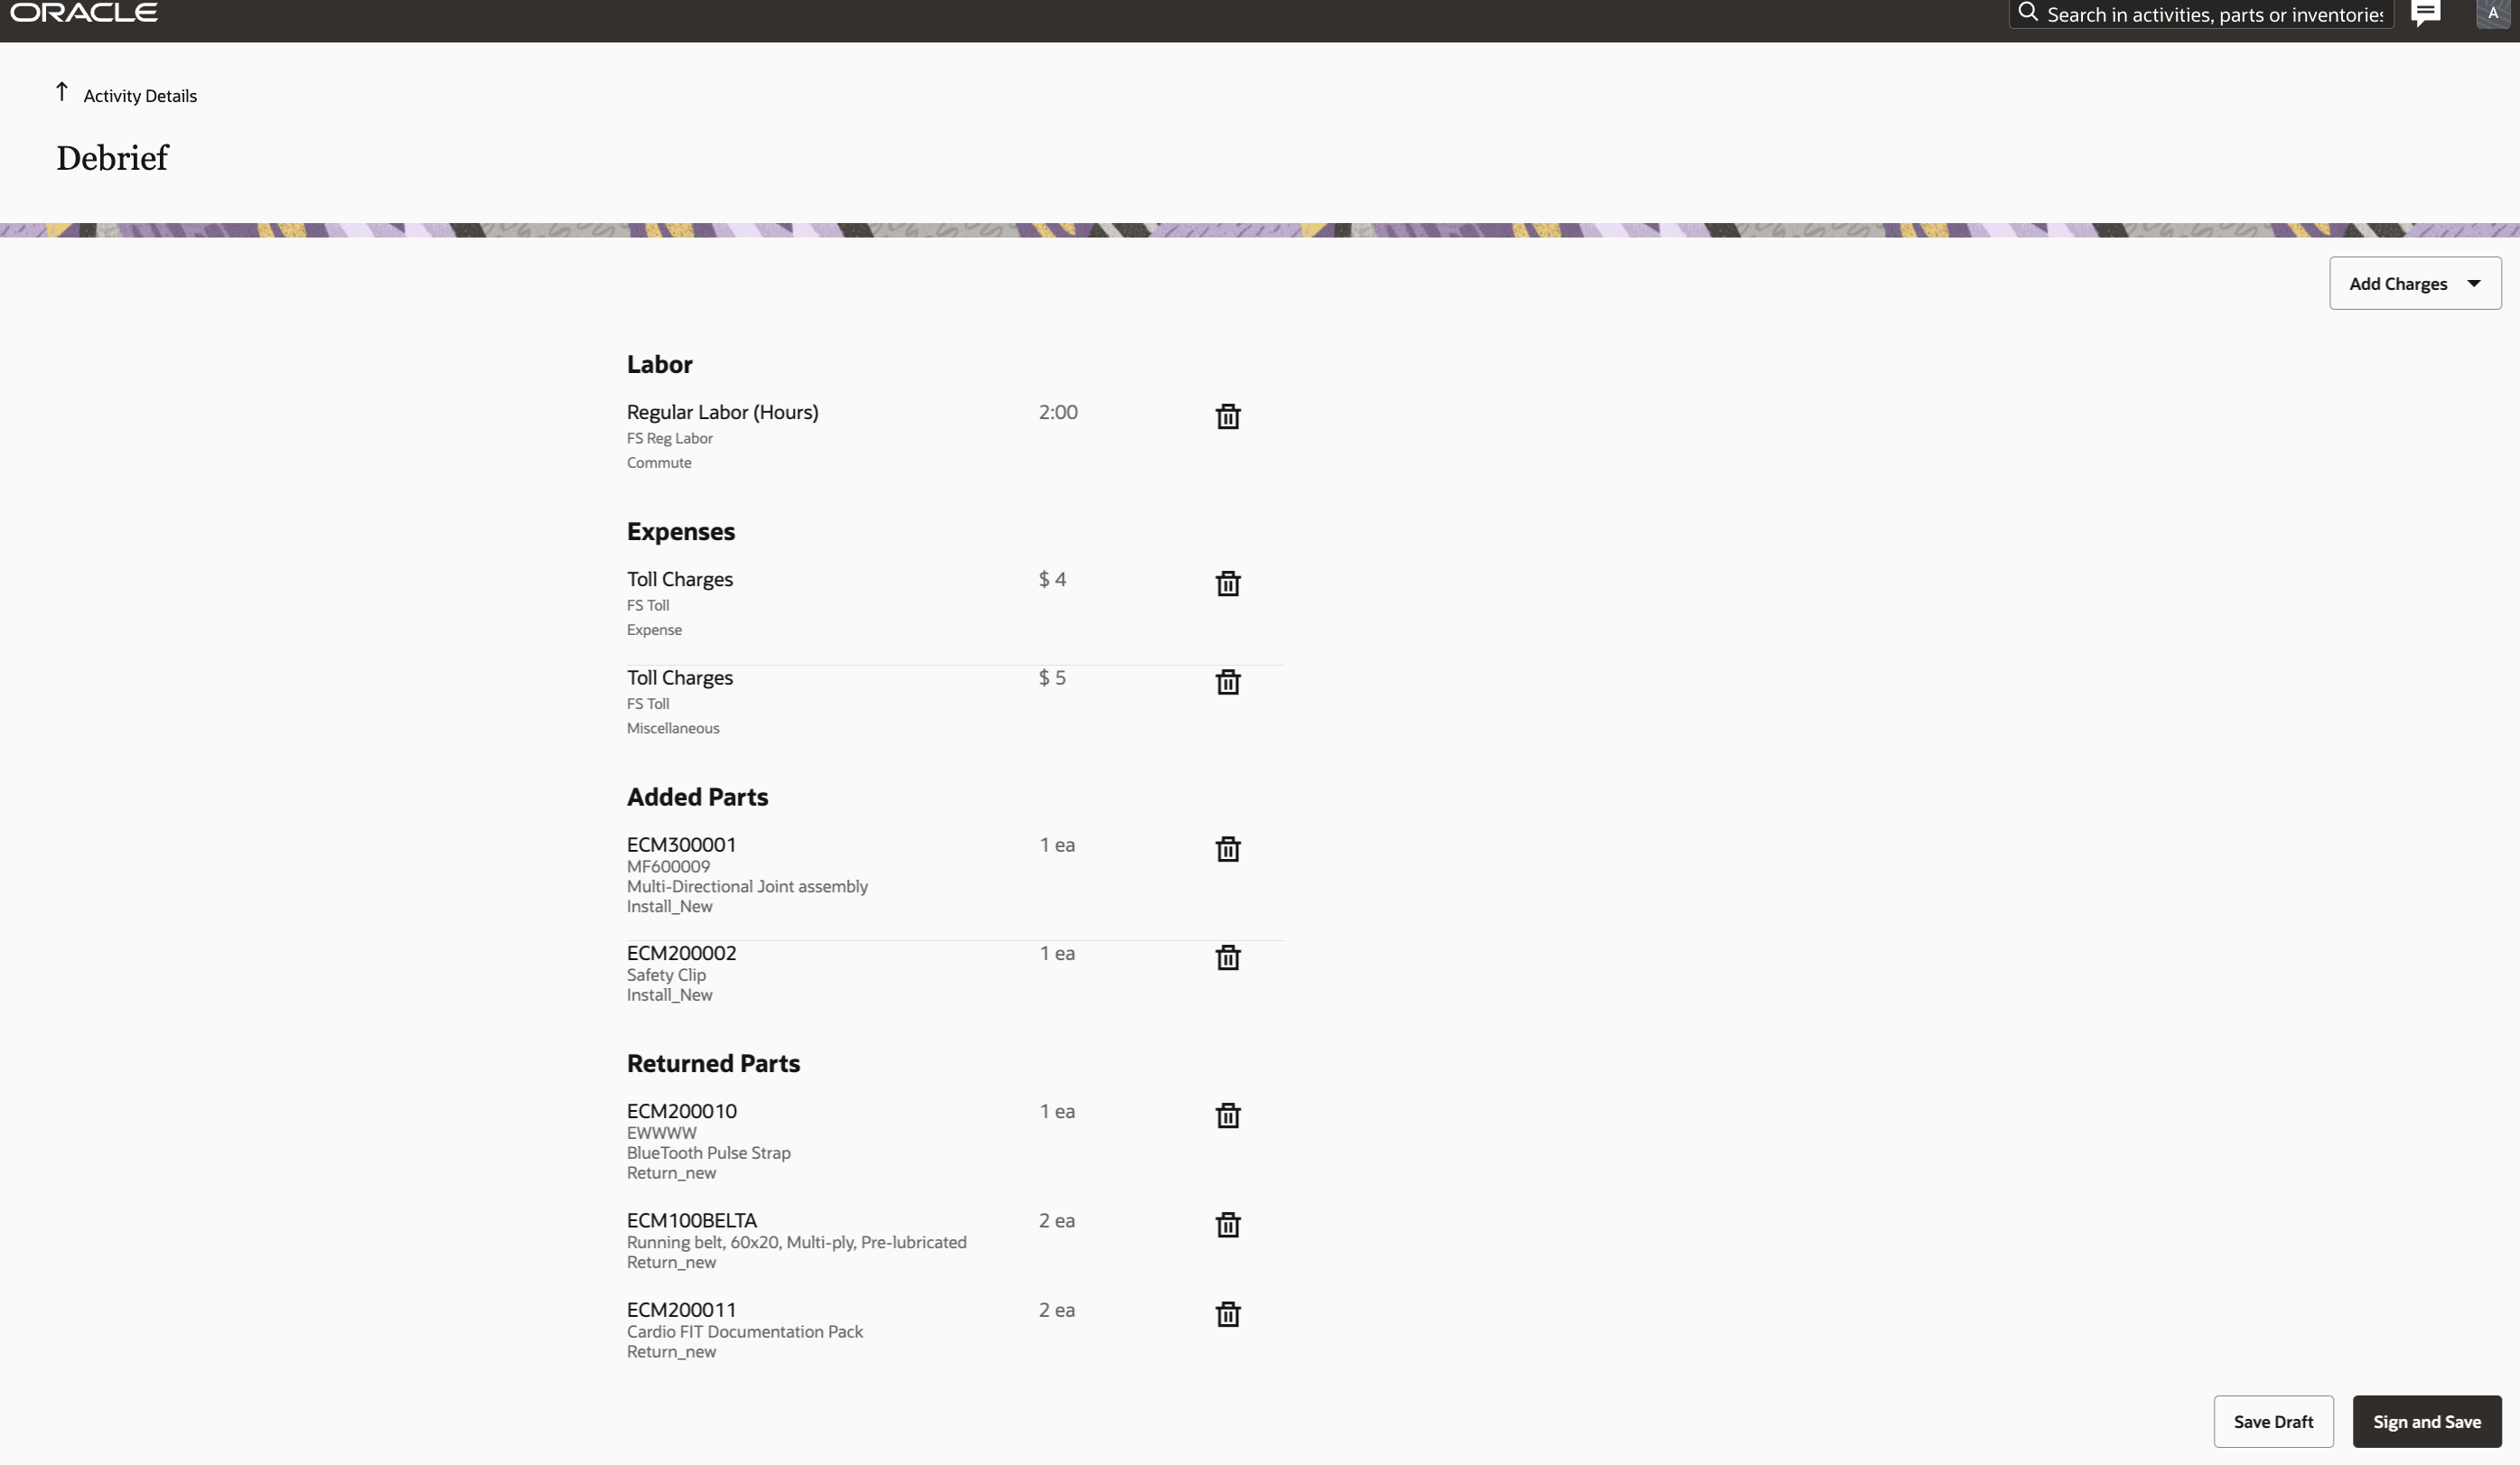
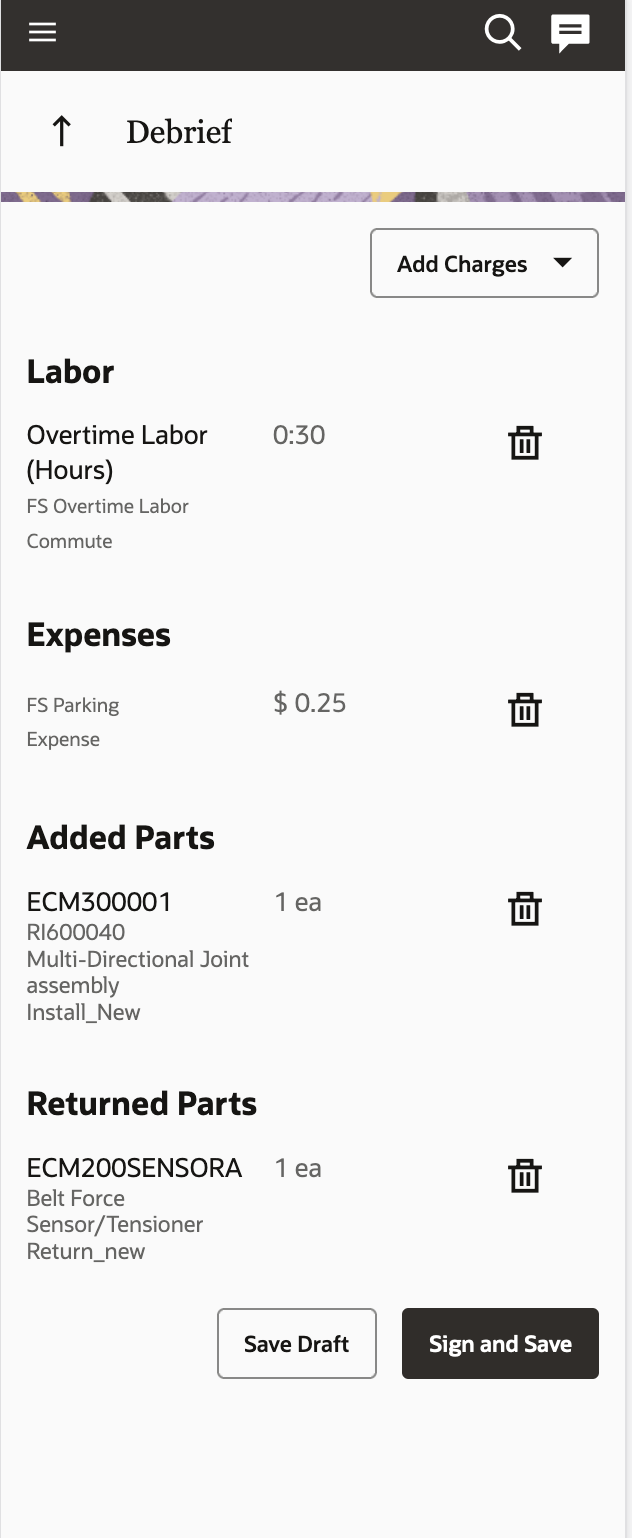
After you complete capturing the debrief information, you can obtain the customer’s signature and generate a PDF invoice.
- Click Sign and Save.
- Use the Signature pane to sign the invoice.
- Click Submit.
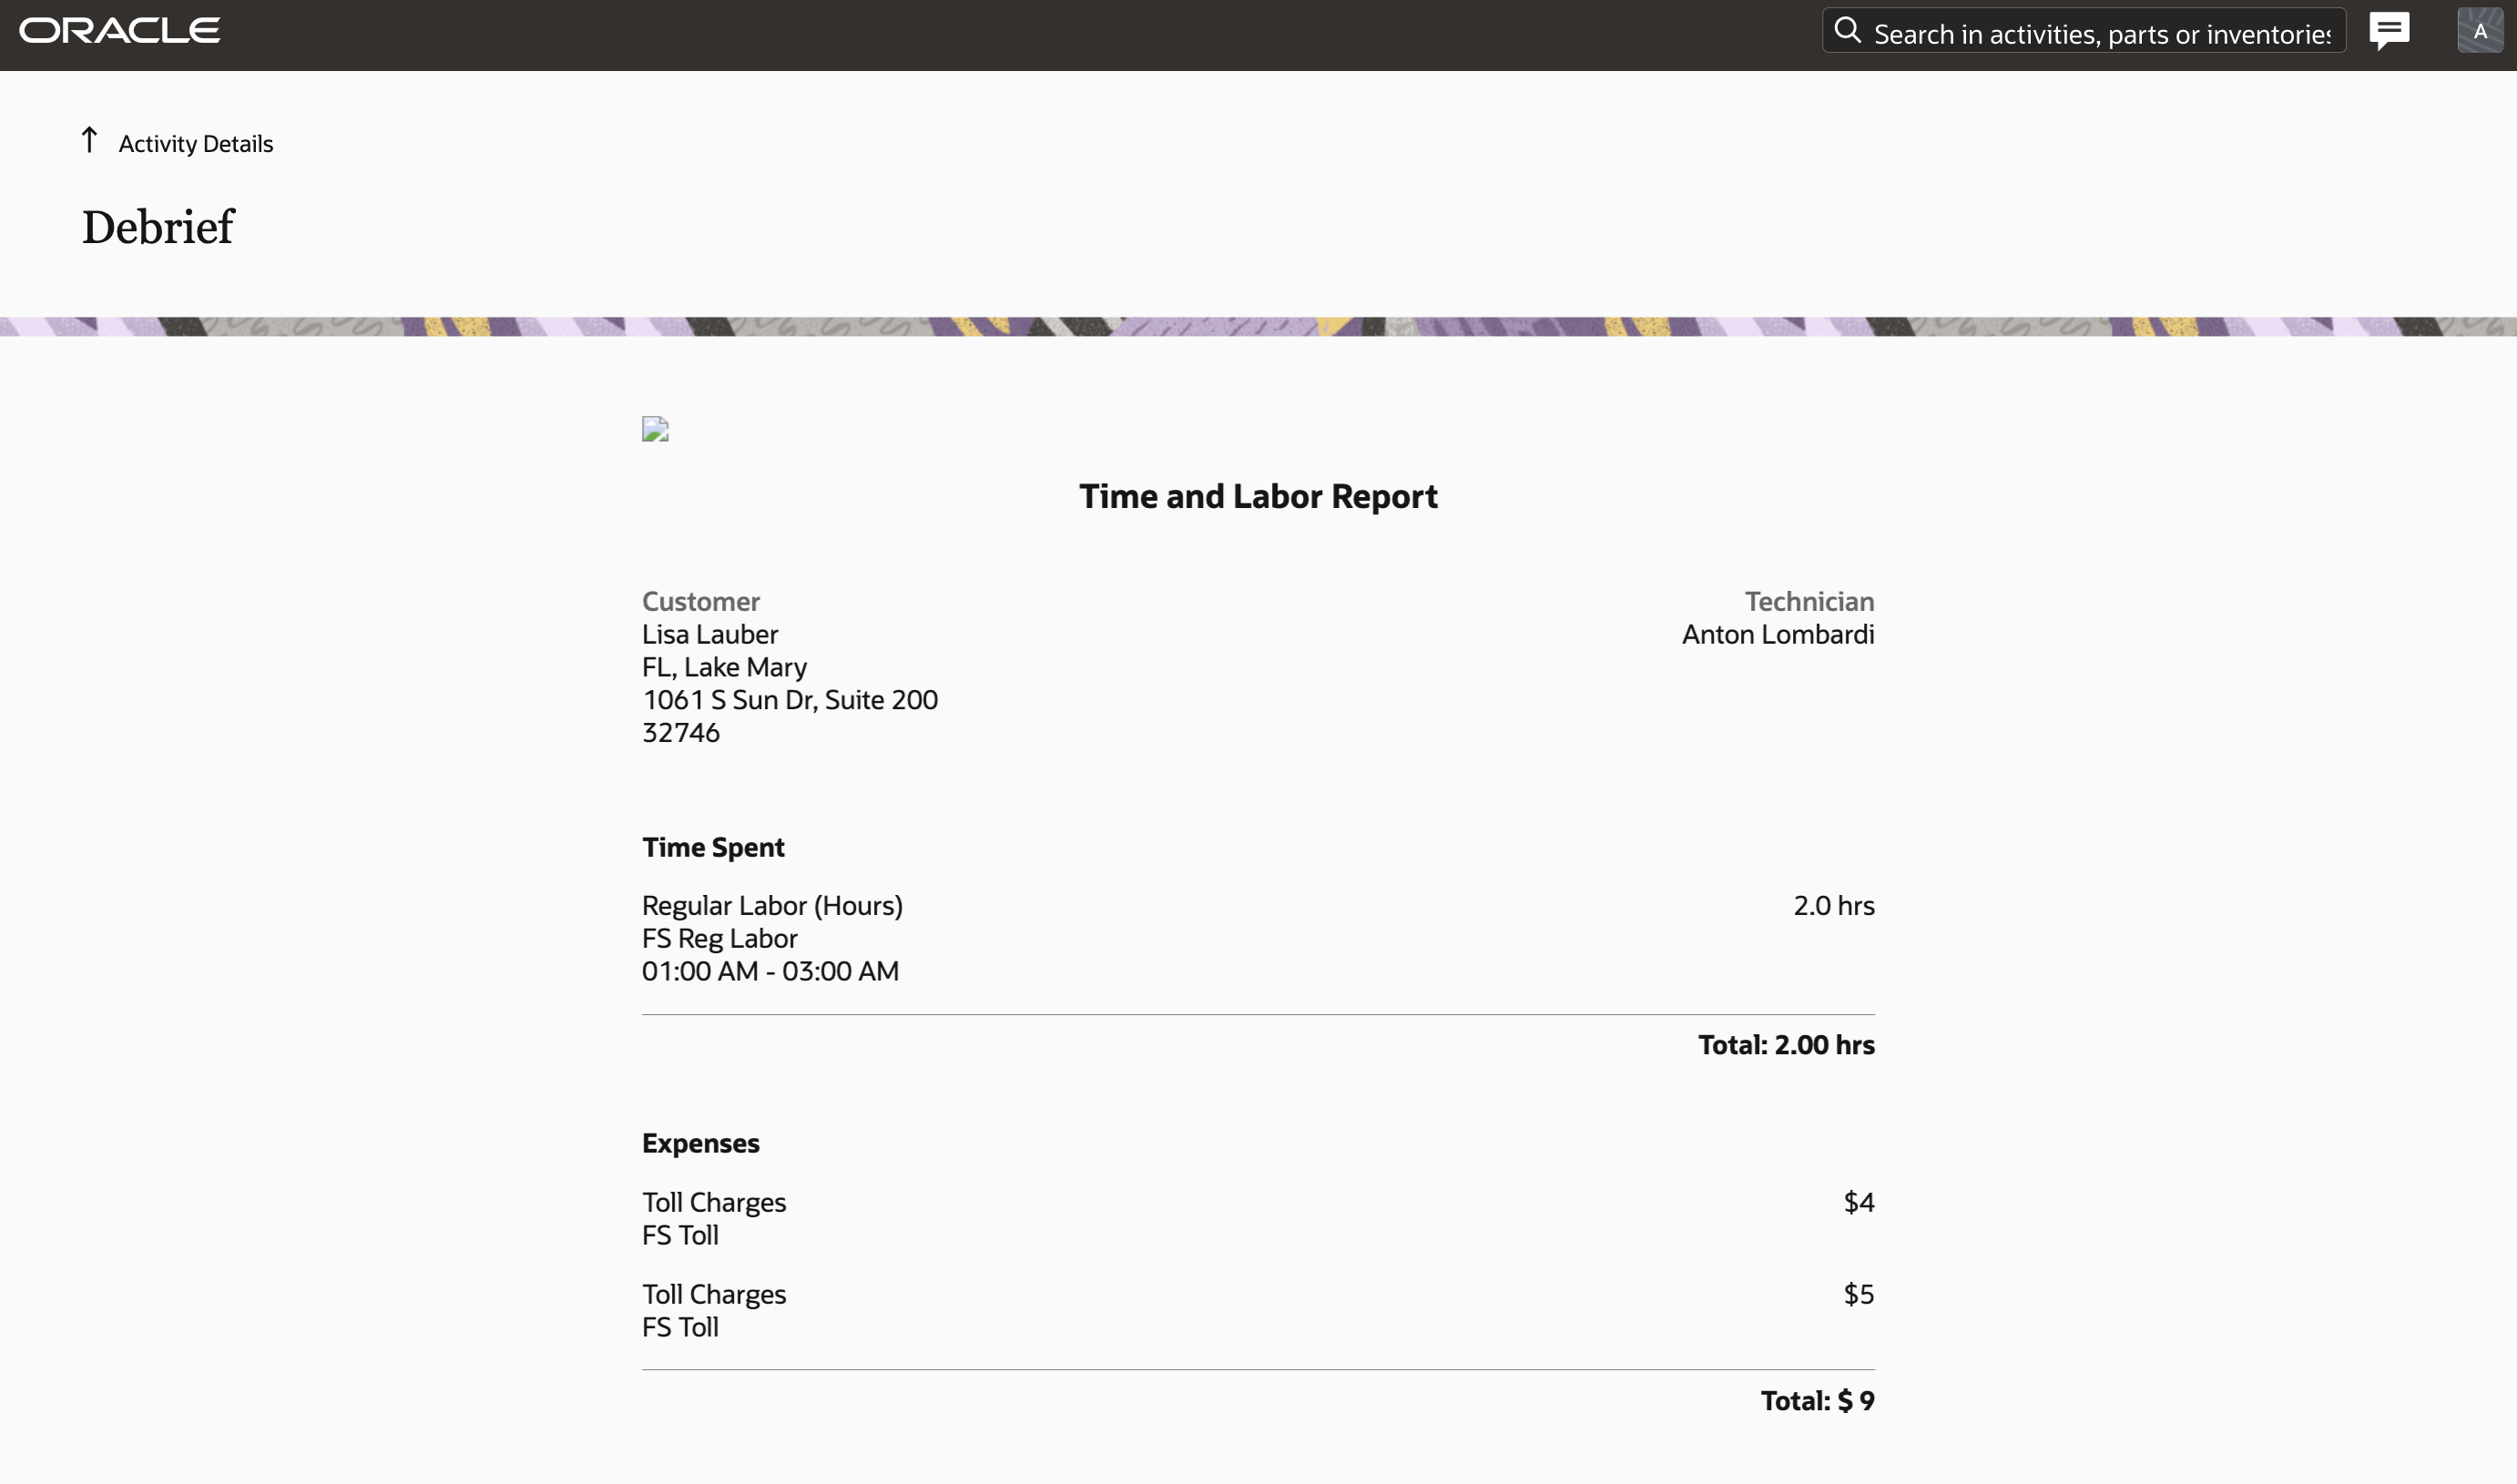
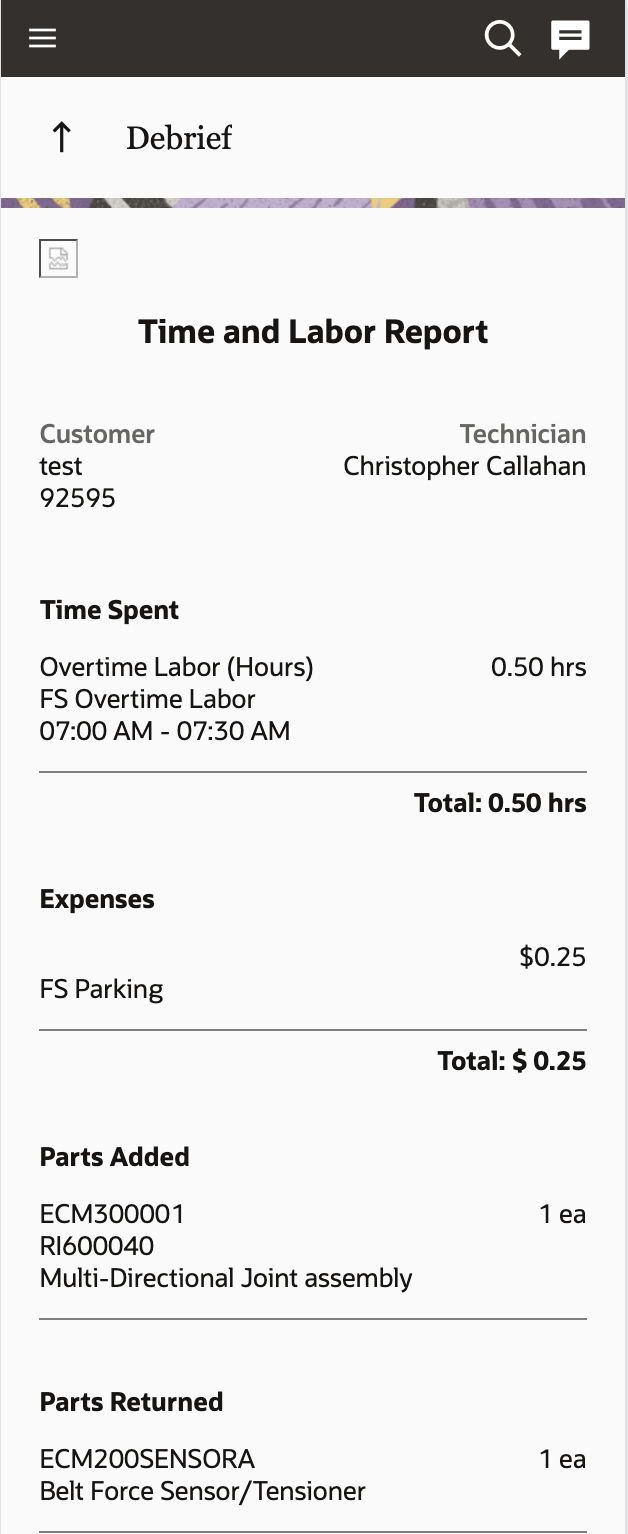
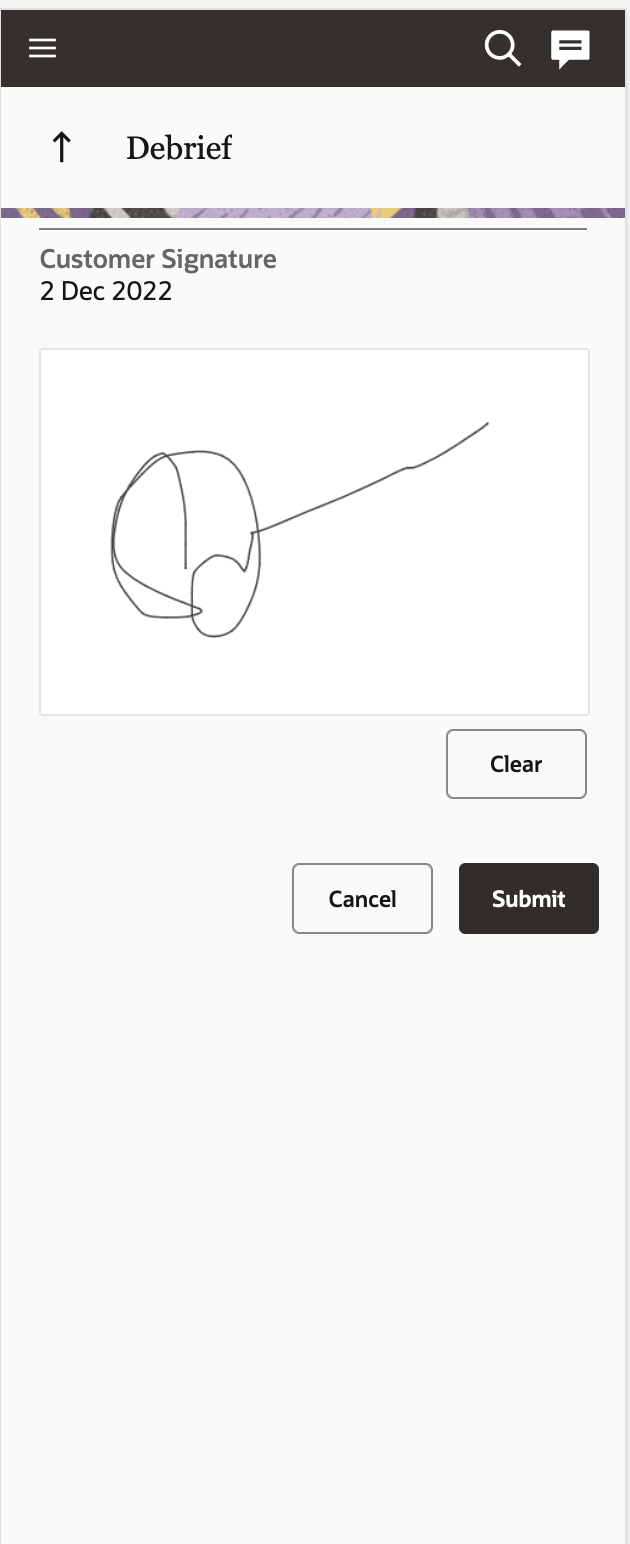
NOTE: After the invoice is submitted, the invoice is stored as a PDF file in an activity property for download and review. If you want to make changes to the invoice, then you must reopen the activity, perform the debriefing again, so that the new PDF file overwrites the old one.
Company Logo
Customer can provide their company logo in the Time and Labour report by adding a new secure parameter with name "logoUrl" and value as "url of the company logo".
Logo image will only support .jpeg and the recommended size of the image is less than "150X60 ".
Customization
To customize the Debriefing plugin:
- Locate the the plugin's source archives in the collection (or example, plugin-debriefing-source-zip).
- Extract the archive and view the README.md file for details.
The standard plug-in 'Debriefing' is available out-of-the-box in Oracle Field Service. You can easily select and install it in a couple of clicks without the need for any special technical skills.
Steps to Enable
You don't need to do anything to enable this feature.
Tips And Considerations
After you download the Debriefing plug-in, you must configure it before you start using it. See the Plug-In Configuration section for the procedure.
Key Resources
- Mobile Plug-in Framework: https://docs.oracle.com/en/cloud/saas/field-service/falid/index.html. This link will be available after Update 23A GA release.
Standard Plug-Ins and Improved User Experience of Plug-Ins
Introduction
The Update 23A provides you with new accessibility to the list of Standard plug-ins that are available out of the box within Field Service. You can easily select and install standard plug-ins in a couple clicks without the need for any special technical skills. The new release initially offers two Standard plug-ins - Sample and Debriefing. In addition, you can also download the source code of a Standard plug-in to then modify as needed to cover special business scenarios and then easily upload it back into the system.
Also, plug-in pages in Oracle Field Service were redesigned to the Redwood style with an improved user experience.
What's New
- New 'Add plug-in' dialog window that allows you to select a type of the plug-in. This window includes descriptions of each plug-in type.
- New Standard plug-in page that provides the list of available plug-ins, their descriptions and versions (Sample and Debriefing plug-in are included in Update 23A).
- New Install plug-in page where user can see what required properties will be used by the plug-in in case they are already present in the system or what properties will be automatically created after the confirmation.
- Installed Standard plug-ins are available in the 'Forms & plug-ins' page with the corresponding Redwood icon.
- All plug-ins pages are redesigned to the Redwood style with improved UX.
Use Cases
- Install a Standard plug-in; a configurator can select Standard plug-ins (Sample or Debriefing plug-in in Update 23A) and Install them within a couple clicks.
- A configurator can add buttons for users to access these plug-ins using Oracle Field Service pages.
- A configurator or integrator can download the source code to made necessary modifications to cover special business scenarios and the upload the plug-in back to Oracle Field Service.
- A configurator can add additional settings to Standard plug-ins; for example, adding additional secure parameters.
Overview of Standard Plug-Ins
Prior to Update 23A, in order to extend Oracle Field Service functionality with special business logic, you implemented your own custom code (using custom plug-ins) and either hosted them in Oracle Field Service (hosted plug-in) or added a link if the plug-in was hosted externally (external plug-ins).
Unlike custom plug-ins, Standard plug-ins are introduced and supported by Oracle, and are available out of the box in the system starting with Update 23A. These plug-ins cannot be changed. They contain logic that covers particular business scenarios (for example Debrief) and can potentially support integrations with other Oracle CX products (for example Service Logistics).
That said, you can download the source code of a Standard plug-in, make modifications to it, and then re-upload it to Oracle Field Service as a hosted plug-in. Just be aware that any modified code would no longer be supported by Oracle.
Configuration of Standard Plug-Ins
Install a Standard Plug-In
- Open Configuration > Forms & Plugins.
- Click Add Plugin. This screenshot shows the Forms & Plugins page:

- Select 'Standard plug-in' option and click 'Next'. This screenshot shows the Plugin Type dialog box:
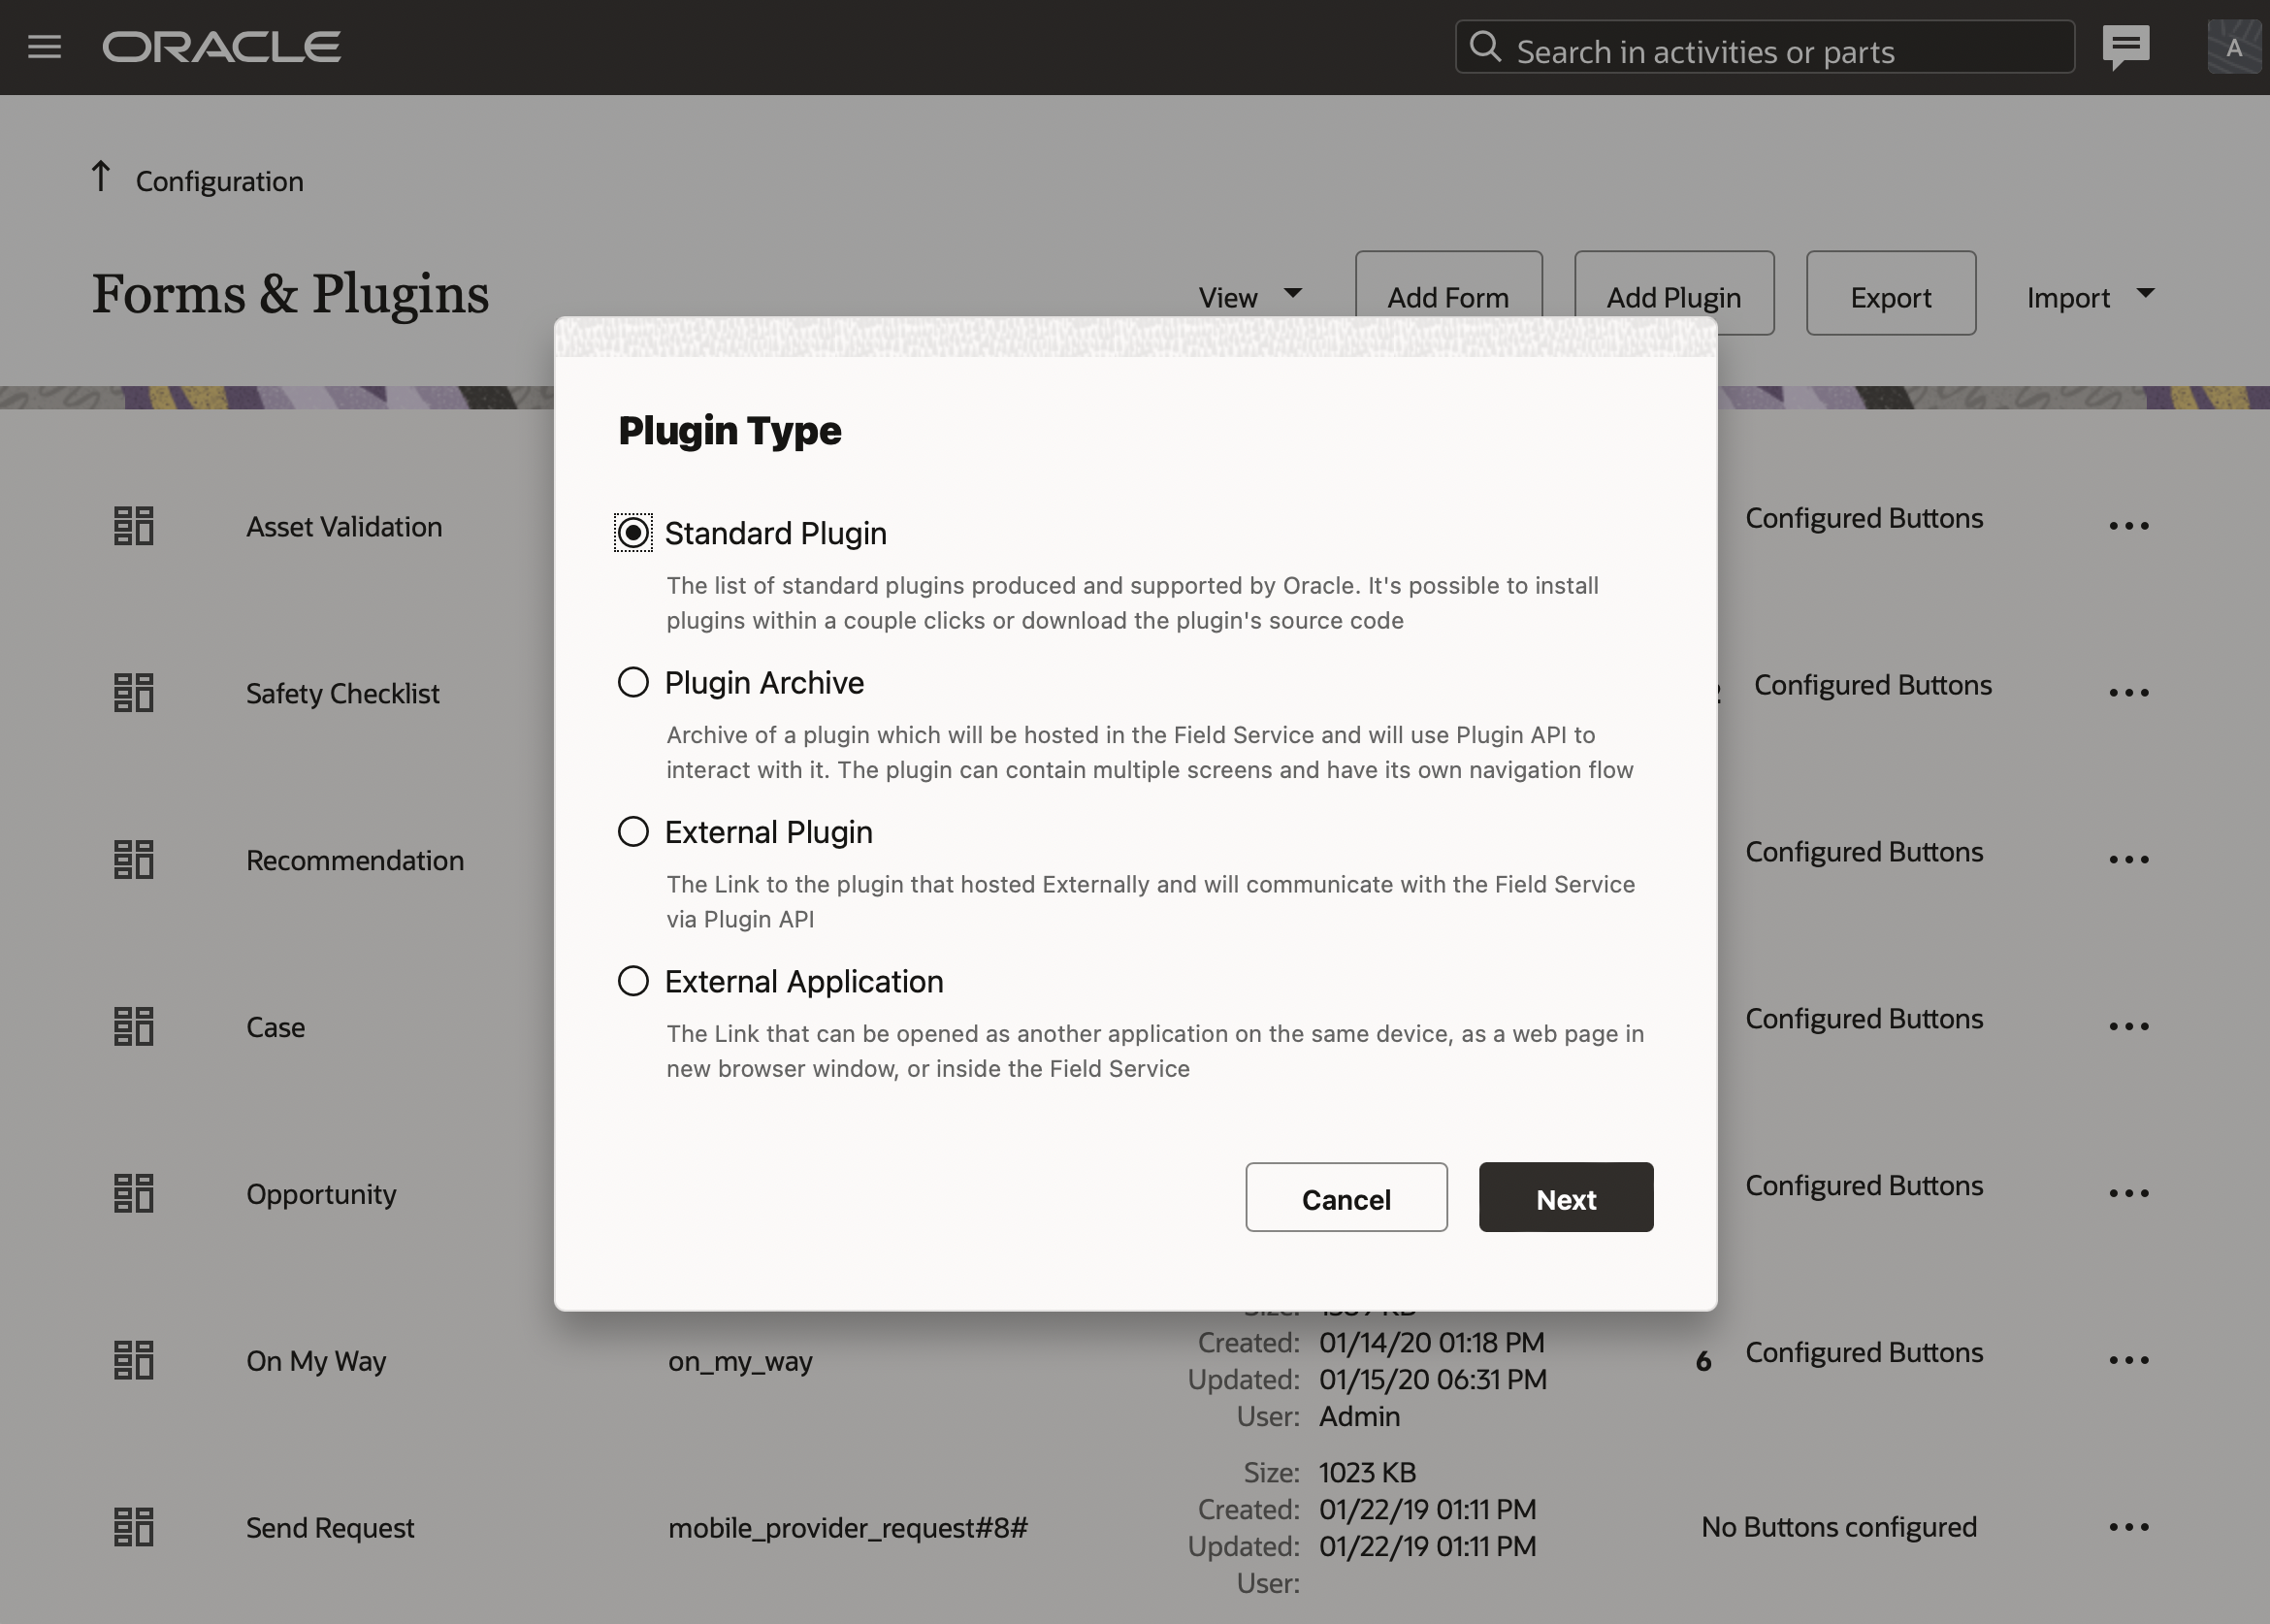
NOTE: Standard plug-ins are not included within the 25 hosted plug-ins limit.
- Select the needed plug-in from the list. Each plug-in has name, description and the current version. In the Update 23A, two plug-ins are available:- Sample plug-in- Debriefing plug-in
NOTE: Plug-ins are supported only in the English language.
This screenshot shows the standard plug-ins available in Oracle Field Service:
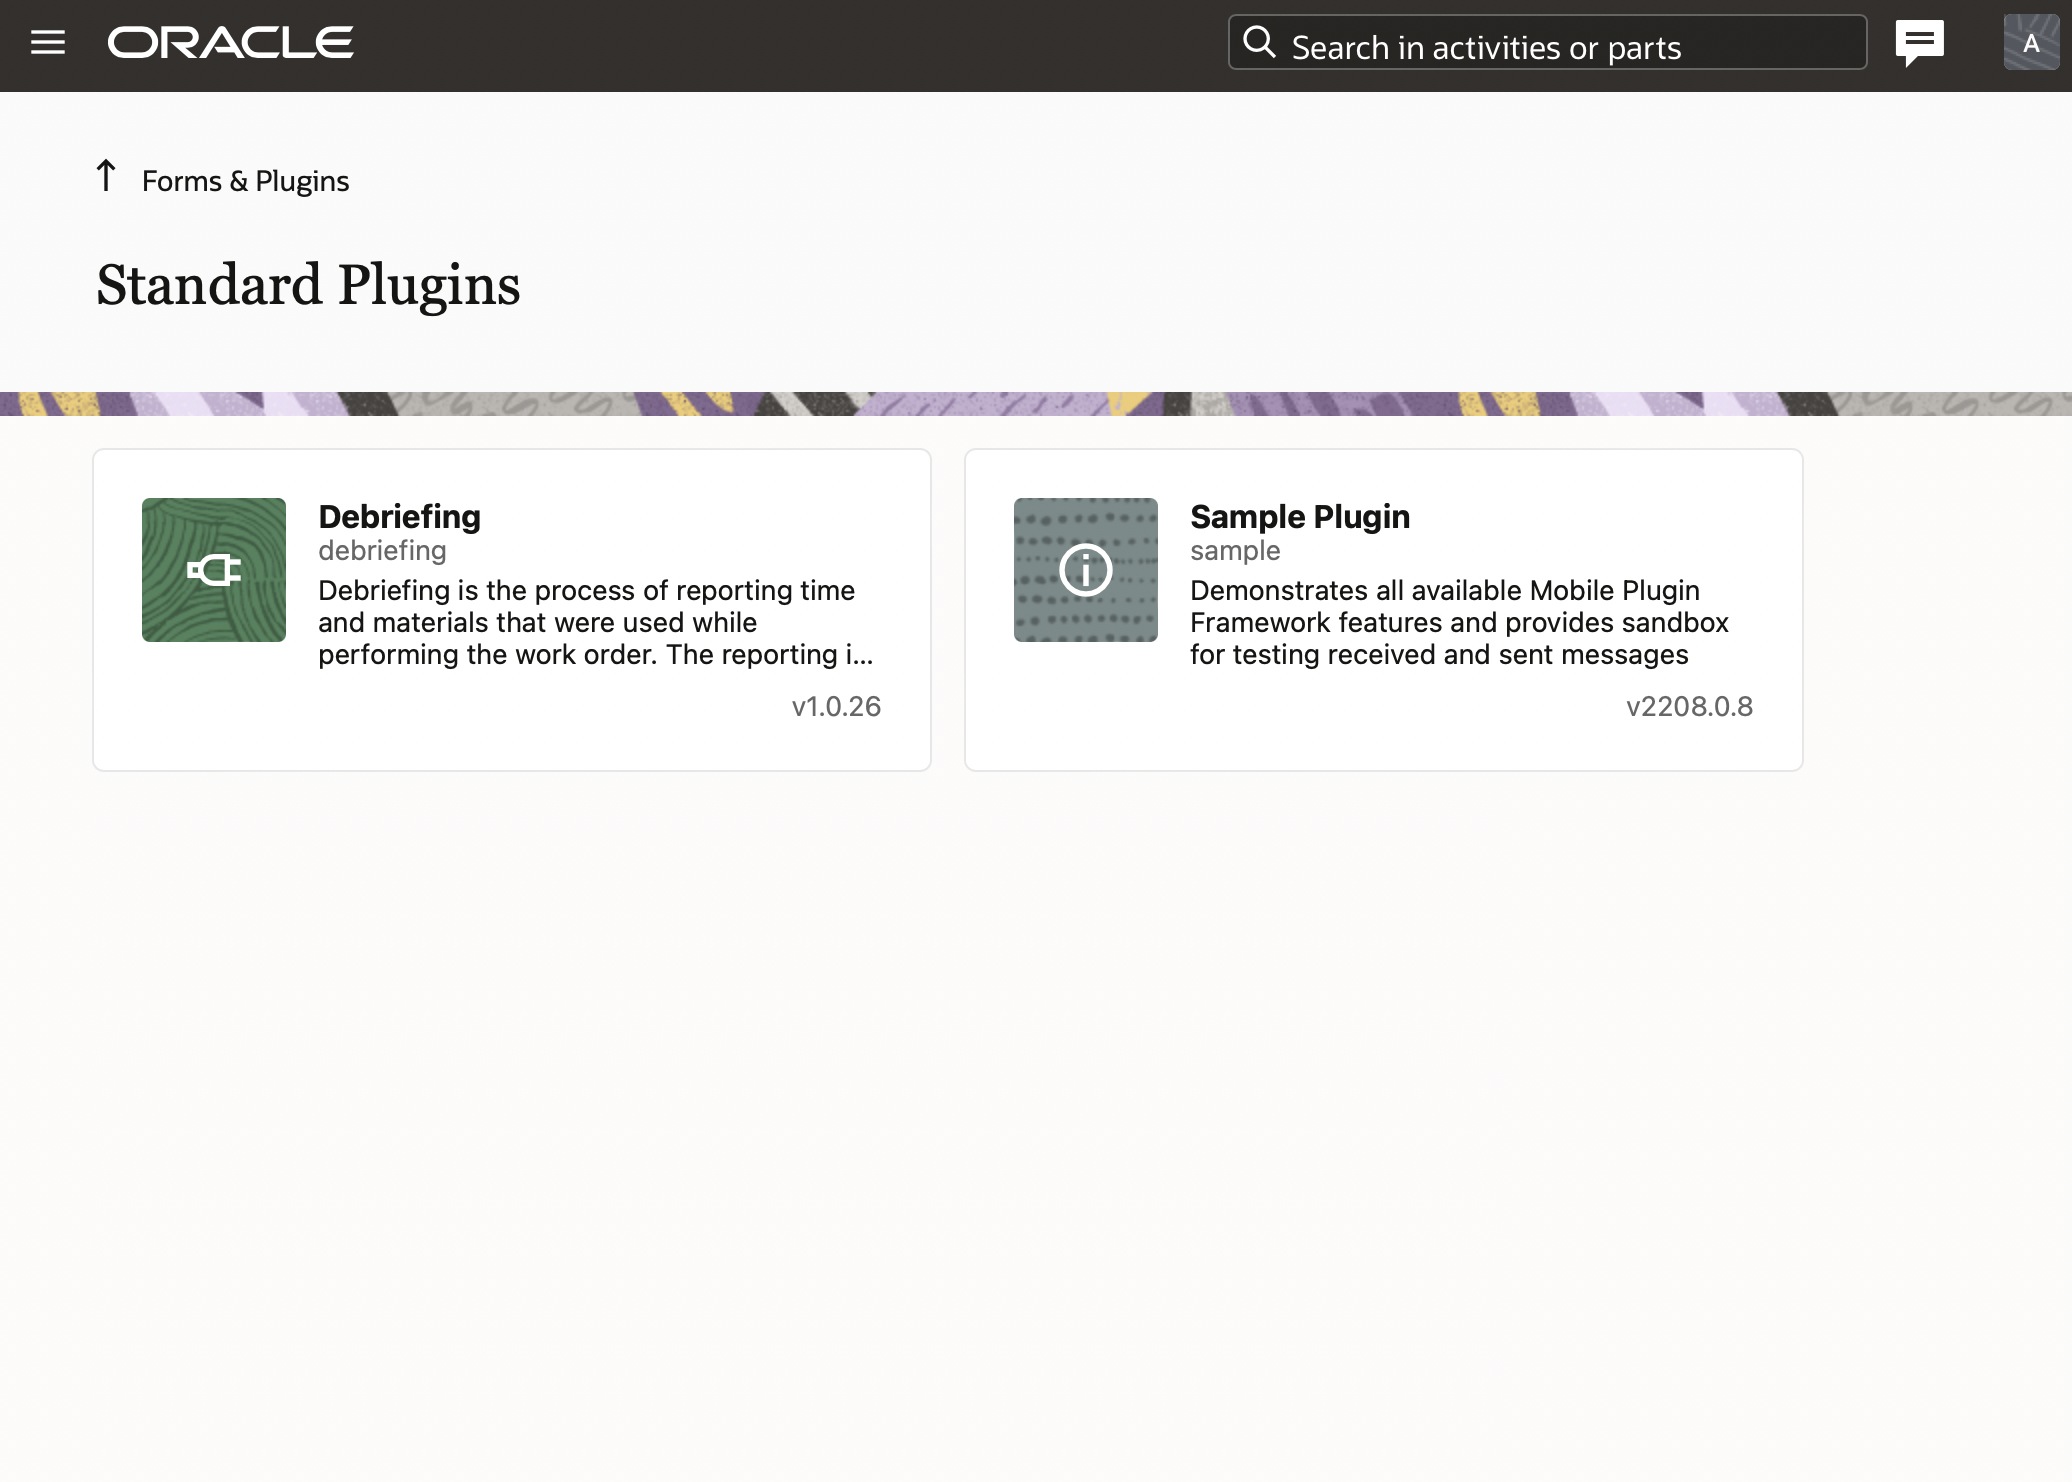
On the plug-in page you can see:
- Properties will be installed. You can see the list of properties that will be automatically installed with the plug-in and will subsequently be available on the Configuration ? Properties page. In cases where the plug-in might be de-installed in the future, these properties will remain on the Properties page.
- Existing properties will be used. You can see the list of properties that are required for the plug-in and are already present in the system.
This screenshot shows the properties that will be installed:
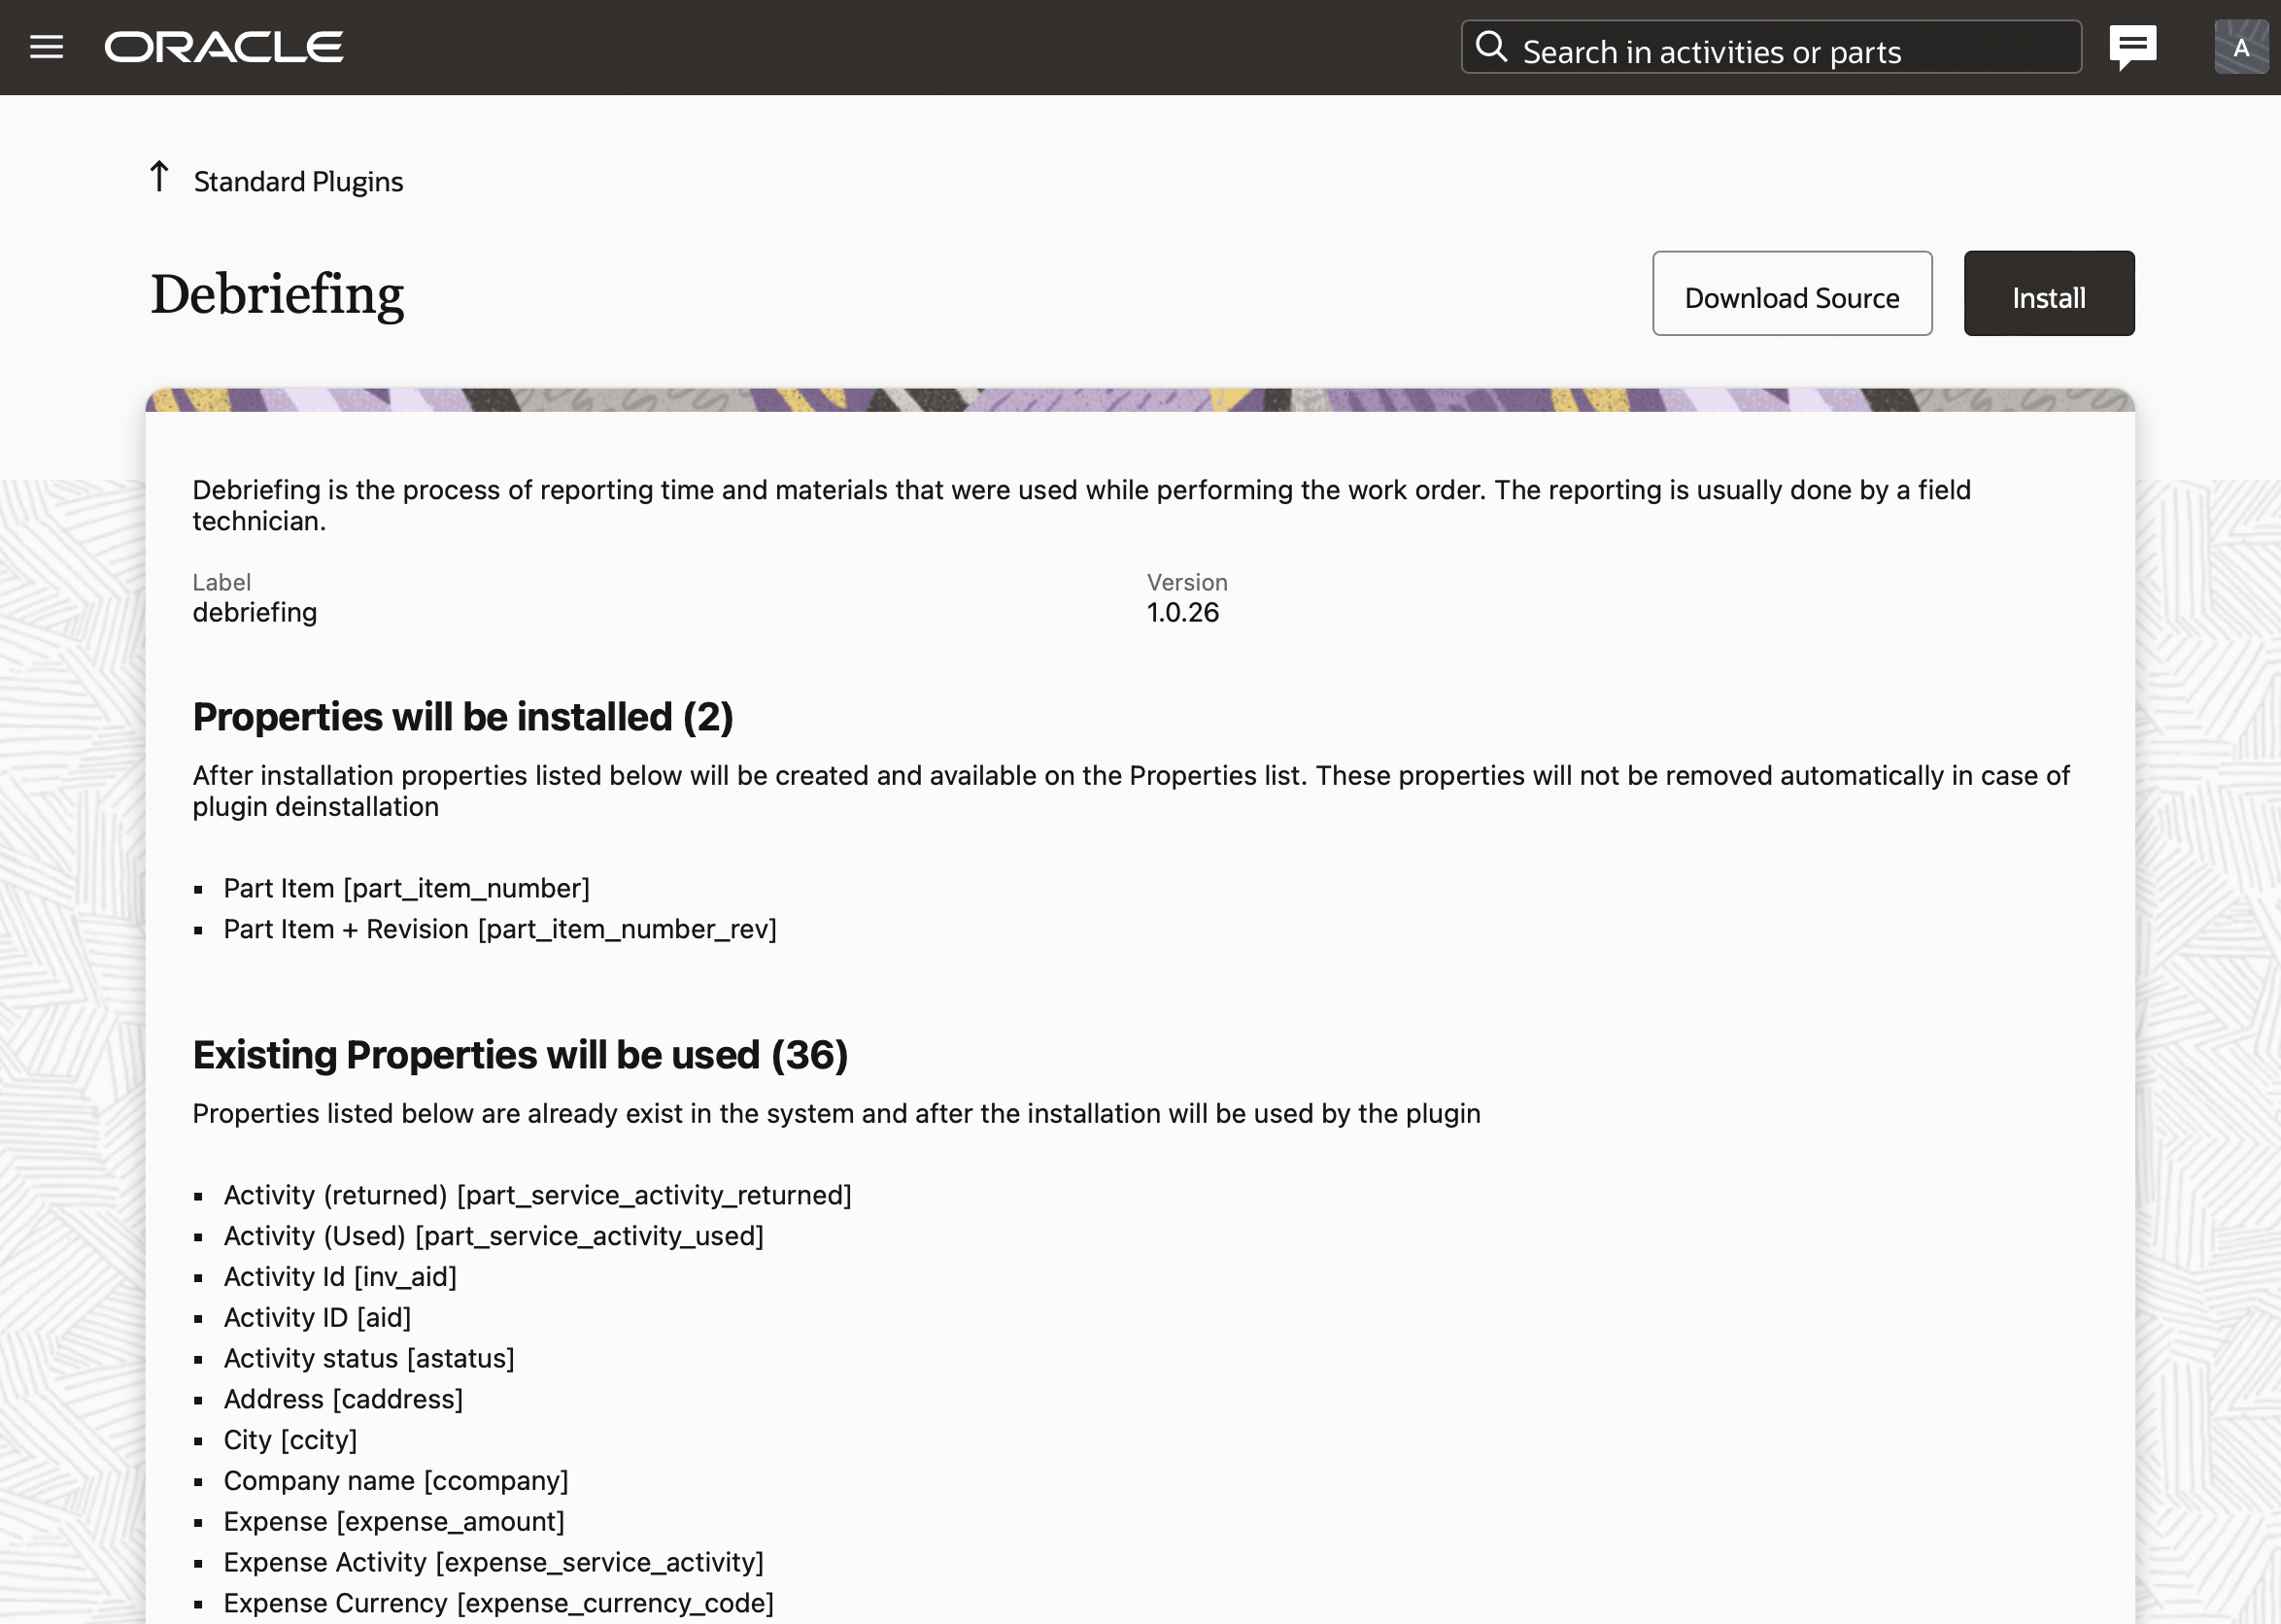
NOTE: If some properties have incorrect configuration (property type, entity, etc.) then the system notifies the user with a corresponding message. You have to open the plug-in's documentation, find the property requirements and change the property settings accordingly.
This screenshot shows the properties that are misconfigured:
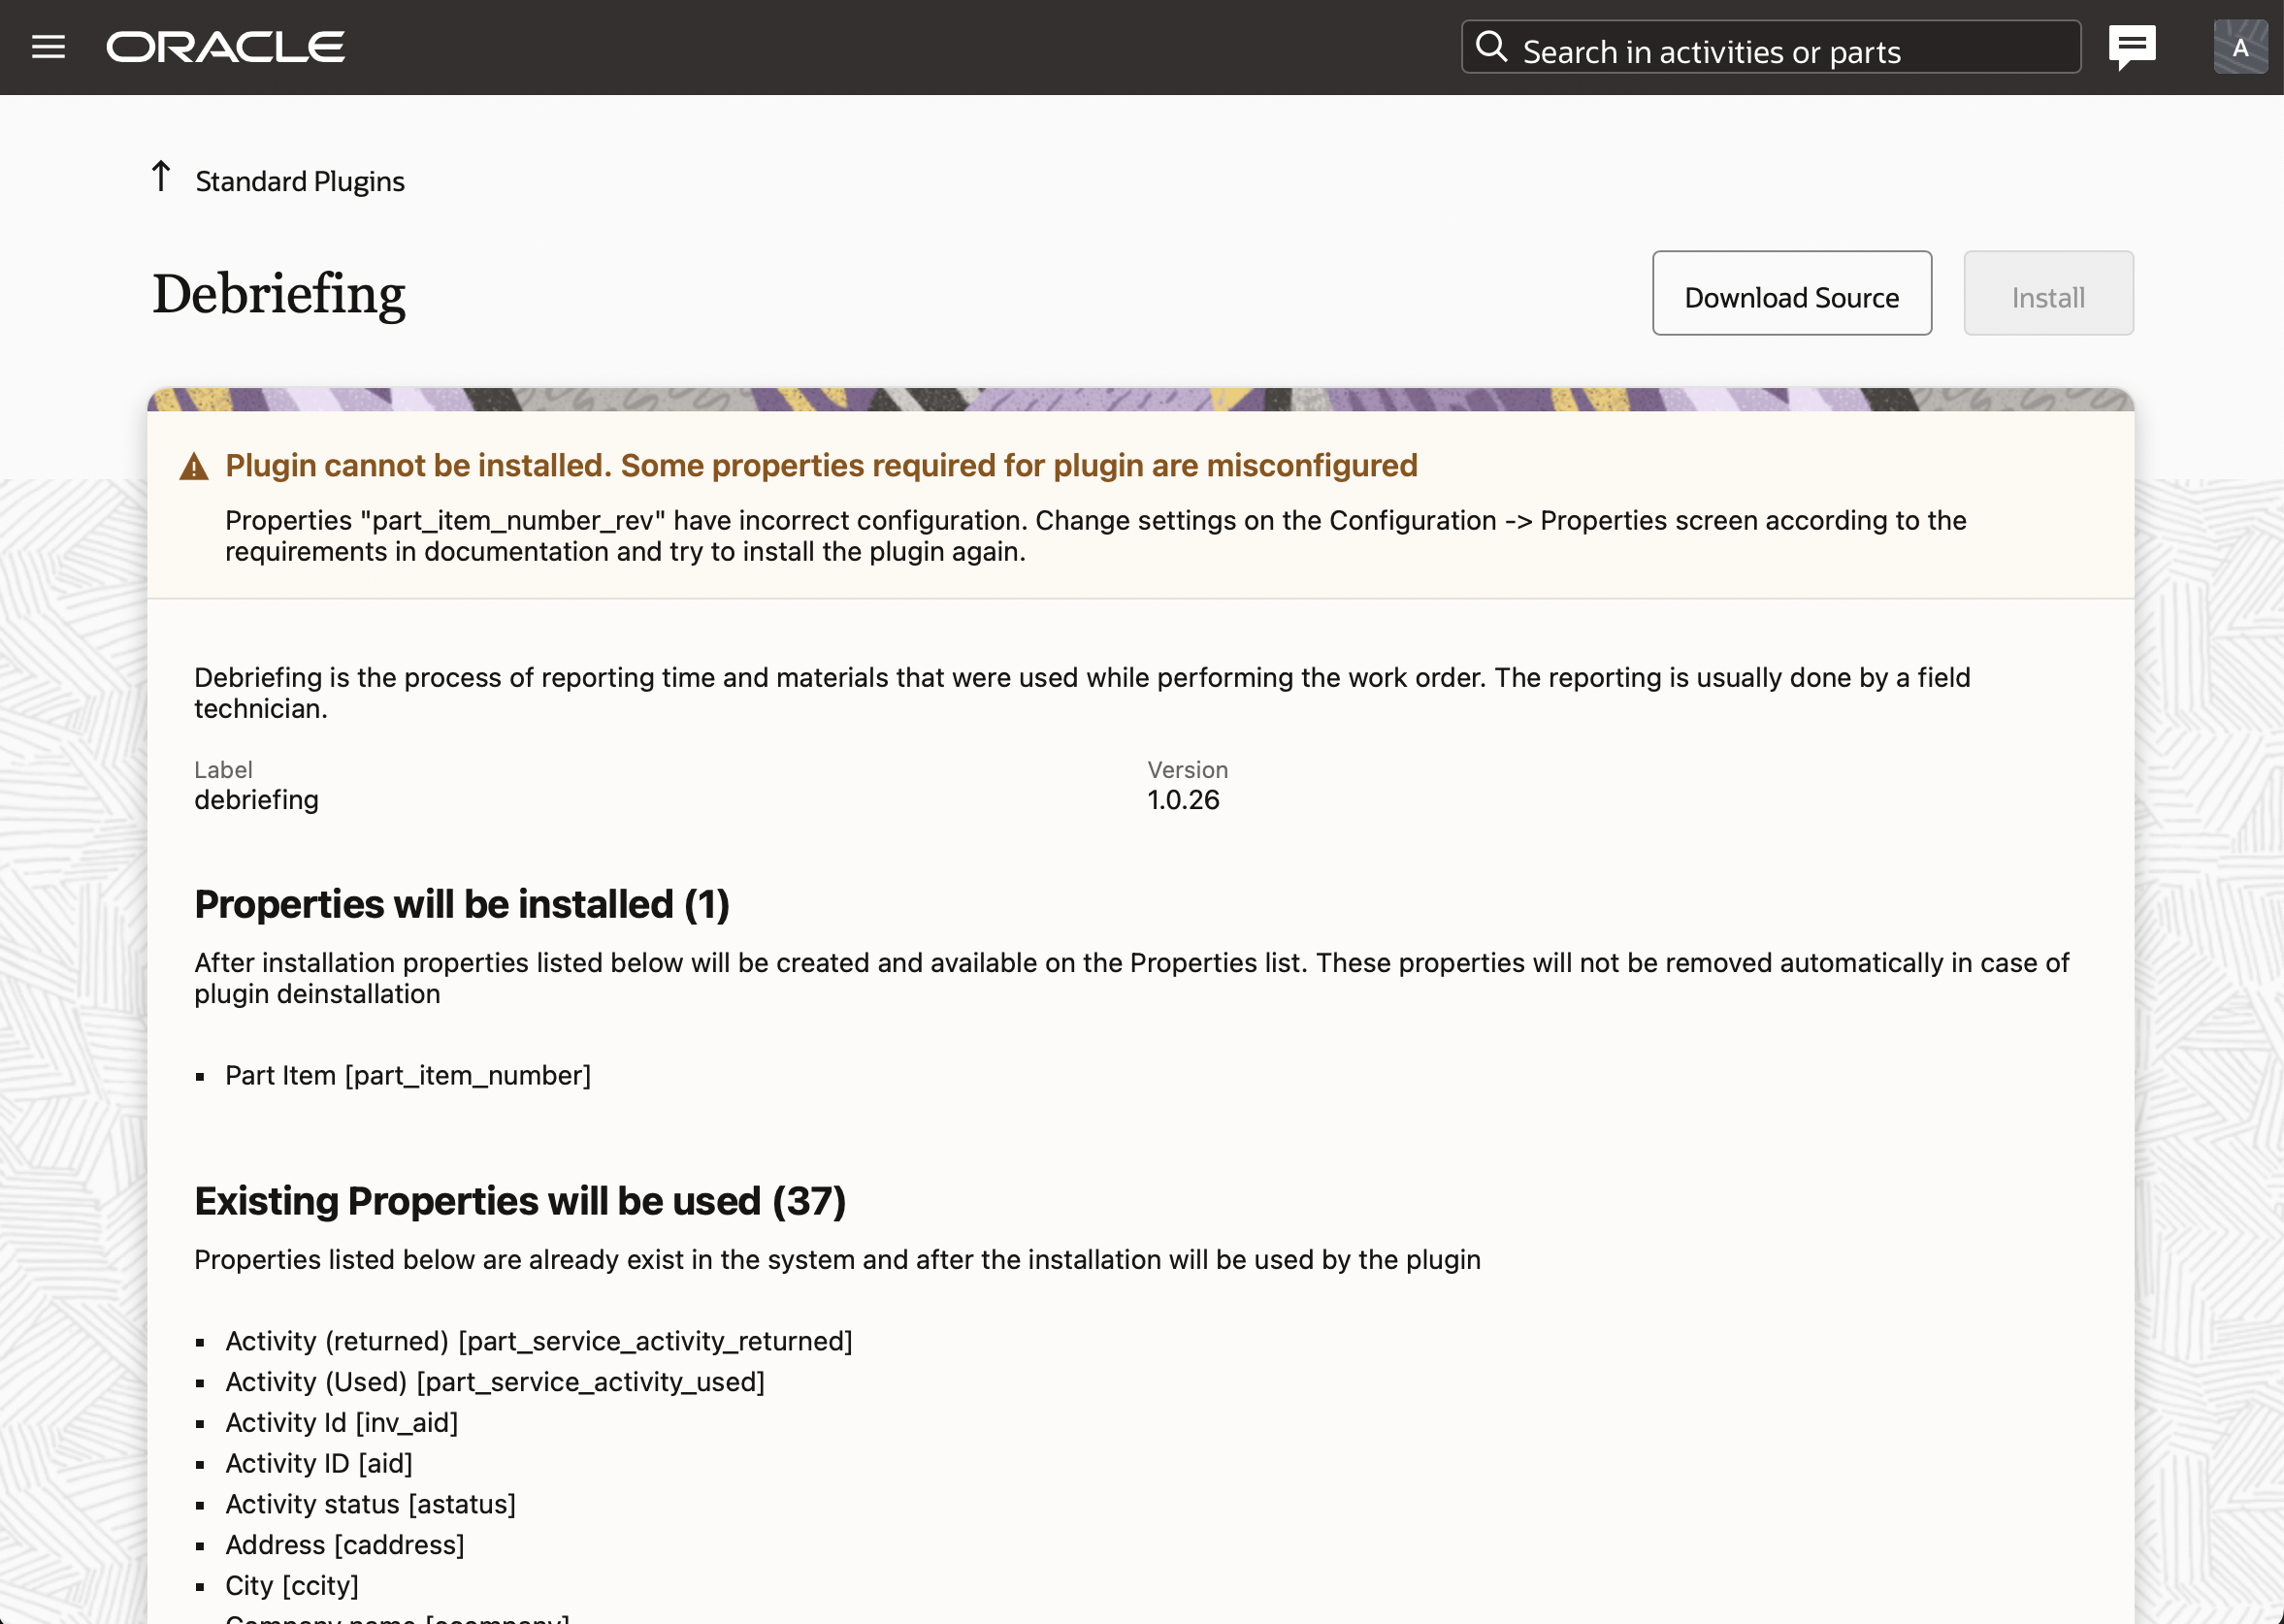
- Click the 'Install' button and confirm the installation.

- After the confirmation, the installation will take some time and once it's finished the user will be redirected to the 'Forms & plug-ins' page with the notification 'The plug-in is successfully installed'.
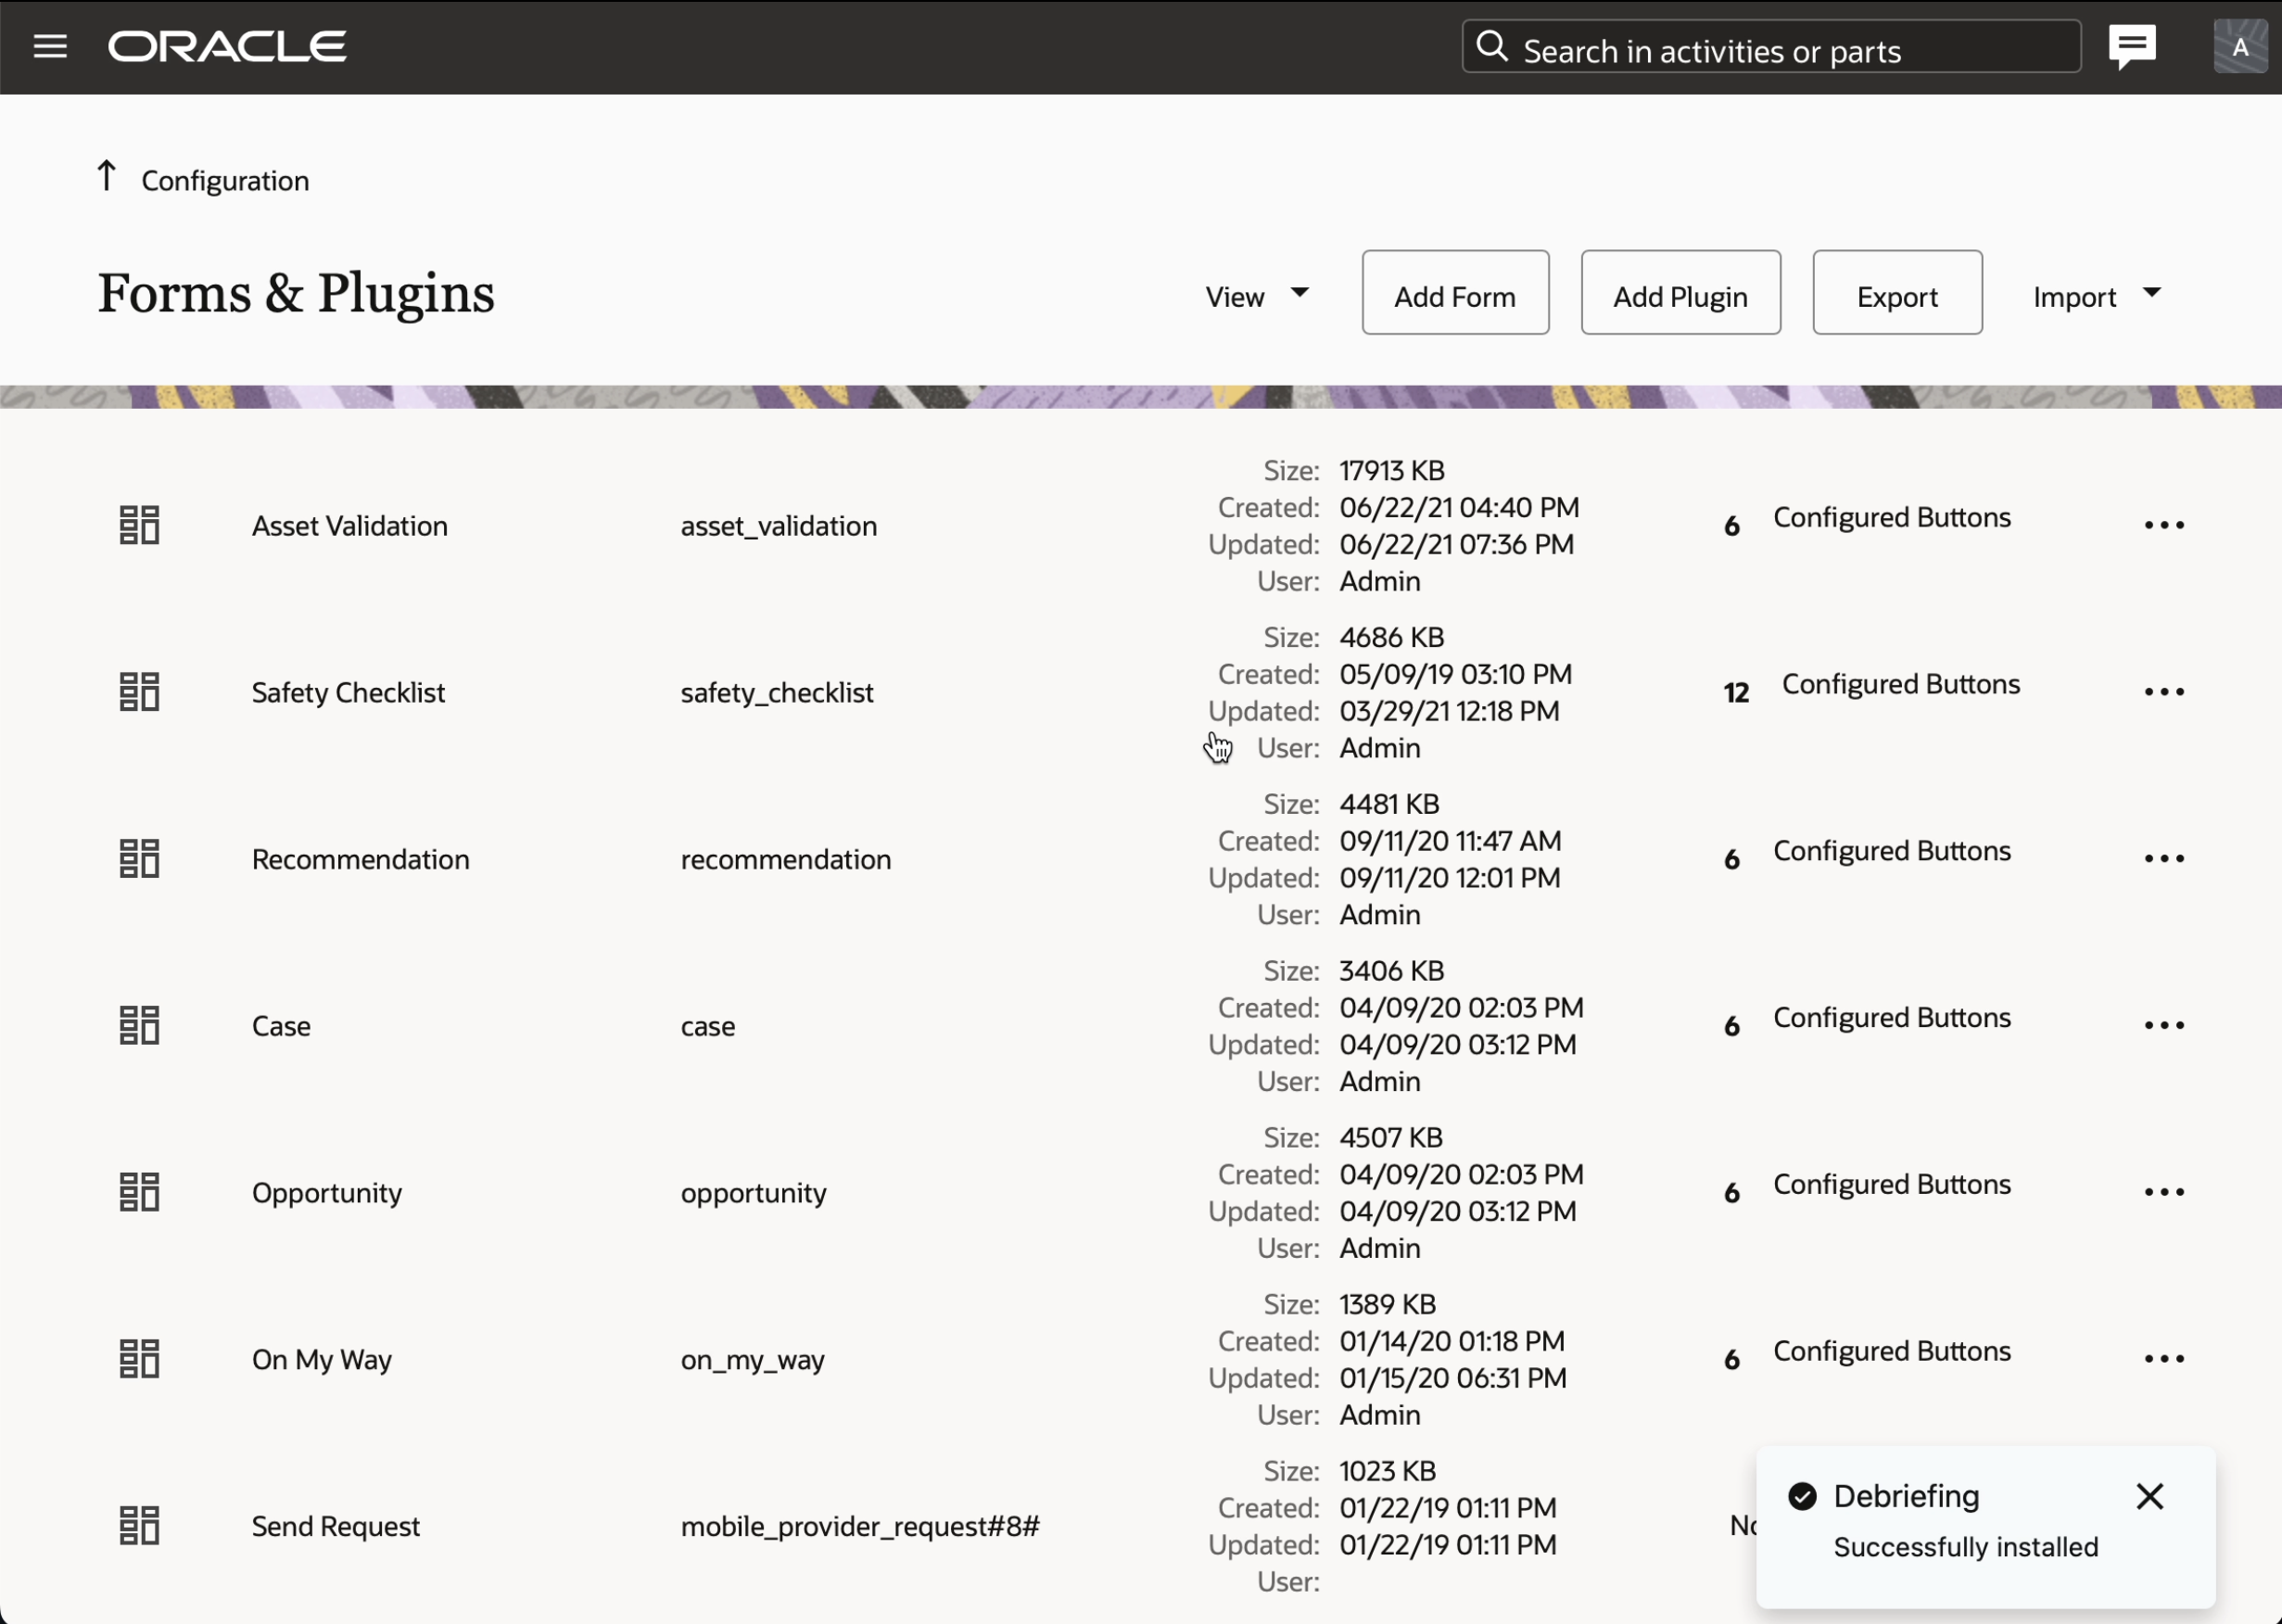
Find Standard Plug-In on Forms & Plugins Page
You can find plug-ins from the list on 'Forms & Plugins' by scrolling or filtering the header.
This screenshot shows only the plug-ins on the Forms & Plugins page:
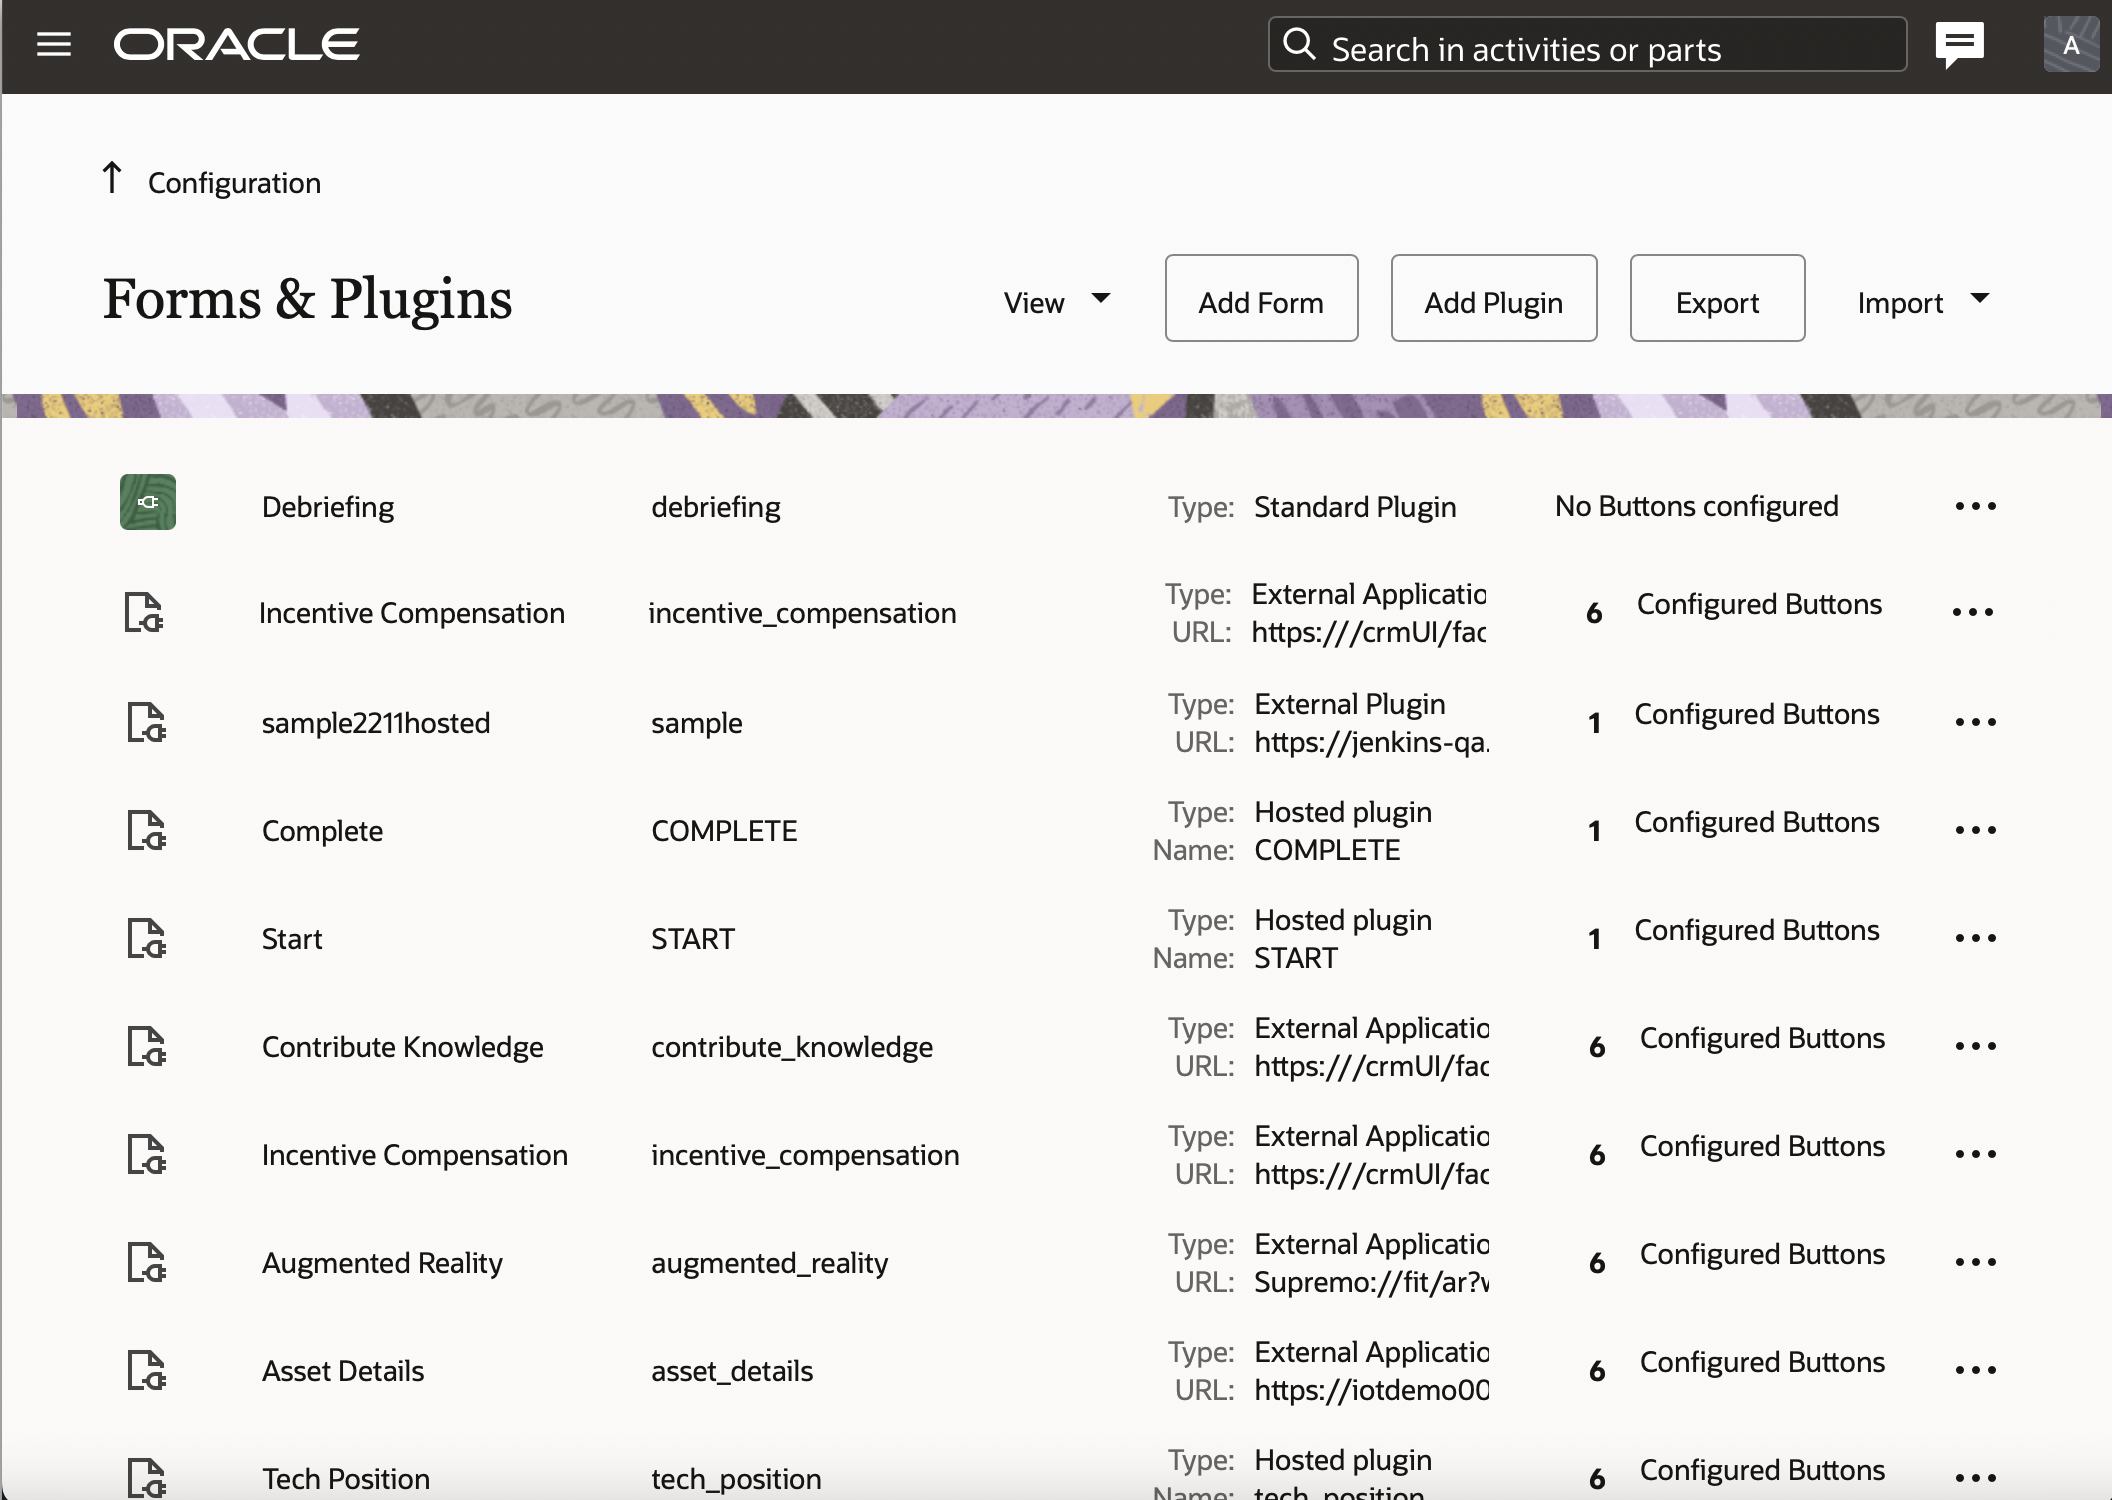
This screenshot shows the filter on the Forms & Plugins page:
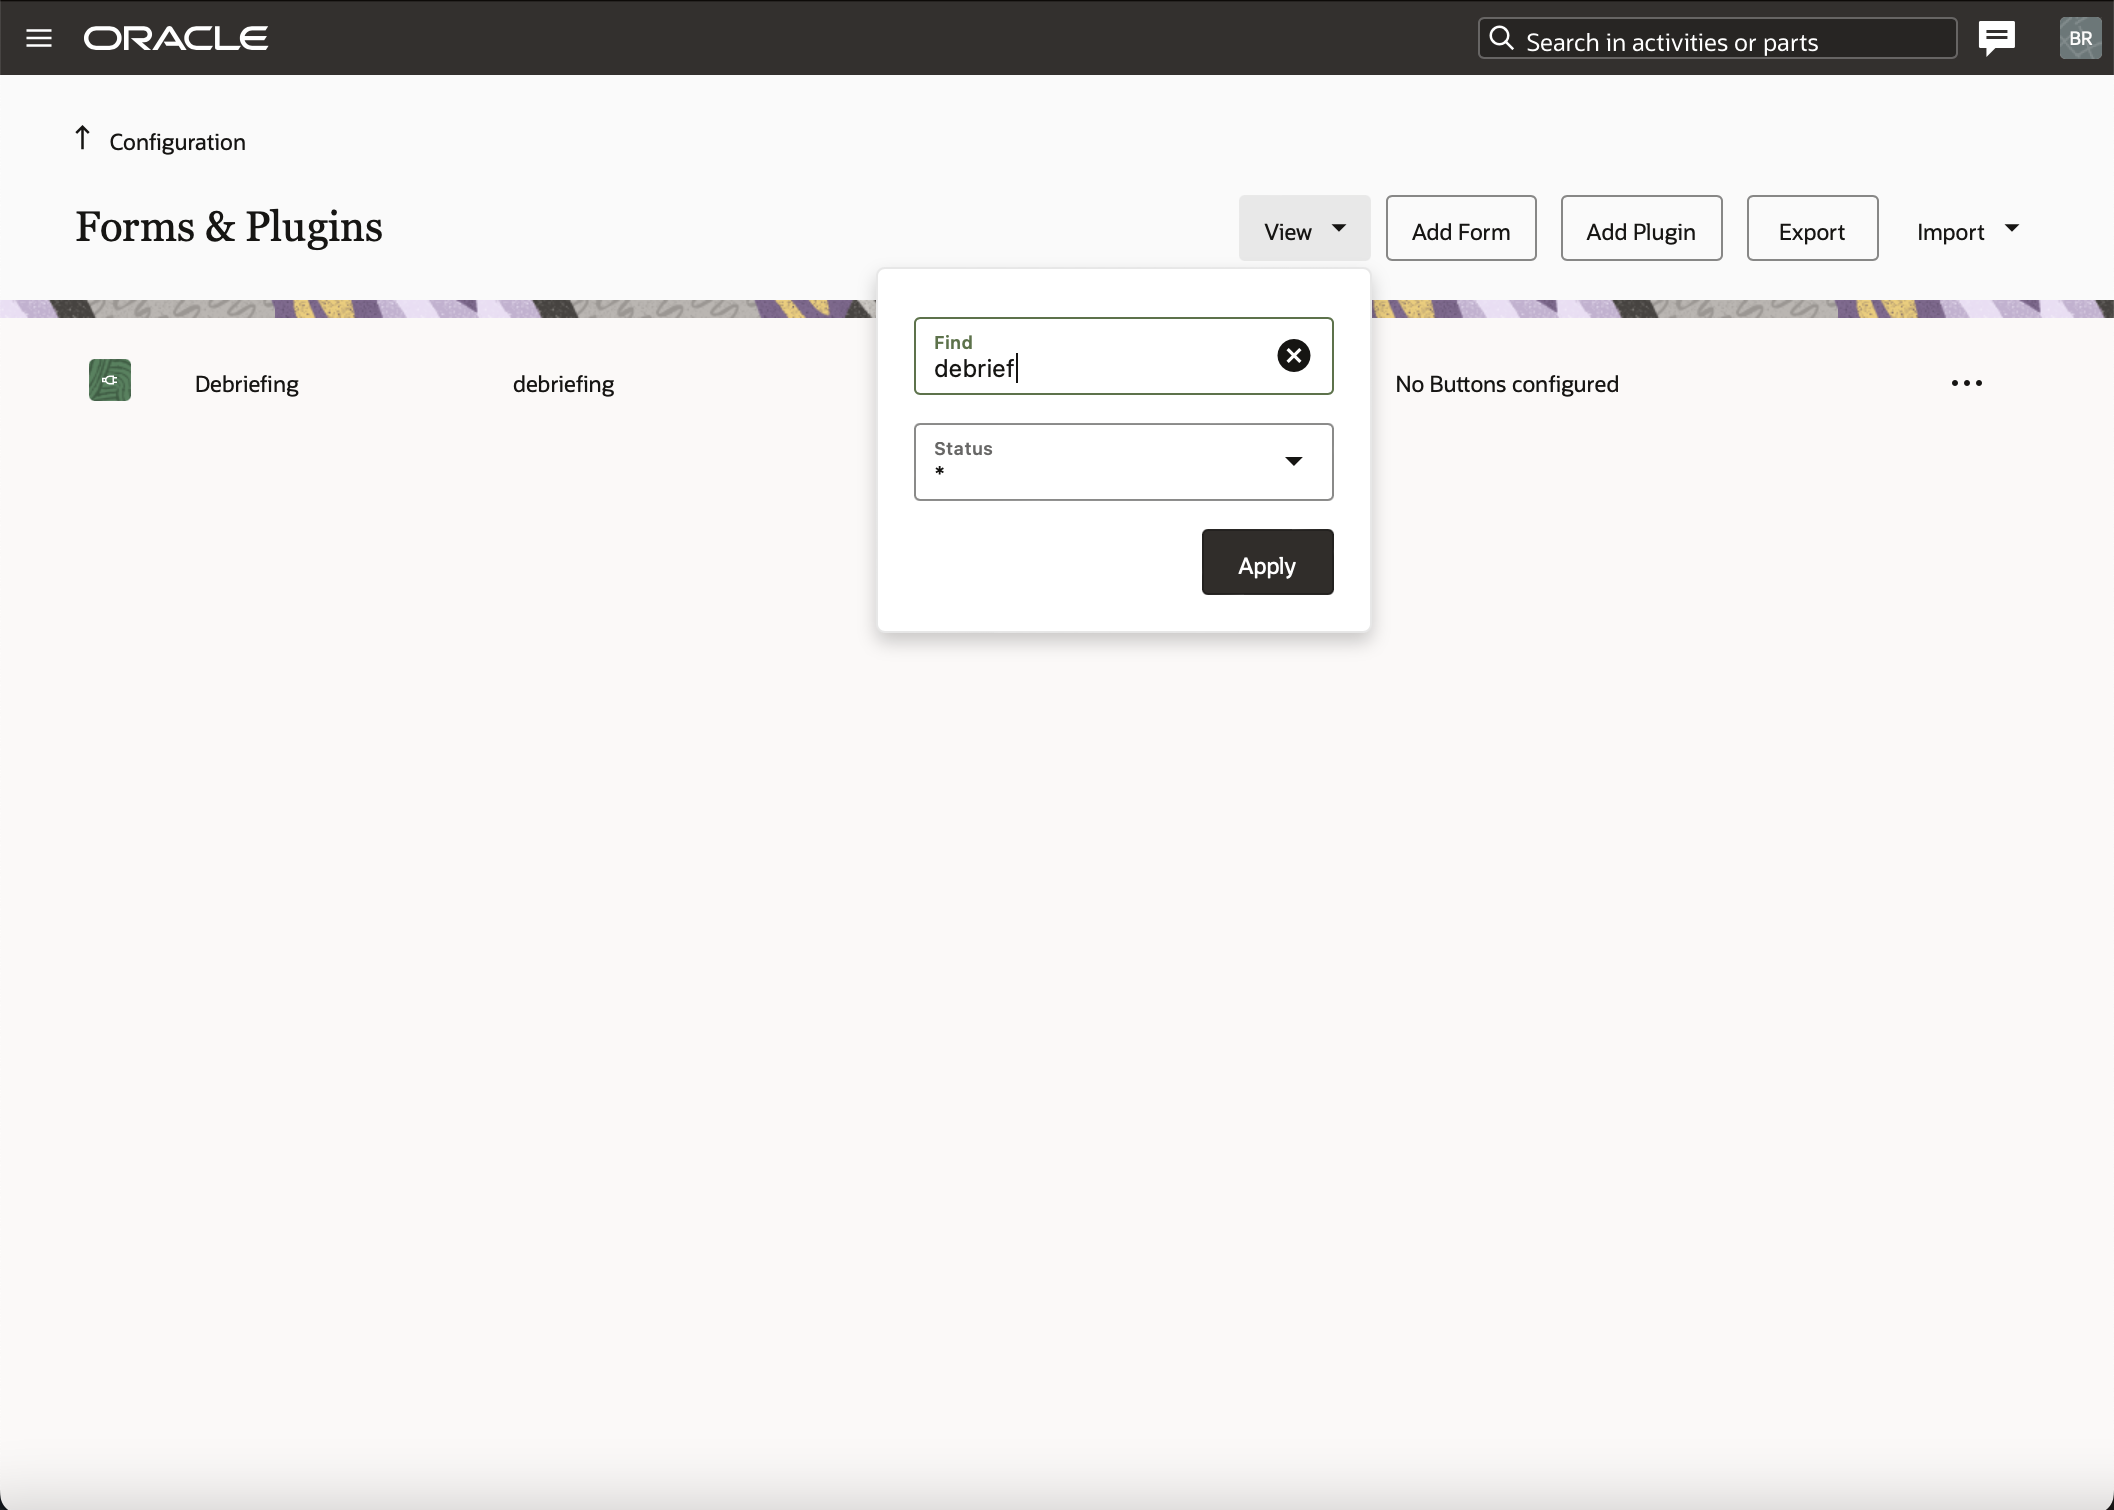
Installed plug-ins cannot be Installed twice. This screenshot shows the Installed label for the Debriefing plug-in:

If you open the installed plug-in, the 'Install' button is disabled. This screenshot shows the Installed button disabled for the Debriefing plug-in:
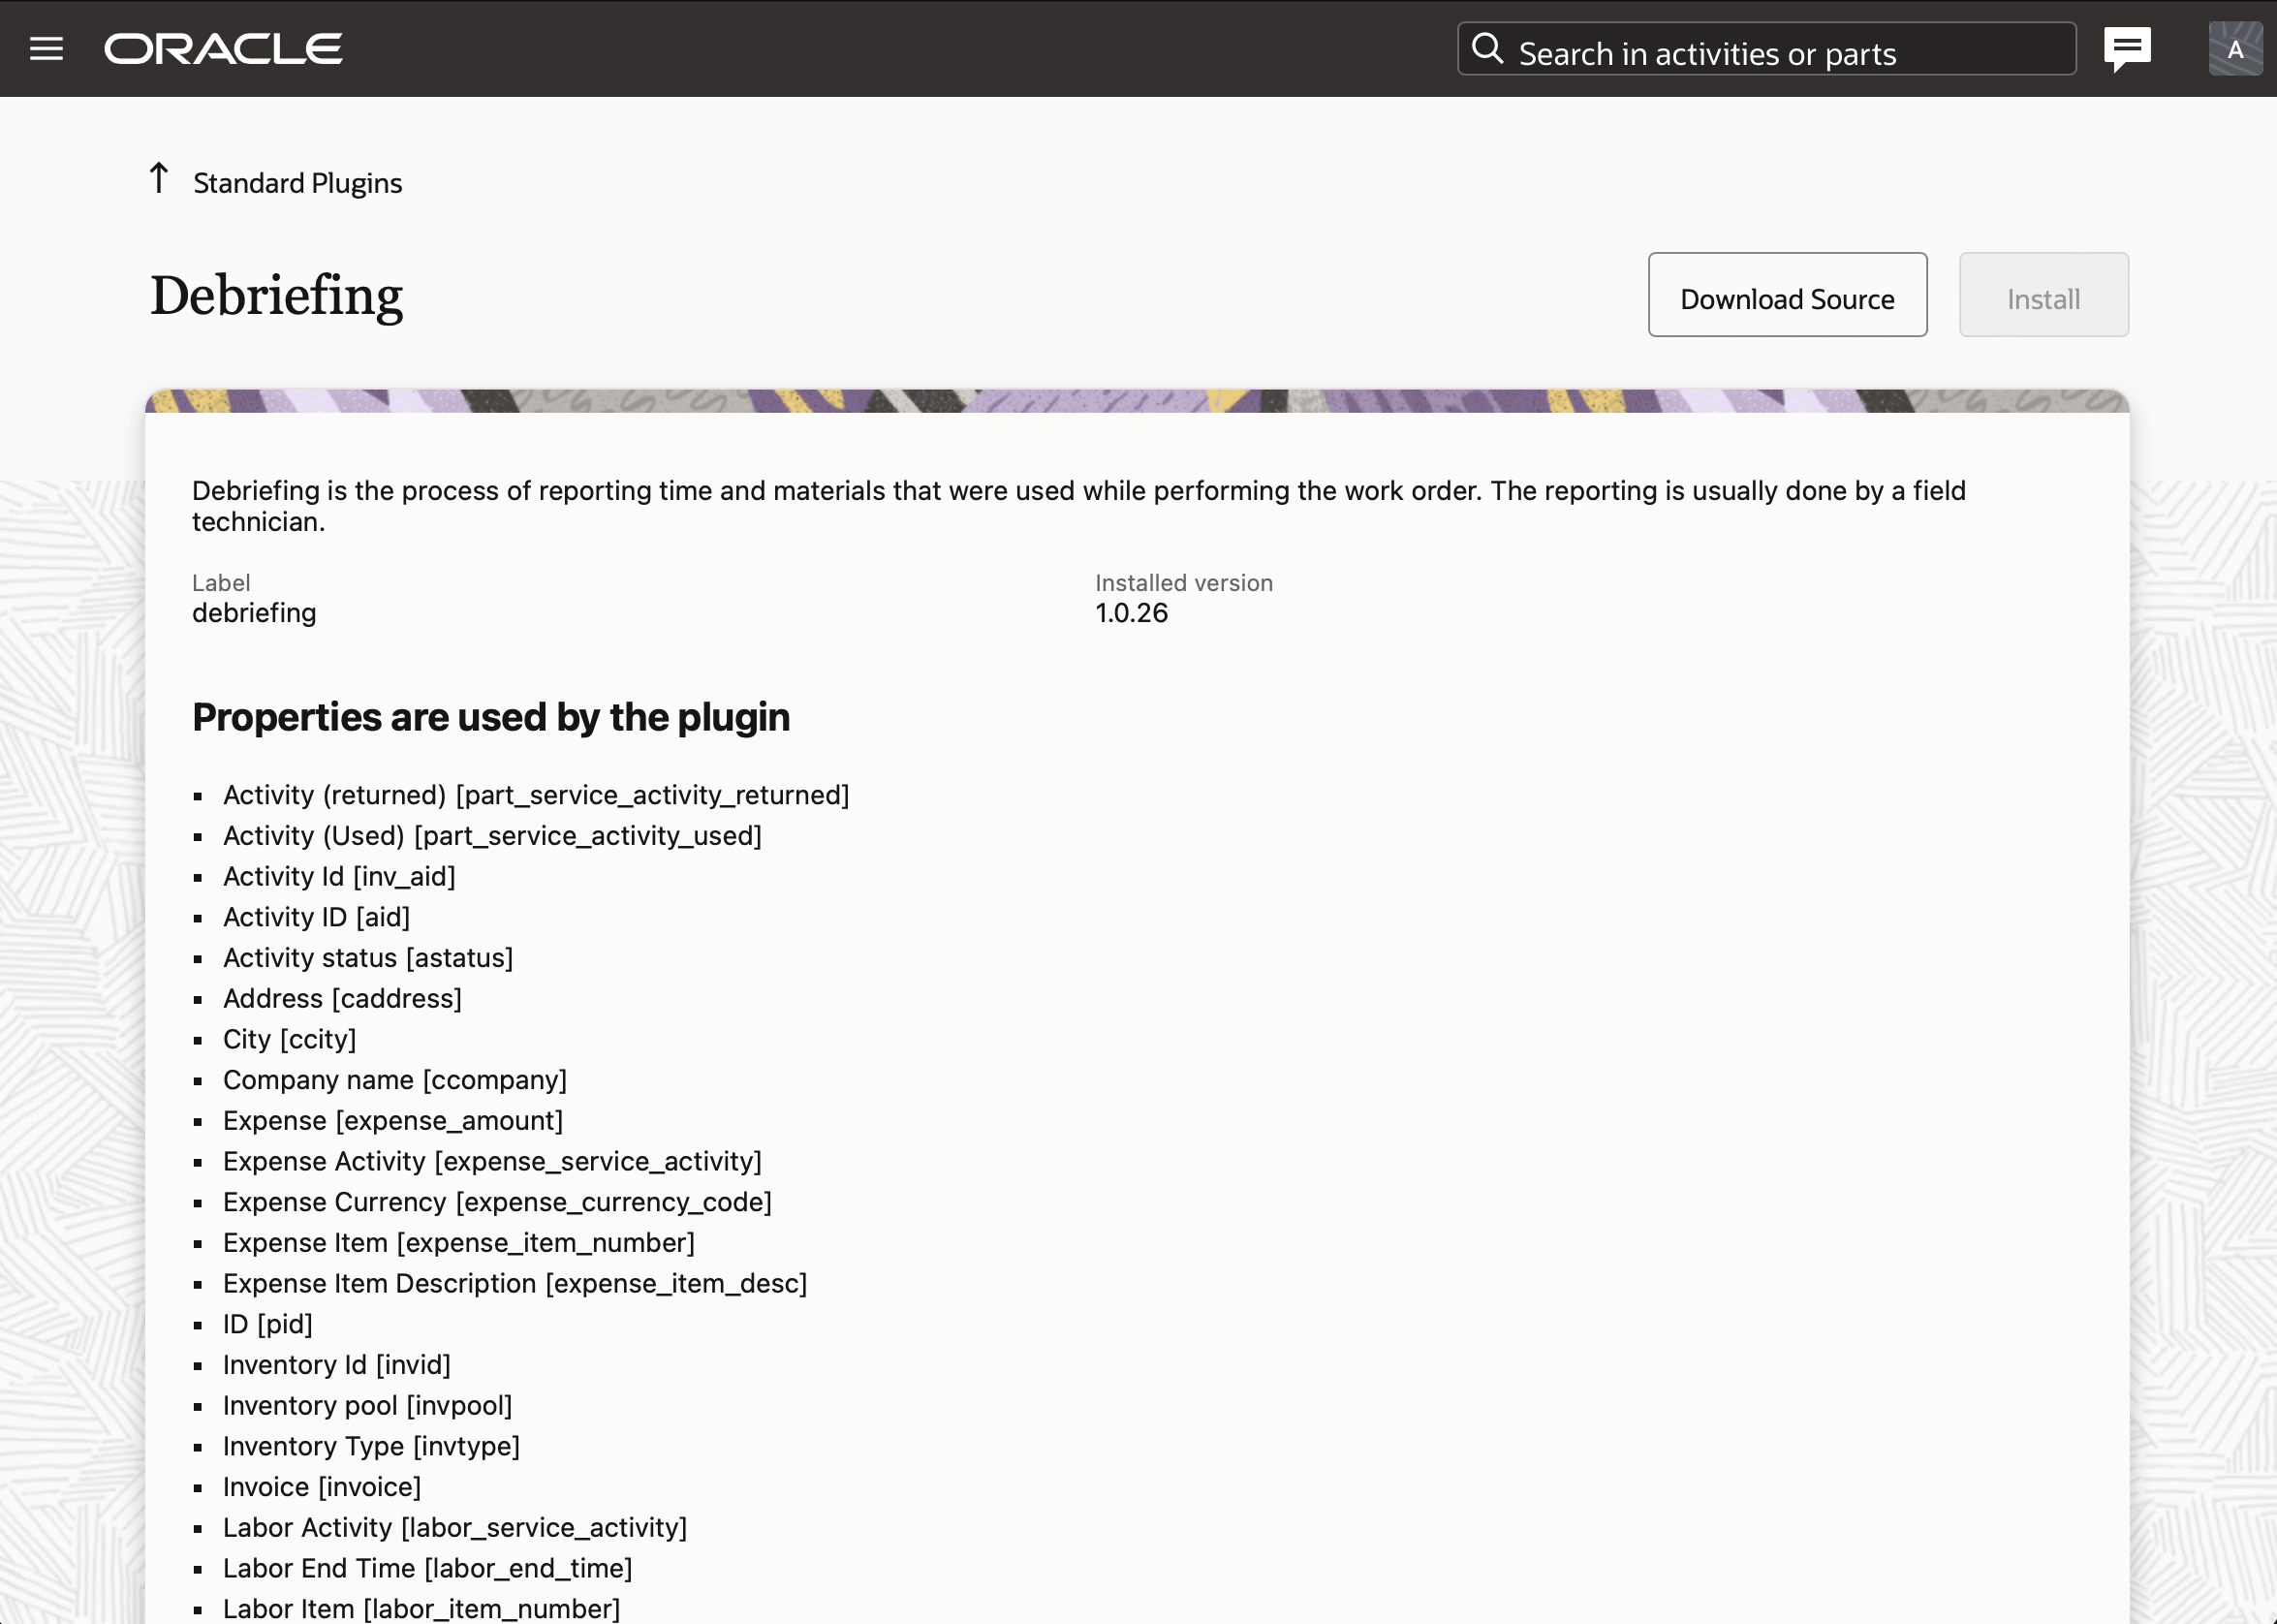
Deinstall Plug-In
Plug-ins can be de-installed by selecting the plug-in from the list and clicking the 'Deinstall' option from the plug-in's action menu:
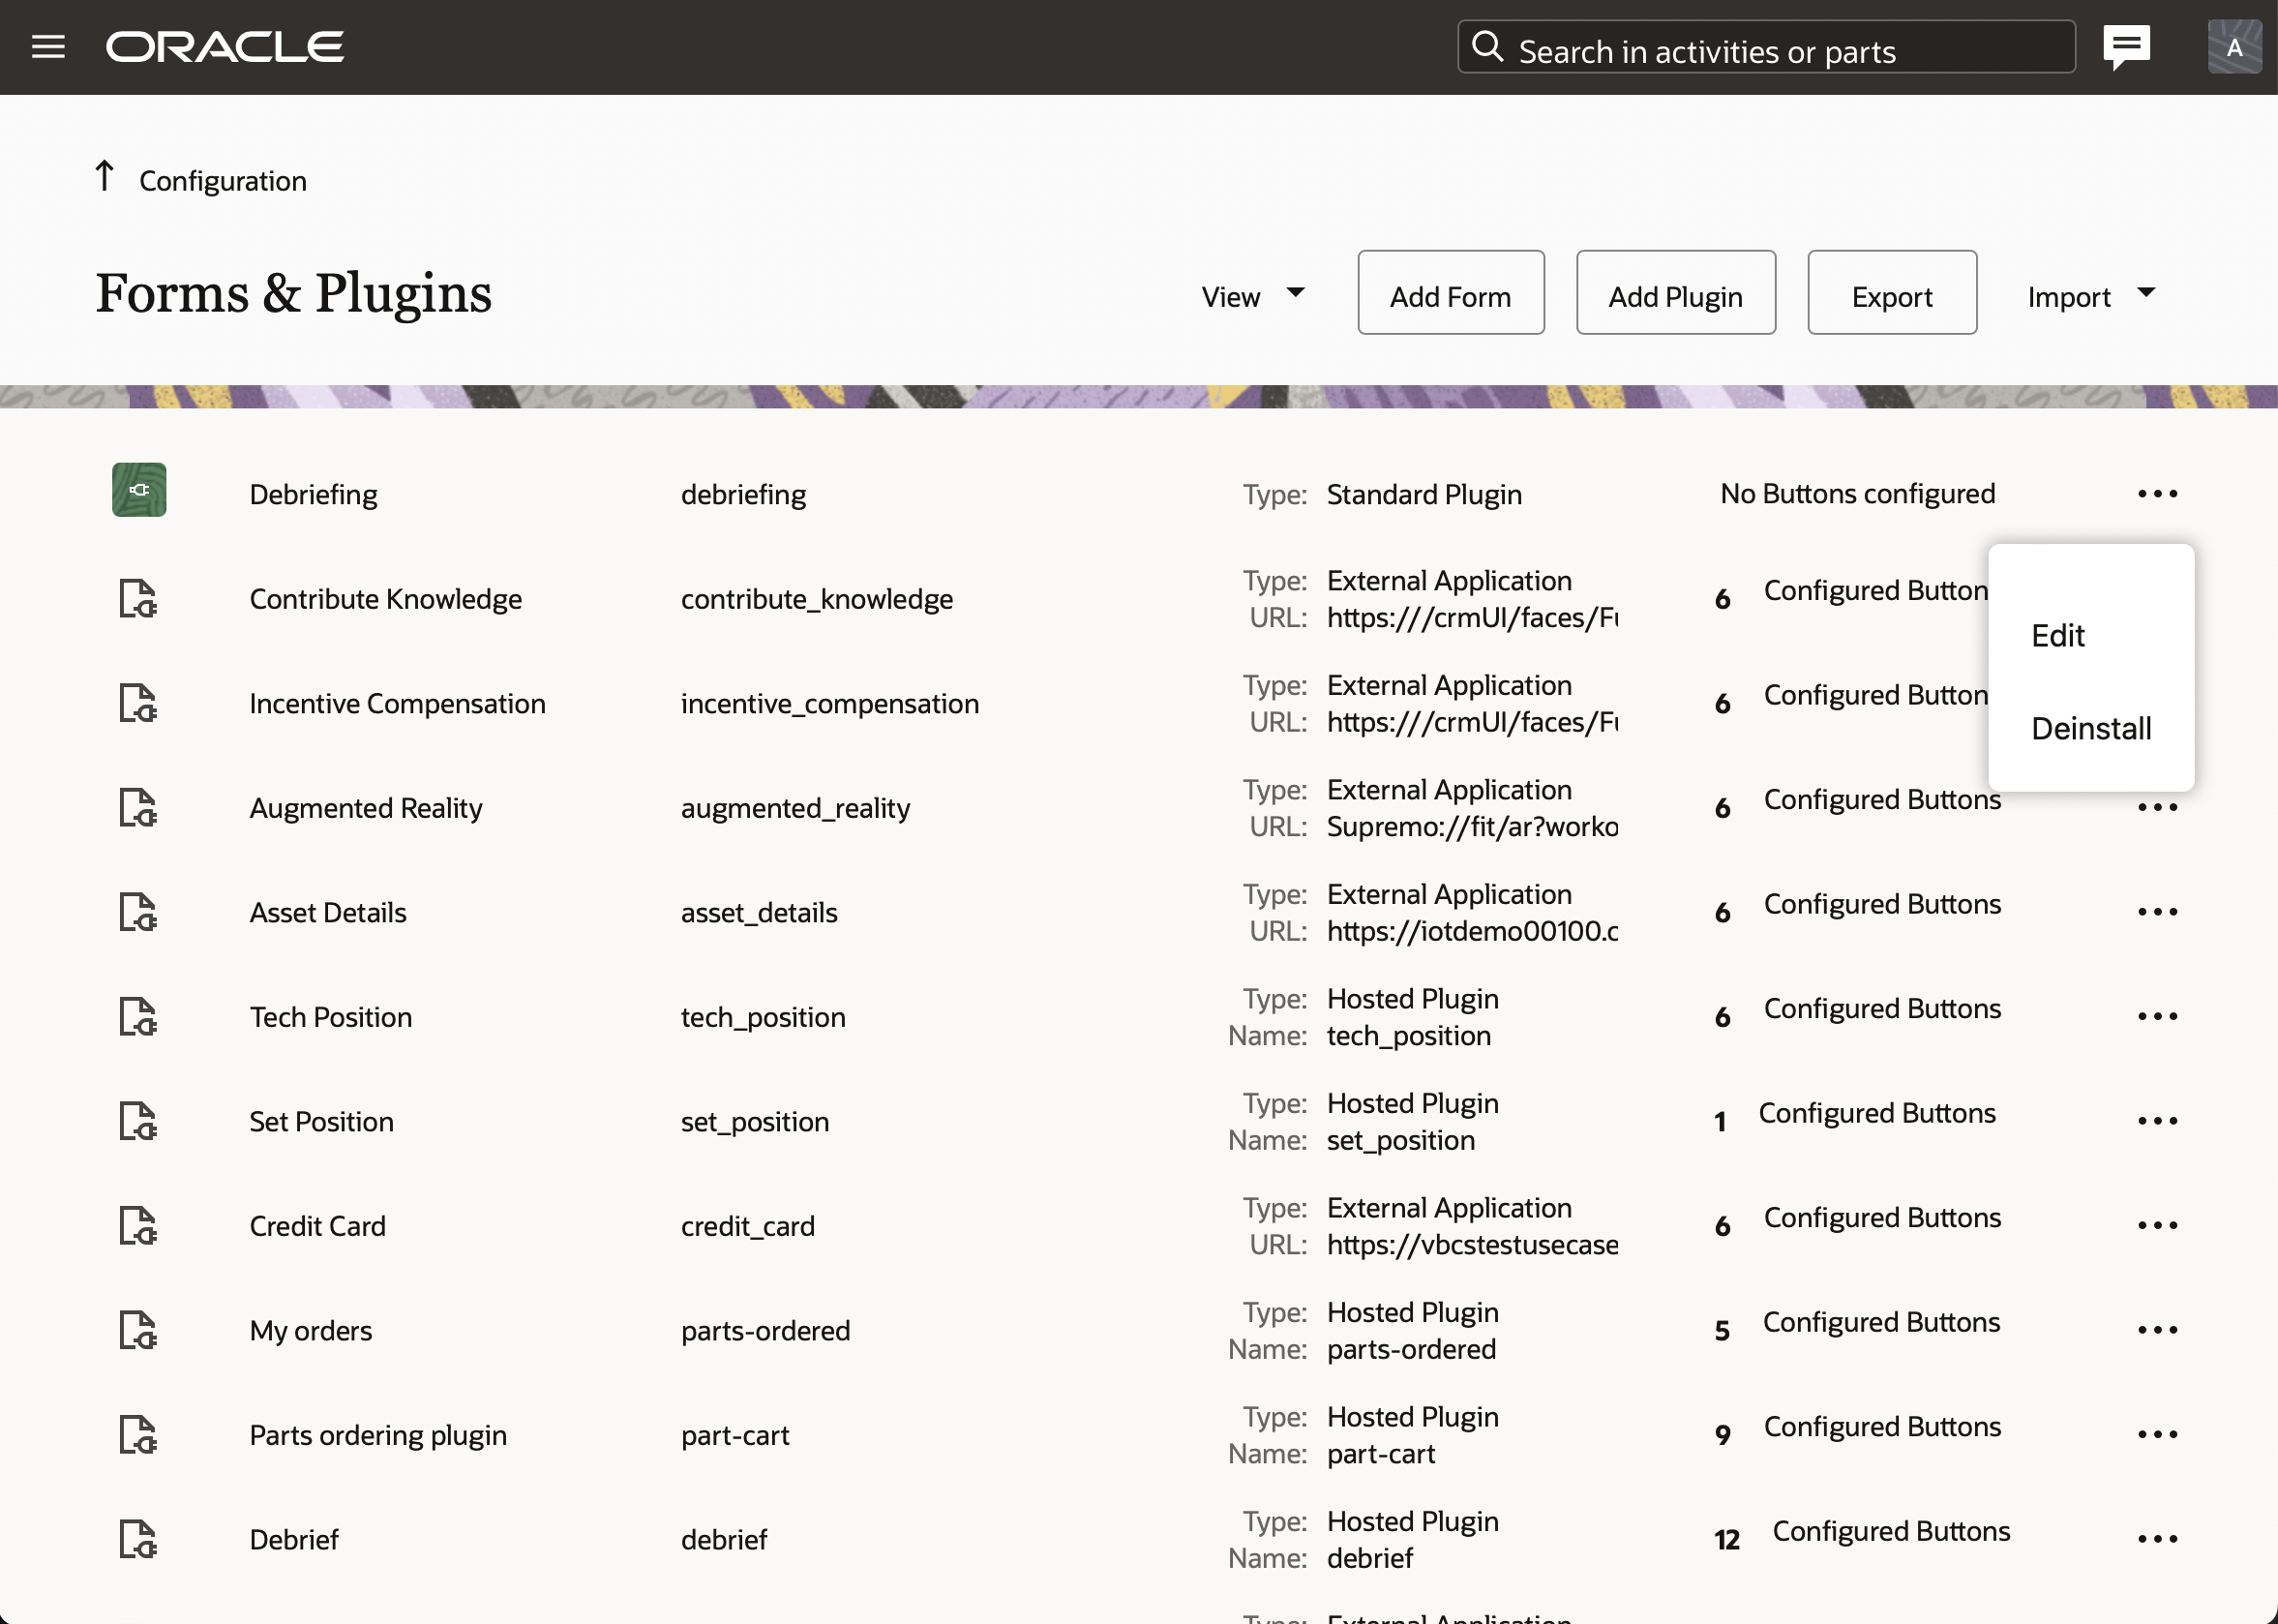
This screenshot shows the Deinstall dialog box:
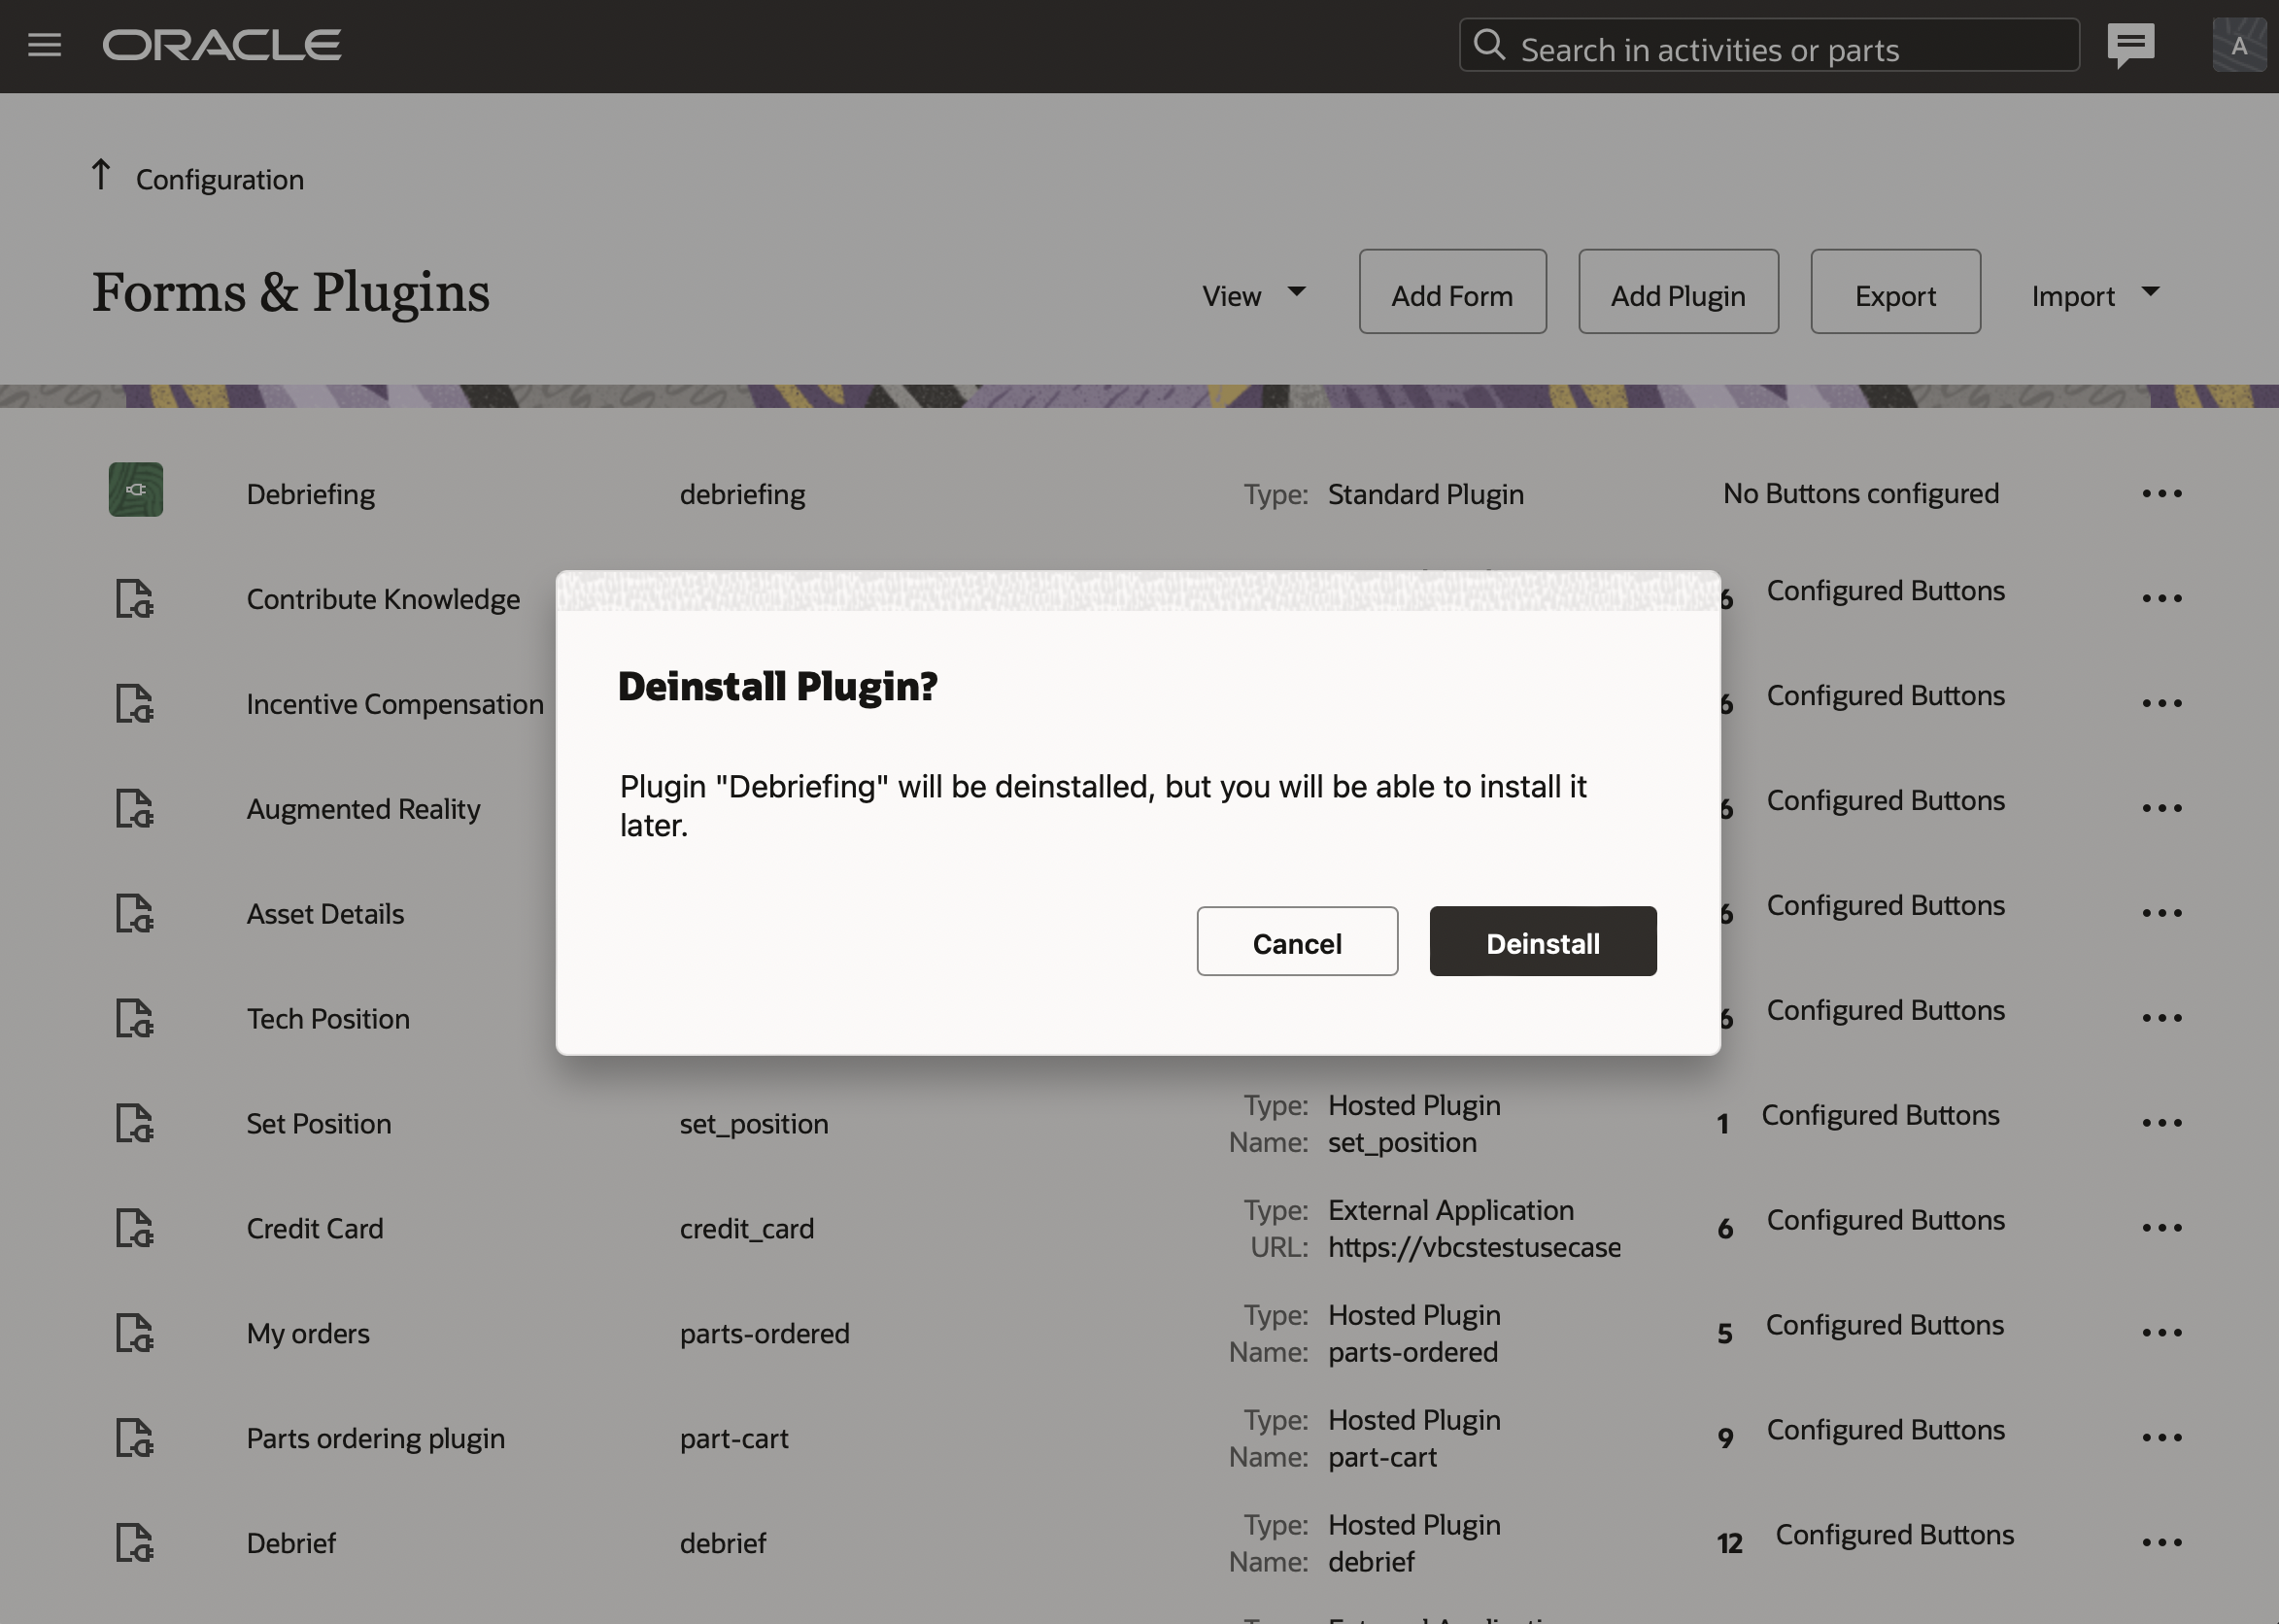
Change Standard Plug-In's Settings
You can make modifications to a Standard plug-in after the installation, with some exceptions. Required fields cannot be changed in order to preserve the plug-in's functionality. The label of plug-ins is always displayed in read-only mode. If a plug-in used to work with particular properties and parameters, they are non-configurable as well. This screenshot shows the Edit External Plugin page:
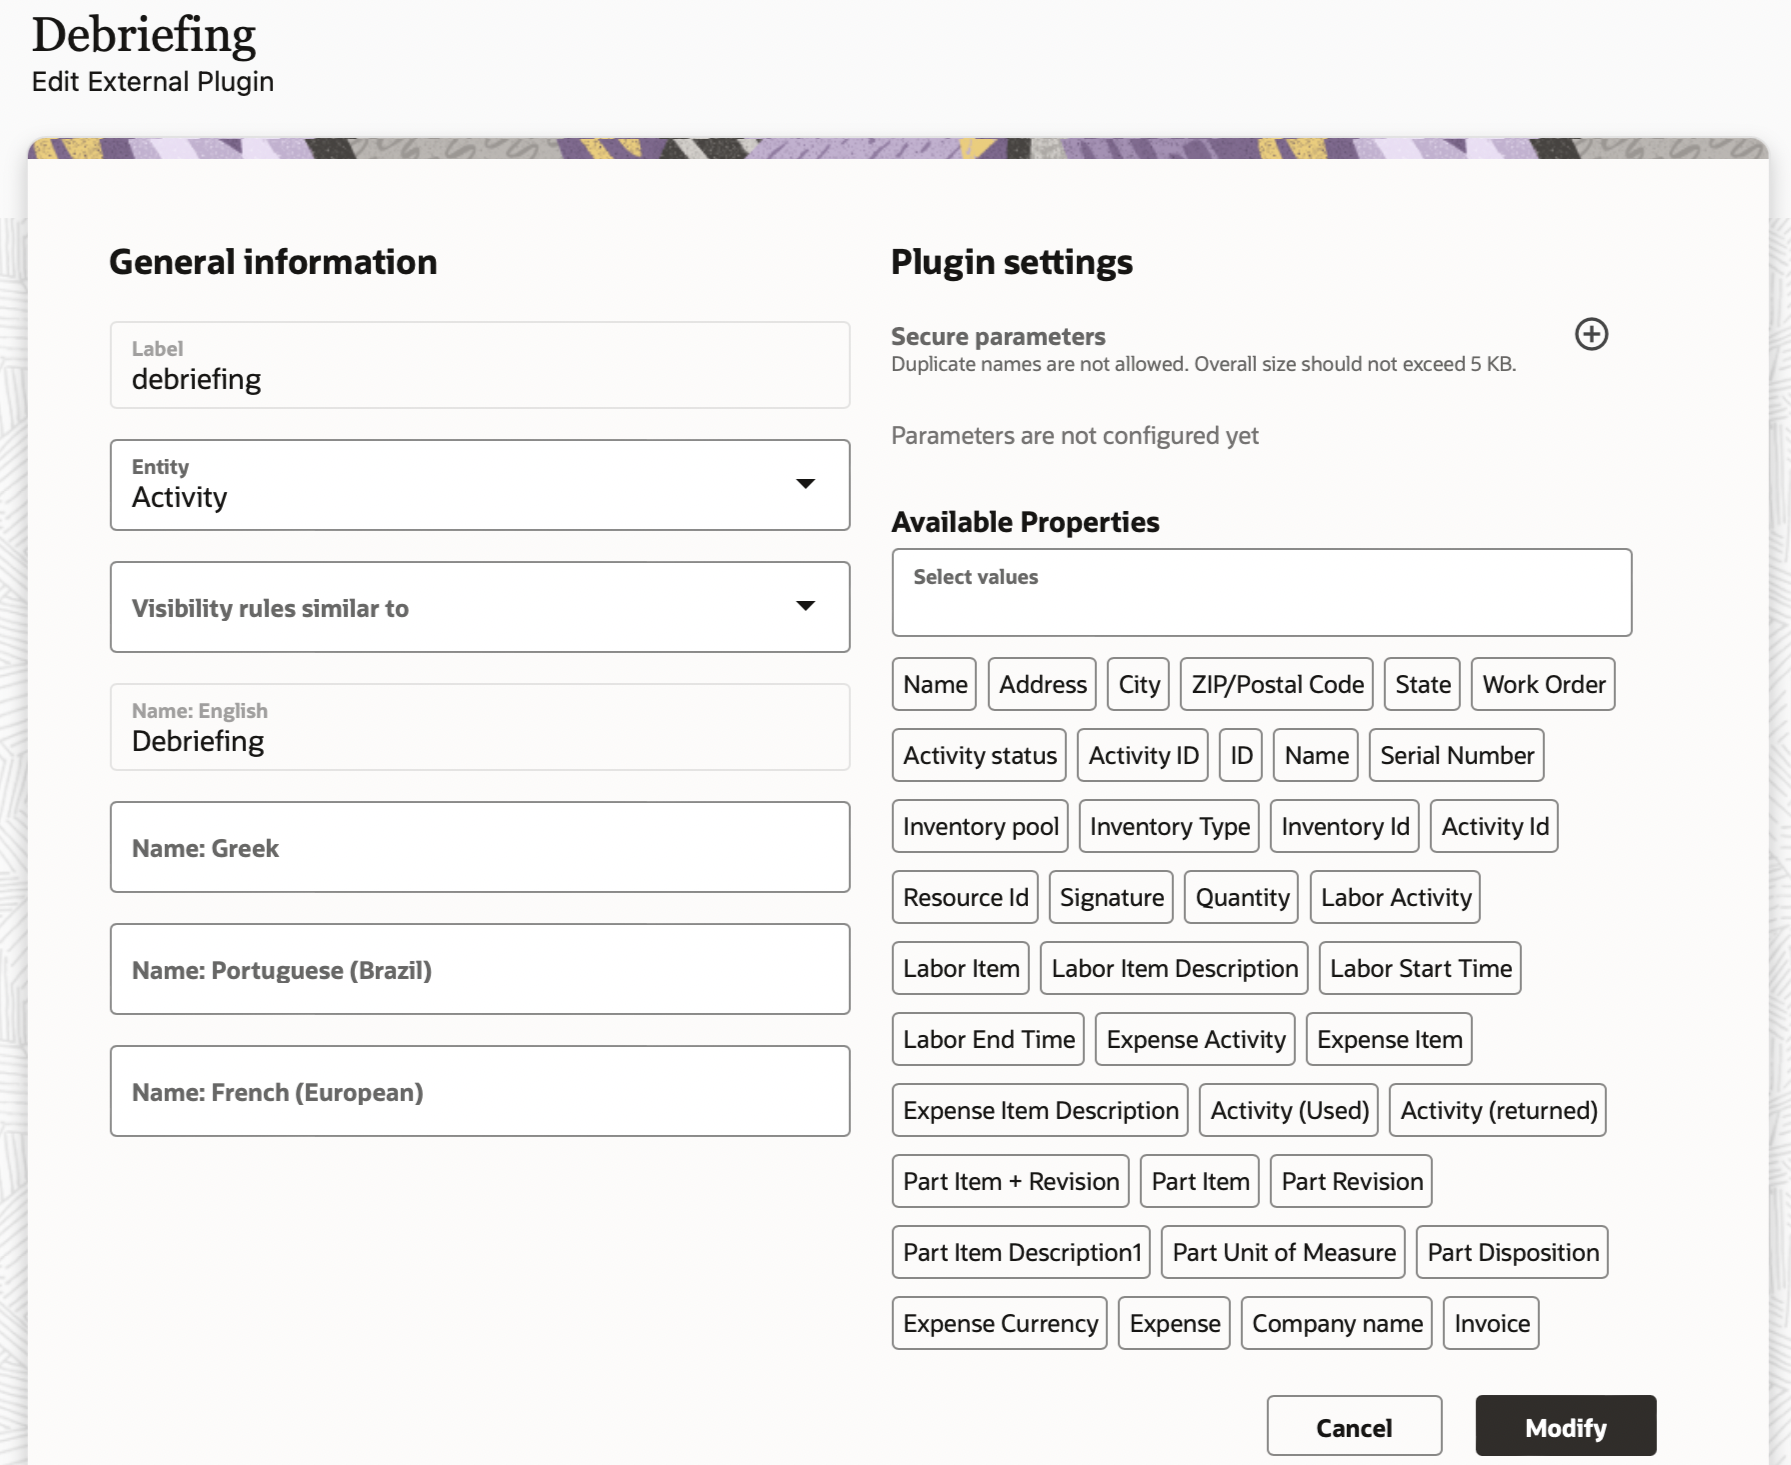
Download the Code to Change a Standard Plug-In
- Go to Standard plug-ins page and select the needed plug-in.
- Click on the 'Download Source' button.
- Make code change.
- Follow instructions in the README.md to create an archive to upload it back to the system as a Hosted plug-in for testing purposes.
- Go to Configuration ? Add plug-in ? Upload plug-in Archive or use the REST API for that.
- Add the button to the page.
- Open the plug-in that contains the modifications and test your scenarios.
IMPORTANT: If you do this, then the plug-in becomes your custom plug-in and is no longer supported by Oracle.
This screenshot shows the Debriefing plug-in with the Download Source button:

-------------------------------------------------------------------------------------------------------------------------------------------------------------------------------------------------------------------------------------------------------------------------------------
Sample Plugin
Overview
Previously, it was very time consuming to copy the code of the Sample plugin from the public documentation, create an archive to upload it to Oracle Field Service, and then work with it. With Update 23A, the Sample plugin is available and accessible out of the box within Oracle Field Service, so you can install it in a couple clicks and use it for testing purposes, check requests, check features such as the Barcode scanner, Print file, Service Worker, etc.
- The Sample Plugin demonstrates the available features within the Mobile Plugin Framework.
- It allows for testing the use case flow, and provides a sandbox for testing received and sent messages.
- It can be used as an example for implementing you own custom plug-ins.
Install Sample Plugin
The process to configure and work with the plug-in is the following:
- Install the Sample Plugin (follow the instructions within How to install Standard Plugin).
- Verify available features of the Mobile Plugin Framework documentation.
- Add required settings to the plugin (properties, secure parameters, etc.).
- Add a button for the plug-in on the needed Oracle Field Service pages.
- Open the plug-in and test scenarios.
- Deinstall the plug-in from the system if you don't need it anymore for testing purposes.
Learn the source code of Sample Plugin
- Click Forms & Plugins ? Add Plugin. Click Standard Plugins.
- On the Standard Plugins page, click Sample plugin.
- Click the 'Download Source' button.
- Verify the implementation (e.g., how to implement the Service Worker to support offline mode).
- You can continue with the code change
- Make code change.
- Follow instruction in the README.md to create archive to upload it back to the system as a Hosted plugin for testing purpose.
- Go to Configuration ? Add Plugin ? Upload Plugin Archive or use the REST API to upload.
- Add the button to the page.
- Open the plug-in that contains modifications and test your scenarios.
------------------------------------------------------------------------------------------------------------------------------------------------------------------------------------------------------------------------------------------------------------------------------------------
Debrief Plug-In
Overview
Debriefing is a process of reporting time and materials used while performing an activity.
A field technician uses the debriefing process to report this information:
- Labor: Includes travel time and working time (measured in hours).
- Parts: Parts and materials used while performing the activity.
- Charges: Any extra charges such as tolls or parking (measured in money spent).
All parts, labor, and expense items are stored in the installed inventory pool of the particular customer activity. Also, the invoice is saved as a PDF file to the file property of the activity.
How to use
The Debrief button that is displayed for a started activity allows a user to add time, expense, or material information to an invoice report, save this information, and obtain the customer’s signature.
Open the plug-in
- Log into the application as a field resource.
- Click Start Activity.
- To open the plug-in, click Debrief on the Activity Details page.
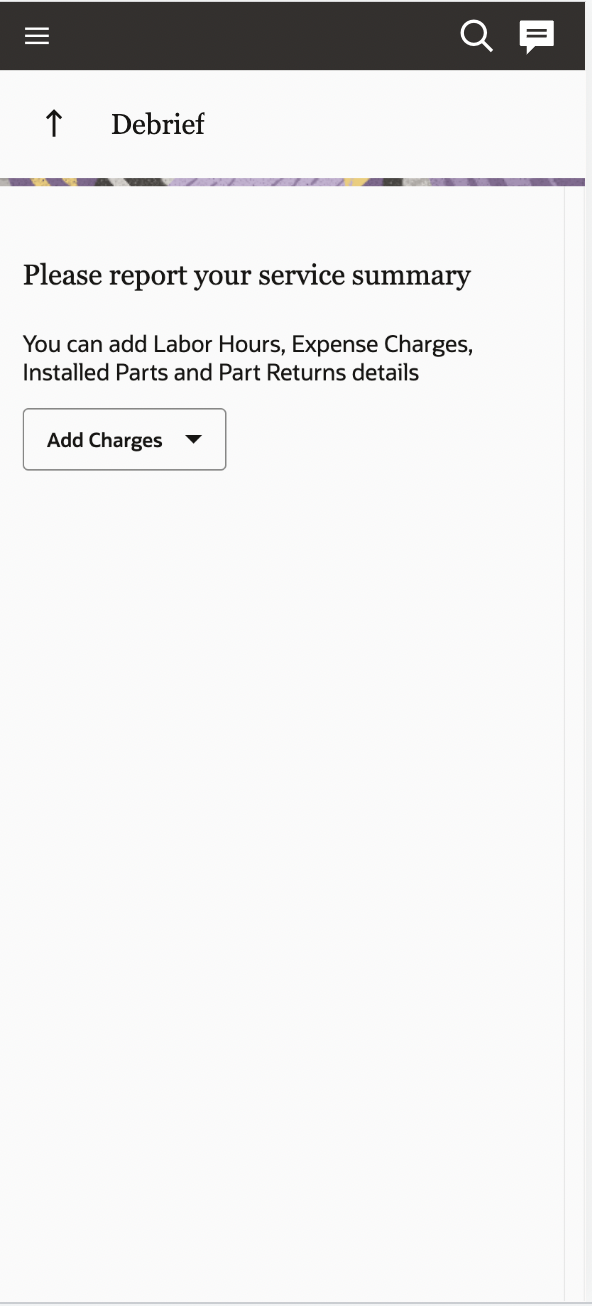
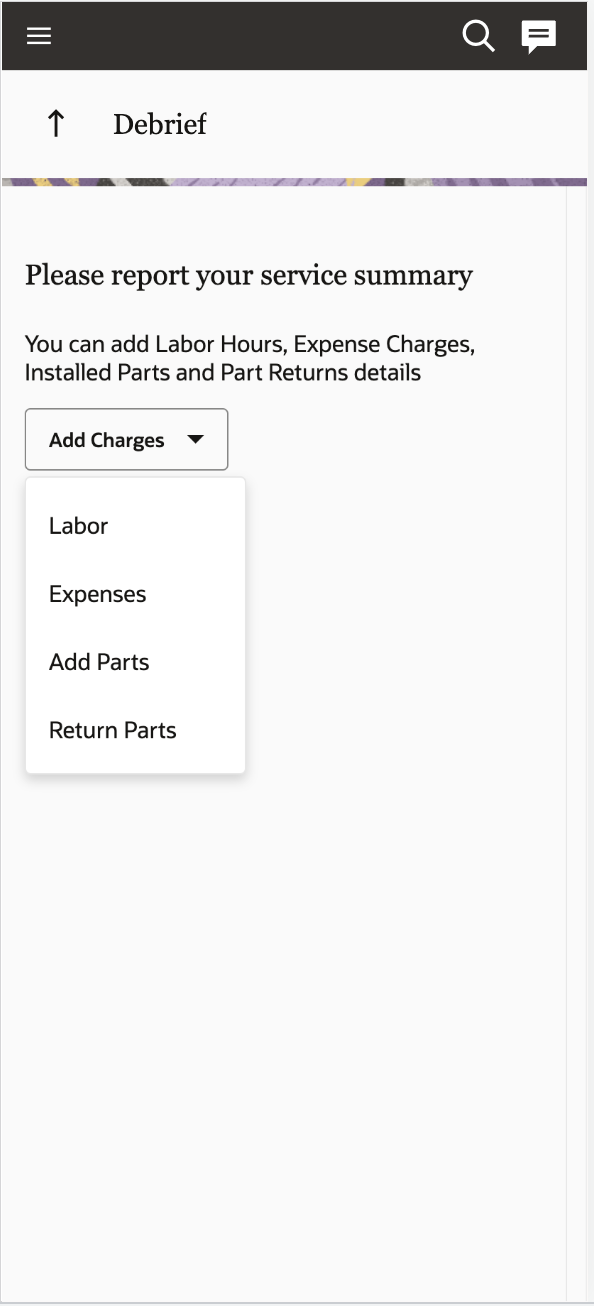
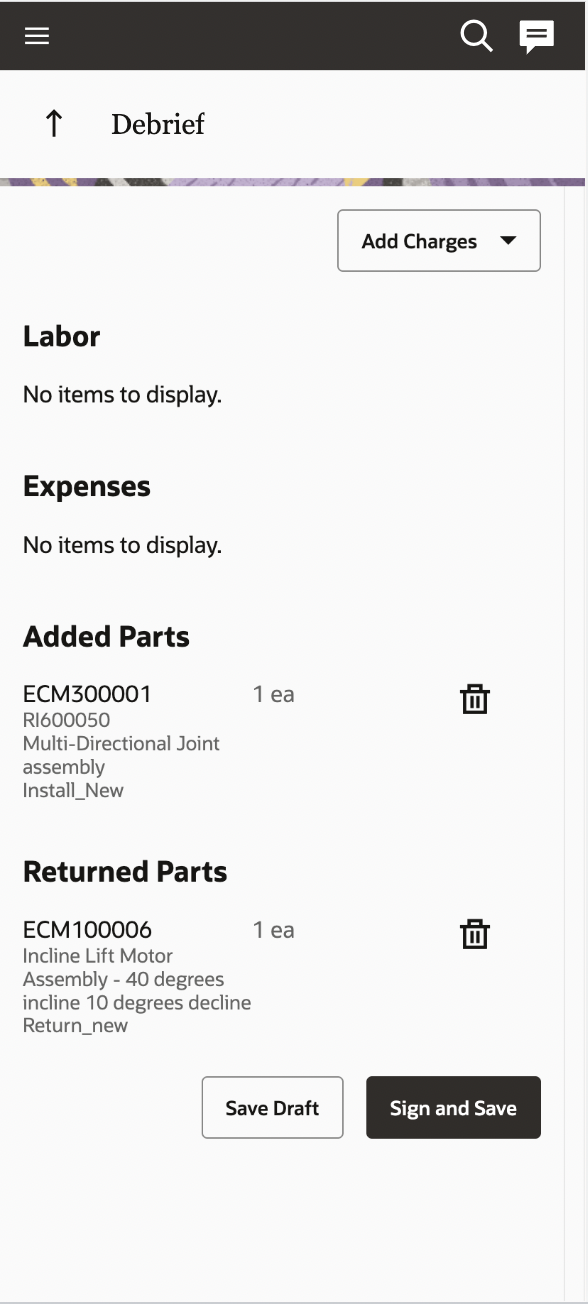
If you have already installed or deinstalled parts for the activity, then these parts are pre-populated as Added Parts and Returned Parts accordingly in the list. Otherwise the Debrief plug-in opens without any items and you can start the debriefing process by clicking the 'Add charges' drop-down list.
Add Time/Labor
Click the 'Add charges' drop-down list, select 'Labor', and fill in the following fields:
- Billing type: The business process that a technician performs. The list of such service activities is defined in their contract. For example, Commute, Diagnose and Repair, etc.
- Billing Item: The action that a technician performs. The cost and prices depend on the selected item.
- Description: The description of the item. The description of the selected item is automatically populated.
- Start Time: The time when the technician starts an activity.
- End Time: The time when the technician ends an activity
- 'Duration' reflects the difference between the start and end times and displays two decimal places for fractional hours to support the rate, which is defined as the amount of money per hour.
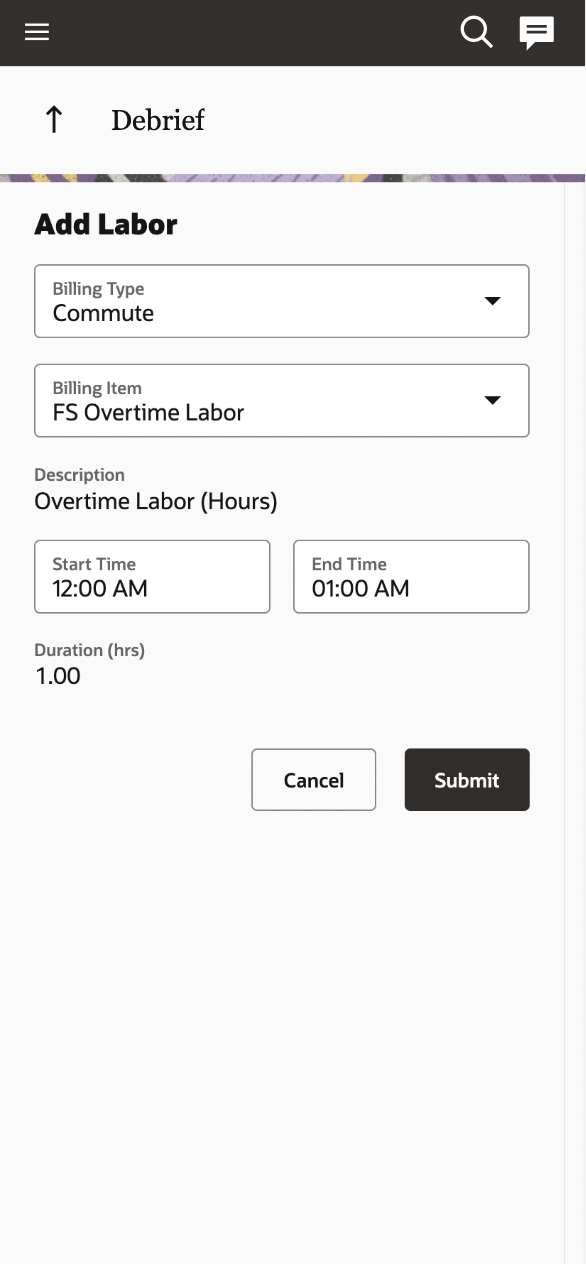
Add Expenses
To add expenses such as parking fees to the report, click the 'Add charges' drop-down list and select Expenses. The Add Expense page is displayed:
- Billing type: The business process that a technician performs. The list of such service activities is defined in the contract. For example, Commute, Diagnose and Repair, and so on.
- Billing Item: The action for which the technician is charged. 'Toll roads', for example.
- Description: The description of the item. The description of the selected item is automatically populated.
- Amount: The money spent for the activity. For example, 25.15.
- Currency: The currency used for the payment. This is automatically populated from the plugin configuration.
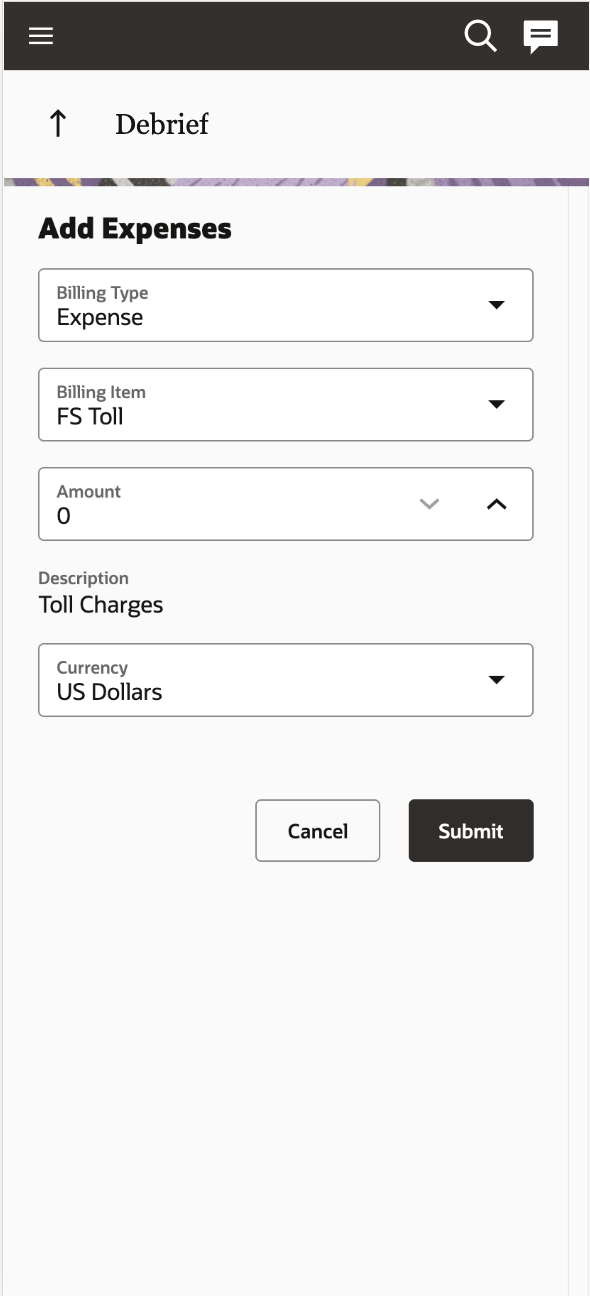
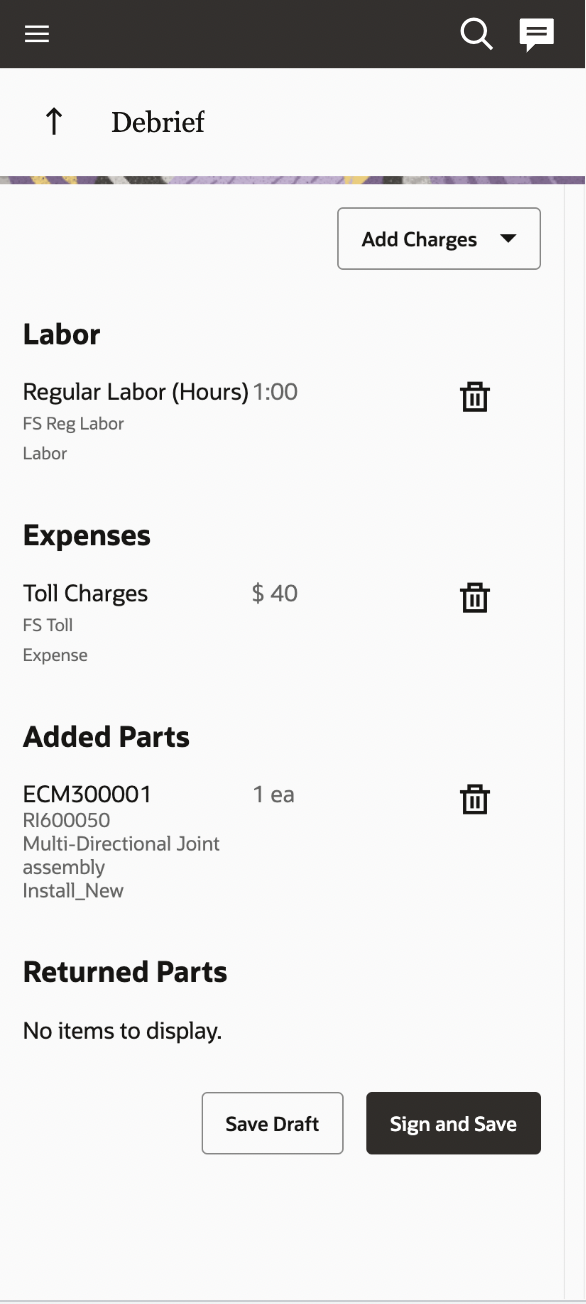
Add Parts
To add the parts used for the activity within the report, click the 'Add charges' drop-down list and select 'Add Parts'. Use the search field to query the required part.
- For non-serialized items, select the part, specify the quantity, and click Submit.
- For serialized items, select the part, specify the serial number, and click Submit.
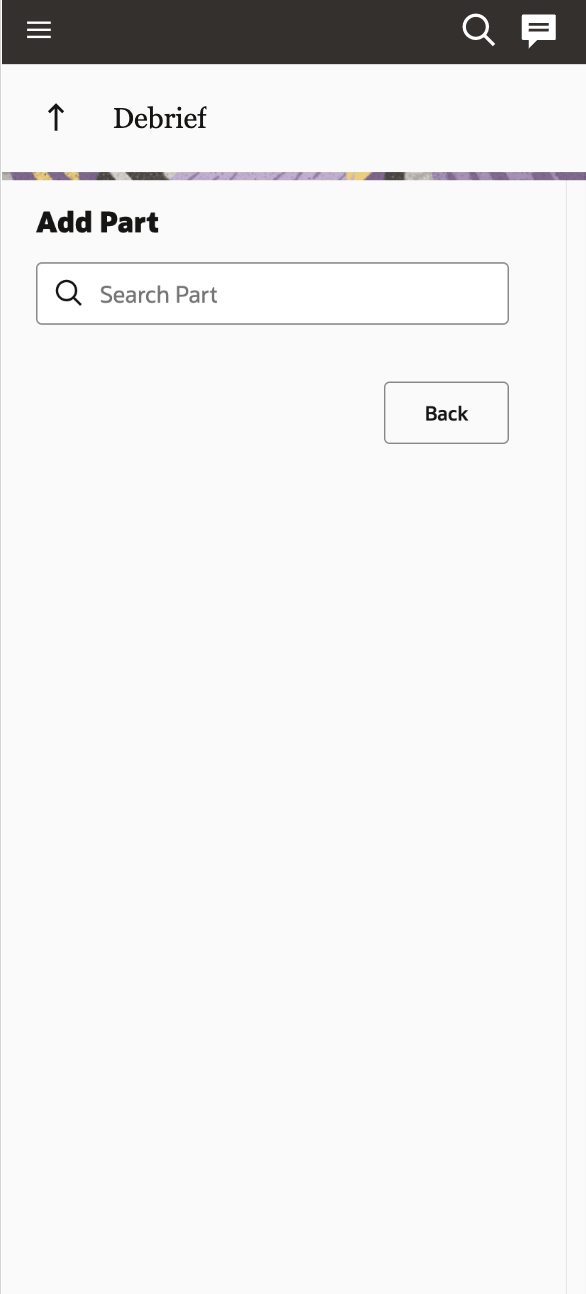
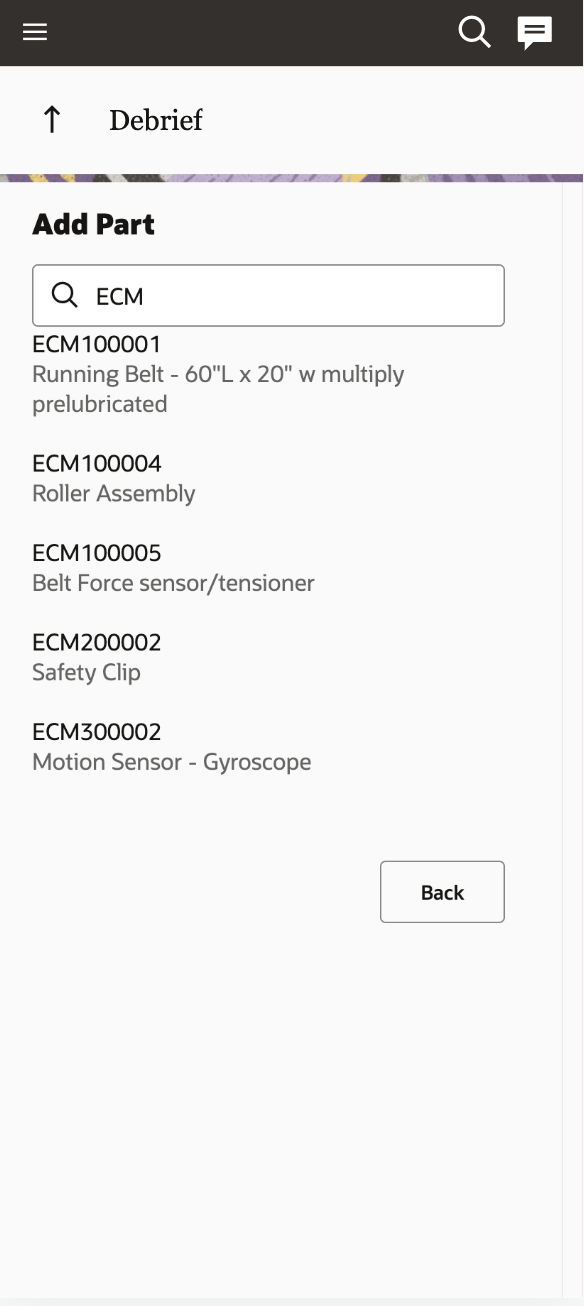
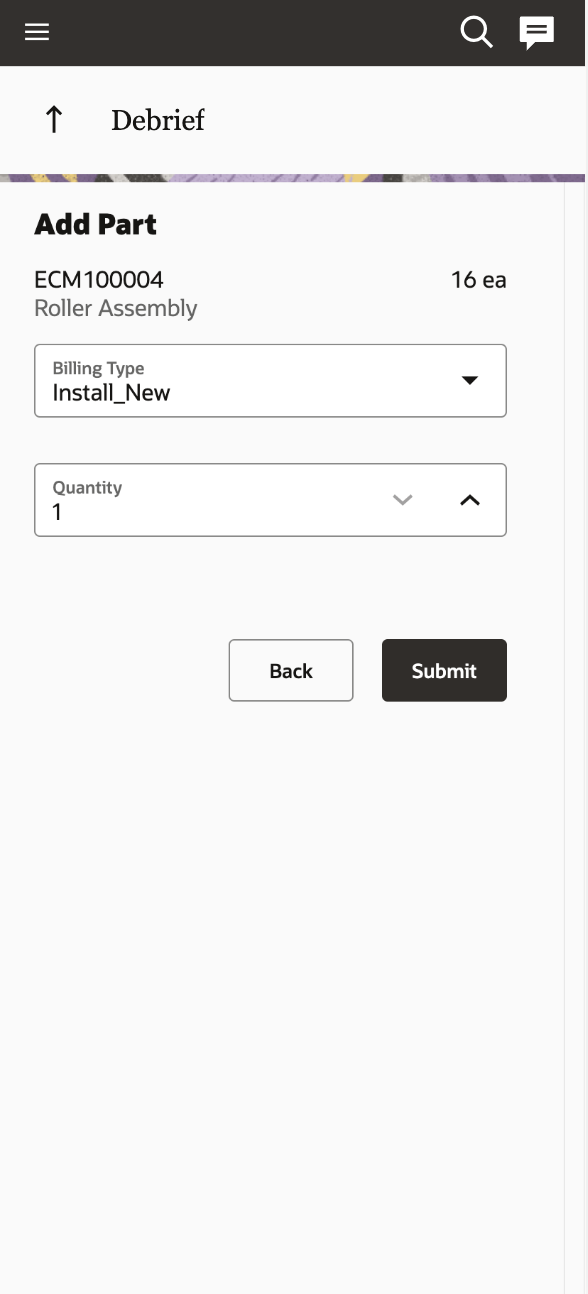
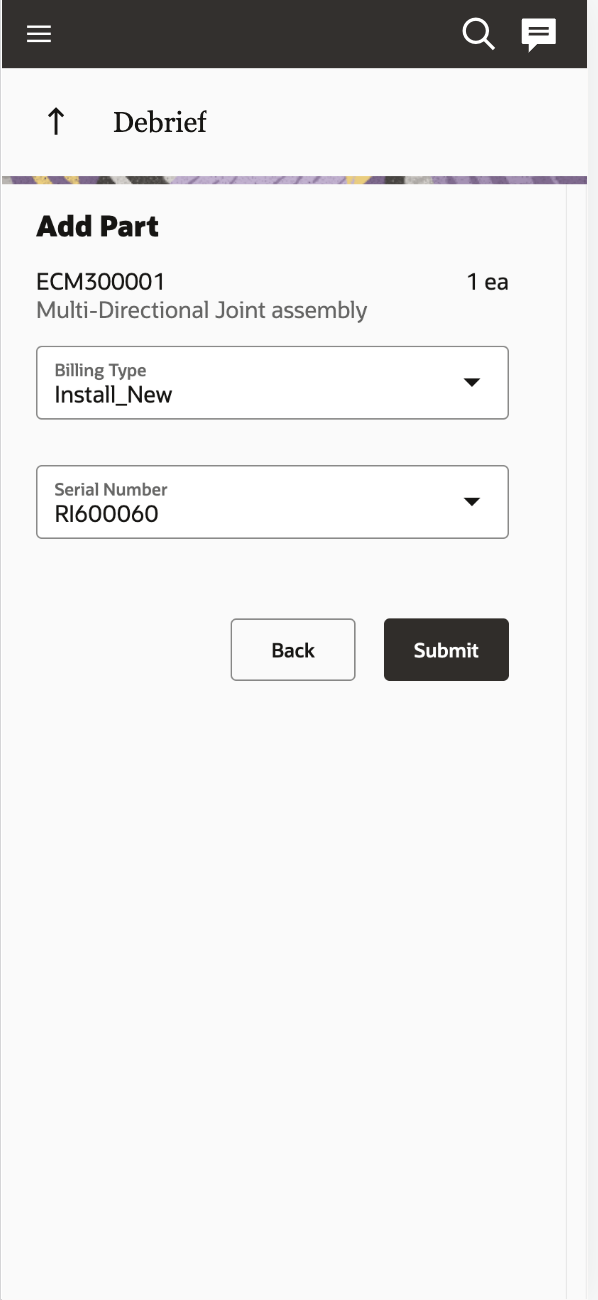
Add Returned Parts
Click the 'Add charges' drop-down list and select 'Return Parts'. Use the search field to query for the required part.
- For non-serialized items, select the part, specify the quantity, and click Submit.
- For serialized items, select the part, type the serial number, and click Submit.
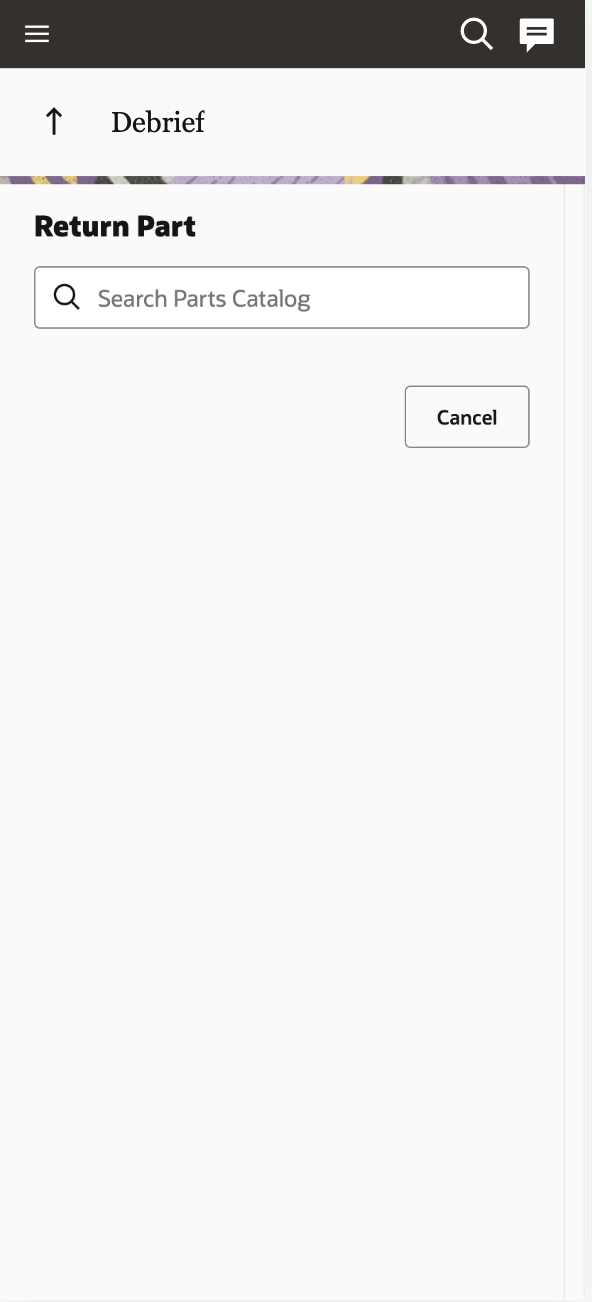
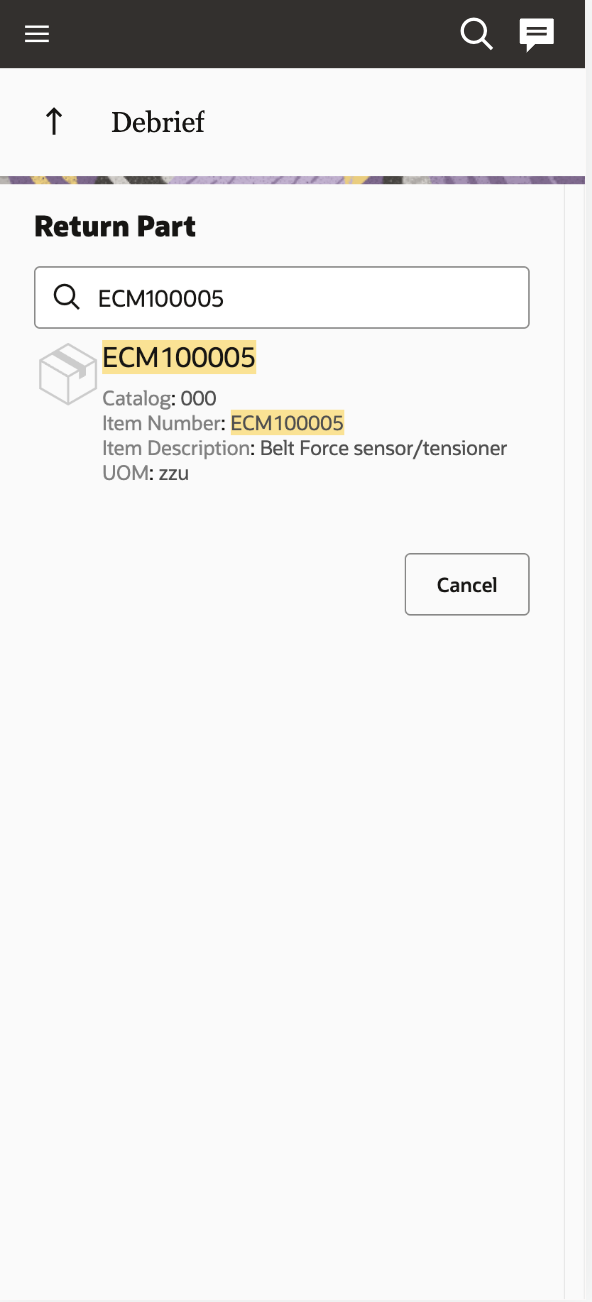
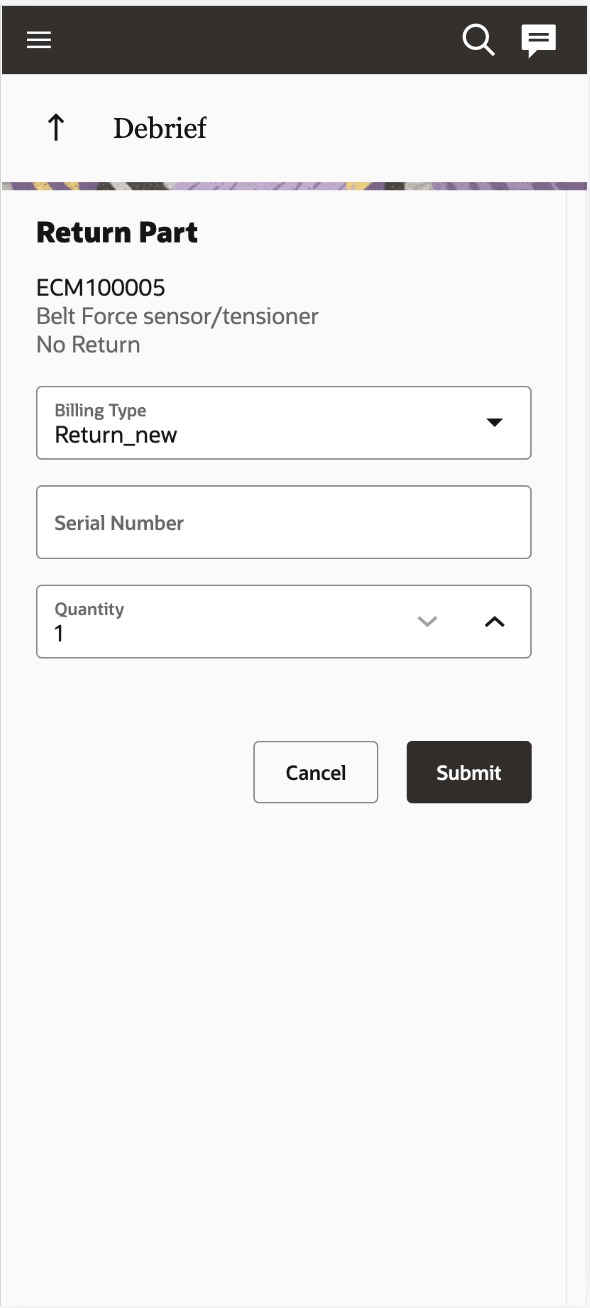
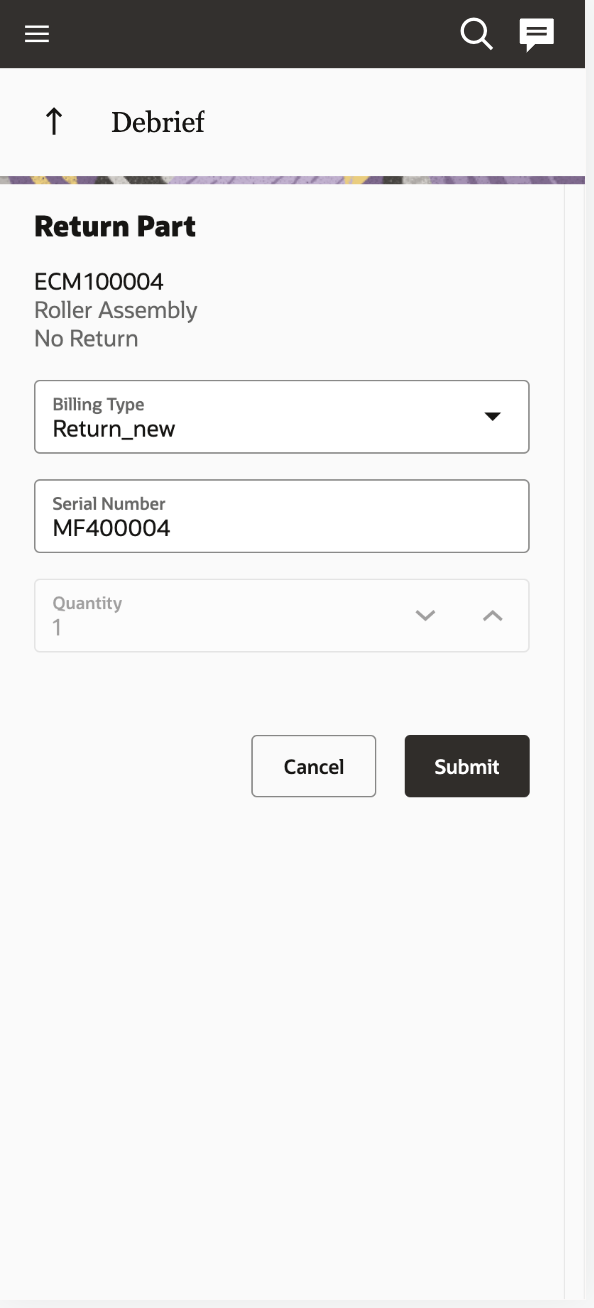

Remove Debrief Items
If you added some items accidentally, you can remove them by clicking on the delete icon.
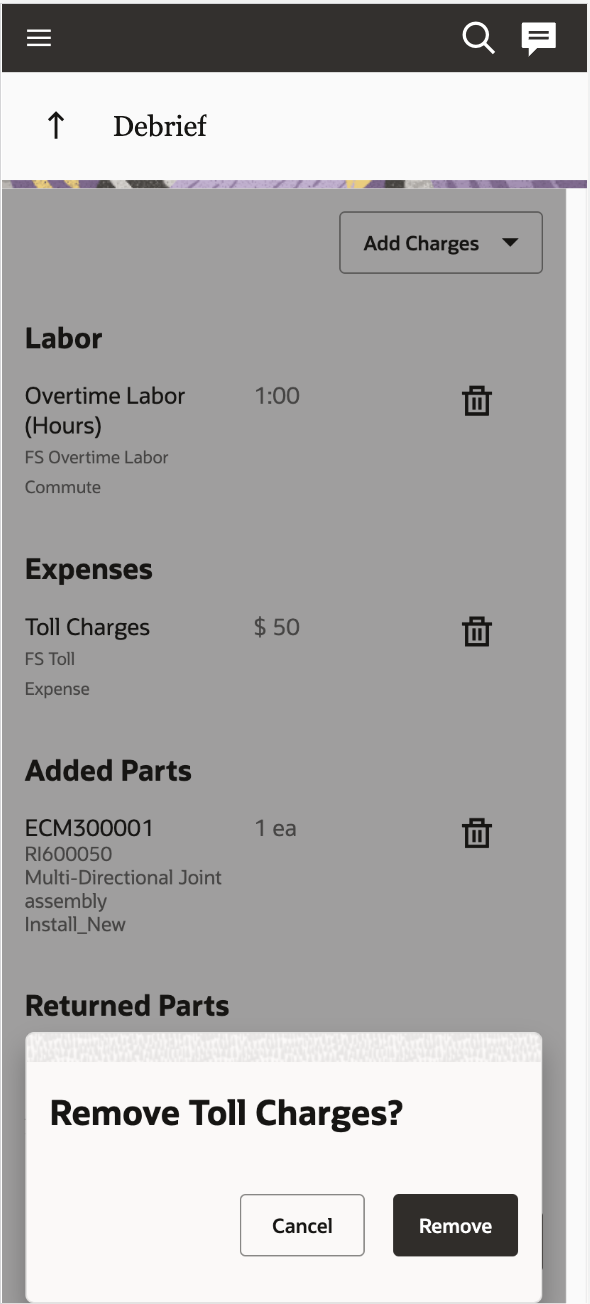
Generate an Invoice when All Debrief Items have been Added
After you completed capturing the debrief information, you can obtain the customer’s signature and generate a PDF invoice.
Click the Sign and Save button. Use the Signature pane to sign the invoice, and then click Submit. The plugin is closed, and the invoice is stored as a PDF file in the activity property for download and review. If you want to update the invoice, then you must reopen the activity and perform the debriefing again, so that the new PDF file overwrites the old one.
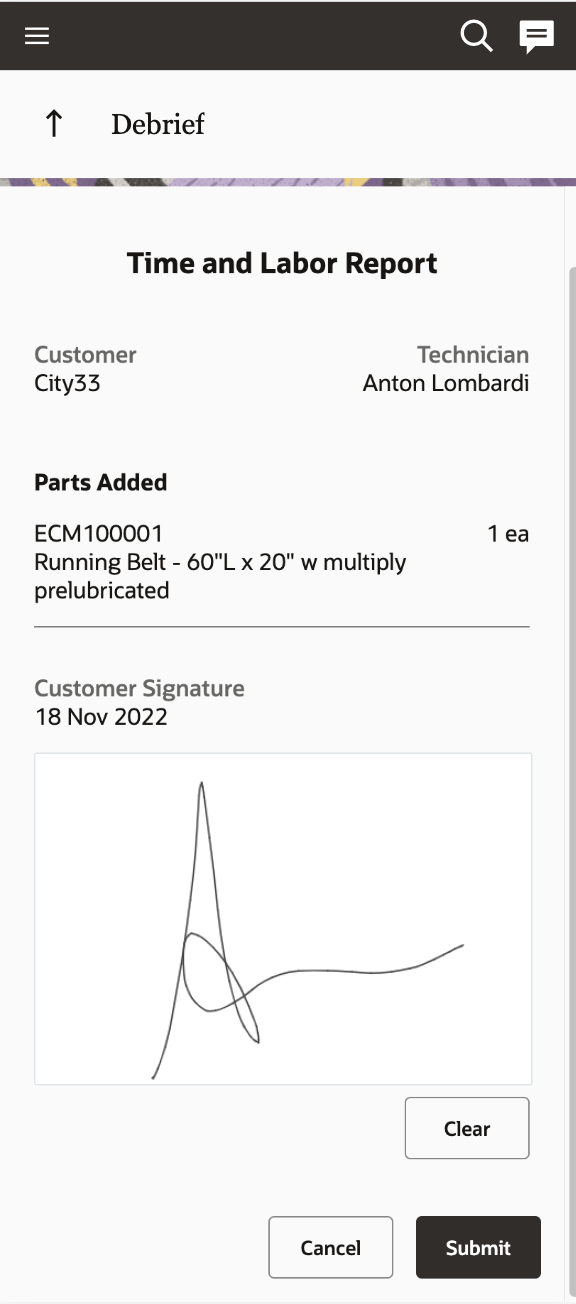
Company Logo
Customer can provide their company logo in the Time & Labour Report by adding a new secure parameter with the name "logoUrl" and value as "url of the company logo".
Logo image will only support .jpeg format and the recommended size of the image is less than "150X60 ".
How to Configure
The process to configure the plug-in is the following:
NOTE: The order of these steps is important.
- Install the Debriefing plugin (follow the instructions within How to install Standard Plugin).
- Create/configure the necessary inventory types and user types.
- Add the URL of the company logo that will be displayed on the invoice for customers.
- Upload the Parts Catalog if the system isn't using it yet.
Property Requirements for Troubleshooting
During the installation process, the system will create the required properties automatically or will notify you that some existing properties will be used by the plugin if they're already configured.Note: In case the system already has properties with the corresponding names and labels but with the improper configuration, the customer will need to change the property setting(s) and repeat the installation again.
Resource Entity Properties
Resource Entity Properties
| Name | Label | Type | GUI |
Description |
|---|---|---|---|---|
| ID |
pid |
Internal ID of the resource. |
||
| Name |
pname |
Name of the resource. |
Activity Entity Properties
| Name | Label | Type | GUI |
Description |
|---|---|---|---|---|
| Invoice |
invoice |
File |
File |
PDF file of the generated invoice. For example, mime_types =”application/pdf” |
| Company name |
ccompany |
String |
Text |
Customer’s company name, displayed as the title of the invoice. |
| Activity ID |
aid |
Internal ID of the activity. |
||
| Name |
cname |
Name of activity used in the PDF invoice. |
||
| Address |
caddress |
Activity address used in the invoice. |
||
| City |
ccity |
Activity city used in the invoice. |
||
| State |
cstate |
Activity state used in the invoice. |
||
| ZIP/Postal Code |
czip |
Postal code used in the invoice. |
||
| Work Order |
appt_number |
Work order used in the invoice. |
||
| Signature |
csign |
Customer signature, required prior to saving the invoice as PDF. |
Inventory Entity Properties
| Name | Label | Type | GUI |
Description |
|---|---|---|---|---|
| Expense |
expense_amount |
String |
Text |
Amount of expense. |
| Expense Currency |
expense_currency_code |
Enumeration |
Combobox |
Value of each enumeration item is separated with the “|” character. |
| Part Disposition |
part_disposition_code |
Enumeration |
Combobox |
The value that identifies whether the inventory is consumable by the customer and there is no need to track it anymore, or whether the inventory is returnable. If the inventory is returnable, the Inventory Management system of Oracle SCM Cloud must track the part until it is returned by the customer. |
| Part Unit of Measure |
part_uom_code |
Enumeration |
Combobox |
The unit of measurement (UOM) of parts (inventories) |
| Part Item Description |
part_item_desc |
String |
Text |
The description of the part. For example, 'Magnetic hard drive'. It is used to search for inventory in the catalog. |
| Part Item Number |
part_item_number |
String |
Text |
The number of the part that has been installed or taken from the customer. It is specified as a code. For example, FS908765. |
| Part Item Revision |
part_item_revision |
String |
Text |
A single-letter code, for example, "A" or "B". Also, it is possible to have a single digit like "1" or "2". Usually, the inventory is identified by Part Item + Part Item Revision, but Item Revision is optional. |
| Part Item Number + Revision |
part_item_number_rev |
String |
Text |
The Part Item number concatenated with the Part Item Revision. For example, FS908765A, where "FS908765" is a Part Item Number and "A" is a Part Item Revision. It is used to search for inventory in the catalog. |
| Expense Activity |
expense_service_activity |
Enumeration |
Combobox |
Type of expense. |
| Expense Item |
expense_item_ number |
Enumeration |
Combobox |
The subtype of expense. |
| Expense Item Description |
expense_item_ desc |
Enumeration |
Combobox |
The description of expense subtypes. The indices must be the same as in the expense_item_numb er property. The values must describe the corresponding expense_item_numb er element. |
| Labor End Time |
labor_end_time |
String |
Text |
The time when a technician stops working on particular service activity. It must be not later than the end time of the work order (Oracle Field Service activity). Also, there must be no overlap between the items in the labor list. The format is T24:59:59. |
| Labor Start Time |
labor_start_time |
String |
Text |
The time when a technician starts working on a particular service activity. It must be not be earlier than the start time of the work order (Oracle Field Service activity). Also, there must be no overlap between the items in the labor list. The format is T24:59:59. |
| Labor Activity |
labor_service_activity |
Enumeration |
Combobox |
The type of labor |
| Labor Item |
labor_item_number |
Enumeration |
Combobox |
The subtype of labor |
| Labor Item Description |
labor_item_desc |
Enumeration |
Combobox |
The description of labor subtype. The indices must be the same as in labor_item_number property. The values must describe the corresponding labor_item_number element. |
| Inventory ID |
invid |
Internal ID of the inventory. |
||
| Activity ID |
inv_aid |
Internal ID of the activity to which the inventory is assigned. |
||
| Resource ID |
inv_pid |
Internal ID of the resource to which the inventory is assigned. |
||
| Inventory Pool |
invpool |
The inventory pool (Resource, Customer, Installed, De- installed) |
||
| Inventory Type |
invtype |
Type of inventory. See Add Inventory Types for the Plug-In. |
||
| Quantity |
quantity |
The installed parts or the parts taken from the customer. It can be either counted or specified in inches, feet, and so on. The quantity is defined as an integer number. |
||
| Serial Number |
invsn |
Field |
Text |
The serial number of the inventory. |
Add Inventory Types for the Plug-in
You must add inventory types (expense, labor, part, part_sn) to capture the information about the time and materials used during the activity. The plug-in stores the reported information about time and expense in the installed pool of the activity. However the materials, that is parts used and parts returned, are stored in the resource and customer pools respectively.
- Log in to the Oracle Field Service as an administrator.
- Navigate to Configuration, Inventory Types, and click Add New.
- Add the 'Expense' inventory type as follows:
- Enter 'expense' in the Label field.
- Enter 'Expense' in the Name field.
- Select 'Expense_item' from the Model Property drop-down list.
- Click Save.
- Add the 'Labor' inventory type as follows:
- Enter 'labor' in the Label field.
- Enter 'Labor' in the Name field.
- Select 'Labor_Item' from the Model Property drop-down list.
- Click Save.
- Add the 'Part' inventory type as follows:
- Enter 'part' in the Label field.
- Enter 'Part' in the Name field.
- Select 'Part_Item+Revision' from the Model Property drop-down list.
- Click Save.
- Add the 'Part SN' inventory type as follows:
- Enter 'part_sn' in the Label field.
- Enter 'Serialized Part' in the Name field.
- Select 'Part_Item+Revision (unique identifier for the Part SN Item field)' from the Model Property drop-down list.
- Click Save.
Add Debriefing Plugin to the User's Page
You can make the plug-in available to multiple user types by associating it with the user types' corresponding Oracle Field Service pages. Since debriefing is only done for 'started' activities, add the Debrief button to the Edit/View Activity page so that it is visible only when activities are in that status.
- Add a button for the plug-in to the page for the applicable user types, using the instructions found here: How to add the plugin to the screen
- Make the plugin available for 'Started' activity only from within the button's Visibility section. Click the 'Add new' option, click the 'plus button' within Conditions, select 'activity status' and in (equal) from the respective drop-downs. Then click Select Value, select the 'Started' check box, and then click Save to close the window. Then save the overall changes within the Visual Form Editor.
Configure the Parts Catalog
How to Upload Parts Catalog
You can search for the parts used or returned from the catalog and then add these parts to an invoice. To view the parts from the catalog, you must create the catalog using the create_catalog method of the SOAP API or the REST API
Following example shows how to create a catalog for Debrief:
{
"name": "my_catalog",
"fieldSchemas": [
{
"label": "part_disposition_code",
"name": "Part Disposition Code",
"searchable": true,
"preview": false
},
{
"label": "part_item_number",
"name": "Item Number",
"searchable": true,
"preview": true
},
{
"label": "part_item_revision",
"name": "Item Revision",
"searchable": true
},
{
"label": "part_item_desc",
"name": "Item Description",
"preview": true
},
{
"label": "part_uom_code",
"name": "UOM",
"preview": true,
"searchable": true
}
],
"typeSchemas": [
{
"itemType": "part",
"inventoryType": "part_general"
},
{
"itemType": "cartridge",
"inventoryType": "part_cartridge"
}
]
}
The following example shows how to create or update parts catalog items for Debrief scenarios:
"type": "part",
"fields": [
{
"label": "part_disposition_code",
"value": "ECM100001A"
},
{
"label": "part_item_number",
"value": "ECM100000"
},
{
"label": "part_item_revision",
"value": "ECM100000A"
},
{
"label": "part_item_desc",
"value": "2" x 5" Robotically Welded Steel Frame"
},
{
"label": "part_uom_code",
"value": "ea"
} ],
"tags": [
"Printer",
"Cartridge"
],
"linkedItems": [
{
"itemLabel": "RG5-7691-250CN",
"data": "1"
},
{
"itemLabel": "RG5-7691-250CF",
"data": "2"
},
{
"itemLabel": "RG5-7691-250CZ",
"data": "3"
} ],
"images": [
{
"imageURL": "https://www.storage-service.com/rg5_7691_250cz.png"
},
{
"imageURL": "https://www.storage-service.com/rg5_7691_250cf.png"
}
]
}
Make sure that:
The 'type' field within the 'create' or 'update' parts catalog calls must equal "part" for any serialized inventory. The 'type' field within the 'create' or 'update' parts catalog calls must equal "part_sn" for any non-serialized inventory. Each item's 'Fields' schemas must contain these elements:
Elements that must be in an item's Fields schema
| Label | Property Label | Searchable |
|---|---|---|
| part_uom_code |
part_uom_code |
0 |
| part_item_revision |
part_item_revision |
0 |
| part_item_number |
part_item_number |
0 |
| part_item_desc |
part_item_desc |
1 |
| part_disposition_code |
part_disposition_code |
0 |
Modify Plugin Configuration
It's possible to add additional secure parameters to the plugin, but it's not possible to change the label, or available properties.
With this feature, you can select and install standard plug-ins easily, without the need for any special technical skills. You can also download the source code of a Standard plug-in, modify to suit your business scenarios, and then upload it back to Oracle Field Service.
Steps to Enable
You don't need to do anything to enable this feature.
Key Resources
- Mobile Plug-in Framework: https://docs.oracle.com/en/cloud/saas/field-service/falid/index.html. This link will be available after Update 23A GA release.
Display Important Filter Criteria on Dashboards
Overview
Any graphical report will now display the criteria used to filter the results, for example, date, resource, and capacity category, as shown here.
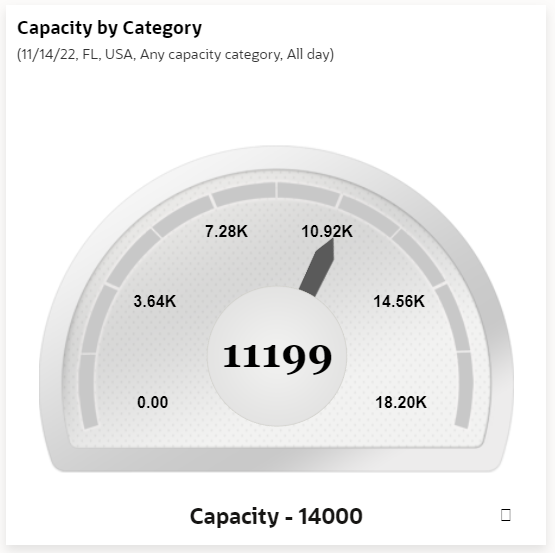
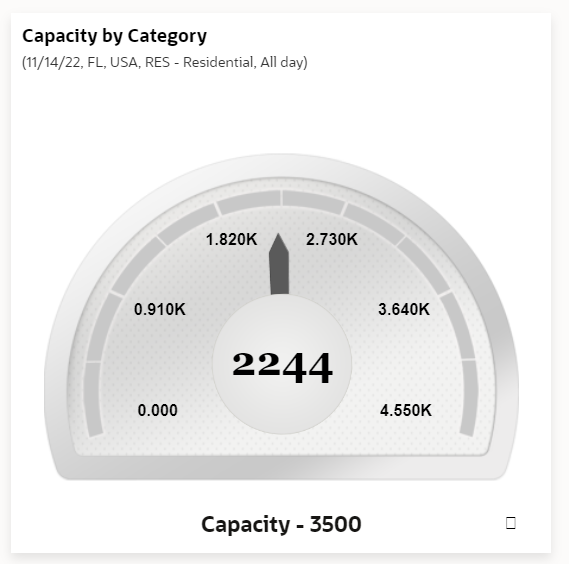
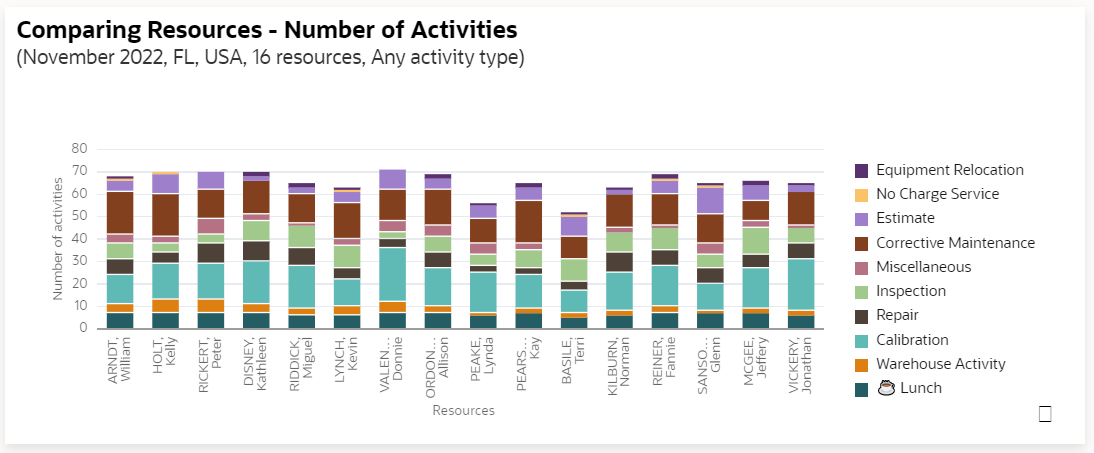

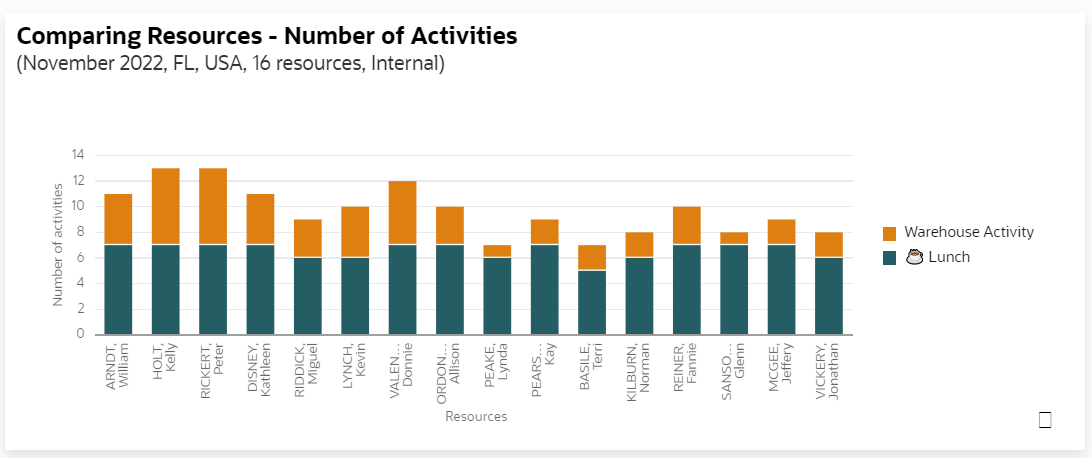
The following filter criteria is displayed on each of the reports in addition to 'Date' and 'Resource'.
Filter Criteria Displayed
| Report | Displayed Filter Criteria |
|---|---|
| Capacity by Category |
Capacity Category, Booking intervals/Time Slot |
| Autorouting results |
Activity Type Group |
| Activities by Statuses |
Activity Type Group |
| Completion Progress by Volume |
Activity Type Group Measurement units will be displayed next to 'Volume' in graph |
| Average Travel Time per Resource |
Activity Type Group |
| Average Productivity by Activity Type |
Activity Type Group |
| Comparing Resources - Number of Activities |
Activity Type Group, Number of resources |
| Comparing Resource Productivity |
Activity Type Group, Number of resources |
| Completion Progress |
Activity Type Group |
| Mean Time to Deliver |
Capacity Category, Activity Type Group, Number of resources |
| Percent of Activities Met |
Activity Type Group, Number of resources |
| Percent of Customer Expectations Met |
Activity Type Group, Allowable Delay, Number of resources |
| Routing Errors Reasons |
Activity Type Group |
This feature displays the filter criteria below the report name, which helps users identify the filter conditions applied to each report easily.
Steps to Enable
You don't need to do anything to enable this feature.
Key Resources
- Configuring and Using Reports: https://docs.oracle.com/en/cloud/saas/field-service/fasmr/index.html. This link will be available after Update 23A GA release.
Export and Import Routing Plan Configuration
Overview
Included in the Update 23A is a new ability to export routing plans in JSON format as well as ability to import previously exported routing plans via the Oracle Field Service UI. Also there is an ability to create, read and update routing plans and profiles via API. In order to support new APIs, all routing profiles and plans now have labels, which are unique system wide.
How to Use
You may use the Import and Export functionality to test routing strategies on real data before implementing them in Production. To do so, first create a Test instance from your Production instance and implement the needed changes into your routing plans. After that is done, export the changed routing plans from the Test instance one by one by choosing the Export menu item from each plan's context menu and saving the downloaded files into a folder on your device. To import routing plans to a Production instance, choose the needed routing profile, then choose the Import Routing Plan context menu item, and upload the JSON file. If the plan with the same name already exists in the routing profile, you will need to confirm rewriting it. If some entities from which the imported plan depends (like activity or resource filters, message scenarios, previous routing plans or activity types) are missing on the target system, you will be warned and presented with a dialog window to choose a replacement for each missing item. Your choice will be saved and used as a pre-selected value next time.
Implementing your CI/CD Strategy
As of Update 23A, a number of new configuration API endpoints have been added in order to automate the import and export of routing plans. Based on them, you may implement your own CI/CD strategy.
In order to allow API access to Routing Plans and Profiles, go to the Configuration > Applications, choose your Authentication method (or add one, if you have no) and add the Routing profiles with Read-Write permissions under the Metadata API node, then save the Application.
- As a first step, you may get the list of routing profiles from the source system in order to retrieve their profile labels.
- Then, using the profile label, you may get list of routing plan labels per given profile.
- You may export the needed plan(s) to get a .json file which may be archived.
- If you need to restore the archived plan(s), you may used the files obtained via previous step and force import them back to the source system.
See the Metadata API documentation for method and parameter details.
NOTE: Exported routing run files are signed in order to prevent unauthorized modification. If you try to import such a modified file, it would bring an error message and the run will not be imported.
Editing Labels
When you add a new routing profile or plan, along with the name, you specify a label that's used by the API to distinguish the profile and plans. The profile label may be edited during modification of the profile, while the routing plan one may be altered during the Add/edit plan process.
NOTE: Both plans and profile labels should be unique system-wide.
Screenshots
These screenshots shows the Export and Import menus and the Import dialog box:
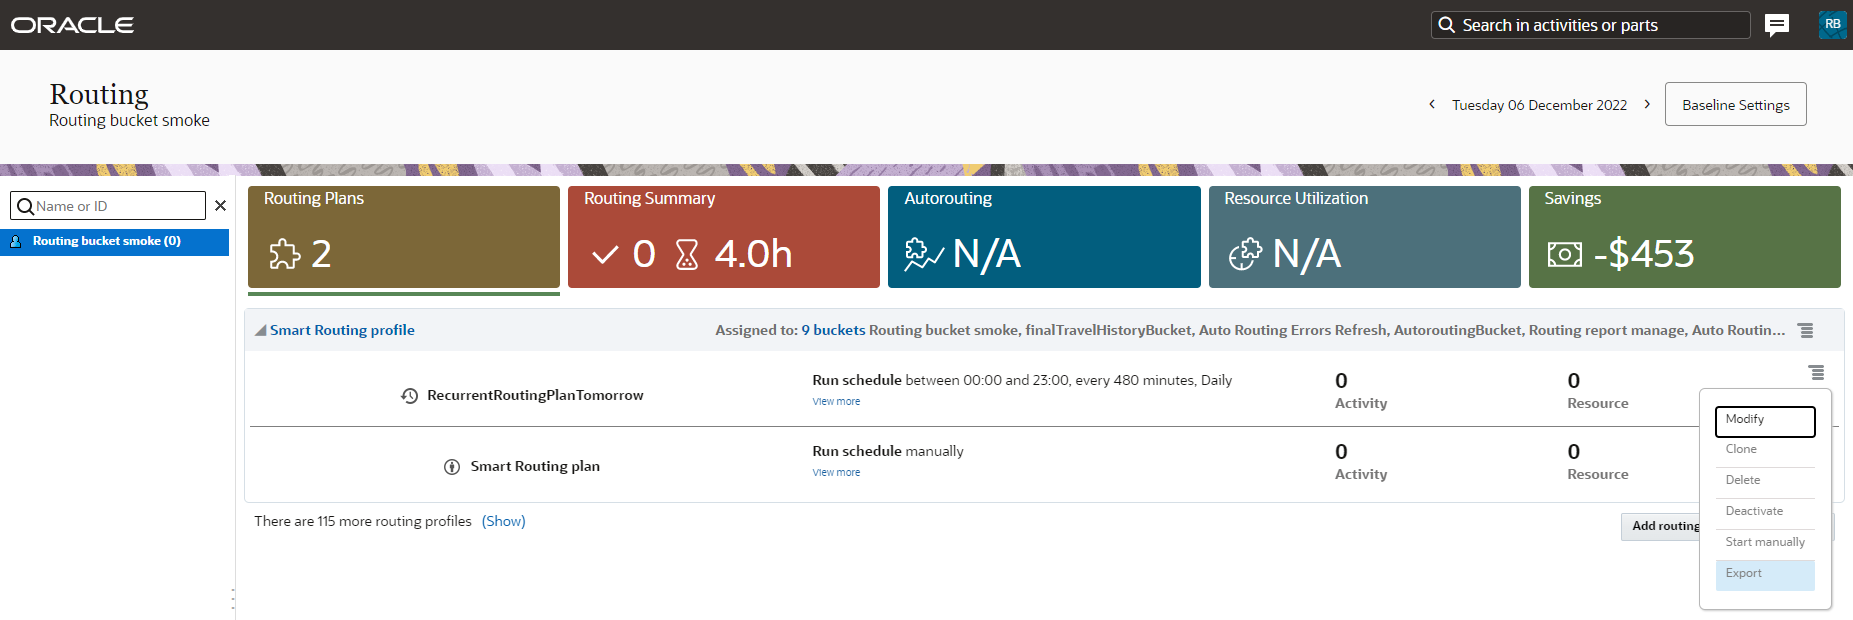


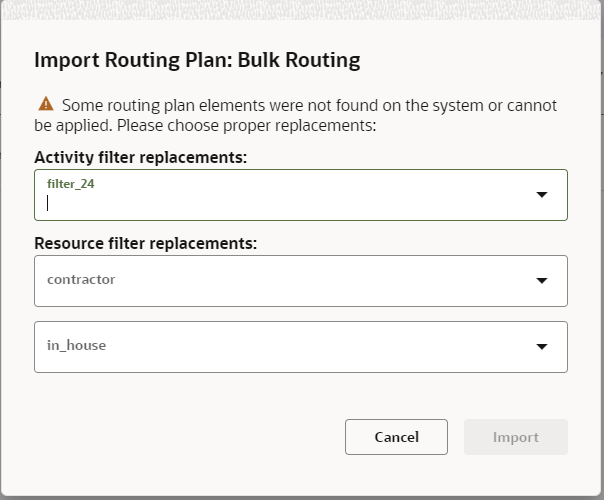
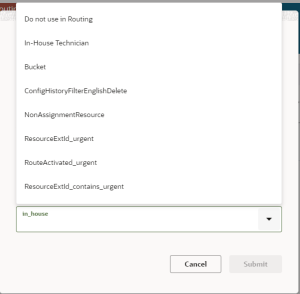

The ability to export and import routing plans helps you migrate the plans between instances easily and implement your pre-tested routing strategy quickly, without manual errors.
Steps to Enable
You don't need to do anything to enable this feature.
Key Resources
- Using Routing: https://docs.oracle.com/en/cloud/saas/field-service/farcu/index.html. This link will be available after Update 23A GA release.
Prioritize Earlier Start of Most Important Activities in Bulk Routing
Overview
A new Optimization Goal called Prioritize earlier start of most important activities has been added to the routing plan settings to ensure that activities can be ordered according to their cost of non-assignment.
What's New
The Prioritize earlier start of most important activities optimization goal allows Routing to order activities by the cost of their non-assignment.
Also, new non-assignment reasons have been added:
New Error Codes
| Error Code | Error | Explanation |
|---|---|---|
| 6077 |
No field resources having right work skills and/or able to work in particular work zones found |
The activity's requirements cannot be met by any available resource. While this error does not necessarily indicate an error, you should check the following settings to confirm that they are accurate for your mobile workforce:
|
| 6092 |
Activity is not movable |
Activity type constraints or routing plan settings prevent the activity from being moved between days and/or resources. |
| 6093 |
No field resources available calendar-wise to handle the particular activities found |
The activity's requirements cannot be met by any available resource. While this error does not necessarily indicate an error, you should check the following settings to confirm that they are accurate for your mobile workforce:
|
How to Use
To prioritize an earlier start for the most important activities, you can create a new bulk routing plan or modify an existing one. In the Optimization Strategy section of the routing plan, choose Prioritize earlier start of most important activities from the Optimization Goal drop-down menu. Then open the Filters section and choose non-assignment costs for activities; the higher an activity's cost of non-assignment is, the closer to the beginning of the working day the activity may be scheduled.
NOTE: Bulk routing tries to optimize the entire set of routes rather than each individual route. Because of that, it is possible (although not likely) for a particular activity with a higher non-assignment cost to be scheduled later than one with a lower non-assignment cost if such an assignment provides better overall optimization when travel time is taken into account.
To achieve the desired result, your non-assignment costs should be consistent among all the filters, including ones for non-scheduled activities and for activities already in the routes, and across all the routing plans within the profile, including optimization plans.
If Prioritize earlier start of most important activities is chosen as an Optimization Goal, the activities are prioritized so that activities with the highest non-assignment costs are scheduled for an earlier time, while the following constraints are applied:
- This optimization goal applies to bundled visits. It is expected that the technician at the job site for the first activity in a given bundle will complete all activities in the bundle. However, activities in the bundle should also be ordered by non-assignment costs, and the activity with the highest non-assignment cost should represent the entire bundle in the route.
- The activity's work skill, work zone and calendar requirements are met.
- The activity's Delivery Window, Service Window/Time Slot and Access Hours are met.
- Late arrival penalties are considered for activities that have the same non-assignment cost priority.
- Travel is optimized while it doesn't affect activity order.
- An activity's SLA is observed, but only for activities that have the same non-assignment cost priority.
There are nine main priority levels used to prioritize an activity's start, ranging from Minimal to At All Costs. If additional levels are required, the Late arrival penalty can be used to further distinguish activity priorities for activities having the same non-assignment cost (from Minimal to High). For example, an activity with the Cost of non-assignment set to High and the Late arrival penalty set to Normal has higher priority than an activity with the Cost of non-assignment set to Normal and the Late arrival penalty set to Normal. However, the first activity has a lower priority than an activity with the Cost of non-assignment set to High and the Late arrival penalty set to High.
Example – Exercise Machine Repair
A company has a line of business for exercise machines with the following activity types:
- Important Repair – The machine is not working and a high fee is paid for each non-working hour.
- Repair – The machine is partially working, for example, the display is non-functional. A smaller fee is paid for each non-working hour.
- Preemptive maintenance – This is SLA-based work. No fee is paid, but the work is expected to be done along with more important ones if a technician is onsite.
All technicians have the same skills.
To implement such a scheme, three activity filters should be created, each with its own activity type.
Filters should be used in both Routing and on the Dispatch Console to allow visual control of filter functionality.
For all existing bulk routing plans in buckets for this line of business, those three new activity filters should be added to all groups under Filters: Non-scheduled activities in the routing bucket that should be scheduled and assigned, Activities in the routing bucket that should be assigned, Preassigned non-scheduled activities that should be scheduled and Activities in the existing routes, with the following settings:
Settings for the Machine Repair Exercise
| Activity Filter | Cost of Not Assigning Activity | Resource Filter | Assignment Cost |
|---|---|---|---|
| Important Repair |
Highest |
Other |
Normal |
| Repair |
Normal |
Other |
Normal |
| Preemptive maintenance |
Minimal |
Other |
Normal |
Choose Prioritize earlier start of most important activities as an Optimization Goal. To achieve better routing performance, select Move activities between routes and reorder within the same route in the Handling of preassigned activities menu.
Ensure that Enable the Visit functionality is checked on the Configuration –> Business Rules page and that the bundling key is set to bundle activities with the same customer and location.
When the routing plan is run, Important Repair activities should be at the beginning of route, followed by Repair activities. Preemptive Maintenance activities are bundled together with more important activities.
Known Constraints
We do not recommend mixing routing plans with different optimization goals in the same bucket, especially if plans having an optimization goal set to Prioritize earlier start of most important activities are combined with plans having other optimization goals. If such a combination is inevitable, we recommend preventing the ability to move activities between routes and reorder activities within the same route for all the plans except the ones that have the optimization goal set to Prioritize earlier start of most important activities.
NOTE: We do not recommend using Immediate Routing for activities matching the filter for the same set of activities that are used by the plan having the optimization goal set to Prioritize earlier start of most important activities as the assignments may be handled differently. However, you can combine an Immediate Routing for Urgent activities plan along side of a plan having the optimization goal set to Prioritize earlier start of most important activities, providing that activities with Urgent priority levels have the maximum non-assignment costs in the plan settings.
This feature help you prioritize earlier start times for the most important activities in a bulk routing plan.
Steps to Enable
You don't need to do anything to enable this feature.
Key Resources
- Using Routing: https://docs.oracle.com/en/cloud/saas/field-service/farcu/index.html. This link will be available after Update 23A GA release.
IMPORTANT Actions and Considerations
REPLACED OR REMOVED FEATURES
Features and technical components of the solution may be removed or replaced to enhance the security, performance, and overall quality of the cloud service. When this occurs, the deprecation of a feature or component will be announced in advance, allowing customers sufficient time to anticipate the change and transition to any enhanced replacement feature/component. After the deprecation is announced, the deprecated feature or component will remain in the solution until the planned removal date and will not be enhanced or made compatible with other new features.
Below is a list of new and previously announced deprecations for this cloud service.
Previously-Announced Deprecations
| Application Area |
Removed Feature |
Deprecation Announcement |
Planned Removal |
Replacement Feature |
Additional Information |
|---|---|---|---|---|---|
| User Login Domain |
Authentication requests using https://login.etadirect.com URL scheme |
22A (February 2022) |
23D (November 2023) |
Use URL scheme https://<instance_name>.fs.ocs.oraclecloud.com |
This change will improve authentication time and adhere to government and corporate policy regulations related to data residency by ensuring the request is directed to the proper data center where the target Oracle Field Service environment is running. Login domain will not be supported from Update 23D general availability date onwards for all environments running on all versions of Oracle Field Service. For more information see the Oracle Field Service Login and API Domains Deprecation topic https://support.oracle.com/knowledge/Oracle Cloud/2922270_1.html. |
| API Domain |
APIs access using https://api.etadirect.com URL scheme |
22A (February 2022) |
23D (November 2023) |
Use URL scheme https://<instance_name>.fs.ocs.oraclecloud.com |
This change will improve authentication time and adhere to government and corporate policy regulations related to data residency by ensuring the request is directed to the proper data center where the target Oracle Field Service environment is running. API domain will not be supported from Update 23D general availability date onward for all environments running on all versions of Oracle Field Service. For more information see the Oracle Field Service Login and API Domains Deprecation topic https://support.oracle.com/knowledge/Oracle Cloud/2922270_1.html. |