
This document will continue to evolve as existing sections change and new information is added. All updates appear in the following table:
| Date | Product | Feature | Notes |
|---|---|---|---|
| 09 NOV 2020 | Created initial document. |
Oracle Taleo Enterprise Edition family of products drives effective talent acquisition within the modern enterprise. The cloud solution enables scalable approval and management of job requisitions, superior candidate experience (sourcing and branding of modern career sites, relationship management, and job application), candidate selection workflow (qualification, evaluation, and interview), job offer, and employee onboarding.
Oracle continues its ongoing investments around intuitive user experience for external and internal candidates, recruiters, hiring managers, and HR administrators. This includes development of core areas such as modern interfaces with multi-device support, configurable decision and approval workflow processes, actionable business insights and reporting, tighter integration with other HCM functions, and adherence to hiring compliance rules.
This guide outlines the information you need to know about new or improved functionality in this update.
GIVE US FEEDBACK
We welcome your comments and suggestions to improve the content. Please send us your feedback at talent_acquisition_doc_feedback_ww_grp@oracle.com.
Column Definitions:
Features Delivered Enabled
Report = New or modified, Oracle-delivered, ready to run reports.
UI or Process-Based: Small Scale = These UI or process-based features are typically comprised of minor field, validation, or program changes. Therefore, the potential impact to users is minimal.
UI or Process-Based: Larger Scale* = These UI or process-based features have more complex designs. Therefore, the potential impact to users is higher.
Features Delivered Disabled = Action is needed BEFORE these features can be used by END USERS. These features are delivered disabled and you choose if and when to enable them. For example, a) new or expanded BI subject areas need to first be incorporated into reports, b) Integration is required to utilize new web services, or c) features must be assigned to user roles before they can be accessed.
| Ready for Use by End Users Reports plus Small Scale UI or Process-Based new features will have minimal user impact after an update. Therefore, customer acceptance testing should focus on the Larger Scale UI or Process-Based* new features. |
Action is Needed BEFORE Use by End Users Not disruptive as action is required to make these features ready to use. As you selectively choose to leverage, you set your test and roll out timing. |
|||||
|---|---|---|---|---|---|---|
| Feature |
Report |
UI or |
UI or |
|
||
Evaluation Management - Categories, Skills, Questions, Questionnaires |
||||||
Enhanced Error Messaging at Candidate Sign In
Enhances account security by informing a candidate that experiences an unsuccessful login, that either their user name or password is incorrect. Candidates are not informed of which of the two credentials is incorrect. This is accomplished by changing the default value at upgrade of the existing setting, "Show explicit error messages to users at login" from Yes to No. Administrators can change the value of this setting at any time.
This setting is used to define the configuration when creating new career sections and applies to all career section types.
Mitigates information harvesting by unintended sources.
Steps to Enable
You don't need to do anything to enable this feature.
Candidates Provide Password When Changing User Name
Enhances account security by requiring candidates to provide their password or OpenID authentication when changing their user name. To accomplish this, the Security setting, "Require users to authenticate after changing their email address" had been renamed to, "Require users to authenticate after changing their email address or user name." At upgrade, this setting defaults to whichever configuration was there prior to upgrade. Administrators are able to disable the feature at their discretion
This authentication validation is possible on both internal and external career sections with the exception of internal career sections with SSO enabled. If SSO is enabled on an internal career section, the "Require users to authenticate after changing their email address or user name" setting will be ignored.
The global setting, "Require users to authenticate after changing their email address" has also been renamed to "Require users to authenticate after changing their email address or user name." This value determines the default value imposed when Administrators create new career sections. This setting is also delivered as it was configured prior to upgrade and can be disabled by Administrators.
Enhance account security by requiring candidates to provide their password or Open ID authentication when changing their user name.
Steps to Enable
You don't need to do anything to enable this feature.
Tips And Considerations
Customers with branding files with styling impacts on the career section should review how this new window renders with their branding file.
The styling attributes for text, buttons, and layout on the modal are shared with the main career section authentication pages.
As a recruiter, you can run and schedule reports directly in Recruiting. You can access Reports from the hamburger menu.
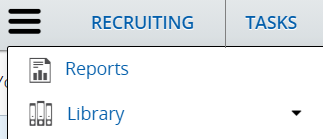
Reports Menu
In the Reporting page, you can display all the reports that you can run, or display reports that you previously ran.
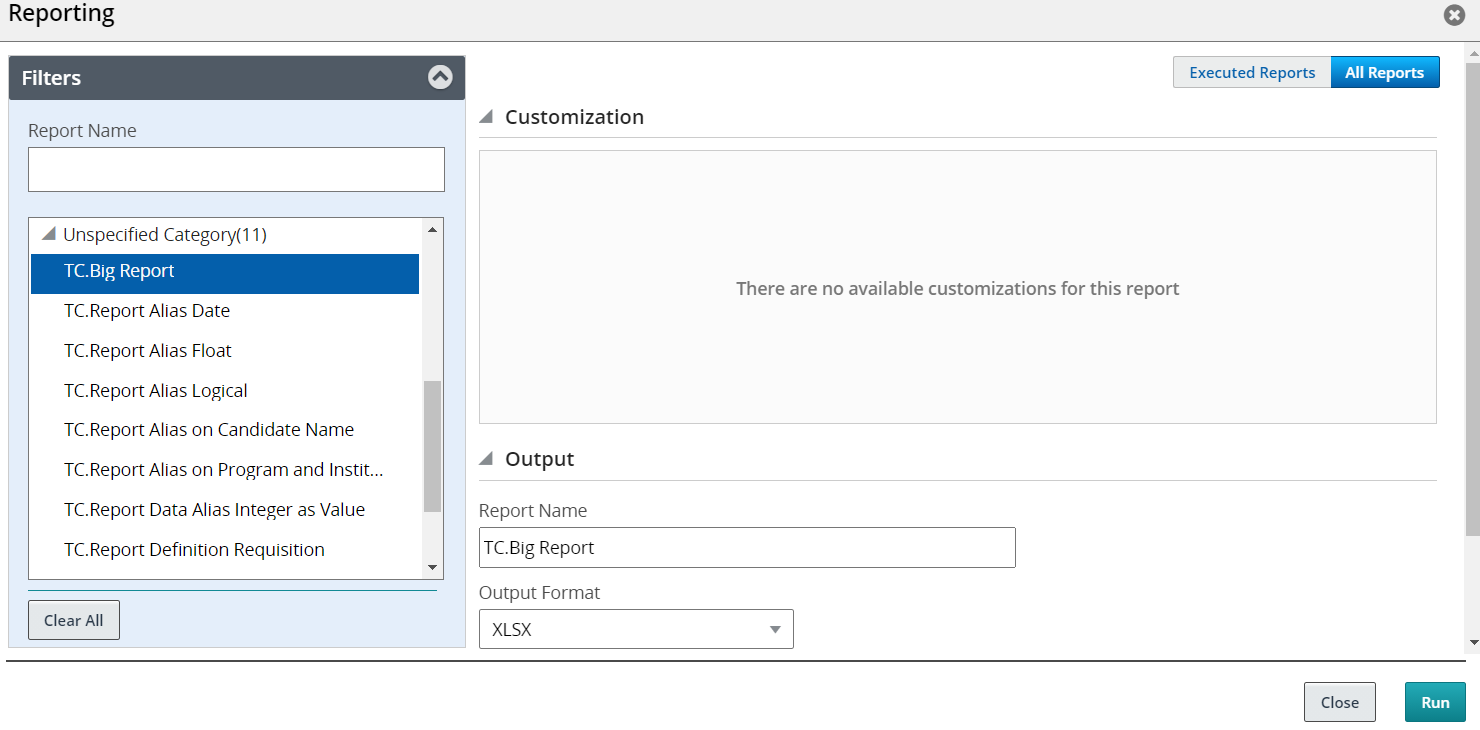
Reporting Page
All Reports
Reports are grouped by categories. Reports that aren't tied to a category are grouped at the bottom of the list under an "Unspecified Category" group. You can use the Report Name field to filter the list of reports. You can also click on a report to view its content.
Depending on how the report was configured, you can select different parameters in the Customization section. In the Output section, you can select the output format of the report (PDF, XLSX, RTF, HTML, EXCEL, XML, CSV). You can also select the Zip the Report option to have the report available as a zip file. You can decide to send a notification to inform people that the report was ran. You can select the recipients who will receive the notification. If you don’t select any recipient, the notification will only be sent to you. Here’s some useful info about the size of the report:
- If the size of the report file is smaller than or equal to the allowed attached file size, you and the recipients will receive the notification with the report attached.
- If the size of the report file is greater than the allowed attached file size, you and the recipients will receive the notification with a link to the report.
- If the report generation fails, you will receive a notification with an error message.
Once a report has run, it’s available in the Executed Reports list and its status is set to Ready.
Executed Reports
When you click the Executed Reports button, you can see reports that were ran and reports that are scheduled to run. For reports that were ran, you can see the date when the report was requested and the status of the report which can be Running, Ready, or Error. When you select a report, actions become available in the toolbar:
- View a snapshot of the report
- Create a scheduled report
- Edit the scheduled report
- Export the report in XML format
- Rerun the report against the latest data
- Delete the report snapshot (only the instance of the report is deleted, not the report itself)
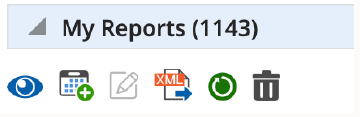
My Reports Actions
If you click on a report or click the action to view a snapshot of the report, you can then download the report.
For scheduled reports, you can see the following info:
- Expiration Date: The date when the report will expire. By default, the expiration date is 3 months from the date the report was scheduled.
- Status: The green icon indicates that the scheduled report is active while the red icon indicates that the scheduled report is inactive.
- Calendar icon: When the scheduled report is being run, a gray calendar icon is displayed next to the report name. When a scheduled report is about to expire, a yellow calendar icon is displayed. When the scheduled report is expired, a red calendar icon is displayed.
When you select a report, actions become available in the toolbar:
- Activate the scheduled report
- Deactivate the scheduled report
- Edit the scheduled report
- Duplicate the scheduled report
- Renew the scheduled report (available only when the report is expired)
- Delete the report snapshot
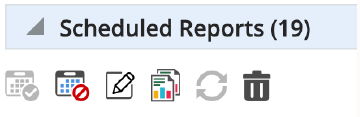
Scheduled Reports Actions
With this feature, you can run reports on all your recruiting data directly in Recruiting.
Steps to Enable
The Enable Embedded Reporting setting must be enabled under Recruiting Settings.
Users must have the Access Embedded Reports permission to view imported reports. (Configuration > SmartOrg Administration > User Types > Select a user type > Recruiting functional domain > Other)
Evaluation Management - Categories, Skills, Questions, Questionnaires
As a content manager, you can create, view, edit, and manage categories, questions, skills, and questionnaires used in evaluation management using the Library. Evaluation Management allows your organization to electronically capture, review, and analyze an evaluator's input obtained during a candidate interview.
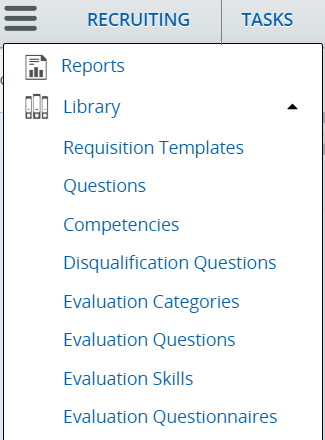
You can access the Library from the hamburger menu.

Library Menu
Evaluation Categories: You use categories to organize evaluation questions and questionnaires. By default, all evaluation categories are displayed in the library. Use quick filters to refine the list by category or status. You can create new evaluation categories and modify existing ones. When you create an evaluation category, the category is created in your preferred language. Once a category is created, you can translate it.
To create an evaluation category:
- In the Library menu, select Evaluation Categories.
- Click Create.
- Provide a name for the category.
- Select the language in which you want to create the category.
- Activate the category.
- Click Save.

Evaluation Categories
Evaluation Questions: This is where you can create and manage questions used in evaluation questionnaires. Before you create a question, look at the existing questions in the Evaluation Questions library. Use quick filters to refine the list by question (enter one or multiple words), status, and category. If you don’t see the question you’re looking for, create a new one.
To create an evaluation question:
- In the Library menu, select Evaluation Questions.
- Click Create.
- Select the type of answer:
- Single: The person can select one answer from a list of choices.
- Multiple: The person can select as many answers as applicable from a list of choices.
- Text: The person can type a brief answer in response to a specific question.
- Date: The person can provide a date to indicate for example, when a certification was obtained.
- For a question with a single or multiple answers, decide if you want to display the answers with radio buttons or using a drop-down menu.
- Enter the question.
- Enter a short label for the question. The Short Label is not required. However, it’s recommended to define one if using this functionality with Oracle HCM Cloud Mobile.
- For a question with a single or multiple answers, enter possible answers.
- If you select the option Show Comment, a text box appears where evaluators will be able to enter justifications to the answers provided.
- Select a category to classify the question.
- Select the Active status.
- Click Save and Close.
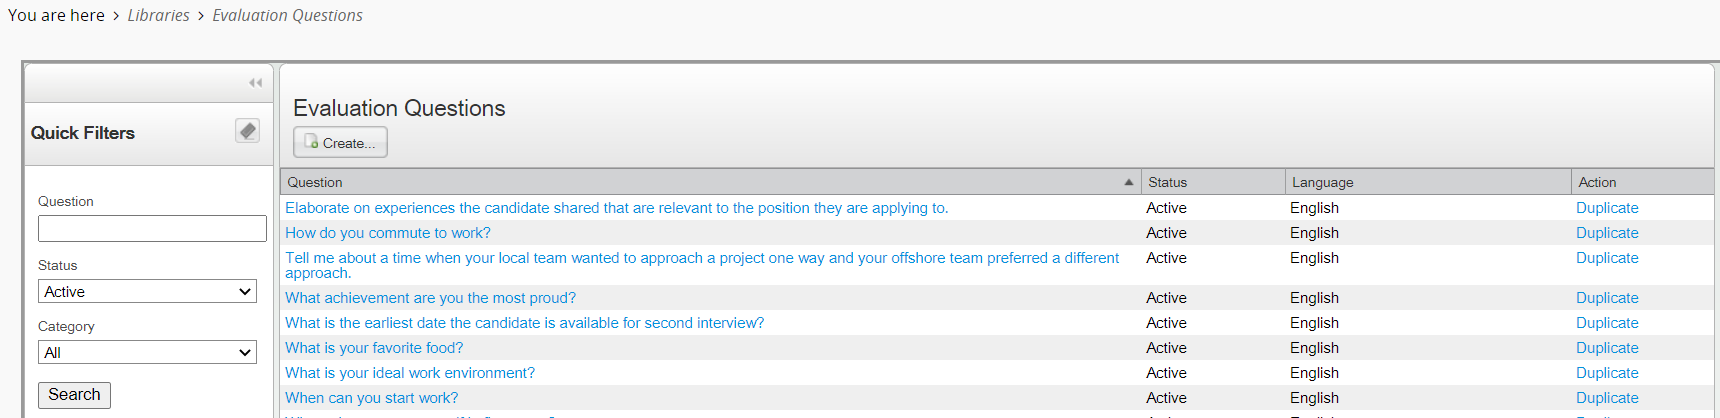
Evaluation Questions
Evaluation Skills: This is where you can create and manage skills used in evaluation questionnaires. Before you create a skill, look at the existing skills in the Evaluation Skills library. Use quick filters to refine the list by skill (enter one or multiple words), status, and category. If you don’t see the skill you’re looking for, create a new one.
To create an evaluation skill:
- In the Library menu, select Evaluation Skills.
- Click Create.
- When you create a skill, the answer type Skill Rating Scale is displayed by default. The answer is always displayed with radio buttons. You can’t modify these values.
- Enter the skill.
- Enter a short label for the skill. The Short Label is not required. However, it’s recommended to define one if using this functionality with Oracle HCM Cloud Mobile.
- Select a category to classify the skill.
- Select the Active status.
- Click Save and Close.
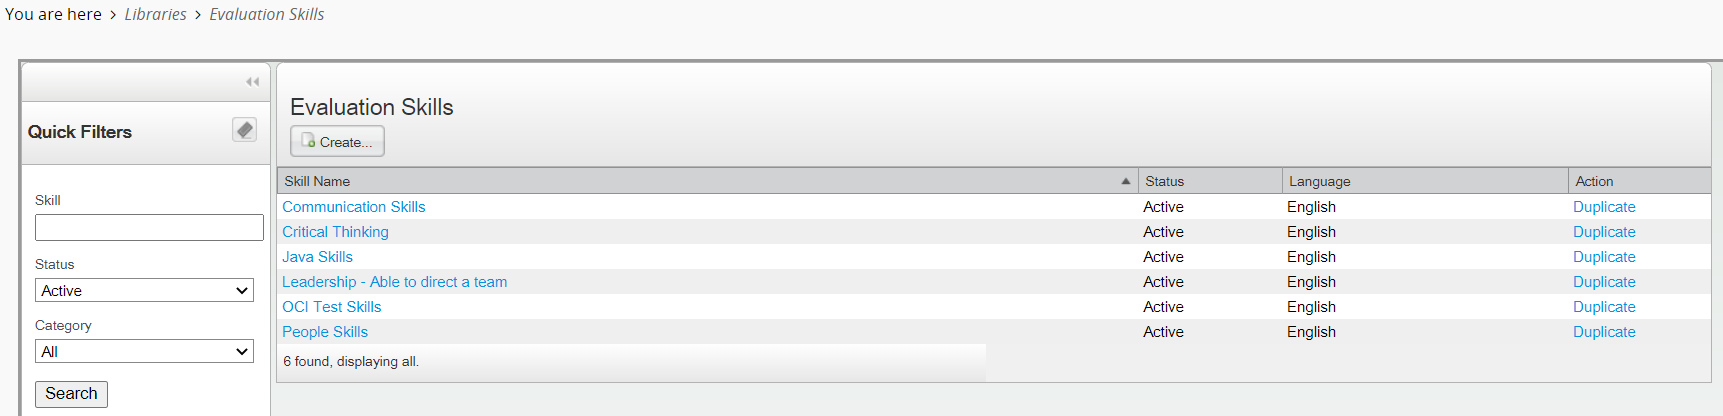
Evaluation Skills
Evaluation Questionnaires: Questionnaires contain questions and skills used to capture an evaluator’s info during a candidate interview. Before you create a questionnaire, look at the existing questionnaires in the Evaluation Questionnaires library. Use quick filters to refine the list by questionnaire (enter one or multiple words), status, and category. If you don’t see the questionnaire you’re looking for, create a new one.
To create an evaluation questionnaire:
- In the Library menu, select Evaluation Questionnaires.
- Click Create.
- Complete the information in the Properties tab. Enter the name of the questionnaire, a short label, and instructions on how to complete the questionnaire. Indicate if you want to display the Questions tab, Skill Ratings tab, and the Overall Recommendation in the questionnaire. If you decide to include the recommendation, you can select the format of the Recommendation response and indicate if the recommendation is mandatory.
- Go to the Questions tab to add questions to the questionnaire. You can indicate which questions as required. Evaluators will have to answer the question when completing the evaluation questionnaire. You can also add weight values to question answers. You can also remove questions, reorder questions, and hide or show question details.
- Go to the Skill Ratings tab to add skills to the questionnaire. Click Select Rating Scale to add a rating scale to apply to the questionnaire. Rating scales are created by your administrator. Once the rating scale is selected, you can define which skills are required when evaluators complete questionnaires. You can add, remove, and reorder skills (which were defined in the Evaluation Skills library). When skills have been added, you select the desired skill level for each skill.
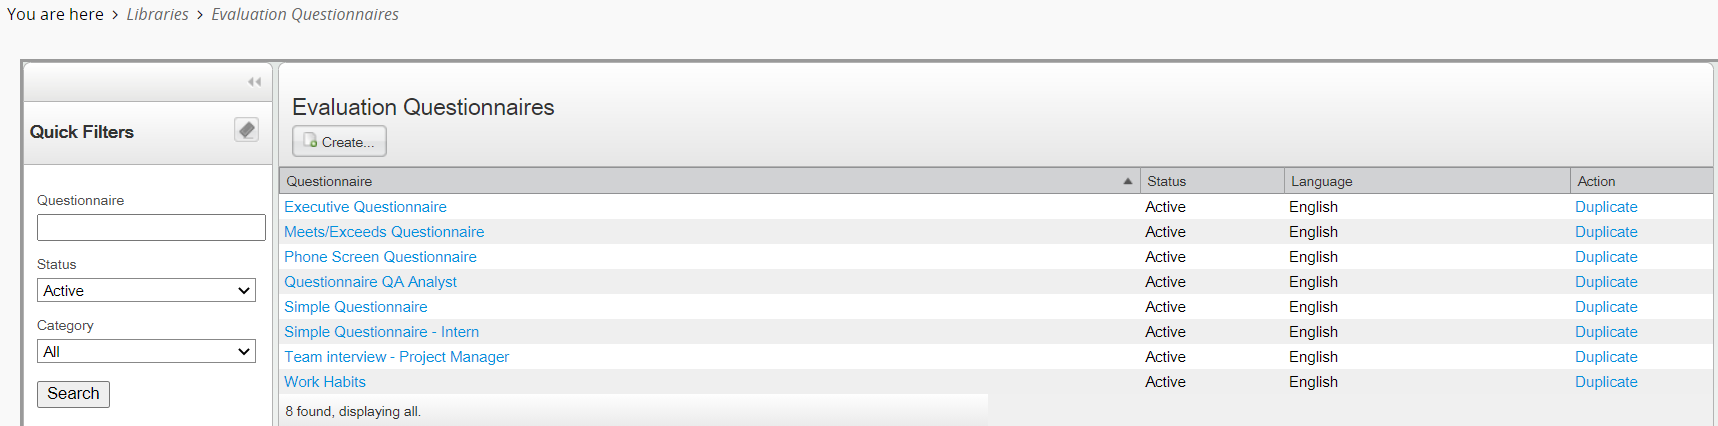
Evaluation Questionnaires
With this feature, content managers will create evaluation questionnaires more easily and will be able to organize questions, skills, and questionnaires in the library.
Steps to Enable
You don't need to do anything to enable this feature.
You can find a specific requisition using the Look up a requisition tool.
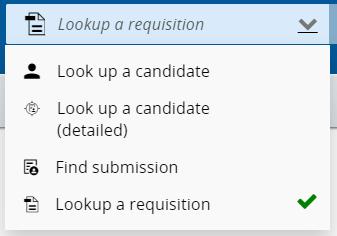
Look Up a Requisition Tool
Let’s say for example that you want to find a requisition for an Analyst position. Enter the term Analyst in the Search field. The system will list all the requisitions titled Analyst, QA Analyst, Technical Analyst, Research Analyst, and so on. You can refine the search by entering the terms Technical Analyst. The system will apply the AND boolean operator by default and display Technical Analyst requisitions in the search results. If the criteria matches a single requisition, you’re taken directly to the requisition details page.
With this feature, you can quickly find a specific requisition that you know exists in the database.
Steps to Enable
To configure the requisition quick search, you need to:
- Enable the Search Widget setting.
- Grant the Requisition Search permission.
- Create a list format to display search results.
Enable the Search Widget Setting
- Go to Configuration > SmartOrg Administration > Configuration Profiles.
- Click a configuration profile.
- Use the Keyword search in the Refine by menu and search for Search Widget.
- Click the Search Widget setting.
- Click Edit.
- Enable the setting by selecting the Yes value.
- Click Save.
Grant the Requisition Search Permission
- Go to Configuration > SmartOrg Administration > User Types.
- Click a user type.
- Expand the Recruiting functional domain.
- Click Edit next to Search.
- Select the Access requisition search permission.
- Click Save.
Create a List Format to Display Search Results
- Go to Configuration > Recruiting Administration > List Formats.
- Click on the Candidate tab.
- Select a variation in the Show list.
- Click the Search Results / Quick Search list format context.
- In the Context Details page, under the Formats for this Context tab, click New.
- Provide a name for the list format.
- Translate the name of the list format using the Languages menu.
- You can enter comments.
- You can specify if the list format you’re creating will be the default list format for the context.
- Select which columns will be used to display candidate info.
- Order columns in the list format by selecting a number in the Sequence Number column then click Reorder.
- Decide how to sort the info. You can use up to three different sorting criteria.
- Select the Active option to enable the list format.
- Click Done.
Library for Requisition Templates
As a content manager, you can create, view, edit, and manage requisition templates in the Library. These templates are then used by recruiters and hiring managers to create requisitions.
You can access the Library from the hamburger menu. Select Requisition Templates to view the list of available templates.

Library Menu
When you view the list of requisition templates, you can use filters and the Keyword search to find a specific requisition template. You can click the title of a requisition template to open it and view all of its details. You can also edit its content.
You can also create new templates using the guided process. The creation process is similar to the creation of requisitions. When you create a requisition template, you can select an existing template to base it upon. When you save the newly created requisition template, its status is Draft. You need to activate it to make it available for use. You can activate it by selecting the Active status within the template.

Create New Requisition Template Guided Process
When you view a requisition template, the left pane displays a summary of key highlights about the template. When you create or edit a requisition template, the left pane displays a table of contents of the requisition template sections. You can click section titles to quickly navigate to that specific content.
With this feature, content managers will create requisition templates more easily and will be able to organize their library to meet their needs.
Steps to Enable
You don't need to do anything to enable this feature.
Library for Prescreening Questions
As a content manager, you can create, view, edit, and manage prescreening questions in the Library. These prescreening questions can then be added to requisitions by recruiters and hiring managers to screen candidates and find the best candidates for a job.
You can access the Library from the hamburger menu. Select Questions to view the list of available prescreening questions. Active questions are displayed by default.
Library Menu
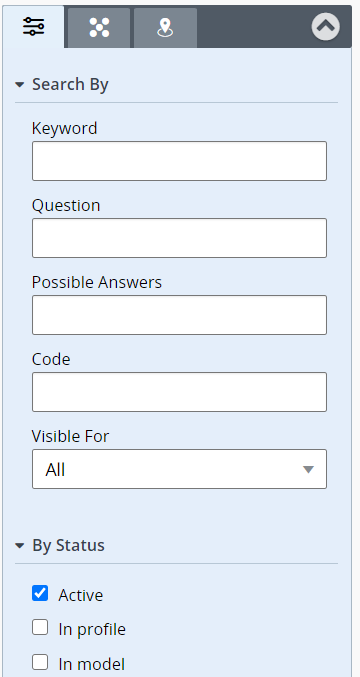
When you view the list of questions, you can use filters and search fields to find a specific question. You can also use the Job Field and Location tabs in the filter panel to view questions by job field or location.

Filter Tabs
You can click the title of a question to open it and view all of its details. You can also edit its content.
You can also create new questions. When you create a new question, you can associate it to locations and job fields. This help recruiters and hiring managers to select the appropriate questions in the Question selector as per their business needs. If you decide to associate a question to locations or job fields, two options are available:
- In profile: The question will be available to users who create candidate profiles, and to candidates who are entering their profile in a career section. Questions will be sorted to match the location and job field preferences defined by the candidate.
- In model: The question will be added to requisitions when recruiters select the Apply Model option in the Prescreening section of a requisition. Questions will be grouped in a model based on the location and job field of the requisition.
Here’s how you create a prescreening question:
- In the Questions list, click Create Question. The Question Details page appears.
- Enter a code for the question.
- Enter the question in the Question field.
- Select the type of answer:
- Single answer: The candidate selects one answer from a list of choices.
- Multiple answers: The candidate selects as many answers as applicable from a list of choices.
- Text answer: The candidate types a brief answer in response to a specific question. Use text questions sparingly; use them where they can allow for expansion of information asked in a previous question.
- For a question with a single or multiple answers, decide if you want to display the answers with radio buttons or using a drop-down menu. Provide possible answers to the question.
- For a text answer, indicate the number of lines available for the candidates to provide an answer.
- You can associate the question to locations and job fields. Click Add/Modify and select specific locations and job fields. If you select the option Associate with Root, the questions will be available for all locations and all job fields.
- Change the status to Active to make the question available for selection in requisitions.
- Click Save and Close.
With this feature, content managers will create prescreening questions more easily and will be able to organize their library to meet their needs.
Steps to Enable
You don't need to do anything to enable this feature.
Library for Disqualification Questions
As a content manager, you can create, view, edit, and manage disqualification questions in the Library. These disqualification questions are then used in requisitions to screen candidates.
You can access the Library from the hamburger menu. Select Disqualification Questions to view the list of available disqualification questions. Active questions are displayed by default.

Library Menu
When you view the list of disqualification questions, you can use filters and search fields to find a specific question. You can also use the Job Field and Location tabs in the filter panel to view questions by job field or location.
Filter Tabs
You can click the title of a question to open it and view all of its details. You can also edit its content.
You can also create new questions. When you create a new question, you can associate it to locations and job fields. Disqualification questions are displayed in a requisition if the locations and job fields of the question matches the locations and job fields of the requisition. If you decide to associate a question to locations or job fields, two options are available:
- In profile: The question will be available to users who create candidate profiles, and to candidates who are entering their profile in a career section. Questions will be sorted to match the location and job field preferences defined by the candidate.
- In model: The question will be added to requisitions when recruiters select the Apply Model option in the Prescreening section of a requisition. Questions will be grouped in a model based on the location and job field of the requisition.
Here’s how you create a disqualification question:
- In the Disqualification Questions list, click Create Disqualification Question. The Disqualification Question Details page appears.
- Enter a code for the question.
- Enter the question in the Question field.
- Select the type of answer:
- Single answer: The candidate selects one answer from a list of choices.
- Multiple answers: The candidate selects as many answers as applicable from a list of choices.
- Text answer: The candidate types a brief answer in response to a specific question. Use text questions sparingly; use them where they can allow for expansion of information asked in a previous question.
- For a question with a single or multiple answers, decide if you want to display the answers with radio buttons or using a drop-down menu. Provide possible answers to the question.
- For a text answer, indicate the number of lines available for the candidates to provide an answer.
- For each answer, you need to indicate the result:
- The candidate passes.
- The candidate is disqualified.
- To be verified: the candidate file must be reviewed.
- For each answer, you can indicate if the candidate is required to provide an explanation for their answer.
- You can associate the question to locations and job fields. Click Add/Modify and select specific locations and job fields. If you select the option Associate with Root, the questions will be available for all locations and all job fields.
- Change the status to Active so the question can be added to requisitions.
- Click Save and Close.
With this feature, content managers will create disqualification questions more easily and will be able to organize their library to meet their needs.
Steps to Enable
You don't need to do anything to enable this feature.