
- Revision History
- Overview
- Feature Summary
-
- Campus Community
- Student Financials
- Student Records
- Student Admissions
-
- View Improved User Interface on Admissions Pages
- Create Admissions Activity Reports
- Set the Evaluation Status on an Admissions Application
- Add a Category to Admissions Attachments
- View Program Fee on Admissions Notification
- Process Admissions Applications
- Send Recommendation Invitations
- Add Branding to Admissions Pages
-
- Transactional business Intelligence for Student Management
This document will continue to evolve as existing sections change and new information is added. All updates appear in the following table:
| Date | Feature | Notes |
|---|---|---|
| 21 JUN 2019 | Created initial document. |
Student Management delivers cloud based, flexible, extensible best practice business flows to support how you enroll your students, maintain their personal information, and manage their payments. From a learner taking anon-credit course to the degree-seeking student, Oracle’s Student Management enables institutions to anticipate students’ needs, illuminate their academic path, and empower them to succeed.
This guide outlines the information you need to know about new or improved functionality in this update, and describes any tasks you might need to perform for the update. Each section includes a brief description of the feature, the steps you need to take to enable or begin using the feature, any tips or considerations that you should keep in mind, and the resources available to help you.
Give Us Feedback
We welcome your comments and suggestions to improve the content. Please send us your feedback at oracle_fusion_applications_help_ww_grp@oracle.com.
Column Definitions:
Report = New or modified, Oracle-delivered, ready to run reports.
UI or Process-Based: Small Scale = These UI or process-based features are typically comprised of minor field, validation, or program changes. Therefore, the potential impact to users is minimal.
UI or Process-Based: Larger Scale* = These UI or process-based features have more complex designs. Therefore, the potential impact to users is higher.
Customer Action Required = You MUST take action before these features can be used by END USERS. These features are delivered disabled and you choose if and when to enable them. For example, a) new or expanded BI subject areas need to first be incorporated into reports, b) Integration is required to utilize new web services, or c) features must be assigned to user roles before they can be accessed.
| Ready for Use by End Users Reports plus Small Scale UI or Process-Based new features will have minimal user impact after an update. Therefore, customer acceptance testing should focus on the Larger Scale UI or Process-Based* new features. |
Customer Must Take Action before Use by End Users Not disruptive as action is required to make these features ready to use. As you selectively choose to leverage, you set your test and roll out timing. |
|||||
|---|---|---|---|---|---|---|
| Feature |
Report |
UI or |
UI or |
Customer Action Required |
||
New Subject Area: Higher Education - Sponsor Agreement Real Time |
||||||
Oracle Campus Community includes everything that is shared among different Student Management product areas, whether person records or common setup objects for implementing Student Management.
Use the redesigned JET External Organization pages to create and edit your external organizations. Go to Academics, Curriculum, Actions, External Organizations. Use this navigation for the 19C release.
Subjects and External Courses are planned for the future.
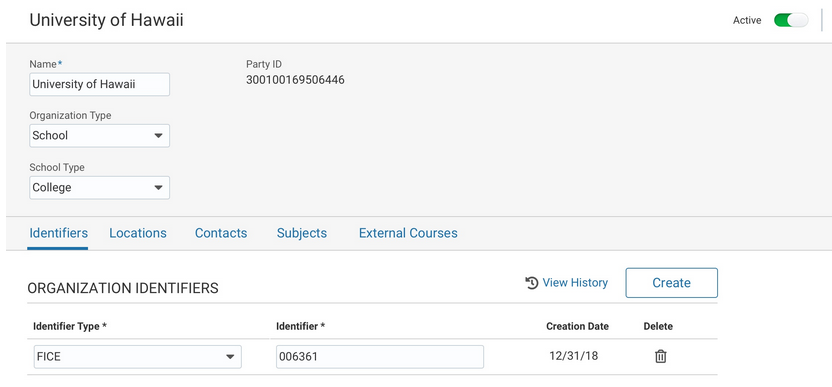
External Organizations
Steps to Enable
No steps are required to enable this feature.
Define a Branding Style for Each Storefront
Specify the branding style for each storefront. Each storefront, such as an Undergraduate storefront or a Continuing Education storefront, can display a different logo and color theme.
This shows a branding style associated with two storefronts:
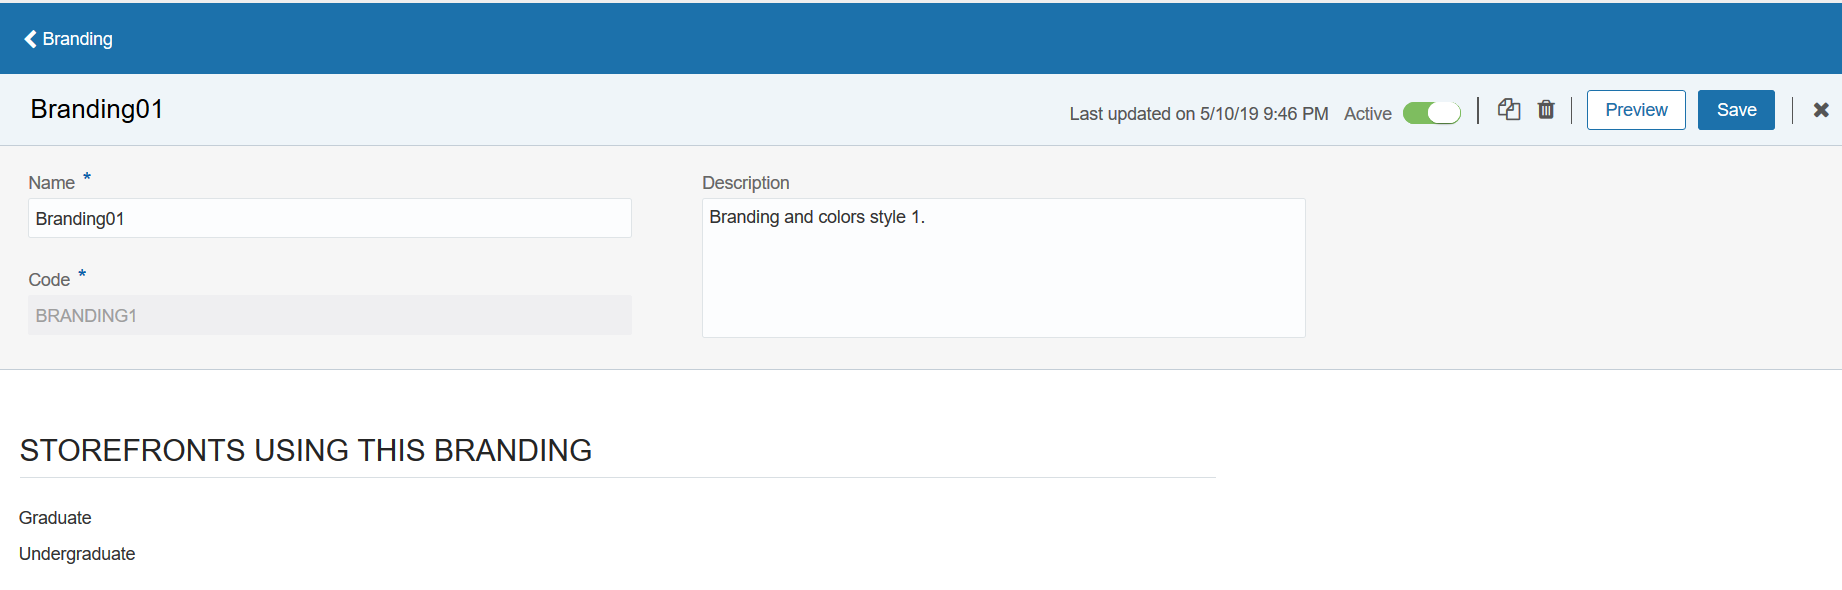
Branding Page (1 of 2)
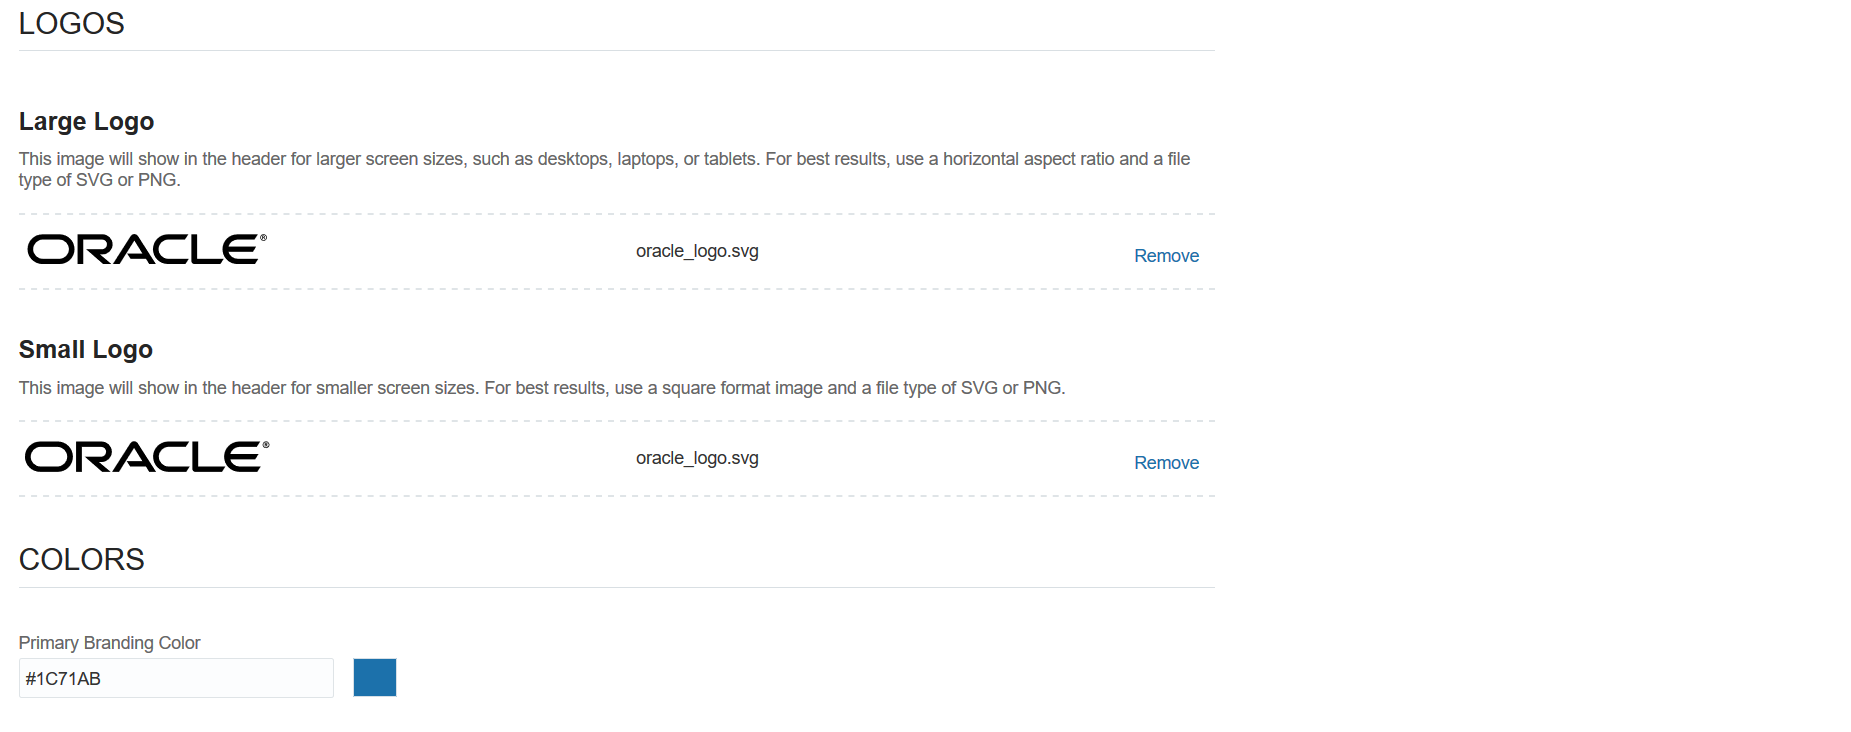
Branding Page (2 of 2)
Steps to Enable
- Create a branding style on the Branding page. To access the Branding page, select the Specify Branding and Colors setup task in Academic Structures functional area.
- Access the Storefront page. To access the page, select the Manage Storefronts setup task in the Academic Structures functional area.
- On the Storefront page, associate the branding style with the storefront. For example, here a branding style is associated with Undergraduate storefront.
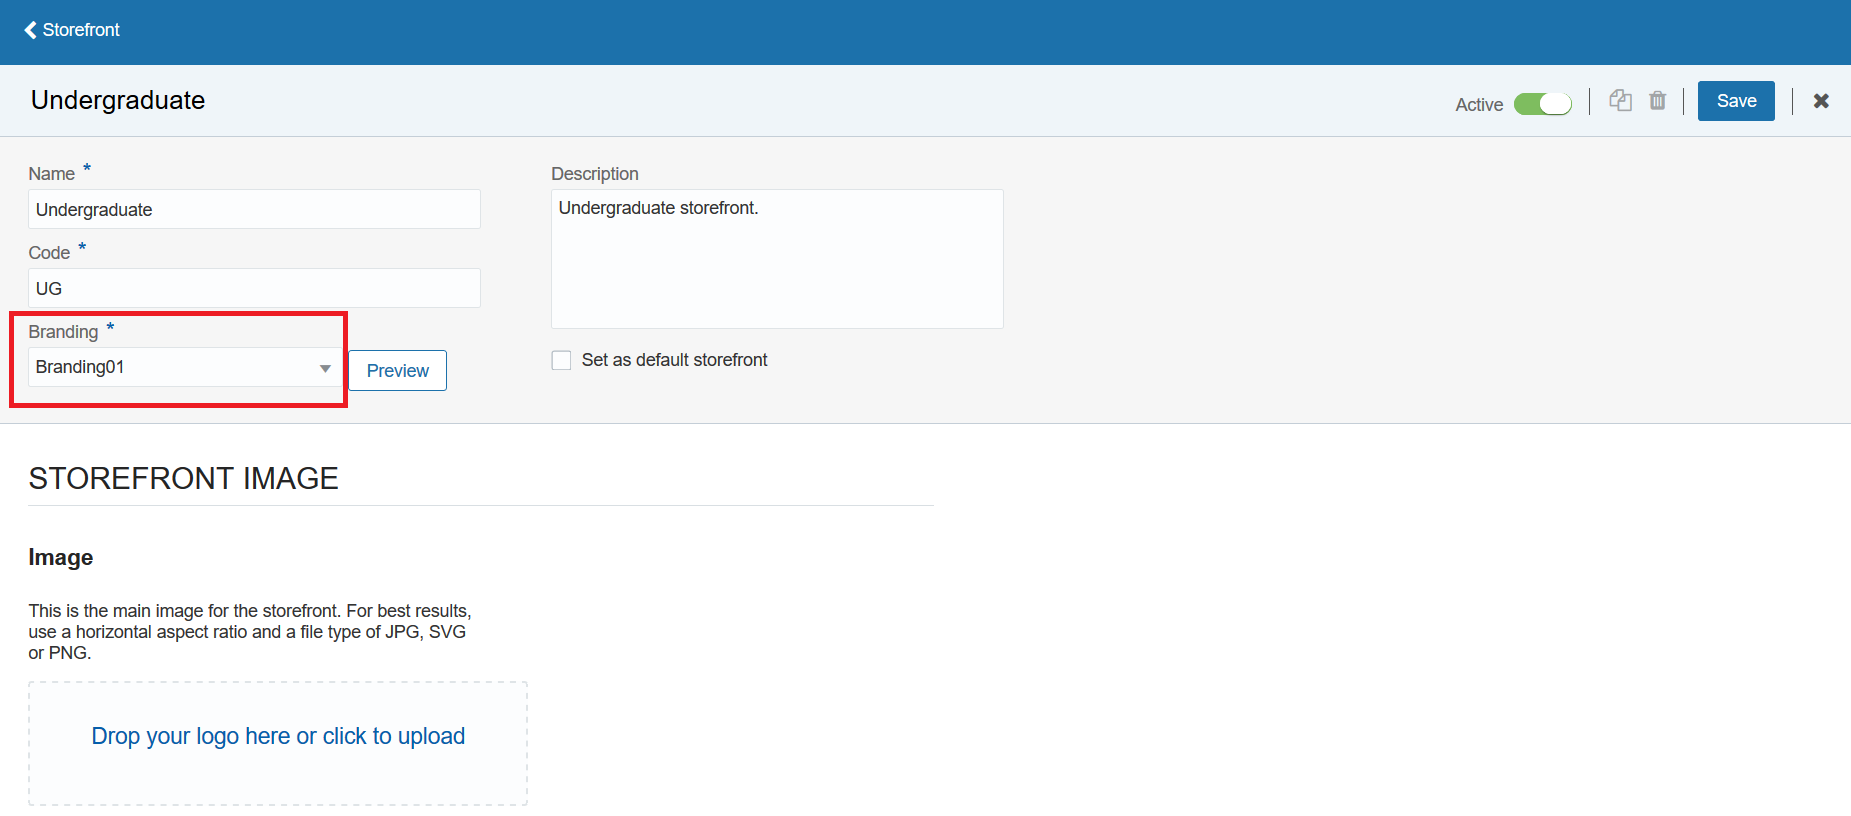
Branding Style Selected for a Storefront
Send Communications for Various Events
Send communications to students and applicants when these events occur:
- A student selected manual fee payment option.
- A checklist is assigned to an applicant.
- A checklist is completed by an applicant.
Steps to Enable
- Add the event to a student management category. To do that, select the Manage Student Management Categories setup task in Student Structures functional area.
- From the home page, click Academic Tools > Communications.
- Click Create Communication on the Communications work area.
- Define the notification content for the event.
View the latest statuses of emails sent to students and applicants. Examples of statuses are delivered, undelivered, and in process.
Steps to Enable
No steps are required to enable this feature.
Tips And Considerations
To view the statuses:
- On the home page, click Academic Tools > Communications to access the Communications work area.
- In the work area, select a communication. For example, select Admissions Application Submission.
- Click the Activity tab on the Communication page to view the statuses of emails sent.

Activity Tab
Categorize Communication Events
Categorize events that trigger communications using the redesigned category page. For example, organize events such as admissions application submitted and admit decision made into an admissions category. To access the page from the home page, select Setup and Maintenance > Setup: Student Management > Student Structures > Manage Student Management Categories.
Steps to Enable
No steps are required to enable this feature.
Tips And Considerations
On the Student Management Category page, click the Add Event button in the Communication Events section to see the complete list of delivered events.
Manage Person Details: Admissions Applications
As an administrator, view a summary of a person’s applications after searching for a person in the Person Search page. From a person page, you can navigate to the admissions pages to get more details about an application.
Steps to Enable
No steps are required to enable this feature.
Tips And Considerations
To view a summary of person's applications:
- From the home page, click Academics > Person Search.
- Search for the applicant. For example, you can search using the applicant's name or email address.
- On the Person Details page, click the Applications tab.
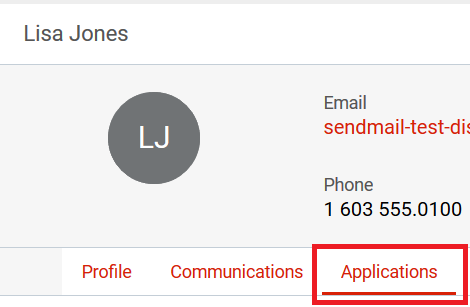
Applications Tab
The cloud application prevents duplication of user accounts by automatically checking for existing user names and email IDs. This check is done when a student or applicant attempts to create a user account.
If the application identifies an existing user name or email ID, it directs the user to the Sign In page to recover the user name or password.
Steps to Enable
No steps are required to enable this feature.
Students and applicants can quickly find add-ons such as parking and insurance services, while browsing for courses and programs.
Users can find the add-on categories on the home page:
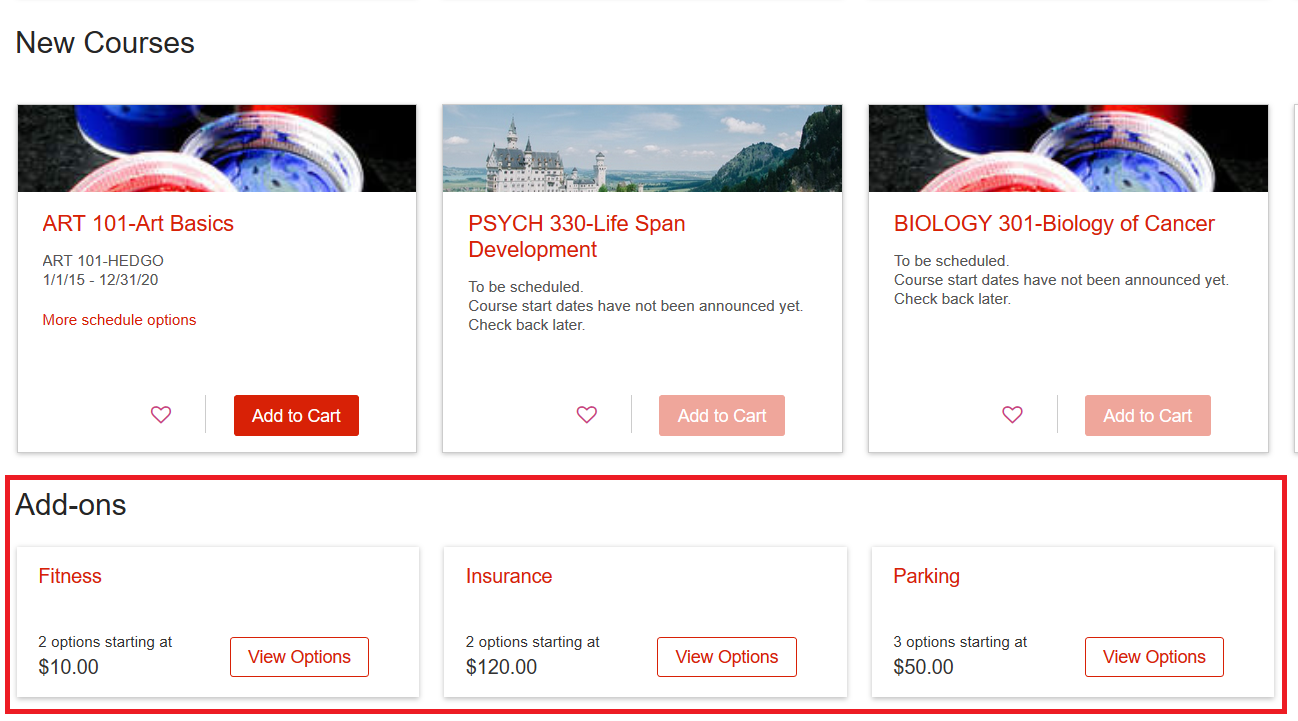
Add-on Categories
When users click View Options for a category, such as Insurance, they can find the specific plans on the Add-ons tab:
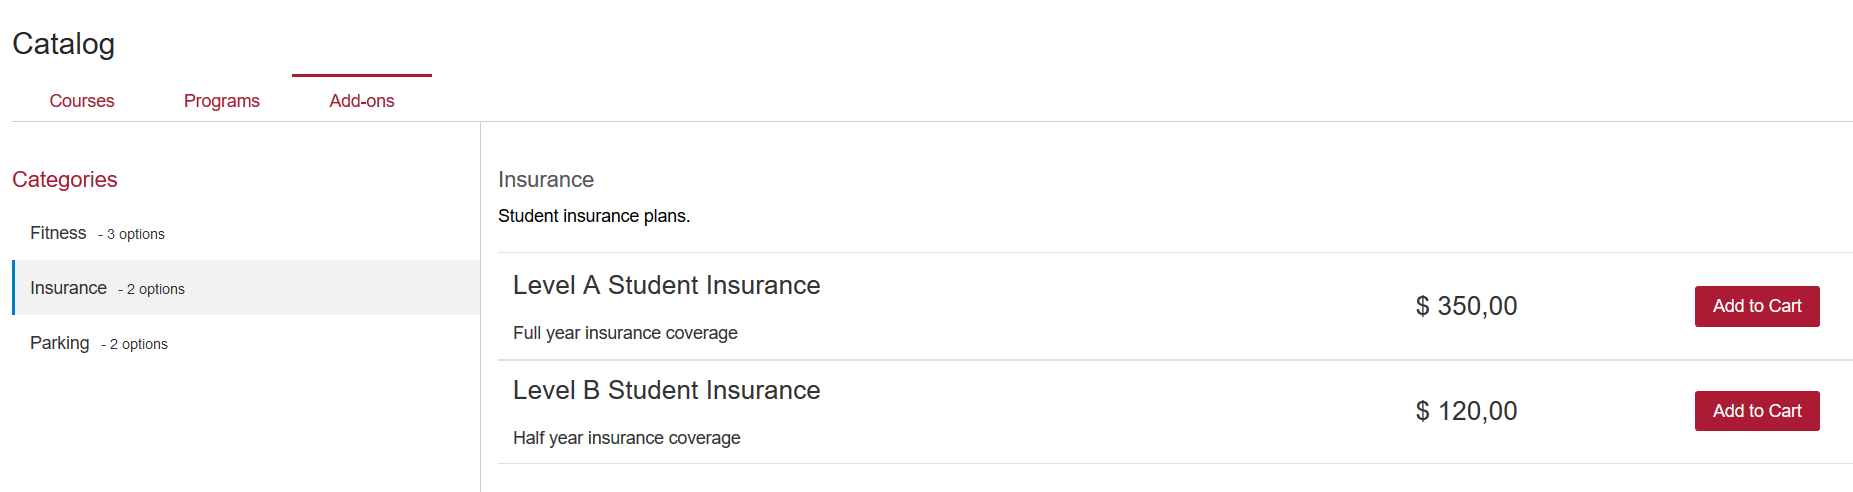
Add-ons Tab
Alternatively, users can click the Browse Catalog and Add-ons link on the home page, to navigate to the Add-ons tab.
Steps to Enable
Add-ons are set up using the Manage Miscellaneous Categories task and the Manage Miscellaneous and General Fees task. These two setup tasks are in the Student Structures functional area.
Oracle Student Financials is a tool for higher education institutions to manage student receivables, billing, and payment collection. Using Student Financials, both staff and students can quickly find and use the financial information they need to make critical decisions. Staff can actively manage student accounts by performing functions such as creating charges, accepting payments, processing refunds, and generating receipts.
Set up Student Management to allow your institution to collect payments manually. When you enable manual payment collection, students who enroll in programs or courses can choose to pay in person or over the phone. The instructions to pay manually appear on the page. Students can also send the instructions to their email address.
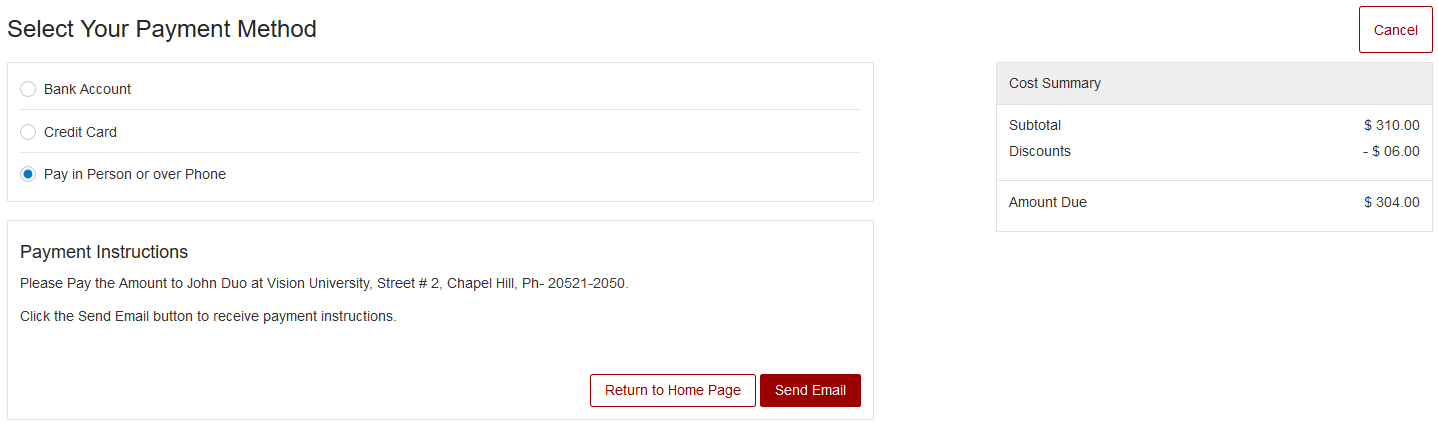
Select Your Payment Method Self-Service
To process student fees manually:
- From the home page, click Academics > Finances.
- Search for the student, then select that student's account.
- From the student's account summary page, click Actions > Review Student Cart Items.
- On the Review Cart page, click Continue.
- On the Select Your Payment Method page, select Collect Payment Manually.
- When you've collected payment, click Confirm Payment. Doing this generates a receipt. The transaction is posted to the student's account, and the student is enrolled.
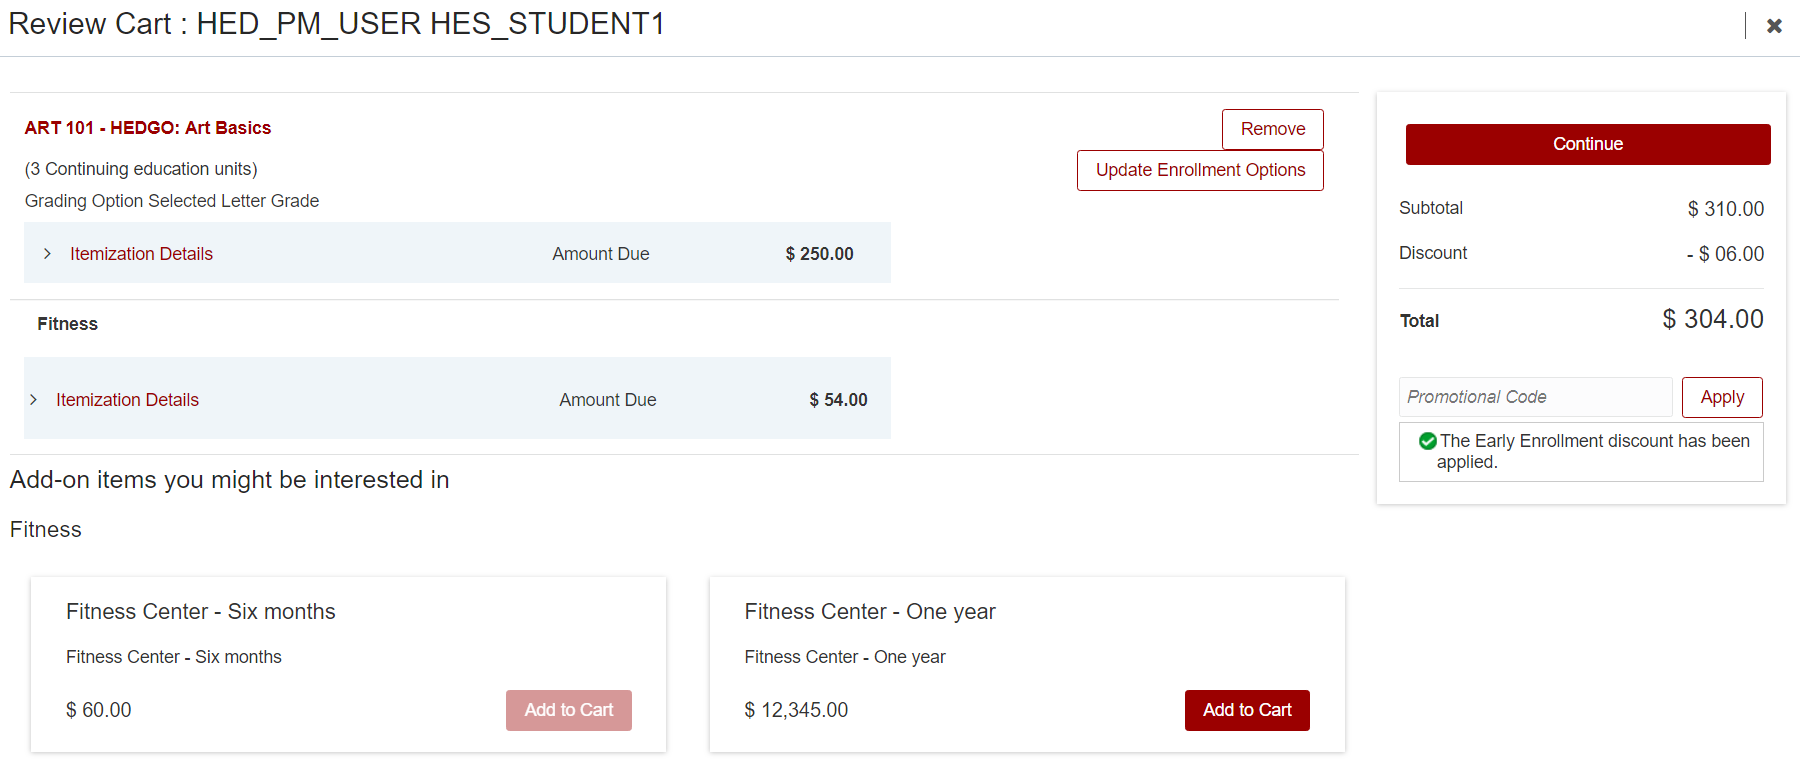
Review Cart Page
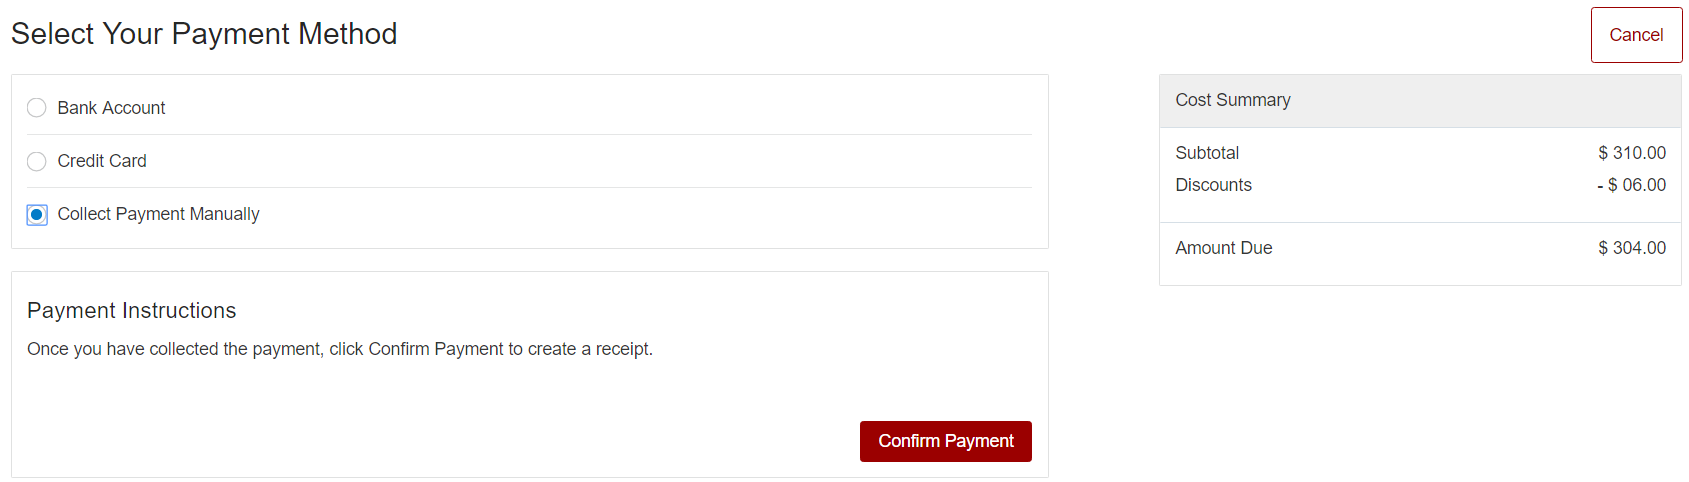
Select Your Payment Method Page
Steps to Enable
To enable manual payments, go to the Student Financials System Options page.
- Log in as an administrator.
- From the home page, click Setup and Maintenance.
- In Setup, select Student Management.
- In Functional Area, select Student Structures.
- In Task, select Manage Student Financial Options.
- On the Student Financials System Options page, click Self Service.
- In Manual Payments, select Allow manual payment collection.
- In Default Receipt Method, select Cash.
- In Checkout Message, enter the message you want to display to students when they make payments in self-service. You must provide a message when you allow manual payment collection. This message should tell students how to make the payment offline.
- Click Save and Close.
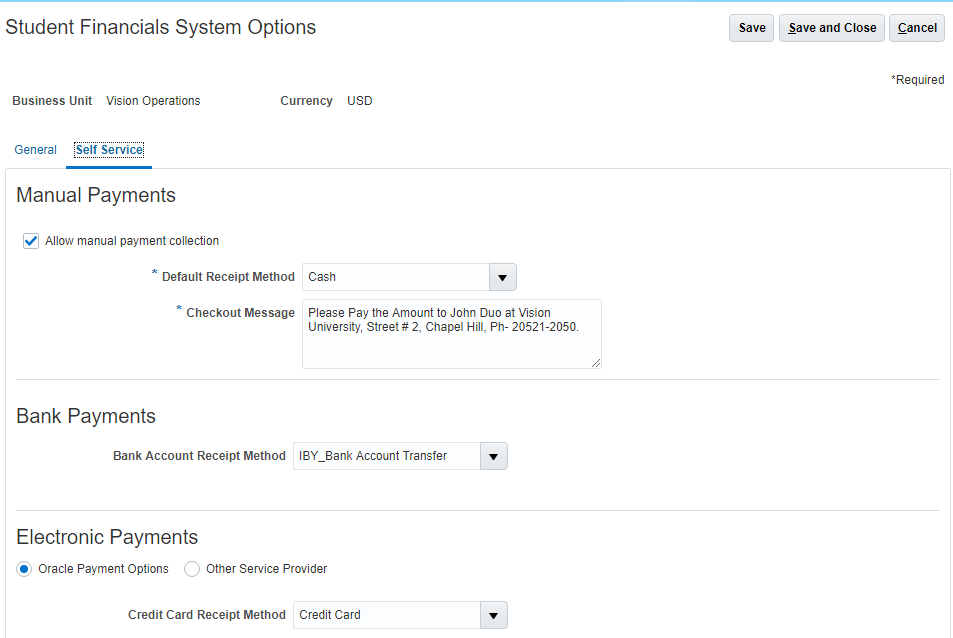
Student Financials System Options for Self-Service
Tips And Considerations
You can set up manual payment collection as well as online payments on the Student Financials System Options page. When you do this, students see both payment options in Self-Service.
Oracle Student Records enables you to set up and maintain your academic structures, curriculum structures and items, and academic calendars. You can enter, track, and process all academic information – from the course catalog and schedule of courses to student programs. You can enroll, grade, and evaluate students.
Set Up Enrollment Repeat Checking
Set up enrollment repeat checking to control what happens when a student tries to enroll in a previously completed course. Complete the setup for both the academic level and the course.
A student is considered to have completed a course if the student previously enrolled in the course (the student’s enrollment status was Enrolled).
ACADEMIC LEVEL SETUP
Select an enrollment repeat option to determine how the enrollment process handles course repeats at a particular academic level.
| Enrollment Repeat Option | What Happens When a Student Tries to Enroll in a Previously Completed Course | Student Enrollment Outcome |
|---|---|---|
| None | Course repeat limits aren't enforced. | The student can enroll in the course without restriction. |
| Warning | The repeat checking routine runs, based on course repeat setup. | The student can enroll in the course but receives a warning message. For example the student is reminded of their previous enrollment. |
| Error | The repeat checking routine runs, based on course repeat setup. | The student can't enroll in the course and receives an error message. |
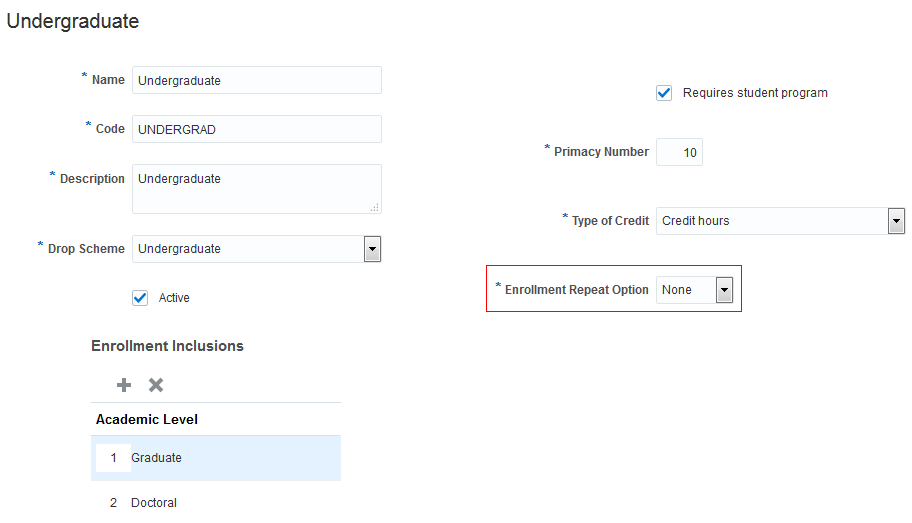
Academic Level Repeat Enrollment Setup
COURSE SETUP
Use the Credit Details section to set repeat checking limits:
- Whether a student can repeat a course.
- How many times a student can repeat (complete) a course. The maximum number of completions includes the original and repeat completions.
- How many units a student can earn for multiple completions of a course. The maximum number of units includes units earned in the original and repeat completions.
- Whether a student can enroll in multiple instances of a course in the same enrollment period. For example, a student might be approved to take two different History independent studies, each with a different supervisor and topic area title.

Course Repeat Enrollment Setup
Steps to Enable
No steps are required to enable this feature.
Override Enrollment Repeat Checking
Override repeat checking validations to enroll a student in a course where repeat isn't allowed or the student exceeds the allowable number of units or completions. Use the repeat limit override when you add the scheduled course to the student’s record.
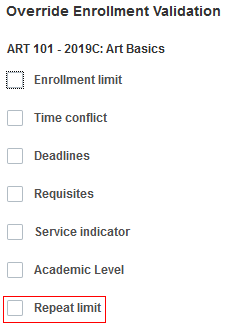
Override Repeat Limit
Steps to Enable
No steps are required to enable this feature.
Set Up Enrollment Permissions for Courses
Set up enrollment permissions to require students to obtain permission to enroll in a course.
COURSE SETUP
When you create a course, use the Administrative Data section to set up enrollment permissions:
- Whether a student must obtain permission to enroll in the course.
- The type of permission, such as instructor or advisor.
- Whether a student can request permission.
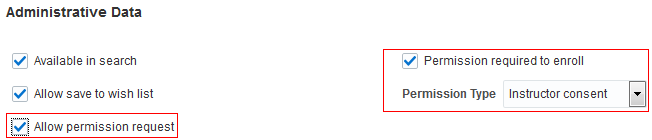
Course Permission
SCHEDULED COURSE SETUP
You can also set up enrollment permissions for a particular instance of a course. For example, course Math 101 doesn’t require permission. But for the scheduled instance Math 101-A, the student must meet with the course instructor before enrolling. Use the Enrollment section to set up permissions when you schedule a course.
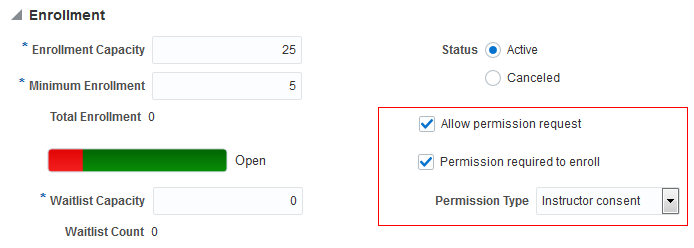
Scheduled Course Permission
This setup is the first step towards the enrollment permissions feature. The ability to use the setup in enrollment processing is planned for the future.
Steps to Enable
No steps are required to enable this feature.
When you process a student’s withdrawal from a reporting period, the student is automatically dropped from all enrolled courses.
For each course, you can indicate whether the student attended and the last date of attendance.
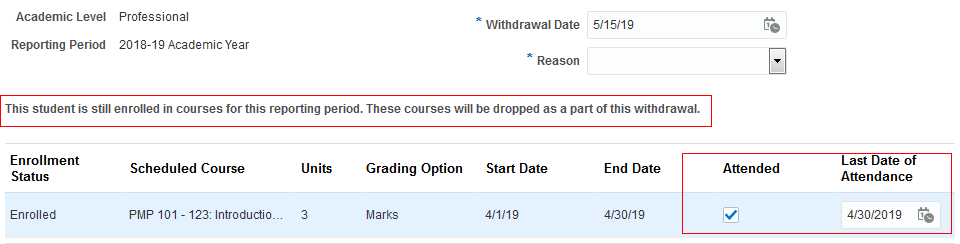
Withdrawal Processing
Steps to Enable
No steps are required to enable this feature.
Use Smart List Search for Course Lists
Use the smart list search option to create a set of broadly defined search criteria and preview the search results. The ability to save the criteria for use by a consuming UI is planned for the future.
To access the redesigned JET Course List pages, go to Academics, Curriculum, Actions, Maintain Course Lists. Use this navigation for the 19C release.
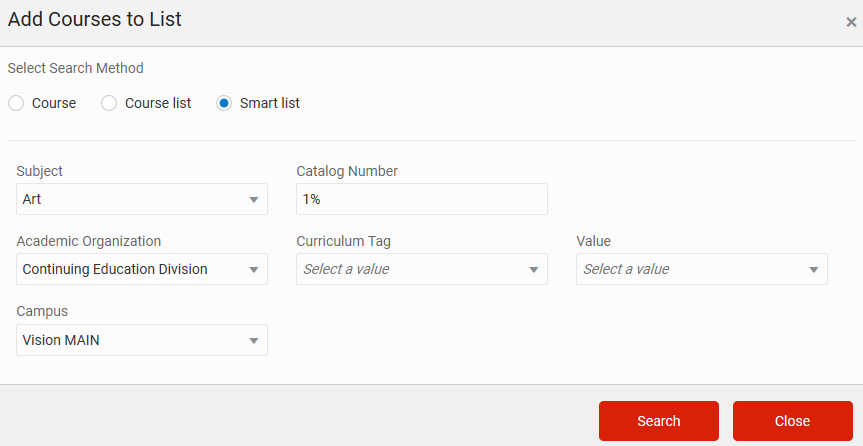
Course List: Smart List Search
Steps to Enable
No steps are required to enable this feature.
Use these predefined result types to enable statistics calculation for courses where the result doesn’t carry grade points and isn't calculated for GPA:
- Period No GPA Earned Units
- Cumulative No GPA Earned Units
Steps to Enable
No steps are required to enable this feature.
Oracle Student Admissions enables users to enter, track, and process the submission of the admissions applications.
View Improved User Interface on Admissions Pages
You have three user interface improvements to help you complete admissions tasks:
-
The new Creation Date column, added to the applications list view, lets you see when each application was created:
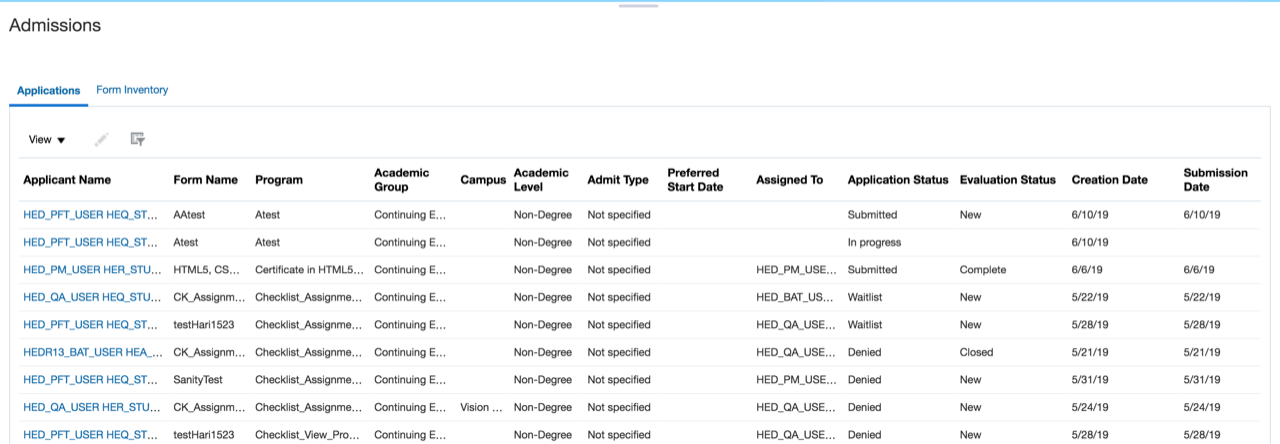
New Creation Date Column
-
The messages icon is now added to the global header for all admissions and student-facing pages:

Messages Icon
-
Students and administrators can now open an attachment while submitting an application or revisiting an in-progress application:
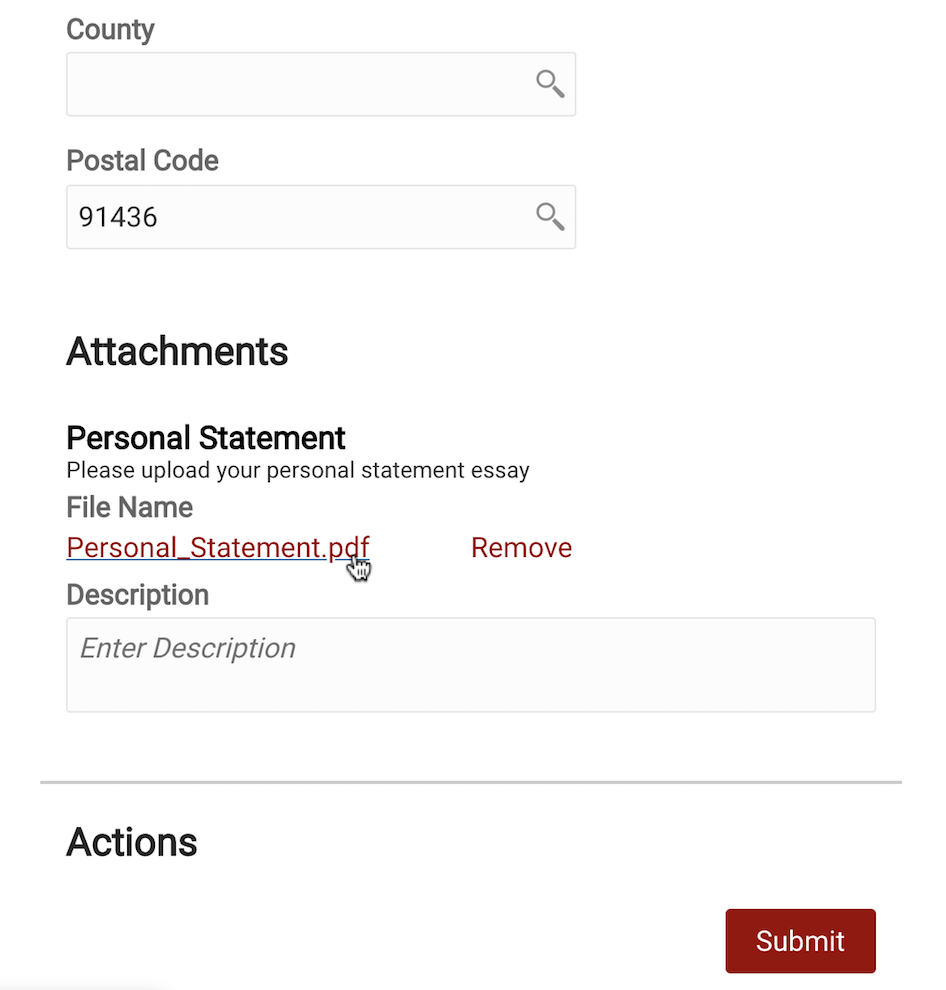
Open an Attachment
Steps to Enable
No steps are required to enable this feature.
Role Information
The user must have the Admissions Manager role.
Create Admissions Activity Reports
Enhance your Student Management reporting with new Relationships reporting and reporting on App Composer custom fields. You can use this new reporting capability to monitor admissions activity.
Steps to Enable
Leverage new subject areas by adding to existing reports or using in new reports. For details about creating and editing reports, see the Creating and Administering Analytics and Reports book (available from the Oracle Help Center > Applications Common > Books).
Set the Evaluation Status on an Admissions Application
Select a value listed in the new Evaluation Status field to update an application's status as it moves through your institution's admissions process.
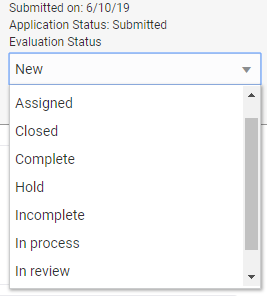
Evaluation Status Field
This helps you update the application from a central location as an applicant completes checklist items or submits other outstanding information.
Steps to Enable
No steps are required to enable this feature.
Role Information
The user must have the Admissions Manager role.
Add a Category to Admissions Attachments
When designing a new application form (Admissions > Form Inventory), or editing an existing one, you can add a section to capture attachments.
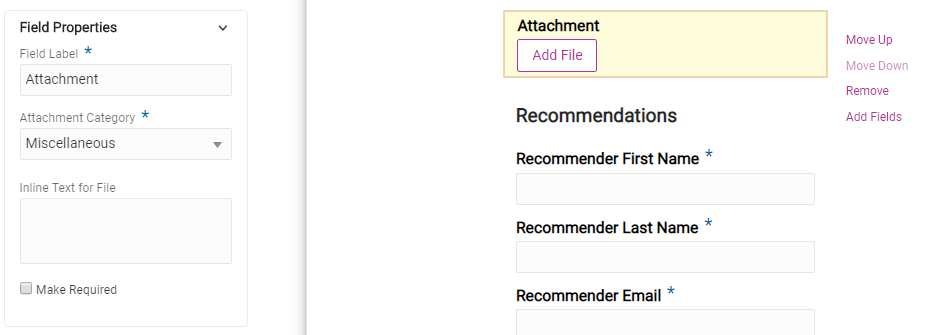
Attachment Section
Now you can select a specific category for that attachments section to organize the files associated with the application.
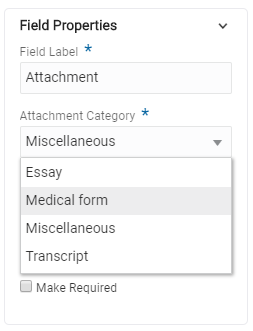
Attachment Category Field
Steps to Enable
No steps are required to enable this feature.
Role Information
The user must have the Admissions Manager role.
View Program Fee on Admissions Notification
The admissions confirmation emails that students receive now contain relevant program fee information.
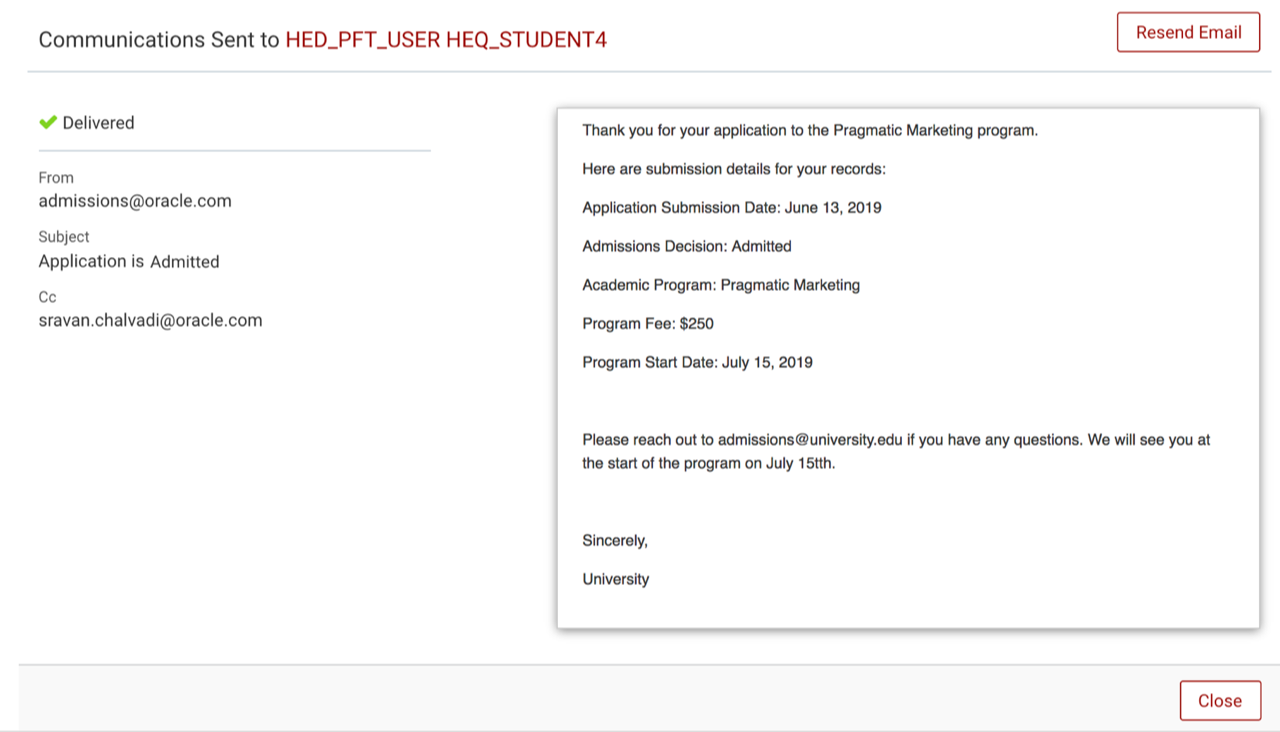
Student Communications with Program Fee
Steps to Enable
No steps are required to enable this feature.
Process Admissions Applications
You can assign a new checklist to any application form.
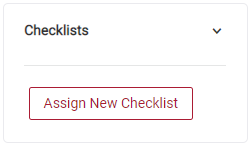
Checklists Section
Click the Assign New Checklist button to select a checklist category, specific checklist, and view any tasks associated with it.
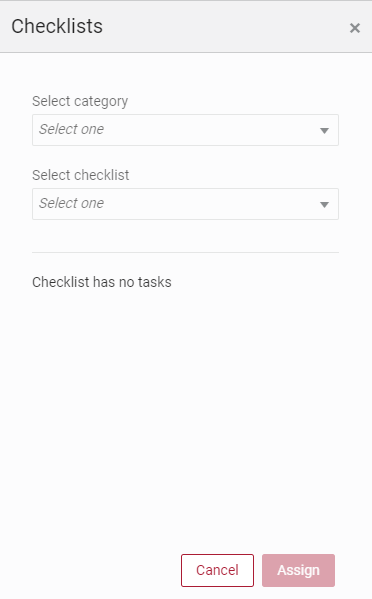
Checklist Selection Window, with No Tasks
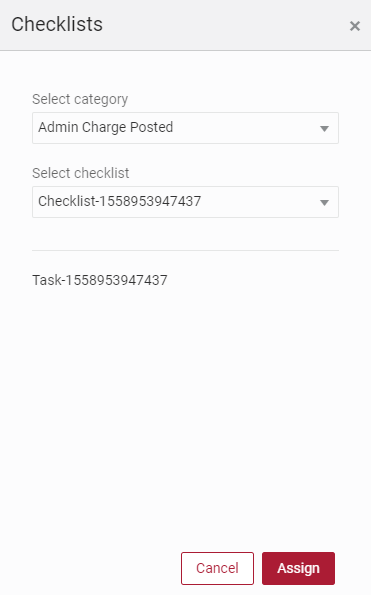
Checklist Selection Window, with Tasks
If the checklist has a task list associated with it, you can click Assign to assign the tasks to an admissions administrator. Assigning a checklist triggers automated emails to the applicant notifying them of the details involved with each step of the task.
Steps to Enable
No steps are required to enable this feature.
Send Recommendation Invitations
If your institution has added a Recommendations section to an application form, this functionality will be available to prospective students. The applicant dashboard page displays all applications for the student, as well as their statuses. When students select an in-progress application, they can add recommender information at any time.
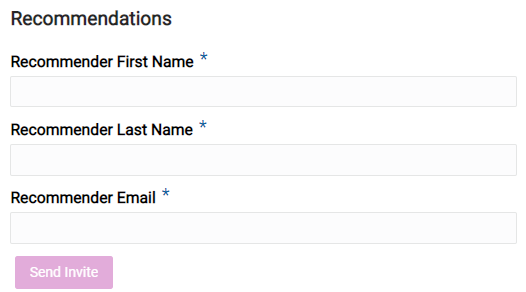
Recommendations Section of an In-Progress Application
Students can enter a person's name and email address, then click the Send Invite button to directly invite the person to file a recommendation on the applicant's behalf. The newly saved application then also confirms the recommendation request was sent and records the date.
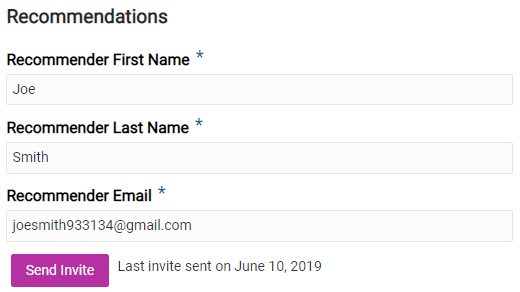
Completed Recommendation Invitation
Steps to Enable
Admissions staff who create the application must add the Recommendations section to the form, to make it available to the student.
Add Branding to Admissions Pages
Similar to the course catalog and other student-facing pages, you can now add the same types of logos, images, and color schemes to Admissions pages shown to prospective students throughout the application process.
Steps to Enable
- Create a branding style on the Branding page. To access the Branding page, select the Specify Branding and Colors setup task in Academic Structures functional area.
- Access the Storefront page. To access the page, select the Manage Storefronts setup task in the Academic Structures functional area.
- On the Storefront page, associate the branding style with the storefront.
Role Information
The user must have the Implementor role.
Transactional business Intelligence for Student Management
Oracle Fusion Transactional Business Intelligence is a real time, self-service reporting solution offered to all Oracle Cloud application users to create ad hoc reports and analyze them for daily decision-making. Oracle Transactional Business Intelligence provides admissions coordinators, academic coordinators, registrars, bursars, academic advisors, and student services managers the critical information to analyze admissions, enrollment, course capacity planning, and student tuition billing accounts.
New Subject Area: Higher Education - Sponsor Agreement Real Time
Enhance your Student Management reporting with this new subject area. You can use this subject area to report on sponsor agreements for external organizations. Details such as agreement name, agreement maximum amount, organization type, and organization name are available for reporting.
This screenshot shows the sponsor agreement subject area:
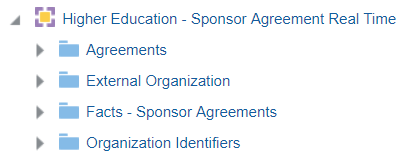
Subject Area for Sponsor Agreement
Steps to Enable
Leverage new subject areas by adding to existing reports or using in new reports. For details about creating and editing reports, see the Creating and Administering Analytics and Reports book (available from the Oracle Help Center > Applications Common > Books).
---