
This document will continue to evolve as existing sections change and new information is added. All updates appear in the following table:
| Date | Feature | Notes |
|---|---|---|
| 20 MAR 2020 | Created initial document. |
Student Management delivers cloud based, flexible, extensible best practice business flows to support how you enroll your students, maintain their personal information, and manage their payments. From a learner taking anon-credit course to the degree-seeking student, Oracle’s Student Management enables institutions to anticipate students’ needs, illuminate their academic path, and empower them to succeed.
This guide outlines the information you need to know about new or improved functionality in this update, and describes any tasks you might need to perform for the update. Each section includes a brief description of the feature, the steps you need to take to enable or begin using the feature, any tips or considerations that you should keep in mind, and the resources available to help you.
Give Us Feedback
We welcome your comments and suggestions to improve the content. Please send us your feedback at oracle_fusion_applications_help_ww_grp@oracle.com.
Column Definitions:
Features Delivered Enabled
Report = New or modified, Oracle-delivered, ready to run reports.
UI or Process-Based: Small Scale = These UI or process-based features are typically comprised of minor field, validation, or program changes. Therefore, the potential impact to users is minimal.
UI or Process-Based: Larger Scale* = These UI or process-based features have more complex designs. Therefore, the potential impact to users is higher.
Features Delivered Disabled = Action is needed BEFORE these features can be used by END USERS. These features are delivered disabled and you choose if and when to enable them. For example, a) new or expanded BI subject areas need to first be incorporated into reports, b) Integration is required to utilize new web services, or c) features must be assigned to user roles before they can be accessed.
| Ready for Use by End Users Reports plus Small Scale UI or Process-Based new features will have minimal user impact after an update. Therefore, customer acceptance testing should focus on the Larger Scale UI or Process-Based* new features. |
Action is Needed BEFORE Use by End Users Not disruptive as action is required to make these features ready to use. As you selectively choose to leverage, you set your test and roll out timing. |
|||||
|---|---|---|---|---|---|---|
| Feature |
Report |
UI or |
UI or |
|
||
Create Chronological Sequence for Academic Reporting Periods |
||||||
Control Program Selection When Adding Programs for a Student |
||||||
Oracle Campus Community includes everything that is shared among different Student Management product areas, whether person records or common setup objects for implementing Student Management.
Show or hide pages or parts of a page to a user by specifying the page elements that their user role has access to.
Steps to Enable
Make the feature accessible by assigning or updating privileges and/or job roles. Details are provided in the Role section below.
- Sign in as IT Security Manager.
- Click Setup and Maintenance.
- In the Setup list, select Student Management.
- In the functional area, click Users and Security.
- Click the Manage Application Access task. If you do not see this task on the list, ensure that the Show list specifies All Tasks.
- Click Pages. Locate the page you want to specify the access permissions for, click the ellipses in that row, and click Assign Detailed Page Access.
- Select the role you're specifying the permissions for.
- Expand the Page Elements list, and for each page element, click inside the Permissions field, and select the permissions. If the page elements are not displayed, ensure that the Page Access toggle is set to show the elements. You can specify permissions for as many roles as you need to.
- When done, click Save.
Role Information
You need the IT Security Manager role to do these tasks.
To control what data is visible to users, create a mapping between a data profile and a role. When users log in, they see only those parts of data from the business object that their role has access to, through the data profile.
Steps to Enable
Make the feature accessible by assigning or updating privileges and/or job roles. Details are provided in the Role section below.
- Sign in as IT Security Manager.
- Click Setup and Maintenance.
- In the Setup list, select Student Management.
- In the functional area, click Users and Security.
- Click the Manage Application Access task. If you do not see this task on the list, ensure that the Show list specifies All Tasks.
- Click Data Profiles, and then click New Data Profile.
- Specify a name and description for the profile, and then select a business object. To see the fields associated with that business object, click inside the Fields box. Then, select the fields whose values this profile should have access to. You can add as many fields as you need to. When done, click Save. The data profile you created is displayed on the list.
- Click the ellipses on the row for the data profile you just created, and click Assign to Roles. If you don't see the ellipses, scroll towards the right.
- Click Add Role, select a role to add to the profile, and click Add.
- For each of the fields that you enabled for the profile, choose the values to define the security filter conditions on the data set for the business object.
- When done, click Add.
- Use the Add Row option to add more security filter conditions on the data set for the business object. All the security conditions rows are aggregated by the system to define the data set from the business object, that this role has access to.
- When done, click Save.
Role Information
You need the IT Security Manager role to do these tasks.
Create groups of roles or pages, and use these groups later to assign page access permissions to roles in bulk. By doing so, you ensure these things:
- Every user has access to only those pages that are appropriate for their role.
- Effort needed to assign default page permissions for many pages can be minimized.
Steps to Enable
Make the feature accessible by assigning or updating privileges and/or job roles. Details are provided in the Role section below.
- Sign in as IT Security Manager.
- Click Setup and Maintenance.
- In the Setup list, select Student Management.
- In the functional area, click Users and Security.
- Click the Manage Application Access task. If you do not see this task on the list, ensure that the Show list specifies All Tasks.
- Depending on the task at hand, click Page Groups or Role Groups.
- Click Create Page Group or Create Role Group.
- Specify a name and description for the group, and click Add Page or Add Role.
- Select the pages or roles to add to the group, click Add, and then click Save. The page group or role group is displayed on the appropriate list.
Tips And Considerations
At any time, you can add or remove roles or pages to and from groups. You can also delete the groups. Deleting the groups does not affect the page access permissions to users because their access is governed by their user profiles, which are mapped to individual roles and, in turn, mapped to pages.
The bulk assignment functionality is currently not available.
Role Information
To do these tasks, you need the IT Security Manager role.
Search for external organizations by organization type. Record phone and email address for external organization contacts. Load external organization data using an Excel spreadsheet.
Steps to Enable
You don't need to do anything to enable this feature.
Tips And Considerations
To search for an external organization, go to Academics > External Organizations. Enter a value in the organization name field, select an organization type such as school, sponsorship, or business, and click the search button.
To record phone and email address of contacts, search for the external organization. Use the Contacts tab to record the phone and email address of the external organization contacts.
To load external organization data using a spreadsheet:
- Click Navigator > Setup and Maintenance.
- In the Setup list, select Student Management.
- In the Academic Structures functional area, click the Create External Organizations in Spreadsheet task to download the spreadsheet. Use this spreadsheet to add the external organization data. The data can include the names of the external organizations, their locations, contacts, and so on.
- To upload this filled out spreadsheet using the rapid implementation process, click the Upload External Organizations in Spreadsheet task in the Academic Structures functional area.
Oracle Student Admissions enables users to enter, track, and process the submission of the admissions applications.
Associate Fees with Admissions Application
An admissions manager can now associate an application fee with a program. Once configured, an applicant is required to provide payment to be considered for admission. The applicant can complete application fee payments within the context of an admissions application.
When the prospective student submits their application information, they are directed to the Make a Payment page to complete the transaction.
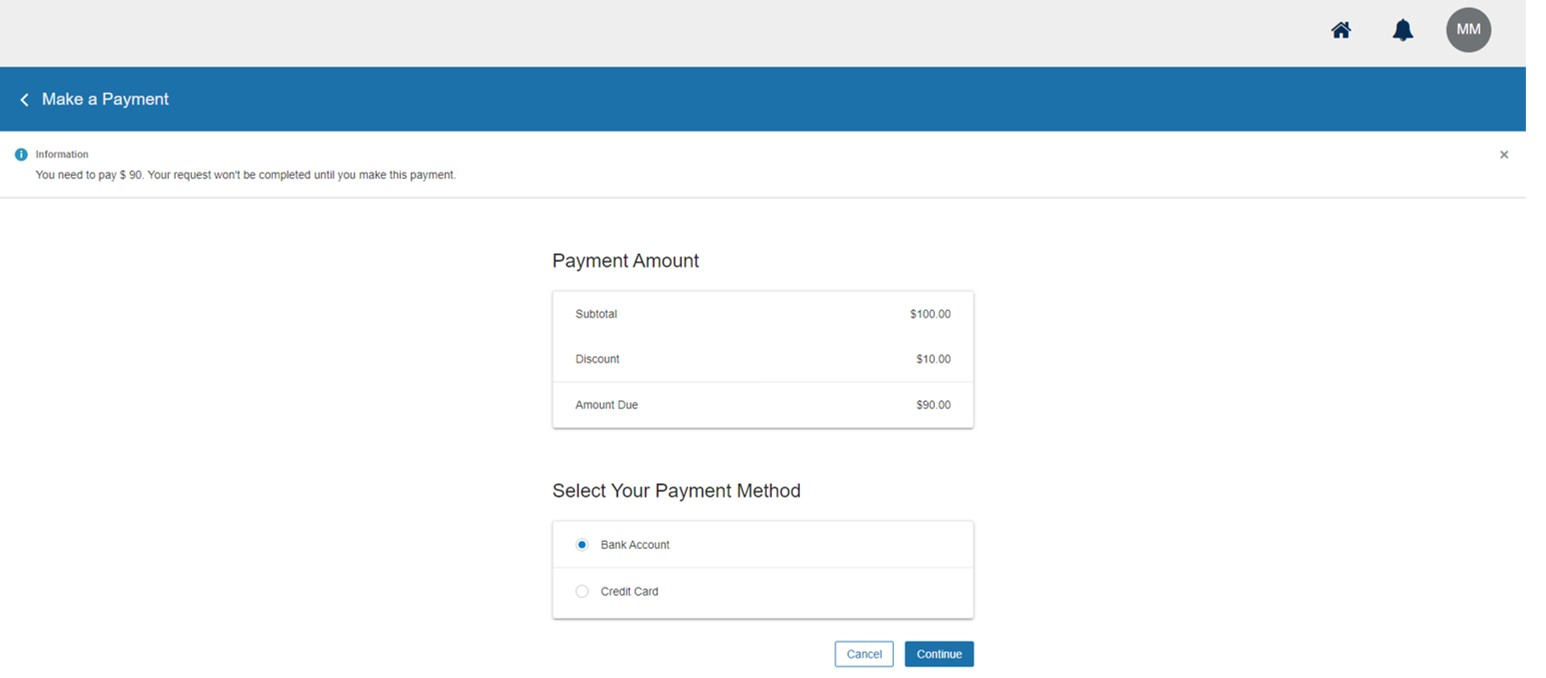
Make a Payment Page
The application fee functionality allows any valid discounts to be applied to the application (such as for early enrollment). Applicants select a payment method and continue through the payment process, receiving a final payment status message at the end.
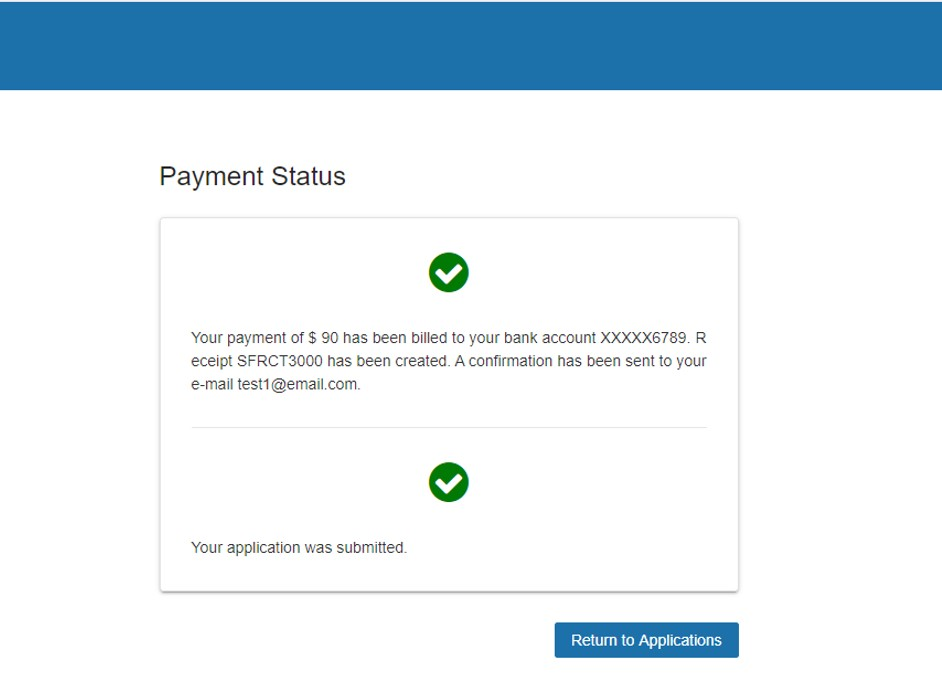
Payment Status Page
Successful payment is required for their application to be considered "submitted"; if payment fails, their application remains in "In progress" status until the fee is paid. On their self service Finances page, users will see paid application fees in their list of transactions.
Steps to Enable
Begin by creating the application fee. In the Academics area, click Finances > Actions > Manage Miscellaneous Fees.

Manage Miscellaneous Fees Page
Next, associate the miscellaneous fee type of application fee with one or more academic programs. In the Academics area, click Finances > Actions > Manage Fees > Fee Associations.
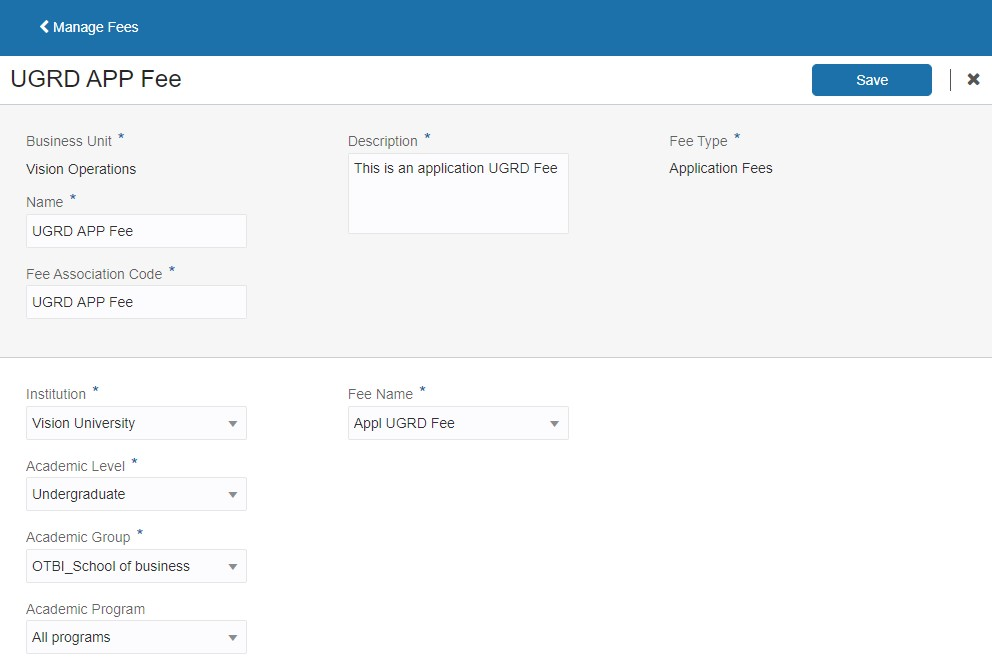
Manage Fees Page
Administrators can set the fee at the academic level (for example, to apply to all continuing education programs if the application fee is the same), to an academic group, or at a specific academic program level.
Role Information
You need the Admissions Manager role to do these tasks.
Updates to the Student Application Form
An admissions manager can now enhance the application form, enabling students to select multiple options for race as well as display and store the admit period. The new user registration page loads when an unauthenticated user attempts to access the admissions form.
RACE
Here are the new multi-select race and ethnicity options. They are available in the Biographical Information section when using Form Builder to create or edit an application form.

Biographical Information on Race
For prospective students, selecting one or more races on an admissions application enables them to submit race information to the university that matches their identity. For admissions administrators, allowing an applicant to identify themselves as Hispanic or Latino, then select one or more races on the admissions application form, enables your institution to collect and report applicants' race information as required by the US Department of Education.
ADMIT PERIOD
An applicant can now select a specific academic period to enter your institution, if their program's application form has been associated with multiple admit periods. Use Form Builder to set up this functionality.
- In the Navigator, in the Academics section, click Admissions > Form Inventory > Details.
- In the Admissions Application Information section, select an Admit Start Type of Period.
- Select one or more reporting periods listed in the Admit Period group box.

Example of Admit Period Options
Once you have associated one or more admit periods with a published application form, prospective students have to choose one of those admit period options to start their program.
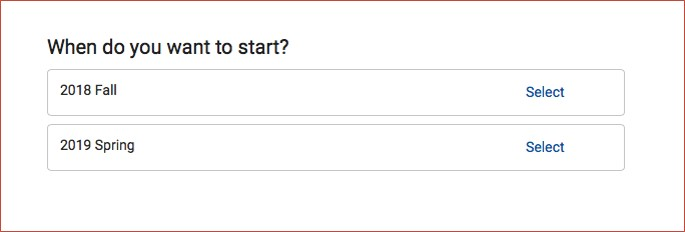
Admit Period Options for an Application Form
NEW USER REGISTRATION
When an unauthenticated user attempts to access an application form using a direct access URL, they are now redirected to the New User Registration page to sign up for an account before beginning their application.
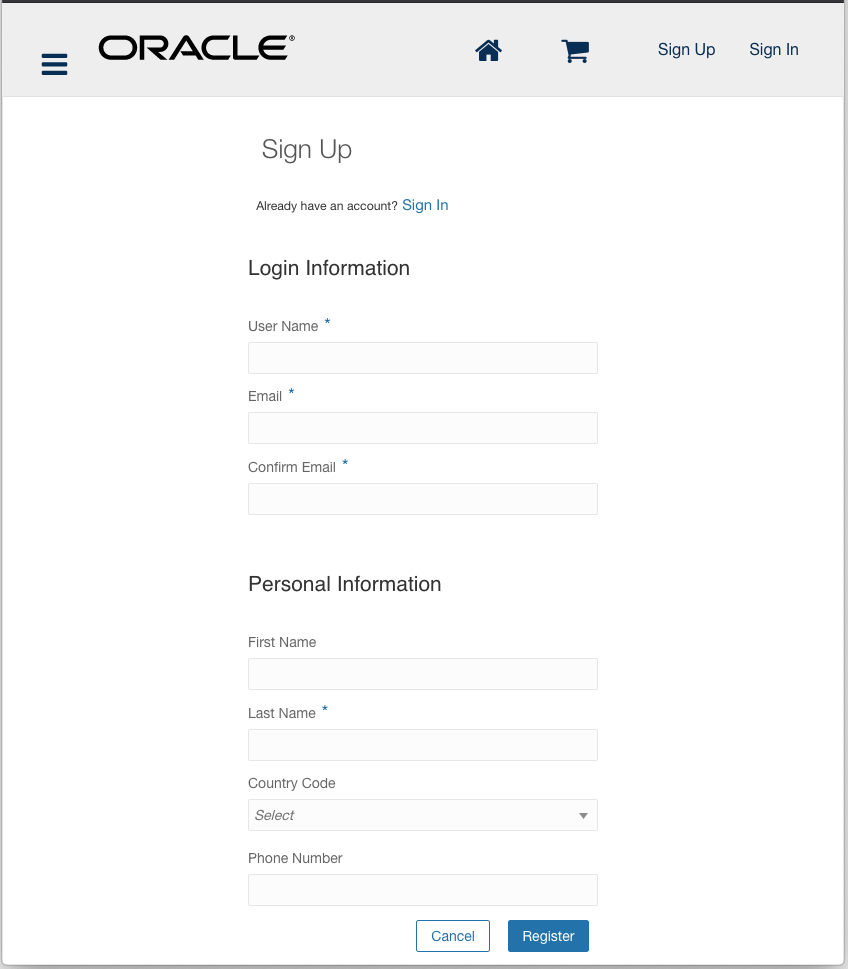
New User Registration Sign Up Page
Steps to Enable
You don't need to do anything to enable this feature.
Role Information
You need the Admissions Manager role to do these tasks.
Oracle Student Records enables you to set up and maintain your academic structures, curriculum structures and items, and academic calendars. You can enter, track, and process all academic information – from the course catalog and schedule of courses to student programs. You can enroll, grade, and evaluate students.
Create and Update Transcript Document Templates
Design transcript document templates for specific student populations. Administrators can design a document layout using a rich text editor. They can also use an extensive list of predefined data fields to include in the transcript.
The Transcript Template section is now available in the Manage Transcript Types task. Use the text editor area to format your data. To insert tokens from the collapsible list, place your cursor in the text editor area, select a token, and click Add. If you are familiar with the syntax, for example {{AcademicLevel}}, you can also type the code in the text editor area.
You can create a transcript template but the ability to produce transcripts isn’t currently available.
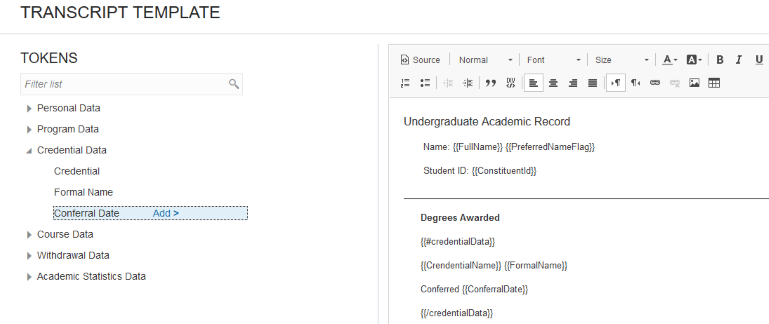
Transcript Template
Steps to Enable
You don't need to do anything to enable this feature.
Create Chronological Sequence for Academic Reporting Periods
Create a chronological sequence of Academic Reporting Periods that mirrors the institutional calendar. Administrators can use this sequence to provide a program timeline for students in their Academic Planner. To support period sequencing:
- Institution is available in the Academic Level tab on the Academic Period page.
- Institution is available in the Academic Level Rapid Implementation spreadsheet.
- Tiers and Tags are removed from the Academic Plan Format Rapid Implementation spreadsheet.
Use the new Manage Period Sequence task to create reporting period sequences by institution and academic level. For example, you might create an undergraduate sequence and a graduate sequence. Or when the institutional calendar is the same for both undergraduate and graduate, you might create a sequence that is shared between undergraduate and graduate students.
The sequence that you create provides a timeline of study for a student in the student’s academic planner. The period in which the sequence begins is the admit period at the academic group level in the student program record (Academics, Learners).
To add sequence periods, click Add Period, search for reporting periods by date range, and select the periods. You can go back later and add more periods for the sequence as needed.
After you add the reporting periods, you can see them listed in order for the sequence. You can expand a period to view the academic periods associated with it (informational only).
You can indicate that a reporting period is optional. For example, if you select the Optional check box for a Summer period, that period doesn’t show automatically in a student’s planner but the student can add the period to their planner.
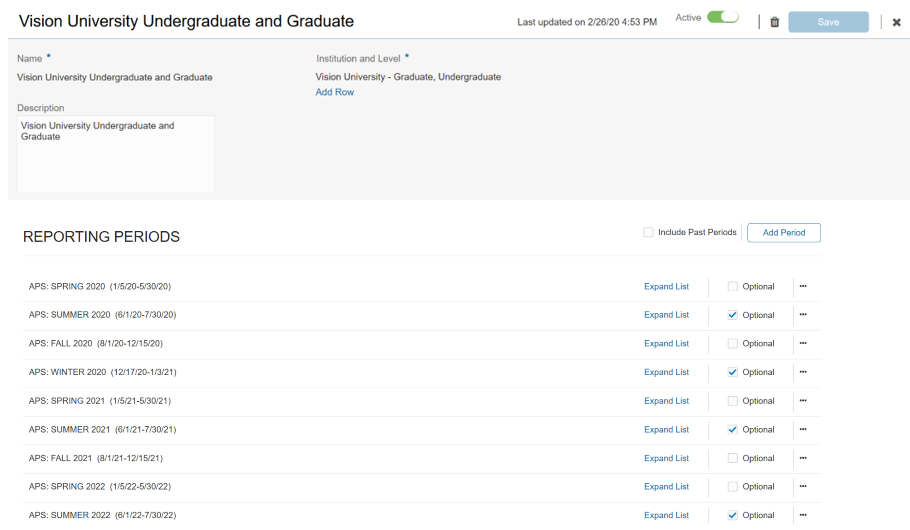
Period Sequencing
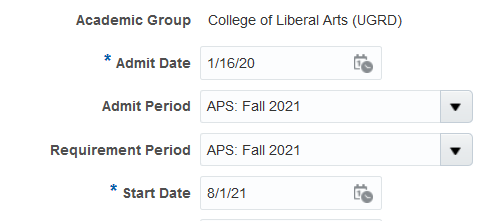
Academic Group_Admit Period
Steps to Enable
You don't need to do anything to enable this feature.
Control Program Selection When Adding Programs for a Student
Control the list of programs that administrators can choose from when adding a program to a student's record. You can also control which student programs an administrator can view and manage. Control is based on the data access profile attached to the user's role or user ID. The data access profile feature allows security administrators to control access to programs using a range of attributes such as institution or academic organization.
Refer to the Campus Community section in this What’s New document for information about how to set up a data profile and assign roles to that profile.
You can create data profiles for these predefined business objects:
- Program: Create this profile to control which programs are available when a user adds a program to a student’s record.
- Student Program: Create this profile to control which programs a user can view and manage (edit or delete) when a user accesses a student’s program record.
DATA PROFILE EXAMPLES
Program by Academic Level:
- The profile is for the Program business object.
- The Registrar role is assigned to the profile.
- The profile applies to a particular set of users.
- The academic level for the profile is Graduate.
A user with this profile wants to add a program to a student’s record (Learners, Programs). When the user clicks Add Program, the user can select from only Graduate programs.
Student Program by Academic Level:
- The profile is for the Student Program business object.
- The Registrar role is assigned to the profile.
- The profile applies to a particular set of users.
- The academic levels for the profile are Non-degree and Professional.
A student is enrolled in a Professional program and an Undergraduate program. When a user with this profile accesses the student’s program record (Learners, Programs), the user can view and take action on only the Professional program data.
Steps to Enable
Make the feature accessible by assigning or updating privileges and/or job roles. Details are provided in the Role section below.
Role Information
You need the IT Security Manager role to do these tasks. Refer to the related Campus Community section in this What's New document.
Generate a Notification When a Scheduled Course Is Canceled
Notify enrolled students when scheduled courses are canceled. Administrators can tailor the communication using predefined data tokens.
Use the new Scheduled Course Canceled event to generate an email notification:
- Create a communication category for the event.
- Create a communication based on that category.
When a user changes the status of the scheduled course from Active to Canceled in the Enrollment section of the Scheduled Course UI, an email notification is automatically sent to all students who are enrolled in the scheduled course.
Refer to the Communication topics in the Implementing Student Management guide, Campus Community chapter.
Steps to Enable
To generate a notification from the Scheduled Course Canceled event:
- Create a communication category for the event.
- Create a communication based on that category.
Track Non-GPA Results for Statistics Calculation
Use a set of predefined Result Types to store more granular academic statistics. Administrators can track units that aren't included in a student's grade point average as a separate metric.
Some new predefined result types are available and some existing result types are renamed. However, the calculation processing for these result types isn't currently available.
Steps to Enable
You don't need to do anything to enable this feature.