
This document will continue to evolve as existing sections change and new information is added. All updates are logged below, with the most recent updates at the top.
| Date |
What’s Changed |
Notes |
|---|---|---|
| 20 JAN 2017 |
Initial Document Creation |
This guide outlines the information you need to know about new or improved functionality in Oracle Taleo Cloud for Midsize (Taleo Business Edition) Release 17A1. Each section includes a brief description of the feature, the steps you need to take to enable or begin using the feature, any tips or considerations that you should keep in mind, and the resources available to help you.
Some of the new Release 17A1 features are automatically available to users after the upgrade and some require action from the user, the system administrator, or Oracle.
The table below offers a quick view of the actions required to enable each of the Release 17A1 features.
| Action Required to Enable Feature |
|||||
|---|---|---|---|---|---|
| Feature |
Automatically Available |
End User Action Required |
Administrator Action Required |
Oracle Service Request Required |
|
| Talent Center Enhancements |
|||||
|
|
|||||
|
|
|||||
|
|
|||||
|
|
|||||
|
|
|||||
|
|
|||||
|
|
|||||
|
|
|||||
|
|
|||||
| Career Center Enhancements |
|||||
|
|
|||||
|
|
|||||
|
|
|||||
| TBE to HCM Cloud (Fusion) Integration |
|||||
|
|
|
||||
| Additional Changes |
|||||
|
|
|||||
|
|
|||||
|
|
|||||

Perform Features on the Talent Center
Employees can now fill out their performance reviews, or self-assessments, on the Talent Center. The reviews are responsive so they can be completed from a mobile device. Any reviews previously assigned or already completed will appear as well, once the Reviews list view widget is added to your Talent Center.
While employees will complete their portion of the reviews from the Talent Center, the managers will still continue to complete reviews for their employees from within Taleo Business Edition. The primary change is in the look and feel as the employee completes the review. The employee eSignature of the review and the resulting PDF document will not be affected by this release.
Employees can also create new goals and submit them for approval, view and edit existing goals, copy, print, and delete goals from the Talent Center. Any goals included in a review can also be scored on the review from the Talent Center.
If you are new to the Talent Center, it is recommended that you review the 16A2, 16B1, and 16B2 release notes to review general Talent Center features. This information is also available in the Help.
Performance Review List View Widget
There is a new list view widget specific to the employee’s self-assessment step of the performance review. This list view widget has not been placed on your Talent Center by default.
If you are currently using the Talent Center for Onboard but you are in the middle of a review cycle and wish to complete your reviews before moving this functionality over to the Talent Center, you can hold off on adding this functionality to the Talent Center. Your employees cannot access their self-assessments from the Talent Center until you have completed this configuration.
Once you are ready for your employees to start using the Talent Center for Perform functions, you can configure the Talent Center accordingly.
Steps to Add the Reviews List View Widget to the Talent Center
NOTE: Although the self-assessment page is responsive for the employee experience, it is not recommended that the administrator configure the Talent Center from a mobile device. It is recommended that the administrator’s employee record have at least one review and goal created previous to the configuration to give the administrator a better understanding of how the configuration changes will appear to employees. A test review or goal can always be created if the employee record doesn’t have a goal or review.
- You must be logged in as an administrator whose User record is linked to an Employee record. Select Administration, then select Customize Perform.
- In the Manage Talent Centers section, click Edit Pages for the Talent Center for which you want to set up Perform. You will have one default Talent Center called ‘Talent Center’ but you may have created additional Talent Centers if you have Onboard as well.
- On the Talent Center Home Page, click + Add new widget at the bottom of the page.
- Click My Reviews List View, and then click Add widget.
- The widget is placed at the bottom, but you may move it to a new location by dragging and then releasing when you see a blue area.
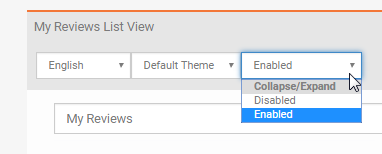
- To rename the list view widget for your employees, click on the widget, enter a new name, and then click the Done button at the top of the widget or click outside of the widget. You may also select another language from the language drop down to change the title for your employees with different preferred locales.
- By default this list view widget will give employees the ability to expand or collapse the widget. You may disable this feature from the third menu.
- You can re-order the columns of this list view by dragging. You can remove certain columns, or click the + icon on the right to add more columns.
- Click the Done button when you have finished configuring the list view.
- Click Save & Publish in the upper right-hand corner to make your changes available for this Talent Center.
NOTE: If your employees will be completing their self-assessments on mobile devices it is not recommended to add too many columns to this list view. Employees will need to scroll to see all the data. Alternatively they can use the Card View.
At this point, any employee who has a current review assigned will see this review from the Active filter on this list view. In addition, any overdue reviews or final reviews will appear in the corresponding filters as well. Configuration changes to list views affect only the Talent Center you are currently configuring.
Performance Review Page Layout
You can configure the layout of the employee’s performance review in a drag and drop interface directly on the Talent Center. You must access the Talent Center through the administration area in order to get to the configuration view.
There is one default page layout that all of your existing review templates will use, but you can create multiple layouts and assign these at the review template level. As previously mentioned, the manager’s experience and the resulting PDF are not changing.
NOTE: The page layouts that have been replaced are the ones called:
EWS – Edit Performance Review
EWS – View Performance Review
You may have multiple versions of these page layouts for custom employee self-assessments that were used by the Employee Website (EWS). If so, you can recreate them from the Talent Center.
Again, it is recommended that you have at least one review assigned to the employee record that is tied to your administrator User record. This is because data is populated from the review so that you can see what the review will look like for your employees.
NOTE: Page layouts for the Talent Center are configured directly from the administrator’s interface on the Talent Center. Any page layouts that you create and configure will be shared across Talent Centers. For example, if you add static HTML to the default performance review page layout, this will be visible for all Talent Centers.
On the other hand, list view widgets can vary between Talent Centers. You may want to remove the Review Type field on a Talent Center designed for one set of employees who only undergo one type of review, and include this field in the list view on another Talent Center designed for employees who undergo multiple review cycles. Because of this feature, you can only have one administrator edit a Talent Center at a time. When a second administrator clicks the Edit Pages link, he or she will receive an alert that another administrator is configuring the Talent Center.
The default Review page layout that is included in the system closely matches the default layouts from the Employee Website (EWS). You should review the default page layout and see if this meets your needs, and if so, no further configuration is needed.
Steps to Configure the Review Page Layout(s)
- If you are still logged into the Talent Center as the administrator, skip to step 3. If you are back in TBE Perform, you must be logged in as an administrator whose User record is linked to an Employee record. Select Administration, then select Customize Perform.
- In the Manage Talent Centers section, click Edit Pages for any Talent Center (remember, the page layouts are shared across Talent Centers).
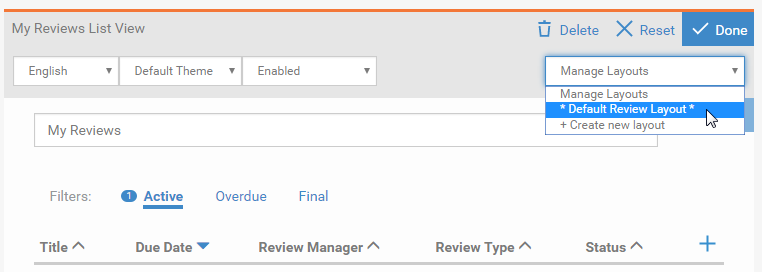
- Once on the Home Page, click the My Reviews list view widget, which will change the list view to Admin Mode.
- Notice there is a Manage Layouts menu just below the buttons. From this menu, select the Default Review Layout option.
- The layout page appears and the data from your most recently assigned review will populate, if available. The layout is comprised of different widgets on the page.
- Click on any of the widgets to configure the fields for that specific section. You can remove fields, add fields, and drag the fields to a different order.
- To change the required or read-only setting for a specific field, click the pencil icon, and then make the changes.
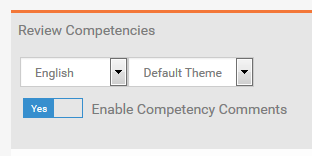
- The Competencies section will display the first competency only while viewing this as an administrator. If you click this widget, you can determine whether or not competency comments are allowed by the employee. This setting is enabled by default.
- If you would like to add instructional text above any of the widgets, click Add new widget at the bottom of the page, select the Static HTML widget, enter your text, and then move the widget to the desired location.
- Each widget is saved by clicking the Done button, but click Save & Publish at the top of the page to save all the changes to your page layout across all Talent Centers.
NOTE: You cannot add the same field two times to the same widget but you can add it again in another widget. However, only one instance of the field can have the Read Only setting set to No. All other instances must be read only. Otherwise, when you Save & Publish, you will get a warning that there are duplicate fields on a particular page layout.
NOTE: Certain fields are set by the system to be read-only or required and cannot be changed. For example, most of the fields in the Review Data section must be read-only because the information is being pulled from the review, and your employees should not be changing this information on a review.
NOTE: The Competencies widget cannot be deleted, unlike other widgets. However, if your review template doesn’t have any competencies assigned this section will not display for the employees.
NOTE: Changes to your page layouts immediately affect all employee self-assessments using those page layouts.
You may change the name of the Default Review Layout page by clicking the Pencil at the top of the page and entering a new name. The asterisks will appear next to the name to indicate that this is the default layout.
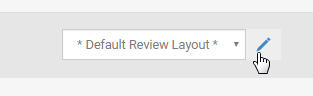
Pencil icon allowing a name change for the page layout
You can clone this layout by clicking the Clone button on the right of the page layout. You can also create other layouts, which will be based on the original look of the Default Review Layout, by selecting Create new layout either from the Manage Layouts menu on the list view, or from the drop down at the top of the layout page.
For custom page layouts, the initial name will always display in English. You can change the name as needed but it can only have one translation that will be used no matter what the preferred locale of other administrators.
If you set up other review layouts you need to edit the review templates and assign these layouts accordingly. See Setting up Review Templates and Rating Scales
There is a new list view widget for employee goals as well. This list view widget also has not been placed on your Talent Center by default.
If you are using goals you should also configure the goals list view and page layouts before employees start adding and updating goals.
Steps to Add the Goals List View Widget to the Talent Center
NOTE: Although the self-assessment page is responsive for the employee experience, it is not recommended that the administrator configure the Talent Center from a mobile device. It is recommended that the administrator’s employee record have at least one review and goal created previous to the configuration to give the administrator a better understanding of how the configuration changes will appear to employees. A test review or goal can always be created if the employee record doesn’t have a goal or review.
- You must be logged in as an administrator whose User record is linked to an Employee record. Select Administration, then select Customize Perform.
- In the Manage Talent Centers section, click Edit Pages for the Talent Center for which you want to set up Perform. You will have one default Talent Center called ‘Talent Center’ but you may have created additional Talent Centers if you have Onboard as well.
- On the Talent Center Home Page, click + Add new widget at the bottom of the page.
- Click My Goals List View, and then click Add widget.
- The widget is placed at the bottom, but you may move it to a new location by dragging and then releasing when you see a blue area.
- To rename the list view widget for your employees, click on the widget, enter a new name, and then click the Done button at the top of the widget or click outside of the widget. You may also select another language from the language drop down to change the title for your employees with different preferred locales.
- By default this list view widget will give employees the ability to expand or collapse the widget. You may disable this feature from the third menu as shown for the reviews list view.
- You can re-order the columns of this list view by dragging. You can remove certain columns, or click the + icon on the right to add more columns.
- Click the Done button when you have finished configuring the list view.
- Click Save & Publish in the upper right-hand corner to make your changes available for this Talent Center.
NOTE: If your employees will be working with goals on mobile devices it is not recommended to add too many columns to this list view. Employees will need to scroll to see all the data. Alternatively they can use the Card View.
At this point, any employee who has goals will see them from the Active filter on this list view. In addition, any overdue goals or completed goals will appear in the corresponding filters as well. Changes to list views affect only the current Talent Center.
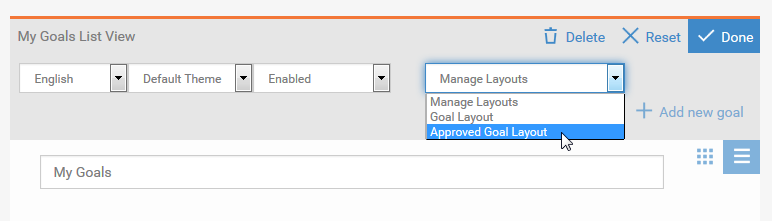
There are two page layouts for goals—one that is used before the goal has been approved by a manager, and one that is used after a goal has been approved. If your employees do not submit goals for approval, only the one page layout will be used. The two page layouts are:
- Goal Layout
- Approved Goal Layout
These cannot be renamed and additional page layouts cannot be created.
NOTE: These page layouts are based upon the following page layouts, located under Employee Website Pages on the Customize Perform page:
Employee Website New Goal Form
Employee Goal Edit
Employee Approved Goal Edit
Employee Goal View Page
These page layouts are not used on the Talent Center, but you may want to look at your current configuration on these pages so that you can add similar configuration for the Talent Center.
As previously mentioned, it is recommended that you have at least one goal assigned to the employee record that is tied to your administrator User record. This is because data is populated from the goal so that you can see what the review will look like for your employees.
NOTE : Page layouts for the Talent Center are configured directly from the administrator’s interface on the Talent Center. Any page layouts that you create and configure will be shared across Talent Centers. For example, if you add static HTML to a goal page layout, this will be visible for all Talent Centers.
On the other hand, list view widgets can vary between Talent Centers. Because of this feature, you can only have one administrator edit a Talent Center at a time. When a second administrator clicks the Edit Pages link, he or she will receive an alert that another administrator is configuring the Talent Center.
You should review the default page layouts and see if they meet your needs, and if so, no further configuration is needed.
Steps to Configure the Goal Page LayoutS
- You must be logged in as an administrator whose User record is linked to an Employee record. Select Administration, then select Customize Perform.
- In the Manage Talent Centers section, click Edit Pages for any Talent Center (remember, the page layouts are shared across Talent Centers).
- Once on the Home Page, click the My Goals list view widget, which will change the list view to Admin Mode.
- Notice there is a Manage Layouts menu just below the buttons. From this menu, select the Goal Layout option.
- The layout page appears and the data from your most recently created goal will populate, if available. The layout is comprised of different widgets on the page.
- Click on any of the widgets to configure the fields for that specific section. You can remove fields, add fields, and drag the fields to a different order.
- To change the required or read-only setting for a specific field, click the pencil icon, and then make the changes.
- After configuring both page layouts, Save & Publish to make these changes available to all Talent Centers.
NOTE: You cannot add the same field two times to the same widget but you can add it again in another widget. However, only one instance of the field can have the Read Only setting set to No. All other instances must be read only. Otherwise, when you Save & Publish, you will get a warning that there are duplicate fields on a particular page layout.
NOTE: Certain fields are set by the system to be read-only or required and cannot be changed. For example, a goal title is always required and therefore the configuration cannot be changed so that it is not a required field.
When you have finished configuring the Goal Layout page, repeat for the Approved Goal Layout page. Most of the fields on this page layout are set to Read Only, except the Status and Percent Complete fields. It is best practice recommendation that employees not be able to change these fields once the goal has been approved by their manager. However, you can change these default settings if you want to allow employees to be able to edit additional fields once the goal has been approved.
Setting Up Review Templates and Rating Scales
Before your employees start using the Talent Center for their reviews, you will want to ensure that your review templates and rating scales are optimized for the Talent Center. By default, all of your review templates refer to the single default review page layout used by the Talent Center. If you have created different page layouts for special cases, you need to assign those page layouts to the review template.
Steps to Apply a page Layout to a Review template
- In Perform, select Review Templates from the Reviews menu.
- Edit the template for which you want to select another page layout.
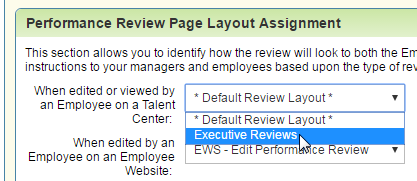
- Scroll to the bottom of the page, and select the layout from the menu for the Talent Center.
- Save the review template
Now any newly created reviews using this review template will use this page layout when on the Talent Center.
In addition, it’s a good time to review your rating scales. You want to ensure that your rating scale is set up so that the numbers on the top row are always in between the lower values, as seen below.
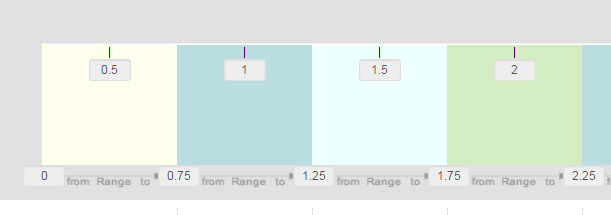
Proper rating scale for a Performance Review
Your numbers can vary, but you don’t want to repeat any numbers. If you need to make any changes, you will need to clone your current scale and update the numbers in the new version. Once you have set up the new correct rating scale, edit your review templates and refer to the new rating scale. Only newly created reviews will be affected.
NOTE: If you know that employees will be completing their reviews on a mobile device, using the stars or sliders in your rating scales is recommend over the picklist rating scales. The picklist may require an additional click after selecting each value, depending on the mobile device.
Directing Employees to the Talent Center
When you are ready to have all employees use the Talent Center rather than the Employee Website (EWS), you should update the system email templates that refer to the Employee Website (EWS) with the new link to the Talent Center.
This merge field is located in the Common fields area and is called Talent Center Link.
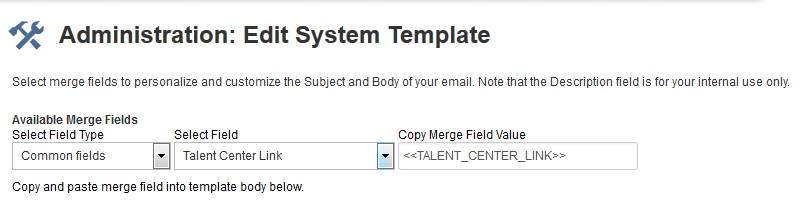
Merge Fields for Talent Center are located under Commend fields
You should review all email templates sent to employees and see which links should be replaced with any of the following:
- <<TALENT_CENTER_LINK>>
- <<TALENT_CENTER_LOGIN>>
- <<TALENT_CENTER_PASSWORD_RESET_LINK>>
You can replace the <<EMPLOYEE_EWS_LINK>> merge field in the Review Created system template with the Talent Center link, for example. The notification for new employees, the Employee Request First Password, can be updated as well. Review all the system email templates containing the word ‘employee’ as well as any custom ones you have created which might contain a link to the EWS, and update the links with the Talent Center merge fields.
When you are ready to have the Self-Service link direct Taleo Business Edition users to the Talent Center rather than the EWS as show below you can configure this as well.
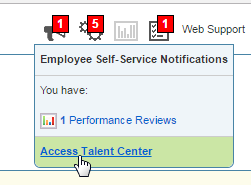
Self-Service link in TBE
Steps to Enable the Talent CEnter as the Default Employee Website
- Select Organization from the Administration menu.
- Click System & Email Settings.
- Scroll to the bottom of the User Interface Settings, and click Make Talent Center the default website for Employees.
- Click Save.
Now any Perform or Onboard users can access the Talent Center when clicking on any of the links on this menu.
Completing Reviews on the Talent Center
Managers assign reviews to employees as they always have. When the employee logs into the Talent Center, all reviews and goals will appear on the Talent Center, once the list view configuration in this document has been completed. The Active filter will be selected by default.
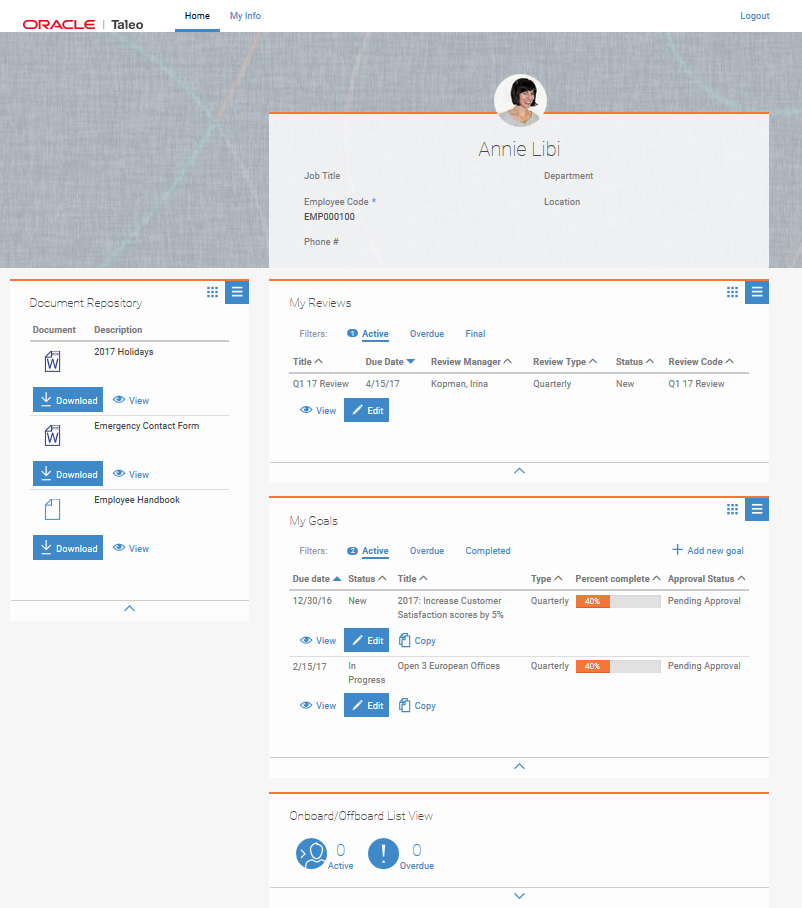
Typical Home Page for Employees who have Perform
Employees can click the Edit button to edit a review. Any editable fields will have a small pencil icon next to them, although most of the fields in the top two sections on a review will be read-only.
Each competency will appear with the various factors listed for the competency. The factor ratings are saved automatically as the employee provides a rating. This prevents data loss due to a poor connection on a mobile device. As the factors are rated, the average scores appear in the upper right for each competency and for each competency section, based on the display selected by the rating scale (text and numbers, numbers only, etc.)

Competency section on a review on the Talent Center
The employee can go back to the list view at any time and continue with the review at a later date. When the employee is ready to submit the review, the employee clicks the Submit button at the top. The system will check that all competency factors and any additional required fields are completed and display a note if the employee missed any. Once the review has been submitted, the same email notifications as in previous releases are sent out, if configured.
The managers still complete their portion of the review from Taleo Business Edition Perform. Approvals are still handled in the same manner. When using eSignature, an email will be sent to the employee, if configured, stating that the review is ready for their signature.
The employee can click the eSign button but then print the review before eSigning if desired. Once the manager has also eSigned, the resulting PDF document will use the same format as in previous releases.
Employees can create new goals on the Talent Center if you have the System & Email setting called ‘Allow employees to create their own goals on EWS’ selected. When this setting is enabled, employees will see a button in the My Goals list view to add a new goal.
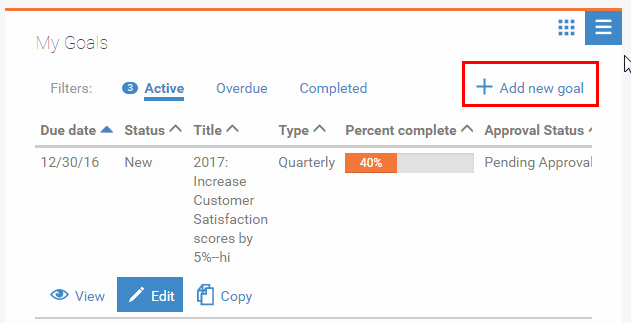
Add new goal button
When the employee adds the new goal, the fields that are on the new page are determined by the page layout you configured previously. Before the goal has been saved the employee can tab from field to field. Once the goal has been saved, when the employee edits the goal, the editable fields will display with a small pencil icon like other pages of the Talent Center.
The employee can now delete a goal they have just created, or copy it, print it, or submit it for approval.
Currently multi-rater requests are not available on the Talent Center. The recommendation is to configure your multi-rater requests to use the template called ‘Multi-rater Assigned Review over email’ or a custom copy of this email template which uses the <<REVIEW_MULTI_RATER_LINK>> merge field. This template has been optimized for mobile devices. Employees can access their requests from the email and then complete the request without logging into the Talent Center or legacy EWS.
Employees can also still access the multi-rater requests from the legacy Employee Website if desired.
Steps to Confirm the Multi-Rater Requests are using the Correct Template
- Select Administration, then select Customize Perform.
- In the Customize System Templates section, click System Email Templates.
- Click Assign System Templates.
- Scroll down to ‘Multi-rater assigned Review’ and ensure that the selected template is ‘Multi-rater Assigned Review over email.’
- If a custom template is being used, compare the merge fields of this custom template to the ‘Multi-rater assigned Review over email’ template to ensure that your selected template contains the same merge fields.
- It is recommended to assign a test multi-rater request to ensure that the resulting email allows an employee to click on the email and provide their feedback without logging into the Employee Website.
This release improves the flow for candidates on the Career Center.
Veteran/Disability Field Change
Customers can elect to make the Veteran/Disability a single select field on the Career Center rather than a multi-select field. This release allows you to also change this field to be a single select field for the Career Center only.
Steps to make the Veteran/Disability Field Single Select
- Select Administration, then select Customize Recruit.
- In the Customize Pages section, click Career Center Pages.
- Select Edit from the Action menu to the right of the Voluntary Information application component.
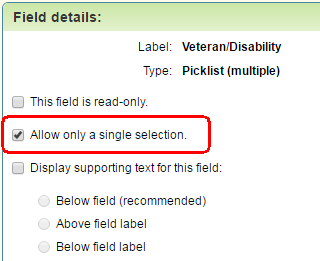
- Click Edit to the right of the Veteran/Disability field.
- Check the option Allow only a single selection.
- Click Submit to save these setting, and then click Save to save the Voluntary Information page.
Now when candidates are presented with this field they can only select one value instead of multiple. By editing the field and controlling the selections that candidates can make, you can stay current on any regulations for this field.
Sourcing Center Candidate Flow
Applicants who apply to jobs from the Sourcing Center will now be routed to the Registration Page or the Login Page when they click Apply on the Career Center within the context of the requisition, depending on if a candidate with that email address already exists. Also, in either flow, the email address field is pre-populated.
The First Name and/or Last Name are also pre-populated once the candidate starts the application workflow, improving the experience. For more information on the Sourcing Center, please refer to the Resource Center.
Candidates coming to the Career Center from an external site such as job boards will be directed to the Login Page, as opposed to the registration page, if the email address provided in the link URL contains an email address that has previously been used to apply for job with this company (therefore a Candidate record already exists). The email address will be pre-populated in either case.
In addition, if the First Name and/or Last Name are provided in the URL link, these fields will be populated once the application is started.
TBE to Oracle HCM Cloud (Fusion) Integration
TBE Customers with the Fusion HCM Configuration option enabled (accomplished via an SR with Oracle Support) will be able to connect their TBE environment with an Oracle Fusion HCM environment for the purpose of automatically creating Employees in Fusion HCM for New Hires out of TBE.
This product features in TBE provide a quick and cost effective method of implementing the basic New Hire scenarios. The solution may be extended through additional custom integrations using the TBE REST APIs and Fusion integration services.
In summary, TBE Customers will be able to define whether to use TBE Candidates or TBE Employees as the source of their new Fusion HCM Employees and define at which step in the respective workflow the integration should occur. A flexible field mapping administration area has been added to TBE to allow for the creation of Fusion Employees with information from the TBE Candidate/Employee, Requisition and offer depending on the mapping options selected.
Additional details of what this feature does can be reviewed in the overview and set up guide available on the TBE Technical Documentation Page: http://www.oracle.com/technetwork/documentation/default-1841567.html
This feature is being released under controlled availability and can be implemented with any of the approved integration partners. Your Oracle contacts can provide a list of approved partners.
First/Last Name Order Change for Certain Languages
The order of the first and last name has been reversed in many areas of the product for the languages of Japanese, Chinese, and Hungarian. These changes appear throughout Taleo Business Edition, as well as the Career Center, Talent Center and legacy Employee Website. This change presents the name in the correct order for those locales.
The order has not changed on page layouts where you can determine the order by moving the fields, but rather in places where this is not configurable, such as when viewing a user or employee record:
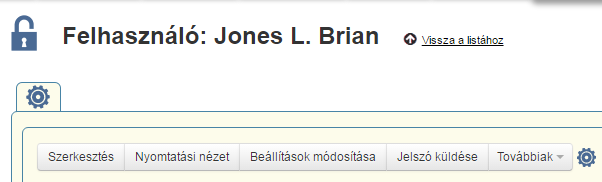
Viewing a User record with the last name presented first in the Hungarian locale
The Taleo Onboard W-4 form has been updated with the 2017 information. Any activity templates referencing this default W-4 form automatically include the new form. Completed activities are not affected. Already assigned activities that have not yet been updated by employees will also automatically refer to the new form.
On Nov. 14, the US Citizenship and Immigration Services announced a revised I-9 form. You will need to ensure new hires complete the new form as of January 21, 2017 (https://www.uscis.gov/i-9-central/whats-new), as all previous versions of the I-9 form will be invalid after that date. The new form brings with it several changes intended to facilitate review of the I-9 form by auditors.
Best Practice Recommendations:
In order to ensure you are ready to adopt the new changes and not experience any business disruption, TBE customers have the following options:
- Use the default form included in this 17A1 release. This form is based on the “paper” version of the form and includes fillable fields and basic data validations (SSN format, date format, one level of required fields) and will not include any prepopulated data. This is not the “smart” form that generates a QR code, but this can be attached to an Employee PDF Form Onboarding Activity and eSigned as part of an Onboarding packet.
- Using the Onboarding Activity type Employee Task, you can provide a link to the new smart I-9 Form, request new hires to complete the form, print it and sign it. You could then instruct new hires to scan the form and attach it using the Attachments widget (this option is only available on the Talent Center, not Employee Website (EWS). Please note that this option does not include any eSignature functionality.
- Leverage an I-9 processing partner from the Oracle Cloud Market Place (https://cloud.oracle.com/marketplace/en_US/homePage.jspx) for the processing of I-9 forms. Many customers are already leveraging partners provided through the Oracle Cloud Market Place as a best practice to support their I-9 processing needs.
- Access the file called I-9 Form (2017 version) on the Resource Center. This is the version that we have included in 17A1. You can download this file, add any binding of fields that you wish, and refer to this custom form in your activity template. You will also want to re-assign the activity to any employees currently onboarding to ensure that they have the correct form.
NOTE: Any assigned activities using the old form that have not yet been completed should be deleted and then re-assigned to ensure that the correct new form is being presented to your employees.
The new I-9 no longer includes instructions on the same document. Our recommendation is to provide a link to this document in the description of the Employee Onboarding Task or add the instructions as a Document in the Document Repository widget (Document Repository widget only available on Talent Center).
---

Copyright © 2017, Oracle and/or its affiliates. All rights reserved.
This document is provided for information purposes only, and the contents hereof are subject to change without notice.This document is not warranted to be error-free, nor subject to any other warranties or conditions, whether expressed orally or implied in law, including implied warranties and conditions of merchantability or fitness for a particular purpose. We specifically disclaim any liability with respect to this document, and no contractual obligations are formed either directly or indirectly by this document. This document may not be reproduced ortransmitted in any form or by any means, electronic or mechanical, for any purpose, without our prior written permission.
Oracle and Java are registered trademarks of Oracle and/or its affiliates. Other names may be trademarks of their respective owners.
Intel and Intel Xeon are trademarks or registered trademarks of Intel Corporation.All SPARC trademarks are used under license and are trademarks or registered trademarks of SPARC International, Inc. AMD, Opteron, the AMD logo, and the AMD Opteron logo are trademarks or registered trademarks of Advanced Micro Devices. UNIX is a registered trademark of The Open Group.