
This document will continue to evolve as existing sections change and new information is added. All updates appear in the following table:
| Date | Feature | Notes |
|---|---|---|
| 17 FEB 2020 | Created initial document. |
This guide outlines the information you need to know about new or improved functionality in Oracle Taleo Cloud for Midsize (Taleo Business Edition) Update 20A. Each section includes a brief description of the feature, the steps you need to take to enable or begin using the feature, and any tips or considerations that you should keep in mind.
We are announcing the general availability of the 20A update of the Oracle Taleo Cloud for Midsize (TBE) on February 21, 2020. This is considered a minor update.
Column Definitions:
Features Delivered Enabled
Report = New or modified, Oracle-delivered, ready to run reports.
UI or Process-Based: Small Scale = These UI or process-based features are typically comprised of minor field, validation, or program changes. Therefore, the potential impact to users is minimal.
UI or Process-Based: Larger Scale* = These UI or process-based features have more complex designs. Therefore, the potential impact to users is higher.
Features Delivered Disabled = Action is needed BEFORE these features can be used by END USERS. These features are delivered disabled and you choose if and when to enable them. For example, a) new or expanded BI subject areas need to first be incorporated into reports, b) Integration is required to utilize new web services, or c) features must be assigned to user roles before they can be accessed.
| Ready for Use by End Users Reports plus Small Scale UI or Process-Based new features will have minimal user impact after an update. Therefore, customer acceptance testing should focus on the Larger Scale UI or Process-Based* new features. |
Action is Needed BEFORE Use by End Users Not disruptive as action is required to make these features ready to use. As you selectively choose to leverage, you set your test and roll out timing. |
|||||
|---|---|---|---|---|---|---|
| Feature |
Report |
UI or |
UI or |
|
||
Selecting Offer Email Template
With this release, Recruit users can now select the email template to be used when sending an offer to a candidate. This feature allows you to present a different email message based on the offer recipient, such as when sending an offer to an internal candidate versus an external candidate.
As part of this feature, custom system email templates can now be designated as "Offer" emails, and only the templates with this designation will be available for selection when sending an offer to a candidate.
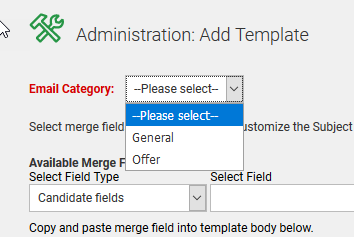
When adding a new system email template, there is a new required field called Email Category. The two options are 'General' and 'Offer'. Select 'Offer' for all email templates pertaining to sending an offer to a candidate. Select 'General' for all other email templates. All of your existing custom templates have 'General' selected already, but moving forward if you create new templates, you will need to select an option.
The default email template sent to candidates is called 'Candidate Offer.' Since this is a standard template, it will not have this Email Category field in the template, but it will always be an available option when users email an offer to a candidate.
Steps to Enable
- Select Administration, then select Customize Recruit.
- Click System Email Templates.
- Click Assign System Templates at the top of the list of templates.
- Scroll down to the 'Email candidate offer' action, and make a note of the template assigned to this action.
- Click Cancel to return to the list of email templates.
- If you had the 'Candidate Offer' template assigned as the template, no action is needed.
- If you had another template assigned, edit this template and change the Email Category field at the top to 'Offer'. Save the template.
- Create other email templates as needed, for the purpose of emailing an offer to a candidate. For example, you may wish to have one email template for internal candidates and one for external candidates, or you may want to have a different template for interns. Remember that any such email templates should be similar to the default 'Candidate Offer' template and contain the <<CANDIDATE_OFFER_LINK>> merge field.
- Make sure that any templates that will be used to send an offer to a candidate have the 'Offer' email category set.
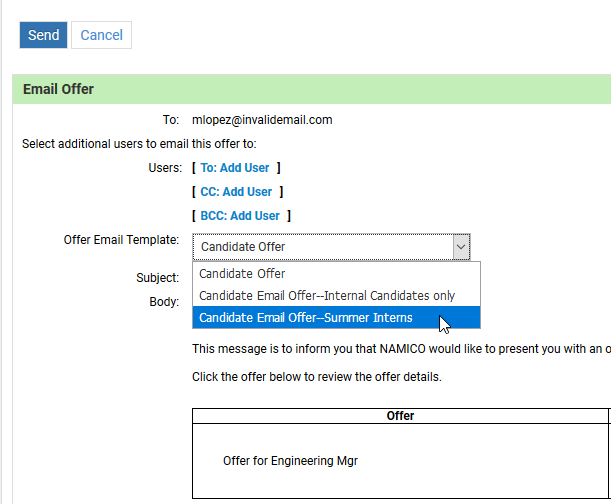
When your users click the Email Offer button during the offer process, the list of templates shown in the drop-down list includes the default 'Candidate Offer' as well as any templates with the Email Category of 'Offer.' The assigned system template for the candidate offer action will always be the first choice in the drop-down list.
Tips And Considerations
If you create multiple templates for emailing offers to candidates, you may want to send some test offers to confirm that the formatting of the email looks correct.
Monster Candidate Search Improvements
This release improves on the Monster Candidate Search functionality introduced in TBE 19D.
Hiring Manager Access
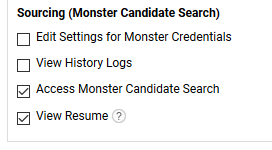
Previously, only users with the Administrator and Recruiter roles could access the Monster Candidate Search feature. You can now extend this functionality to users with the Hiring Manager role as well, although this is not enabled by default. If you wish to extend this feature to your Hiring Managers, be sure to turn on the access under Users>Roles>Assign Access Control. The bottom two options are recommended for Hiring Managers.
Hiring Managers can only add candidates to open requisitions for which they are an owner. They can only import job descriptions from open requisitions they own as well. With this feature, you can easily greatly increase the candidate pool for your hiring managers, while still limiting their requisition access appropriately.
Improvements in the Search Function
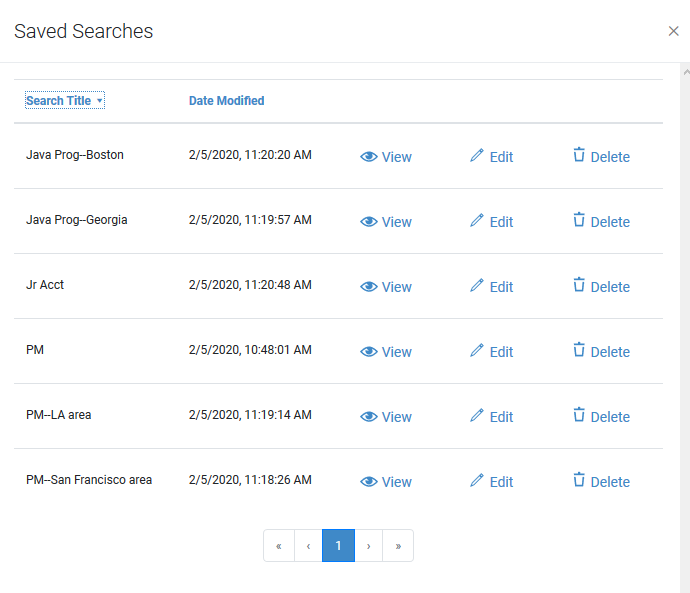
When saving searches, users will now have the ability to 'save as' so they can easily create a new search, based on the search criteria of a prior search. You can use the new Save As both when you initially create a search and when you have modified the search criteria, and want to save a copy with this new criteria.
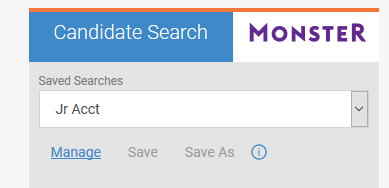
In addition, when you click Manage to list all saved searched, the list can be sorted by both title and the date modified. Pagination has been added as well, to easily accommodate a large number of saved searches.
Viewing the Full Profile for the Candidate
In the previous release, users could click the More Details link to see additional information that is not shown in the search results page. With this release, in addition to the More Details link, the candidate's name is now a link that will show the full profile.
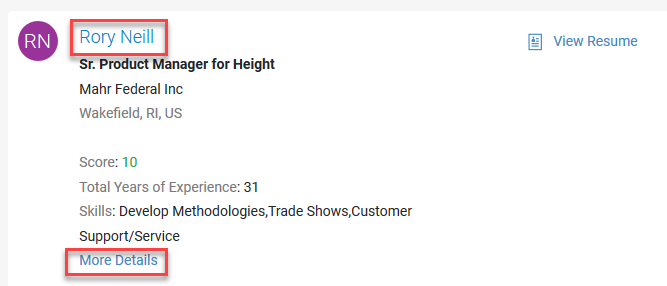
This feature allows users to get a more complete picture of the candidate before deciding to add the candidate to TBE with the View Resume link.
NOTE: If you add a Monster candidate to a requisition and the candidate already exists in TBE, the candidate will still be attached to the requisition, but the Candidate record is NOT updated with any changes which may exist since the record was created.
Steps to Enable
You don't need to do anything to enable this feature.
Tips And Considerations
When importing the job description or when adding a candidate to a requisition, the list of requisitions presented for selection includes those whose statuses are 'considered open'. You may have other custom statuses mapped to this category, not just Open, which is the default. You will see this 'considered open' checkmark in your list of Requisition statuses. You can edit the status mappings "Open Requisition Statuses' section to designate which statuses receive that checkmark.
Renaming Buttons in Rolling Entity Sections
Some customers re-purpose the 'Other Rolling Entity' sections of the Career Center (References, Residence History, Certificates and Licenses) to gather different types of candidate information. While the labels in the section were already editable, this release also allows for custom text for the buttons in these respective sections. This way, the button text matches the section text, avoiding any confusion during the application process.
Steps to Enable
As an example, let's assume that on your Career Center you need to capture accident reports from job seekers. You will want to change the label in the section, but also now the button text label as well.
- Select Administration, then select Customize Recruit.
- In the Customize Pages section, click Career Center Pages.
- Edit the 'Other Rolling Entities' application component.
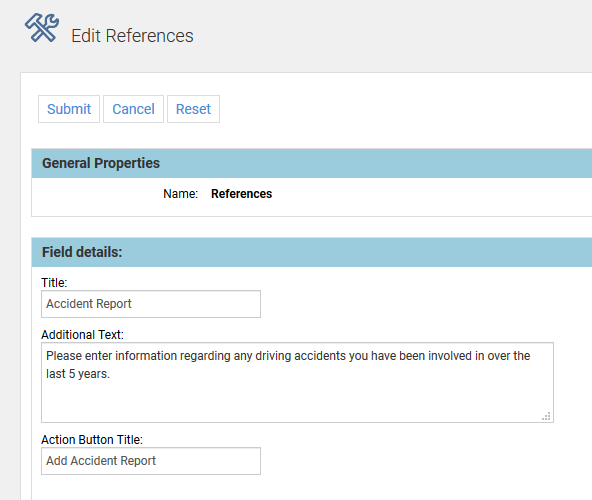
- Click Edit to the right of the specific section you wish to re-purpose: Residence History, References, or Certificates and Licenses. Notice that the section will still have the name of the original section at the top but this will not appear on the Career Center.
- Enter the desired title for the section, and any additional text you want to appear.
- In the new Action Button Title field, enter the text that should appear on the button. If you do not enter anything here, the default text will be used.
- Adjust the fields as needed, along with the minimum and the maximum number of entries.
- Click Submit, and upon return to the previous page, click Save.
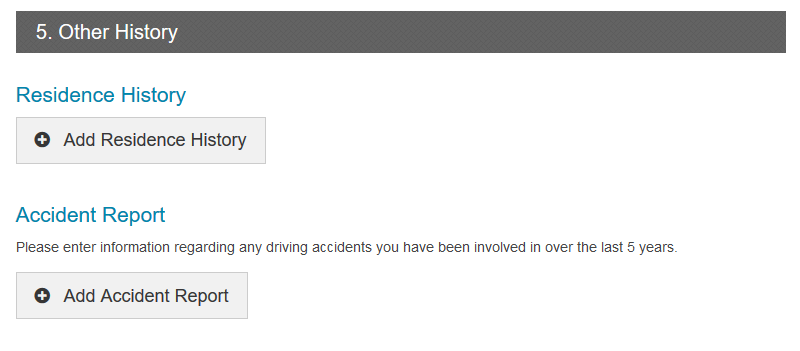
Now when your job seekers are filling out the application, the button text will display as configured.
If you have exposed this section on the My Info page as well, you will need to edit the My Info page in the Navigation section of the Career Center pages, and enter the updated button text here as well.
W-4 Form
The default W-4 form has been updated with the 2020 information. Any onboarding activity templates referencing this default W-4 form automatically include the new form. Completed activities are not affected.
However, due to the re-ordering of the fields on the form this year, employees who open an activity assigned previous to the release and saved their changes may see some of the fielded data in the wrong location. Because of this issue, it is recommended that any W-4 form activities that have been assigned but not yet completed be deleted and then re-assigned.
I-9 Form
The default I-9 form has also been updated with the latest version. Any onboarding activity templates referencing this default I-9 form automatically include the new form. Completed activities are not affected. It is recommended that any I-9 form activities that have been assigned but not yet completed be deleted and then re-assigned.
As with the previous version of this form, the form included with TBE is based on the 'paper' version of the form. Many fields are required, and no data will be pre-populated from TBE.
You may wish to download the instructions available for this form, and then upload them into your Talent Center Document Repository widget to help your employees when they complete it.
NOTE: There is a known issue on the Talent Center where clicking the View button for completed forms will always show the latest form, but with the data as it was originally entered. Employees can use the Download button instead to view their forms from previous years until this issue is resolved. This issue does not affect managers viewing older forms from TBE Onboard.
These forms are available with TBE Onboard, as well as from TBE Recruit to email to a candidate.
Steps to Enable
You don't need to do anything to enable this feature.