
This document will continue to evolve as existing sections change and new information is added. All updates appear in the following table:
| Date | Product | Feature | Notes |
|---|---|---|---|
| 12 MAY 2021 | Created initial document. |
This guide outlines the information you need to know about new or improved functionality in this update.
We are announcing the general availability of the 21B update of the Oracle Taleo Cloud for Midsize (TBE) on May 12, 2021. This is considered a minor update.
Column Definitions:
Report = New or modified, Oracle-delivered, ready to run reports.
UI or Process-Based: Small Scale = These UI or process-based features are typically comprised of minor field, validation, or program changes. Therefore, the potential impact to users is minimal.
UI or Process-Based: Larger Scale* = These UI or process-based features have more complex designs. Therefore, the potential impact to users is higher.
Features Delivered Disabled = Action is needed BEFORE these features can be used by END USERS. These features are delivered disabled and you choose if and when to enable them. For example, a) new or expanded BI subject areas need to first be incorporated into reports, b) Integration is required to utilize new web services, or c) features must be assigned to user roles before they can be accessed.
| Ready for Use by End Users Reports plus Small Scale UI or Process-Based new features will have minimal user impact after an update. Therefore, customer acceptance testing should focus on the Larger Scale UI or Process-Based* new features. |
Customer Must Take Action before Use by End Users Not disruptive as action is required to make these features ready to use. As you selectively choose to leverage, you set your test and roll out timing. |
|||||
|---|---|---|---|---|---|---|
| Feature |
Report |
UI or |
UI or |
|
||
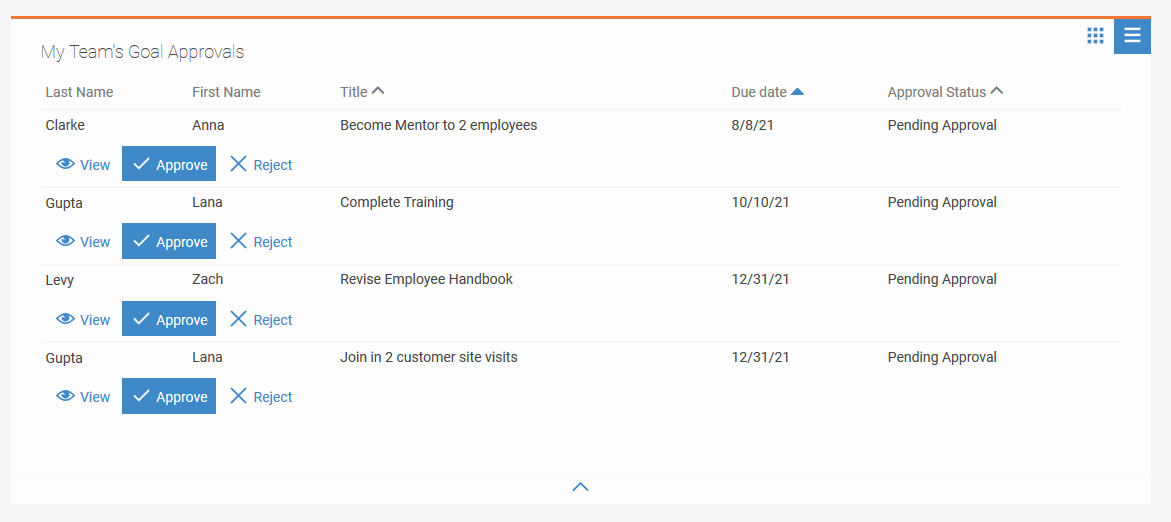
My Team's Goal Approvals Widget
The "My Team" page of the Talent Center now features a new widget named "My Team's Goal Approvals." Managers accessing the Talent Center can see all goals that are awaiting their approvals, and can approve or reject them (while adding comments) from their mobile devices. All changes made from this new widget are immediately reflected in the new widget, the employee's "My Goals" widget, and TBE Perform.
This enhancement enriches managers' actionable tasks available in a mobile responsive interface.
Steps to Enable
Please note that the My Team page is only visible to employees with linked User and Employee records who are listed as direct managers for at least one other employee. The new widget is not automatically added to the My Team page, because not all TBE Perform customers mandate approvals for their goals.
Steps to add the My Team's Goal Approvals widget to the My Team page:
- If you have not already enabled the My Team page, select Administration>Organization, and then select System & Email Settings. In the User Interface Settings section, check the option Enable 'My Team' page on Talent Center. Click Save.
- Select Administration, then select Customize Perform.
- Locate the desired Talent Center and click Edit Pages.
- Click the My Team tab at the top of the page.
- Click +Add new widget.
- Add the My Team's Goal Approvals widget.
- Click on the widget to add or remove columns, change the title of the widget, etc. as you would configure other Talent Center list view widgets.
- To view the current page layout for the goal approvals, click on the widget to edit it, and choose Goal Approval Layout from the Manage Page Layouts drop-down.
- Update the page layout by adding or removing fields as you would for other page layouts. Please note that the entire approval page will be read only for your managers, therefore fields on this page layout do not have required or read-only attributes.
- Click Done to save the widget.
- Click Save & Publish to save all your changes.
Steps to use the My Team's Goal Approval widget:
- As the manager logged into the Talent Center, click the My Team page.
- Click View to review the contents of any of the goals in the My Team's Goal Approval widget.
- From the view page, click either the Approve or Reject button.
- Enter an optional comment, and check the option shown below if you want the comment to be included in the notification the system emails the employee.
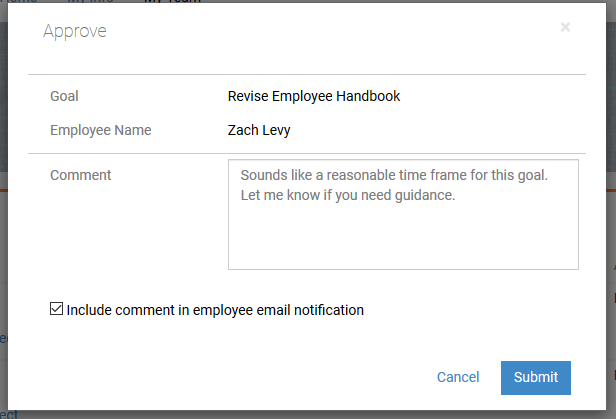
- Click Submit.
- If you need to edit a goal, return to the My Team page and locate the goal in the My Team's Goals widget. Edit the goal from this widget.
- Continue approving or rejecting the goals, from either the list view or from the View page.
Tips And Considerations
The two widgets on the My Team page display goals and goal approvals for active employees only. If you have goal approvals for employees with a non-active status, such as Terminated or LOA, you can still approve the goals from within TBE Perform, depending on how you set up the filters for the approval list views.
Currently, the My Team's Goal Approvals widget does not list proxy approvals. Proxy approvers will still need to approve goals from TBE Perform.
There is a known issue when editing the My Team page to include 2 or 3 columns. Please use the default one-column layout until this issue is addressed.
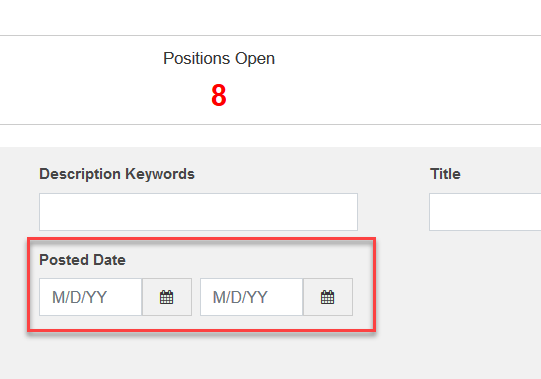
You can now include the 'Posted Date' field on the Job Search and Job Search Results page of the Career Center. Job seekers can then either search for jobs posted within a certain date range, or sort jobs search results by the 'Posted Date' field. This feature is a popular enhancement from our Ideas Lab on Customer Connect..
Exposing the 'Posted Date' field allows job seekers to easily filter or sort jobs posted on the Career Center.
Steps to Enable
- Select Administration, then select Customize Recruit.
- Click Career Center Pages in the Customize Pages section.
- Scroll down to the Navigation section, and select Edit from the Action menu to the right of the Job Search page.
- Click Edit to the right of the Search Criteria section.
- Locate Posted Date from the Available list on the left, and move it to the Added list on the right by using the arrow keys. You can use the up and down arrow keys to set the order as well.
- Click Submit.
- Click Save on the Job Search page.
- Repeat the above, this time editing the Job Search Results page in the 'Search Results' section. Please note that for this page, a maximum of 4 fields can be added.
When you add the field to the Job Search page, two boxes appear so that job seekers can enter a range for the date:
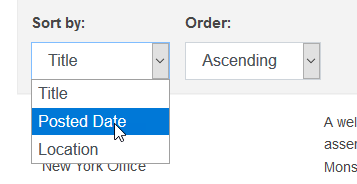
When you enter the Posted Date field to the Job Search Results page, job seekers can choose the sort order:
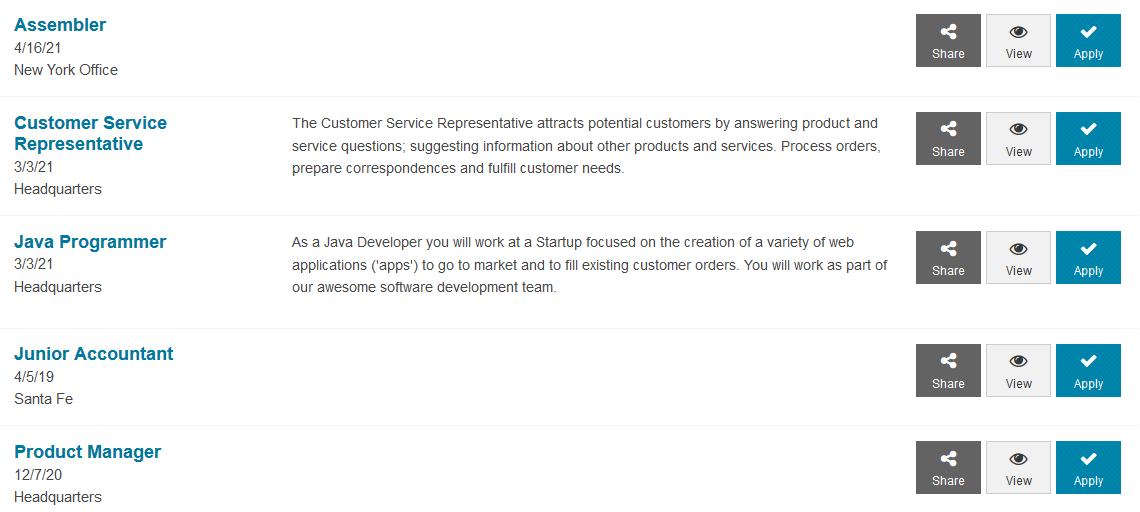
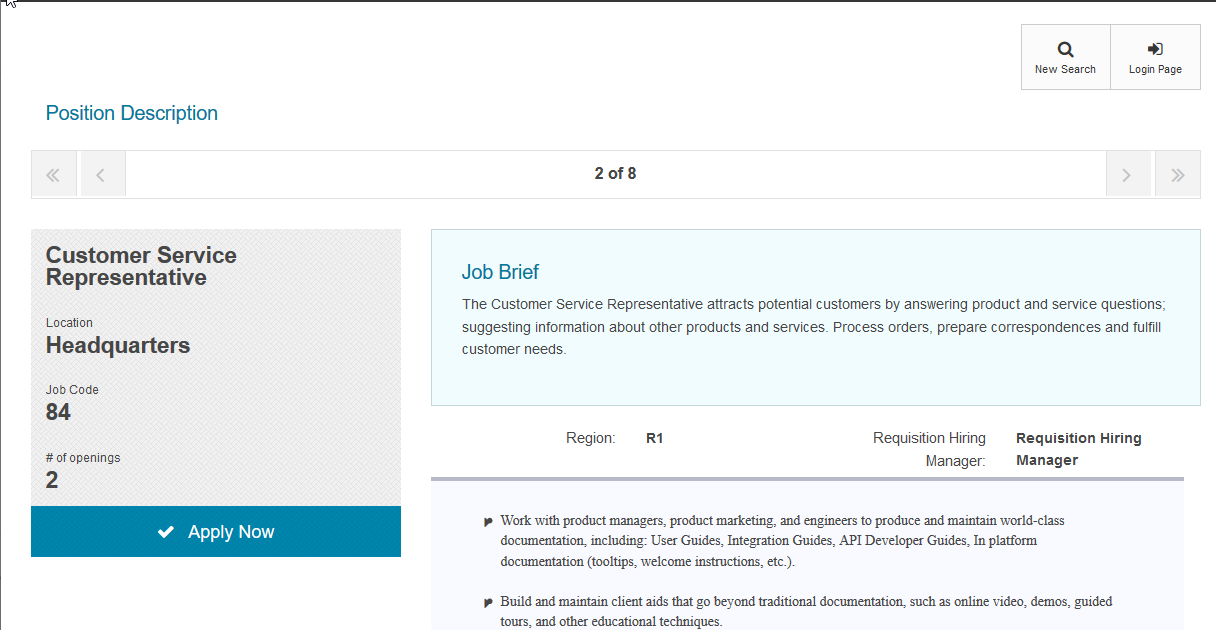
Job Brief Field available on Requisition Summary
The Job Brief is a requisition containing a short description of the job requisition, up to 255 characters. It is always shown as a fixed-width column in the job search results page of the Career Center, and at the top of the page when viewing a job. In this release, the Job Brief can be added as one of the four fields listed in the Requisition Summary of any application workflow.
The field can appear in every page of the application process, with the added benefit that it provides context to which job is being applied for, as the job seeker completes the application process. This can be especially helpful for those job seekers that might apply for multiple jobs at once and want to quickly recognize the job for which they are currently applying.
Steps to Enable
- If you are not already using the Job Brief field, add the field to your Add/Edit Requisition and View Requisition page layouts, and start populating the field with a brief description for your open positions.
- Select Administration, then select Customize Recruit.
- Select Career Center Pages in the Customize Pages section.
- In the Application Workflows section, click Edit in the from the Action menu to the right of the workflow name used by the Career Center in question.
- In the Application Header section, click Edit to the right of the Requisition Summary..
- Locate Job Brief on the Available list on the left, and move it to the Added list on the right by using the arrow keys. You can use the up and down arrow keys to set the order as well. You can add up to 4 fields here.
- Click Submit.
- Save the Application Workflow.
- Repeat for other workflows as needed.
Tips And Considerations
Given that the Job Brief is a fixed-width column displayed in specific Career Center pages, it behooves customers to enable the Job Brief field for their requisition summaries, as both job search results and job details displayed in the application process will look more meaningful and relevant to site visitors. In the example below, requisition summaries that have Job Briefs defined look more compelling and relevant.
IMPORTANT Actions and Considerations
Google Integrations
As announced in the What's New document for TBE 21A, two Google integrations were removed from the 21B update.
The option to upload documents from Google Drive is no longer available for the Career Center or the Talent Center. Also, the option to look up interview schedues for Corporate Gmail is no longer available in the Interview Availability Lookup feature. No further action is required from your end.
Apply with Monster
Monster has discontinued its 'Apply with Monster' integration that facilitates the filling of candidate applications using Monster profiles. There is currently no replacement for it.The option has been removed from the appropriate Career Center page. No further action is required from your end.