
This document will continue to evolve as existing sections change and new information is added. All updates appear in the following table:
| Date | Product | Feature | Notes |
|---|---|---|---|
| 11 FEB 2022 | Outbound Logistics | Display Total Quantity in RF Pick Cart | Updated document. Revised feature information. |
| 14 JAN 2022 | Created initial document. |
 HAVE AN IDEA?
We’re here and we’re listening. If you have a suggestion on how to make our cloud services even better then go ahead and tell us. There are several ways to submit your ideas, for example, through the Ideas Lab on Oracle Customer Connect. Wherever you see this icon after the feature name it means we delivered one of your ideas.
GIVE US FEEDBACK
We welcome your comments and suggestions to improve the content. Please send us your feedback at owms-cloud-comms_us@oracle.com.
DISCLAIMER
The information contained in this document may include statements about Oracle’s product development plans. Many factors can materially affect Oracle’s product development plans and the nature and timing of future product releases. Accordingly, this Information is provided to you solely for information only, is not a commitment to deliver any material, code, or functionality, and should not be relied upon in making purchasing decisions. The development, release, and timing of any features or functionality described remains at the sole discretion of Oracle.
This information may not be incorporated into any contractual agreement with Oracle or its subsidiaries or affiliates. Oracle specifically disclaims any liability with respect to this information. Refer to the Legal Notices and Terms of Use for further information.
Column Definitions:
Report = New or modified, Oracle-delivered, ready to run reports.
UI or Process-Based: Small Scale = These UI or process-based features are typically comprised of minor field, validation, or program changes. Therefore, the potential impact to users is minimal.
UI or Process-Based: Larger Scale* = These UI or process-based features have more complex designs. Therefore, the potential impact to users is higher.
Features Delivered Disabled = Action is needed BEFORE these features can be used by END USERS. These features are delivered disabled and you choose if and when to enable them. For example, a) new or expanded BI subject areas need to first be incorporated into reports, b) Integration is required to utilize new web services, or c) features must be assigned to user roles before they can be accessed.
| Ready for Use by End Users Reports plus Small Scale UI or Process-Based new features will have minimal user impact after an update. Therefore, customer acceptance testing should focus on the Larger Scale UI or Process-Based* new features. |
Customer Must Take Action before Use by End Users Not disruptive as action is required to make these features ready to use. As you selectively choose to leverage, you set your test and roll out timing. |
|||||
|---|---|---|---|---|---|---|
| Feature |
Report |
UI or |
UI or |
|
||
Update Page Count in Reserve and Active Inventory UI Modules |
||||||
Change Default Printer from Warehouse Management UI
Now, you can easily change your default label printer and default document printer.
NOTE: Users with an Admin/Supervisor/Employee role have access to change the default Label/ Document Printer using the Change Printer option available in the Global Settings menu.
Steps to Enable
To change the default printer setting from the Global Setting menu:
- Change the default printer from the option Change Printer under the Global Settings menu.
- A new window will pop up and you can either change the default label printer or/and default document printer
- Click Save.
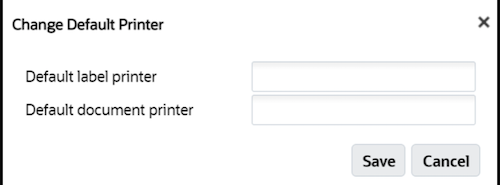
You must enter a valid printer name.
Key Resources
Additional Fields in Interface Protected Fields UI
The following new fields are now available in the Interface Protected Fields UI:
- Create Timestamp
- Mod Timestamp
- Create User
- Mod User
The new columns are hidden by default. You can add these fields using the column selection option:

Steps to Enable
You don't need to do anything to enable this feature.
Key Resources
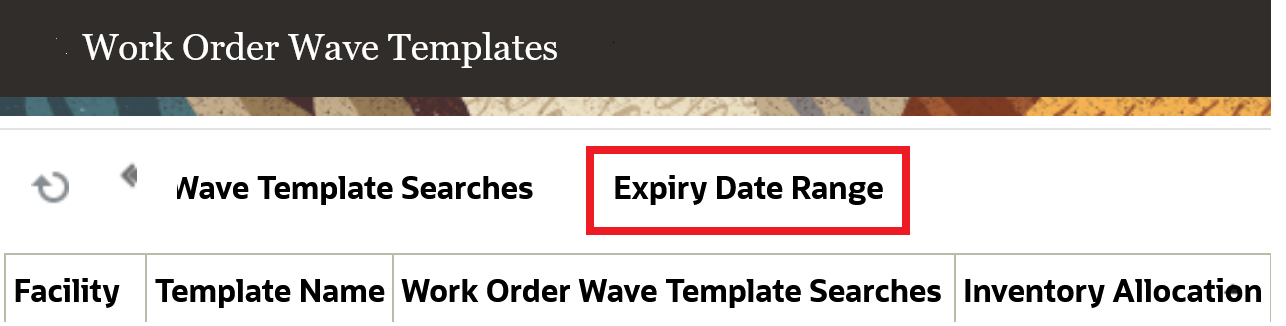
Work Order Wave Based on Expiry Date Range
In 22A, you can now set up rules and instruct the system to allocate the components that are used for the assembling process. These components are then placed at a specific location based on the expiry date range rule defined on the template.
The new button “Expiry Date Range” (introduced in the Work Order Wave Template) allows you to define the expiry date rule for your work order. You can now create a new expiry date rule name, description, and add the corresponding rules with a date range and sequence numbers.
In the Expiry Date Range UI, you can define the rule name and description. The Expiry Range Header UI includes the following fields:

Expiry Date Range Header:
- Rule Name
- Priority
- Criteria-1 to 6
- Value-1 to 6
- Expiring After (in days): Number of days in numeric value.
- Expiring before (in days): Number of days in numeric value.
The expiry date rule on the work order wave template Is applicable for component SKU's if performing assembly for parent items, or if performing disassembly or de-kitting. Upon running the work order template, the system honors the expiry date range rule configured on the template and creates allocations for the components that satisfy the expiry date range criteria. After determining the allocation quantity, the system identifies the appropriate component or inventory to be brought to the required assembly location.
You can now add the Expiry Date Range to your Work Order Wave Template.
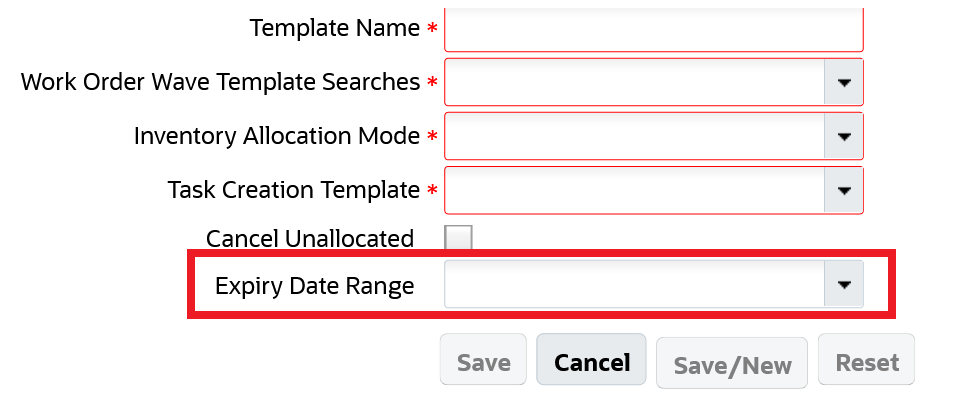
NOTE: The expiry date range rule is applicable to the allocation of components within the expiry date range configured in the work order wave template. The work order wave always considers replenishing new components for the assembly process.
For example,
| Location | SKU | Group Code | Quantity | Expiry Date |
|---|---|---|---|---|
| ASSM01 |
KIT01 |
Sandwich |
25 |
|
| RES_LCR1 |
COMP01 |
Bread |
25 |
05/July/2021 |
| RES_LCR1 |
COMP02 |
Jam |
25 |
15/July/2021 |
| RES_LCR1 |
COMP01 |
Bread |
50 |
25/Aug/2021 |
| RES_LCR1 |
COMP02 |
Jam |
75 |
4/Sept/2021 |
Let’s say you create a work order for KIT01 with 25 units and you subject the work order for allocation using a work order wave template with the following configurations:
- Assembly location ASSM01
- Components to be allocated from RES_LCR1
- Expiry date range rule: Group: Code Bread, Sandwich, Jam, Expiring Before 20 days, Expiring After 2 days
When you run the work order wave template on a date (28/June/2021), then based on the expiry date range rule, the inventory with an expiry date of range (30/June/2021 to 18/July/2021) will be eligible. As the order needs 25 units, the system allocates COMP01 and COMP02 of 25 units each honoring the expiry date range. That is, the system allocates inventories (COMP01 - 25 units - Exp Date (05/July/2021) and COMP02 - 25 units - Exp Date (15/July/2021) from location "RES_LCR1".
Oracle Warehouse Management allows you to configure an Expiry Date Range rule in your work order wave template.
Steps to Enable
To configure the Expiry Date Range rule for the Work Order Wave Template:
- Go to the Work Order Wave Template UI.
- Click the Expiry Date Range button.
- In the Expiry Date Range UI, define the rule name and Description.
- From the Expiry Range Header, select the rule and click the detail icon. Define the expiry date range criteria.
To enable an Expiry Date Range rule for Work Order Wave Template:
- Go to the Work Order Wave Template UI.
- Add the expiry date range rule to the work order wave template and click Save.
Key Resources
Update Page Count in Reserve and Active Inventory UI Modules
The pagination has been updated in the Reserve and Active Inventory UI modules, providing increased performance for users.
Instead of the expected number of pages, the UI now displays 9999 pages.

Steps to Enable
You don't need to do anything to enable this feature.
Key Resources
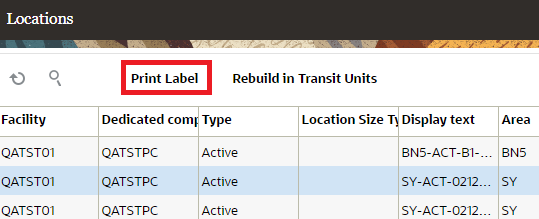
Print Labels for All Locations Filtered in Locations UI
You now have the option to print labels for all locations that have been filtered in the Locations UI irrespective of the number of records and pages, on one click of a button. You can also print more than one label per location by providing the number in the Print Label confirmation window.
You can enable the new action button “Print Label” by selecting “location/ Can Print Location Labels" in Group Permissions. After locations are filtered with a desired criteria on the Locations UI, click the “Print Label” Button.
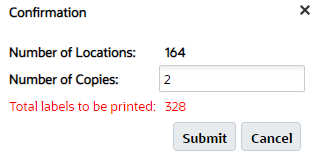
A pop-up window will appear that will show the number of locations selected for printing (irrespective of the number of pages.) You can also print multiple copies for each label by providing the number in the “Number of Copies” field
For example:
- Let’s say you filter the Locations by Area and the total number of locations retrieved are 164.
- The results will be spread across 7 pages assuming that the total number of rows per page is set to 25.
- On clicking the “Print Label” button, the confirmation window will pop-up as shown below.
- The “Number of Locations” field will show 164 and the “Number of Copies” will allow you to specify the number of copies that you need for each location.
- For example, if you enter 2 against “Number of Copies”, a total of 328 labels will be printed.
- If “Number of Copies” is more than 1, all copies of a location is printed before printing copies for next location.
ADDITIONAL NOTES
- Due to the potentially large count of labels, the “Print Label” printing mode is asynchronous.
- Filtered locations printing will be done in the order selected by the user in the Locations UI. If no order is selected, location barcode is used by default.
NOTE: In prior versions, the system allowed printing of location labels and a popup screen was not displayed. With this new feature, a pop-up screen is displayed when accessing the print location label action button.
Steps to Enable
To enable the Print Label action button, add location / Can Print Location Labels from Group Permissions.
Key Resources
Palletize and Cartonize LPNs During WMS Kitting
In “Make to Stock/Order” scenarios where you are assembling standardized kits, instead of being prompted in the RF to assemble one LPN at a time, you might prefer to enter the number of LPNs created along with the quantity per LPN. Also for standardized kits, users might want to palletize the LPN’s created so that the number of scans are reduced in downstream operations. This is now possible with three new parameters available in the RF Work Order Kit Processing (rf.outbound.cwrfprocessworkorderkit) module, which will boost your productivity during assembly operations.
The RF Work Order Kit Processing Module has been enhanced with the following three parameters:
| Parameter Name | Parameter Choices | Behavior |
|---|---|---|
| prompt-pallet | Non|Yes|No | When set to yes, Pallet Prompt will be displayed right before LPN Scan. When set to No, pallet prompt will not be displayed. This parameter can be set to “Yes”, to perform palletization of Inbound/Outbound LPNs during the kitting process. |
| lpn-prompt-behavior | None|Auto Generate|Enter LPN Count |
If set to none, you are asked to confirm the LPN. If set to Auto Generate, the LPN prompt will not display and the system will auto generate the LPN. If set to Enter LPN Count, the system displays the LPN count and quantity per LPN field. |
| Print-lpn-label | None|Yes|No |
Now users will be able to print labels for inbound LPNs created as part of the assembly process. Applicable for printing Inbound LPN Labels only. If set to Yes, the application will print inbound labels upon entering the LPN count and after the quantity per LPN and validation for the entered quantity is successful. |
NOTE: lpn-prompt-behavior when set to Enter LPN Count is applicable only during Assembly Process. lpn-prompt-behavior when set to Auto Generate will be applicable for both kitting and de-kitting process.
The following is the flow when the “prompt-pallet” parameter is set to Yes:
- After you scan the work order number or assembly location, the “prompt-parameter” displays.
- You’ll scan a new pallet or existing pallet to proceed.
- The scanned pallet number displays in the Sku Quantity Entry (Inbound LPNs) for Make to Stock flow (Pallet number displays in Sku Scan Mode if you are doing Make to Order (Outbound LPNs) flow.)
- Press the CTRL-O Hot key to end the pallet.
- Upon completing the assembly operation, the inbound LPNs or outbound LPNs are now associated to the scanned Pallet.
In addition, the new “lpn-prompt-behavior” parameter allows you to autogenerate the LPN number to save time during kitting. When you have lpn-prompt-behavior set to Auto Generate, the system will just autogenerate the LPN numbers and the user won’t have to scan them or print blind labels.
Steps to Enable
From the Work Order Kit Processing module:
- To enable palletization behavior, set the prompt-pallet to yes.
- To print the inbound LPN label, set print-lpn-label to yes.
- To perform palletization and create a specified number of standard LPNs, set prompt-pallet to "yes" and lpn-prompt-behavior to "enter lpn count."
- To perform palletization and auto generate LPNs, set prompt-pallet to "yes" and lpn-prompt-behavior to "Auto Generate."
Key Resources
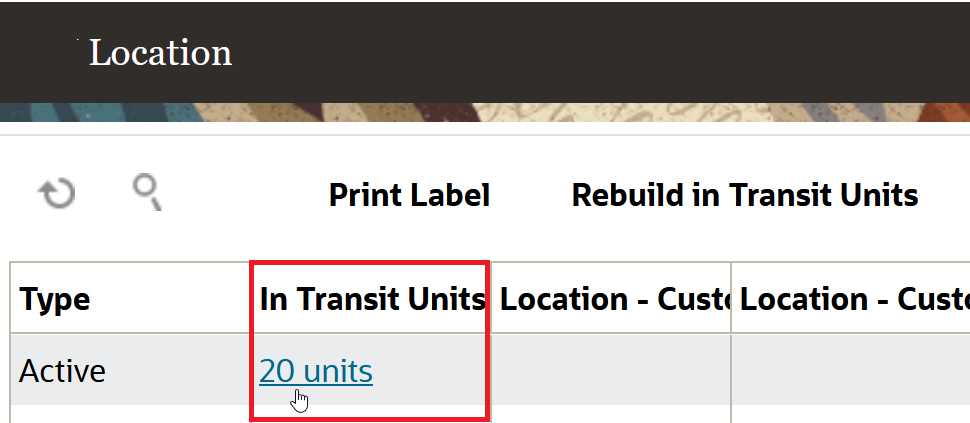
Access Replenishment Transit Quantities from Location UI
In 22A, a new “In Transit Inventory” sub-UI has been introduced in the Location UI for users who want to look at their in-transit inventory. Now, you can see the sum of all the in-transit inventory in this new field.
This sub-UI can be accessed from the Location UI by clicking on the hyperlink value. The sub-UI will show in-transit inventory for each SKU/Batch Number/Expiry Date/ Inventory Attributes combination.
Forecast incoming inventory to specific locations and make better plans for your allocation and fulfillment.
Steps to Enable
- Go to the Location UI.
- Choose the Location and navigate to the In Transit Units column.
- Click the hyperlinked value. The In-transit Inventory page opens.
Key Resources
Receiving Enhancements for Serialized Items
In industries such as manufacturing or pharmaceutical where there are a lot of regulatory requirements for capturing/maintaining batch/lot information and the serial number information in all stages of the supply chain from production to end user consumption. It is crucial to link the correct information for each inventory. In update 22A, we have added new fields to the IB Shipment Serial Number interface. This change provides more information for the system to link the serial number with its corresponding shipping detail. Then after receiving, a link to inventory is available. The IB Shipment Serial Number interface now includes the following fields:
- Batch_number
- Expiry_date
- Inventory_attributes (a-o)
- PO Number
- PO Sequence Number
- Receipt Advice Line
These new fields allow the system to link the IB Shipment detail in scenarios such as IB Shipment has multiple lines for the same SKU, but it has different attribute combination.
NON-CARTONIZED SHIPMENTS
Prior to Update 22A, it was required to always send the LPN in the IB Shipment Serial Number Interface File. This requirement didn’t allow the system to link inventory with serial numbers. Now the LPN number is no longer a required field in the IB Shipment Serial Number interface.
This means that you can send enough information for us to link serial numbers for Non-cartonized shipments. Being able to send this information in advance allows the system to link the appropriate shipment details, therefore saving you time when receiving.
The interface will run successfully as long as the system is able to determine the corresponding shipment detail For Action Codes "Create"/"Update"/"Delete", when an LPN number is not provided, the system searches the corresponding shipment detail by SKU/batch/expiry_date/invn_attributes (a-o)/PO Number/PO Sequence Number/Receipt Advice Line combination
For Action Code "Create", the number of serial numbers must match to the shipped quantity identified for the shipment detail. For example, when the shipment detail is the following:
| IB Shipment | Item | Batch | Inv Attr A | Qty |
|---|---|---|---|---|
| SHIP1 | Item01 | B1 | EU | 2 |
| SHIP1 | Item01 | B2 | USA | 1 |
nd when you provide the following serial numbers via the IB Shipment - Serial Number Interface:
| IB Shipment | Item | Batch | Inv Attr A | Serial Number |
|---|---|---|---|---|
| SHIP1 | Item01 | B1 | SERB1001 | |
| SHIP1 | Item01 | B1 | SERB1002 | |
| SHIP1 | Item01 | B2 | SERB2001 |
The system determines that serial numbers SERB1001 and SERB1002 can be associated to a unique shipment detail based on the shipment number (SHIP1)/Item (Item01)/Batch (B1) combination. These are associated even when Inventory Attribute A value is not shared in the interface, and also serial number SERB2001, can be associated to the shipment number (SHIP1)/Item (Item01)/Batch (B2)/Inv Attr A (USA)/combination.
If the system is not able to determine the association of serial numbers with any details for the shipment, the IB shipment – Serial Number Interface errors out.
NEW FIELD IN THE IB SHIPMENT TYPE UI
A new field “Non-Cartonized Receiving Serial Nbr Prompt Control" is introduced in the create/copy/edit pane of the IB Shipment Type UI.
You can choose from the following options for the new field in the create/copy/edit pane of the Shipment Type UI:
NOTE: The field can also be left blank.
- Prompt if not known
- Always prompt
This Non-Cartonized receiving serial nbr prompt control" field is available in the Shipment Type UI and is hidden by default. The Non-Cartonized receiving serial nbr prompt control field also controls serial number prompting for detailed receiving through RF Receive Shipment, Load.
CHANGES TO INBOUND SHIPMENT SERIAL NUMBER UI
New fields have been added to the Inbound Shipment Serial UI in the Create, Edit and Copy pane
- Batch_number
- Expiry_date
- Inventory_attributes (a-o)
- PO Number
- PO Sequence Number
- Receipt Advice Line
LPN is no longer a mandatory field. The minimum required fields to create a new record in this UI are "Inbound Shipment Nbr, Item Code and Original Serial Number". By default these fields can be hidden, and user can add it to his viewing group from the "add fields" section. New fields have also been added to the filter criteria.
CHANGES TO RF RECEIVE SHIPMENT AND RF RECEIVE LOAD
During the receiving process we identify/link the inventory to the serial number. The following three scenarios have been enhanced to better identify/link the inventory to its corresponding serial number:
- Prior to this update, while receiving cartonized shipments, when multiple attribute serial number combinations are on the LPN for the same SKU, an error message displayed indicating that you needed to do detailed receiving.
- You can now receive cartonized shipments for multiple attribute-serial number combinations on the LPN for the same SKU, and complete receiving faster, provided that:
- The shipment type for the shipment has “Cartonized receiving serial nbr prompt control” set to “Do not prompt/Prompt if not known.” You can also do this when the “Cartonized receiving serial nbr prompt control” value is blank for "shipment type set/shipment type not set" for the shipment and the item received is configured to "Required don’t validate serial number."
- Serial numbers are associated in the IB Shipment – Serial Number UI for all shipment details for the shipment/LPN prior to receiving
- You can also now receive non-cartonized shipments without entering serial numbers and complete receiving faster when:
- Serial numbers are associated in the IB Shipment – Serial Number UI for all shipment details prior to receiving, the number of serial numbers associated is the same as the shipped quantity, and the received quantity is also the same as the shipped quantity.
- When the shipment type for the shipment has the “Non Cartonized receiving serial nbr prompt control” set to “Do not prompt/Prompt if not known”, or when the “Non Cartonized receiving serial nbr prompt control” value is blank for "shipment type set/shipment type not set" for the shipment and the item received is configured to "Required don’t validate serial number."
- When you provide the serial numbers with the IB Shipment Serial Number Interface prior to receiving and you are prompted to provide the serial number during receiving. In scenarios where the serial number scanned while receiving is different than the serial number in the IB Shipment Serial Number UI, a warning message "serial number not present in shipment" will display. When you accept, the system will record the serial number scanned in the Received Serial Number field (in the IB Shipment Serial Number UI.),
NOTE: The above warning message can also be configured as a hard error.
CHANGES TO RECEIVE ENTIRE SHIPMENT
The Receive Entire Shipment functionality in the Inbound Shipment UI has been enhanced to better identify/link serial numbers with its corresponding inventory according to its SKU/batch/expiry_date/invn_attributes (a-o)/PO Number/PO Sequence Number/Receipt Advice Line combination.
In update 22A, When you perform Receive Entire Shipment for items that require serial numbers configured to “Required, Don’t validate”, and you have already provided all the serial numbers linked to the IB Shipment, the system will create the inventory with the corresponding serial numbers. The system will verify whether serial number association can be determined for all the IB shipment details corresponding to the LPN.
If serial numbers can be determined for all the shipment details and the number of serial numbers match the quantity being received, then the shipment can be received (provided other existing validations are satisfied).
NOTE: If all existing validations are not satisfied, an error will display, and you may have to add additional information or perform RF detail receiving to enter the serial number information.
RESTRICT CARTONIZATION FOR NON-CARTONIZED SHIPMENTS LINKED TO SERIAL NUMBERS
In the IB Shipment Detail screen, if there is a serial number linked to the Shipment Detail, Warehouse Management Cloud now restricts the cartonization process before the user can proceed further.
Whenever you attempt to cartonize the Shipment Detail with any of the following options, the system will display the error "Shipment Detail linked to Serial Number, Cannot Cartonize" if the detail is linked to a Serial Number.
- Cartonize
- Cartonize Standard Case
- Cartonize LPN by Case
- Cartonize by SKU --> Inbound Shipment Header Screen
INBOUND SHIPMENT INTERFACE - RECEIPT ADVICE LINE
The Inbound Shipment Interface has been updated so that upon successful interface, WMS will retain shipment lines when the receipt advice line is different even if the combination of Sku/LPN/batch_nbr/invn_attr(a-o)/expiry date.) is the same.
NOTE: The system will not consider cust_field_1 as an identifier to consolidate different shipment details.
Steps to Enable
You don't need to do anything to enable this feature.
Key Resources
Auto Verify Advanced Shipment Notification Status
With 22A, you will have the flexibility to enter the required selection criteria between receiving started and receiving complete status.
NOTE: If the shipment status has an invalid value or blank, then the system will pick the shipments with the status “Receiving Started” and “Receiving complete” by default for verification. In-transit status is not a valid entry to be used in this scheduled job.
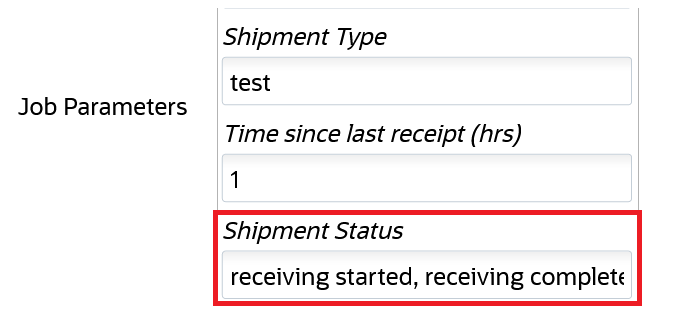
Currently, when the shipment is Auto Verified using a scheduled job, receiving started, and receiving complete status is applicable. Sometimes customers might not want to allow verification of ASN's for shipments that are in receiving started status to avoid timing issues.
Steps to Enable
- Go to the Scheduled Jobs UI.
- Choose the Job Type, Auto-Verify IB Shipment
- Enter the required Job Parameters > Shipment Status to the desired status.
- Click Save.
Key Resources
Improvements to Label Printing in Inbound LPN Inquiry UI
In 22A, Warehouse Management has added more flexibility in managing and configuring printers. Now users can easily distinguish and change printers depending on warehouse location and activity.
Previously, in the Inbound LPN Inquiry UI, the print command for labels was always sent to the default printer for logged in users. Now, Label Printing in the IBLPN Inquiry UI has been enhanced so that you can select the printer that is closest to you, saving you time in daily operations. You also now have the option to print multiple label copies per LPN.
After you select the IBLPN records and click on the Print Label action button, an easy to use pop up lets you manage your printer destination and select the desired number of copies to print. You can select your desired printer from the Printer Name drop-down:
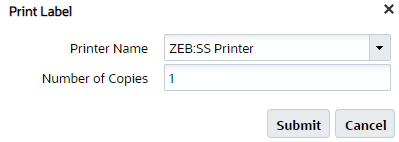
Next, specify the Number of copies (labels) you would like to print per LPN and click Submit.
- If "Number of copies" is greater than 1, the system will complete printing for the first IBLPN, and then move to the next IBLPN.
- If you do not select a printer from the list of printers, and proceed with "Submit", then your default printer will be selected to print the label.
- The sequence of printing the labels will be in the sequence displayed in the IBLPN Inquiry screen.
- A confirmation message will display to let you know that printing is complete.
You can also select a printer and number of label copies when you need to print Blind Labels via the Blind Labels action button:
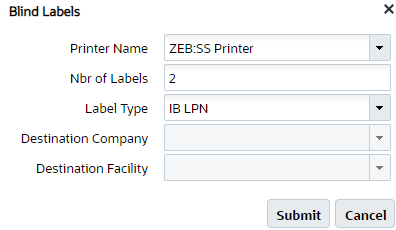
Steps to Enable
You don't need to do anything to enable this feature.
Key Resources
Support Crossdock Receiving Using a REST API
The Receive REST API is enhanced to now allow Cross Docking of an LPN.
URL:
POST .../entity/iblpn/receive
REQUEST PARAMETER - OPTIONS
| Name | Required | Type | Default | Options |
|---|---|---|---|---|
| xdock_mode |
N | String | None |
|
When the xdock_mode parameter is set to one of the following 4 options, the system will attempt to crossdock the following:
| Parameter Option | System Will Crossdock |
|---|---|
| lpn | LPN Nbr and Single SKU Xdock |
| lpn-and-one-sku | LPN Nbr Xdock |
| lpn-one-and-multi-facility | LPN Nbr, Single, Multi SKU Xdock facility |
| lpn-one-and-multi | LPN Nbr Single and Multi SKU Xdock |
Steps to Enable
Review the REST service definition in the REST API guides, available from the Oracle Help Center > your apps service area of interest > REST API. If you're new to Oracle's REST services you may want to begin with the Quick Start section.
Display Total Quantity in RF Pick Cart
A new Show Total Quantity For Location parameter has been added to RF Pick Cart which shows the total units that are picked from a location for your whole cart.
This new information saves time, especially in scenarios where you can pick multiple quantities at a time and distribute them across all the bins in your cart. Knowing the total quantity of items to be picked from a location reduces your movements during picking and this improves your productivity. Also, knowing the total number of units needed to be placed in the cart improves productivity and speed because the system displays the total units picked and the number of units expected to be placed in each bin.
As an example, let’s say that you have built a pick cart with multiple containers on your pick cart, and the total to be picked from the location/SKU is 15 units. All 3 orders require 5 units of USB cables. Before the parameter was introduced in the RF Pick cart, you would be prompted to visit the same active location three times to pick up 5 units of the USB cables each time and place them in different bins. That would mean three trips back and forth between the pick cart and the location.
With the introduction of the new parameter “Show-total-qty-info-for-location-SKU”, you have the option to see the total quantity to be picked from the location at one go. After picking, the number of units to be placed in each bin is also shown to you.
When the “Show-total-qty-info-for-location-SKU” parameter is enabled, the Pick Cart screen displays two new lines as shown in the image below:
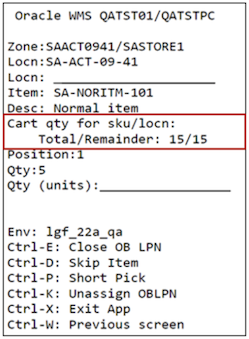
“Total” indicates the total number of units to be picked from a location and “Remainder” indicates how many units are pending to be placed in the bins on the pick cart. To begin with, both these numbers are the same and you are prompted to place 5 units in Position 1. After you place 5 units in position 1 and confirm, “Remainder” is reduced by 5 units and you are prompted to place 5 units in Position 2.

This continues until you place all of the units in different positions of the cart as directed by the RF screen.
In other words, you walk to the location only once to pick the total units and you place the units in different positions as directed by RF Pick Cart.
Steps to Enable
To enable display of total quantity in RF Pick Cart, set the "Show-total-qty-info-for-location-SKU" parameter to yes.
Key Resources
Increase Productivity Using OBLPN Cart Position Ordering
A new option, OBLPN Cart Position has been added to the Column Ordering UI -> ordering selection criteria -> Order By field. If you select OBLPN Cart Position from the order by field options, the system will order the allocations in a logical sequence in the pick cart.
This increases productivity as you won’t need to move around the cart as frequently while picking.
Steps to Enable
To enable OBLPN Cart Position:
- From the Order By field option in the Column Ordering UI, Order Selection Criteria, select OBLPN Cart Position.
- To order task details in ascending order, deselect the Order by Descending Flag.
- To order task details in descending order, select the Order by Descending Flag.
Key Resources
Key Changes in 22A for Manufacturing Integration
A new movement request entity has been added – movement request will be available in a future release – will allow you to handle movement of components to the assembly area.
NOTE: The following changes are added for future use and its recommended not to configure these fields or use the functionality until it is recommended in further official release announcements.
USER INTERFACE (UI) CHANGES
- To support integration to Fusion Manufacturing, a new UI module Movement Request Header is now available in Warehouse Management that allows you to handle internal warehouse movements like shop floor movements associated with Assembly and Manufacturing areas.
- You will be able to configure movement types associated with movement requests via the Movement Request Type UI. This allows you to differentiate various kinds of movements happening inside the warehouse.
Steps to Enable
You don't need to do anything to enable this feature.
Key Resources
Filter by Order Number in the MHE Pick Confirmation UI
You now have a quick and easy way to check all the pick confirmations received for a particular order. You can now search by Order Number in the MHE Pick Confirmation UI so that you can see records processed or errored by order number.
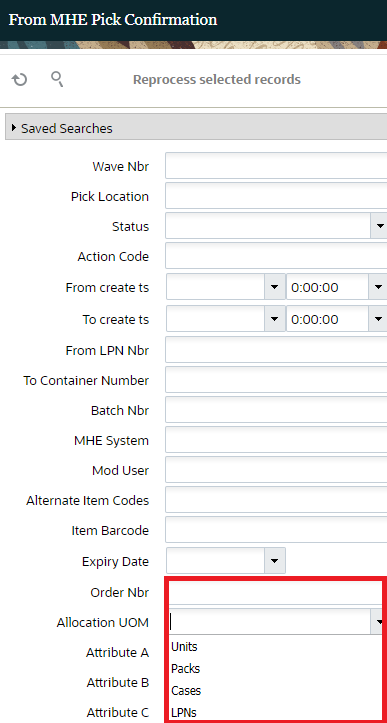
The following fields have been added to the MHE Pick Confirmation UI:
- Order Number: A text field entry where you can search based on order number. If you need to search for multiple orders, this field allows you to search for multiple order numbers separated by a comma.
- Allocation UOM: This is a Drop-down where you can select Units, Packs, Cases or LPNs. This field is useful for searching MHE Pick confirmations based on the allocation UOM.
Steps to Enable
You don't need to do anything to enable this feature.
Key Resources
Alternate Location Support for Putaway
A new drop-down Reason for Alt. Location is added in the Alternate location screen and it is displayed after you choose the Alternate Location option from the overflow menu. In this screen, you can choose the reason code from the list and request a change location. On confirming, the application records the reason code and keeps a track of the reason.
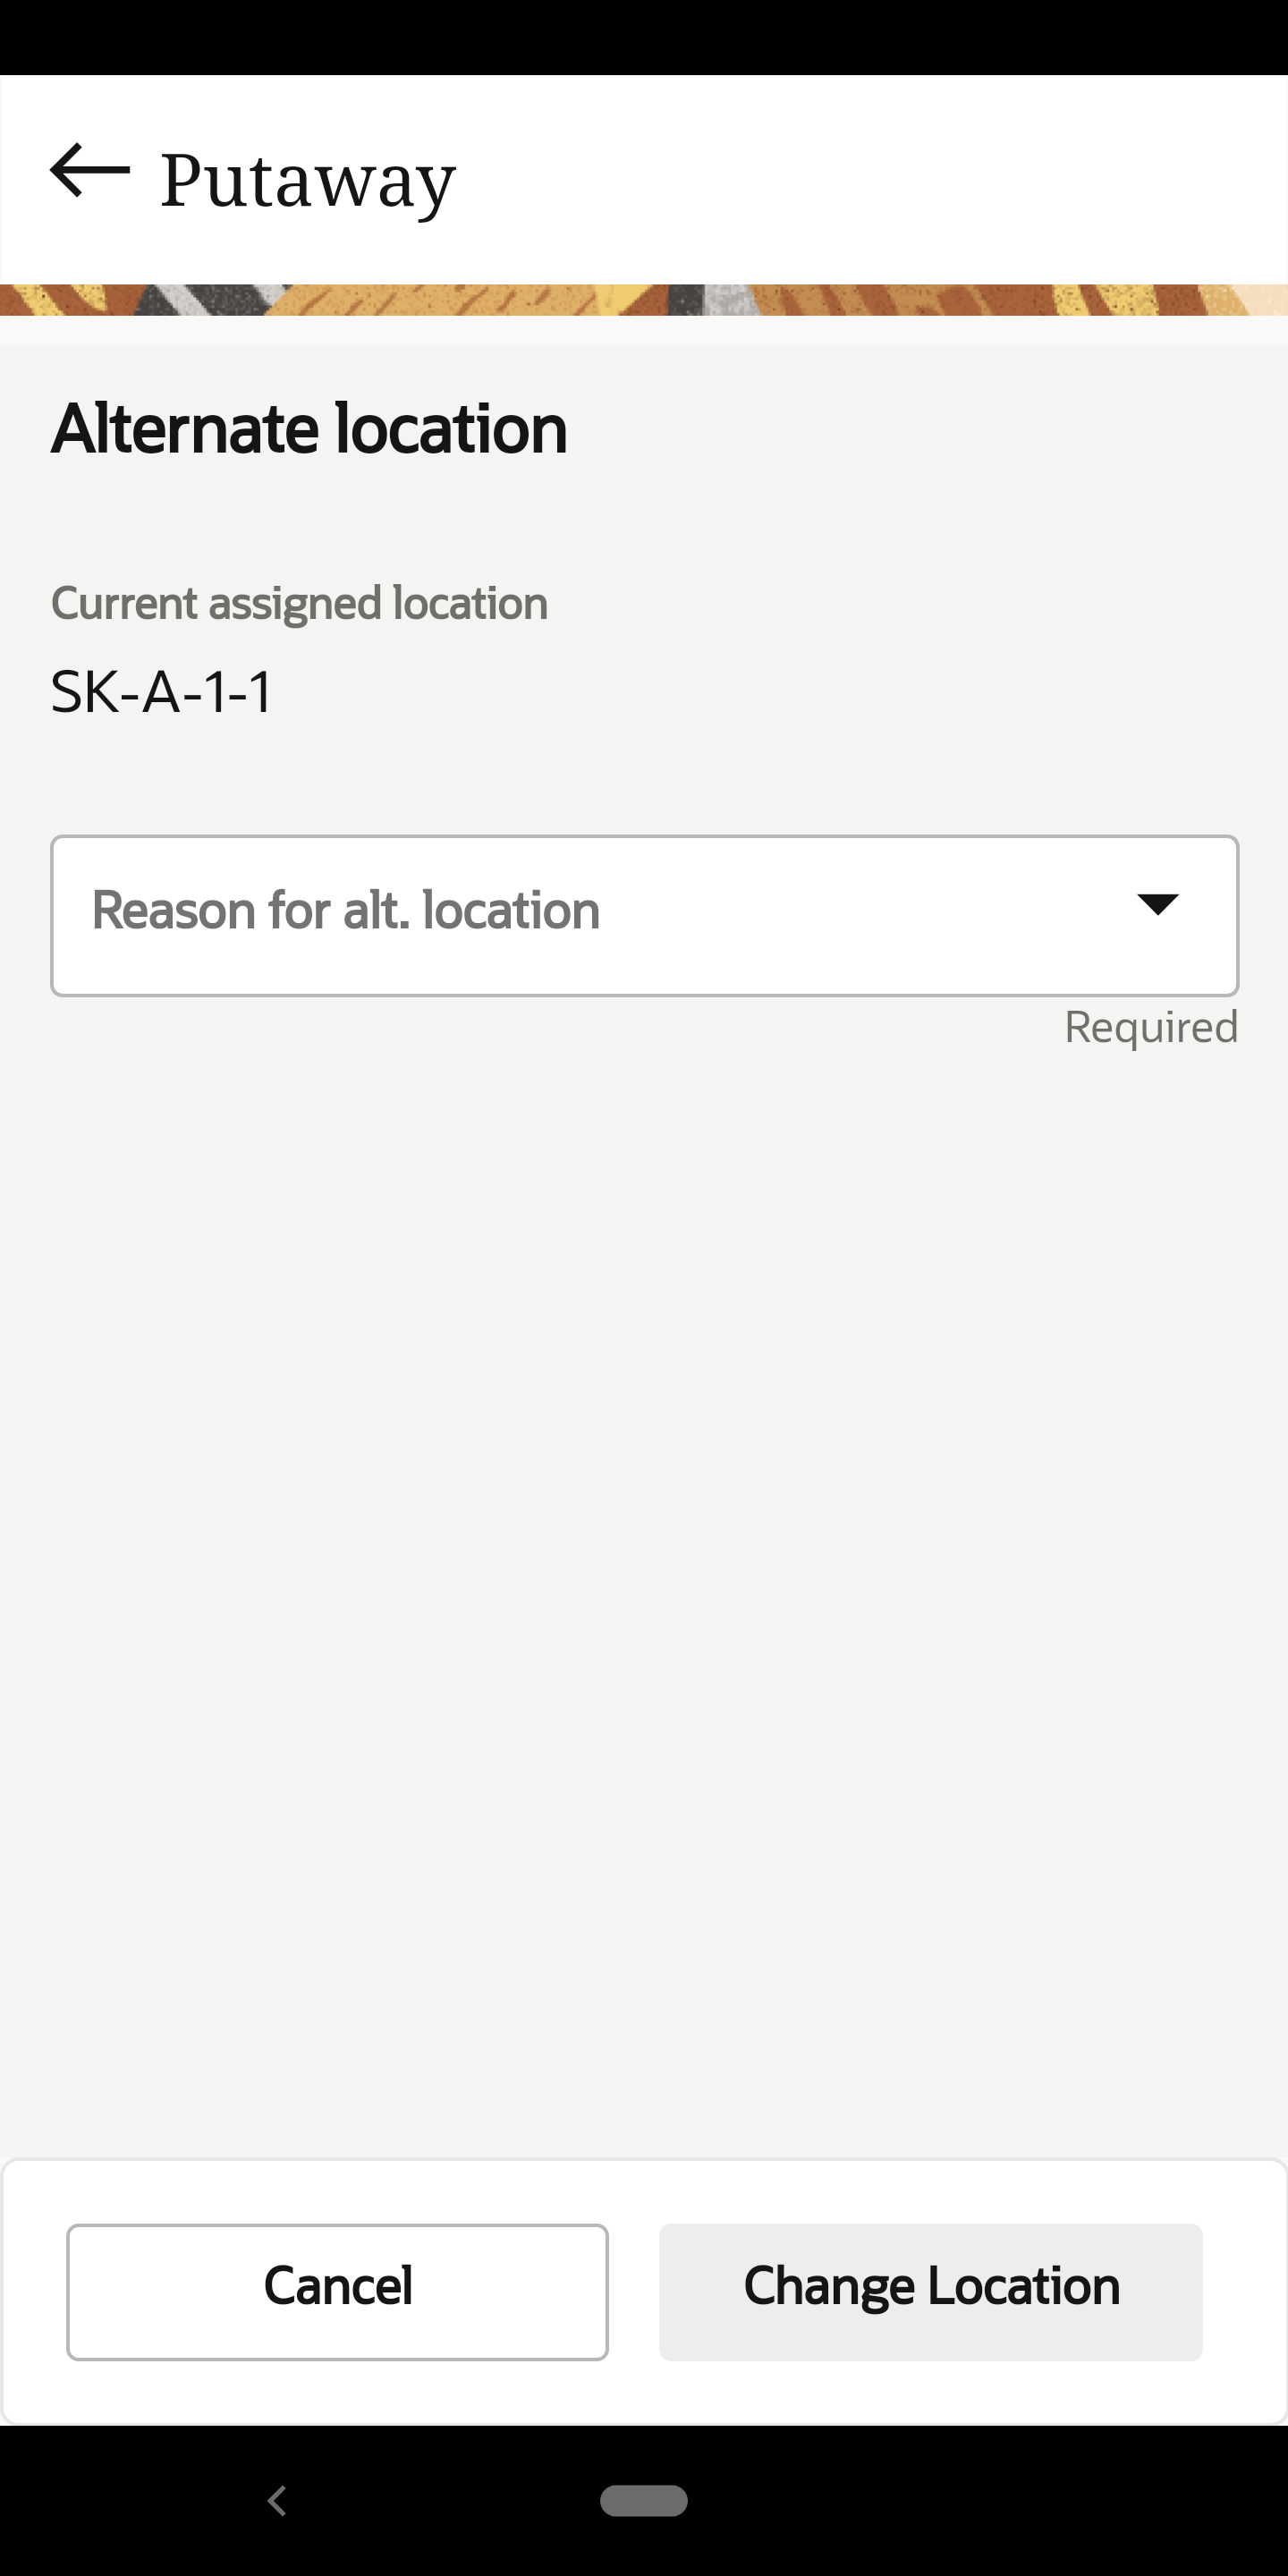
When you tap the Change Location button, the application writes a newly introduced IHT activity "Putaway Alternate Location". If you tap Cancel, you will be directed to the scanned Location screen where the original location of the LPN ready for putaway is displayed.
ALTERNATE LOCATION ENHANCEMENT IN RF TRANSACTION
In RF Directed Putaway, the system determines an optimal location based on configured location determination strategy. On determining the location, the user can request an alternate location using hotkey (CTRL-K) or can manually override the location by scanning. When an alternate location is determined by the system or is a user invoked, from 22A onwards, the application will provide traceability of alternate location invocation by writing a new IHT.
To capture the exact reason for requesting or scanning an alternate location, users are prompted for a reason code. Following two new parameters are added to the RF putaway module:
-
Prompt Reason Code: This is a selection field where you can set the parameter:
- None/Blank (default): The system does not prompt for a reason code, but IHT-86 is written without a reason code captured in IHT.
- Yes: The system prompts you to enter a reason code before the new location is determined.
-
Default Reason Code: On configuring a valid reason code, the system uses the same reason code when the user requests for alternate location or scan are an alternate location.
NOTE: This parameter is only available for direct putaway and the new parameter Prompt Reason code is set to YES. When the user invokes CTRL-K to determine an Alternate location, whether the system determines the alternate location or not, an IHT-86 is generated. If the system determines an alternate location and user accepts the alternate location, IHT-86 will have an original location and to-location populated to provide traceability of what was the initial location requested and the alternate location determined. If the user overrides the system-determined location by scanning the location, IHT-86 will be written only if the scanned location passes validation checks.
You can now select a reason code when you request a new alternate location during putaway using the WMS Mobile App.
Steps to Enable
To configure the alternate location prompt:
- Go to the RF Putaway (rf.inbound.cwrfputaway) module.
- Select the parameter prompt_reason_code and set the desired option.
Key Resources
Shipping Method Enhancements for Sales Orders
Oracle Warehouse Management is now able to derive ship via information based on the carrier, mode of transport, and service level values provided in the Order Interface.
The Ship via code is derived based on the combination of carrier, mode of transport, and service level values sent when you are creating/updating an order in the Order Interface. The system will compare and validate the values sent with existing data in WMS, and process the values.
INCREASED CHARACTER LENGTH
The carrier name and standard carrier service fields have been expanded to accommodate values sent from Oracle Inventory Management.
The following table shows the Oracle Inventory Management carrier fields and corresponding WMS fields:
| Warehouse Management Entity | Warehouse Management Column | Character Length |
|---|---|---|
| CARRIER | DESCRIPTION | 400 |
| STD_CARRIER_SERVICE | CODE | 30 |
NOTE: Existing records in carrier and std_carrier_service entities should not be impacted by this change and the existing values should remain the same.
Steps to Enable
See all of the updated XSD files mentioned above in the Update 22A XSD files on the Oracle Warehouse Management Cloud - Documentation for 22A page.
Key Resources