Last updated: 04/17/15 01:30 pm EDT
Overview
Purpose
This tutorial shows you how to use Theme 25 to create a responsive web application in Application Express Release 5.0.
Time to Complete
Approximately 20 mins
Introduction
Responsive Web Design is an approach to web design
in which a designer intends to provide an optimal
viewing experience—easy reading and navigation with
a minimum of resizing, panning, and scrolling—across
a wide range of devices (from desktop computer
monitors to mobile phones). Oracle APEX 5.0 handles
responsive design through Theme 25. Theme 25 has
support for all screen sizes and uses a flexible
grid layout that adjusts based on the device you are
using.
Prerequisites
Before starting this tutorial, you should:
- Have access to or have Installed Oracle Database 11g or later.
- Have access to or have installed the Oracle
Application Express 5.0.
Creating a Database Application Using Blue
Responsive Theme
To create the Responsive Web Application, perform the following steps:
-
On the Application Express Home Page, click Application Builder down arrow and select Database Applications.

-
Click Create >.

-
Select Desktop > and click Next.

-
Enter Responsive Web Application as the Name. Click the up arrow in the Theme field to select the responsive theme.

-
Select All Themes from select list.

-
Select the Blue Responsive theme.

-
Click Next >.

-
Click Add Page to add a page to the application.

-
Select Form icon.

-
Select Home(1) for Subordinate to Page and select EMP for the Table Name. Click Add Page.

-
Click Next >.

-
Accept the default and click Next >.

-
Accept the default and click Next >.

-
Click Create Application.

-
The application has created successfully. Click Shared Components.

-
Click Lists under navigation.

-
Click Create.

-
Select option From Scratch. ClickNext.

-
For Name enter EMP. Click Next.

-
For List Entry Label enter EMP. For Target Page ID or Custom URL Enter 2 . Click Next.

-
Click Create List.


-
Click the 1 - Home page.

-
Under Rendering section, right-click Regions and select Create Region.

-
Under Region section, enter Navigation for the Title . For Type select List . For List select EMP and click Save. Select Yes for Start New Row.

-
Under Rendering section, right-click Regions and select Create Region.
-
Under Region section, enter Region 1 for the Title . Select Yes for Start New Row. Click Save.

-
Right-click Regions and select Create Region. Enter Region 2 for the Title and click Save.

-
Right-click Regions and select Create Region. Enter Region 3 for the Title and click Save.

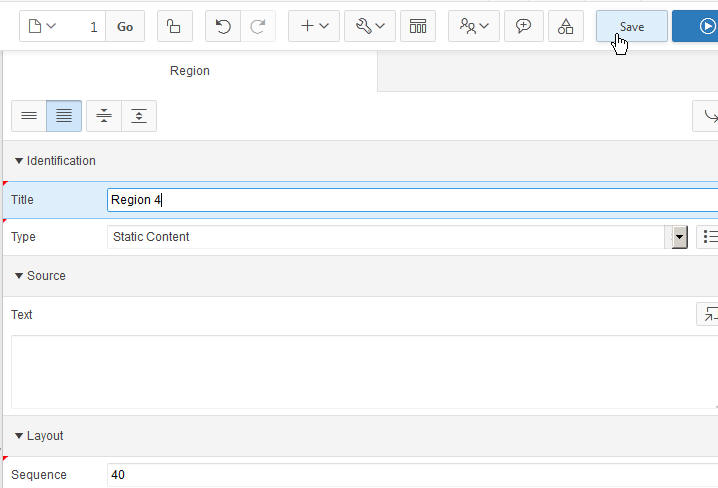
-
Right-click Regions and select Create Region. Enter Region 4 for the Title and click Save.
-
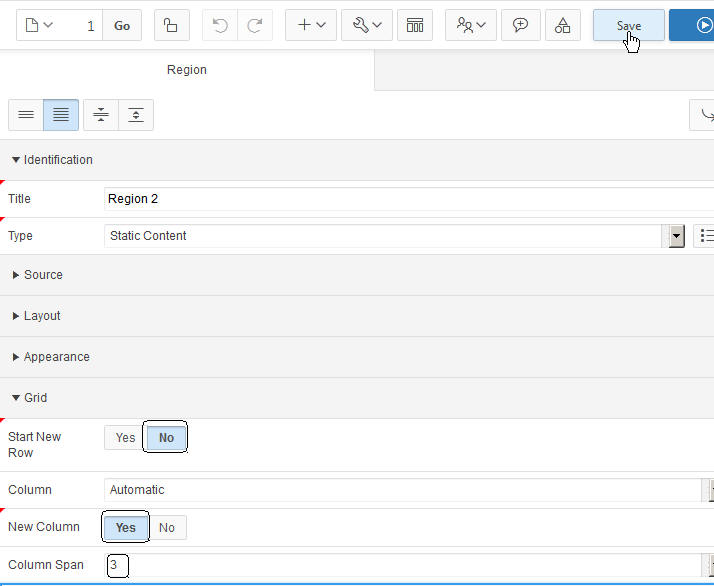
For the Regions 2, 3, and 4 select No for the Start New Row, select Yes for New Column and enter 3 for Column Span in the Grid Layout. Click Save.
-
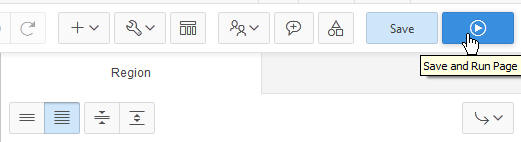
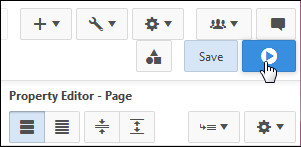
Click Save and Run Page.
-
Enter obe for Username and Password and click Login.

-
The application home page is displayed. Click the Edit Page 1 link in the developer toolbar.

-
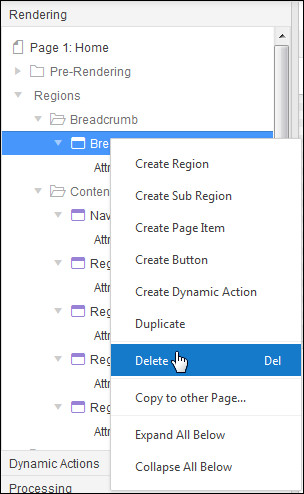
Click Breadcrumb and select Delete to delete the breadcrumb region from the Home page.
- Click Save and Run Page.
-
The breadcrumb has been removed. Click the Emp link.

-
This is a standard form. To change the region to alert region, click the Edit Page 2 link in the developer toolbar.

-
Click EMP under page rendering section.

-
Under Region section, select Alert Region for the Template. In the Grid Layout, select 3 for Column to start the region from offset of two columns and 8 for Column Span.

-
Click Save and Run Page.

-
The EMP form is displayed in the center. Click the Home breadcrumb.

-
Resize the browser to check the responsive functionality of the application. This size fits for the I pads,Tablets, etc.

-
Resize the browser to be smaller. The regions are now placed on top of each other which fits best for the mobile devices. Click Emp link under Navigation.

-
Notice that the labels have shifted above the fields making it easier to view the form fields and the labels together at once. The breadcrumb points back to the Home page.

Summary
Resources
- APEX OTN Home Page
- To Learn more about Responsive Theme, refer to Managing Themes
- To learn more about Application Express 5.0, refer to additional OBEs in the Oracle Learning Library
- Oracle Application Express: Workshop I
- Oracle University
Credits
-
Lead Curriculum Developer: Dimpi Sarmah