Before You Begin
Purpose
This tutorial describes the Policies and Actions component of the WebLogic Diagnostics Framework (WLDF) that provides the means for monitoring server and application states and then sending actions based on criteria set in the policies. Policies and actions are configured as part of a diagnostic module targeted to one or more server instances in a domain.
Important Note: As of WebLogic Server 12.2.1, the terms watch and notification are replaced by policy and action, respectively. However, the definition of these terms has not changed.
Time to Complete
Background
A policy identifies a situation that you want to trap for monitoring or diagnostic purposes. You can configure policies to analyze log records, data events, and harvested metrics.
A policy includes:
- A policy expression (with the exception of
calendar based policies)
The default language for policy expressions is the WLDF query language; however, the WLDF query language is deprecated. You can also use Java Expression Language (EL) for policy expressions. - An alarm setting
- One or more action handlers
An action is an operation that is executed when a policy expression evaluates to true.
WLDF supports the following types of actions:
- Scaling a dynamic cluster
- Java Management Extensions (JMX)
- Java Message Service (JMS)
- Simple Mail Transfer Protocol (SMTP)
- Simple Network Management Protocol (SNMP)
- Diagnostic Images
- REST
You must associate a policy with an action for a useful diagnostic activity to occur; for example, to notify an administrator about specified states or activities in a running server.
The motivation/driver for this scenario is to setup Resource Consumption Management – a new feature that’s part of WLS 12.2.1 Multitenancy – to trigger notification actions at different levels of heap utilization. The RCM implementation in WLS 12.2.1 of trigger notifications outputs a message in the server log file. The trigger notification can be consumed by an external system. A common method for monitoring systems is SNMP. WLDF supports sending SNMP traps and a monitoring system (like OEM, Nagios, solarwinds, etc.) that can then either log or react to the SNMP trap.
What Do You Need?
Operating System and Software Requirements
- A Linux machine with version 6 or greater of Oracle Linux or Red Hat Linux
- JDK 1.8 update 51 and above
- Oracle WebLogic Server 12c (12.2.1) software
Prerequisites
You should have completed the following tutorials:
-
Oracle WebLogic Server 12c (12.2.1): Installing WebLogic Server Using the Infrastructure Installer
- Oracle
WebLogic Server 12c (12.2.1): Creating a Restricted JRF
Domain
Important Note: Make sure you create the domain with an Admin Server. The creation of Admin Server has NOT been included in this tutorial.
-
Oracle WebLogic Server 12c (12.2.1): Configuring a Single Domain Partition
Note:Only few topics (as described below) are required to be completed from this OBE.
Enable Resource Consumption Management(RCM)
Note: It is assumed that at this point you have installed Weblogic Server Using the Infrastructure Installer and also created a Restricted JRF Domain by following the steps described in the OBE tutorials mentioned above.
To enable RCM, perform the following steps:
-
Shutdown all the java processes on the host host01.example.com.
- Open a terminal session on host host01.example.com as the oracle user.
- Execute pkill java to stop all the java processes.
-
Enable Resource Consumption Management in the Weblogic Server domain.
- Open a terminal session on host host01.example.com as the oracle user.
- Navigate to
/u01/fmw/wls1221/user_projects/domains/jrf_domain/bin. Edit thestartWebLogic.shfile.
- Locate the commented out
JAVA_OPTIONSline (at or near line 106):#JAVA_OPTIONS="-XX:+UnlockCommercialFeatures -XX:+ResourceManagement -XX:+UseG1GC ${SAVE_JAVA_OPTIONS}"
- Uncomment the
JAVA_OPTIONSline (at or near line 106):JAVA_OPTIONS="-XX:+UnlockCommercialFeatures -XX:+ResourceManagement -XX:+UseG1GC ${SAVE_JAVA_OPTIONS}"
- Save and close the
startWebLogic.shfile:
:wq - Start the Admin Server.
$ ./startWebLogic.sh
Creating a Virtual Target
A virtual target represents a target for a resource group, both at the domain level and in a domain partition. It defines the access points to resources, such as one or more host names, a URI prefix, and the Managed Servers or cluster to which the virtual target is itself targeted.
To create a single domain partition, perform the
following steps:
Note: The below mentioned steps have been
referenced from Oracle
WebLogic Server 12c (12.2.1): Configuring a Single
Domain Partition tutorial and are customized
to match our requirements in the current tutorial:
-
Log in to Fusion Middleware Control. In the browser navigate to
http://host01.example.com:7001/em, enter a Username and Password, and click Login. - From the WebLogic Domain drop down menu select Environment and click Virtual Targets.
- Click Create.
- Enter HeapAppTarget for the Name, 9999 for the Explicit Port, host01.example.com for the Host Name, and click Next.
- Select AdminServer from the Server drop down menu and click Create.
-
The virtual target is created successfully.
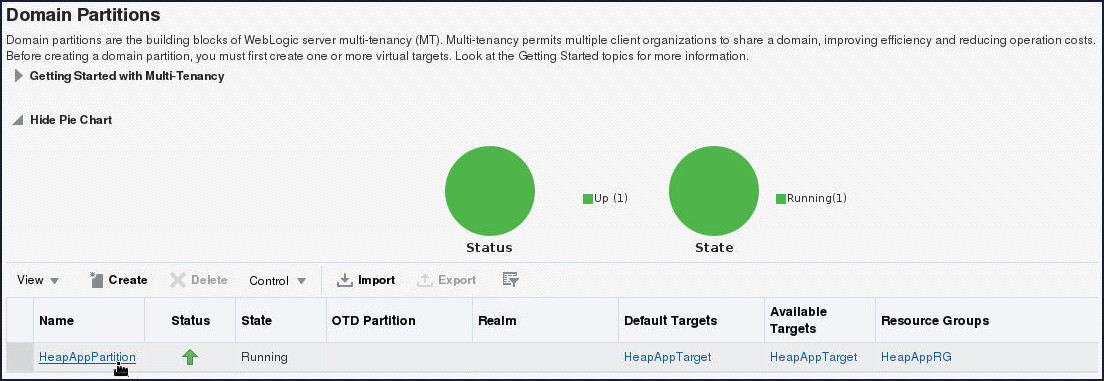
Creating a Domain Partition
WebLogic Server Multitenant (MT) implements an administrative and run time slice of a domain, called a domain partition. A domain partition is a portion of a Weblogic domain that is dedicated to running application instances and related resources.
To create a domain partition, perform the following steps:
-
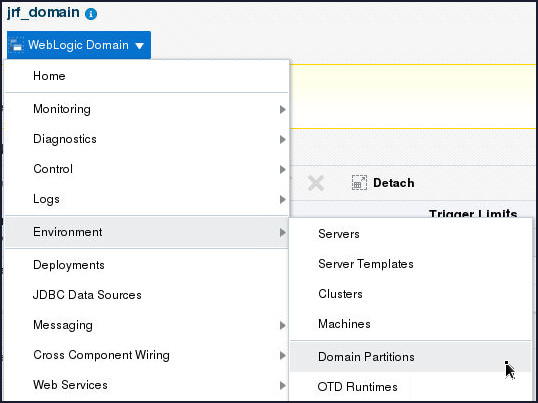
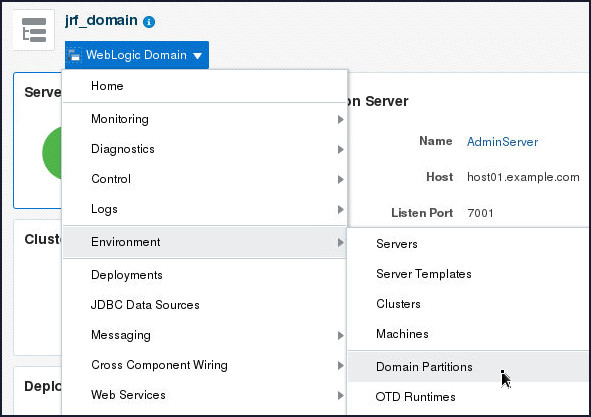
From the WebLogic Domain drop down menu select Environment and click Domain Partitions.
-
Click Create.
-
Enter HeapAppPartition for Name, and click Next.
-
Click to select the HeapAppTarget virtual target, click Set as Default, and click Next.
-
Enter HeapAppRG for Resource Group Name, shuttle the HeapAppTarget to Selected Targets, and click Next.
-
Review the Create Domain Partition: Summary and click Create.
- Next, you will deploy HeapApp application to the domain partition HeapAppPartition.
- Download the heapApp.war from
here
and save the application in an appropriate
location in your machine. In this tutorial, the
heapApp.warfile is downloaded to/home/oracle. -
Deploy the heapApp application.
- From the Domain Partition menu, select Deployments.
- Click Deployment and select Deploy.
- Select Archive or exploded directory is on the server where Enterprise Manager is running.
- Click Browse.
- Navigate to /home/oracle, select the
heapApp.warand click OK. - Click Next.
- For Distribution, select Install only. Do not start. and click Next.
- Review the Deployment Settings and click Deploy.
- After successful deployment, click Close.
-
Start the HeapAppPartition domain partition
- In the HeapAppPartition domain page, click Start Up.
- After successful startup click Close.
-
Test the heapApp application
- Open a Browser window and navigate to
http://host01.example.com:9999/heapApp.
The heapApp application displays.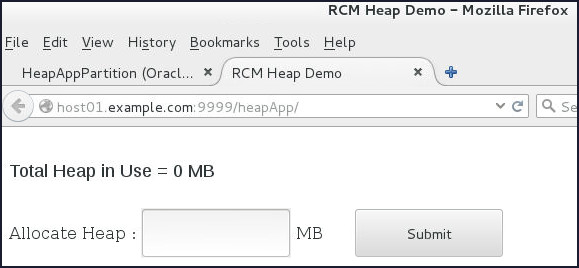
- Open a Browser window and navigate to
Implementing and Testing Resource Consumption Management Policies
In this section, you will implement and test Resource Consumption Management policies by creating a Resource Manager and configuring a domain partition to use the Resource Manager. Then, you configure and test a Resource Manager for heap utilization.
-
Login to the jrf_domain WebLogic Server Domain using Fusion Middleware Control.
- Open a Browser window and navigate to
http://host01.example.com:7001/em. - For User Name, enter
weblogicand for Password, enterwelcome1. Click Login.
The Fusion Middleware Control home page for the jrf_domain displays.
- Open a Browser window and navigate to
-
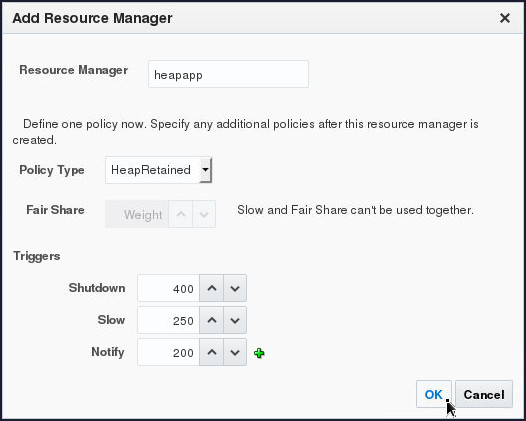
Create a Resource Manager named heapapp with a HeapRetained policy that notifies when heap utilization rises to 200 MB, slows at 250 MB and performs shutdown at 400 MB.
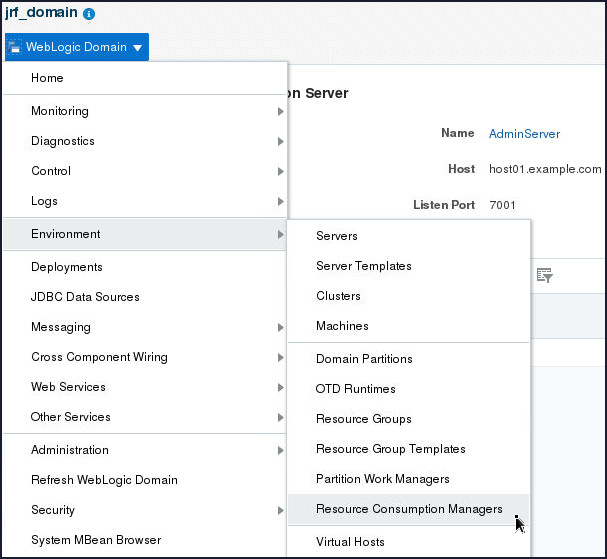
- From the WebLogic Domain menu,
select Environment and then
click Resource Consumption Managers.
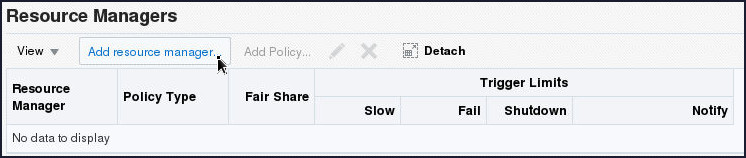
- Click Add resource manager…
- For Resource Manager,
enter
heapapp. - For Policy Type, select HeapRetained.
- For Notify, enter 200.
- For Slow, enter 250.
- For Shutdown, enter 400.
- Click OK.
Make sure you observe the following message:

- From the WebLogic Domain menu,
select Environment and then
click Resource Consumption Managers.
-
Configure the HeapAppPartition domain partition with the Resource Manager heapapp.
- From the WebLogic Domain
menu, select Environment and
then click Domain Partitions.
- Click on the table entry for the HeapAppPartition
domain partition.

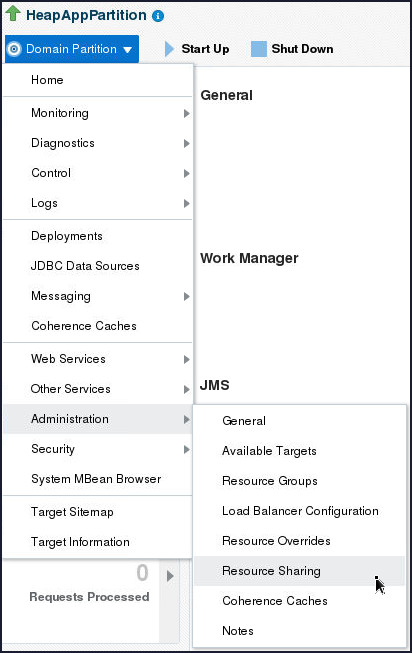
- From the Domain Partition
menu, select Administration
and then click Resource Sharing.
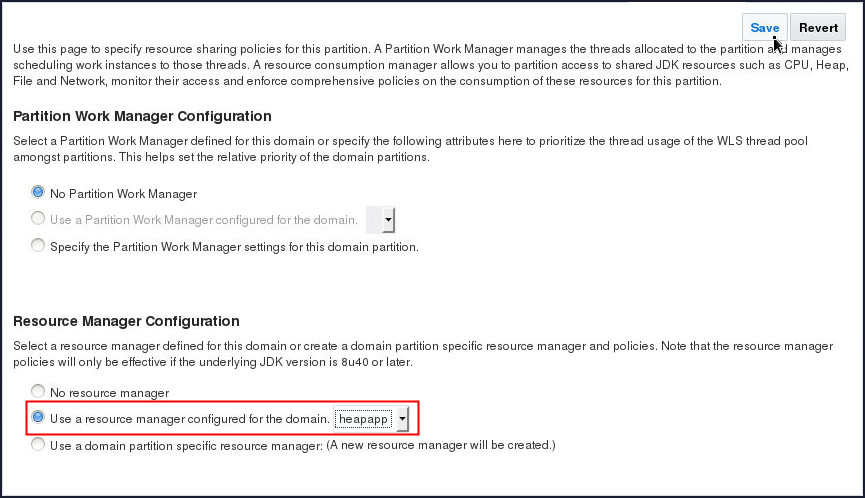
- Click Use a resource manager configured for the domain. and select the heapapp Resource Manager.
- Click Save.
Make sure you observe the following message.

- From the WebLogic Domain
menu, select Environment and
then click Domain Partitions.
-
Test the policy by allocating memory with the application.
- Open a Browser window and navigate to
http://host01.example.com:9999/heapApp.
The heapApp application displays. - Open a terminal session on host
host01.example.comas theoracleuser. - Navigate to
/u01/wls1221/user_projects/domains/jrf_domain/servers/AdminServer/logs.
-
Tail the
AdminServer.logfile to view the Resource Consumption Management notifications.$ tail AdminServer.log -f - Switch back to the Fusion Middleware Control browser window.
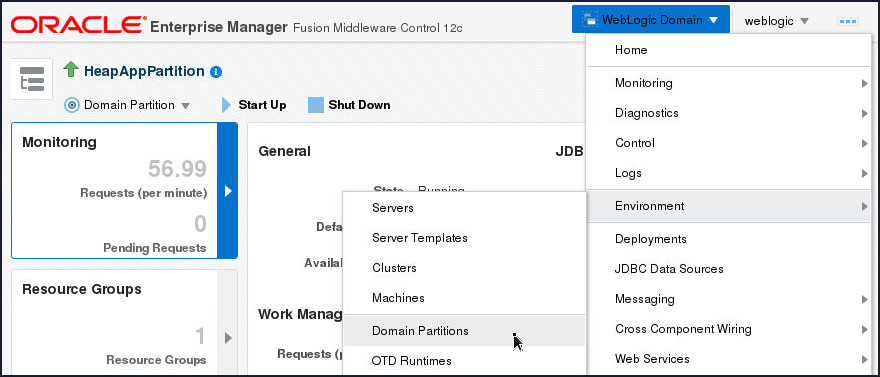
- From the WebLogic Domain
menu, select Environment and
click Domain Partitions.
- Click on the HeapAppPartition
entry in the Domain Partitions
table.

-
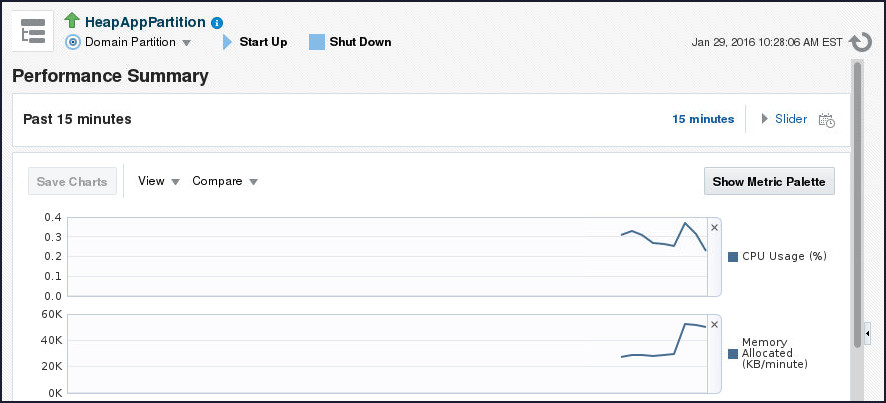
From the Domain Partition menu, select Monitoring and click Performance Summary.
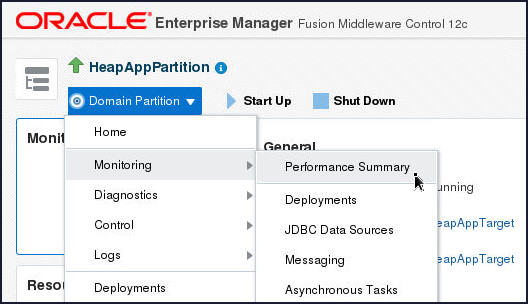
Keep this window open since it will display the partition performance activity.
-
In the browser window with the heapApp application, in the Allocate Heap field, enter
150and click Submit.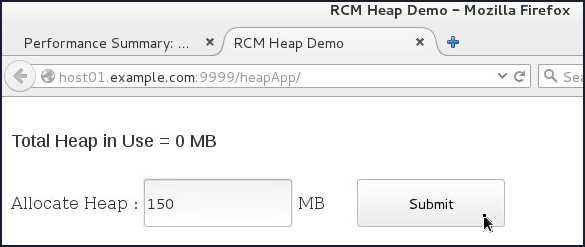
Note that the browser window with Fusion Middleware Control displays increasing memory utilization.
Also, note that the
AdminServer.logdoes not display any notifications since the partition has not reached the limit in the Notify policy. - In the browser window with the heapApp
application, in the Allocate Heap
field, enter
60and click Submit.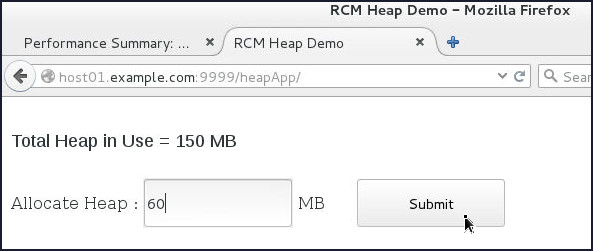
- Inspect the terminal session that is tailing
the
AdminServer.logfile – it should display notifications that the partition has exceeded the quota and a notification is displayed.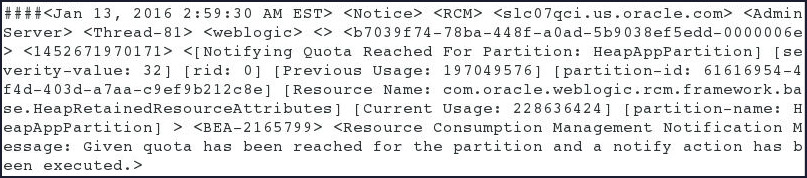
- In the browser window with the heapApp
application, in the Allocate Heap
field, enter
50and click Submit.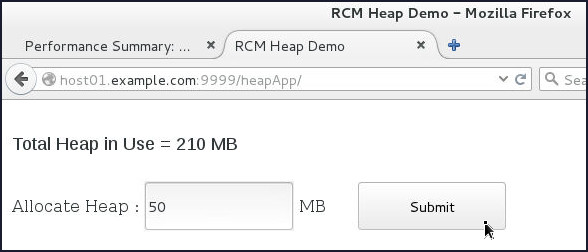
- Inspect the terminal session that is tailing
the
AdminServer.logfile – it should display notifications that the partition has exceeded the quota and a slow action is displayed.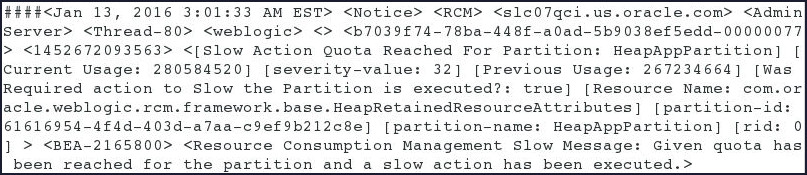
- In the browser window with the heapApp
application, in the Allocate Heap
field, enter
150and click Submit.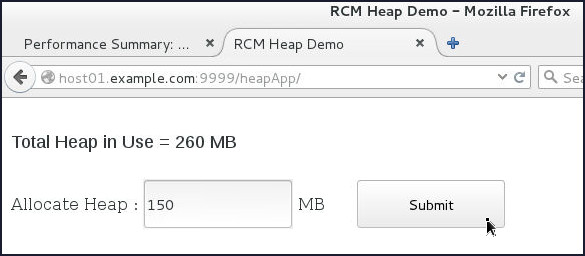
- Inspect the terminal session that is tailing
the
AdminServer.logfile – it should display notifications that the partition has exceeded the quota and a shutdown action is displayed.
-
In the browser window displaying Fusion Middleware Control, click the refresh icon – the partition state is changed to shutdown.
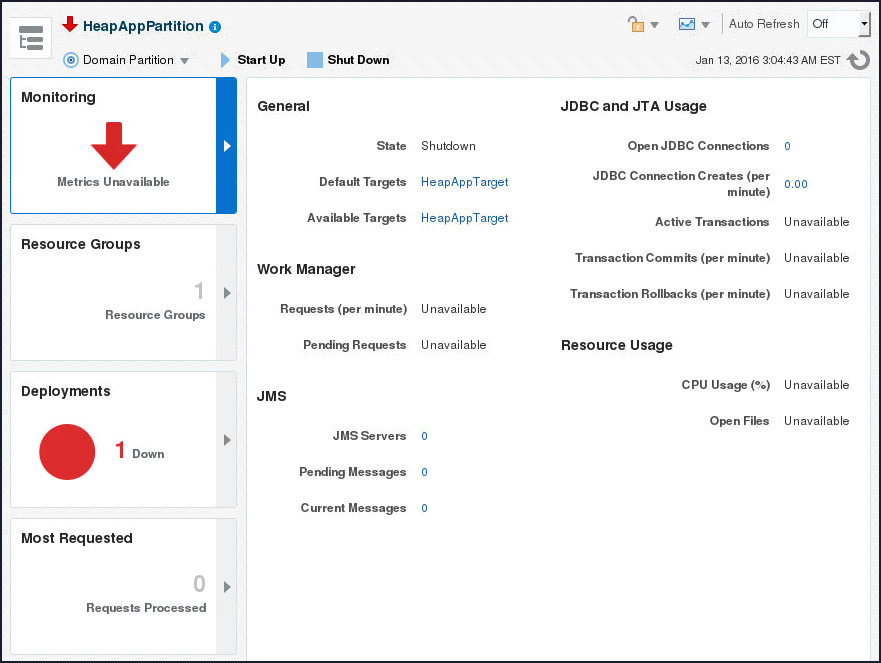
The Resource Manager for heapApp has shut the partition down since it exceeded the CPU Utilization quota defined in the policy.
- Open a Browser window and navigate to
Using WLDF to add SNMP traps for notifications when RCM policies are triggered
In this section you will configure WLDF to send SNMP trap notifications when RCM policies are triggered.
Creating Server SNMP Agent and Trap Destination
Perform the following steps to create Server SNMP Agent and Trap Destination:
-
Open the Weblogic Administration Console in a browser window and login using the credentials
weblogic(Username)/welcome1(Password).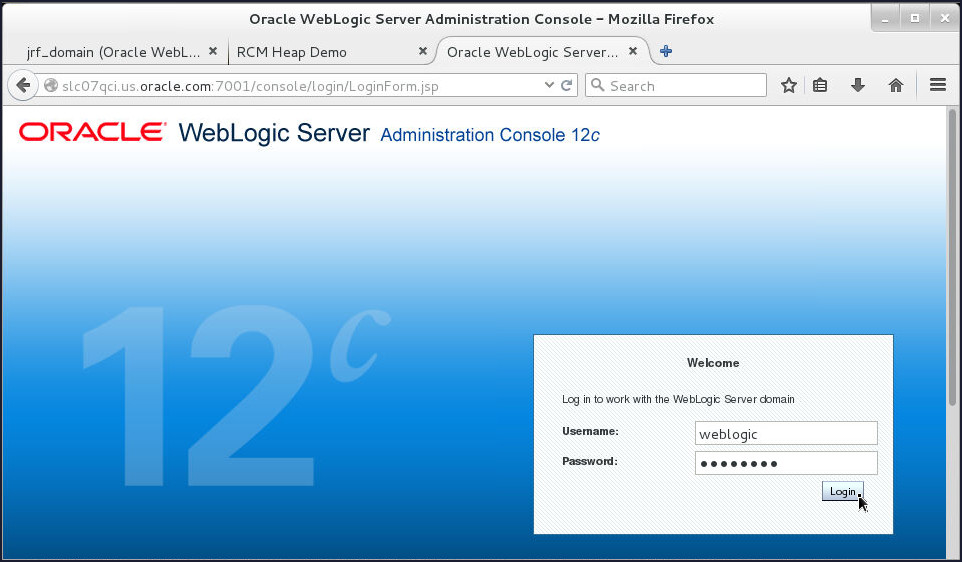
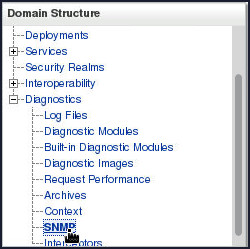
-
Click Diagnostic > SNMP under Domain Structure in the left pane.
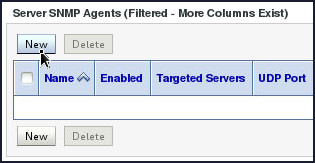
-
On the SNMP page, click New button under the Server SNMP Agents region.
-
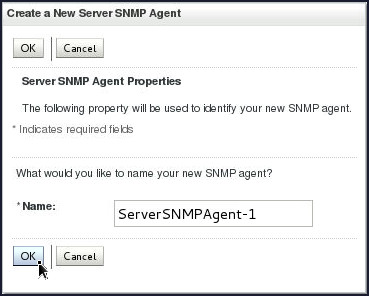
On the Create a New Server SNMP Agent page, enter ServerSNMPAgent-1 in the Name field and click OK.
-
Confirmation messages will appear indicating the successful creation of the SNMP Agent.

-
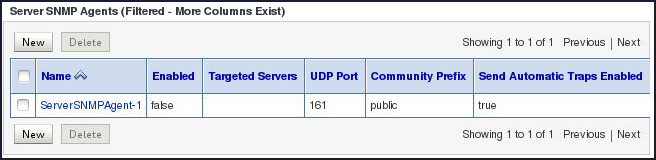
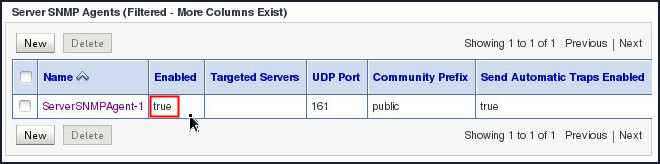
You will observe the newly created SNMP agent under the Server SNMP Agents region on the SNMP page. Notice that the newly created SNMP agent is not in the enabled state by default.
-
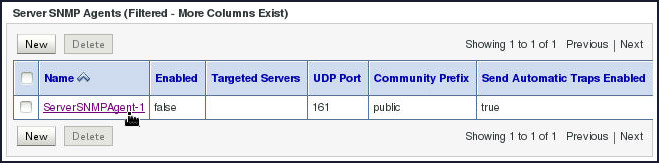
Click the newly created SNMP agent ServerSNMPAgent-1 in order to enable it.
-
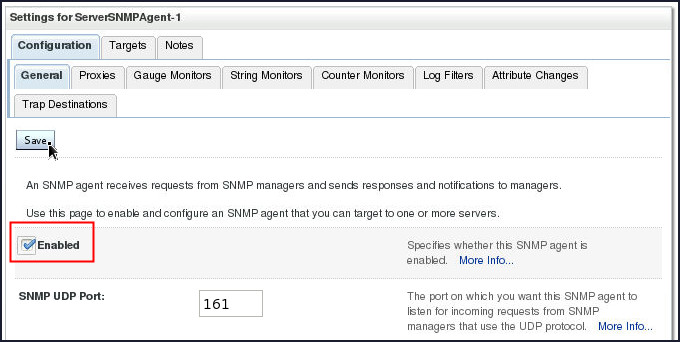
Select the check box adjacent to Enabled and click Save.
-
Confirmation messages will appear indicating the successful nature of your activity.
You will also notice that the newly created SNMP Agent has been successfully enabled.
-
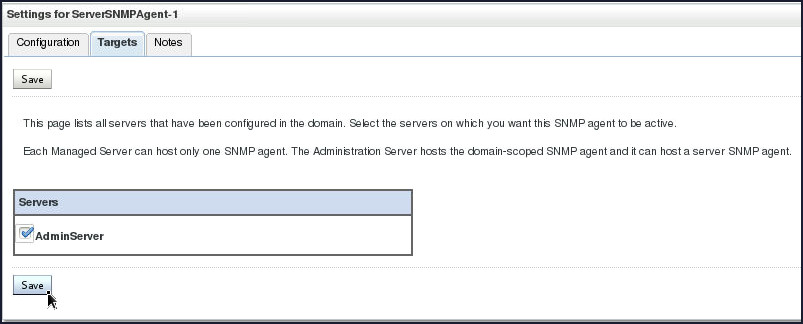
Again, click the SNMP Agent ServerSNMPAgent-1. Select the Targets tab in the upper row of tabs to select the server on which you want this SNMP agent to be active.

-
Select the check box adjacent to AdminServer and click Save.
-
Confirmation messages will appear indicating the successful nature of your activity.

-
Next, you will create the Trap Destination. Select the Configuration Tab.
-
In the second row of tabs under the Configuration tab, select Trap Destinations tab.

-
Under SNMP Trap Destinations region, click on the New button.

-
On the Create a New SNMP Trap Destination page, enter
RCMNotifyin the Name field,host01.example.comin the Host field,4000in the Port field and click OK.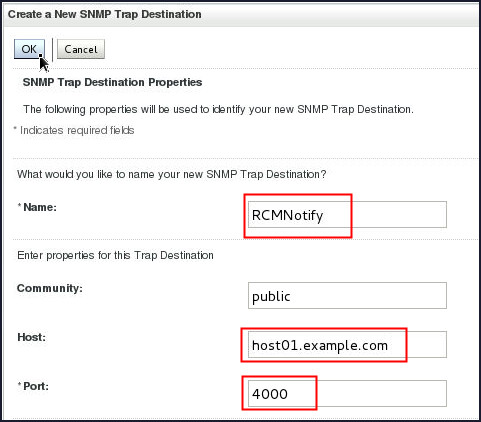
Note: The name of the destination, RCMNotify, has to match the WLDF action and the port has to match what the manager is listening on.
-
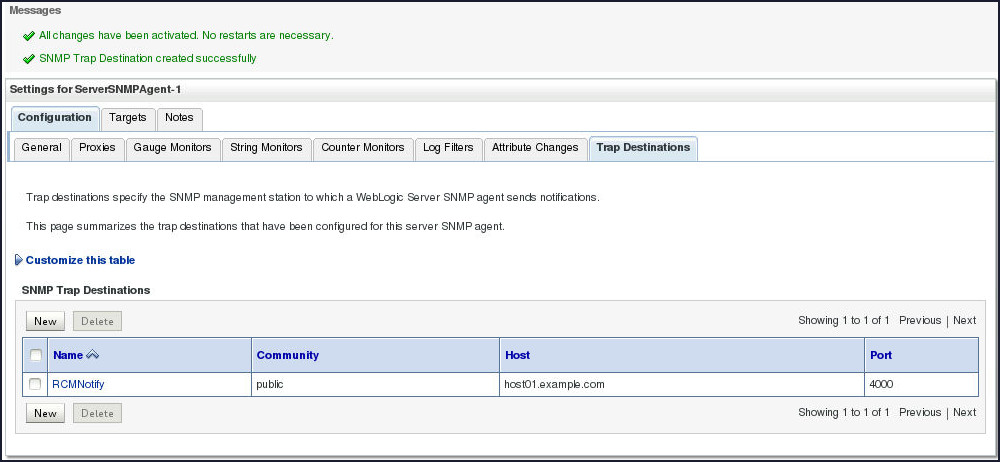
Confirmation messages will appear indicating the successful creation of the Trap Destination.
You will also notice the newly created SNMP Trap Destination RCMNotify under SNMP Trap Destinations region.
SNMP Trap Diagnostic Action and RCM Policy Creation
In this section, you will create a SNMP Trap diagnostic Action named RCMNotify which will send the notification when the heap utilization touches the specified limits. You will also create a Policy that will monitor the AdminServer Log for any messages related to RCM. Next, you will associate the policy with the action for the diagnostic activity to occur.
Perform the following steps to create an Action and a Policy:
- Log in to Fusion Middleware Control.
In the browser navigate to
http://host01.example.com:7001/em, enter the Username and Password, and click Login. - From the WebLogic Domain
drop down menu select Environment
and click Domain Partitions.
- Click on the table entry for the
HeapAppPartition domain partition.
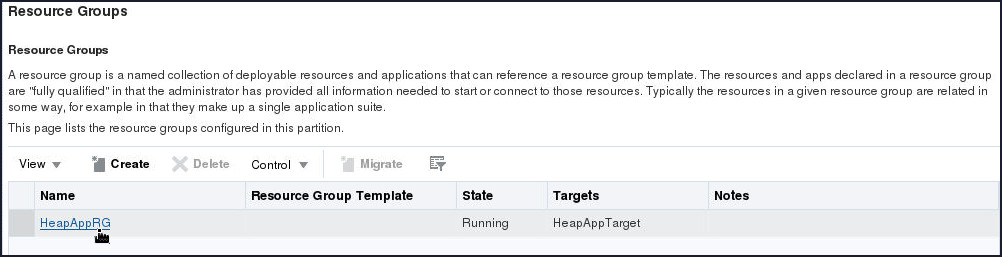
- Click Resource Groups.
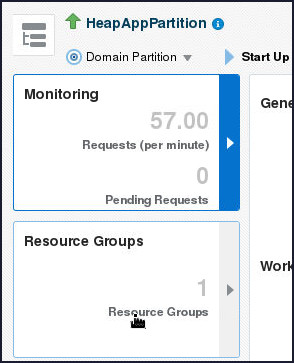
- Click on the table entry for the HeapAppRG.
- On the Resource Group : HeapAppRG
page, select Services > Diagnostics
tab.
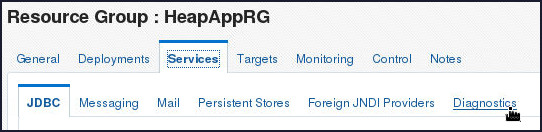
- Click Create.
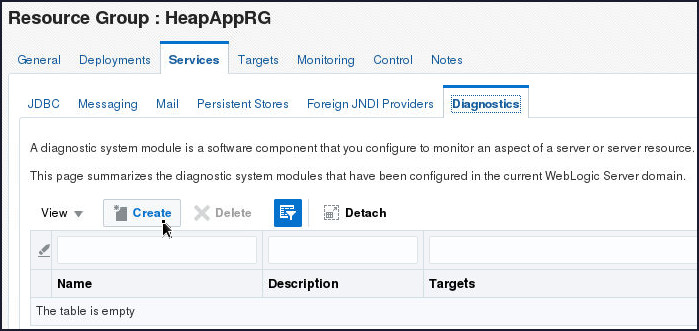
- Enter the Diagnostic Module name as HeapAppModule
and click Create.

- A confirmation message gets displayed
indicating the successful creation of the
module.
- Select Services > Diagnostics
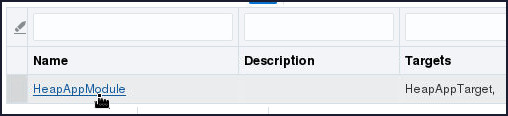
tab again.

- Click on the table entry HeapAppModule.
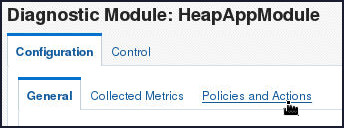
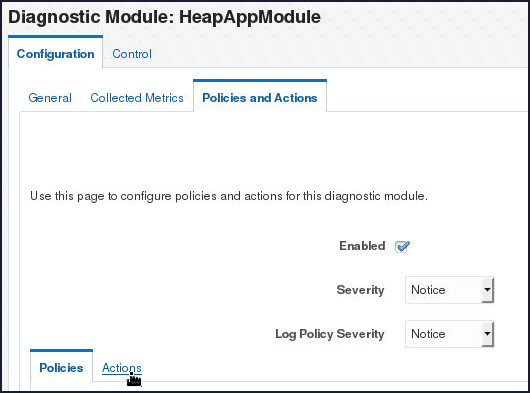
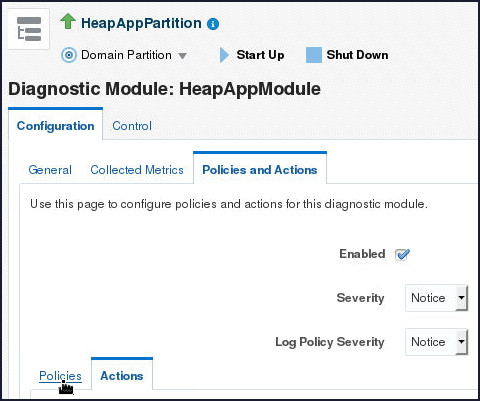
- Select Configuration >
Policies and Actions on the Diagnostics
Module: HeapAppModule page.
- Select Notice from the Log
Policy Severity drop down and click
Apply.
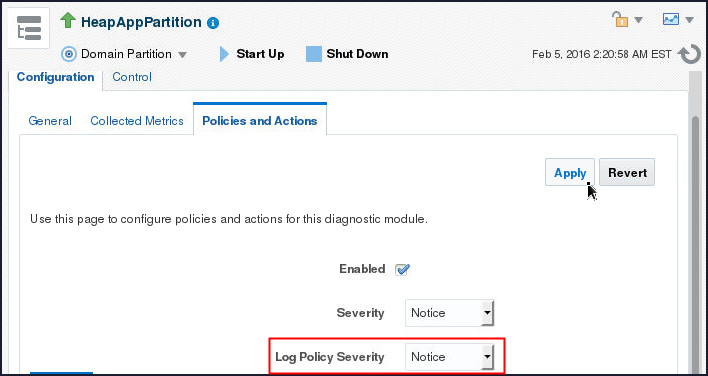
- A confirmation message gets displayed.

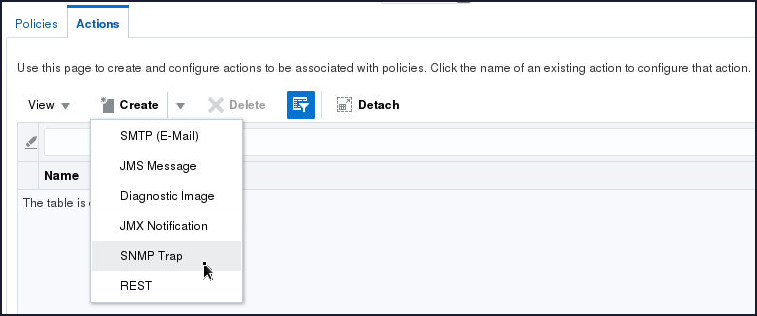
- Select the Actions tab in
the lower part of the Policies and Actions
tabbed page.
- Select SNMP Trap from the
Create drop down.
- Specify RCMNotify in the Action
Name field and click Create.
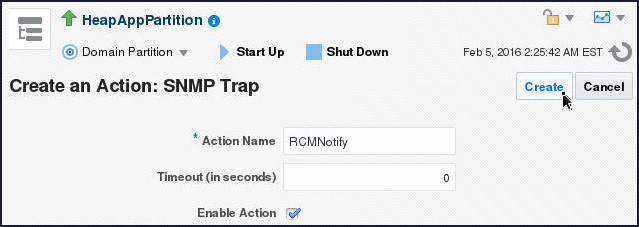
- A confirmation message gets displayed.

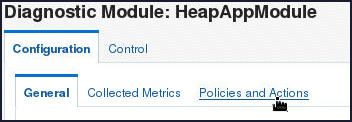
- On the Diagnostics Module:
HeapAppModule page, select Configuration
> Policies and Actions
tab.
- Click the Policies tab in the lower part of the Policies and Actions tabbed page.
- On the Policies tabbed
page, click Create.

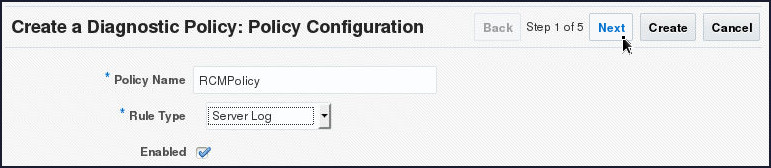
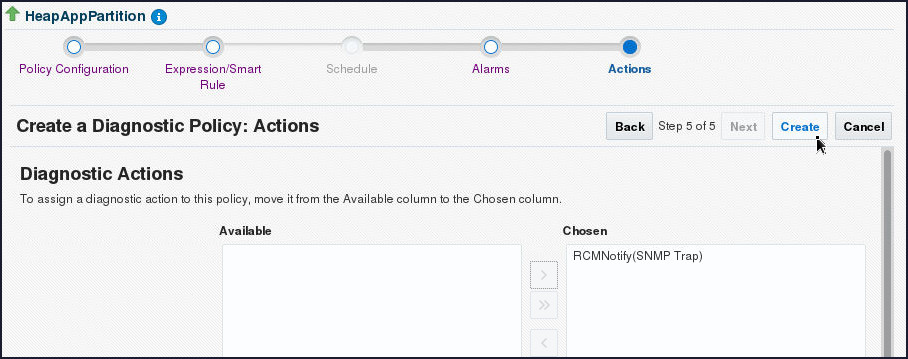
- On the Create a Diagnostic Policy:
Policy Configuration page, specify
RCMPolicy in the Policy
Name field, select Server
Log from the Rule Type
drop down and leave the Enabled
field checked by default. Click Next.
- On the Create a Diagnostic Policy:
Expression/Smart Rule page, specify
(log.subsystem=='RCM')in the Expression text area and click Next.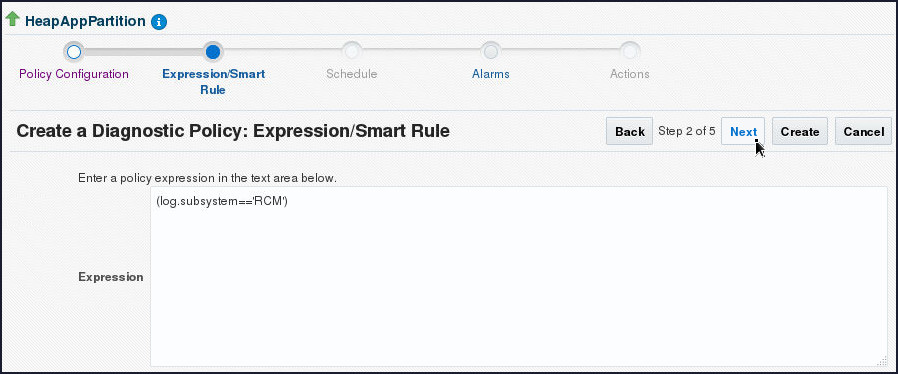
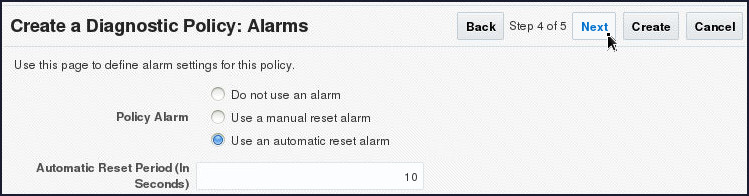
- On the Create a Diagnostic
Policy:Alarms page, select Use
an automatic reset alarm radio
button and click Next.
- On the Create a Diagnostic Policy:
Actions page, shuttle the RCMNotify(SNMP
Trap) Action item to Chosen Field and
click Create.
- A confirmation message gets displayed. This
completes the creation of Action and Policy
for the current scenario.

Testing SNMP Trap Notifications Triggered due to RCM Policies
In this section, you will start the SNMP Trap Monitor and verify if the SNMP Trap Notifications are being triggered due to the RCM policies that have been implemented in the previous topics. Basically, the SNMP Trap Monitor activity waits for an event to occur on a port that you specify.
-
Oracle WebLogic Server provides an SNMP command-line tool that can be used to perform a full suite of SNMP commands, including spawning a trap monitor. In order to start up a trap monitor to receive our notifications, perform the following steps:
-
Open a terminal window and set up the WLS environment variables using the the following script:
setWLSEnv.sh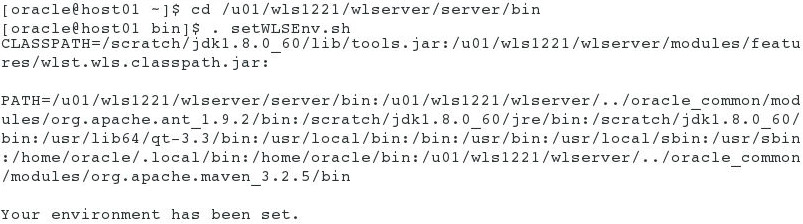
- Enter the following command to start the SNMP Trap Monitor:
java weblogic.diagnostics.snmp.cmdline.Manager SnmpTrapMonitor –p 4000
-
- Open a Browser window and navigate to
http://host01.example.com:9999/heapApp.
The heapApp application displays. - In the Allocate Heap field, enter
210and click Submit.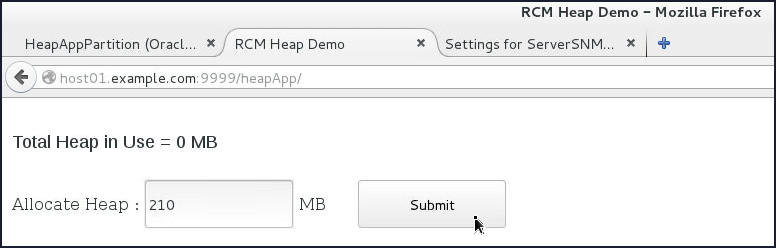
-
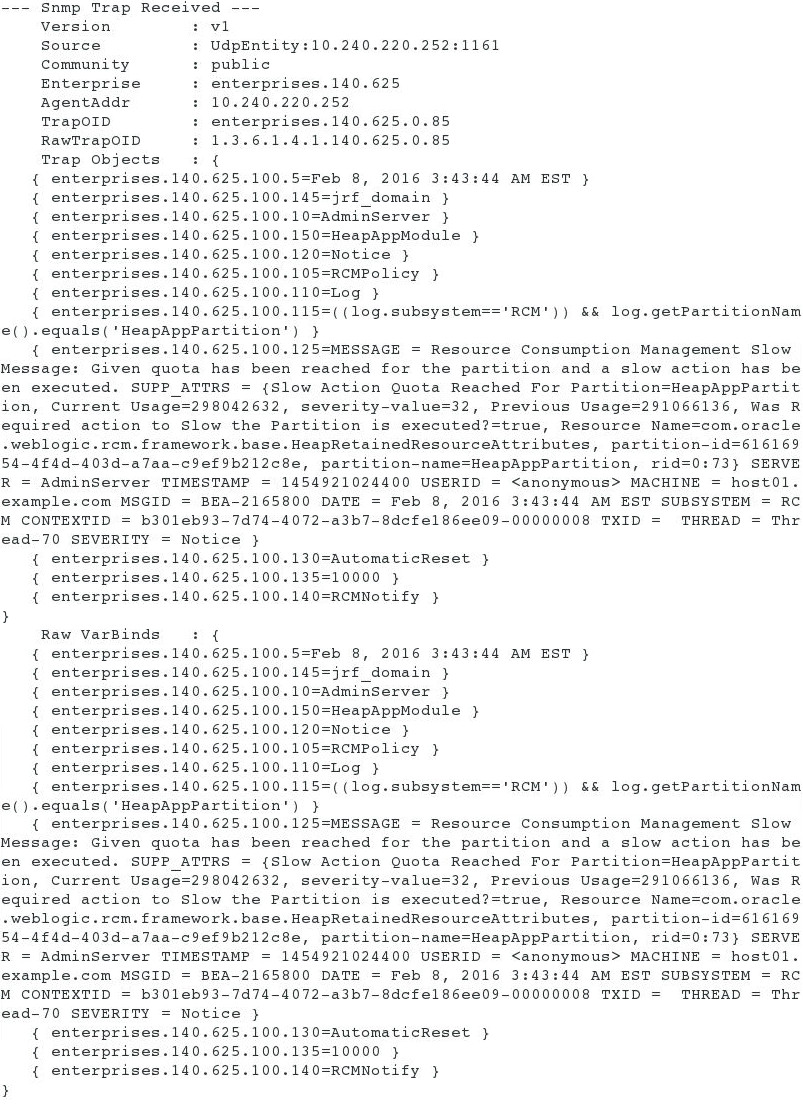
Switch to the terminal window where the SNMP Trap Monitor is running.
You will observe a SNMP Trap Notification.
Want to Learn More?
-
For documentation on Oracle WebLogic Server 12c (12.2.1), visit the Oracle WebLogic Server Documentation Library.
-
For more information on configuring and using WLDF for Oracle Weblogic Server, refer Oracle® Fusion Middleware Configuring and Using the Diagnostics Framework for Oracle WebLogic Server.
-
To learn more about Oracle WebLogic Server, refer to additional OBEs in the Oracle Learning Library
Credits
- Lead Curriculum Developers: Tom Eliason, Veerabhadra Rao Putrevu
Version
- 02-40-001-Conf_Diag_Pol_Act