
 Manage Security for Service Instances
 Before You Begin
This tutorial shows you how to assign roles to different users of the Data Integration Platform Cloud service. This tutorial takes approximately 20 minutes to complete.
Background
The users and roles for Data Integration Platform Cloud (DIPC) are managed through Oracle Idenity Cloud. There are two sets of roles associated to DIPC.
- DIPC Service Level - roles to determine what a user can do within the DIPC service such as create and delete service instances
- DIPC Application Level - roles to determine what a user can do within the applications that are available for a specific DIPC service instance. With every DIPC service instance, you get acess to applications such as Oracle Data Integrator (ODI) console, Enterprise Data Quality (EDQ) console (that comes with Governance edition) and access to WebLogic Server and Fusion Middleware console.
It's important that you assign the right roles to your users. For example, you may want a user just to access ODI and EDQ consoles while not having the options to create and delete DIPC service instances. Or there may be two DIPC service instances, A and B and you'd want your user to only access the applications of DIPC service A and not B.
What Do You Need?
- A DIPC instance. In this tutorial, this instance is called DIPC123.
- Adminstrator credentials for your Oracle account's My Services dashboard. This user is the administrator for all Oracle Public Cloud Services for this account (in this idenity domain.). (Let's refer to him as the super admin for this tutorial.). In this tutorial, the username for this administrator is DomainAdmin.
- A user that that's listed as a user in Identity Cloud, but has not been assigned any roles yet. In this tutorial, this user is Laleh. and will be assigned diffent DIPC roles.
 Open the Identity Cloud Console
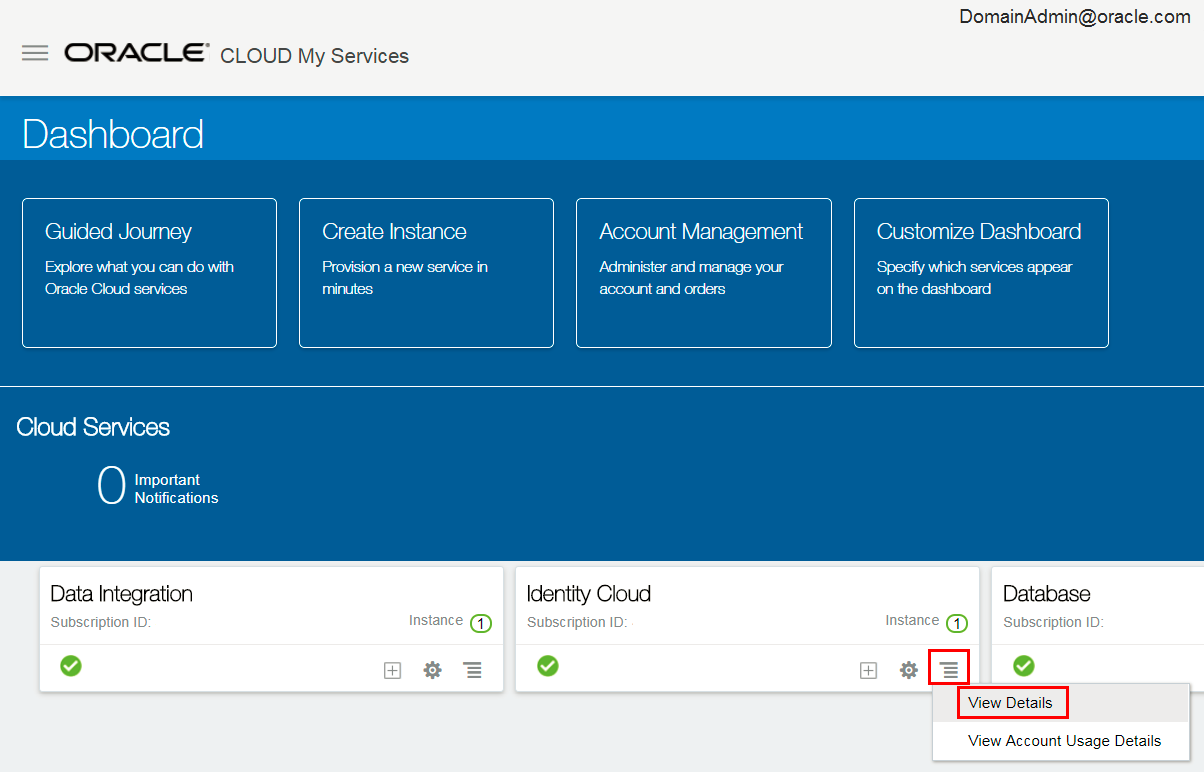
- Log in to your account's My Services dashboard with the account's administrator credentials, DomainAdmin for this tutorial.
- Click the action menu of the Idenity Cloud tile. (If there's no Identity Cloud tile in your Cloud Services section, then click Customize Dashboard and click Show for Identity Cloud.)
- Click View Details.
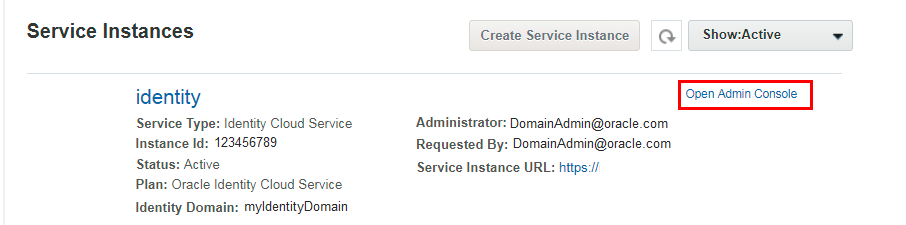
- In the Service Instances section, find the instance with the name identity.
- Ensure that the Administrator field of the identity service instance displays the administrator name that you have credentials for. (DomainAdmin for this tutorial.)
- Click Open Admin Console.
 Find Your DIPC Service Instance
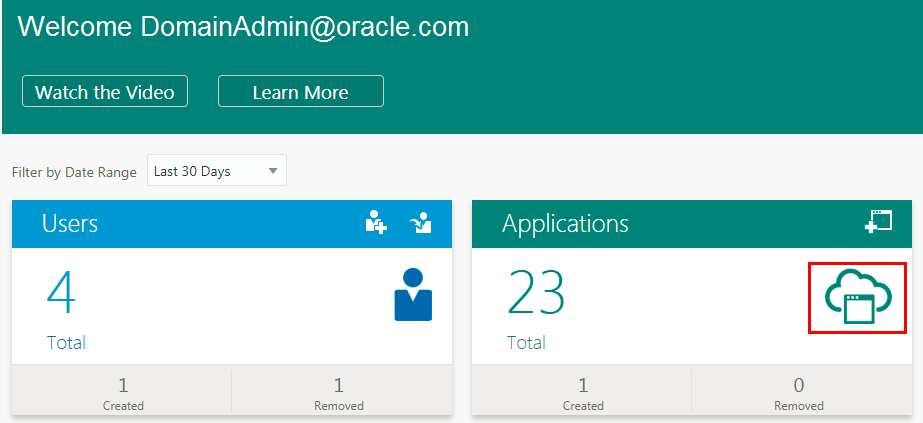
- Click the icon in the Applications tile.
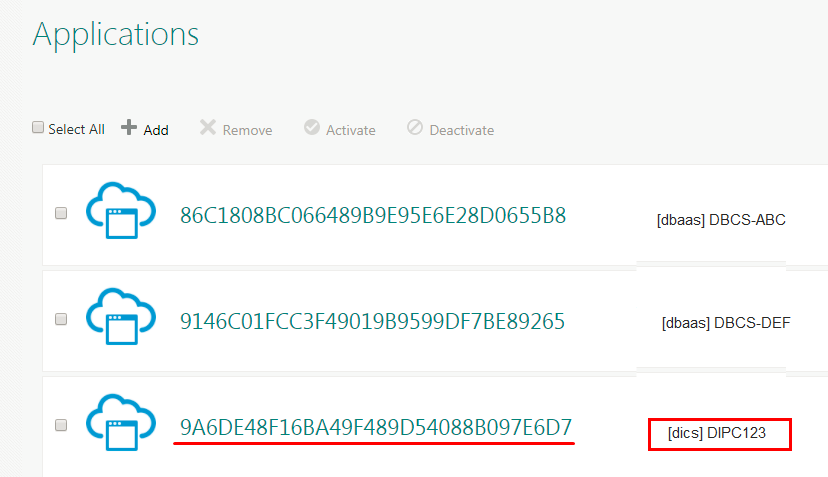
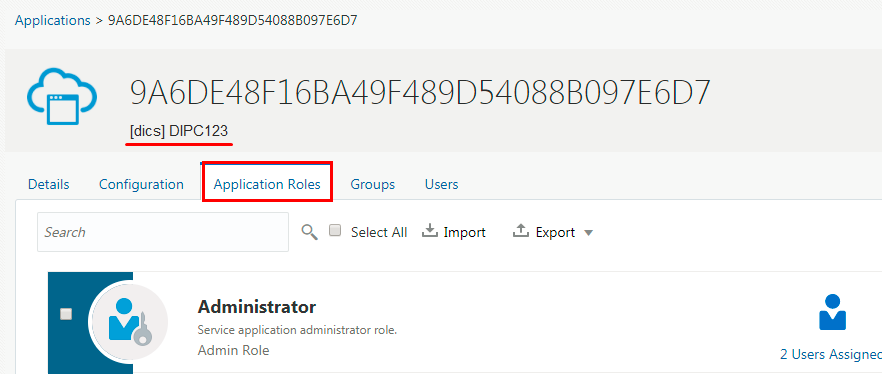
- In the list of applications, find the one that is labeled with [dics]YourApplicationName. For this tutorial, it's [dics]DIPC123.
- Click the name of your application.
 Assign Application Roles to Users
In this section, you'll assign a non-admin application role to the user Laleh.
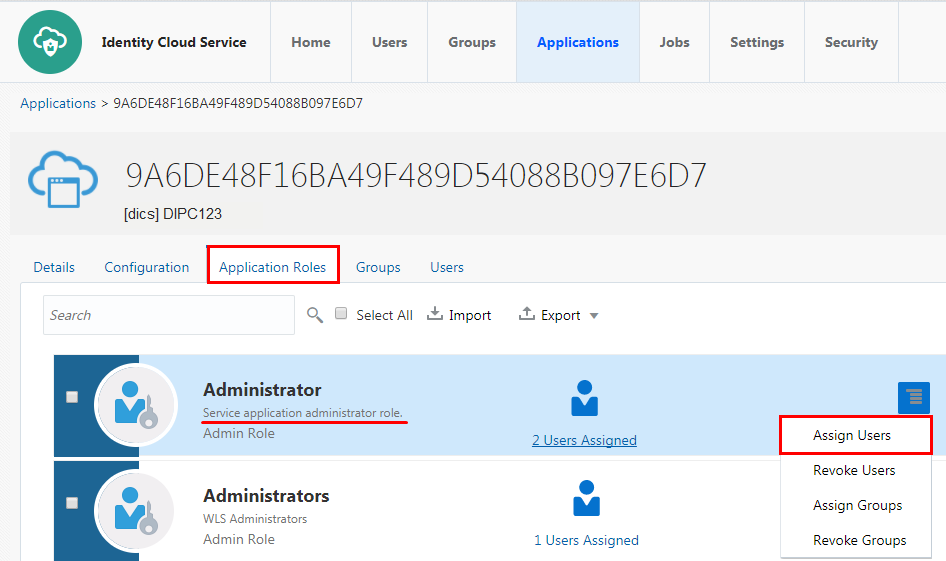
- Click the Applications Roles tab.
- Review the roles. The following roles are created for the DIPC application and you should only assign application users to these roles.
Role in Idenity Cloud Service Equivalent ODI Profile Description Is Admin? Adminstrator Profiles ednding in ADMIN Service application administrator role Yes Developer DESIGNER
(Use in ODI Studio for ELT designs)Service application developer role No User OPERATOR
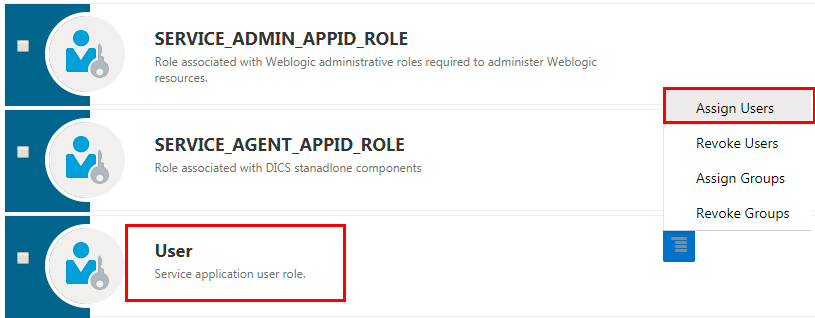
(Use in ODI console for job execution and status review)Service application user role No - Click the action menu for the Users role.
- Click Assign Users.
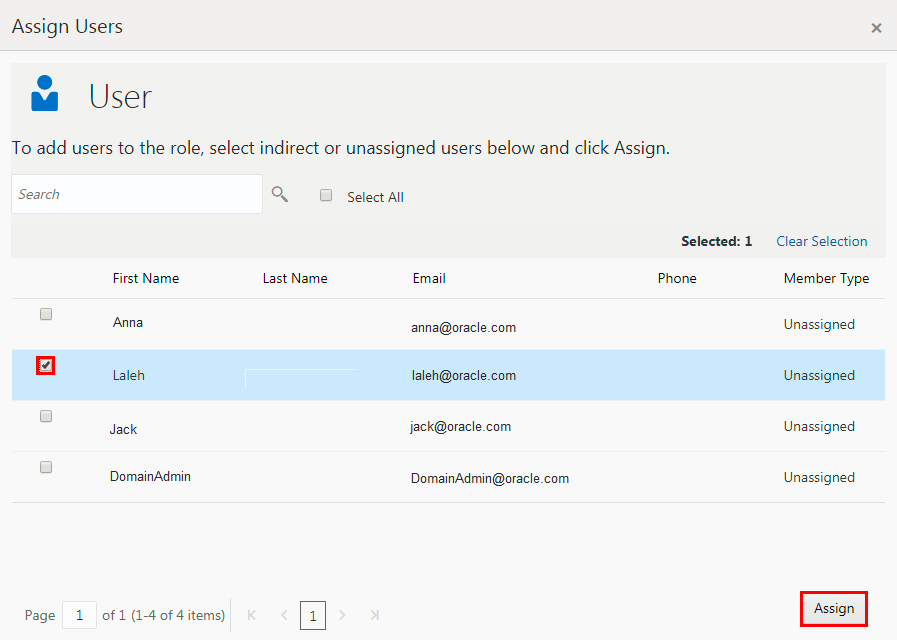
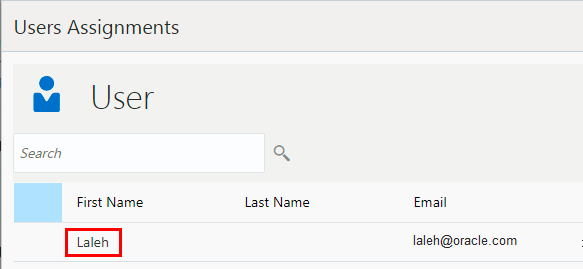
- Select the checkbox for the user Laleh from the list and then click Assign.
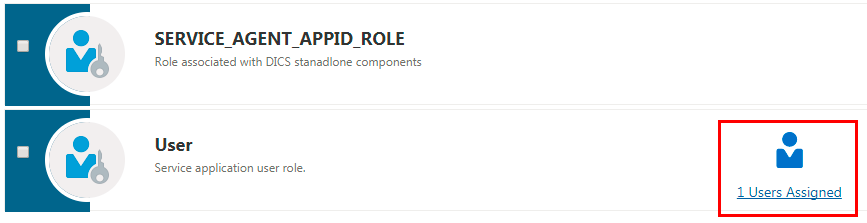
- Confirm that the User row displays 1 Users Assigned.
- Click the 1 Users Assigned link and confirm that Laleh is in the list of Users Assignments.
- Click Close.
- Don't sign out from My Services.
 Find the Data Integrator Console URL
In this section, you'll find the URL for the Data Integrator console with your admin credentials.
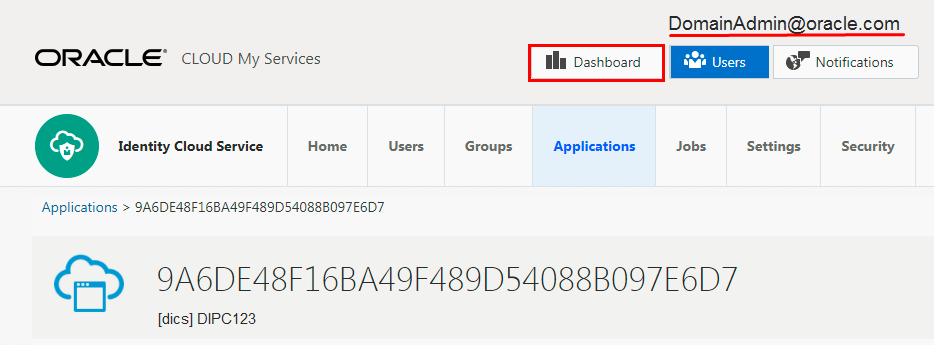
- While you are still logged in as DomainAdmin, from the Applications page of Idenity Cloud Service , click Dashboard.
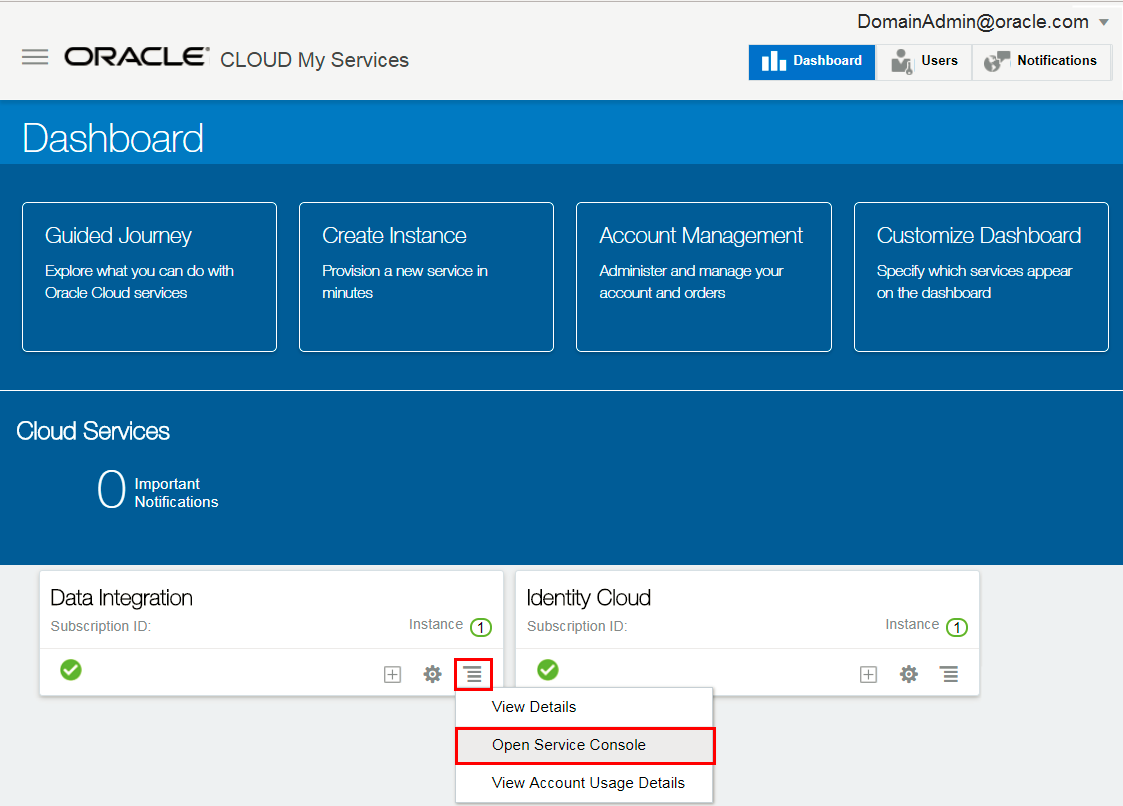
- Click the action menu of the Data Integration tile. (If there's no Data Integration tile in your Cloud Services section, then click Customize Dashboard and click Show for Data Integration.)
- Click Open Service Conosle.
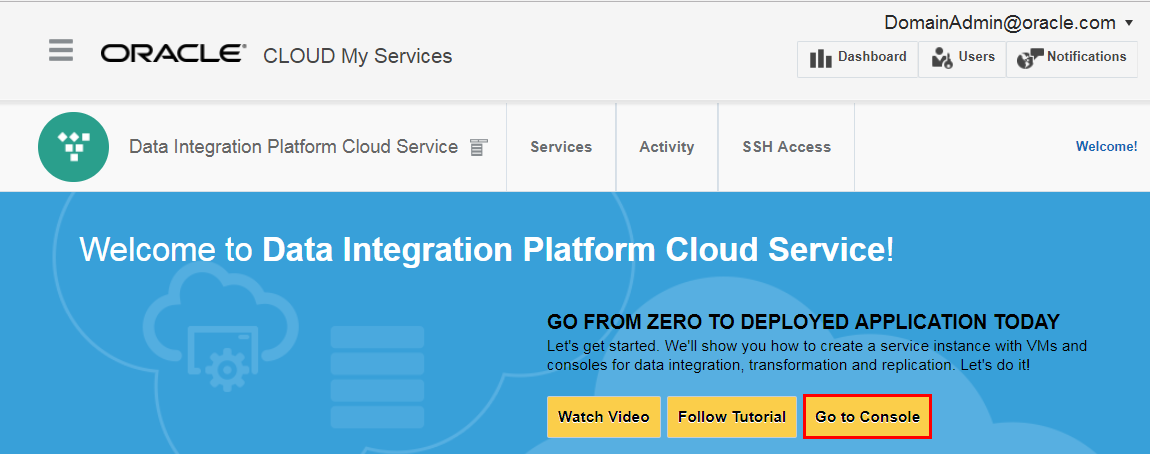
- if you get a welcome page, click Go to Console.
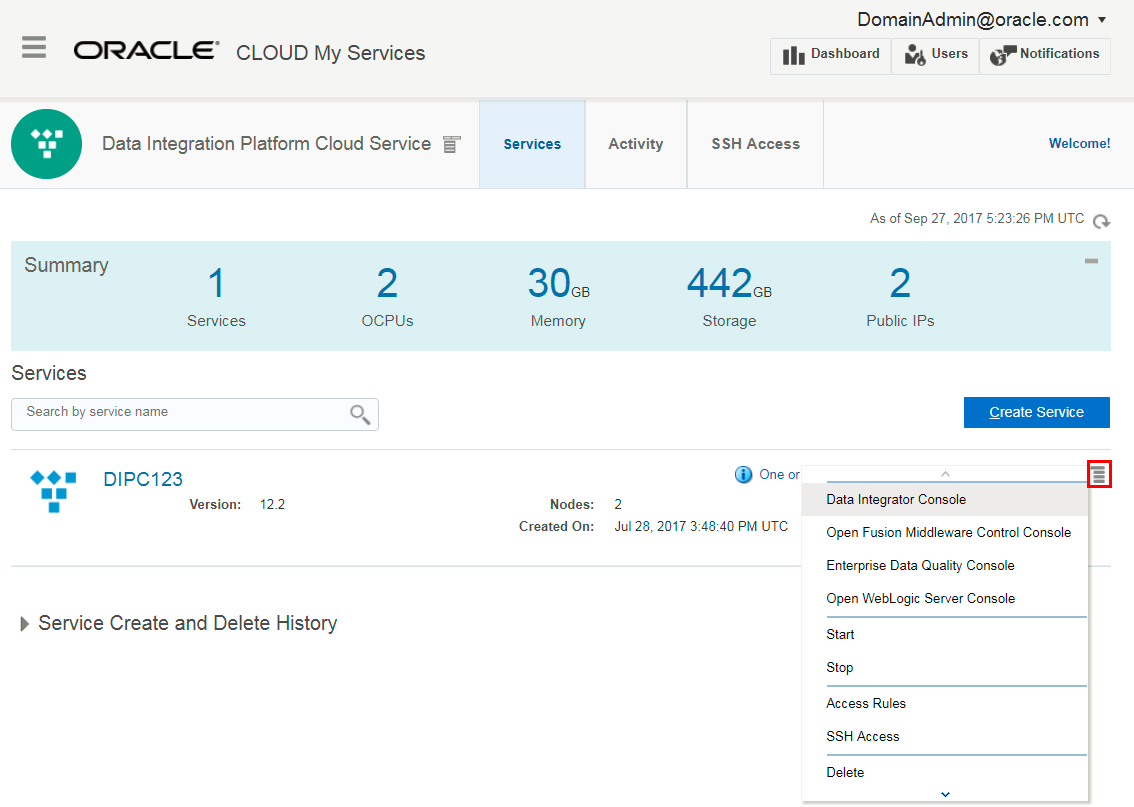
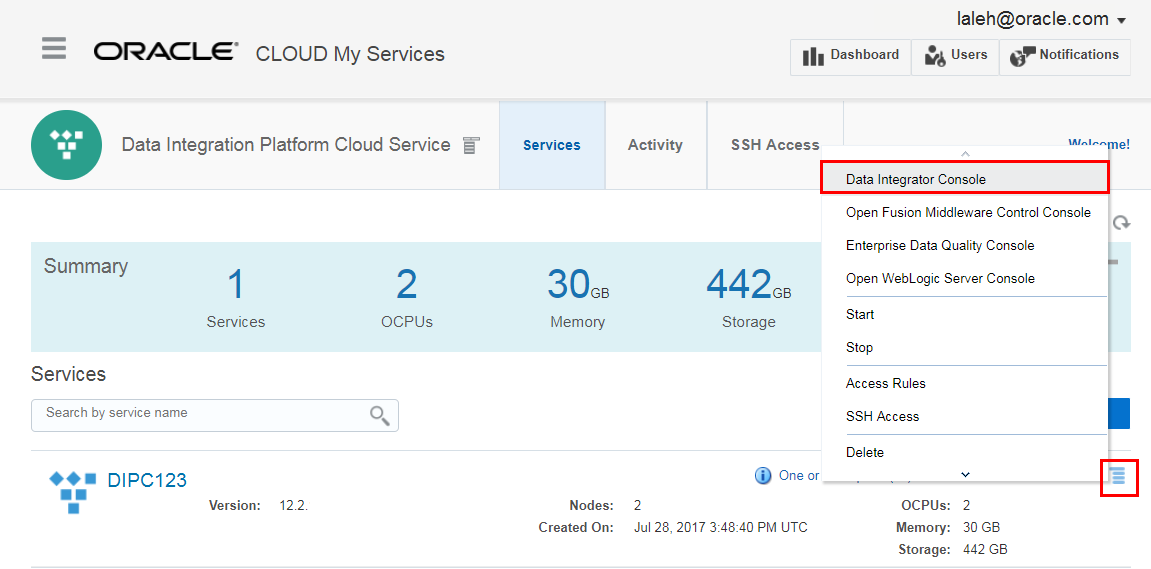
- Click the action menu for your instance, DIPC123.
- Click Data Integrator Console.
- Copy the URL for the Data Integrator Console for the next section. It will be in the following format:
https://<your instance name plus some information>/odiconsole/
 Access the Data Integrator Console with Super Admin Role
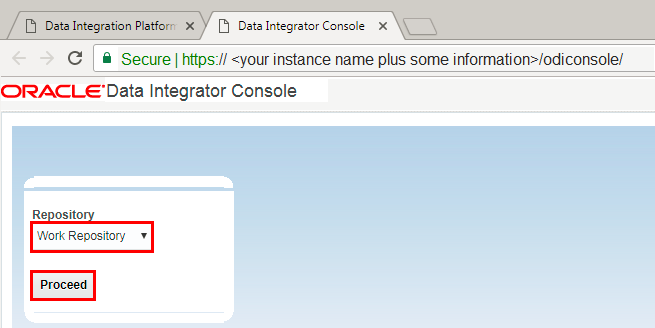
With the Single Sign on provided through Identity Cloud Service, when you click the Data Integrator Console action menu item, because you're already logged in to My Services, you immediately get logged in to Data Integrator console without having to enter your credentials again. The super admin has access and is administrator for all services avaiable through My Services, including Idenity Cloud and Data Integration Platform Cloud.
- In the login page, select Work Repository from the Repository dropdown list and click Proceed.
- Click the Management Tab in the Navigation pane.
- Expand the Security section.
- Right click Users.
- Click Create.
- Click Cancel.
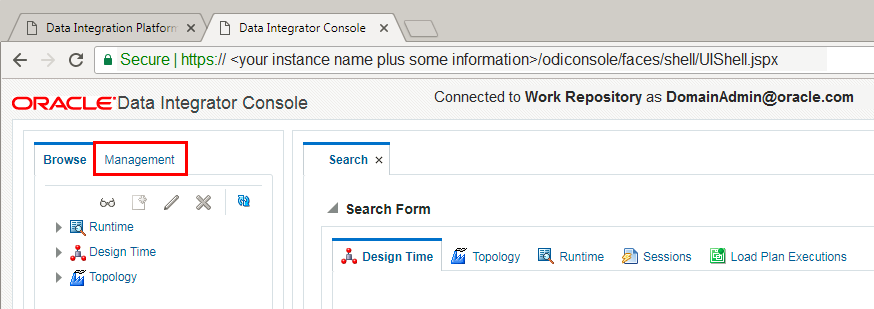
Don't use ODI console for user and role management. (That's the legacy method.) Add users and assign roles to users through Oracle Idenity Cloud Service. The final few steps are just there to demonstrate what the admin user can do within the applications available for DIPC.
 Acess the Data Integrator Console with User Role
- Acess My Services as Laleh.
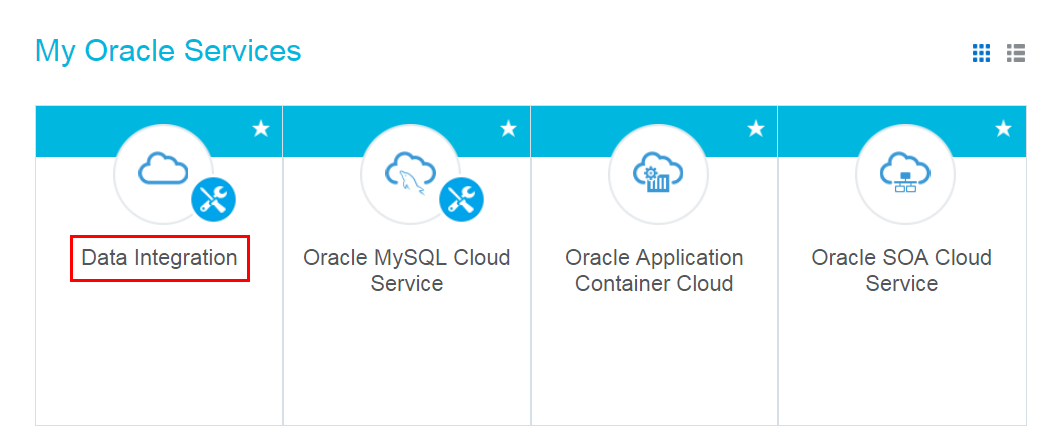
- Find Data Integration in the list of services. (You may need to go to a second page.)
- Click Data Integration.
- Ensure that the username displays Laleh. (You're logged in as Laleh.)
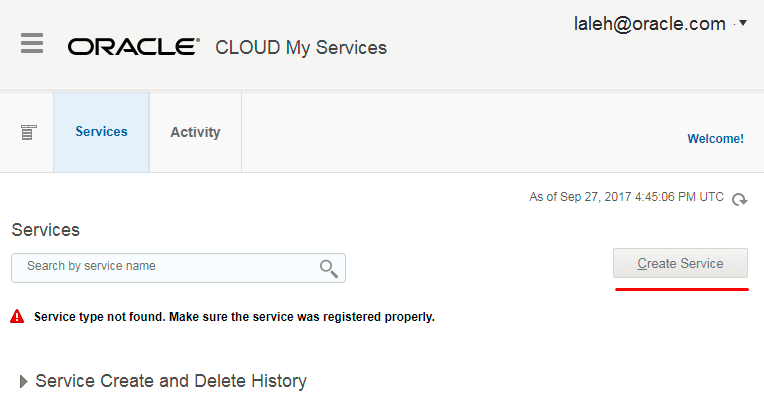
- Observe that the user Laleh doesn't have the list of instances such as the DIPC123 in the list of services, and the Create Service button is disabled. Therfore, Laleh with the User role can't access the Data Integrator Console from here and she doesn't any rights at the service instance level.
- Sign out.
- Log in as user Laleh, to the Data Integrator console with the URL provided by the admin user, pasted in the previous section. (https://<your instance name plus some information>/odiconsole/)
- In the login page, select Work Repository for the Repository dropdown list and click Proceed.
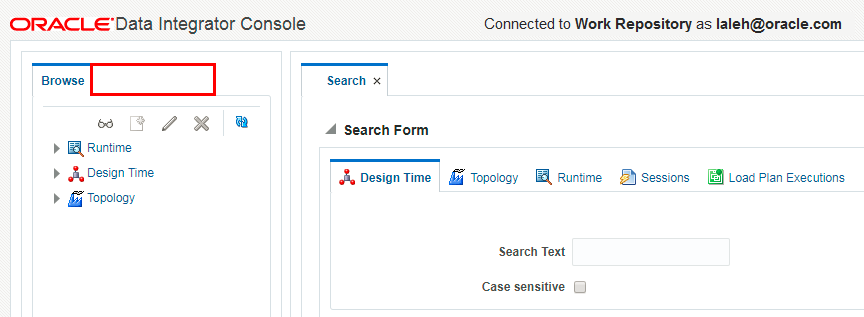
- Observe that the left navigation pane has no Management tab that the admin user has.
- Close the Data Integrator console window.
This is a descriptive paragraph that follows a list item.
 Replace User Role with DIPC Service Admin Role
In this section you revoke the application level User role from Laleh and give her a service level administrator role.
- With the super admin credentials of the AdminUser, access My Services.
- Open the Identiy Cloud Service console.
- In the list of applications, find the DIPC123 application and click it.
- Click the Applications Role tab.
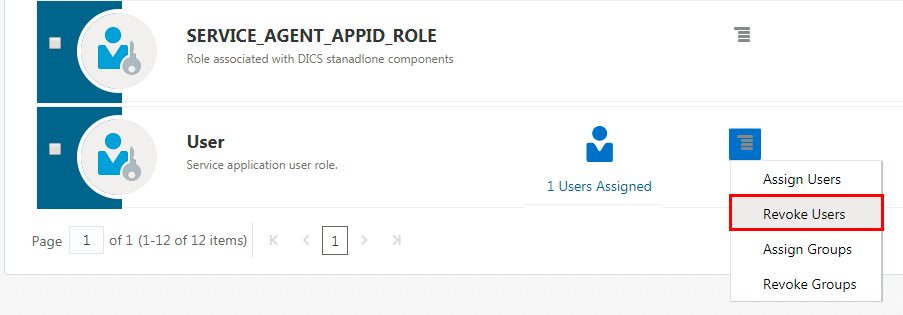
- In the action menu of the User role, click Revoke Users.
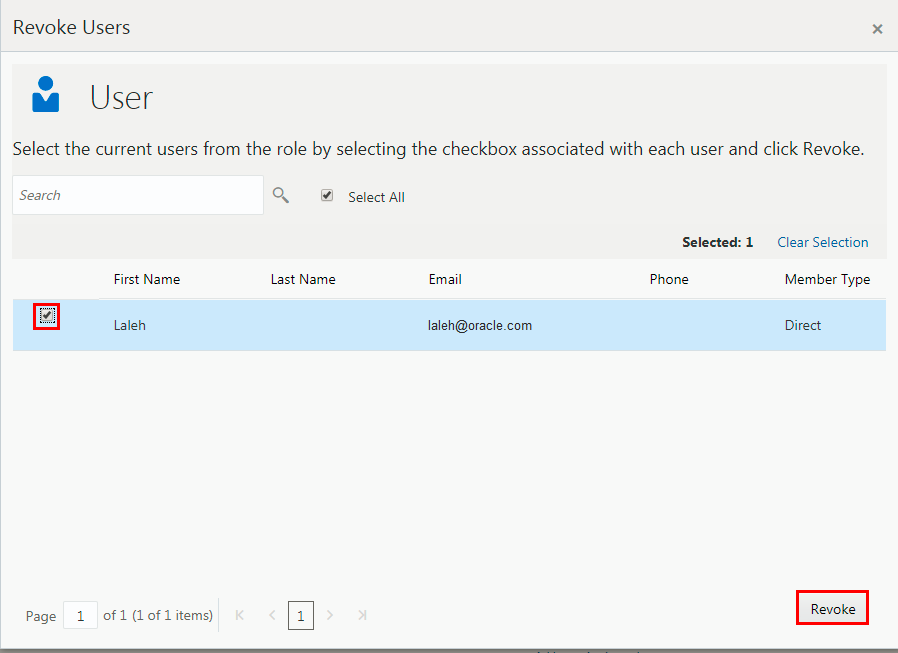
- Select Laleh from the list.
- Click Revoke.
- Click Applications to go back to the list of applications.
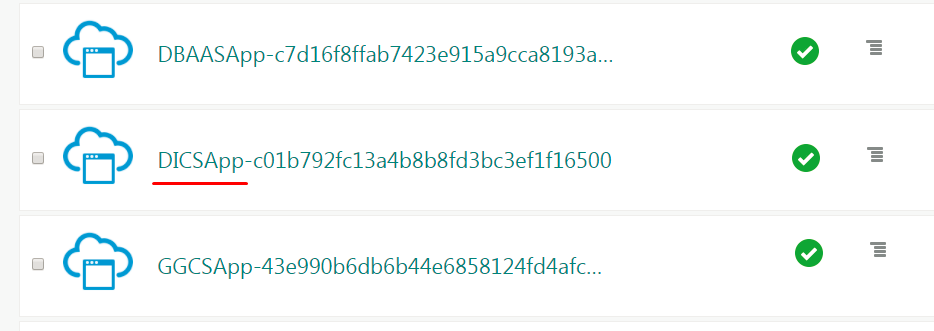
- Click the application that starts with DICSApp. This application is the entire DIPC application added to this Idenity Cloud Service instance. (All the applications in your idenity domain are listed here with App, appended to their abbreviated service type. At this moment the abreviated service type for DIPC is labeled as DICS.)
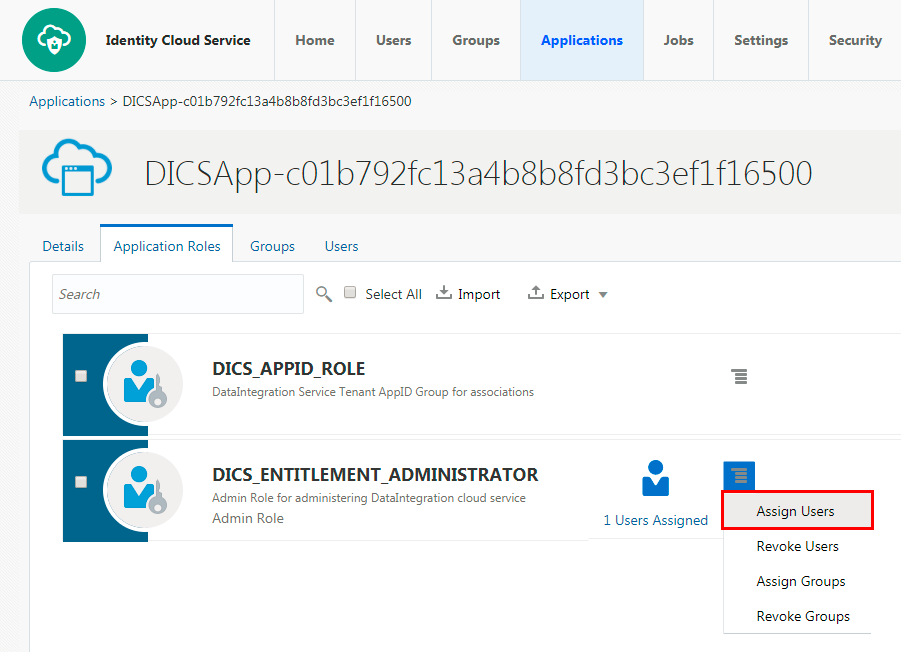
- Click the Applications Role tab.
- Click Assign Users in the action menu for DICS_ENTITLEMENT_ADMINSTRATOR role. WIth this role. you get administrative rights at the service level for DIPC and you can manage all the service instances from the DIPC console.
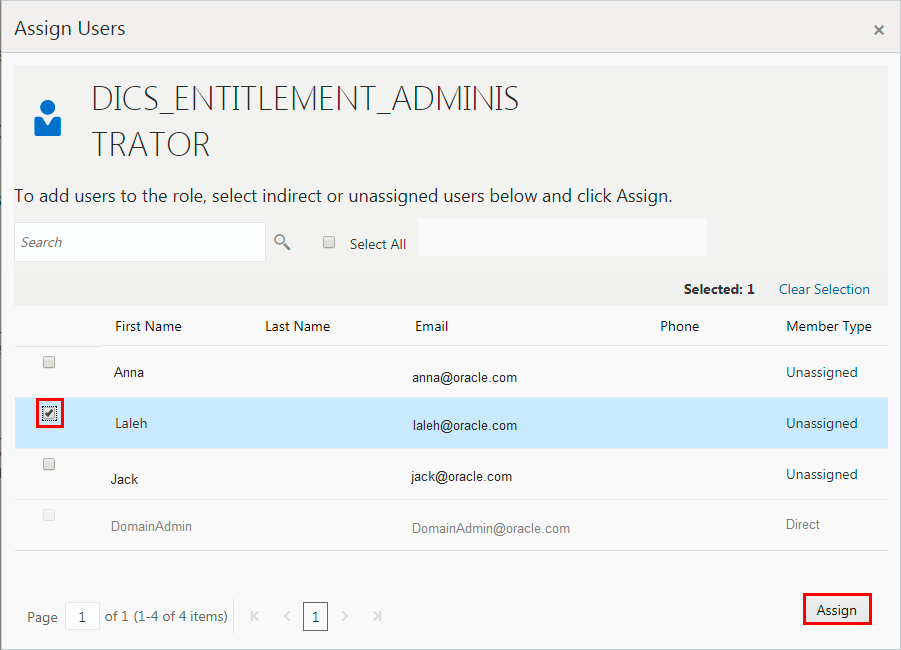
- Select Laleh and then click Assign. (Now Laleh has the administrator role for all DIPC applications, but that does not include other applications such as Database Cloud Service.)
- Sign out.
- Give a few minutes for these changes to take effect.
 Explore the DIPC Service Level Admin Role
- Sign in to My Services as Laleh.
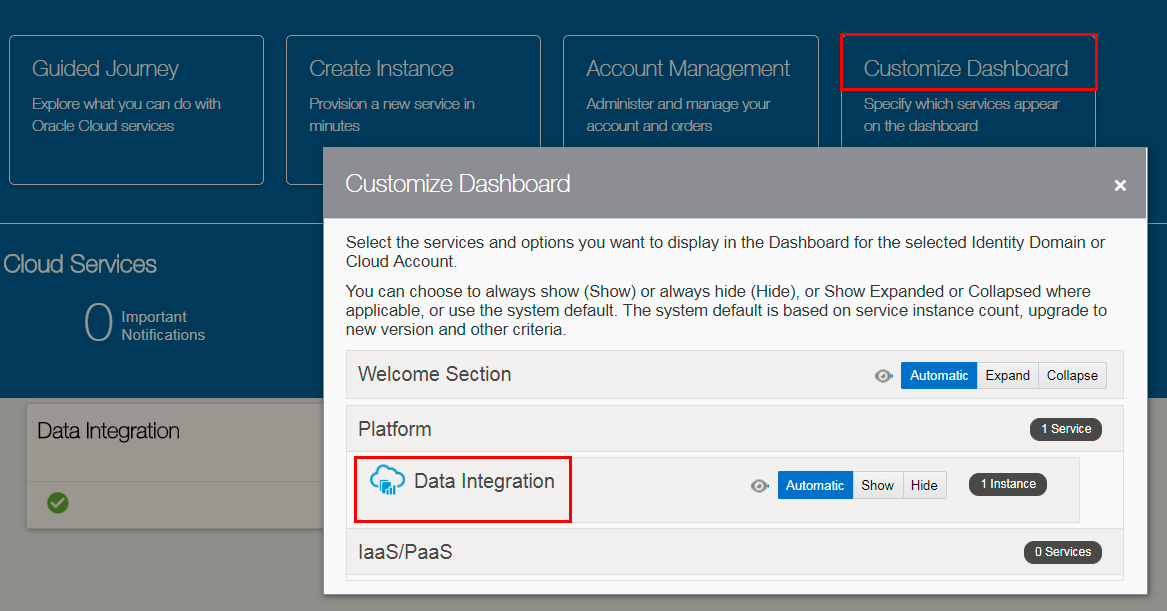
- Click the Customize Dashboard tile.
- Observe that there is no Identity Cloud Service or Database Cloud Service for a user with the DIPC Entitlement Administrator role. The only application that's displayed is Data Integration.
- Close the Customize Dashboard popup window.
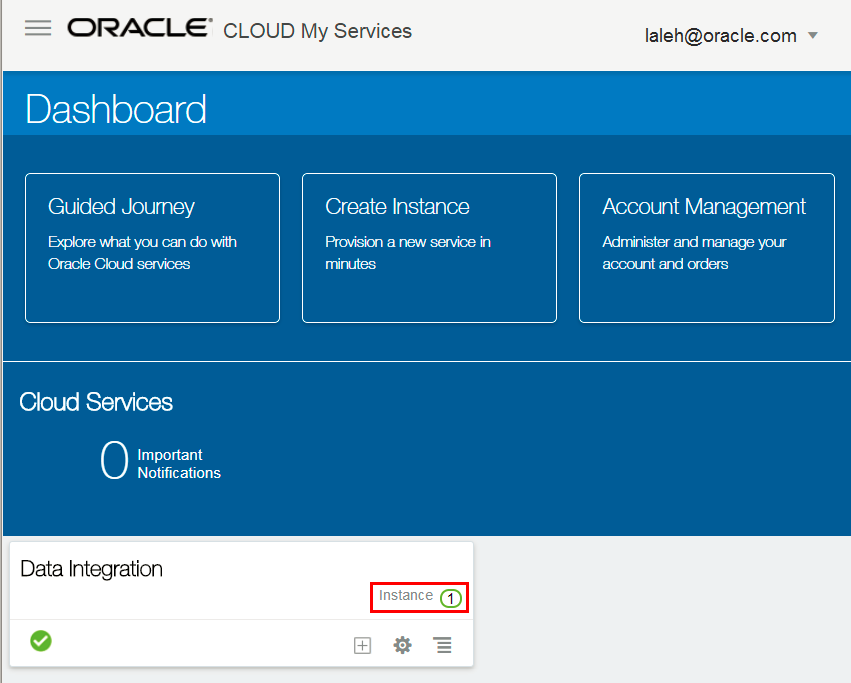
- If there's no Data Integration tile in the Cloud Services section, then use the Customize Dashboard to display this tile. (The Data Integration tile should be displayed already for Laleh, because there's at least one service instance created with this service, DIPC123.
- Click the Instance link in the Data Integration tile.
- Observe that this user can Create Services, and manage the Activity and SSH sections and manage the service instances of DIPC, just like the super admin user who was the admin for all the cloud services, could do at the service level.
- Log in the ODI console as Laleh.(https://<your instance name plus some information>/odiconsole/)
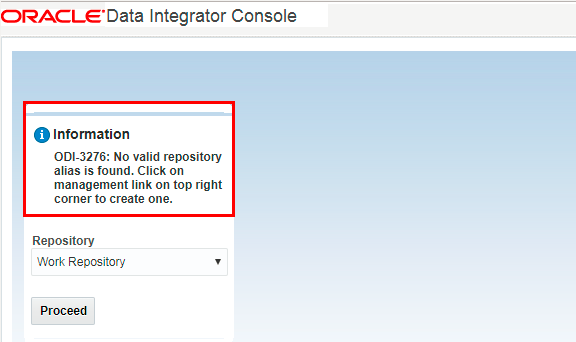
- Observe that even though you log in to ODI console, you don't have access to the repositories that ODI is connected to. (You're not assigned any application roles.)
- With the Admin credentials, access My Services. For Laleh to access the ODI console, she needs any of the four DIPC application roles. To access to the Mangement tab of the ODI console, she should have the application level adminstator role, so the super admin should assign this role to Laleh.)
- Open the Identiy Cloud Service console.
- For the DIPC123 application, assign Laleh to the Service Application Administrator role.
- Sign out as admin and Sign in as Laleh to My Services.
- From the DIPC123 instance, access the ODI console.
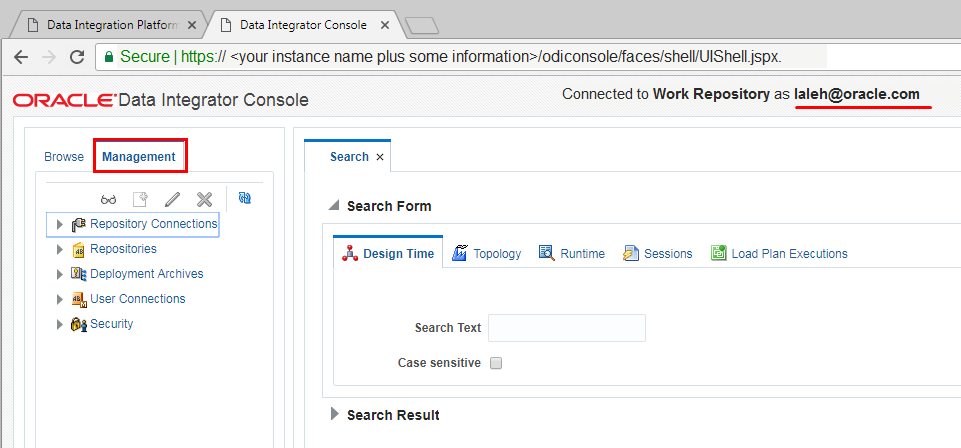
- Observe that Laleh, now can access the ODI console, and also has the management tab available to her.
 Want to Learn More?