Before You Begin
Purpose
This tutorial shows you how to add additional components to your existing database application using Oracle Application Express.
Time to Complete
Approximately 40 minutes.
Overview
Oracle Application Express (Oracle APEX) is a rapid web application development tool for the Oracle database. Using only a web browser and limited programming experience, you can develop and deploy professional applications that are both fast and secure. Oracle Application Express is available with the Oracle Database, whether it's on-premises or in the Oracle Cloud.
In this tutorial, you use Oracle Application Express Release 5.0 to create and run a database application.
Please keep in mind the following while running this tutorial:
- Logging into your Oracle Application
Express workspace: Your Oracle
Application Express workspace may reside in an
on-premises Oracle Database or in Oracle Database
Cloud Services. The login credentials differ
depending on where your workspace is located:
- Logging into Oracle Application Express in a Oracle Database Cloud Service: Reference the Oracle Help Center for your Oracle Database Cloud Service. To do this, go to the Oracle Help Center for Cloud, and select Platform and Infrastructure. From here, select your Database Cloud Service and the Get Started page will appear.
- Logging in to Oracle Application Express on-premises: From your browser, go to the location of your on-premises installation of your Oracle Application Express workspace provided by your Workspace Administrator.
- Application ID: Screenshots in this tutorial show a blurred Application ID. Your Application ID can be any value assigned automatically while creating the application.
- Schema: If you are accessing an Oracle Application Express workspace in Database Schema Service, you have one schema assigned to you with a schema name that you cannot change. If you are accessing the workspace in an on-premises Oracle database, you may have more than one schema assigned to your workspace by the Oracle Application Express Instance Administrator.
What Do You Need?
Before starting this tutorial, you should:
- Have access to an Oracle Database 11g or later release, either on-premises or in a Database Cloud Service.
- Install Oracle Application Express Release 5.0 into your Oracle Database (for on-premises only).
- Download and unzip the files.zip file into your working directory.
- Configure the database and the application environment by performing any one of the following:
- Execute the following tutorials in the specified sequence:
- Execute the following environment setup steps in the specified sequence:
- Create an Oracle Application Express user looking at the instructions in Creating New User Accounts in Oracle Application Express Administration Guide.
- Download the files.zip to your working directory.
- Upload and run the
deinstall_database_obj.sqlto reset the application environment. - Use the
Project_Tasks_Appln_1.exein your working directory to import the application. Make sure you install the supporting objects.
Adding a Flash Chart
-
From the Oracle Application Express home page, click the down arrow next to the Application Builder tab and select Database Applications.
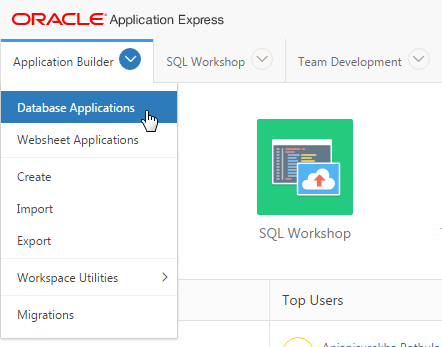
Description of this image -
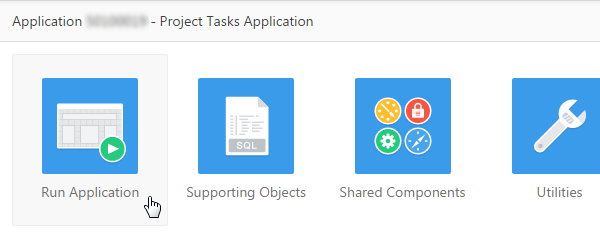
Click Project Tasks Application.

Description of this image -
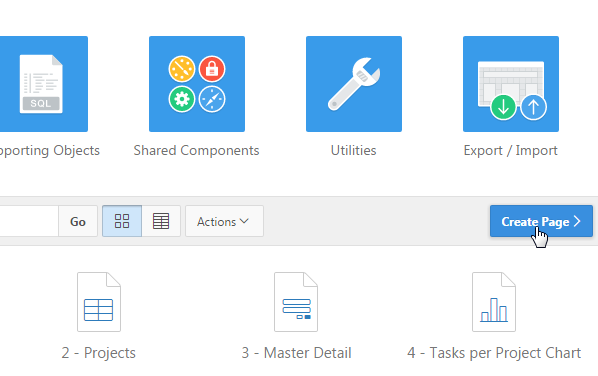
Click Create Page.
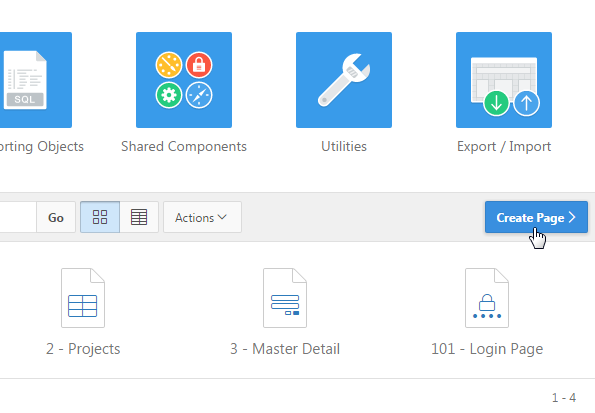
Description of this image -
Click the Chart icon.
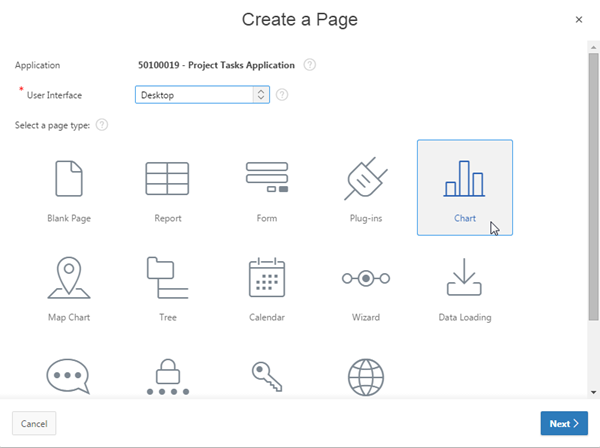
Description of this image -
Select Flash Chart for Chart Rendering, and click Next >.
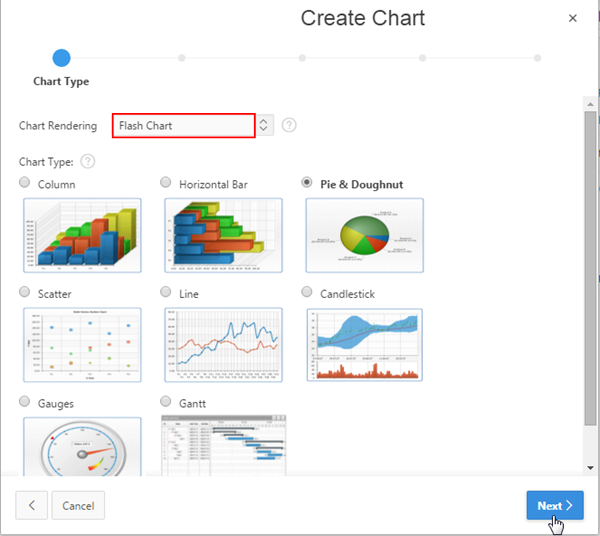
Description of this image -
Select 2D Pie, and click Next >.
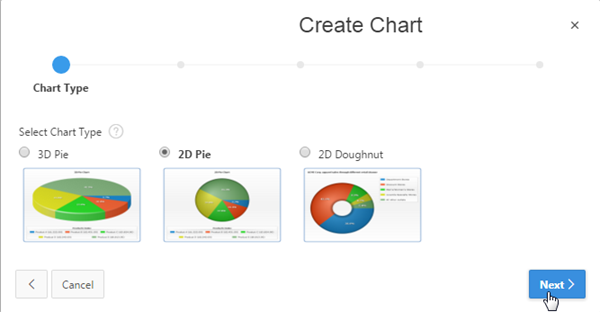
Description of this image -
Enter Tasks per Project Chart for Page Name and Region Name, and click Next >.
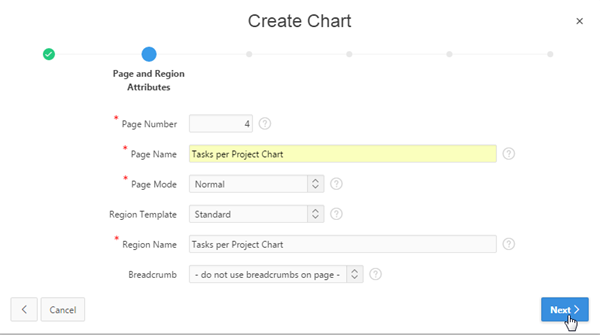
Description of this image -
Select Create a new navigation menu entry for Navigation Preference, select Home for Parent Navigation Menu Entry, and click Next >.
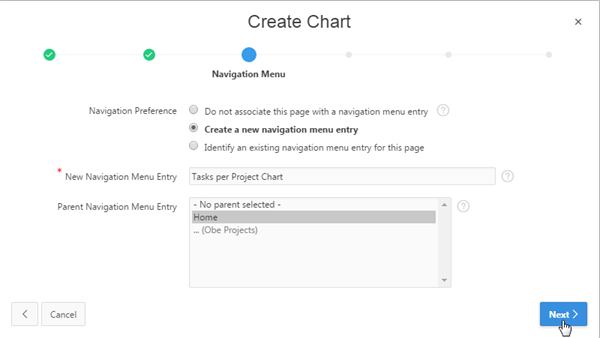
Description of this image -
Enter Tasks per Project Chart for Chart Title, select Slide From Left for Chart Animation, Solid Color for Background Type, #FFFFFF for Background Color 1, Bottom for Show Legend, and click Next >.
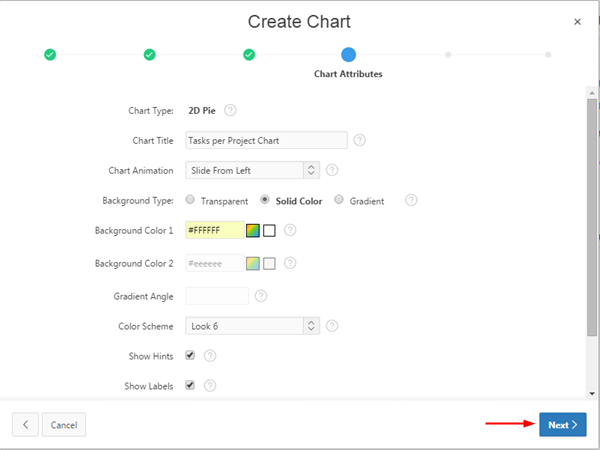
Description of this image -
You need to provide a SQL query to create the chart. Enter the below query in the text area provided for SQL Query, and click Next >.
select null
                                  link,

                                         p.project
                                  label,


                                  t.task_count value

                                  from (select project_id,

                                        count(*)
                                  task_count from obe_tasks group by project_id)
                                  t,

                                       obe_projects p

                                  where t.project_id = p.project_id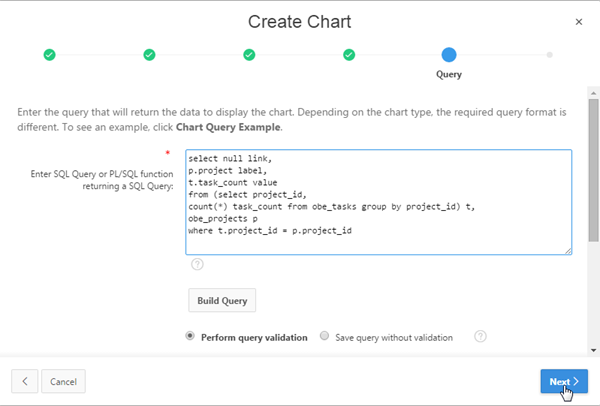
Description of this image -
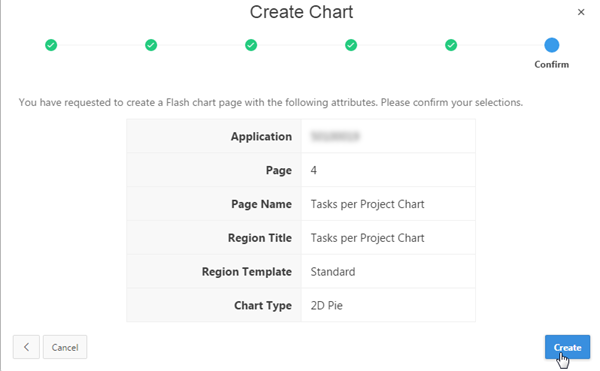
Click Create.
Description of this image -
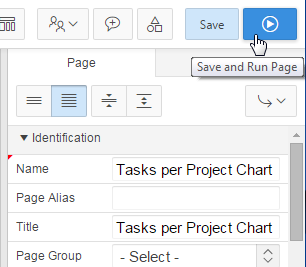
The new chart page is created. Click Save and Run Page.
Description of this image -
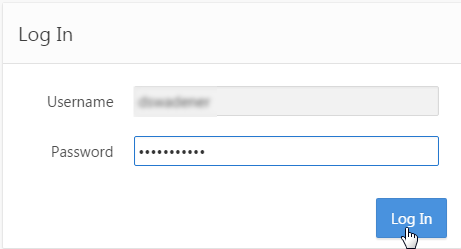
If Log In screen appears, enter your Oracle Application Express credentials, and click Log In.
Description of this image -
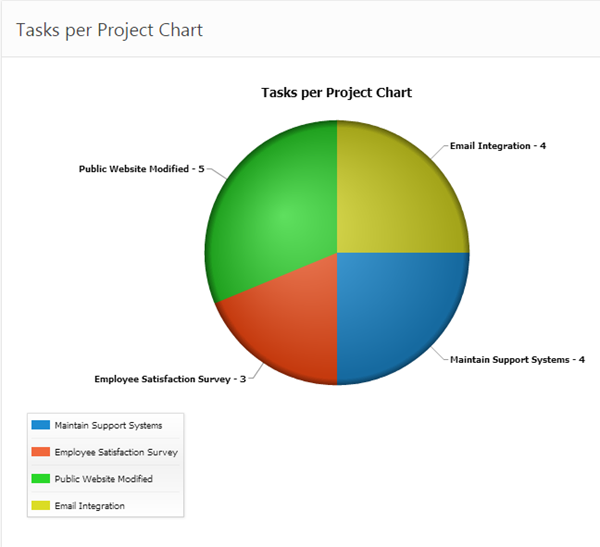
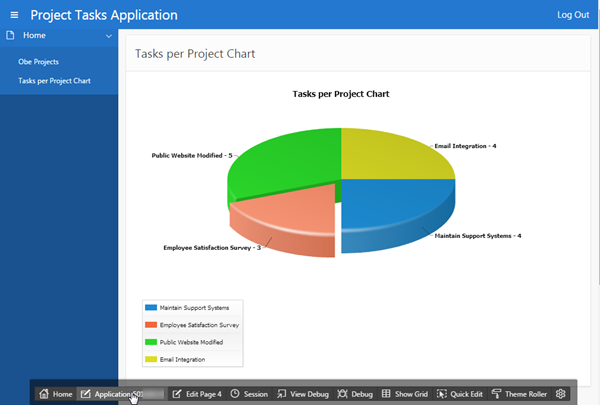
Observe the animation as the chart is loaded, appearing from the left side of the page. The flash chart shows the number of tasks per project. Keep your mouse over the pie to display the tool tips for the chart data.
Description of this image -
Click any slice of the pie chart to see the effect of exploding slices.

Description of this image -
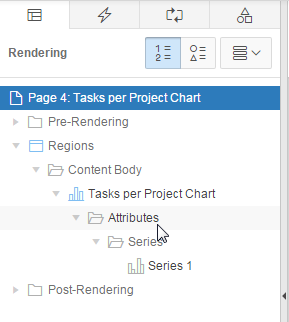
You want to change the 2D Pie Chart to a 3D Pie Chart. Click Edit Page<n> on the developer tool bar.
Description of this image -
Under the Rendering tab, click Attributes.
Description of this image -
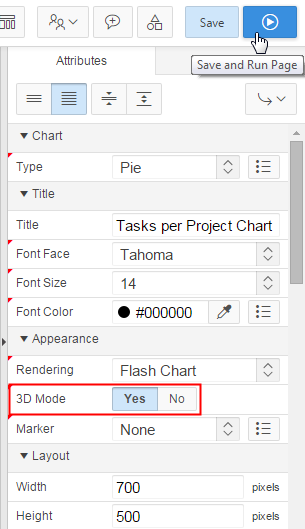
In the property editor, under Appearance, select Yes for 3D Mode, and click Save and Run Page.
Description of this image -
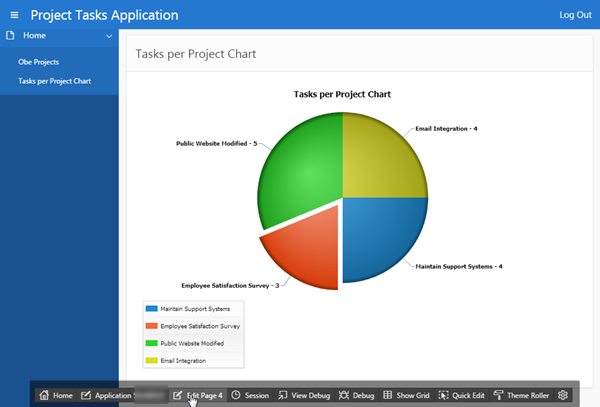
The 3D Pie Chart is displayed.You can click any slice of the pie to see the effect of exploding slices. Click Application<n> in the developer tool bar.
Description of this image
Adding a Calendar
In this section, you add a calendar that shows the deadlines of each project and then add a button on the Projects report to link to the Calendar. Perform the following steps:
-
Click Create Page >.
Description of this image -
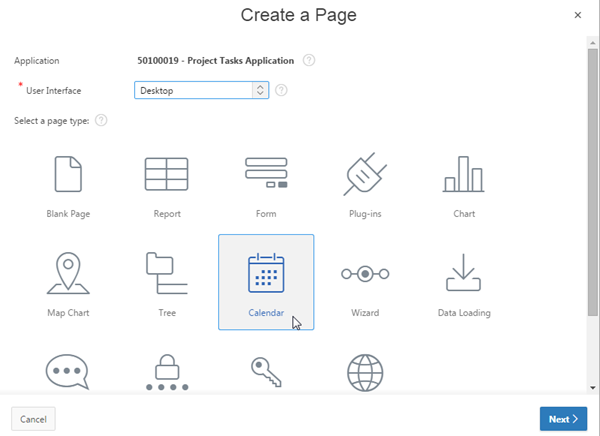
Click the Calendar icon.
Description of this image -
Click Legacy Calendar.

Description of this image -
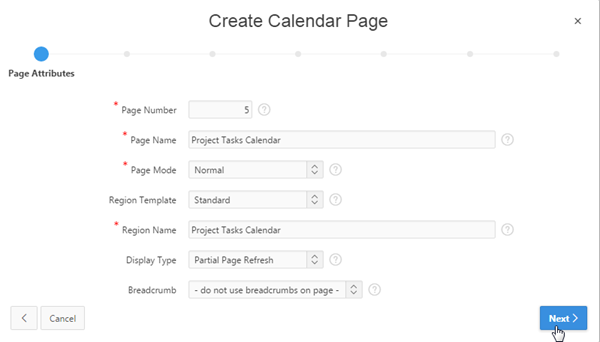
Enter Project Tasks Calendar for Page Name and Region Name, and click Next >.
Description of this image -
Select Do not associate this page with a navigation menu entry for Navigation Preference, and click Next >.
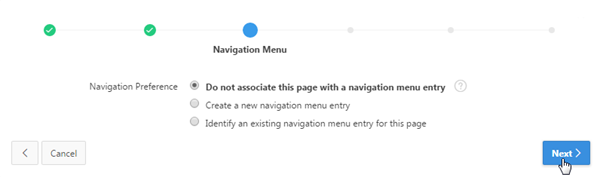
Description of this image -
Select OBE_PROJECTS (table) for Tabe/View Name, and click Next >.
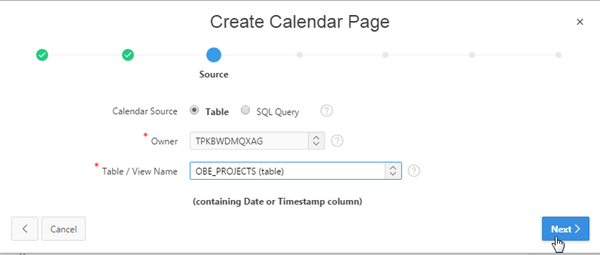
Description of this image -
Select PROJECT_DEADLINE for Date Column, PROJECT for Display Column, and click Next >.
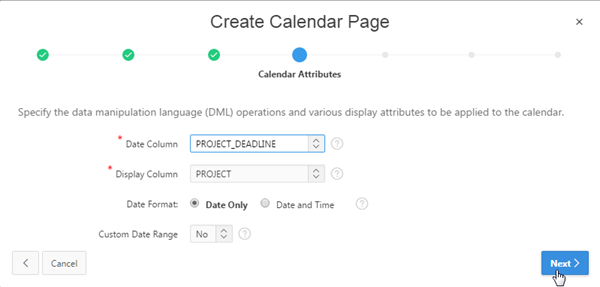
Description of this image -
Select Create new edit page for Link Target,
PROJECT_IDfor Source Table Primary Key Column. Enter following values for the new edit page, and scroll down further.Page Number 6 Source Table Primary Key Column PROJECT_ID Page Name Edit Calendar Entry Region Name Edit Calendar Entry Owner Your default schema 
Description of this image -
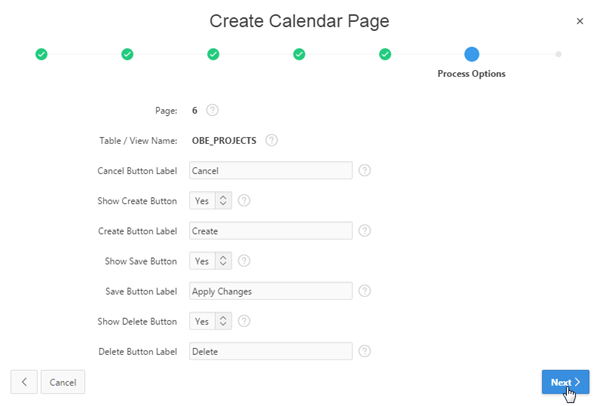
Select the following values for the remaining properties of the new edit page, and click Next >.
Table/View Name OBE_PROJECTS (table) Date Column PROJECT_DEADLINE (Date) Primary Key Column PROJECT_ID (Number) Select Column(s) All the columns 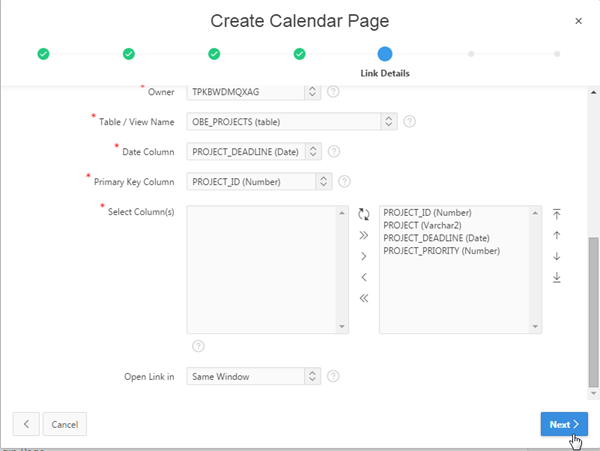
Description of this image -
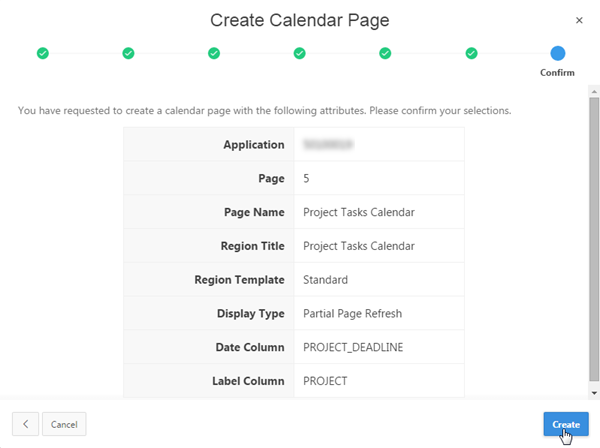
Accept the defaults, and click Next >.
Description of this image -
Click Create.
Description of this image -
The new calendar page is created. Click Save and Run Page.

Description of this image -
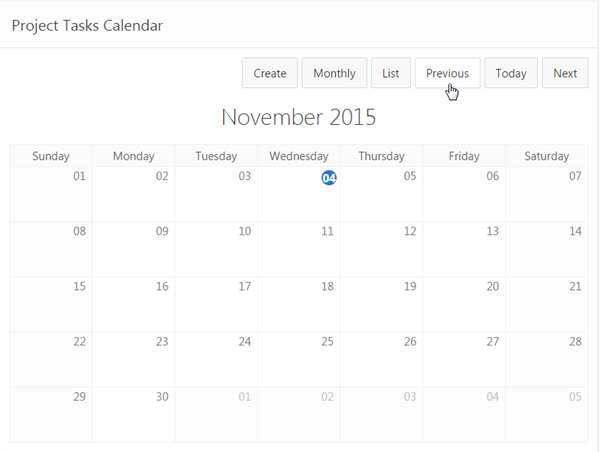
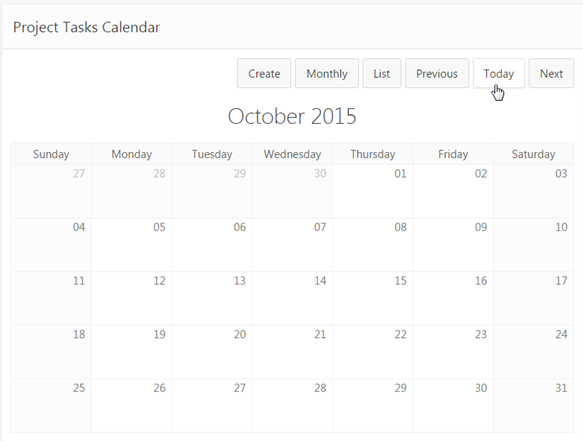
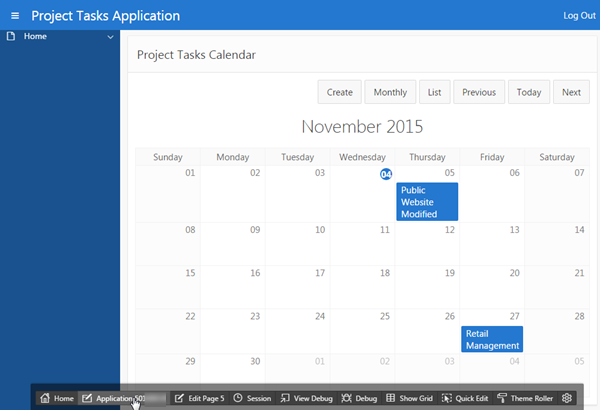
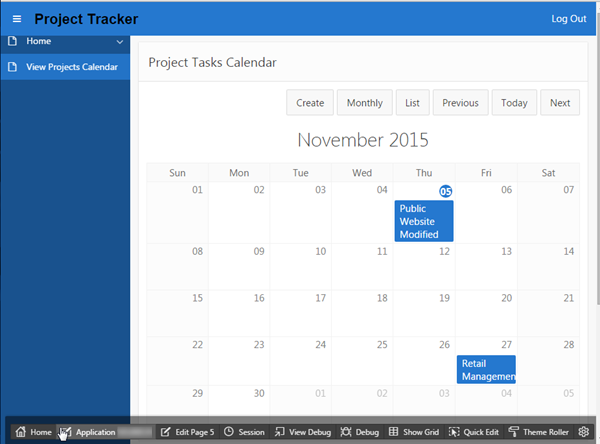
The Project Tasks Calendar is displayed. Notice that today's date is highlighted in a blue circle. The Previous and Next buttons are provided for calendar navigation. If you do not see any project entry in the current month, click Previous until you see a project entry on the calendar.
Description of this image -
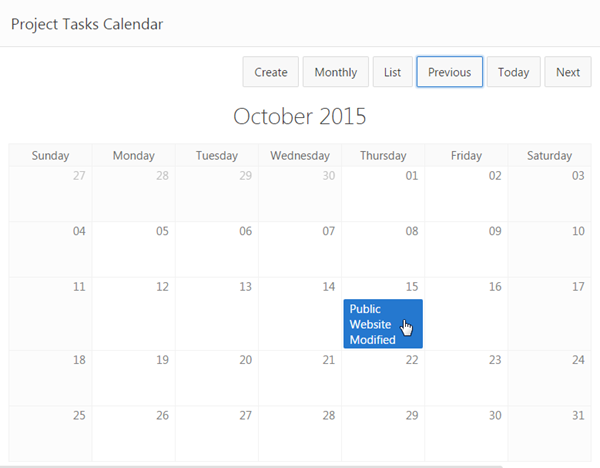
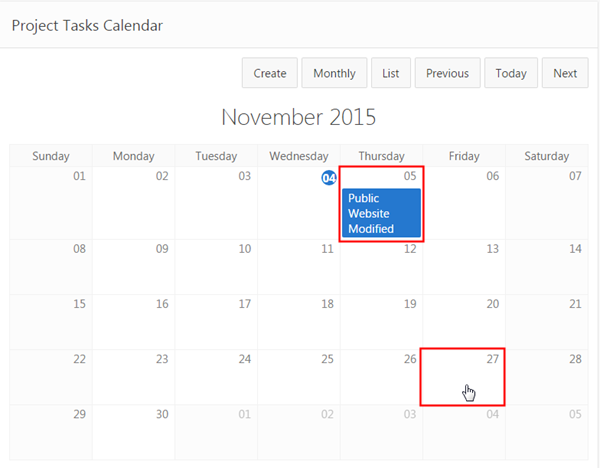
You can see the Public Website Modified project on its due date in the calendar. Click Public Website Modified calendar entry.
Description of this image -
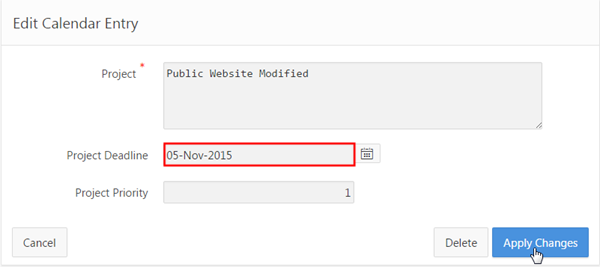
The Edit Calendar Entry window is displayed. Change Project Deadline to a date greater than today's date, and click Apply Changes.
Description of this image -
If you notice that the Public Website Modified is not having an entry on the calendar now, click Today.
Description of this image -
Notice that the Public Website Modified project appears on the date you specified for its deadline. You want to create a new calendar entry. Click any future date on the calendar.
Description of this image -
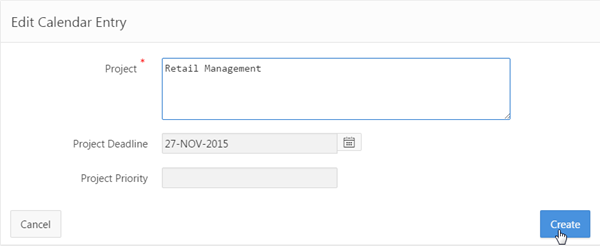
The Edit Calendar Entry page appears with Project Deadline auto-populated with the date which you clicked on the calendar. Enter Retail Management for Project, and click Create.
Description of this image -
The new project appears in the calendar on the date you selected earlier.
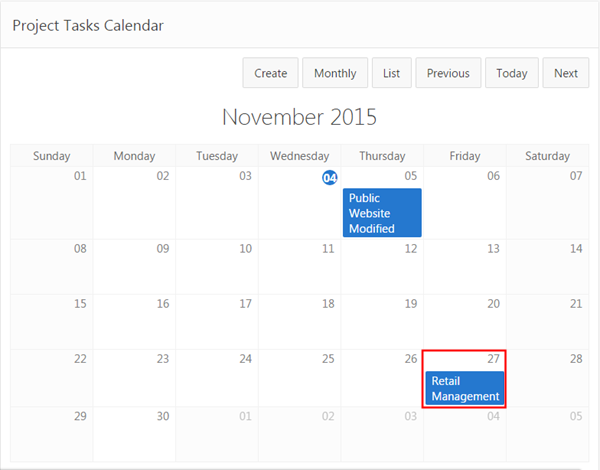
Description of this image -
You want to create a button on the Projects page that will redirect to the Project Tasks Calendar. Click Application<n> on the developer toolbar.
Description of this image -
Click 2-Projects.
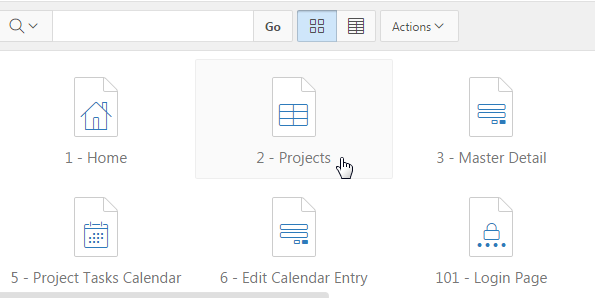
Description of this image -
Click the Buttons tab in the gallery under the Grid Layout.
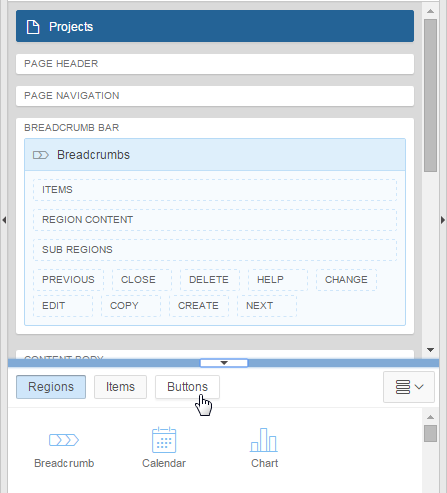
Description of this image -
Select and drag Text with Icon, and drop it in the TOP OF REGION area in the Grid Layout.
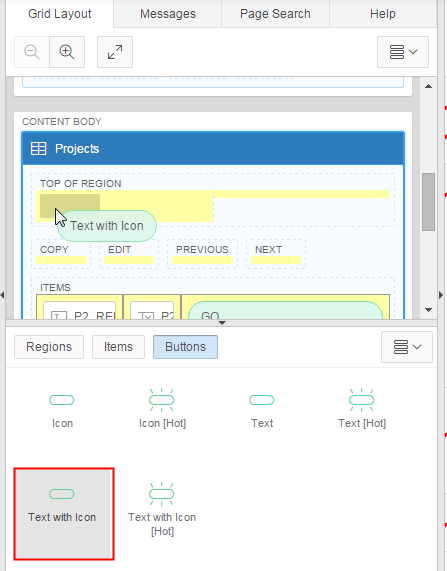
Description of this image -
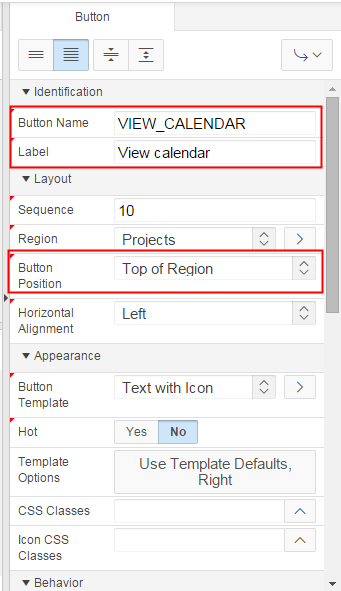
In the Property Editor, under Identification, enter VIEW_CALENDAR for Button Name and View Calendar for Label. Ensure that Button Position under Layout is already selected as Top Of Region.
Description of this image -
Under Behavior, select Redirect to Page in this Application for Action, and click No Link Defined for Target.

Description of this image -
Click the List of Values: Page up arrow.
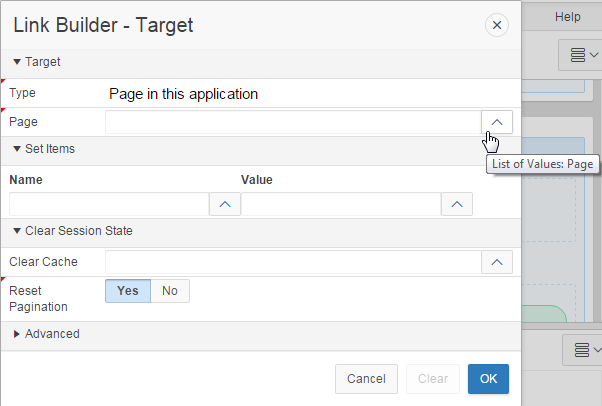
Description of this image -
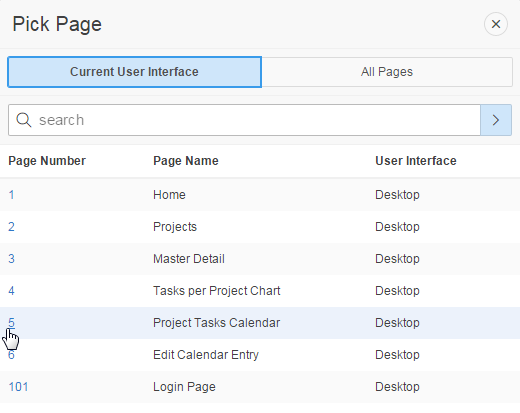
Click 5 (Project Tasks Calendar).
Description of this image -
Click OK.
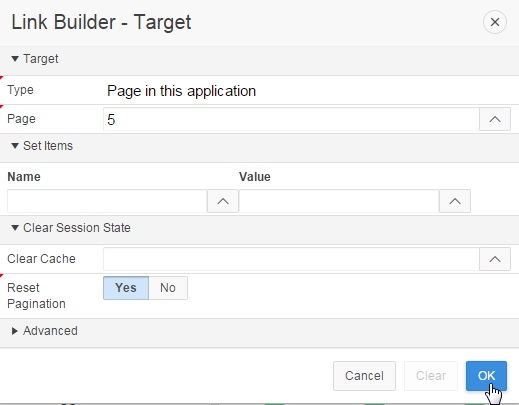
Description of this image -
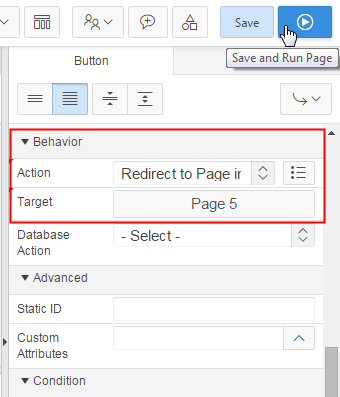
Click Save and Run Page.
Description of this image -
Notice that View Calendar button appears on the Projects page. Click View Calendar.

Description of this image -
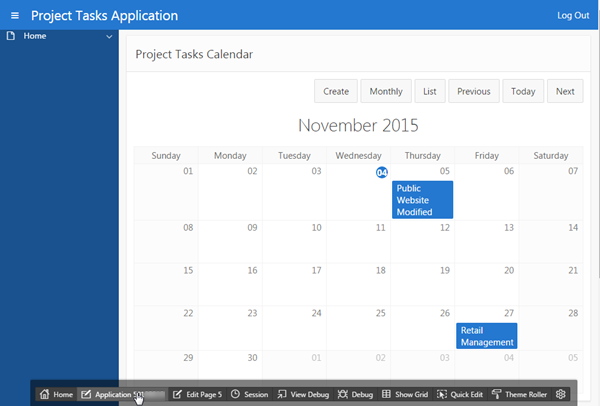
Project Tasks Calendar appears. Click Application<n> on the developer toolbar.
Description of this image
Adding a Logo
You can very easily add a text or image logo to the application. In this section, you add a text logo. Perform the following steps:
-
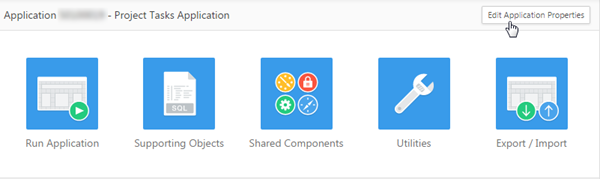
Click Edit Application Properties.
Description of this image -
Click the User Interface tab.
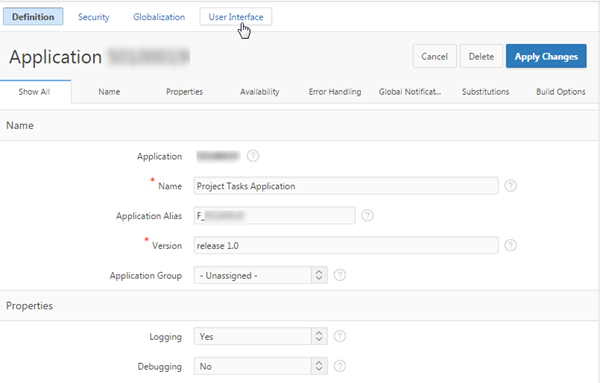
Description of this image -
Click the Logo sub-tab.
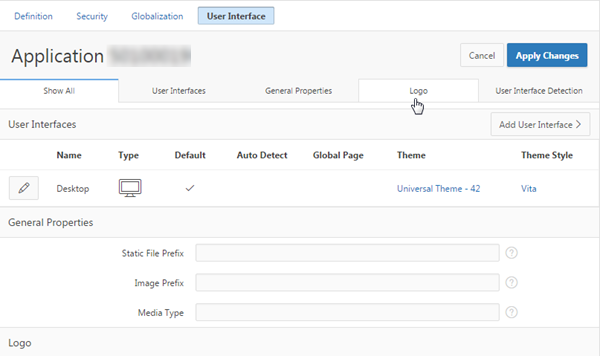
Description of this image -
Select Text for Logo Type, enter Project Tracker for Logo, and click the up arrow for Logo Attributes.
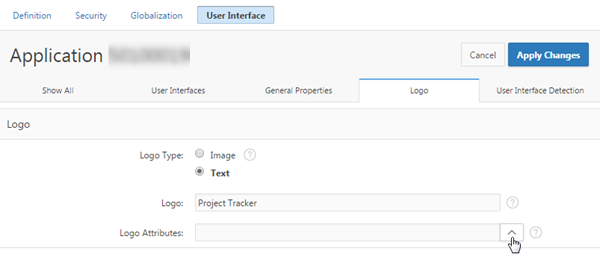
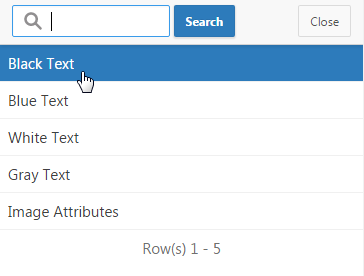
Description of this image -
Click Black Text.
Description of this image -
Click Apply Changes.

Description of this image -
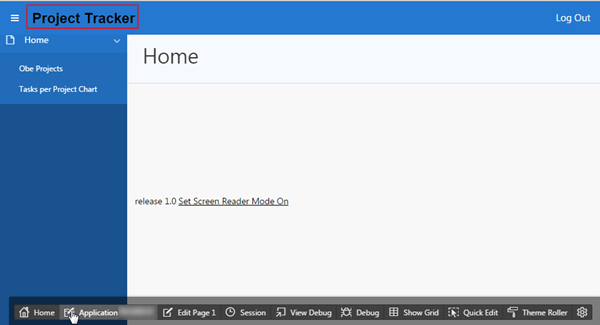
Click Run Application.
Description of this image -
Notice the logo appears on the application home page as a black text. Click Application<n> on the developer toolbar.
Description of this image
Updating the Home Page Navigation List
Now that you have completed your Master Detail Form and Flash Chart, you need to add them to the Home Page Navigation List. Perform the following steps:
-
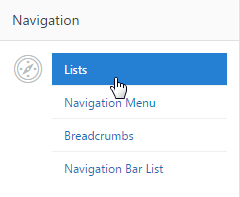
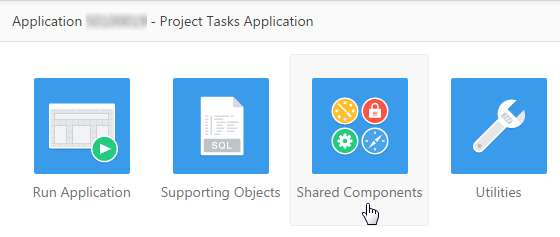
Click Shared Components.

Description of this image -
Click Lists under Navigation.
Description of this image -
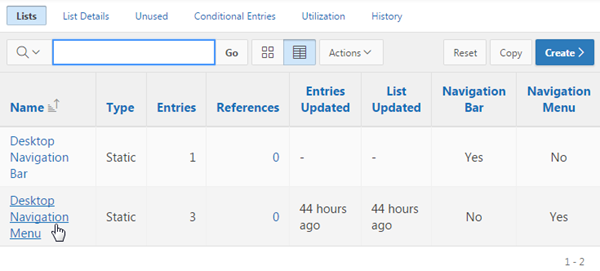
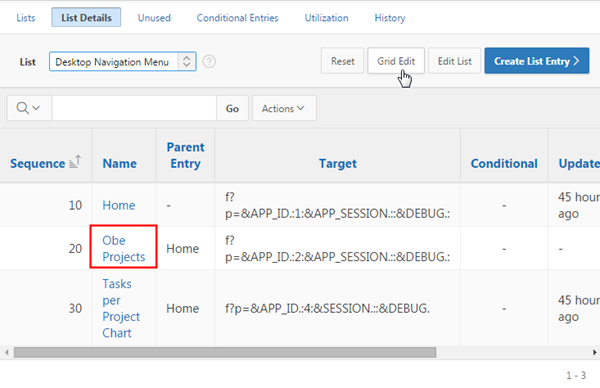
You want to add new pages to the navigation menu. Click Desktop Navigation Menu.
Description of this image -
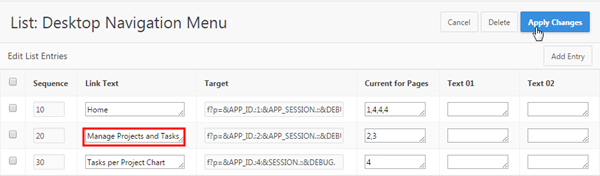
Notice that two pages are already added to the navigation menu with the Home page as their Parent Entry. Click Grid Edit.
Description of this image -
Change Link Text for Obe Projects to Manage Projects and Tasks, and click Apply Changes.
Description of this image -
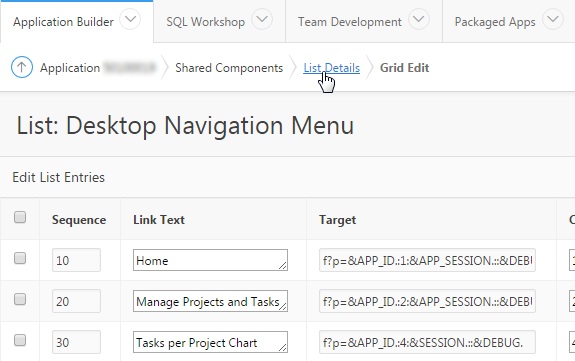
You want to add a new menu entry to this navigation menu. Click List Details.
Description of this image -
Click Create List Entry >.

Description of this image -
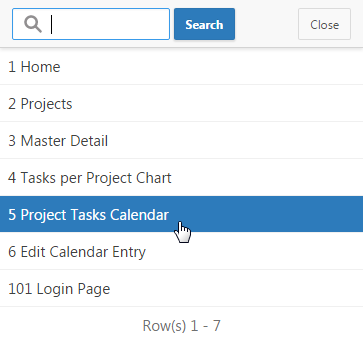
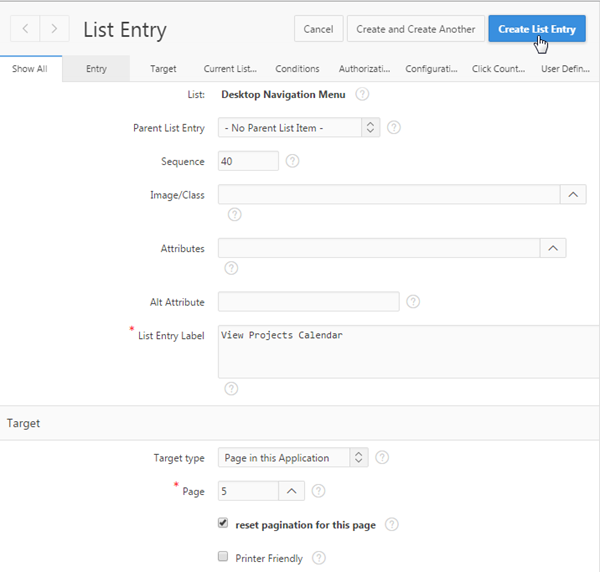
Enter View Projects Calendar for List Entry Label, ensure Target type is selected as Page in this Application, and click up arrow for Page.

Description of this image -
Click 5 Project Tasks Calendar.
Description of this image -
Click Create List Entry.
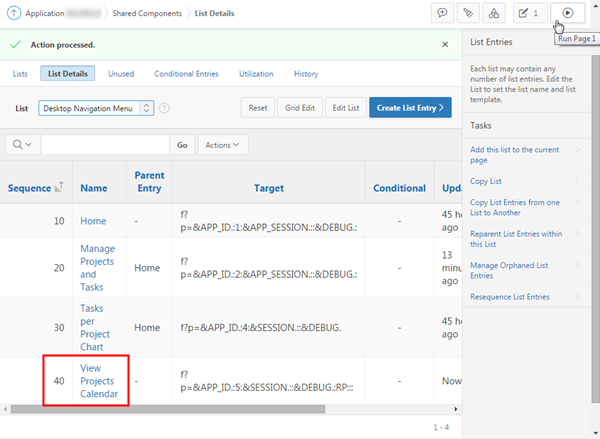
Description of this image -
The new menu entry appears in the list. Click the Run Page 1 icon.
Description of this image -
Notice that the changes appear in the Navigation Menu. Click Manage Projects and Tasks.
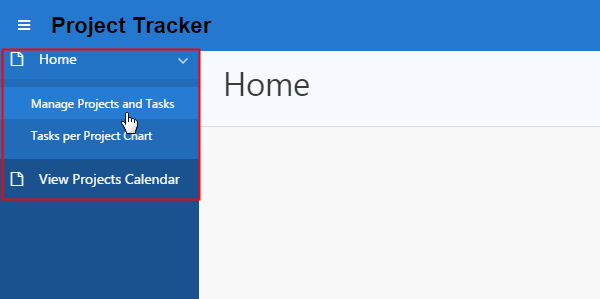
Description of this image -
The Obe Projects page appears. Click View Projects Calendar in the Navigation Menu.

Description of this image -
The Project Tasks Calendar appears. Click Application<n> in the developer toolbar.
Description of this image
Creating a New Theme
In this topic, you create a new theme. This tutorial does not cover the steps to switch to the new theme because this application was created with Universal Theme in the previous tutorial.
Note: An application with a modern theme like Universal Theme can be switched only to any other modern theme, but it can not be switched to any of the existing tab based (legacy) themes. Since, the Universal Theme is the only modern theme available with Oracle Application Express 5.0 (as of now), it can not be switched to any other theme.
A modern theme can be defined as one that uses a responsive, grid-based layout and list based navigation menus. As of now, all the themes supported by Oracle APEX 5.0 other than Universal Theme are tab-based themes and new modern themes are under development and can be added to Oracle Application Express in the near future. Only then, will an application with Universal Theme be able to support switching to another modern theme.
-
Click Shared Components.
Description of this image -
Click Themes.
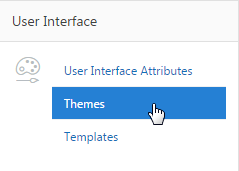
Description of this image -
Click Create >.
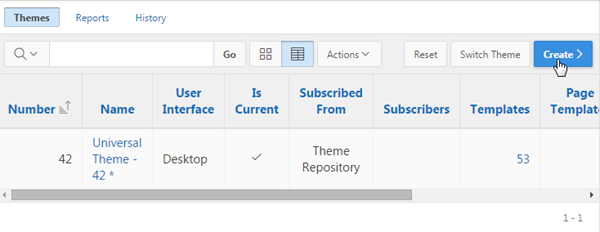
Description of this image -
Select From the Repository, and click Next >.
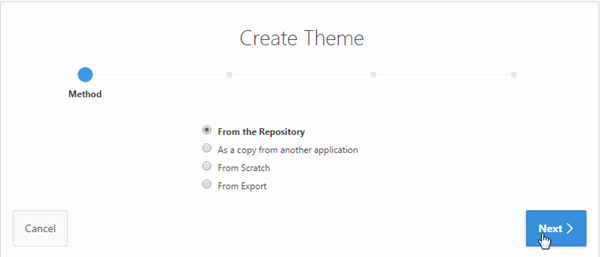
Description of this image -
Select Desktop for User Interface, and click Next >.

Description of this image -
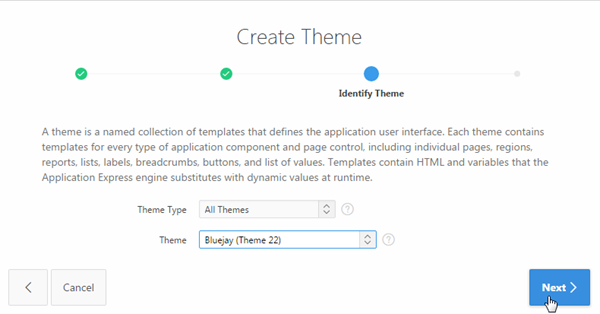
Select All Themes for Theme Type, Bluejay (Theme 22) for Theme, and click Next >.
Description of this image -
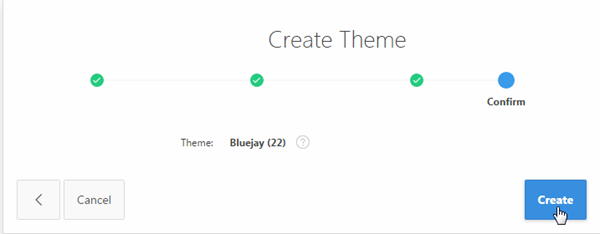
Click Create.
Description of this image -
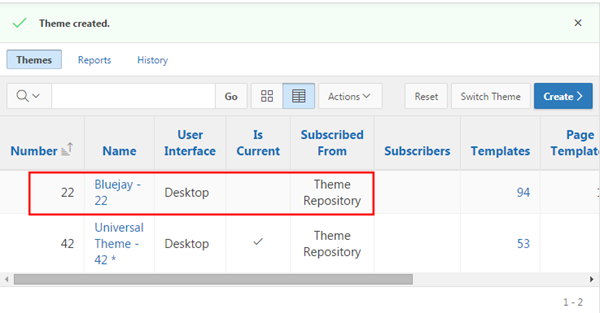
The new theme is created and included in the Themes list.
Description of this image
Summary
In this tutorial, you have learned how to:
- Create a Flash Chart and modify it
- Create a Calendar and link it to a different page in the application
- Create a Logo for the application
- Update the Navigation Menu and add new menu entries
- Create a new Theme
Want to Learn More?
- Other tutorials on Oracle Database Cloud Service - Database Schema Service
Credits
-
Curriculum Developer: Anjani Pothula
- Other Contributors:Drue Swadener