Before You Begin
Purpose
This tutorial shows you how to perform a Quick Start installation of Oracle SOA Suite 12c on your Linux environment.
Time to Complete
About 2.5 hours
Note: In step 2, you must download the installer, which takes about 2 hours, and then the installation will take approximately 30 minutes.
Background
Oracle SOA Suite 12c is a member of the Oracle Fusion Middleware family of products. It provides a complete set of service infrastructure components for designing, deploying, and managing composite applications. Using Oracle SOA Suite 12c, you can create, manage, and orchestrate your services into composite applications and business processes.
What Do You Need?
- A Linux environment that meets the Oracle Fusion Middleware System Requirements and Specifications
- Basic knowledge executing Linux commands
- Permission and privileges for installing applications on your Linux environment
- An installed and certified JDK
Note: For SOA Suite release 12.1.3 use JDK 7 only.
Downloading Oracle SOA Suite 12c Installer
-
Open a terminal window. Create the mywork/install directories by executing the following command:
> mkdir -p mywork/install -
Download the All Platforms-Generic 64bit JVM SOA Suite Quick Start installer zip file to the following directory:
> mywork/install/Note: You need to Accept the OTN Free Developer License Agreement to download the All Platforms-Generic 64bit JVM version.
Setting Environment Variables
-
Set the environment variable
JAVA_HOMEto point to the location of your JDK.Note:
JAVA_HOMEmust be in all capitals. Your path definition should be formatted something like the following:JAVA_HOME=$HOME/Java/jdk1.7.0_xx export JAVA_HOME -
Set the environment variable
ORACLE_HOMEto point to the location where you want to install Oracle SOA Suite 12c.Note:
ORACLE_HOMEmust be in all capitals. Your path definition should be formatted something like the following:ORACLE_HOME=$HOME/Oracle/Middleware/Oracle_Home export ORACLE_HOME
Starting the Quick Start Installer
After you've downloaded the installer and set the environment variables, start the Quick Start installer:
-
In a terminal window, go to the
mywork/installdirectory and unzip the downloaded zip file, by executing the following commands:> cd mywork/install > unzip fmw_12.1.3.0.0_soaqs_Disk1_1of1.zipYou see two JAR files after unzipping the installer:
> ls -a . .. fmw_12.1.3.0.0_soa_quickstart2.jar fmw_12.1.3.0.0_soa_quickstart.jar -
In a terminal window, start the installation wizard using the following command:
> $JAVA_HOME/bin/java -jar fmw_12.1.3.0.0_soa_quickstart.jarThe installation wizard appears.
-
On the Installation Inventory Setup page, accept the default values, and click OK.

Description of this image Note: On UNIX and Linux systems, the wizard begins by prompting for the location of the Installation Inventory file. This page doesn't appear on Windows operating systems.
-
On the Welcome page, click Next.

Description of this image -
On the Installation Location page, provide your ORACLE_HOME directory, and click Next.

Description of this image Note: You can update the installation path as you need to.
-
On the Prerequisites Checks page, verify success, and click Next.

Description of this image -
On the Installation Summary page, review all the components that are about to be installed, and click Install.

Description of this image -
On the Installation Progress page, wait for the installation and configuration of all software, and click Next.

Description of this image -
On the Installation Complete page, deselect Start JDeveloper, and click Finish.

Description of this image
Creating and Configuring a Default Domain
After you've installed Oracle SOA Suite 12c and set the environment variables, you can create and configure a Default Domain.
Starting Oracle JDeveloper
-
In a terminal window, go to the Oracle JDeveloper home directory and start it by executing the following commands:
> cd $ORACLE_HOME/jdeveloper/jdev/bin
> ./jdev
Oracle JDeveloper starts.

Description of this image -
When prompted, select Studio Developer as your role and click OK.

Description of this image
Tuning Oracle JDeveloper (Optional)
After you've started Oracle JDeveloper, you can tune the configuration.
-
To improve the performance of Oracle JDeveloper IDE, you can increase the default memory size assigned by editing the following file:
> vi $ORACLE_HOME/jdeveloper/jdev/bin/jdev.conf -
Locate the following entry, and increase the value, for example to
784Minstead of320M.AddVMOptionHostspot -XX:MaxPermSize=320MNote: This value doesn't need to be added or changed for Windows distributions.
-
Save your edited entry and restart Oracle JDeveloper to apply the changes.
Configuring a Default Domain
-
In Oracle JDeveloper, select the Run menu, and click Start Server Instance:

Description of this image -
In the Create Default Domain page, provide and confirm an administrator password, and click OK.
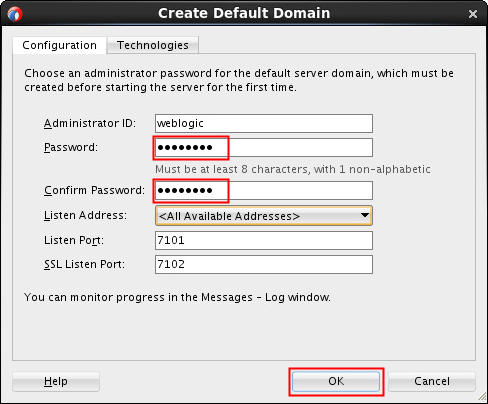
Description of this image Note: These are your credentials for your Oracle WebLogic Server.
The domain creation takes several minutes. You can monitor the progress in the Running: IntegratedWebLogicServer-Log tab.

Description of this image
Verifying Your Domain
The default domain is now configured. Verify your installation:
-
Open a web browser and access the Enterprise Manager Fusion Middleware Control by entering the URL following this format:
http://hostname.domain:7101/em -
In the Login page, provide your credentials and click Login.
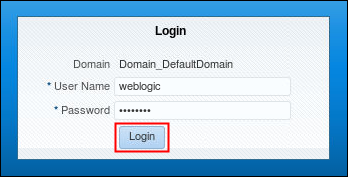
Description of this image Verify that you now have access to the Enterprise Manager Fusion Middleware Control console.

Description of this image
Want to Learn More?
-
In the Oracle Help Center: Introducing the Quick Start Distributions
-
In the Oracle Help Center: Installing Oracle SOA Suite Quick Start for Developers
-
In the Oracle Help Center: Preparing for an Oracle Fusion Middleware Installation
-
Creating a SOA Composite Application with Oracle JDeveloper 12c
-
Creating an Oracle Service Bus Application with Oracle JDeveloper 12c