Getting Started with Oracle Data Provider for .NET (C# Version)
Overview
Purpose
This tutorial describes how you can build a .NET application that uses the Oracle Data Provider for .NET to access data in an Oracle Database.
Time to Complete
Approximately 30 minutes
Introduction
Oracle Data Provider for .NET (ODP.NET) is Oracle's high performance ADO.NET compliant data provider that exposes a complete set of Oracle specific data access features and tuning options including support for Real Application Clusters, XML DB, and advanced security. It is available for free download from the Oracle Technology Network website.
This tutorial will guide you through building a basic .NET appliction that retrieves data from the Oracle database. You will learn how ODP.NET interacts with standard .NET controls. Then, you will learn how to handle errors with ODP.NET. Lastly, you will modify the application to return multiple columns of data.
Prerequisites
Before starting this tutorial, you should:
-
Install Microsoft Visual Studio 2013 or later.
-
Install Oracle Database 12c or later.
-
Install Oracle Data Access Components (ODAC) 12.1.0.1.2 or later from OTN. The ODAC download includes Oracle Developer Tools for Visual Studio and ODP.NET that will be used in this lab.
Creating a Project in Visual Studio
To create a new project in Visual Studio, perform the following steps:
-
From your Windows Program menu, start Visual Studio. From the File menu, select New > Project....

-
From the Project types list, select Visual C#: Windows. Select the Template Windows Form Application. In the Name field, enter OraWinApp. In the Location field, enter the directory where you want to save the files. (Note: if the directory does not exist, it is created). Click OK.

-
The project has been created. From View menu, select Solution Explorer to open the Solution Explorer if not already open.

Adding a Reference
Because your project needs access to an Oracle database, it is necessary to add a reference to the DLL containing the data provider. Perform the following steps:
-
From Project menu, select Add Reference...

-
Select Extensions menu on the side bar. Scroll down the list of extensions and select Oracle.ManagedDataAccess and click OK.

Retrieving Data from the Database
To retrieve data from the database, you can add some controls to your form, then data access logic behind them. Perform the following steps:
-
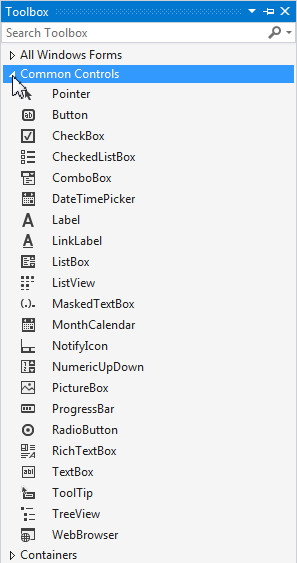
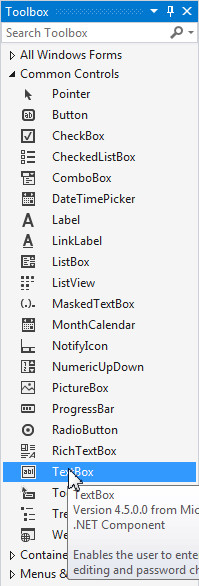
From View menu, select Toolbox. The toolbox appears.

Expand Common Controls.
Note: Before selecting the Toolbox, you should have the form open.
-
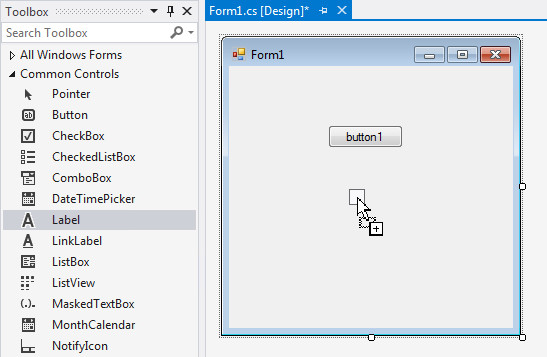
Drag the Button control to the Form1 canvas.

The control is shown on the canvas. You also need to create a Label.
-
From the Toolbox, drag the Label control to the Form1 canvas.
-
Double-click button1 to open the code window.

Note: Form1.cs code window opens.

-
Add the following C# using statements before the Public Class declaration.
using Oracle.ManagedDataAccess.Client; // ODP.NET, Managed Driver
using Oracle.ManagedDataAccess.Types;
-
Add the following C# code in between the private void button1_Click(object sender, EventArgs e) { and } statements. This code will connect to the HR schema, then query the DEPARTMENTS table for the department name with the ID of 10.
string oradb = "Data Source=ORCL;User Id=hr;Password=hr;";
OracleConnection conn = new OracleConnection(oradb); // C#
conn.Open();
OracleCommand cmd = new OracleCommand();
cmd.Connection = conn;
cmd.CommandText = "select department_name from departments where department_id = 10";
cmd.CommandType = CommandType.Text;
OracleDataReader dr = cmd.ExecuteReader();
dr.Read();
label1.Text = dr.GetString(0);
conn.Dispose();
-
Select Build > Build OraWinApp.
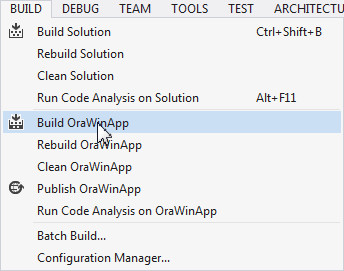
In the output window, ensure you did not get any errors. Now you can run the form.
-
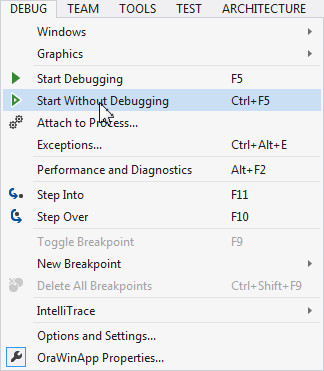
Select Debug > Start Without Debugging.
-
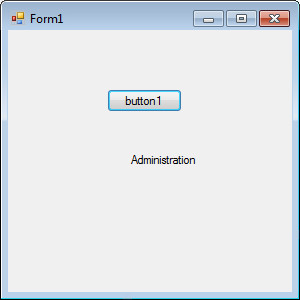
The form appears. Click button1.
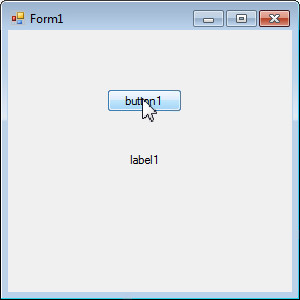
The result is shown in the label. Since the query in the code was to show the department name for department ID of 10, the result is the Administration department. Close Form1.
Incorporating Interactive Controls
Instead of running the hard coded query, you can add a text box control to accept user input for the department ID. Perform the following steps:
-
Select the Form1.cs [Design] tab. From the Toolbox, drag the TextBox control to Form1 canvas.
The text box is shown. You can drag it to the desired location.

-
Drag another Label control onto Form1 canvas above the text box.

-
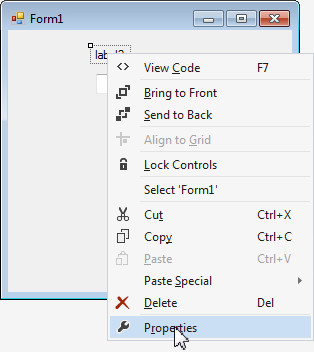
The Label is shown. Right-click Label2 and select Properties.
-
In the Properties tab, change the Text property to Enter Department ID:

-
Select the Form1.cs tab.

-
You use a bind variable to include the value of the text box as part of the SELECT statement. Bind variables improve performance by preventing the database from having to reparse the SQL statement every time the text box value changes.
Add the following code right after the conn.Open(); statement:
OracleParameter parm = new OracleParameter();
parm.OracleDbType = OracleDbType.Decimal;
parm.Value = textBox1.Text;
-
Add the below mentioned statement right after the cmd.Connection = conn; statement:
cmd.Parameters.Add(parm);
-
Change the code for the cmd.CommandText statement to the following:
cmd.CommandText = "select department_name from departments where department_id = :1";
-
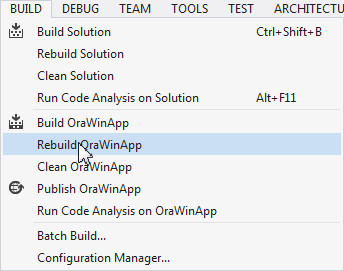
Select Build > Rebuild OraWinApp.
Check in the output window for any errors reported. If no errors or warnings, proceed with the next step.
-
Select Debug > Start Without Debugging.
-
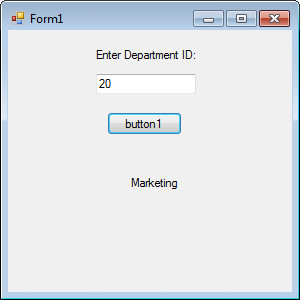
Enter 20 for the Department ID and click button1.

-
Notice that the label1 changes to the name of the department. This value depends on what is entered in the Department ID field.
-
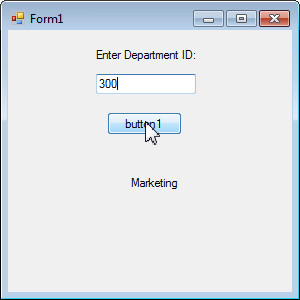
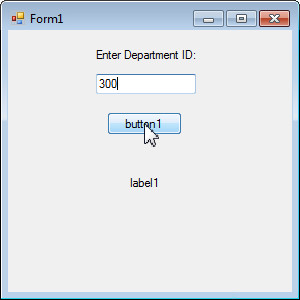
Enter 300 for the Department ID and click button1.
-
This time you receive an error because there is no department with the ID of 300. Click Quit. In the next topic you add some error handling so you know exactly why you received the error.

Adding Error Handling
Error handling is needed to instruct the user why something doesn't work properly. In this topic, you modify your code to prevent an error when an invalid Department ID is provided. In this tutorial, you add some very simple error handling code. For more robust error handling, Structured Exception Handling should be used. For more information on Structured Exception Handling with ODP.NET please refer to the ODP.NET online documentation. Perform the following steps:
-
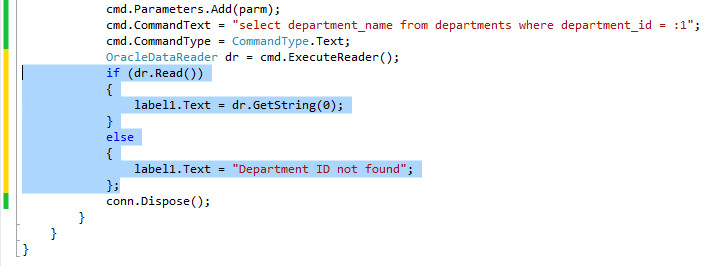
In Form1.cs window, change the following code from:
dr.Read();
label1.Text = dr.GetString(0);to
if (dr.Read())
{
label1.Text = dr.GetString(0);
}
else
{
label1.Text = "Department ID not found";
};
-
Select Build > Rebuild OraWinApp. Ensure that there are no errors reported in the output window.
-
Select Debug > Start Without Debugging.
-
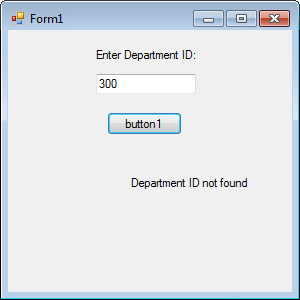
Enter 300 again for the Department ID and click button1.
-
This time, the message Department ID not found is displayed. Close Form1.
Retrieving Multiple Columns and Rows
In this topic, you will retrieve more than one column of information using a listbox. The new query will be a join of the DEPARTMENTS and LOCATIONS tables. The query will return all the department IDs, the department names, and their locations. The department names and their respective location will then be displayed. Perform the following steps:
-
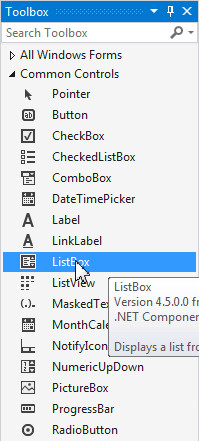
Click the Form1.cs [Design] tab. From the Toolbox, drag the ListBox control to the Form 1 canvas.
-
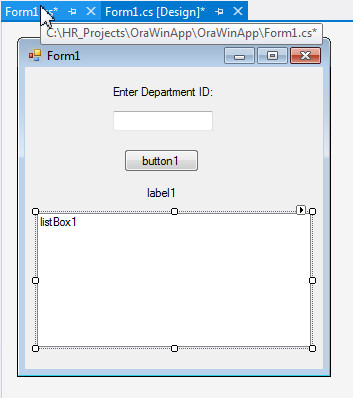
The new ListBox appears on the form. You can position and re-size the ListBox appropriately. Click Form1.cs tab.
-
Delete the cmd.Parameters.Add(parm); statement.

-
Change the cmd.CommandText code from:
cmd.CommandText = "select department_name from departments where department_id = :1";to
cmd.CommandText = "select department_id, department_name, city" +
" from departments d, locations l" +
" where d.location_id = l.location_id";
-
Also change the following lines of code from:
if (dr.Read())
{
label1.Text = dr.GetString(0);
}
else
{
label1.Text = "Department ID not found";
};to
while (dr.Read())
{
listBox1.Items.Add("The " + dr.GetString(1) +
" department is in " + dr.GetString(2));
}
-
Select Build > Rebuild OraWinApp.
-
Select Debug > Start Without Debugging.
-
Click button1.

-
The list of all the departments and their location is shown. Close Form1.

Summary
In this tutorial, you have learned how to:
- Create a C# ODP.NET project and add a reference
- Retrieve data from the database
- Incorporate interactive controls and error handling
- Retrieve multiple columns and rows with a join
Resources
- Visit the Oracle Technology Network Portal to learn the latest developments in Oracle .NET.
- To learn more about Oracle .NET with Visual Studio refer to additional OBEs in the Oracle Learning Library.
Credits
- Lead Curriculum Developer: Ashwin Agarwal
- Other Contributors: Alex Keh, Christian Shay
To navigate this Oracle by Example tutorial, note the following:
- Topic List:
- Click a topic to navigate to that section.
- Expand All Topics:
- Click the button to show or hide the details for the sections. By default, all topics are collapsed.
- Hide All Images:
- Click the button to show or hide the screenshots. By default, all images are displayed.
- Print:
- Click the button to print the content. The content that is currently displayed or hidden is printed.
To navigate to a particular section in this tutorial, select the topic from the list.