Using Multitenant Container Databases in Visual Studio
Overview
Purpose
This tutorial covers how to use Multitenant Container Databases in Visual Studio.
Time to Complete
Approximately 40 minutes
Introduction
The Oracle Multitenant option is introduced in Oracle Database 12c Release 1 to enable an Oracle database to function as a multitenant container database (CDB) that includes zero, one, or many customer-created pluggable databases (PDBs). A PDB is a portable collection of schemas, schema objects, and nonschema objects that appears to any Oracle client application as a non-CDB. Note that all Oracle database versions prior to Oracle Database 12c Release 1 (12.1) are known as non-CDBs.
PDBs can be created quickly from a seed pluggable database or cloned from another pluggable database. These operations are much faster than creating a non-CDB database from scratch. Pluggable databases can also be unplugged, resulting in a set of database files and an XML metadata file that can be plugged into other container databases.
For developers, this feature makes testing a database configuration with your application as simple as cloning an existing PDB, or plugging in a PDB in the form of some provided database files. Similarly, a pluggable database can be shared with other developers, either by cloning or through unplugging and sharing the database files. At deployment time, a development PDB can simply be unplugged from the development container database and plugged into the production container database.
Note: In this tutorial, the container database uses the TNS alias CONTAINERDB with a database located on the same Windows file system as Visual Studio. This container database TNS alias and the location of the database files may be different in your environment. If your database is on Linux, file system paths will need to be specified in the Linux format.
Prerequisites
Before starting this tutorial, you should:
-
Install Microsoft Visual Studio 2013 or later
-
Review the tutorial Installing Oracle Database 12c on Windows
-
Install Oracle Database 12c Release 1 and configure it as a container database
-
Install Oracle Developer Tools for Visual Studio version 12.1 or higher
-
Download and extract files.zip
Connecting to the Container Database as a SYSDBA
In this section, we will be creating a database connection to a multitenant container database using SYSDBA privileges.
-
Open Microsoft Visual Studio 2013.

-
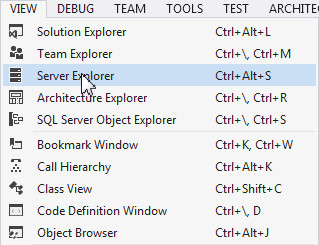
Select VIEW > Server Explorer.
-
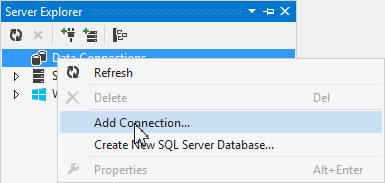
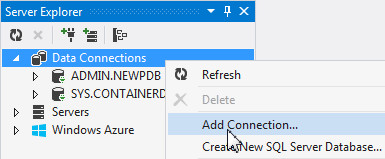
In the Server Explorer, right-click Data Connections and select Add Connection...
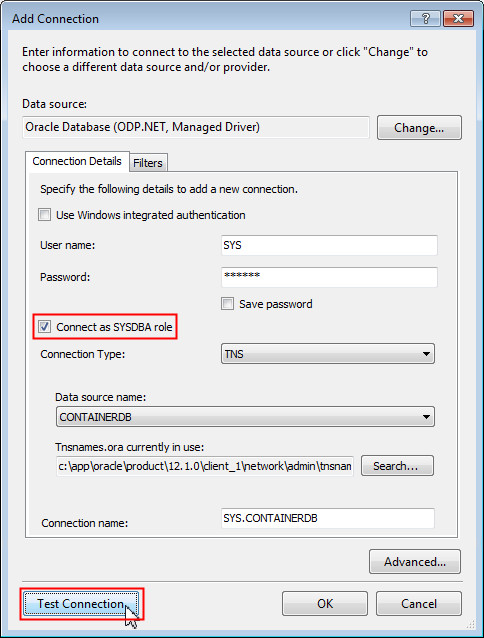
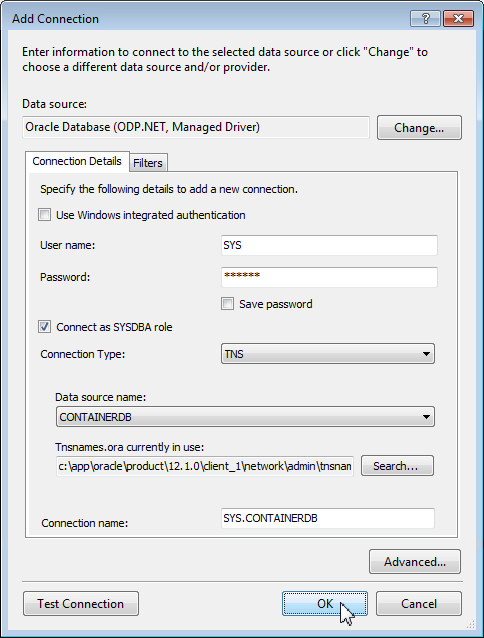
The Add Connection dialog box opens. Perform the following:
- Ensure that the data source selected is Oracle Database (ODP.NET, Managed Driver)
- Enter the user name as SYS and enter the password
- Check The Connect as SYSDBA role checkbox
- Ensure the data source name is CONTAINERDB
- Click Test Connection
Test connection was successful. Click OK.
-
Click OK to confirm creating the new connection. The SYS.CONTAINERDB connection is a multitenant container database in which we will be creating one or more pluggable databases in the later sections.
-
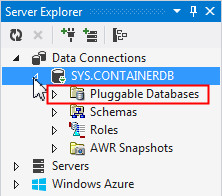
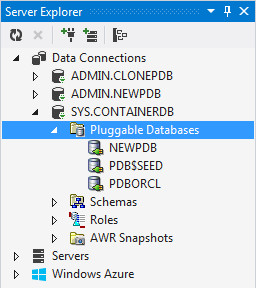
Expand the connection. You will see the Pluggable Databases node.
Note: If you do not see the Pluggable Databases node under the SYS.CONTAINERDB connection, it is likely that one or more of the following are true:
- You do not have a SYSDBA privilege
- You have not connected to Oracle Database 12.1 or higher or it is not configured as a container database.
- You connected to a pluggable database instead of a container database.
-
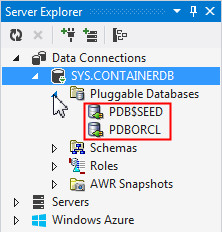
Expand the Pluggable Databases node. You may see the following pluggable databases:
- PDB$SEED: This is the permanent part of the database that is used for creating new pluggable databases.
- PDBORCL: This is a sample pluggable database that contains the HR schema
Creating a New Pluggable Database
In this section, we will create a new pluggable database in the multitenant container database.
-
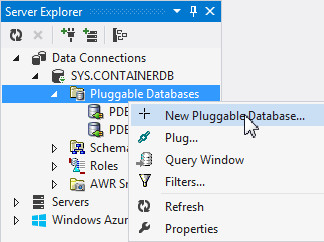
In the Server Explorer, right click Pluggable Databases and select New Pluggable Database...
-
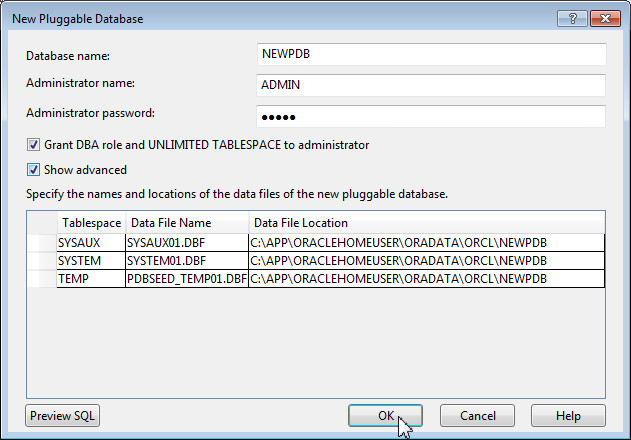
In the New Pluggable Database dialog box, perform the following:
- Change the name of the database to NEWPDB
- Enter the password as admin
- Select the Show advanced option. This option shows the location in which the data files for the new pluggable database will be stored.
- Click OK
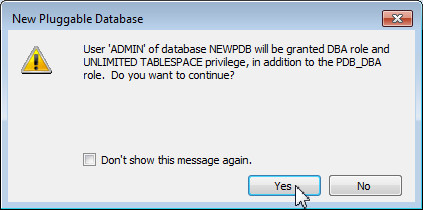
Click Yes in the New Pluggable Database dialog box.
-
Wait for a few minutes. You will receive a confirmation message indicating that the pluggable database was created successfully. Click OK.
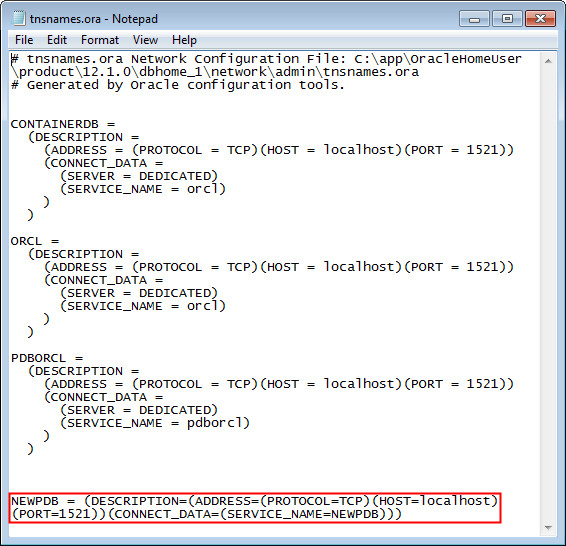
Note: When you create a pluggable database, the Oracle Developer Tools for Visual Studio creates a TNS alias for it in the tnsnames.ora file and then creates a connection to the pluggable database as ADMIN in Server Explorer.

-
Navigate to the client Oracle Home (NOT the Database Oracle Home) and go to the <ORACLE HOME>/NETWORK/Admin directory. Open the tnsnames.ora file. You will see a TNS alias, NEWPDB, created for the new pluggable database. The database SERVICE_NAME is assigned the name of the pluggable database, in this case "NEWPDB". The port and the host name is the same as that of the container database.
-
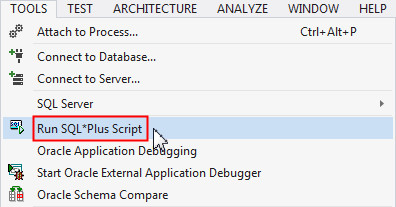
Navigate back to Visual Studio, Click on TOOLS > Run SQL*Plus Script.
-
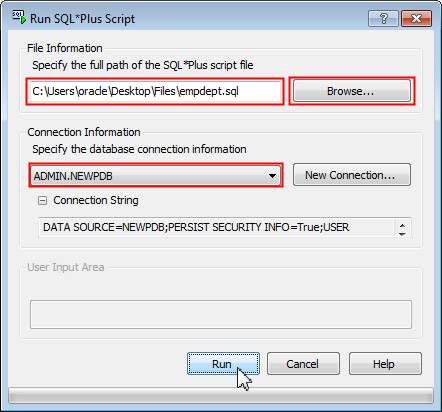
In the Run SQL*Plus Script dialog box, perform the following tasks:
- Click the Browse... button under File Information, navigate to the location of the empdept.sql file which was provided in the prerequisites section, select the file and click Open.
- Under Connection Information, ensure ADMIN.NEWPDB is selected. Click Run.
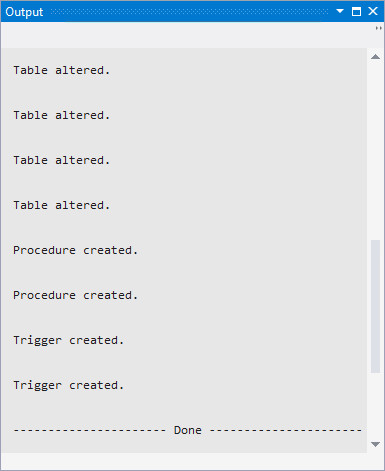
Note: The empdept.sql file creates the following tables and procedures in the new pluggable database:
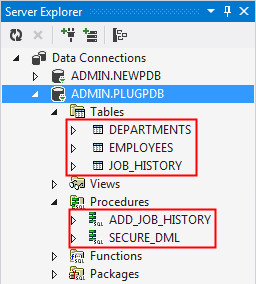
- Tables: DEPARTMENTS, EMPLOYEES and JOB_HISTORY
- Procedures: ADD_JOB_HISTORY and SECURE_DML
-
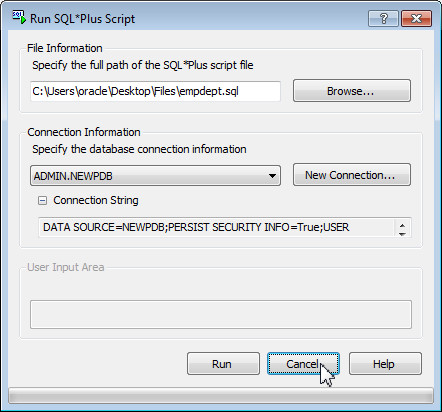
After the SQL script is executed, click the Cancel button to close the Run SQL*Plus Script dialog box.
-
Check for errors in the output window. You must have no errors.
-
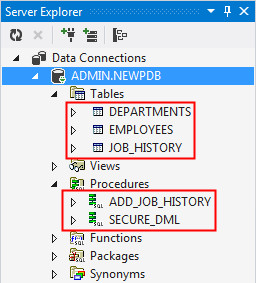
In the Server Explorer, right click ADMIN.NEWPDB and select Refresh.

-
Expand the tables and procedures node to view the list of tables and procedures under the connection.
-
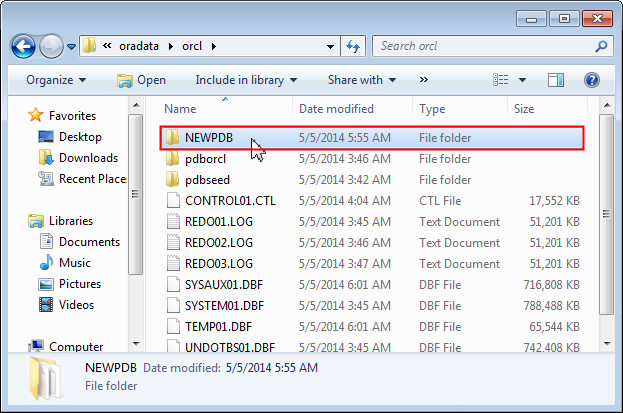
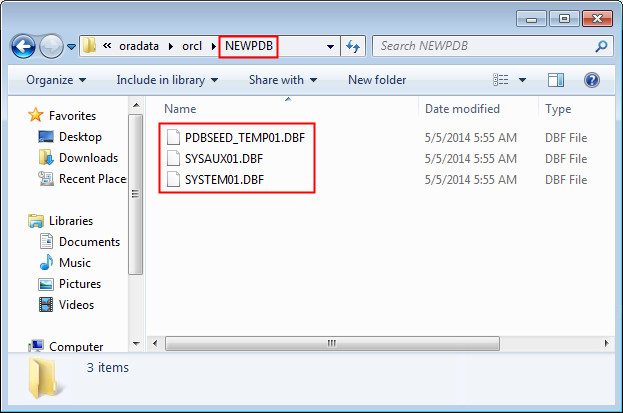
To view the files for the NEWPDB pluggable database in the file system, navigate to the location of the files specified under Data File Location in step 2. Use Windows Explorer if the database is installed on the same machine as Visual Studio. Otherwise connect to the remote machine where the database is located to browse the filesystem. The NEWPDB directory contains all the files related to the pluggable database.
Cloning the Pluggable Database
In this section, we will make a clone of the NEWPDB pluggable database. A clone is a copy of another pluggable database. It is much faster to clone a pluggable database than it is to create a non-pluggable database from scratch.
-
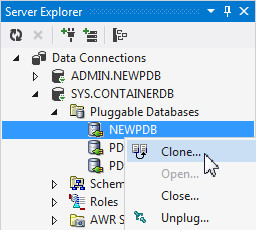
In the Server Explorer, expand SYS.CONTAINERDB > Pluggable Databases. Right click on the NEWPDB node and select Clone...
-
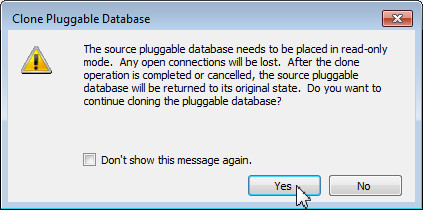
Visual Studio alerts that the source pluggable database needs to be placed in read-only mode and therefore will terminate any open connections. Click Yes.
-
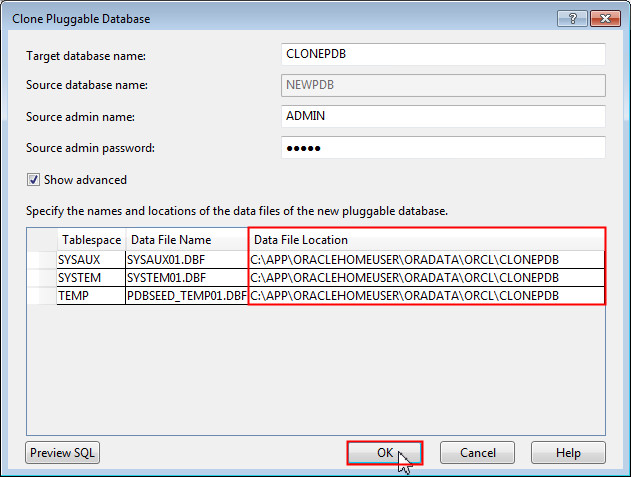
The Clone Pluggable Database dialog box opens up. Change the name of the target database to CLONEPDB, enter the source admin password as admin, select the Show advanced option and click OK.
-
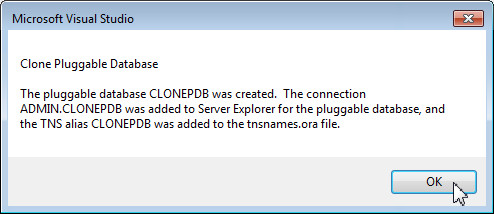
Wait for a few minutes. You will receive a confirmation message indicating that the cloned pluggable database CLONEPDB was created successfully. Click OK.
-
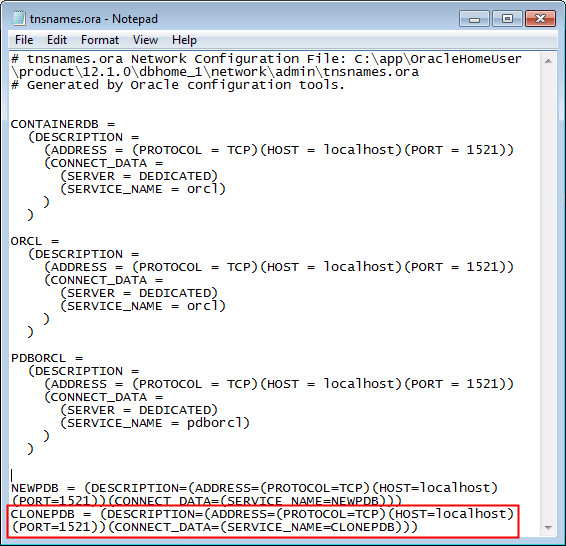
View the tnsnames.ora file that you had opened in the previous section. You will see a new entry for the CLONEPDB TNS alias.
Note: The SERVICE_NAME for the CLONEPDB TNS alias is CLONEPDB.
-
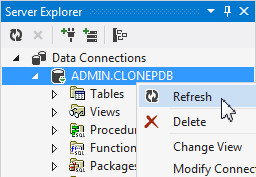
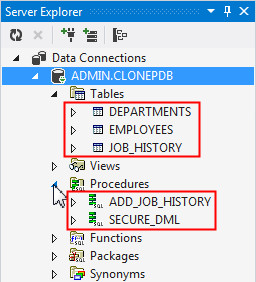
In the Server Explorer, right click ADMIN.CLONEPDB and select Refresh. Expand the tables and procedures node. You will see that the tables and procedures are identical to the NEWPDB pluggable database.
-
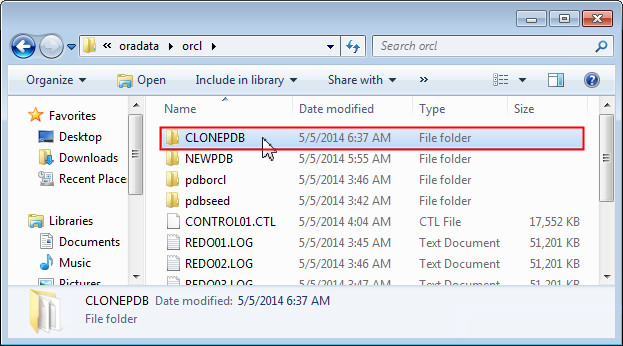
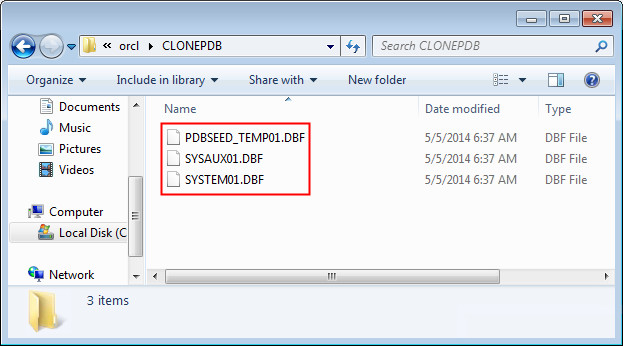
Navigate to the CLONEPDB directory in the database oracle home in the filesystem. This directory contains all the data files related to the cloned pluggable database.
Unplugging the Cloned Database
You can unplug a pluggable database from a container database and then plug it into different container databases or plug it back into the same container database. In this section, you will perform steps to unplug the CLONEPDB database that you created in the previous section.
-
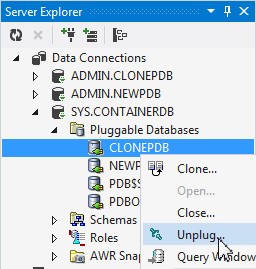
In the server explorer, navigate to SYS.CONTAINERDB > Pluggable Databases. Right click CLONEPDB and select Unplug...
-
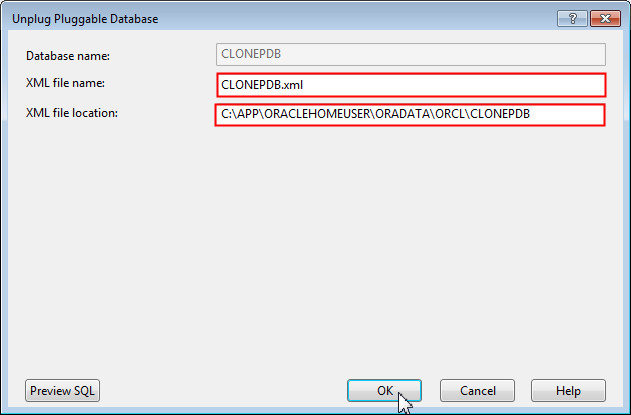
The Unplug Pluggable Database dialog box opens up. Click OK to unplug the CLONEPDB database.
Note: Once you click OK, an XML file containing metadata information about the cloned pluggable database is created. By default, this XML file is stored along with the data files in the CLONEPDB directory.
-
Notice that CLONEPDB is not longer listed under SYS.CONTAINERDB > Pluggable Databases node.
-
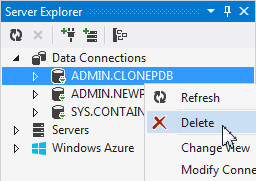
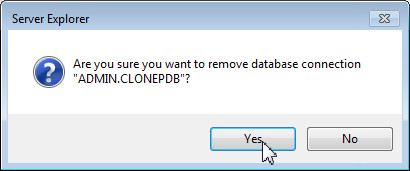
As you have unplugged the database, you no longer require the data connection. Delete the ADMIN.CLONEPDB connection from the Server Explorer.
-
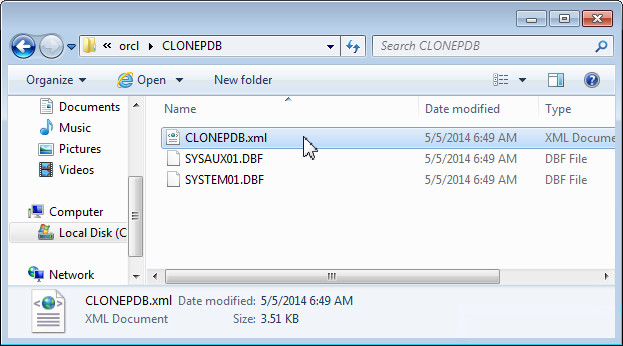
Navigate to the CLONEPDB directory in the database oracle home in the filesystem. You see the CLONEPDB.xml file is created and stored along with the data files.
-
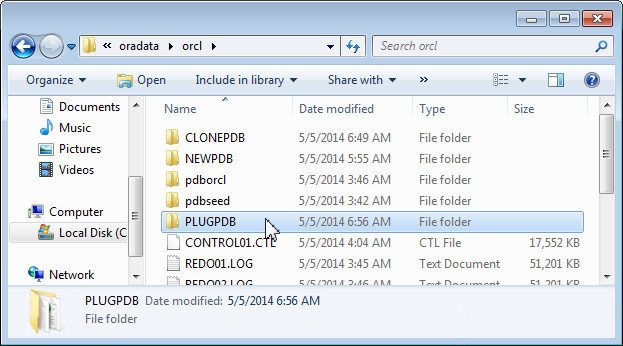
Make a copy of the CLONEDB directory. Rename the copy of the directory to PLUGPDB.
Note: The contents of this directory can be provided to other developers who can then plug in this pluggable database into different container databases.
Verifying the Compatibility of the Pluggable Database with the Container Database
In this section, we will verify the compatibility of the PLUGPDB database with the container database. Any developer who receives a pluggable database must perform the following steps before plugging the database into a container database.
Note: To plug a pluggable database into a container database, you must meet the following requirements:
- The container database and the pluggable database must use the same character set.
- The container database and the pluggable database must have the same endianness.
- The original container database which created the pluggable database, and the target container database must have the same set of database options installed.
To check to see if these requirements are met, perform the following steps:
-
Open the compat.sql script that you downloaded in the prerequisite section. It contains a PL/SQL block that calls the DBMS_PDB.CHECK_PLUG_COMPATIBILITY procedure. This procedure requires:
- The complete path to the CLONEPDB.XML file (modify the path to the CLONEPDB.XML file in your database filesystem).
- The name of the pluggable database.
If there are incompatibilities, the details are stored in the PDB_PLUG_IN_VIOLATIONS table.
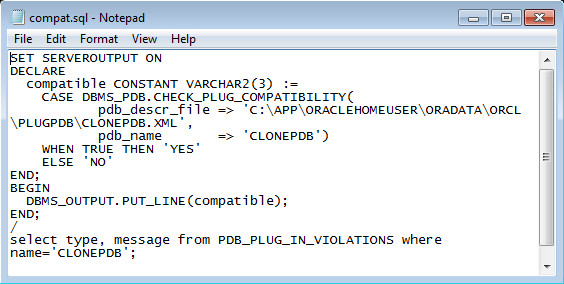
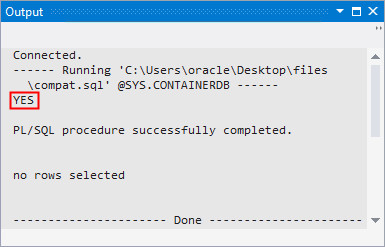
Note: The compat.sql script checks the compatibility of the pluggable database with the container database. If the databases are compatible, the script returns YES. Else, the script returns NO.
-
Select TOOLS > Run SQL*Plus Script.
-
In the Run SQL*Plus Script dialog box, click Browse under File Information and select the location of the compat.sql file. Select SYS.CONTAINERDB under Connection Information and click Run.
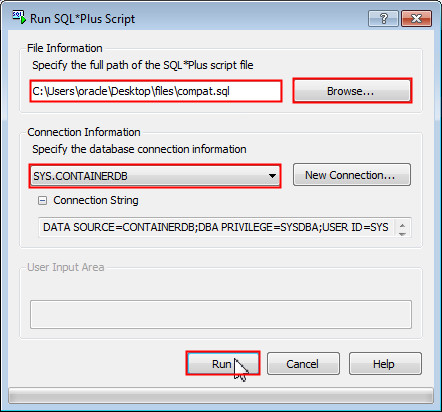
Click Cancel to close the Run SQL*Plus Script dialog box.
-
Navigate to the output window. The script returns YES indicating that both the container databases and the pluggable database are compatible.
Plugging in the Pluggable Database
In this section, you will plug in the PLUGPDB pluggable database into the container database.
-
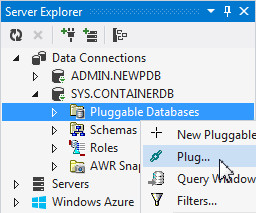
In the Server Explorer, expand SYS.CONTAINERDB. Right click Pluggable Databases and select Plug...
-
The Plug Pluggable Database window appears. Perform the following:
- Change the database name to PLUGPDB
- Verify the name of the XML file to be CLONEPDB.xml
- Set the location of the XML file to C:\APP\ORACLEHOMEUSER\ORADATA\ORCL\PLUGPDB
- Select the Show advanced check box. and change the location of the data files to C:\APP\ORACLEHOMEUSER\ORADATA\ORCL\PLUGPDB
- Click OK.

-
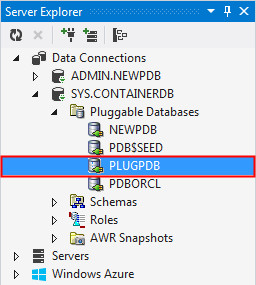
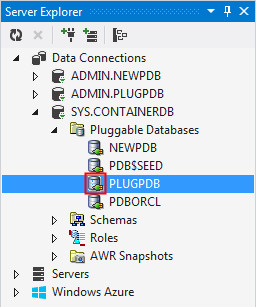
Navigate to the Server Explorer. You see PLUGPDB listed under Pluggable Databases. This indicates that the database was plugged successfully.
-
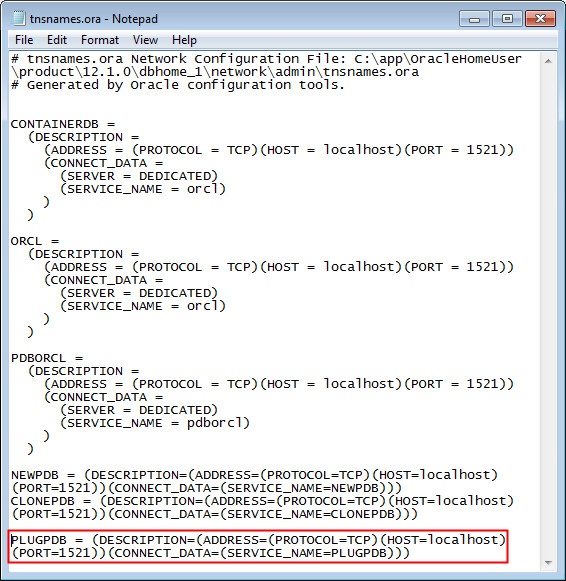
Notice that plugging the PLUGPDB database did not create a new connection in Server Explorer. The database creates a new connection and enters the configuration information in the tnsnames.ora file for new and cloned databases only. Therefore, let us create an alias for PLUGPDB in the tnsnames.ora file. Open the tnsnames.ora file. Copy and paste the alias for CONTAINERDB to the bottom of the TNSNAMES.ORA file. Rename the copied alias to PLUGPDB. Change the SERVICE_NAME to PLUGPDB. For example:
PLUGPDB = (DESCRIPTION=(ADDRESS=(PROTOCOL=TCP)(HOST=localhost)(PORT=1521))(CONNECT_DATA=(SERVICE_NAME=PLUGPDB)))
-
Save the file and close it.
-
In Visual Studio, create a database connection for PLUGPDB. Right click Data Connections and select Add Connection...
-
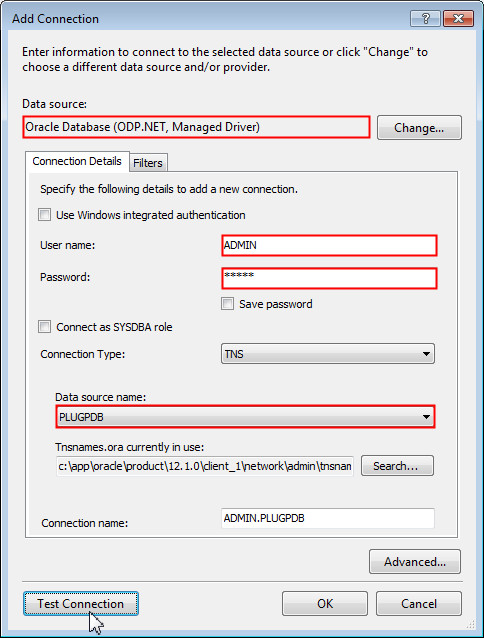
Ensure that the selected data source is Oracle Database (ODP.NET, Managed Driver). Enter ADMIN as the user name and admin as password. Select PLUGPDB as the data source name and click Test Connection.
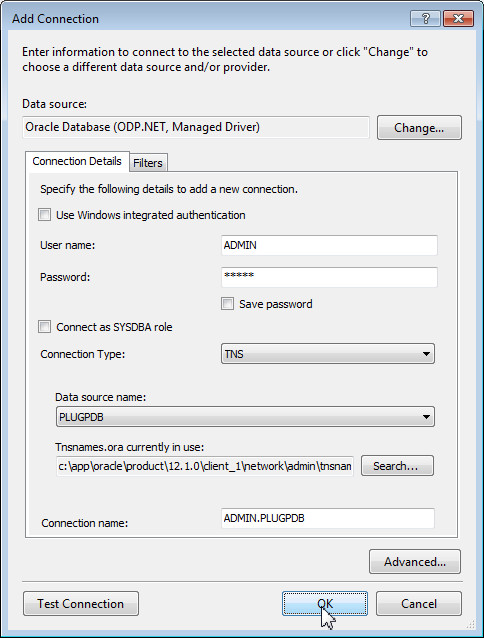
The test connection was successful. Click OK. Click OK again to create the connection.
-
Expand tables and procedures under PLUGPDB. The tables and procedures are same as that of CLONEPDB.
Opening and Closing the Pluggable Database
In this section, you will close, open, and delete the PLUGPDB database that you plugged in the previous section.
Closing a Pluggable Database
Closing a pluggable database in a multitenant container database is equivalent to shutting down a non-container database. This may be necessary to perform certain maintenance tasks.
-
In the Server Explorer, expand SYS.CONTAINERDB > Pluggable Databases. Right click PLUGPDB and select Close...

-
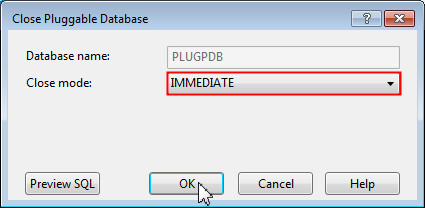
The Close Pluggable Database dialog box opens up. You can choose to close the database by using the following options:
Immediate: The database does not wait for users currently connected to the database to disconnect. The database implicitly rolls back active transactions and disconnects all connected users.
Normal: The database waits for all currently connected users to disconnect from the database.
Choose IMMEDIATE and click OK.
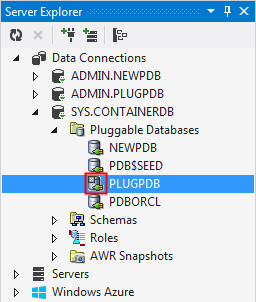
-
Notice the change in icon for PLUGPDB in the Server Explorer. This indicates that the database is closed.
Opening the Pluggable Database
Opening a pluggable database is equivalent to starting up a non-container database. By default, pluggable databases remain closed when a container database starts up. They need to be opened before they can be accessed.
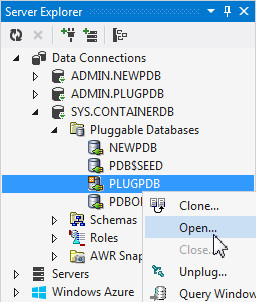
-
Right Click PLUGPDB and select Open...
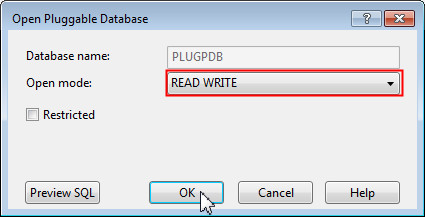
-
The Open Pluggable Database dialog opens up. The default is to open in READ WRITE mode. Click OK.
-
Notice the change in icon of PLUGPDB again.
Deleting the Pluggable Database
Plugging and unplugging a pluggable database adds or removes the pluggable database from the container database while the database files in the filesystem remain intact. If you want to permanently delete the pluggable database from the container database and also delete the files from the file system, you must choose the Delete option.
-
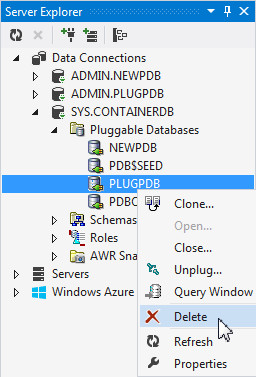
Right PLUGPDB and select Delete.
-
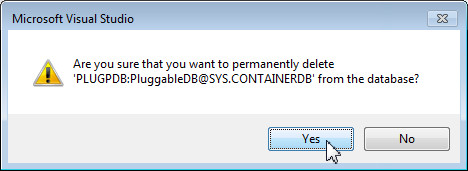
Visual studio prompts for a confirmation. Click Yes to confirm the delete action.
-
You get a warning message indicating that the data files for the pluggable database will be permanently removed. Click Yes.
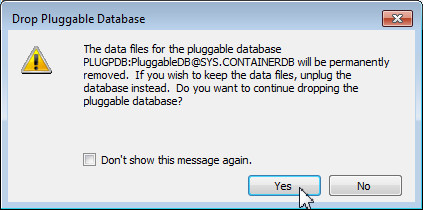
The PLUGPDB database is deleted.
Summary
In this tutorial, you have learned how to:
- Connect to the multitenant container database as SYSDBA
- Create a pluggable database
- Clone a pluggable database
- Unplug the cloned pluggable database
- Verify the compatibility of the pluggable database with the container database
- Plug a pluggable database in to the container database
- Perform administrative steps such as closing, opening and deleting the pluggable database
Resources
- Oracle .NET Developer Center
- Additional .NET OBEs in the Oracle Learning Library
Credits
- Lead Curriculum Developer: Ashwin Agarwal
- Other Contributors: Alex Keh, Christian Shay
To navigate this Oracle by Example tutorial, note the following:
- Topic List:
- Click a topic to navigate to that section.
- Expand All Topics:
- Click the button to show or hide the details for the sections. By default, all topics are collapsed.
- Hide All Images:
- Click the button to show or hide the screenshots. By default, all images are displayed.
- Print:
- Click the button to print the content. The content that is currently displayed or hidden is printed.
To navigate to a particular section in this tutorial, select the topic from the list.