Using Oracle User-Defined Types with .NET and Visual Studio
Overview
Purpose
This tutorial describes how you can create applications that access Oracle user-defined types with .NET and Visual Studio.
Time to Complete
Approximately 45 minutes
Introduction
User-defined types (UDTs) make it possible to model real-world entities such as "Customers" or "Purchase Orders" as objects in the Oracle Database. The Oracle Data Provider for .NET (ODP.NET), Unmanaged Driver supports UDTs, so that developers can access their objects, VARRAYs, and nested table types from C# or VB.NET code. Oracle Developer Tools for Visual Studio also supports UDTs, enabling you to use Visual Studio to create and modify object types and to autogenerate .NET code to access them.
In this tutorial, you will create an application that displays the contents of a relational table that has UDTs defined for some of the columns. You will create the type definition in Oracle using Visual Studio, create the relational table that contains the UDT, load data into the table, and then auto generate the .NET data access code for the application that will display the data.
It is important to understand that Oracle object data can be stored "inline" with each attribute in the object being stored as hidden columns inside of a relational table alongside the other relational columns. They can also exist in their own dedicated "object table" where they become "referencable" via a "pointer" or object id which is a text string known as a "REF". In this tutorial, you will access UDT data in both cases: where Oracle objects are stored inline in a relational table, and those cases where simply the REF to the object is stored in the table.
UDTs will be of particular interest to .NET developers leveraging Oracle Spatial and Oracle Advanced Queuing, which accept UDTs as part of their PL/SQL interfaces. VARRAYs and nested table types are also frequently used in PL/SQL packages.
Note: ODP.NET, Managed Driver does not support UDTs as of this writing. ODP.NET, Unmanaged Driver must be used instead.
Prerequisites
Before starting this tutorial, you should:
-
Install Microsoft Visual Studio 2013.
-
Install Oracle Database 10.2 or later.
-
Install Oracle Data Access Components (ODAC) 12.1.0.1.2 or later from OTN. The ODAC download includes Oracle Developer Tools for Visual Studio and ODP.NET that will be used in this lab.
-
Download and unzip the files.zip to a local folder on your file system. In this tutorial, we use the C:\files folder.
Creating an Oracle Connection
Before you begin creating your application, you open Visual Studio and examine the interface. Perform the following steps:
-
Open Visual Studio
-
Select View > Server Explorer

-
In Server Explorer, if you already have a connection to the HR schema, delete it by highlighting it and pressing the delete key.

Then, right-click Data Connections and select Add Connection....

-
Enter HR for the User name and Password. Click Save password. Choose a Data source name such as ORCL, and click Test Connection.
Note: The Data Source selected should be Oracle Database (ODP.NET, Unmanaged Driver). ODP.NET, Managed Driver does not currently support User Defined Types.

-
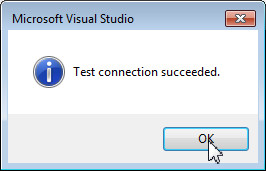
Test connection succeeded. Click OK.
-
Click OK.

-
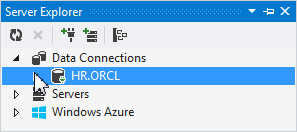
Your connection has been created. Expand HR.ORCL.
Creating User-Defined Types
In this section, you will create the UDT definitions using the Visual Studio designer. Perform the following steps:
-
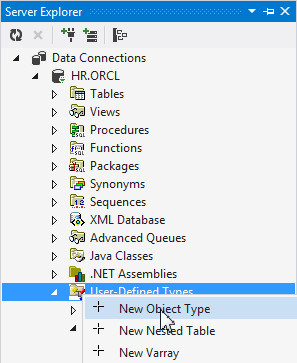
Expand the HR.ORCL connection. Right-click User-Defined Types and select New Object Type.

-
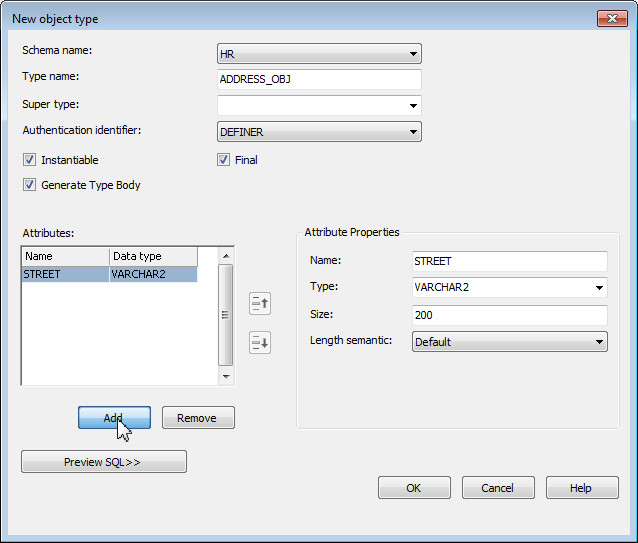
Enter ADDRESS_OBJ for Type name and under Attributes, click Add.

-
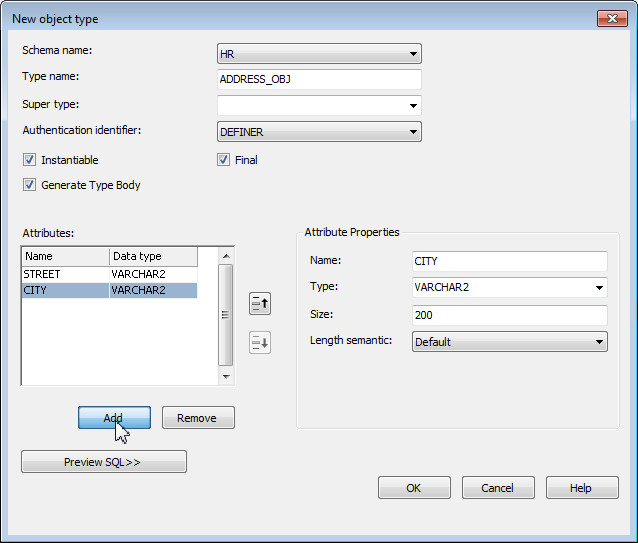
Under Attribute Properties, enter STREET for the Name, select VARCHAR2 for the Type and enter 200 for the Size. Then click Add again to add another attribute.
-
Under Attribute Properties, enter CITY for the Name, select VARCHAR2 for the Type and enter 200 for the Size. Then click Add again to add another attribute.
-
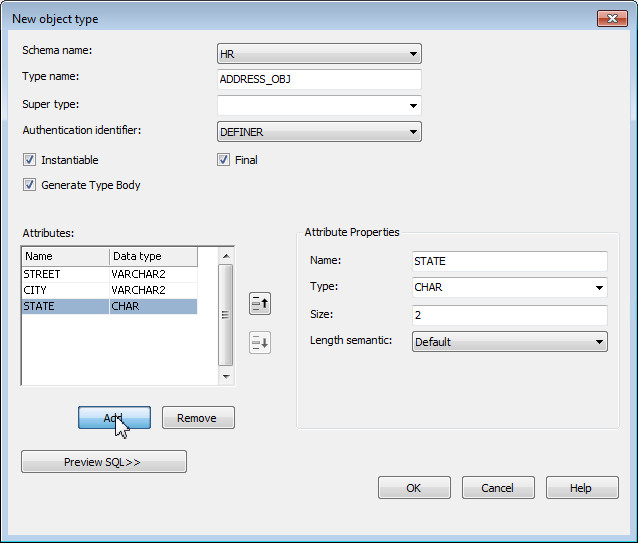
Under Attribute Properties, enter STATE for the Name, select CHAR for the Type and enter 2 for the Size. Then click Add again to add another attribute.
-
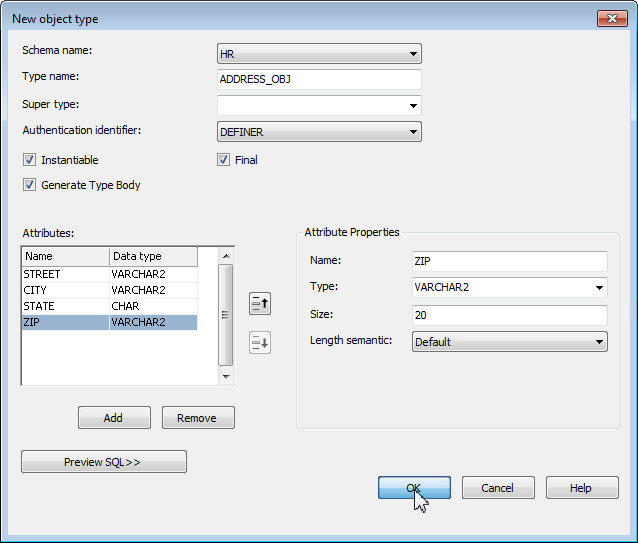
Under Attribute Properties, enter ZIP for the Name, select VARCHAR2 for the Type and enter 20 for the Size. Then click OK to create the object type.
-
The ADDRESS_OBJ user-defined type was created successfully.

-
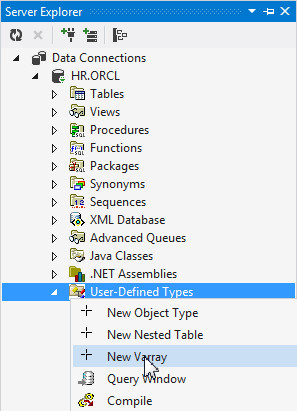
Next, you need to create a phone number list, PHONELIST_OBJ which will be a VARRAY of as many as 10 phone numbers. Right-click User-Defined Types and select New Varray.
-
Enter PHONELIST_OBJ for the Type name, enter 10 for the Limit, select VARCHAR2 for the Type and enter 20 for the Size. Then click OK.

-
The PHONELIST_OBJ Varray was created successfully.

-
Next, you will create the CUSTOMER_OBJ user defined type which will have as attributes the ADDRESS_OBJ and PHONELIST_OBJ objects you just created. Right-click User-Defined Types and select New Object Type.
-
Enter CUSTOMER_OBJ for Type Name and under Attributes, click Add.

-
Under Attribute Properties, enter CUSTNO for the Name, and click Add again to add another attribute.

-
Under Attribute Properties, enter CUSTNAME for the Name, select VARCHAR2 for the Type and enter 200 for the Size. Then click Add again to add another attribute.

-
Under Attribute Properties, enter ADDRESS for the Name, select ADDRESS_OBJ for the Type and click Add again to add another attribute.

-
Under Attribute Properties, enter PHONELIST for the Name, select PHONELIST_OBJ for the Type and click OK to create the object type.

-
The Object type was created successfully.

-
Next, you will create the ACCOUNTREP_OBJ user defined type. Right-click User-Defined Types and select New Object Type.

-
Enter ACCOUNTREP_OBJ for Type name and under Attributes, click Add.
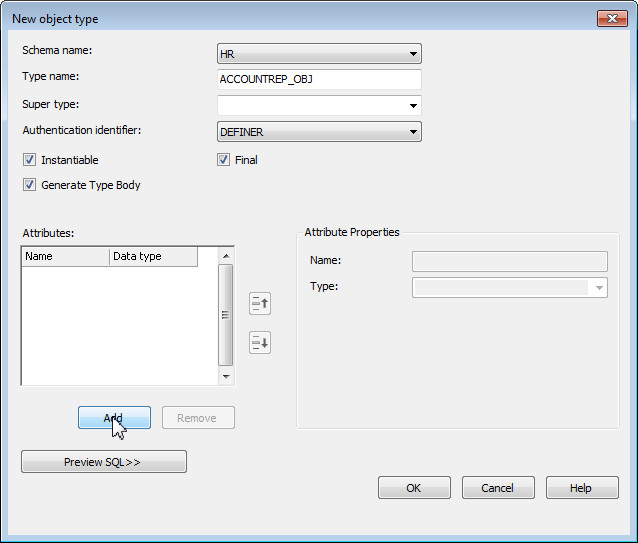
-
Under Attribute Properties, enter ID for the Name, make sure NUMBER is selected for Type and click Add again to add another attribute.

-
Under Attribute Properties, enter NAME for the Name, select VARCHAR2 for the Type and enter 200 for the Size. Then click Add again to add another attribute.
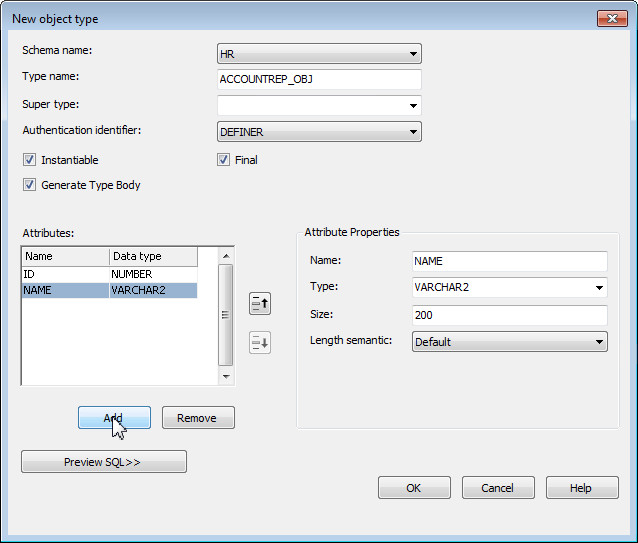
-
Under Attribute Properties, enter PHONELIST for the Name, select PHONELIST_OBJ for the Type and click OK to create the type.

-
The ACCOUNTREP_OBJ user-defined type was created successfully.

Creating the Object Table and Relational Table
In this section, you will create an "object table" which is where ACCOUNTREP_OBJ objects will be stored and will be accessed via a "REF". These objects will be "dereferenced" by the application in the last section of this tutorial. Perform the following steps:
-
Under Server Explorer, right-click Tables and select New Object Table.

-
Enter ACCOUNTREP_TAB for the Table name and select ACCOUNTREP_OBJ for Object type, then click Save

-
Your object type table was created successfully. Now, you will create a relational table. Right-click Tables and select New Relational Table.

-
Enter CUSTOMER_MEETINGS for the Table name. Under Column Properties, enter MEETING_ID for the name and uncheck Not Null. Click Add.

-
Enter TIME for the Name, select DATE for the Data type, uncheck Not Null and click Add.

-
Enter LOCATION for the Name, select VARCHAR2 for the Data type, uncheck Not Null and enter 20 for the Size. Then click Add.

-
Enter CUSTOMER for the Name, select CUSTOMER_OBJ for the Data type, uncheck Not Null and click Add. Note that you did not check the "Create as REF" check box. This means that the CUSTOMER_OBJ data will be stored as hidden columns inside the CUSTOMER_MEETINGS table.

-
Enter ACCOUNT_REP for the Name, select ACCOUNTREP_OBJ for the Data type, uncheck Not Null, click the Create as Ref check box and click Save. By selecting this check box, a "REF" (which is a text string pointer to the ACCOUNTREP_TAB object table) will be stored in this column.


The object and relational tables have been created successfully.
Inserting and Viewing data
In this section, you will insert some data into the object table and the relational table and then view the data in the Data Window. Perform the following steps:
-
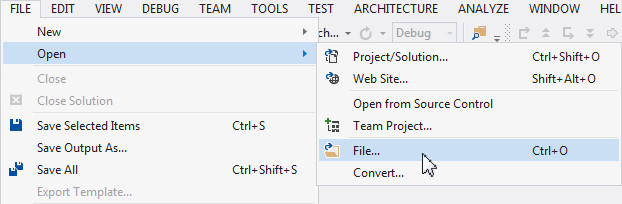
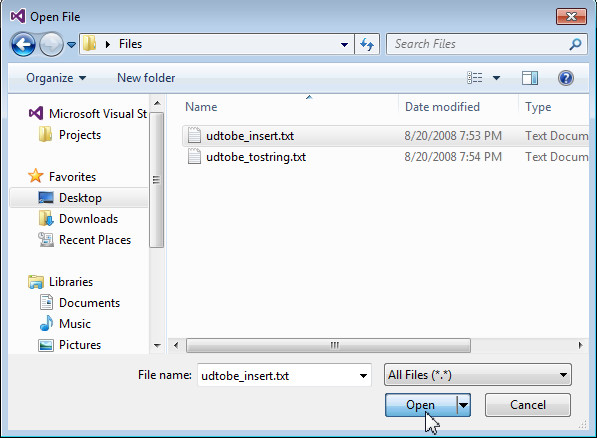
Select File > Open > File.. or press Ctrl+O.
-
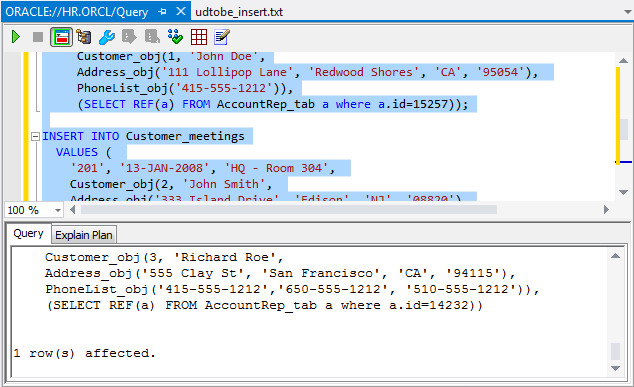
Select udtobe_insert.txt from the files folder that you extracted and click Open.
-
Next, you need to open a query window so that you can execute the insert statements from the file you just opened. Right-click HR.ORCL and select Query Window.

-
From the udtobe_insert.txt window, select all the text and right-click to select Copy.

-
Switch to the Query window and Paste the code that you just copied.

-
Right-click in the Query Window again and select Select All or press Ctrl+A.

-
Click the Execute Query
 icon.
icon.
-
Your query executed successfully.
-
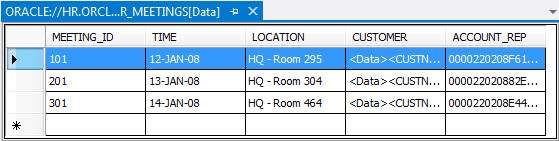
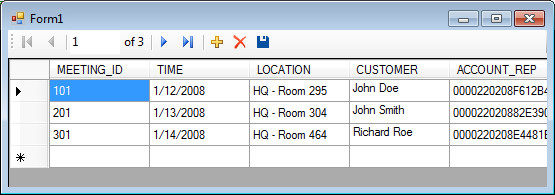
To view the data, in Server Explorer, right-click the CUSTOMERS_MEETINGS table and select Retrieve Data.

-
The data is displayed. Note that the inline object value is displayed as XML, while the REF is a text string that is a pointer to an object in the ACCOUNTREP_TAB table.
-
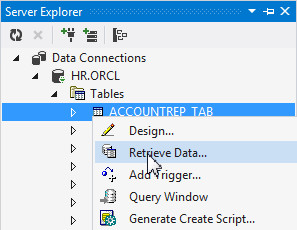
To view the data, in Server Explorer, right-click the ACCOUNTREP_TAB table and select Retrieve Data.
-
The data is displayed.

Creating a Project
You will now create a new project. Perform the following steps:
-
Select File > New > Project...

-
Select Visual C# > Windows from the left navigator, select Windows Forms Application for the Template and click OK.

-
Your project was successfully created.

Adding a Data Source and Grid
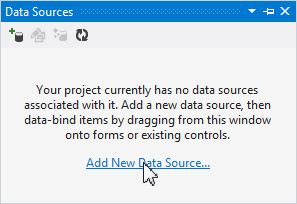
In this section, you will use Visual Studio's automatic code generation capabilities to create an application that uses a DataGridView to display the Oracle data. To do that you first need to create a data source. Perform the following steps:
-
Select View > Other Windows > Data Sources or use the shortcut Shift+Alt+D.

-
Click Add New Data Source...
-
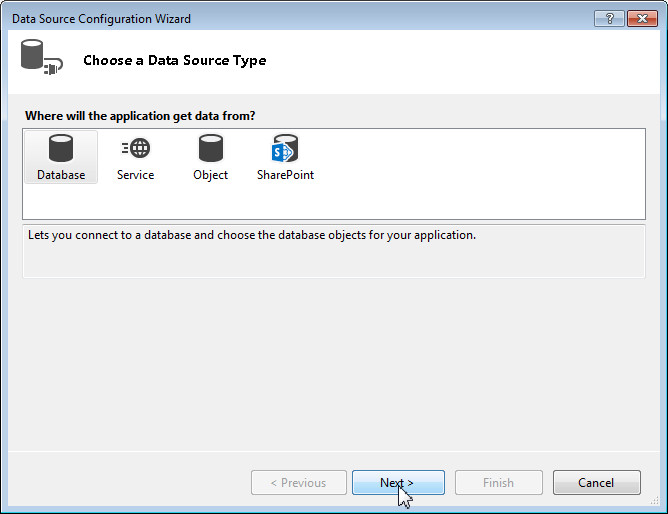
Select Database and click Next.
Select Dataset and click Next.

-
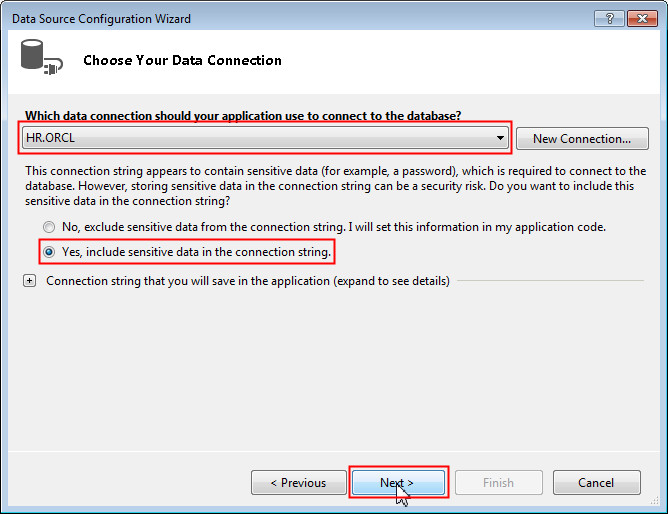
Make sure HR.ORCL is selected, click Yes, include sensitive data in the connection string. Click Next.
-
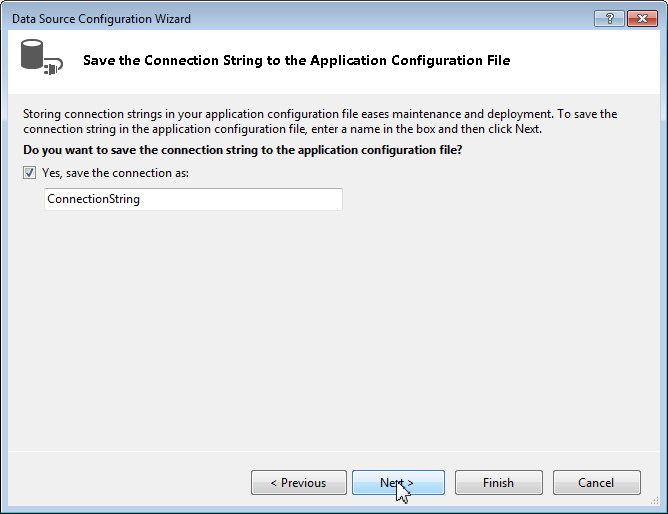
Click Next.
-
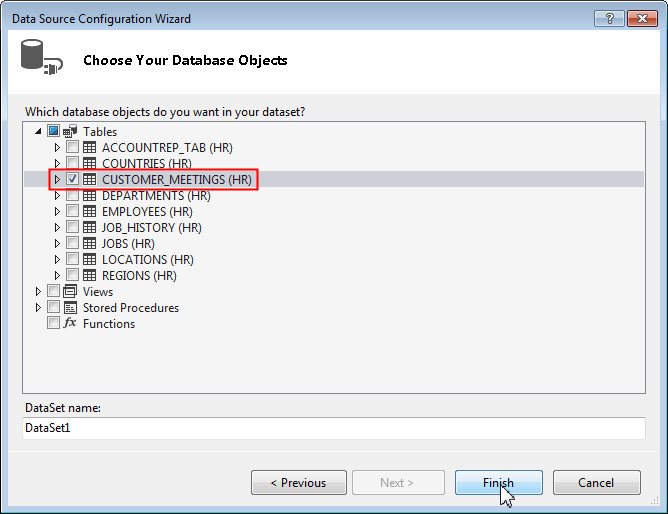
Initially you will create an application that displays only the CUSTOMER_OBJ data that is stored "inline" inside of the CUSTOMER_MEETINGS table. You will examine how to display the ACCOUNTREP_OBJ data that is stored as a "REF" in a later section of this tutorial. Expand Tables > CUSTOMER_MEETINGS and select the check box for CUSTOMER_MEETINGS. Then click Finish.
-
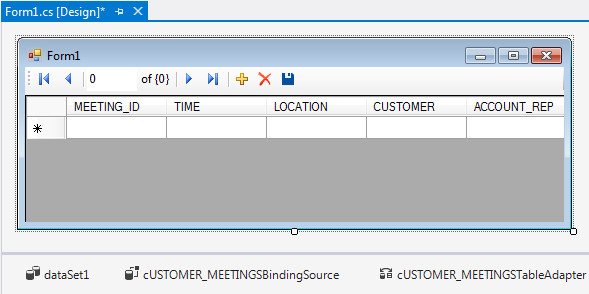
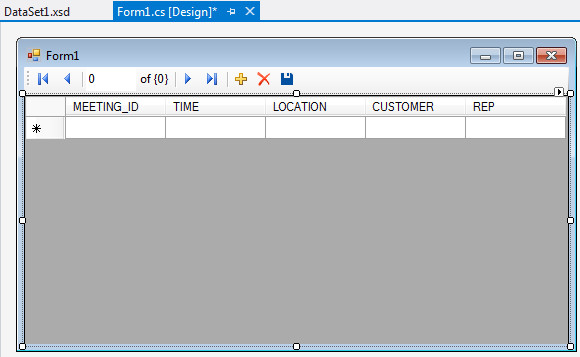
Drag and drop the CUSTOMER_MEETINGS data source to the Form1 canvas.
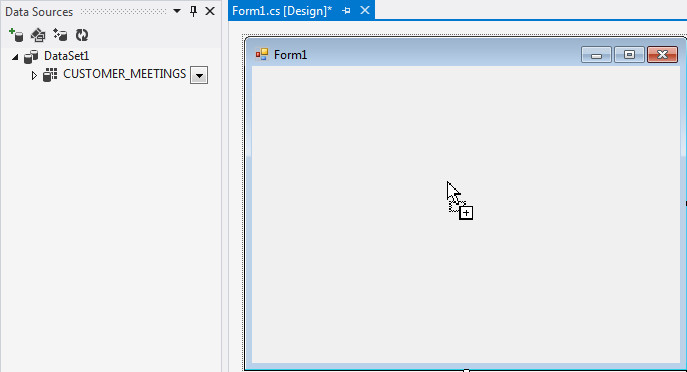
-
The DataGridView control, a dataset, a TableAdapter and a few other classes have been automatically generated.
Modifying Properties in the Grid
In this section, you will modify the grid so that it is capable of displaying multiple lines of data per cell. This will make it possible to display all of the UDT data when the user hovers the mouse over a UDT column cell. Perform the following steps:
-
Right-click the grid and select Properties.

-
Scroll down the list. Expand RowTemplate and select the
 icon for DefaultCellStyle.
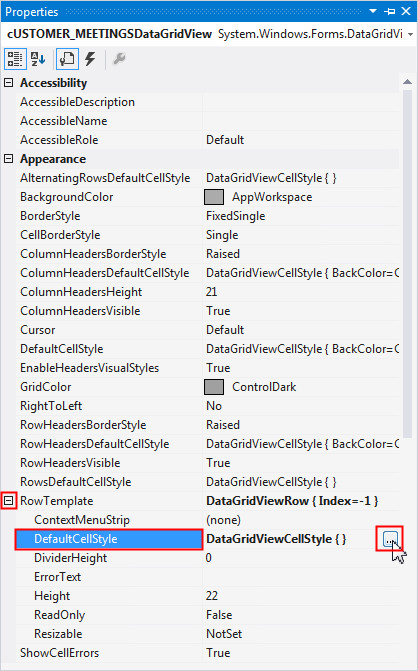
-
Change the WrapMode parameter to True and click OK.

Generating Custom Classes for User-Defined Types
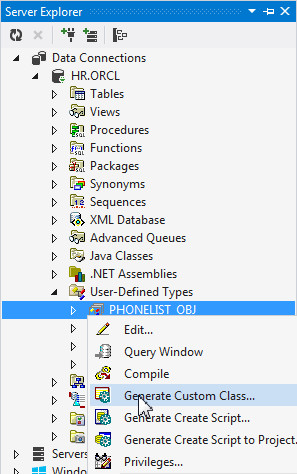
When using User Defined Types, you need to define some .NET classes that can hold the data when it is returned from Oracle. Oracle Developer Tools for Visual Studio includes a Custom Class Code Generation Wizard for this purpose. Perform the following steps:
-
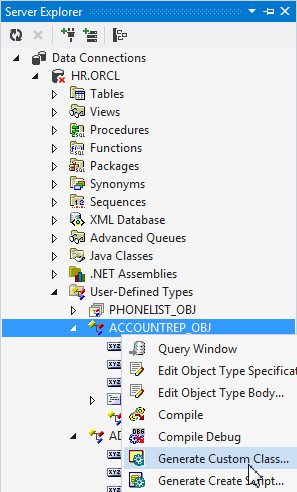
Select the Server Explorer tab. Under User-Defined Types, right-click ACCOUNTREP_OBJ and select Generate Custom Class.
-
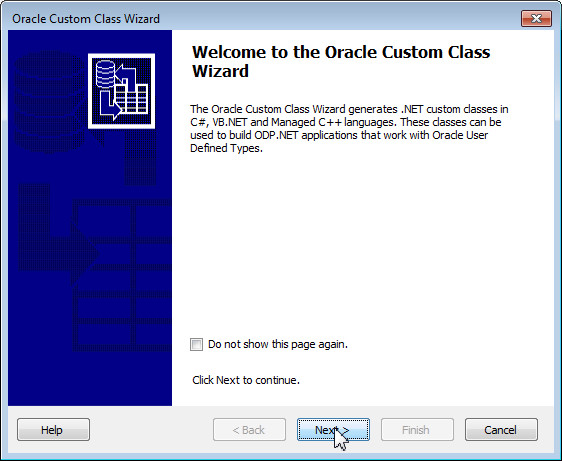
In the Oracle Custom Class Wizard Welcome page, click Next.

-
Accept the defaults and click Next.

-
Accept the defaults and click Next.

-
Click Finish. If you receive an error here, check to make sure your HR connection in server explorer is using ODP.NET Unmanaged Driver. The Managed Driver is not currently supported.

-
Under User-Defined Types, right-click ADDRESS_OBJ and select Generate Custom Class.

-
In the Oracle Custom Class Wizard Welcome page, click Next.

-
Accept the defaults and click Next.

-
Accept the defaults and click Next.
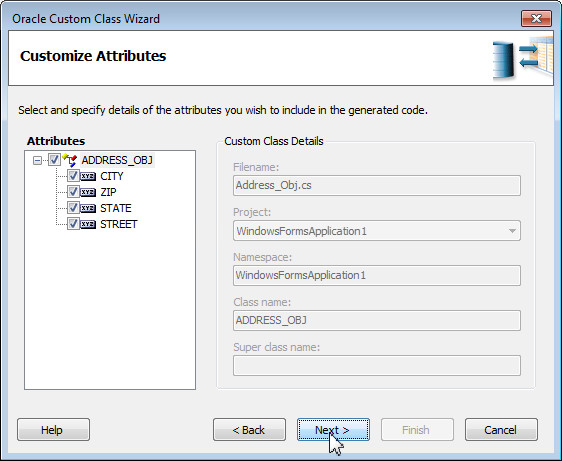
-
Click Finish.

-
Right-click CUSTOMER_OBJ and select Generate Custom Class.

-
In the Oracle Custom Class Wizard Welcome page, click Next.
-
Accept the defaults and click Next.

-
Accept the defaults and click Next.

-
Click Finish.

-
Right-click PHONELIST_OBJ and select Generate Custom Class
-
In the Oracle Custom Class Wizard Welcome page, click Next.

-
Accept the defaults and click Next.
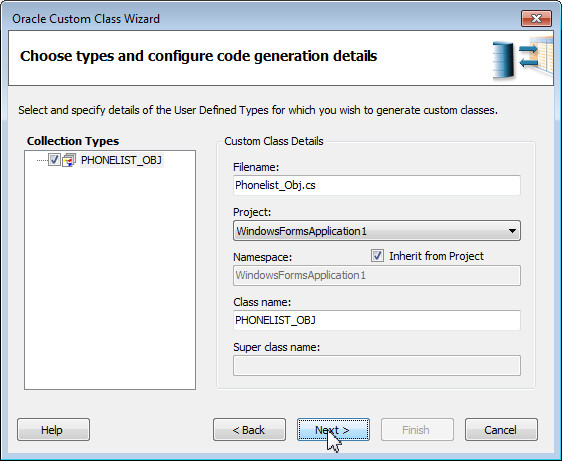
-
Accept the defaults and click Next.

-
Click Finish.
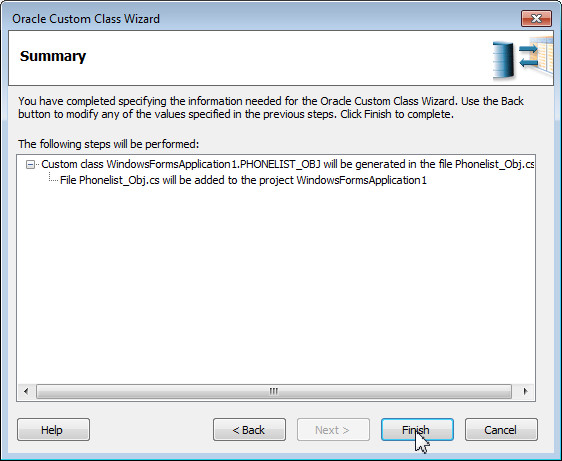
-
Click the Solution Explorer tab. Notice that the Accountrep_Obj.cs, Address_Obj.cs, Customer_Obj.cs, Phonelist_Obj.cs file was created.
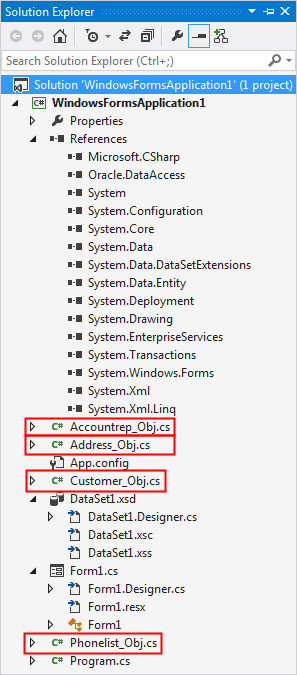
All classes have been generated. In the next section, you run the project.
Running the Project
In this section, you run the application which will display the data. Perform the following steps:
-
Select Build > Build WindowsFormsApplication1.

-
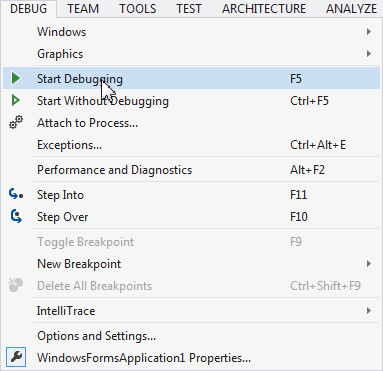
Select Debug > Start Debugging or press F5.
-
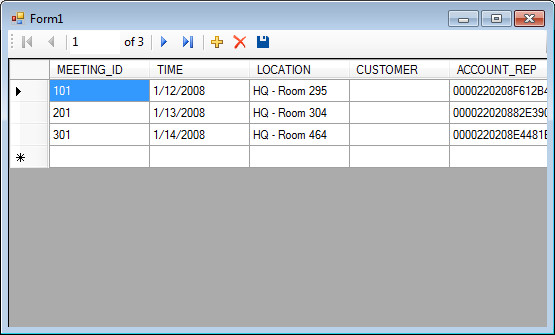
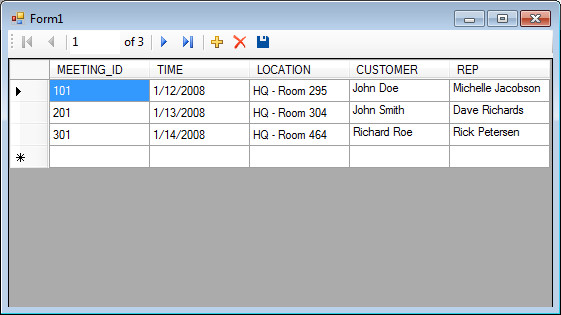
The application is run and the data is displayed. Notice that there is no data contained in the CUSTOMER field. The field is a user-defined type and therefore you need to define how the grid should represent this data by modifying the ToString() method of each of the .NET custom classes you created earlier. This method is called whenever the class data is to be displayed in a text field.
Close the form.
Modifying the ToString method of the UDT Custom Classes
In this section, you will now add code to the ToString() method in each of your 4 custom classes. Perform the following steps:
-
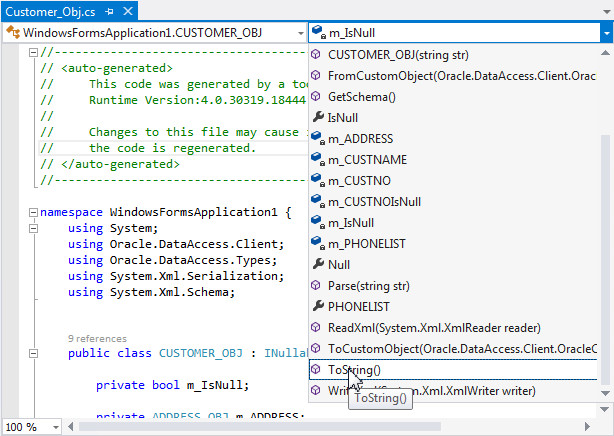
In the Solution Explorer, right-click Customer_Obj.cs and select View Code.
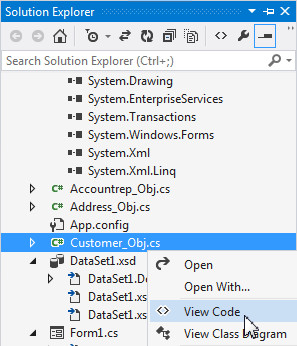
-
From the drop down list, select ToString().
-
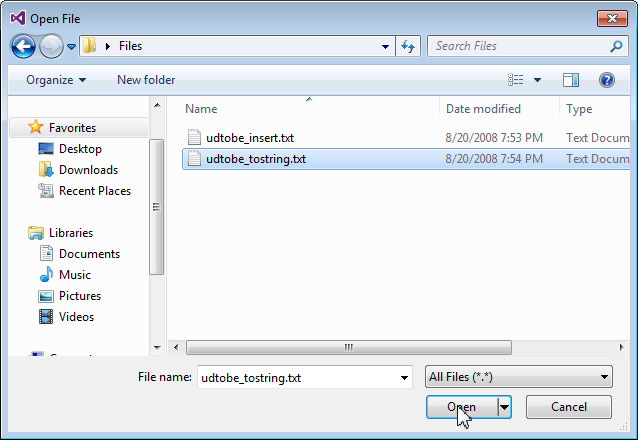
You want to replace this section in the code with the code contained in a file. Select File > Open > File.
-
Select the udtobe_tostring.txt file in the files folder on your desktop. Click Open.
-
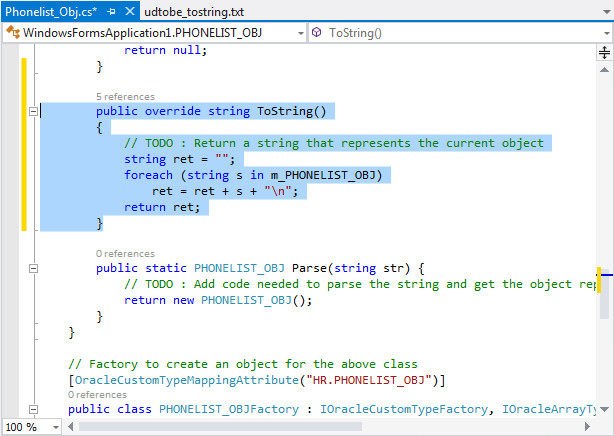
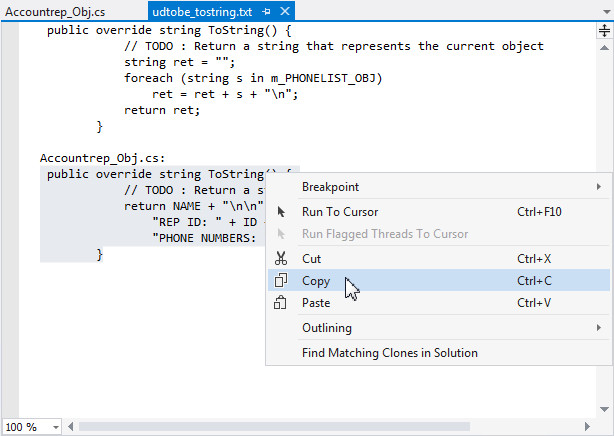
Select the code in the Customer_Obj.cs section from the file. Right-click and select Copy.

-
Select the Customer_Obj.cs tab. Select the ToString() section, right-click and select Paste.

-
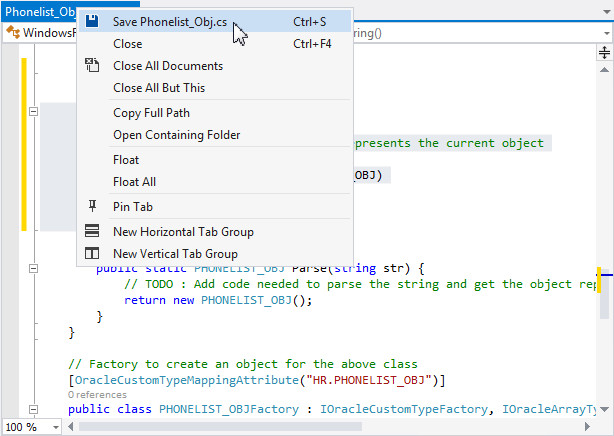
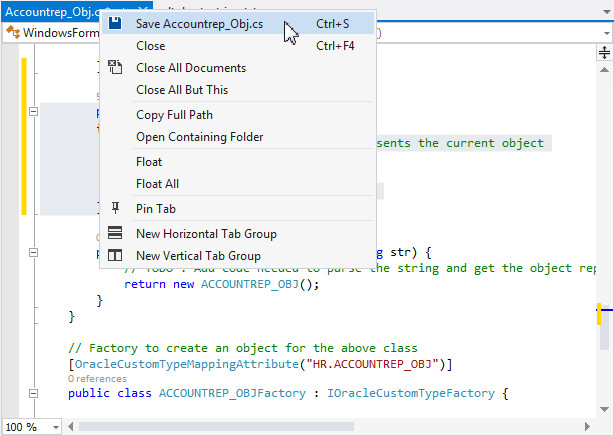
Right-click the Customer_Obj.cs tab and select Save Customer_Obj.cs.

-
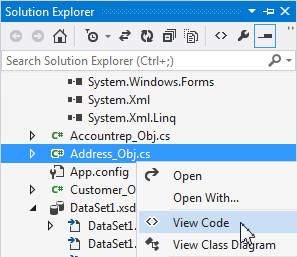
In the Solution Explorer, right click Address_Obj.cs and select View Code.
-
From the drop down list, select ToString() section.

-
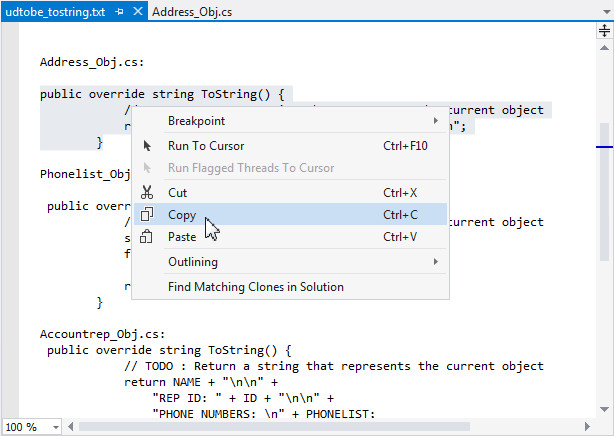
Select the udtobe_tostring.txt tab. Select the code in the Address_Obj.cs section from the file. Right-click and select Copy.
-
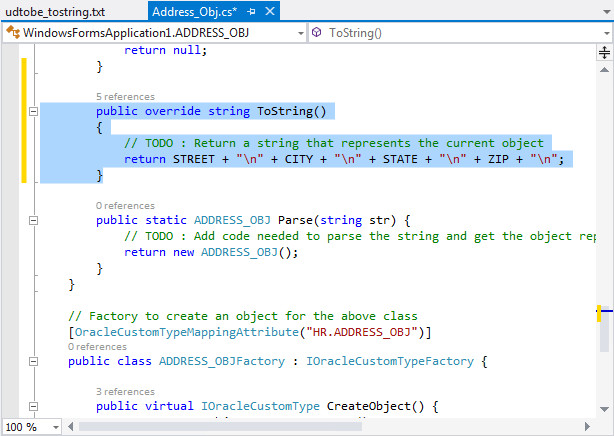
Select the Address_Obj.cs tab. Select the ToString() section, and Paste the code that you copied.
-
Right-click the Address_Obj.cs tab and select Save Address_Obj.cs.

-
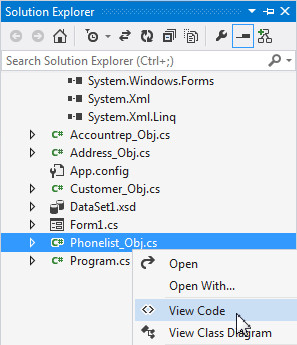
In the Solution Explorer, right click Phonelist_Obj.cs and select View Code.
-
From the drop down list, select ToString() section.

-
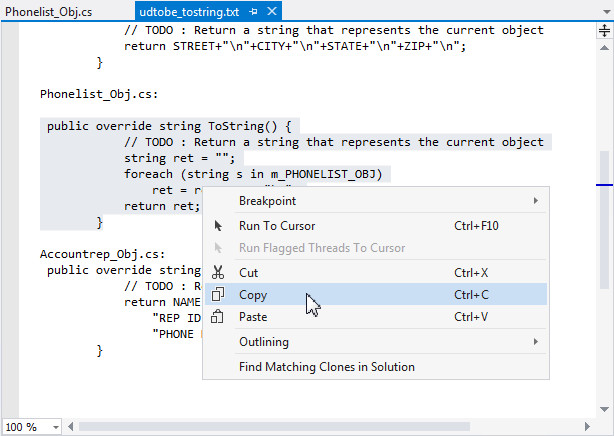
Select the udtobe_tostring.txt tab. Select the code in the Phonelist_Obj.cs section from the file. Right-click and select Copy.
-
Select the Phonelist_Obj.cs tab. Select the ToString() section, and Paste the code that you copied.
-
Right-click the Phonelist_Obj.cs tab and select Save Phonelist_Obj.cs.
-
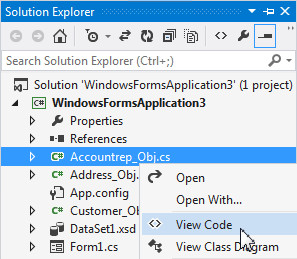
In the Solution Explorer, right click Accountrep_Obj.cs and select View Code.
-
From the drop down list, select ToString() section.
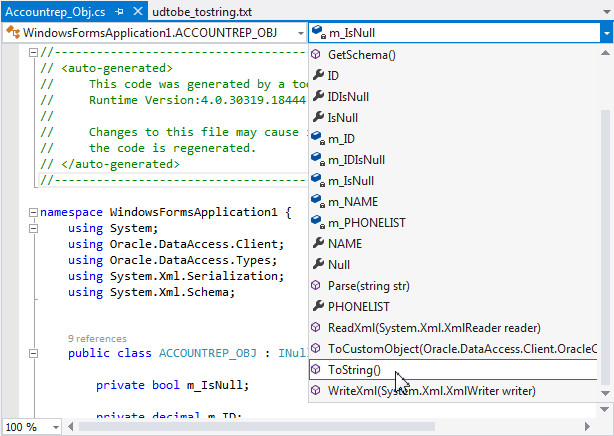
-
Select the udtobe_tostring.txt tab. Select the code in the Accountrep_Obj.cs section from the file. Right-click and select Copy.
-
Select the Accountrep_Obj.cs tab. Select the ToString() section, and Paste the code that you copied.
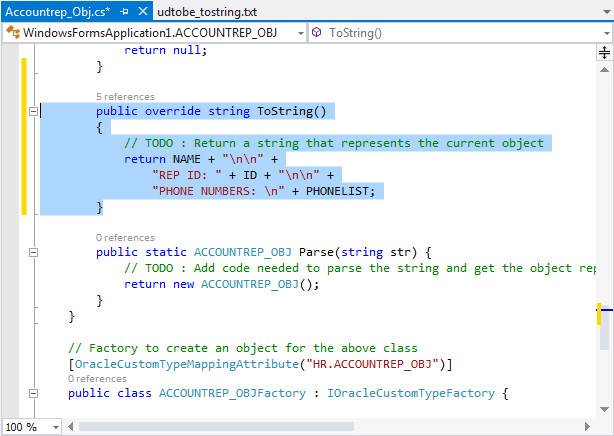
-
Right-click the Accountrep_Obj.cs tab and select Save Accountrep_Obj.cs.
-
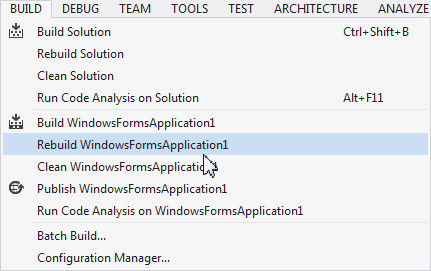
You can rerun the application. Select Build > Rebuild WindowsFormsApplication1.
-
Select Debug > Start Debugging.
-
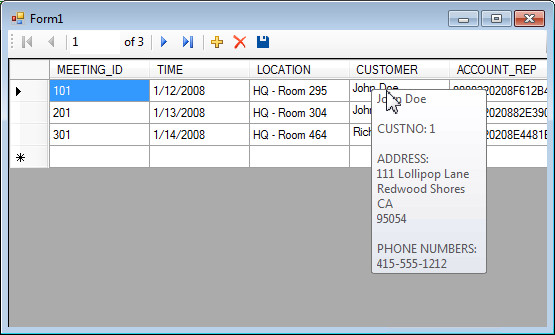
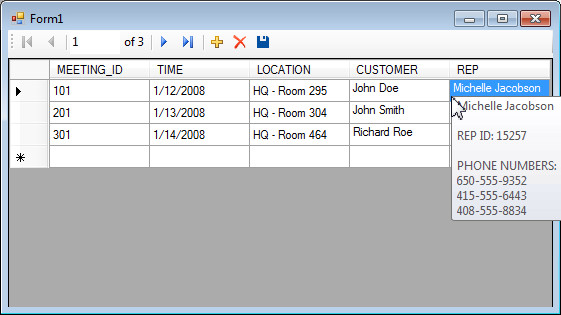
The grid is displayed. Notice that only a small portion of the UDT data is visible in the CUSTOMER field.
-
Place your cursor over one of the CUSTOMER field values to see that when you hover, the rest of the data is displayed.
Modifying the Application to Access REFs to Object Data
In the last section, you saw that the application displayed a REF in the ACCOUNT_REP column. In this section, you will change the SQL being used by the application so that it will "dereference" this REF and display the value of the ACCOUNTREP_OBJ object. To acheive this, you will need to use the dataset designer to change the SQL that is being executed. Perform the following steps:
-
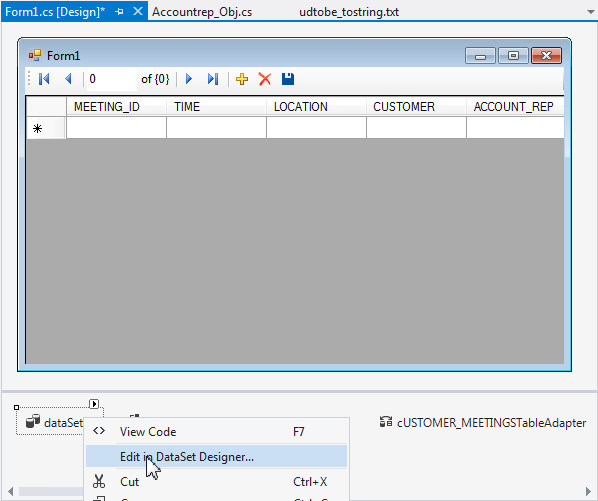
Select the Form1.cs tab. Right-click dataSet1 and select Edit in DataSet Designer...
-
Select Fill, GetData(). Right - click and select Properties.

-
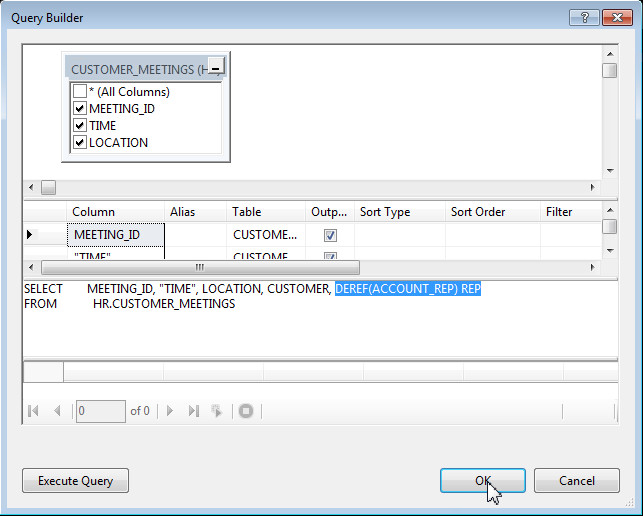
In the Properties window, for CommandText, select the
icon.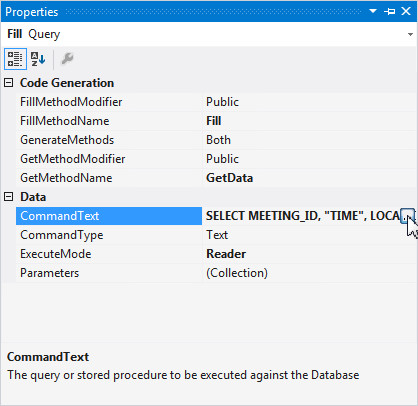
-
In the Select statement, change ACCOUNT_REP to DEREF(ACCOUNT_REP) REP and click OK.
-
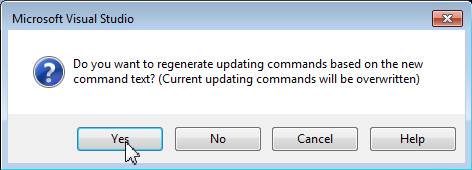
Click Yes to regenerate update commands based on the new command text.
-
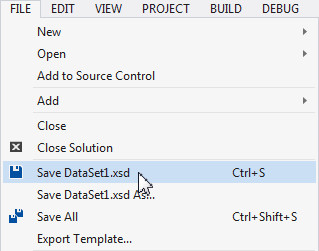
Save the Dataset. From the Visual Studio menu choose File > Save Dataset1.xsd.
-
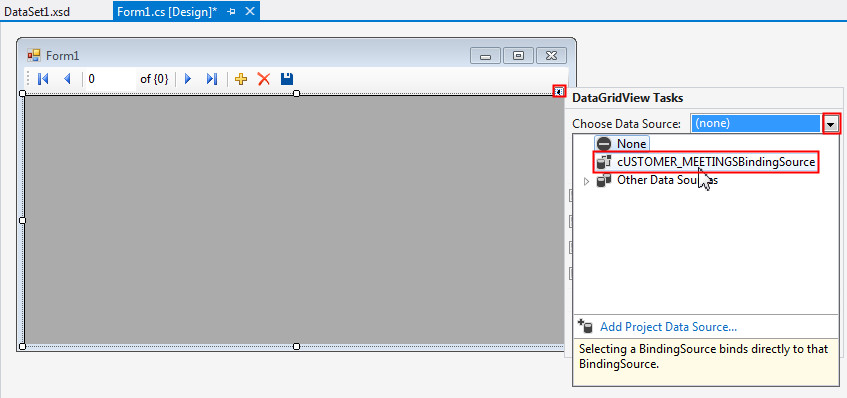
You need to refresh the data source for the grid. To do this, you will delete and reselect the datasource. Select the Form1.cs tab. Select the Grid, then select the arrow to get the menu and select None for Choose Data Source.
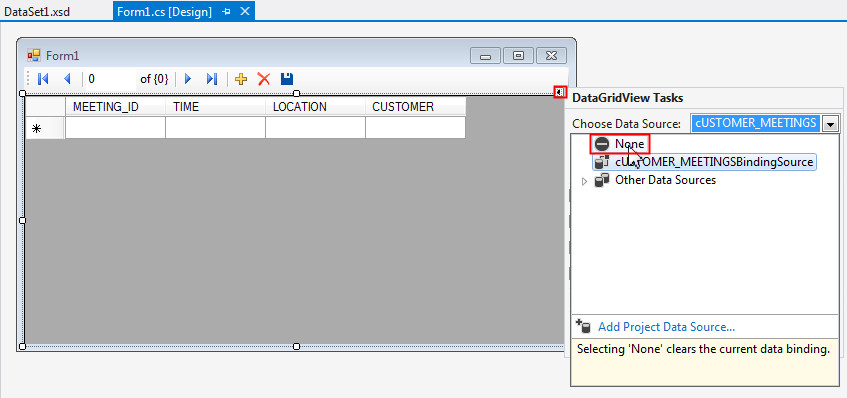
-
Reselect the data source. With the Grid selected, select the arrow to get the menu and select cUSTOMERMEETINGSBindingSource.
-
The ACCOUNT_REP column has been refreshed.
-
Now you can rerun the application. Select Build > Rebuild WindowsFormsApplication1.
-
Select Debug > Start Debugging.
-
The form is displayed with the data.
-
Hover over one the cells under REP to see the detail.
Summary
In this tutorial, you have learnt how to:
- Create user-defined datatypes
- Create and insert data into object and relational tables
- Create a project with an Oracle datasource and a DataGridView control
- Generate .NET custom classes for Oracle user-defined types
- Modify the ToString() method of the custom classes
- Use the DEREF SQL operator to select the value of a REF
Resources
- You may visit the Oracle Technology Network Portal to know the latest developments in Oracle .NET.
- To learn more about Oracle .NET with Visual Studio refer to additional OBEs in the Oracle Learning Library.
Credits
- Lead Curriculum Developer: Ashwin Agarwal
- Other Contributors: Alex Keh, Christian Shay
To navigate this Oracle by Example tutorial, note the following:
- Topic List:
- Click a topic to navigate to that section.
- Expand All Topics:
- Click the button to show or hide the details for the sections. By default, all topics are collapsed.
- Hide All Images:
- Click the button to show or hide the screenshots. By default, all images are displayed.
- Print:
- Click the button to print the content. The content that is currently displayed or hidden is printed.
To navigate to a particular section in this tutorial, select the topic from the list.