Last updated: 04/17/15 01:30 pm EDT
Before You Begin
Purpose
This tutorial covers how to translate an application developed in Application Builder using Oracle Application Express 5.0.
Time to Complete
Approximately 40 minutes
Introduction
To translate an application developed in Application Builder, you must map the primary and target language, seed and export text to a translation file, translate the text, apply the translation file, and publish the translated application. In this tutorial, you will import an application that is developed in Application Builder using English as the Primary Language. You will then perform some steps to translate this application to German.
Prerequisites
Before starting this tutorial, you should have:
- Access to an Oracle Database 11g database or above that has the sample schema installed.
- Installed Oracle Application Express Release 5.0.
- Downloaded and unzipped the files.zip into your working directory.
- Create a workspace and user to perform this tutorial.
Importing the Order Management Application
In this topic, you will first import a pre-built Order Management application into Application Builder. This application is currently using English as its Primary Language. You will later translate this application into German.
-
Log into the Application Express Login page using your login credentials. Enter the following credentials and click Sign In.
Workspace: <your workspace name>
Username: <your username>
Password: <your password>
-
Select Application Builder and click Import.

-
Click Browse and navigate to your working directory, for example,
C:\Downloads\files. Locate the Order Management.sql file and click Open.

-
Click Next > to install the application.

-
Click Install Application.

-
Click Run Application.

-
Enter obe for Username and obe for Password. Click Login.

-
The Order Management application is launched displaying the Home page. Notice that this application uses English as its Primary Language.

Translating the Order Management Application
To translate an application, you must map the primary and target language, seed and export text to a translation file, translate the text, apply the translation file, and publish the translated application. To translate the Order Management application to German, perform the following steps:
-
In the Order Management application's home page, click Application<n> on the developer tool bar. Note: Here <n> refers to the Application ID of your application.

-
Click Shared Components.

-
In the Globalization section, click Globalization Attributes.

-
Select Application Primary Language for Application Language Derived From and click Apply Changes.

-
Click Shared Components. In the Globalization section, click Translate Application.

-
In the Translate Application page, click Map primary language application to a translated application under Define Application Languages.

-
Click Create >.

-
In the Create/Edit Application Language Mapping page, you have to enter a unique application ID for the translated application. Enter the unique application ID for Translation Application. Select German (Germany) (de) for Language. Click Create.

-
Click Translate.

-
Next, in the Translate Application page, click Seed translatable text . Seeding the translation copies translatable text into the translation text repository. Once the translatable text is seeded, you can translate the text strings.

-
Click the check box against the translated application and click Seed.

-
Click Translate.

-
Next, in the Translate Application page, click Download XLIFF translation files.

-
In the XLIFF Export page, under the Download XLIFF File for Complete Application section, select Language as German (Germany) (de) and click Export XLIFF for Application.

-
Open the XLIFF file that was downloaded. Note: You can navigate to
C:\Downloadsfolder and look for the file with the .xlf extension.Open the file using a text editing tool and translate the elements by replacing the target with an equivalent German phrase. Click Replace. In this tutorial, you will replace all the <target> text strings with <target>Ordnung as prefix to the existing English phrases. Click Replace All.


-
Save and close the file.

-
Click Translate.

-
Once the XLIFF file is populated with the translations, the XLIFF file is uploaded back into the translation repository. To do this, in the Translate Application page, click Apply XLIFF translation files.

-
Click Upload Files >.

-
Click Browse and locate the translated file. Click Open to upload the translated XLIFF file into the XLIFF repository. Click Upload.

-
To apply the XLIFF files, check the row against the file name and also choose a translation mapping from the Apply to Translation column and then click Apply Checked.

-
Click Translate.

-
The final step is to publish the translated application from the translation repository. Click Publish translated applications.

-
Check against the row containing the translated application and click Publish.

The application will be successfully published.

Specifying the Primary Language for the Translated Application
Globalization attributes specify how the application express determines the primary language for an application. Perform the following steps to view your translated application by specifying the Primary Language.
-
Click Shared Components.

-
In the Globalization section, click Globalization Attributes.

-
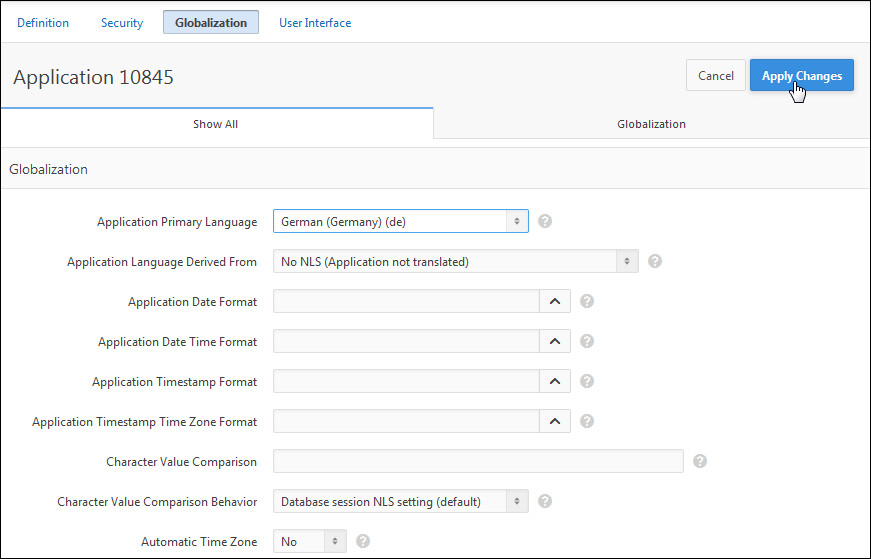
In the Globalization page, select Application Primary Language as German (Germany) (de) and Application Language Derived From as Application Primary Language. Click Apply Changes.

-
Run the application.

-
You will notice that the application is in German and is based on the XLIFF file that was uploaded to the translation repository. Enter your login credentials as obe for Username and obe as Password in the Login page and click Ordnung Login.

-
Notice that the application has been translated to German based on the XLIFF file that was uploaded.

Translating Messages Used in PL/SQL
If your application includes PL/SQL regions or PL/SQL processes or calls PL/SQL package, procedures, or functions, you may need to translate generated HTML. First, you define each message on the Translatable Messages page. Second, you use the APEX_LANG.MESSAGE API to translate the messages from PL/SQL stored procedures, functions, triggers, or packaged procedures and functions. You create translatable messages on the Translate Messages page. To translate messages used in PL/SQL, perform the following steps:
-
Click Application<n> on the developer tool bar of the application. Note: Here <n> refers to the Application ID of your application.

-
Click Shared Components.

-
Under the Globalization section, click Globalization Attributes.

-
In the Globalization page, select Application Primary Language as English (en) and Application Language Derived From as No NLS ( Application not Translated) and click Apply Changes.

-
You will define a message called Greeting_Message in your application in English as "Good morning %0" and in German as "Guten Tag %0" and invoke this message from PL/SQL in the Home page by creating a region called Translation Region. Click Home page.

-
Right-click Regions and select Create.

-
Enter Translation Region for Title . Select PL/SQL Dynamic Content for the type of region and enter the following PL/SQL. Click Save.
begin
htp.p(apex_lang.message('GREETING_MESSAGE', V('APP_USER')));
end;
-
Click Shared Components.

-
Under Globalization, select Text Messages.

-
Click Create Text Message.

-
Enter GREETING_MESSAGE for Name and select English (en) for Language. Enter Good Morning %0 for Text. Click Create and Create Another.

-
Enter GREETING_MESSAGE for Name and select German Germany (de) for Language. Enter Guten Tag %0 for Text. Click Create Text Message.

-
Run the page.

-
The Translation Region with the English greeting message is displayed.

-
You want to display this greeting message in German. Click Application<n> on the Developer tool bar.

-
Click Shared Components.

-
Under Globalization, select Globalization Attributes.
-
Select German (Germany)(de) for Application Primary Language and click Apply Changes.
-
Run the page.

-
The Home page is displayed with the Greeting message translated in German.

Want to Learn More?
In this tutorial, you have learned how to:
- Import the Order Management application
- Perform the steps to translate the Order Management application
- Specify the primary language for the translated application
- Translate messages used in PL/SQL
Resources
- APEX OTN Home Page
- To learn more about Application Express 5.0, refer to additional OBEs in the Oracle Learning Library
- Oracle Application Express: Workshop I
- Oracle University
Credits
-
Lead Curriculum Developer: Dimpi Sarmah