 Extending List of Values Validation in HCM Spreadsheet Data Loader Spreadsheets
 Before You Begin
This 20-minute tutorial shows you how to provide validation in your spreadsheets.
Background
Attributes that are lookup validated automatically provide a choice list in bulk-loading spreadsheets, allowing the user to select a valid choice for the attribute. Attributes that provide a reference to another object often provide a searchable list of values. Similarly, the attribute that identifies the record to update or delete will also provide searchable list of values.
This tutorial explains how you can extend the pre-configured list of values validation.
What Do You Need?
- A Windows machine with the Desktop Integrator installed. Downloaded this from the Tools menu in the application. Desktop Integrator is not available on the Mac operating system.
- Access to the Spreadsheet Templates task in order to create and maintain spreadsheet templates.
Follow the steps in the Securing the Spreadsheet Templates Task topic within the Configure HCM Spreadsheet Data Loader Security tutorial, to configure a role with the access to create spreadsheet templates for the Worker business object.
Note: Custom job roles should be configured to provide access to HCM Spreadsheet Data Loader functionality.
- This tutorial extends the templates created in these tutorials, it's assumed that you have previously completed them:
- An understanding of attribute keys:
When you add an attribute to your template, it's assigned a unique key to identify it in the template. The attribute key value is derived from the internal attribute name, prefixed with the component name. For example, Worker_ActionCode, or ElementEntryValue_ScreenEntryValue.
If you have multiple occurrences of a component in your template, the occurrence number is included in the attribute key. For example, ElementEntryValue_2_ScreenEntryValue.
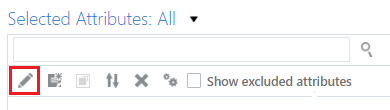
You can find and edit the attribute keys clicking the Advanced Options icon on the Selected Attributes toolbar.

 Lookup Validation
Configuring Lookup Sourced LOVs
Most lookup validated attributes will provide a choice list by default. However, you'll need to configure lookup validation yourself for some types of attribute:
- Flexfield segments
- Element entry values
- Calculation Card overrides
In this example, you'll configure lookup validation for the Periodicity entry value in the Create Overtime Entries template created in tutorial Creating a HCM Spreadsheet Data Loader Template for loading Element Entries.
- On the home page, click My Client Groups > Data Exchange.
- On the Data Exchange page, select Spreadsheet Templates.
- Search for the Create Overtime Entries template and click the name to edit the template.
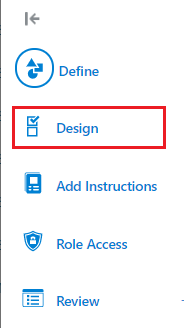
- Click Design.
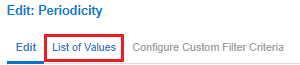
- In the Selected Attributes panel, select the Periodicity attribute to add lookup validation to and click the Edit icon.
- Click List of Values.
- Specify an LOV Source of 'Lookup' and search and select the lookup type.
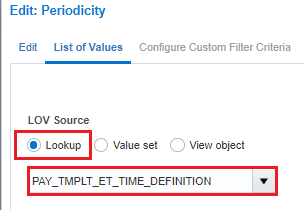
Note: When you are configuring an element entry value attribute, you can find the lookup type in the element definition. When you are configuring a flexfield segment attribute, you can find the lookup type in the flexfield definition.
- Click the appropriate Displayed As radio button to specify how the list of values should be displayed:
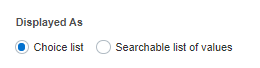
- Choice list should only be used if the number of values is small, such as 20 or less.
- Searchable list of values allows the user to filter the values displayed in the spreadsheet and is ideal for larger lists.
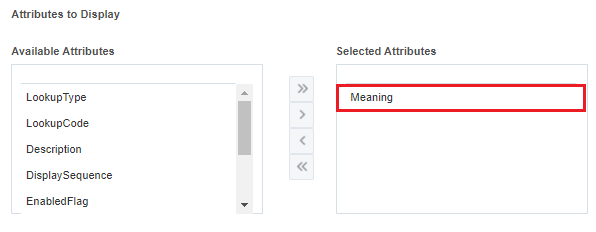
- Specify the attributes to display in the list of values.
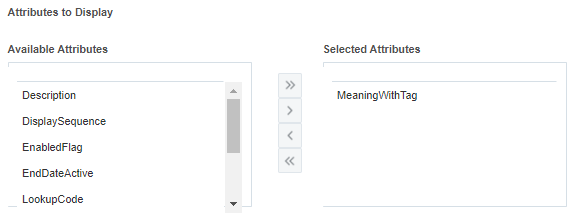
Note: By default, the MeaningWithTag attribute is selected, but if the lookup doesn't use tags, you could use the Meaning attribute instead.
Note: For choice lists, you can only display one attribute.
- Specify which value should be returned to which attribute in the spreadsheet:

Note: By default, the LookupCode is returned to the attribute the list of values is being configured for. You can return other values to other attributes.
- Click OK.
The filter criteria will be defaulted for you.
The lookup validation is complete.
Legislation Specific Lookups
Some lookups use tags in order to identify which values are applicable to your legislation code. In order to filter the list of values by the legislation specified in the spreadsheet row, you will need to instead use a view object to provide the list of values.
In this step, you will configure the Gender attribute, to filter the list of values by the legislation code already provided in the spreadsheet. To do this, you can use the New Hire template you created in the Creating a HCM Spreadsheet Data Loader Template for loading New Hires tutorial.
- On the home page, click My Client Groups > Data Exchange.
- On the Data Exchange page, select Spreadsheet Templates.
- Search for the New Hire template and click the name to edit the template.
- Click Design.
- If the Gender attribute doesn't already exist in your template, select Person Legislative Data in the Available Attributes header.
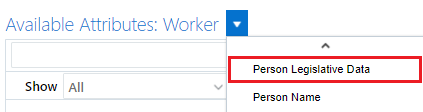
Search for the Gender attribute and add it to your template

- In the Selected Attribute panel, select the Gender attribute and click Edit.
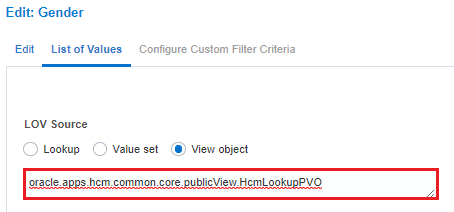
- Click List of Values.
- Make a note of the lookup type used to validate this attribute, in this case 'SEX'. You'll use this later.
- Change the LOV Source to View object and specify the source as 'oracle.apps.hcm.common.core.publicView.HcmLookupPVO'.
- In the Attributes to Display section, select the Meaning attribute.
- In the Values to Return section, specify the LookupCode.

- In the Filter Criteria section, three filter criteria are automatically selected:
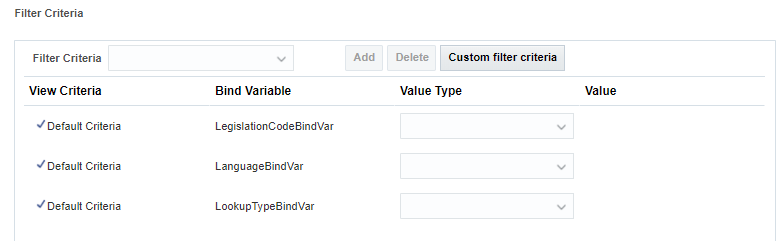
- For the LegislationCodeBindVar criteria, specify the attribute that the user will use to specify the legislation code in the spreadsheet.
If you are extending the New Hire template, this will be PersonName_LegislationCode.

- For the LookupTypeBindVar specify the name of the lookup type used to validate the attribute, in this case the constant value SEX.

Tip: You do not need to provide a value for LanguageBindVar.
- For the LegislationCodeBindVar criteria, specify the attribute that the user will use to specify the legislation code in the spreadsheet.
If you are extending the New Hire template, this will be PersonName_LegislationCode.
- Click OK.
 View Object Validation
Copying List of Value Configuration
View object validation is normally pre-configured for internal 'surrogate ID' attributes that reference the local, parent or a foreign object. However, when you include these attributes directly the internal auto-generated numeric value is returned to the spreadsheet. This value is meaningless to the user. You can copy the validation from a surrogate ID attribute to implement the list of values on more user-friendly attribute, if it doesn't already exist.
In this example, you'll copy the LOV configuration provided on the Position ID attribute and place it on the Position Code attribute. This extends the template created in tutorial Creating a HCM Spreadsheet Data Loader Template for loading New Hires.
- On the home page, click My Client Groups > Data Exchange.
- On the Data Exchange page, select Spreadsheet Templates.
- Search for the New Hire template and click the name to edit the template.
- Click Design.
- To copy the list of values you first need to add the Position ID attribute to the template.
Tip: It's not possible to review the LOV configuration for an attribute that isn't selected in the template.
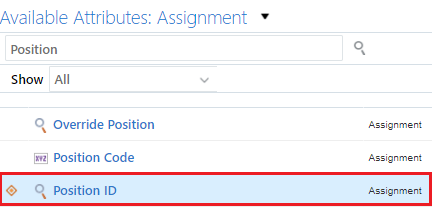
Use the choice list on the Available Attributes header to select the Assignment component.
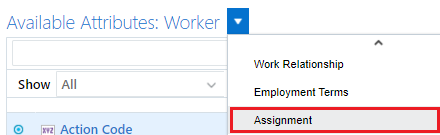
Search for and add the Position ID attribute to the Selected Attributes panel.
Note: If your template doesn't already include it, also add Position Code.
- Select the Position ID in the Selected Attributes panel and click Edit.
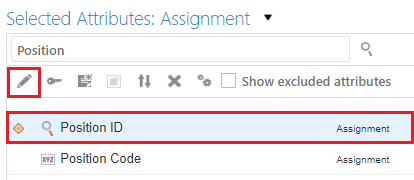
Tip: You can use the choice list on Selected Attributes panel header to show only attributes from a specific component, Assignment in this case.
- Click List of Values.
Copy the view object used as the source for the Position ID's list of values. You'll need to specify this exact value when defining the LOV on the Position Code.

Review the rest of the LOV configuration, particularly the Attributes to Display
Also the Filter criteria.

Click Cancel.
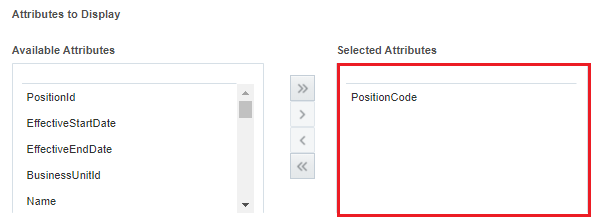
- Edit the Position Code attribute and specify a List Display Type of List of Values.

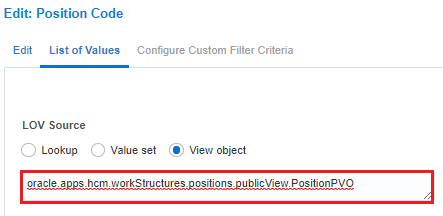
Click the List of Values tab.
- Specify an LOV source of View object and specify the source you copied from the PositionId attribute: 'oracle.apps.hcm.workStructures.positions.publicView.PositionPVO'.
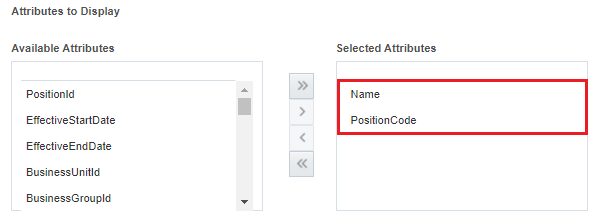
- In the Attributes to Display section, select Name and PositionCode.
- In the Values to Return section, select PositionCode.

- In the Filter Criteria section, use the choice list to select the data security criteria view criteria 'FNDDS__PER_CHOOSE_POSITION_DATA__HR_ALL_POSITIONS_F__PositionDPEO' and click Add.
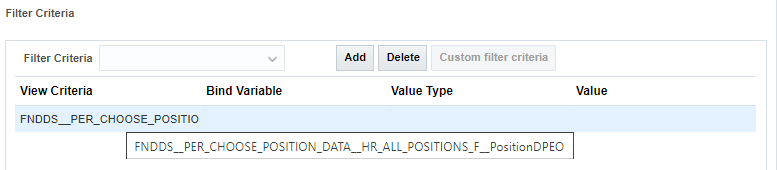
Tip: This ensures your spreadsheet users can only select positions they have the data security to work with.
You have now copied the list of values configuration from a surrogate ID attribute to the user key attribute.
Some lists of values are dependent upon other values and this is the case with Position. The following topic explains how to filter the Position list of values, by the Business Unit selected in the spreadsheet row.
Filtering LOVs by Other Selected Attributes
Some attributes, such as Position, can be filtered by other attributes provided in the spreadsheet. The view object used by the list of values will determine which attributes you can filter by. Sometimes the list of values expect a surrogate ID attribute instead of a user key value.
In this step, you will filter the Position list of values by the business unit selected in the spreadsheet row.
- Continue the steps provided in the Copying List of Values Configuration, so that you are editing the Position Code attribute.
- In the Filter Criteria section, use the choice list to see the filters that can be applied to this list of values.

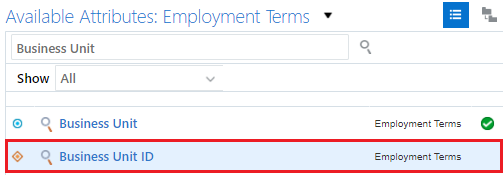
You need to filter this list of values by Business Unit, but only Business Unit ID is supported. Before the filter can be added, the Business Unit ID attribute must exist in your template and the value defaulted from the Business Unit list of values.
Click OK to save the Position Code changes.
- Add the Employment Terms Business Unit ID attribute to your template.
- Edit the Employment Terms Business Unit and click List of Values.
- In the Values to Return section, use the Selected Attributes choice list, to select the attribute key that uniquely identifies the Business Unit ID attribute.
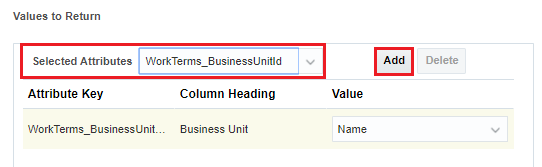
Click Add to add the attribute to the Values to Return table.
- Use the Value choice list to select the attribute value to return to this attribute, i.e. BusinessUnitId.

The Business Unit list of values will now populate the Business Unit ID attribute, when a business unit is selected in the spreadsheet.
- Click OK to save the Business Unit list of values configuration changes.
- Edit the Position Code attribute and click List of Values.
- In the Filter Criteria section, use the choice list to select the findByBusinessUnitId criteria and click Add.
Specify a Value Type of Attribute and a Value of WorkTerms_BusinessUnitId.

- Click OK and save your changes.
The Position Code list of values configuration is now complete. You can now hide the Business Unit ID attribute from the spreadsheet. It's value will be populated when the Business Unit is selected from the LOV.
Adding Custom Filter Criteria
The Job business object is used to explain custom filter criteria. When you define a Job, you can also specify a benchmark job, both the new job and the benchmark job need to belong to the same set.
In this section, you'll copy the view object based LOV from the Job ID attribute to configure a list of values for the benchmark job in the same way as described above. You'll then add custom filter criteria to filter the jobs displayed to those that belong in the Set specified in the spreadsheet row.
- On the home page, click My Client Groups > Data Exchange.
- On the Data Exchange page, select Spreadsheet Templates.
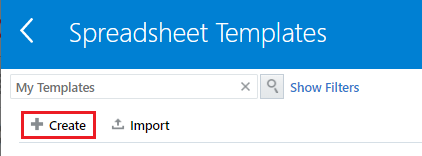
- Click Create to open the Create Template dialog box.
- Specify the template name, code, select a business object of 'Job' and optionally provide a description. Leave the Supported Action as 'Create and Update'.
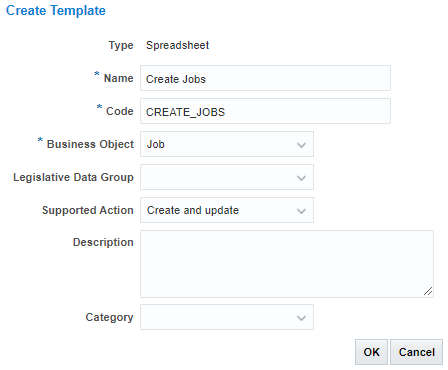
Click OK. You'll be navigated to the Define tab.
- Click Define.
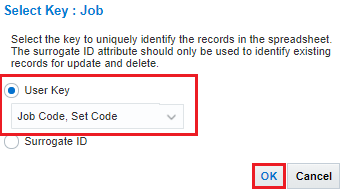
- Add the Job ID attribute to the Selected Attributes panel, accepting the User Key key type when prompted.
Note: You need to select the Job ID attribute in order to copy the list of values configuration from it. Once the view object is copied, you can remove this attribute from the template.
- Edit the Job ID attribute in the Selected Attributes panel and click List of Values.
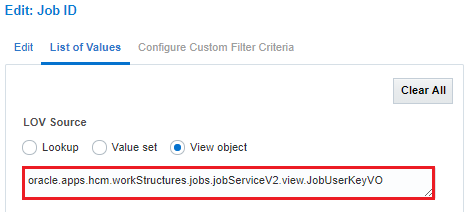
Copy the view object path and click Cancel.
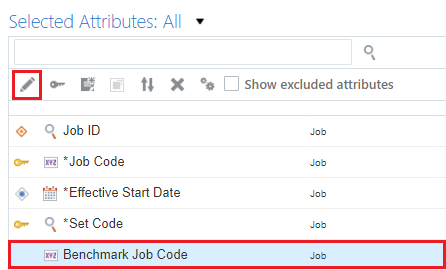
- Add the Benchmark Job Code to the list of Selected Attributes and click Edit.
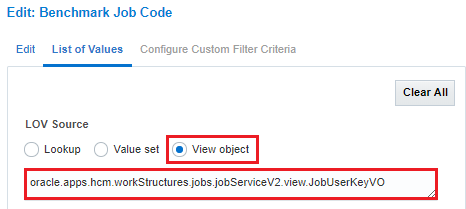
- Click List of Values and specify an LOV Source of view object.
Paste the view object path in the text field.
- In the Attributes to Display section, add the Job Code to the Selected Attributes panel.
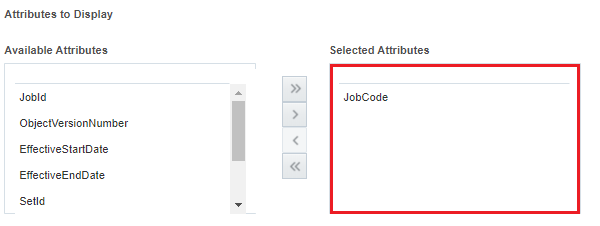
- In the Values to Return section, specify JobCode as the Value to return to the Benchmark Job Code attribute.

You now have a working list of values for Benchmark Job Code, but it will display all jobs, not just those in the Set specified in the spreadsheet row.
- In order to filter the list of values further, in the Filter Criteria section click Custom filter criteria.

You'll be navigated to the Configure Custom Filter Criteria tab.

Note: Here you define the attribute you want to filter and with what values. If you require complex logic you can generate different separate bracketed groups to AND or OR.
- Click Create Group, Group_1 is created with defaulted criteria for the first item.
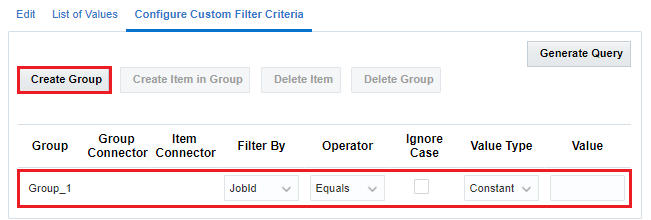
Note: A custom filter criteria must always have one group. A group wraps the one of more items within it in brackets.
- Update the default criteria to filter the SetCode on the view object by the Set Code attribute value specified in the spreadsheet.
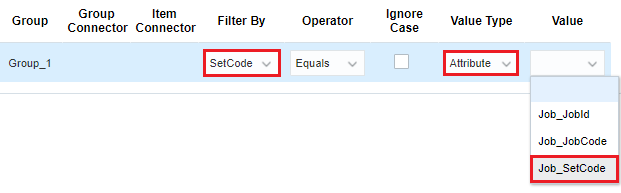
The list of values configuration is now complete and will only display jobs that belong in the Set specified in the spreadsheet row.
- To explain custom filter criteria fully, you'll now create a second group with two filters to restrict the list of jobs to those that start with 'A' or those that start with 'Z'.
Click Create Group, Group_2 is created with defaulted criteria, this time there is a group connector added.
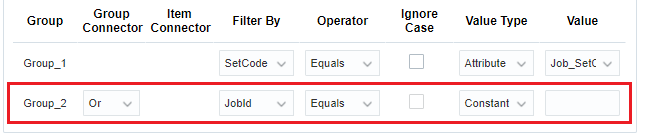
- Update the default criteria to filter those jobs with a job code that starts with A.
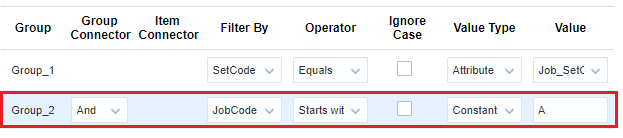
Note: Setting the Group Connector to AND will ensure both criteria are met.
- Select the item in group 2 and click Create Item in Group, this will create a second item in the group 2.
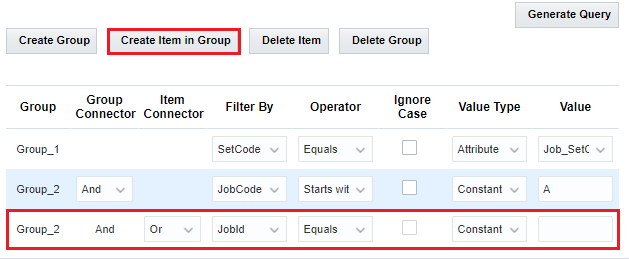
- Update the default criteria to filter those jobs with a job codes that starts with Z.

Note: Setting the Item Connector to OR will ensure either criteria in group 2 are met.
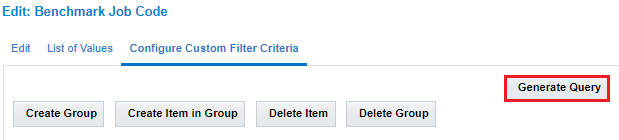
- Click Generate Query
The view criteria that will added to the view object is found at the bottom of the page, along with the bind variables:
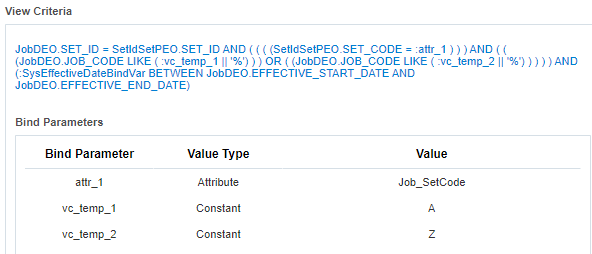
Note: Other view criteria may be defaulted in for you.
- Click OK.
 Value Set Validation
You may want to provide additional validation, or restrict the values that the user can enter. You can create a custom value set and configure an LOV to validate an attribute with that value set, or you can use a preconfigured value set.
In this example, you'll create a choice list for the Job Code attribute on the Assignment object, in the Worker object. This extends the template created in tutorial Creating a HCM Spreadsheet Data Loader Template for loading New Hires.
The list of values will be provided by the preconfigured ORA_HSDL_PER_JOBS_VS value set, a table based value set that retrieves jobs for the business unit specified in the spreadsheet row. You'll need to have completed the View Object validation section in this tutorial in order to complete this section.
- On the home page, click My Client Groups > Data Exchange.
- On the Data Exchange page, select Spreadsheet Templates.
- Search for the New Hire template and click the name to edit the template.
- Click Design.
- Select the Job Code attribute in the Selected Attributes panel and click Edit.
- Click List of Values.
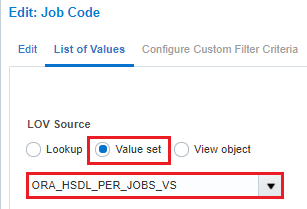
Specify a LOV Source of Value set and use the choice list to search for and select the Value Set to use, in this case 'ORA_HSDL_PER_JOBS_VS'.
- In the Attributes to Display section, review the attributes that will be visible in the list of values and alter as required.
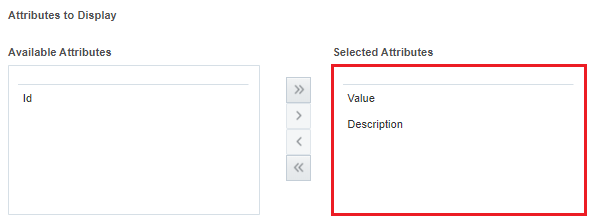
Note: The Value attribute will display the job code, the Description attribute will display the job name.
- In the Values to Return section, ensure that the Value attribute is returned to the Job Code.

- In the Filter Criteria section, ensure that the pEffectiveDate criteria is set to the Expression 'adf.currentDate'

And that the pBusinessUnitId criteria is set to accept the value from the Business Unit ID attribute.

- Click OK and save your changes.
Tip: You kept the default display type of Searchable list of values for this LOV. If the number of rows will be small you can change this to choice list. However, choice lists can only display one value, so if multiple are selected in the Attributes to Display section, only the first will be seen.