
In addition to the range of data quality processors available in the Processor Library, OEDQ allows you to create and share your own processors for specific data quality functions.
There are two ways to create processors:
OEDQ allows you to create a single processor for a single function using a combination of a number of base (or 'member') processors used in sequence.
Note that the following processors may not be included in a new created processor:
A single configured processor instance of the above processors may still be published, however, in order to reuse the configuration.
Processor creation example
To take a simple example, you may want to construct a reusable Add Gender processor that derives a Gender value for individuals based on Title and Forename attributes. To do this, you have to use a number of member processors. However, when other users use the processor, you only want them to configure a single processor, input Title and Forename attributes (however they are named in the data set), and select two Reference Data sets - one to map Title values to Gender values, and one to map Forename values to Gender values. Finally, you want three output attributes (TitleGender, NameGender and BestGender) from the processor.
To do this, you need to start by configuring the member processors you need (or you may have an existing process from which to create a processor). For example, the screenshot below shows the use of 5 processors to add a Gender attribute, as follows:
1. Derive Gender from Title (Enhance from Map)
2. Split Forename (Make Array from String)
3. Get first Forename (Select Array Element)
4. Derive Gender from Forename (Enhance from Map)
5. Merge to create best Gender (Merge Attributes)
To make these into a processor, select them all on the Canvas, right-click, and select Make Processor.
This immediately creates a single processor on the Canvas and takes you into a processor design view, where you can set up how the single processor will behave.
From the processor design view, you can set up the following aspects of the processor (though note that in many cases you will be able to use the default settings):
The inputs required by the processor are calculated automatically from the configuration of the base processors. Note that where many of the base processors use the same configured input attribute(s), only one input attribute will be created for the new processor.
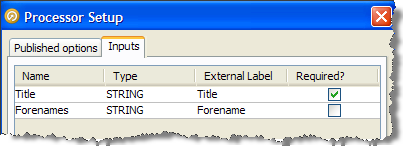
However, if required you can change or rename the inputs required by the processor in the processor design view, or make an input optional. To do this, click on the Processor Setup icon at the top of the Canvas, then select the Inputs tab.

In the case above, two input attributes are created - Title and Forenames, as these were the names of the distinct attributes used in the configuration of the base processors.
The user chooses to change the External Label of one of these attributes from Forenames to Forename to make the label more generic, and chooses to make the Forename input optional:
Note that if an input attribute is optional, and the user of the processor does not map an attribute to it, the attribute value will be treated as Null in the logic of the processor.
|
Note: It is also possible to change the Name of each of the input attributes in this screen, which means their names will be changed within the design of the processor only (without breaking the processor if the actual input attributes from the source data set in current use are different). This is available so that the configuration of the member processors matches up with the configuration of the new processor, but will make no difference to the behavior of the created processor. |
The processor design page allows you to choose the options on each of the member processors that you want to expose (or "publish") for the processor you are creating. In our example, above, we want the user to be able to select their own Reference Data sets for mapping Title and Forename values to Gender values (as for example the processor may be used on data for a new country, meaning the provided Forename to Gender map would not be suitable).
To publish an option, open the member processor in the processor design page, select the Options tab, and tick the Show publishing options box at the bottom of the window.
You can then choose which options to publish. If you do not publish an option, it will be set to its configured value and the user of the new processor will not be able to change it (unless the user has permission to edit the processor definition).
There are two ways to publish options:
|
Note: If you do not publish an option that uses Reference Data, the Reference Data will be internally packaged as part of the configuration of the new processor. This is useful where you do not want end users of the processor to change the Reference Data set. |
In our example, we open up the first member processor (Derive Gender from Title) and choose to publish (as new) the option specifying the Reference Data set used for mapping Title values to Gender values:
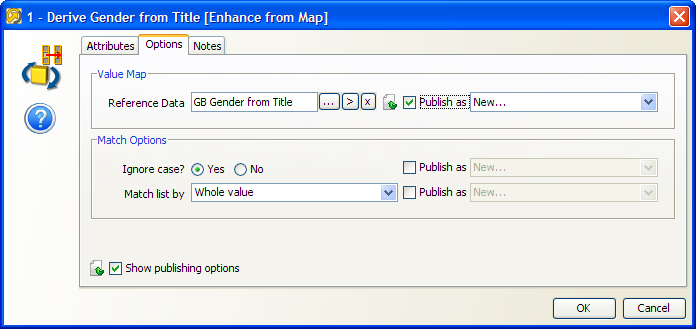
Note above that the Match Options are not published as exposed options, meaning the user of the processor will not be able to change these.
We then follow the same process to publish the option specifying the Reference Data set used for mapping Forename values to Gender values on the fourth processor (Derive Gender from Forename).
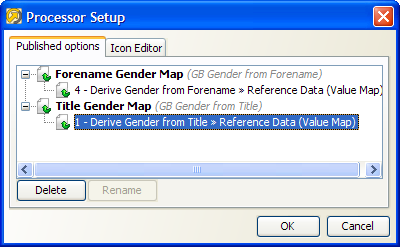
Once we have selected the options that we wish to publish, we can choose how these will be labeled on the new processor.
To do this, click on Processor Setup button at the top of the canvas and rename the options. For example, we might label the two options published above Title Gender Map and Forename Gender Map:
The Output Attributes of the new processor are set to the output attributes of any one (but only one) of the member processors.
By default, the final member processor in the sequence is used for the Output Attributes of the created processor. To use a different member processor for the output attributes, click on it, and select the Outputs icon on the toolbar:

The member processor used for Outputs is marked with a green shading on its output side:

|
Note:Attributes that appear in Results Views are always exposed as output attributes of the new processor. You may need to add a member processor to profile or check the output attributes that you want to expose, and set it as the Results Processor (see below) to ensure that you see only the output attributes that you require in the new processor (and not for example input attributes to a transformation processor). Alternatively, if you do not require a Results View, you can unset it and the exposed output attributes will always be those of the Outputs processor only. |
The Results Views of the new processor are set to those of any one (but only one) of the member processors.
By default, the final member processor in the sequence is used for the Results of the created processor. To use a different member processor for the results views, click on it, and select the Results icon on the toolbar:
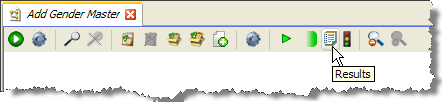
The member processor used for Results is now marked with an overlay icon:

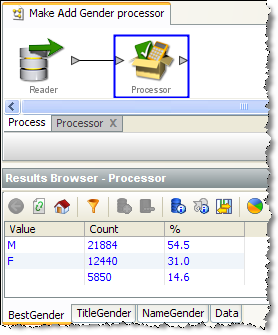
Note that in some cases, you may wish to add a member processor specifically for the purpose of providing Results Views. In our example, we may wish to add a Frequency Profiler of the three output attributes (TitleGender, ForenameGender and BestGender) so that the user of a new processor can see a breakdown of what the Add Gender processor has done. To do this, we add a Frequency Profiler in the processor design view, select the three attributes as inputs, select it as our Results Processor and run it.
If we exit the processor designer view, we can see that the results of the Frequency Profiler are used as the results of the new processor:
The Output Filters of the new processor are set to those of any one (and only one) of the member processors.
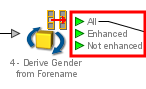
By default, the final member processor in the sequence is used for the Output Filters of the created processor. To use a different member processor, click on it, and select the Filter icon on the toolbar:

The selected Output Filters are colored green in the processor design view to indicate that they will be exposed on the new processor:
The Dashboard Publication Options of the new processor are set to those of any one (and only one) of the member processors.
If you require results from your new processor to be published to the Dashboard, you need to have an Audit processor as one of your member processors.
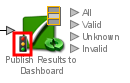
To select a member processor as the Dashboard processor, click on it and select the Dashboard icon on the toolbar:

The processor is then marked with a traffic light icon to indicate that it is the Dashboard Processor:
|
Note: In most cases, it is advisable to use the same member processor for Results Views, Output Filters, and Dashboard Publication options for consistent results when using the new processor. This is particularly true when designing a processor designed to check data. |
You may want to add a custom icon to the new processor before publishing it for others to use. This can be done for any processor simply by double-clicking on the processor (outside of the processor design view) and selecting the Icon & Group tab.
See the topic Customizing Processor Icons for more details.
Once you have finished designing and testing your new processor, the next step is to publish it for others to use.
Oracle ® Enterprise Data Quality Help version 9.0
Copyright ©
2006,2011 Oracle and/or its affiliates. All rights reserved.