Managing your contract schedule in Oracle Primavera Cloud
In this article, we’ll cover best practices for evaluating and optimizing your schedule in Oracle Primavera Cloud. This information will help you effectively manage your schedule as your project progresses.
Update your schedule
Update activity information regularly to track the work in your schedule.
Define the timeframe in which you'll commit to updating your schedule. Highlight activities that fall into the designated timeframe using the Progress Spotlight. Progress activities by entering updated status, duration, and resource assignment information in the Activity Details section.
Schedule the project using the business day after the end of the update period as the new data date. Change the data date each time you schedule the project to start the new update period.
Schedule Health Checker
Once you create and/or update your schedule, use the Schedule Health Checker to evaluate its quality. The tool will identify missing relationship logic or resources, invalid dates, and more.
Configure Schedule Health Checker settings to select the criteria that you want to measure your schedule against. Choose the target percentage and weighting for each criterion, which will make up your overall schedule health score.
The Schedule Health Checker automatically updates when you enter and/or modify schedule information. Select the heart icon on the Activities page to view results.
A higher overall score indicates a higher quality schedule. Any criterion that exceeds its target value will be red.
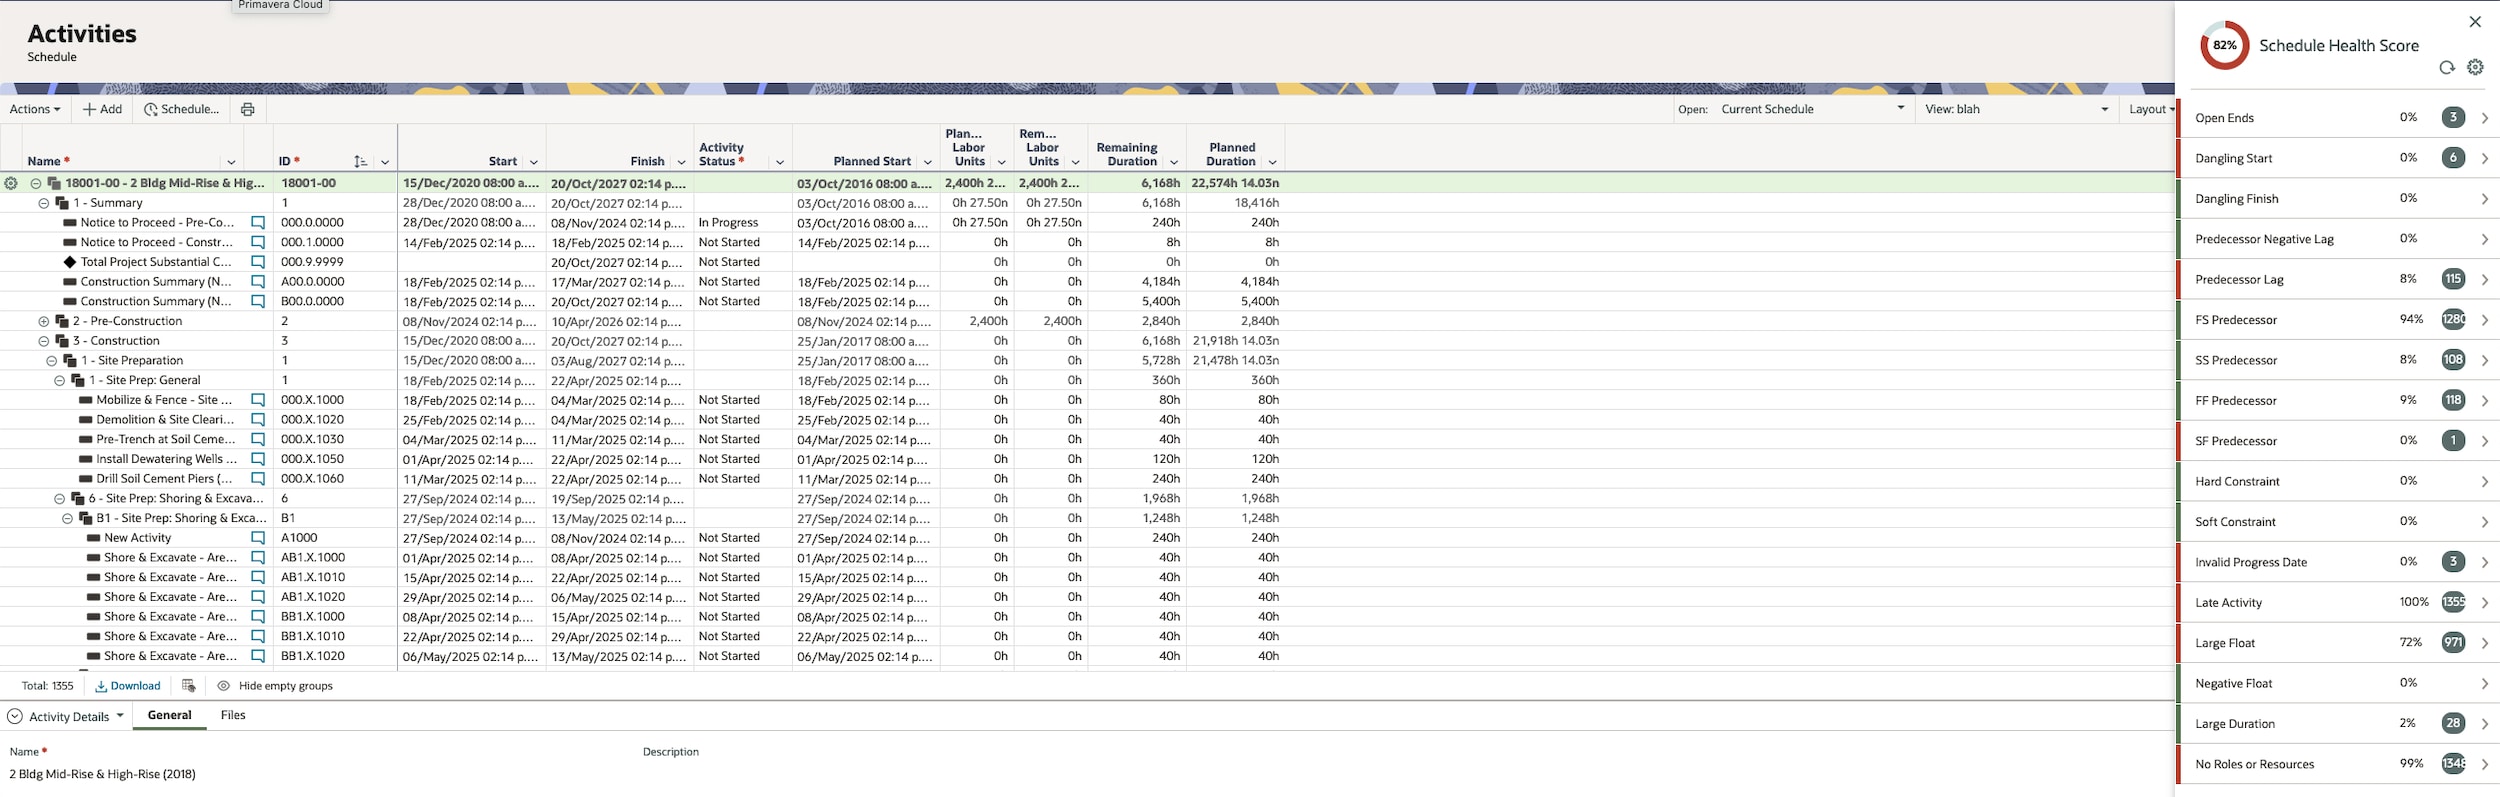
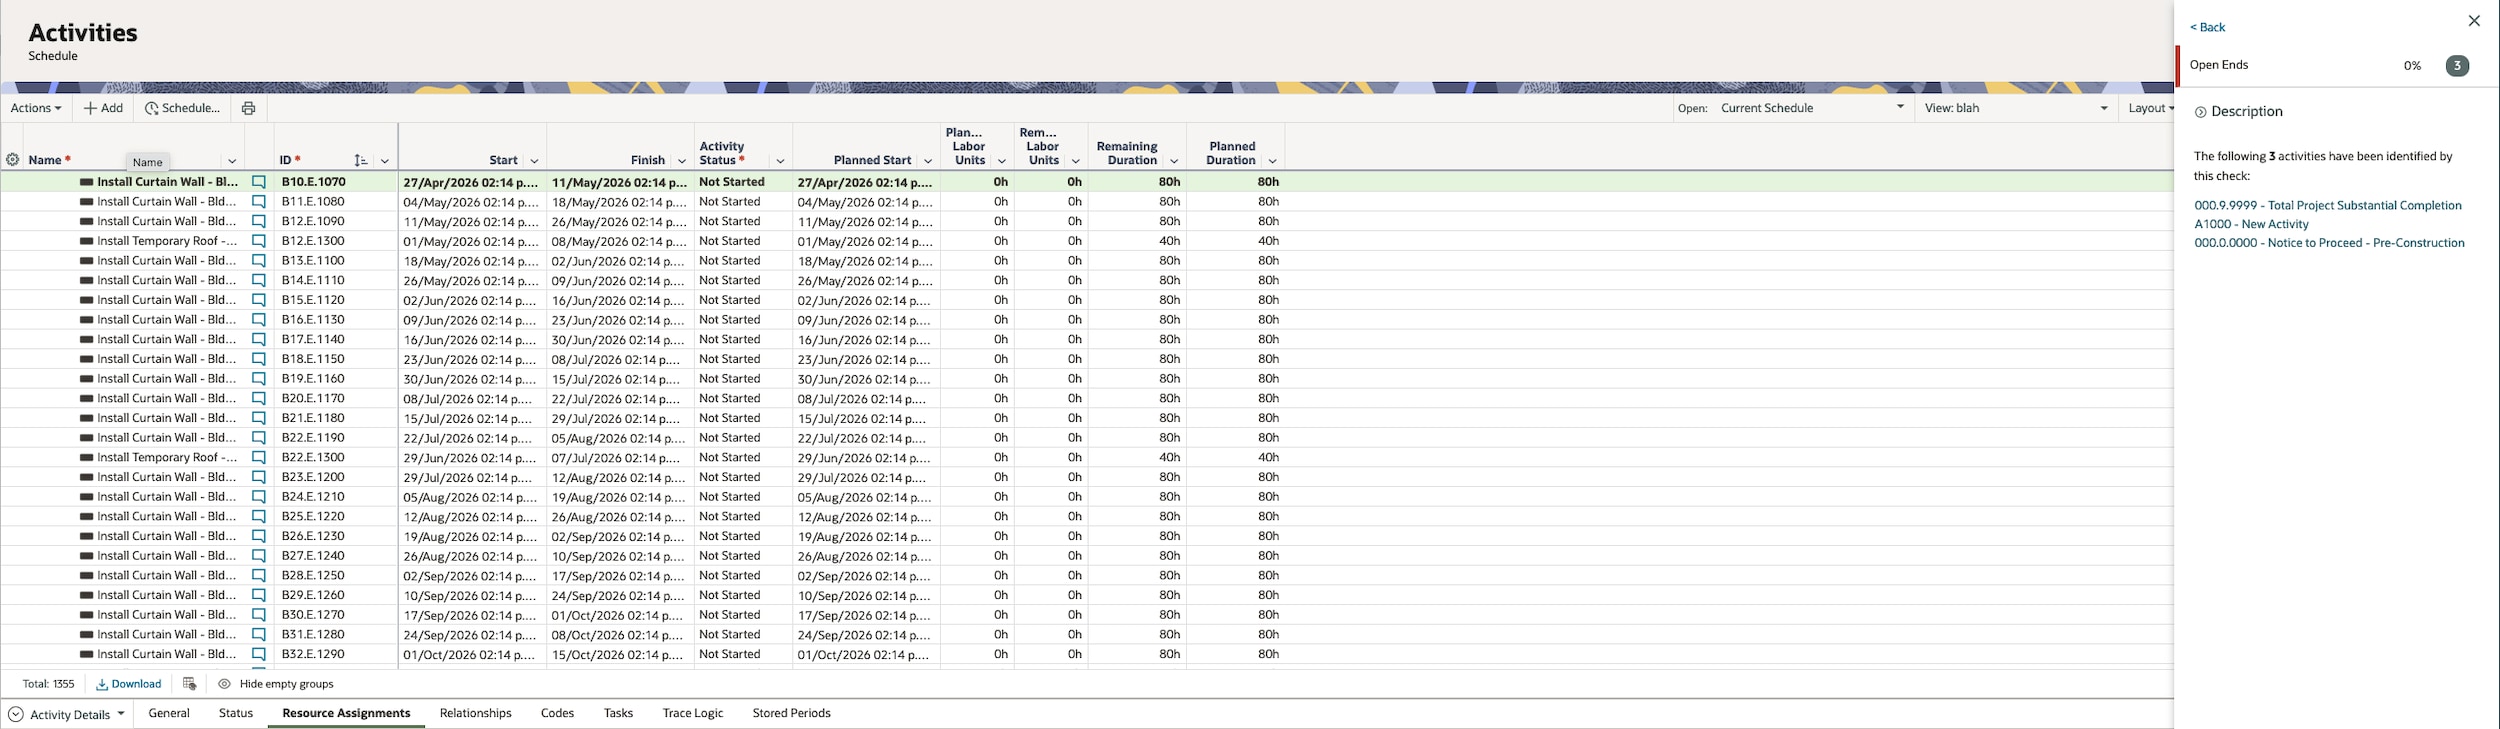
Select a criterion to view activities that impact the score. Use this information to make adjustments to your schedule. Once you resolve schedule issues, you’ll see the overall health score improve.
Visit this article for more information.
Baselines
Baselines let you look at your schedule from points in the past to evaluate performance as your project progresses.
The first baseline you create is the original baseline. We recommend adding this once your project plan is approved and before work begins.
Once your project progresses, you can add a current baseline to compare your project against the original baseline. Or you can add a supplementary baseline to capture the current state of the project before a major schedule update. Note that you can create baselines based on points of time in the past, as desired. If needed, you can also set data from a baseline as your current schedule.
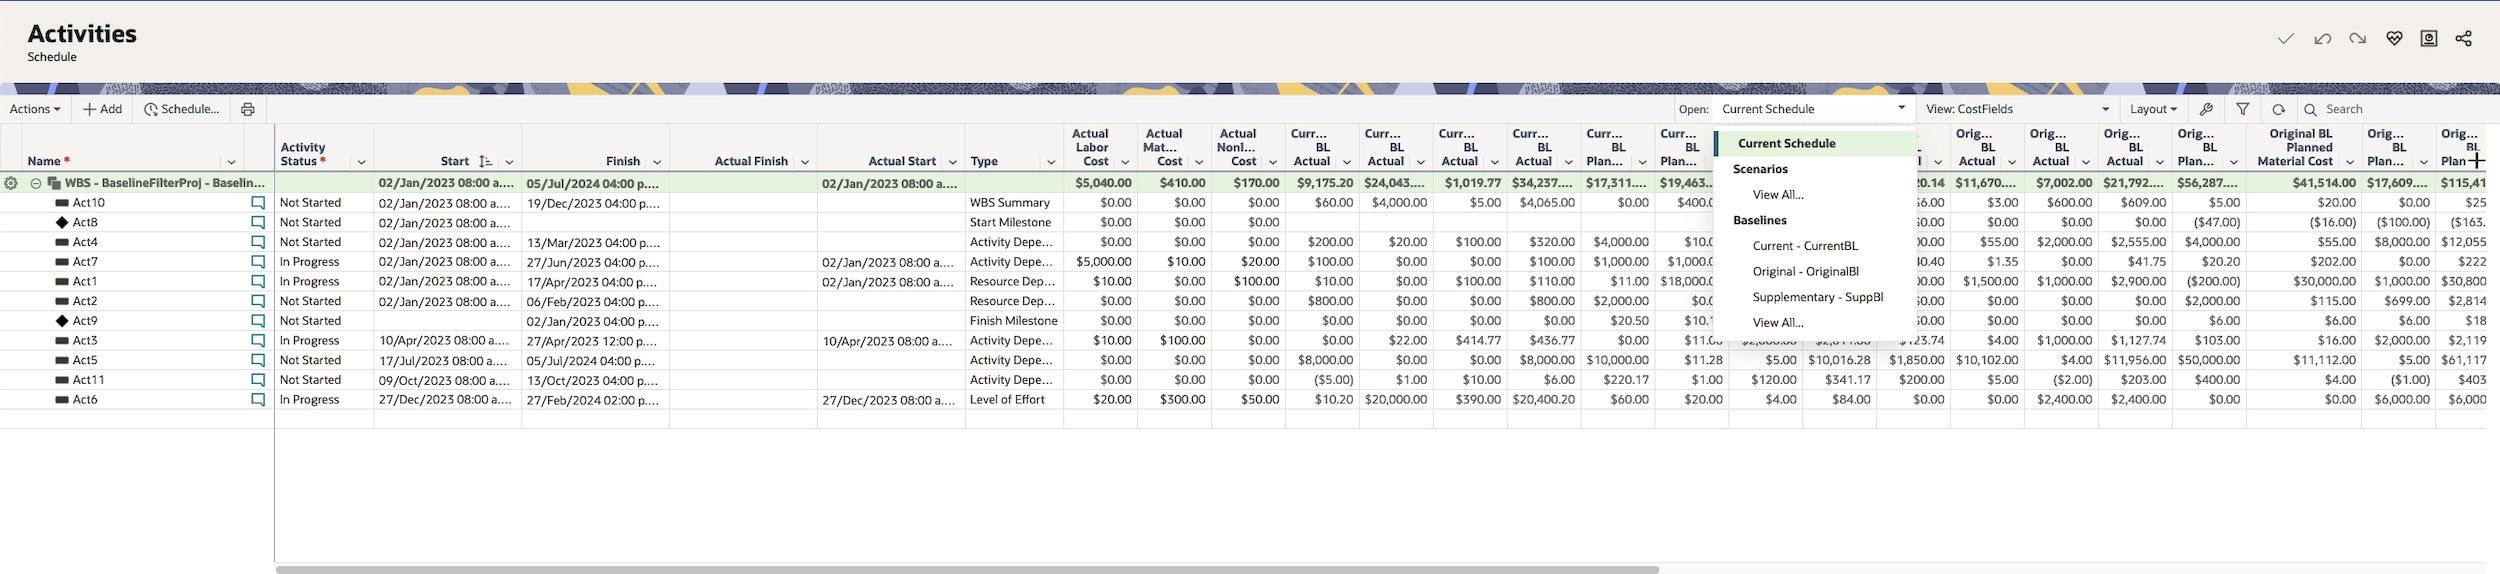
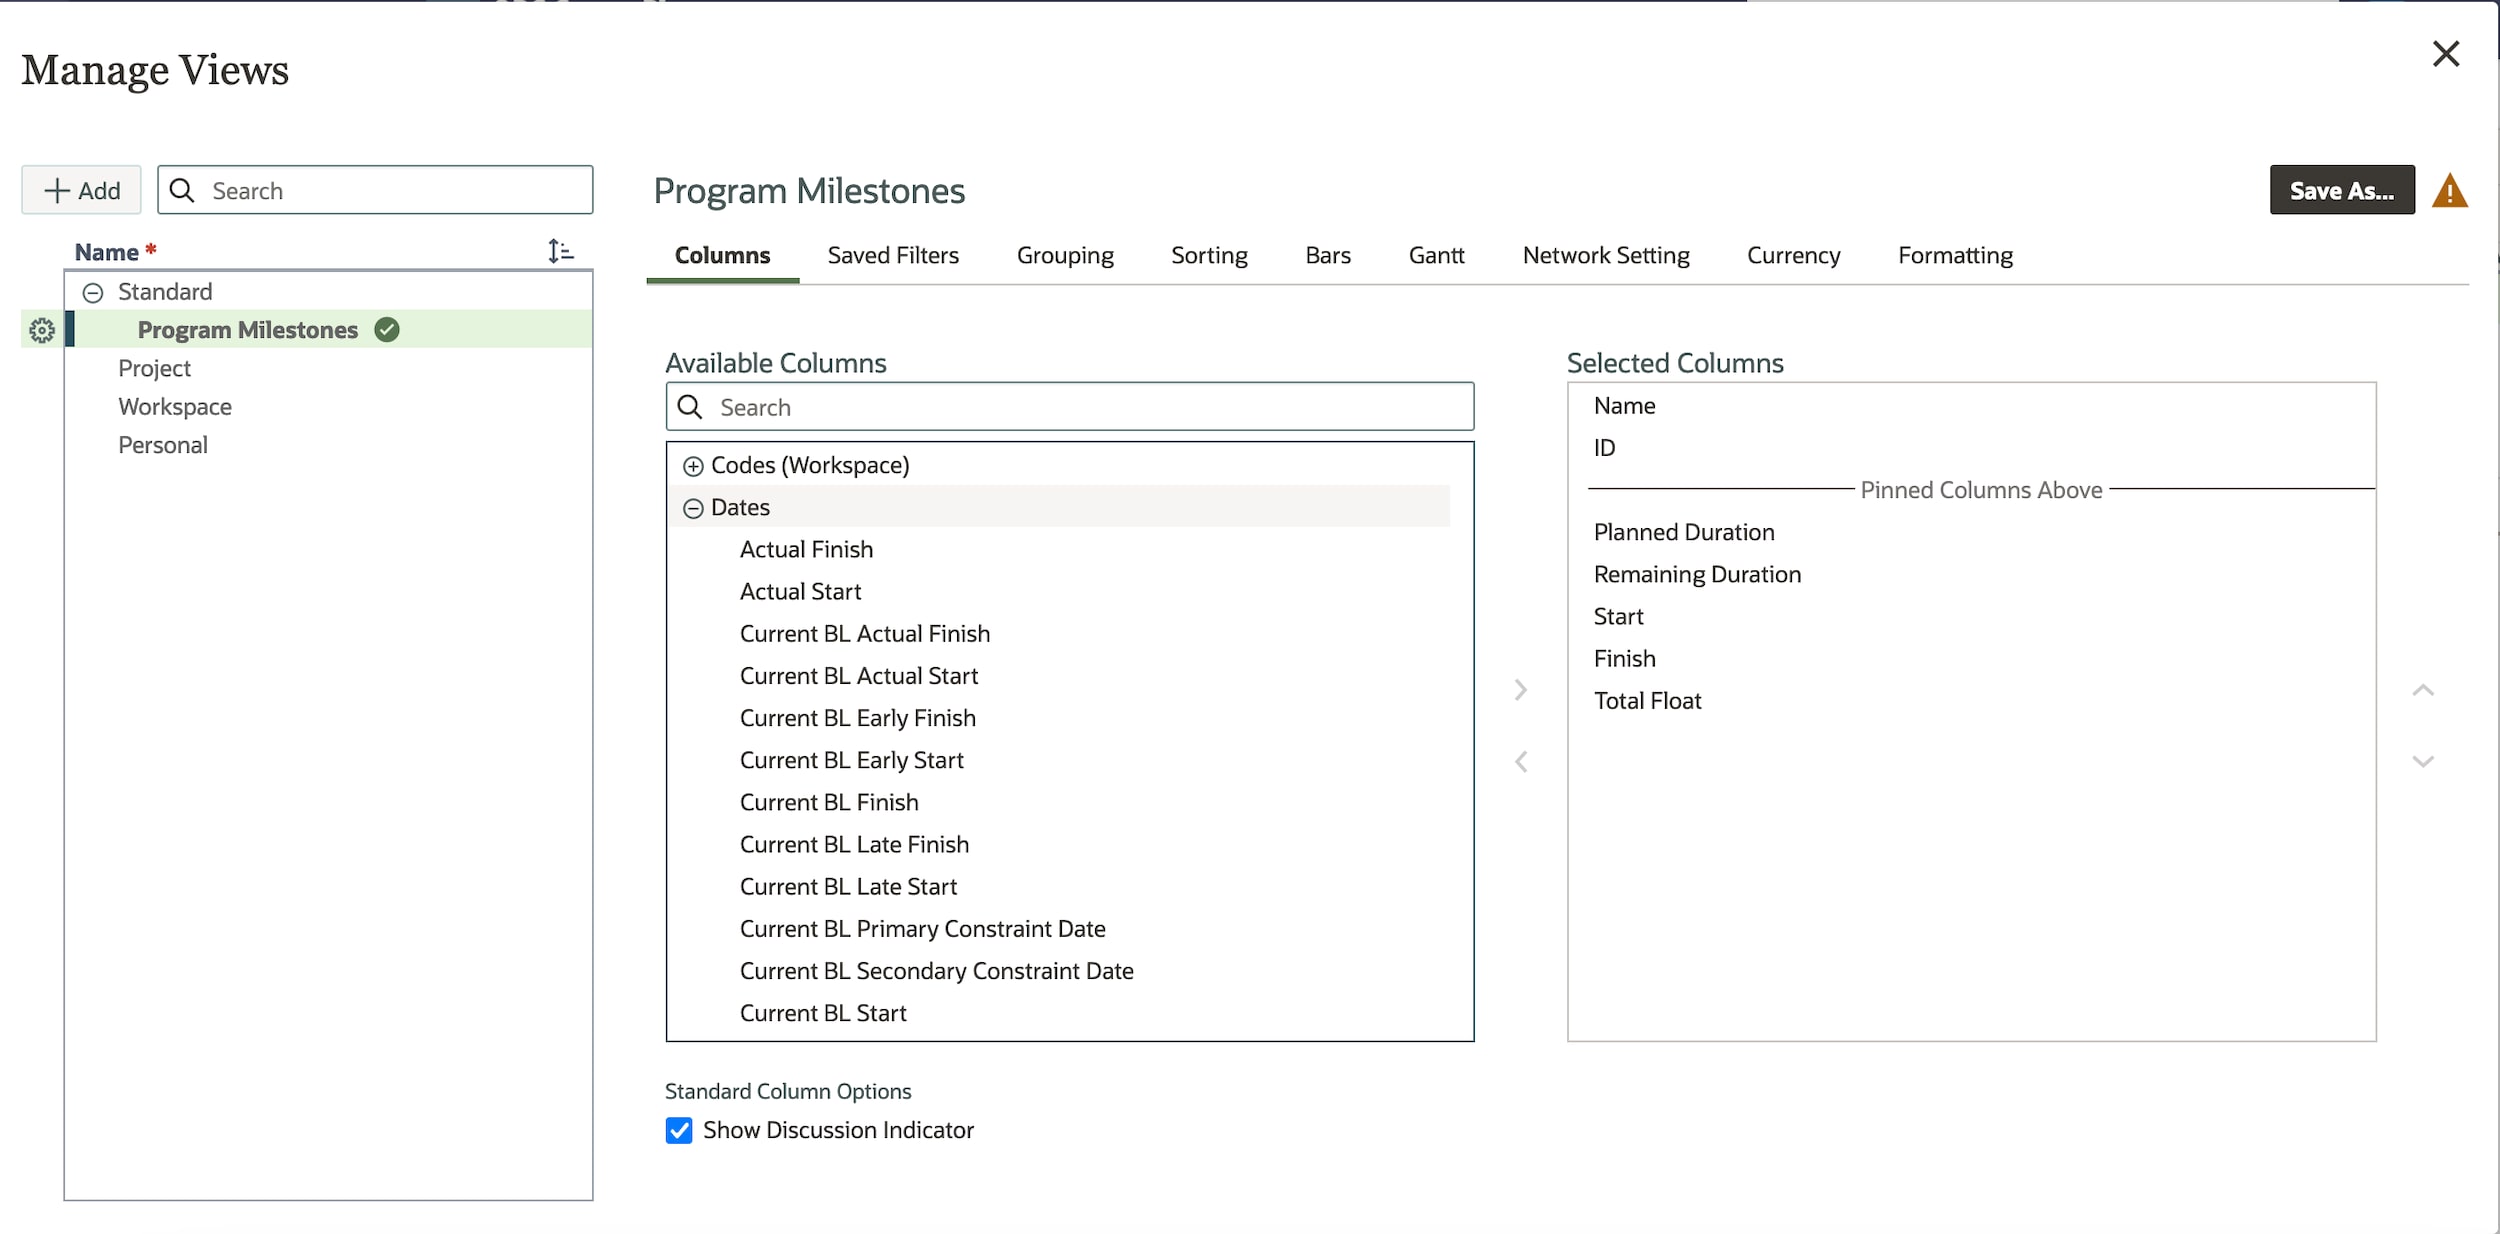
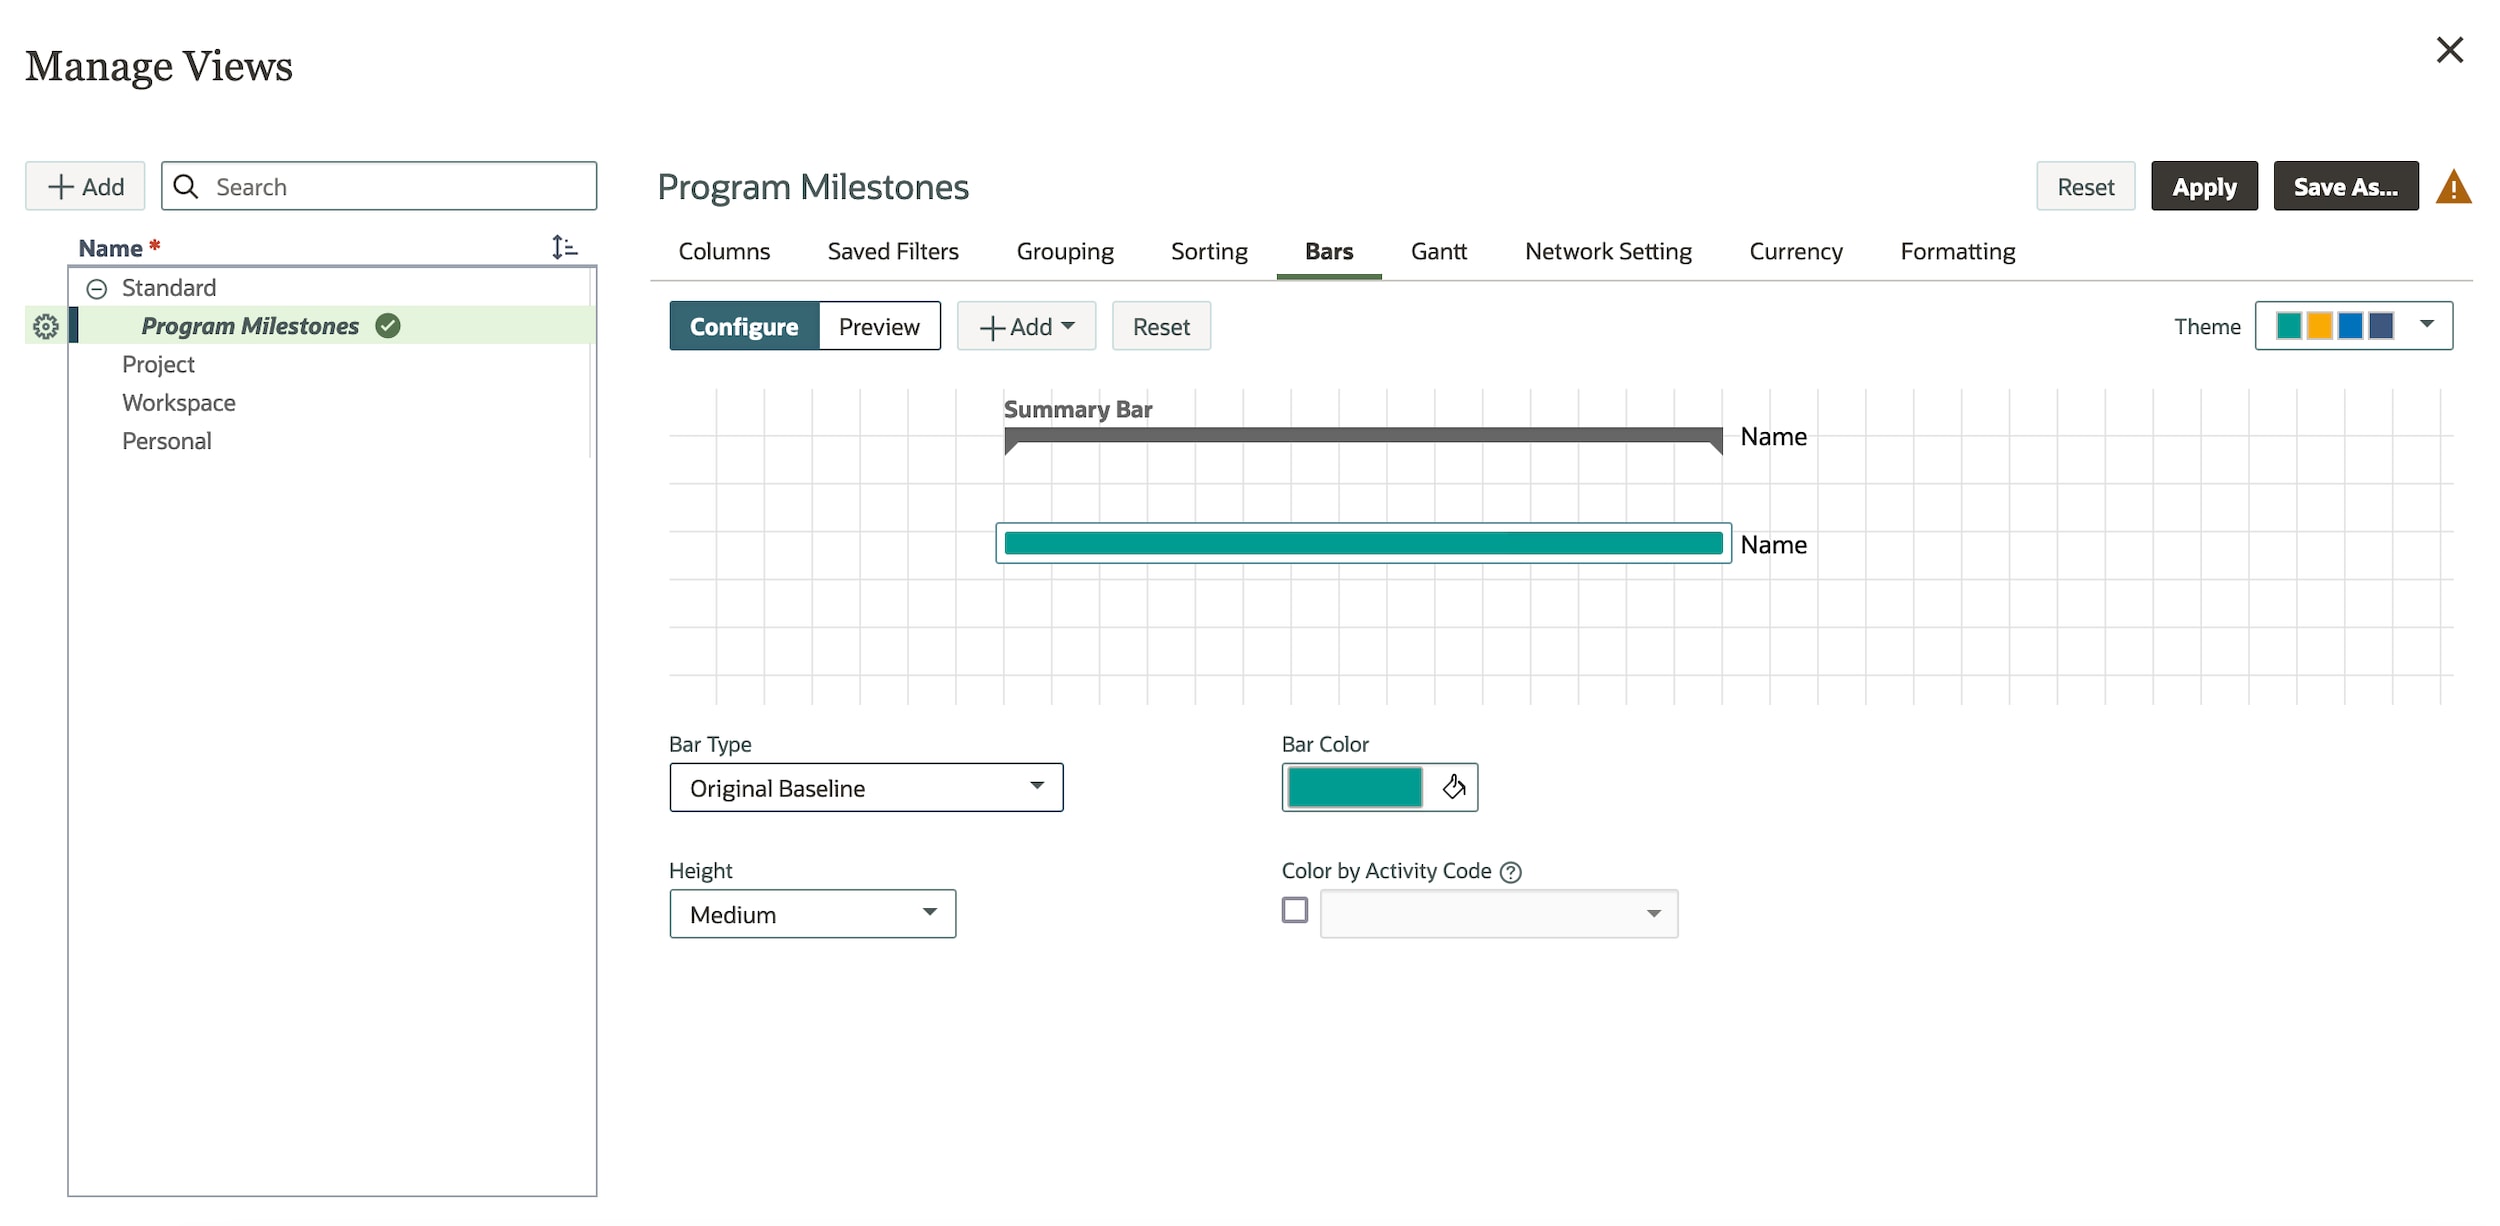
Add views to show desired baseline data. Note that baseline-specific columns are denoted by BL.
You can also add bars to see a visual representation of original baseline data against your current project data.
Visit this article for more information.
Scenarios
As your project progresses, you’ll likely encounter situations that will require you to update your schedule, such as for weather, resource delays, scope changes, and more. Scenarios allow you to create a what-if version of your schedule to anticipate how these changes will impact your project.
If you have used another application like Oracle Primavera P6 or Microsoft Project, you might be accustomed to making a copy of your current schedule to create an alternate version. We recommend against this practice in Primavera Cloud. Duplicate schedules can cause confusion as to what version is current. Additionally, activity progress, committed tasks, costs sheets, and approvals don’t appear in copied schedules. Scenarios allow you to create multiple schedules to evaluate different situations without changing your current schedule or reporting.
You can add as many scenarios as needed to accommodate different project schedules.
When adding a scenario, you can set the data source to be the current schedule, an existing scenario, an existing baseline, or a point of time in the past.
The data from the source is copied to the new scenario. You can modify most of the data in a scenario as you would in the current schedule. If desired, you can set a scenario as the current schedule.
Risks
Use the Risk app to assess any potential threats or opportunities your project might encounter. While organizations may have their own Risk Manager, as a Scheduler, it’s good practice to identify and add risks to keep on top of issues that may impact your schedule. Adding risks also helps the Risk Manager at your organization, if applicable, properly analyze all potential issues and opportunities for your project.
The Risk Register is where risks are added. Once populated, the register provides a clear view of all risks and their current statuses to project stakeholders.

When adding risks, choose the type, status, probability of occurring, amount of time it may impact the schedule, and any associated costs. Based on this information and the predefined risk matrix and thresholds set up by your Administrator or Risk Manager, the risk will generate a score. Risk scoring helps you and/or your Risk Manager understand the severity of risks, rank them in order of importance, and establish actions to reduce their potential effects.
Note that for weather risks, you’ll estimate non-working days for a specified period instead of adding probability, schedule, and cost information.
Assign activities to your risks, so you can identify when the risks may impact your schedule.
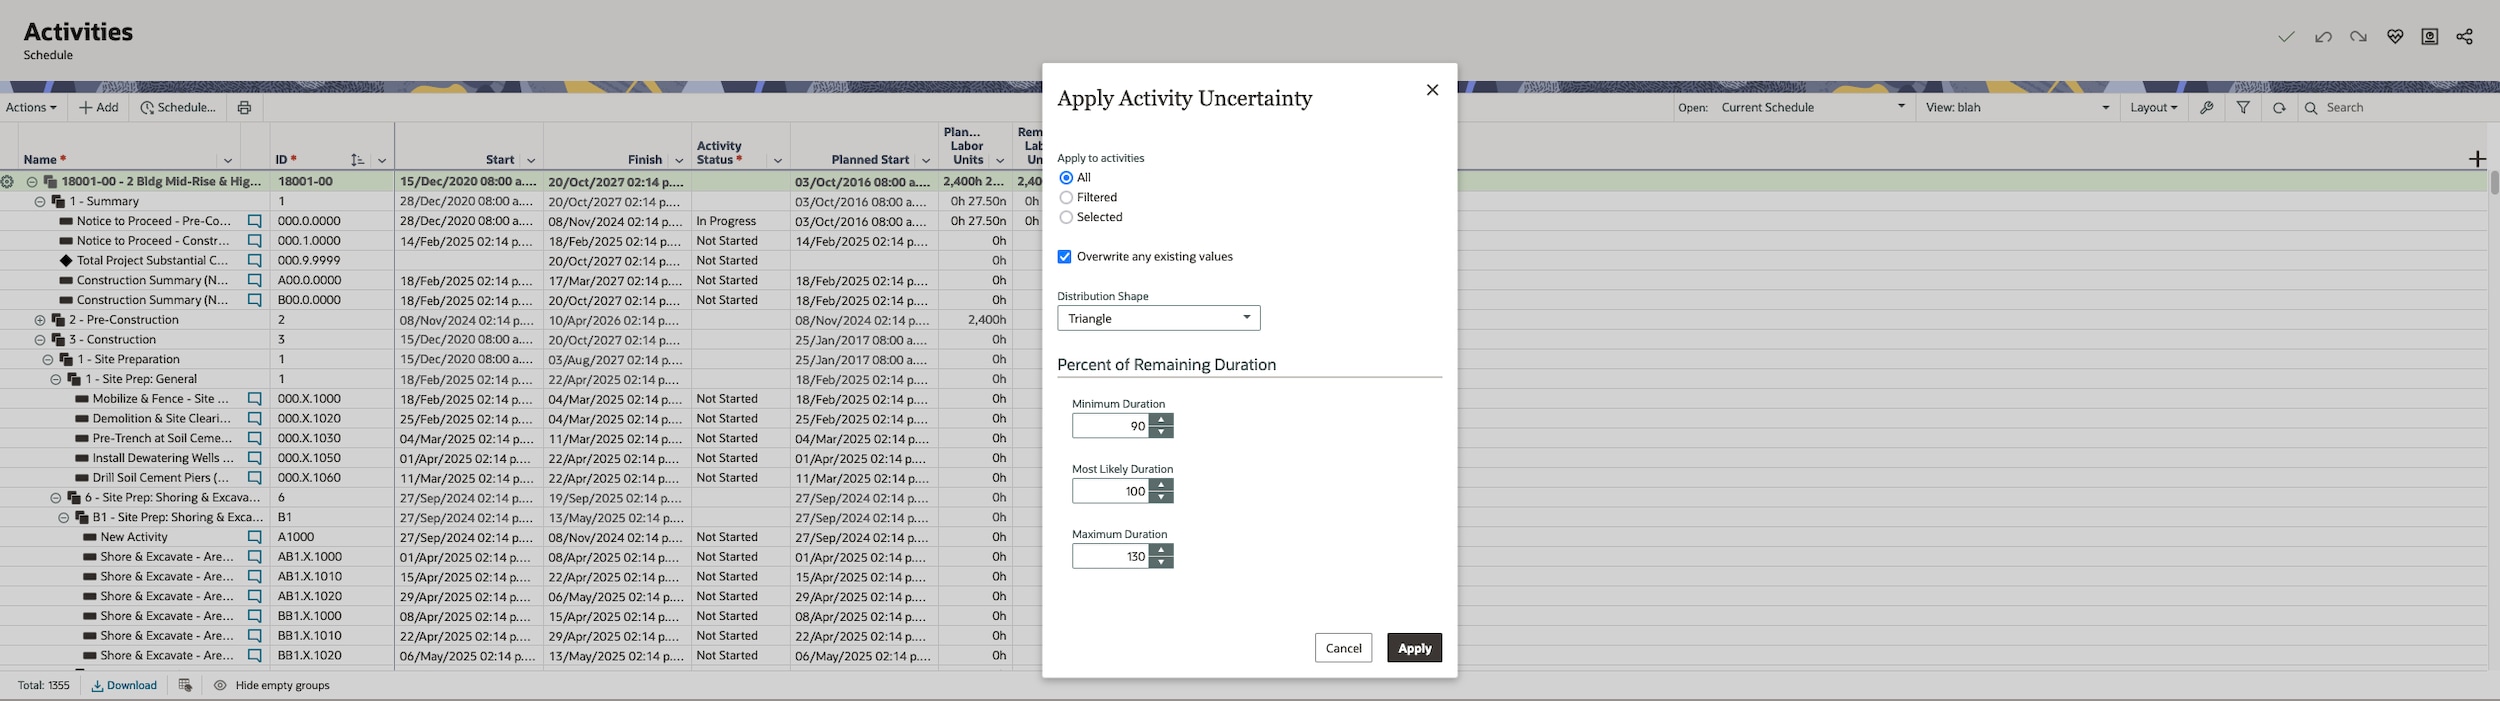
Another way to identify risk in your schedule is by applying activity uncertainty. Estimate minimum to maximum durations to help predict how long it will take to complete an activity.
Once all risks and activity uncertainty are added, you or your Risk Manager can run an analysis to determine the probability of your project finishing on time and on budget.
See this article for more information.
Programs
Programs allow you to manage a group of related projects that share similar dependencies, such as the same resources, scopes, timelines, and more. Using program measures, you can track needed data across the projects in your program. You can also view risks and program milestones to see how the projects within your program are progressing.
Note that you can only add projects to a program that are in the same workspace hierarchy in which the program was created. The same project can belong to multiple programs as needed for tracking purposes.
See this article for more information.
Reports
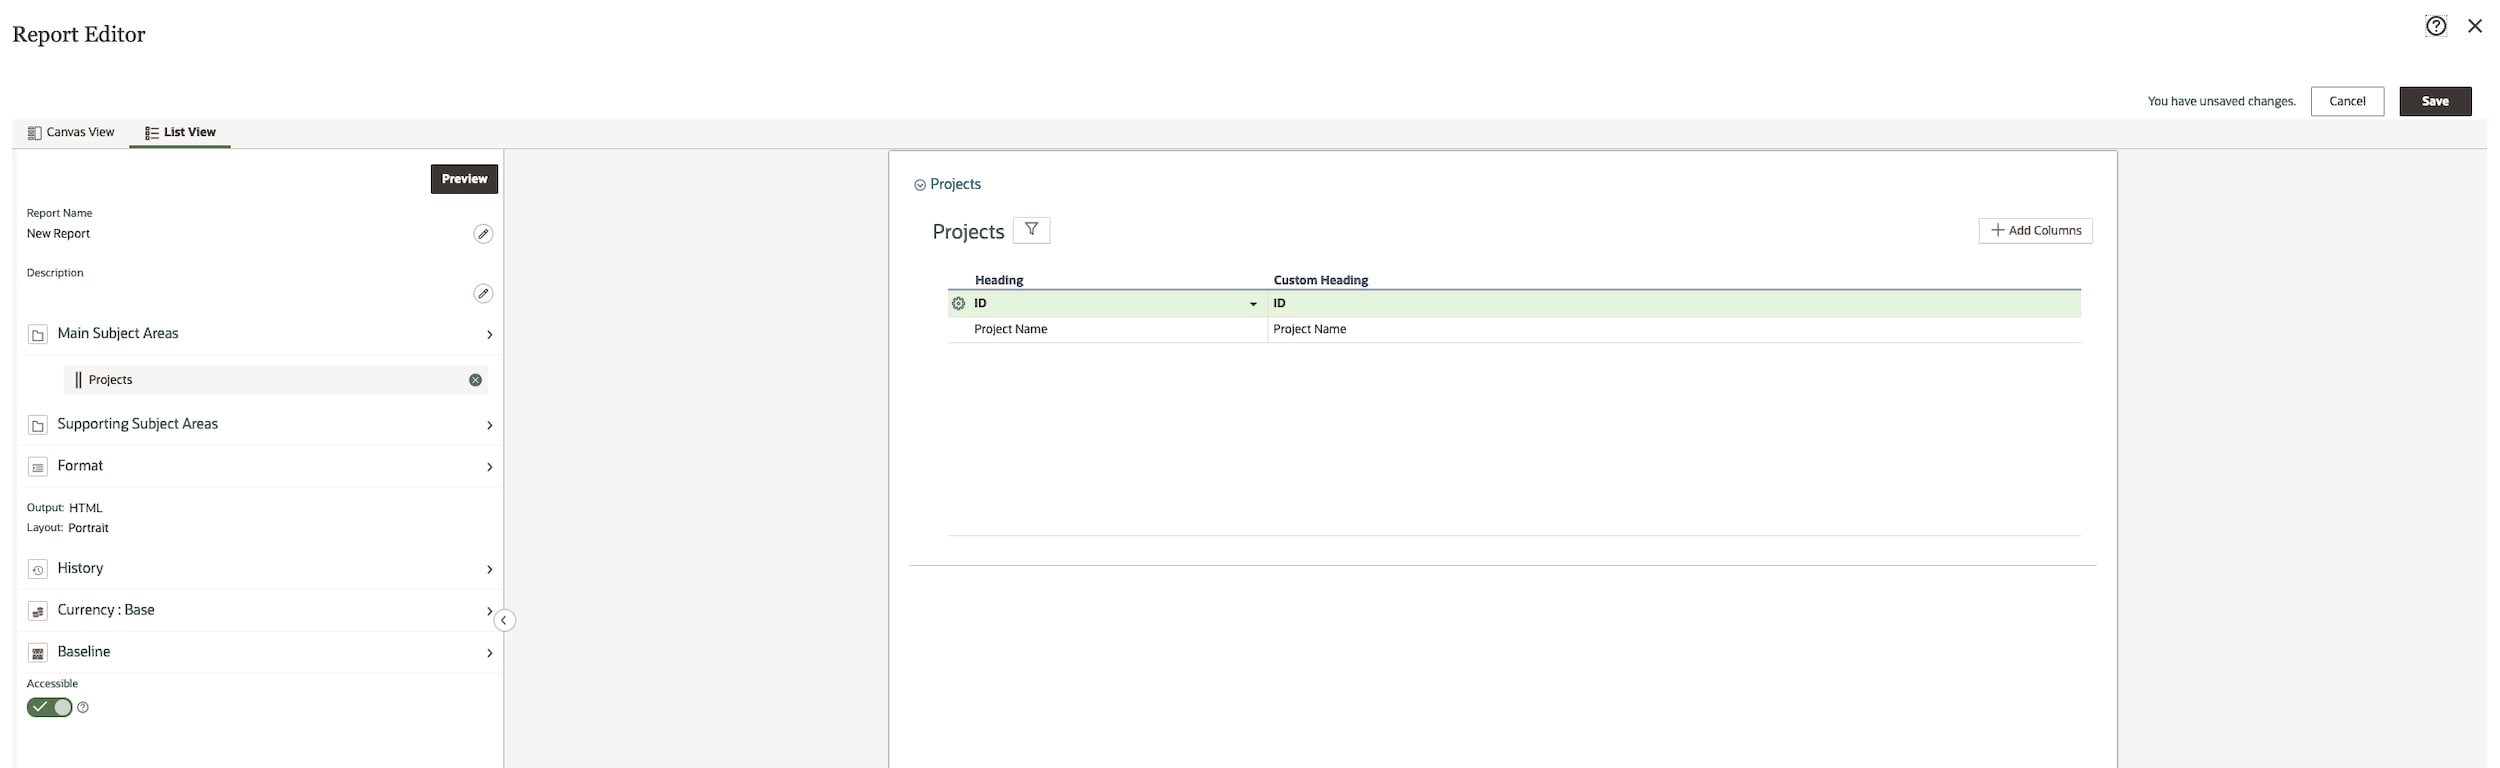
Use the Reports app to communicate project information to your organization. The Report Editor allows you to select the desired data fields you want to report on.
Visit this article for more information.