Key differences between Oracle P6 and Oracle Primavera Cloud
We know that moving from Oracle Primavera P6 to Oracle Primavera Cloud is a big change, but we'll help make the transition as seamless as possible. This article covers similarities and differences between the two applications to help you get off to a good start.
Navigation
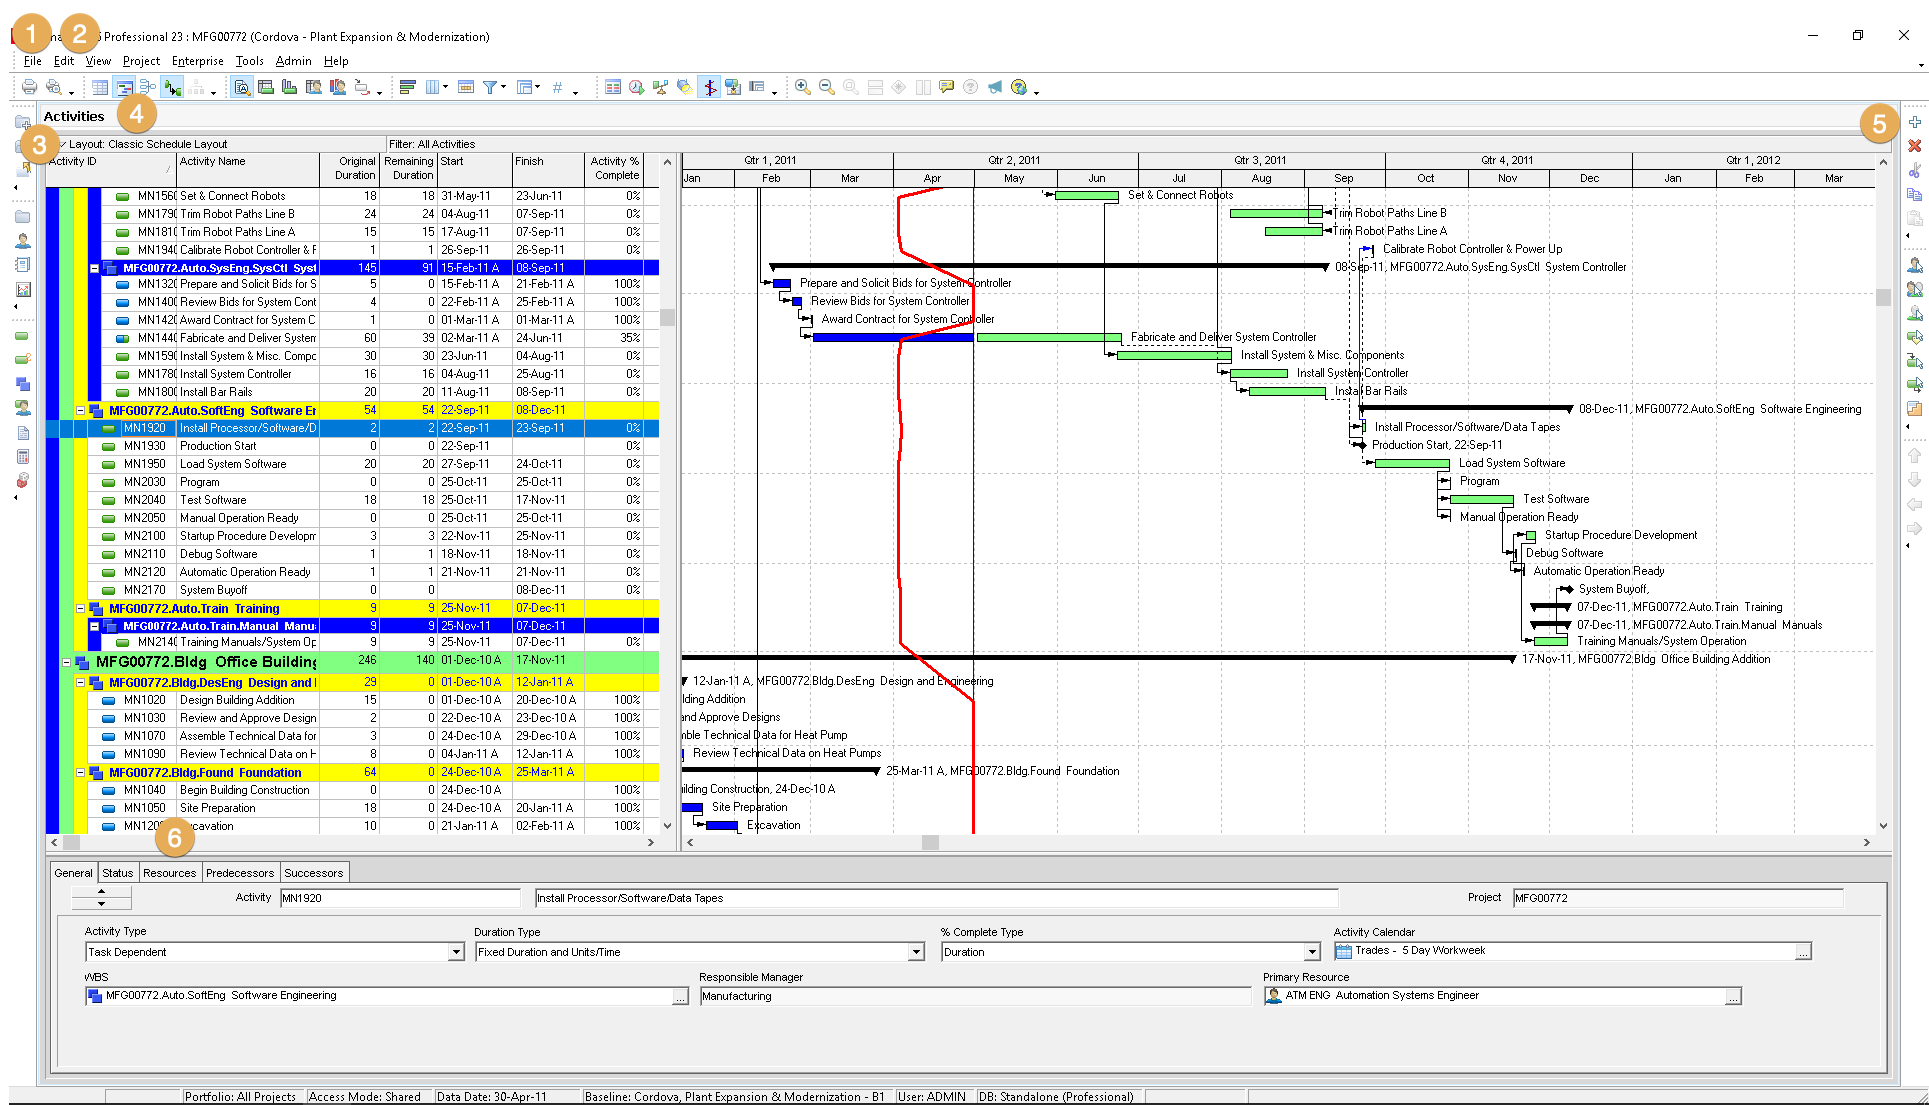
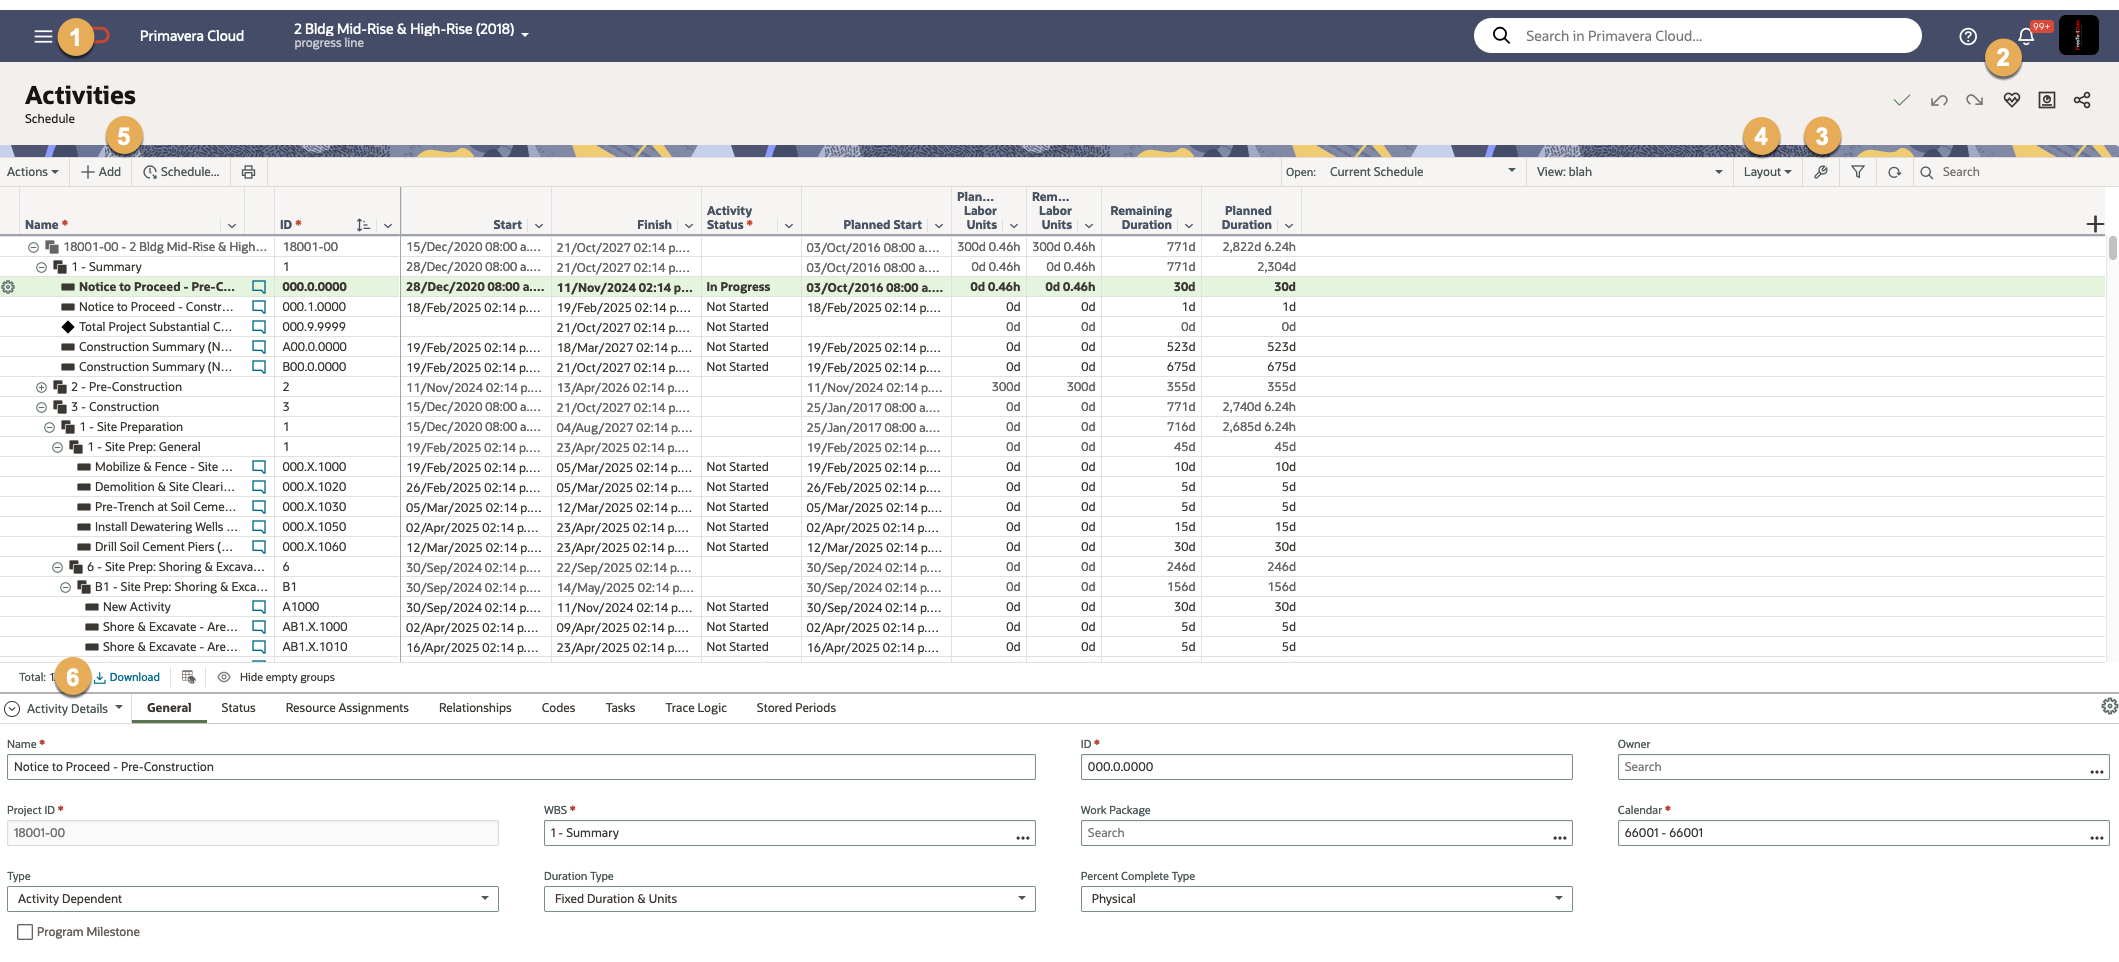
Although the location of objects may differ from P6, you can still find them in Primavera Cloud. Let’s compare the page where you create your schedule in both applications – the Activities page. Note that the screenshot below is covering the Activities page in P6 Professional.
P6 Professional
Primavera Cloud
| P6 Professional | Primavera Cloud | |
|---|---|---|
| 1- Accessing the Activities page | You opened a project, and then it opened in the Activities window. | Use the object selector along the upper-left to select a project. Select the Schedule app, and then Activities. |
| 2 – User preferences/help | These options were available under Edit and Help, respectively, in the upper navigation menu. | These options are located along the upper-right corner of the application. |
| 3 - Views | You used Layouts to view desired project information. | Select the wrench icon to add and apply views to see desired project information. |
| 4 – Activity display | You used the icons above the activity window to choose to view activity information in a Gantt chart, usage spreadsheet, or activity network. | Use the Layout drop-down above the activity window to display activity information in a Gantt chart, grid, or activity network. |
| 5 – Adding activities | You selected Edit > Add or used the plus icon in the toolbar to add an activity where desired. | You can select the Add button above the activity window, right-click an activity to add an activity above or below it, or select a row and press Insert on your computer. |
| 6 – Modifying activity details | You used Activity Details along the bottom of the Activities page to enter details. | You'll also use Activity Details along the bottom of the Activities page to enter details. |
See this article for more navigational information.
Project organization
In P6, you used the enterprise project structure (EPS) to organize and group projects according to your organization's preferred structure, such as company division, phase, geography, or project size.
In Primavera Cloud, you’ll use workspaces to group and organize projects in a hierarchy. The hierarchy allows you to easily manage data and security across your workspaces.
Take a look at the hierarchy below.
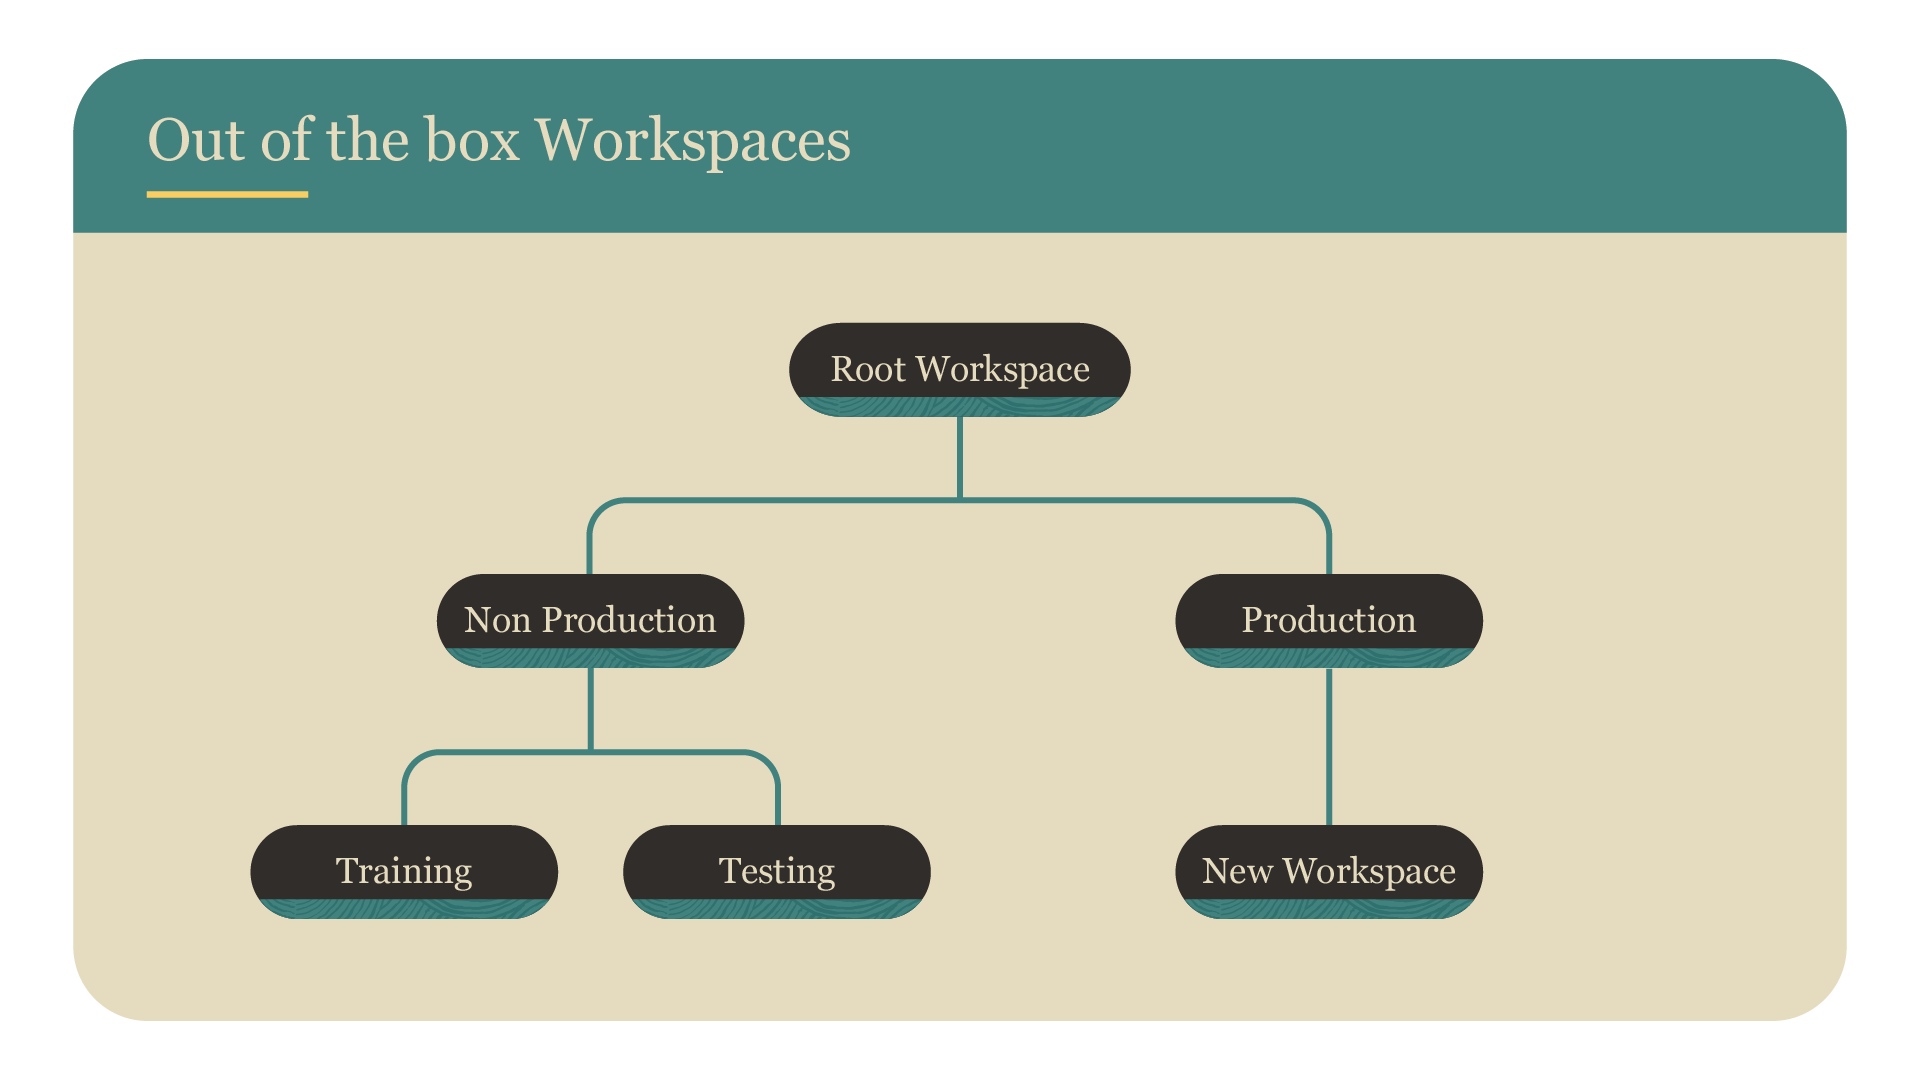
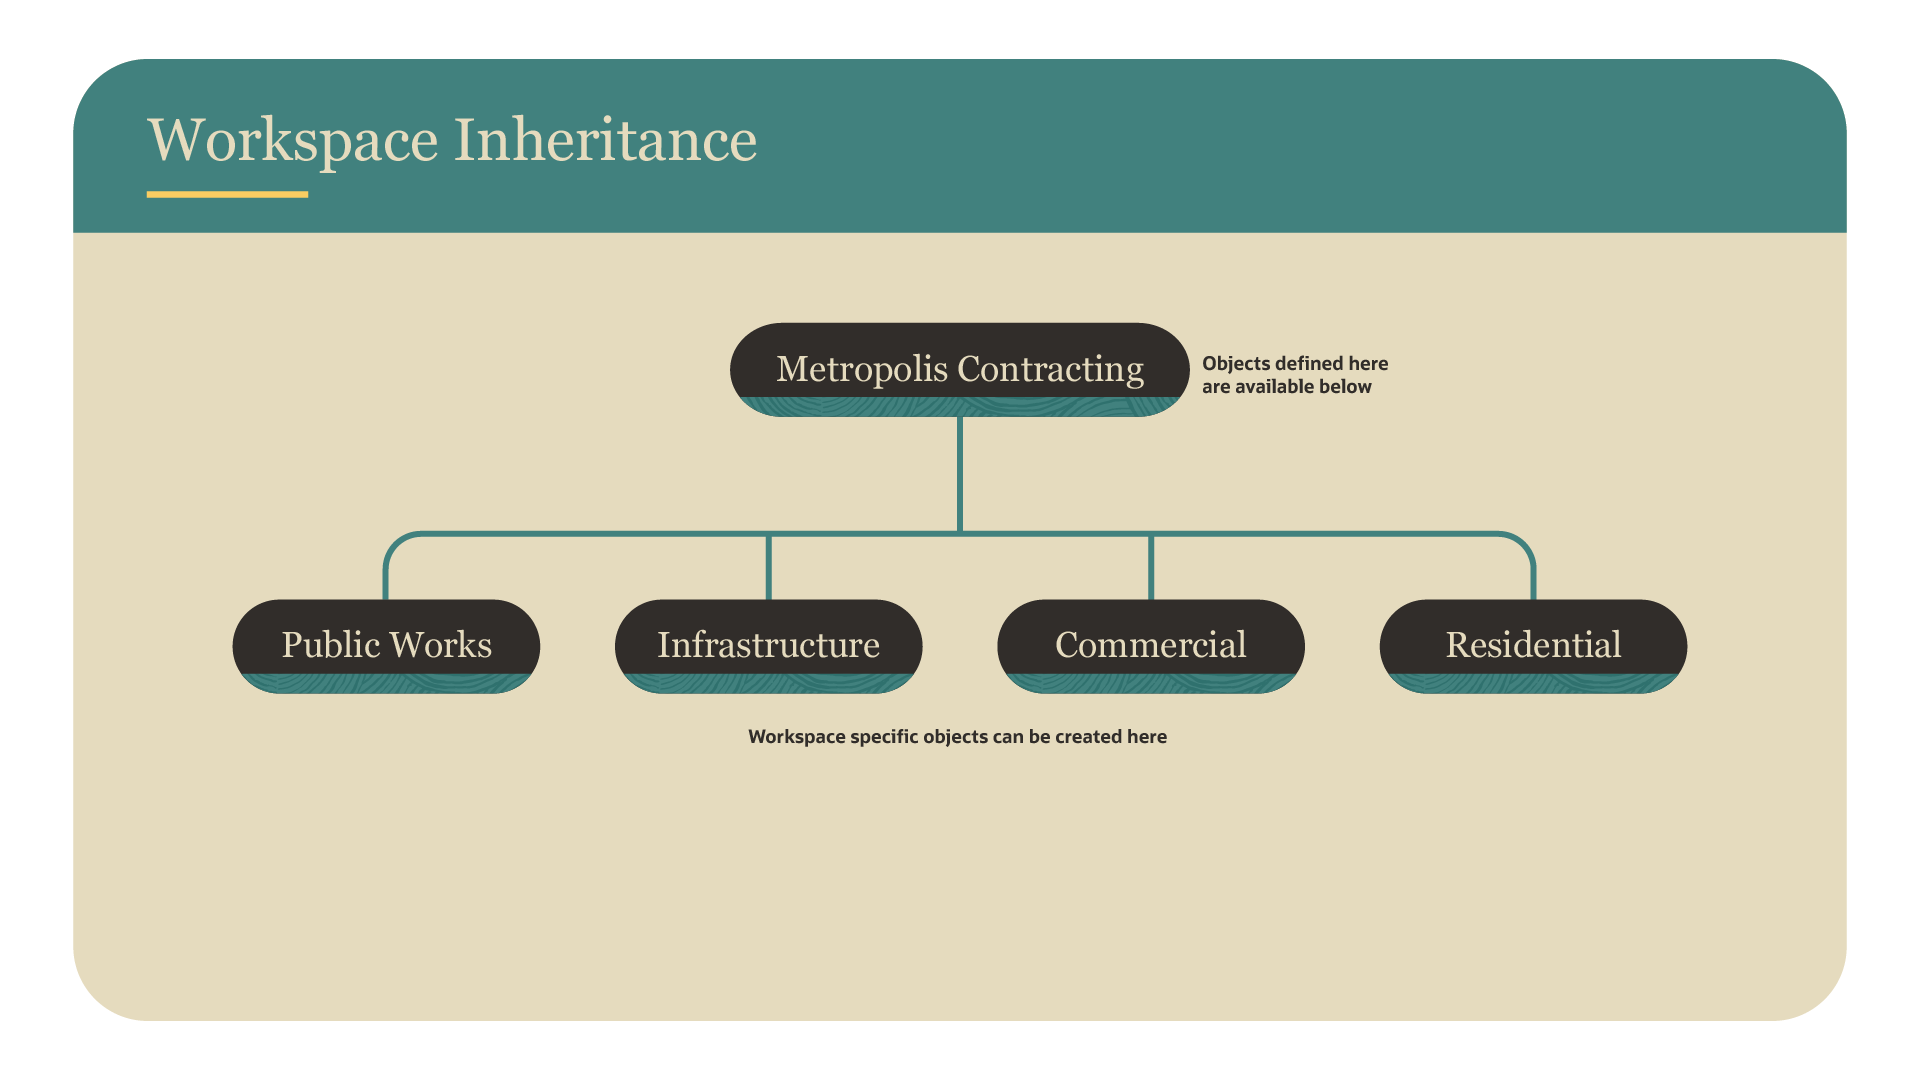
In P6, you could have multiple root nodes of the EPS. In Primavera Cloud, there's just one top level of the workspace, which is referred to as the Root workspace. The Root workspace is typically renamed to your company's name.
Then, there are two workspaces below the Root workspace: Production and Non Production. Each subsequent workspace level is known as a child and grandchild workspace, respectively.
Your Application Administrator will likely set up the hierarchy structure. Though you may need to add lower-level workspaces to organize your projects. See this article for more on workspaces, if desired.
Data
In P6, most enterprise data is global and accessible to all projects, such as currencies, baseline types, and resources.
Most enterprise data that's available in P6 is available in Primavera Cloud in the form of dictionaries. You'll create dictionaries at the workspace level, and then the data can be automatically or manually shared to child workspaces. This ensures that data is available at the appropriate project level.
Dictionaries are often set up by your Application Administrator. Though you may need to create additional dictionaries for your workspaces and projects. See this article for more on dictionaries, if desired.
Data organization
In P6, you used Layouts to filter, group, and sort information. In Primavera Cloud, you'll use Views to accomplish the same thing.
There are four view types in Primavera Cloud:
- Standard: Preinstalled with Primavera Cloud and is only available on the Activities page; contains configured view options
- Workspace: Saved at the workspace level and accessible to all users in the workspace
- Project: Saved at the project level and accessible by other project members
- Personal: Private and only accessible to the user who created them
You can add as many personal, project, or workspace views as you wish in Manage Views. Easily get there by selecting the wrench icon. If pages don't support adding views, you can still see standard view options.
Visit this article to learn how to add and apply views and configure information.
Resources and roles
Resource and role functionality in Primavera Cloud is similar to that of P6, but there are a few key differences.
Let’s go over the similarities first. In both P6 and Primavera Cloud, you can:
- Create roles to define the jobs and skills needed on your projects.
- Assign resources to activities. Or assign roles to activities, and then staff them with resources. You can assign multiple resources or roles to an activity at the same time.
- Assign multiple availability periods and pay rates. This can be used for schedule or portfolio-planning purposes in Primavera Cloud.
Here are some key differences to note:
- In P6, you created resource and roles at a global level and then assigned them to projects within your organization. In Primavera Cloud, you’ll create resource and roles at the workspace and/or project level, and then manually assign them to lower workspace levels when applicable.
- In P6, you could level resources. In Primavera Cloud, you can level both resources and roles.
See this article for more information on creating a resource-loaded schedule.