Oracle Primavera Cloud workspaces
Get familiar with Oracle Primavera Cloud workspaces, so you can successfully set them up for your organization.
Workspace basics
Workspaces are the foundation of Oracle Primavera Cloud. They organize all your company's projects and contain everything from data to settings to user permissions.
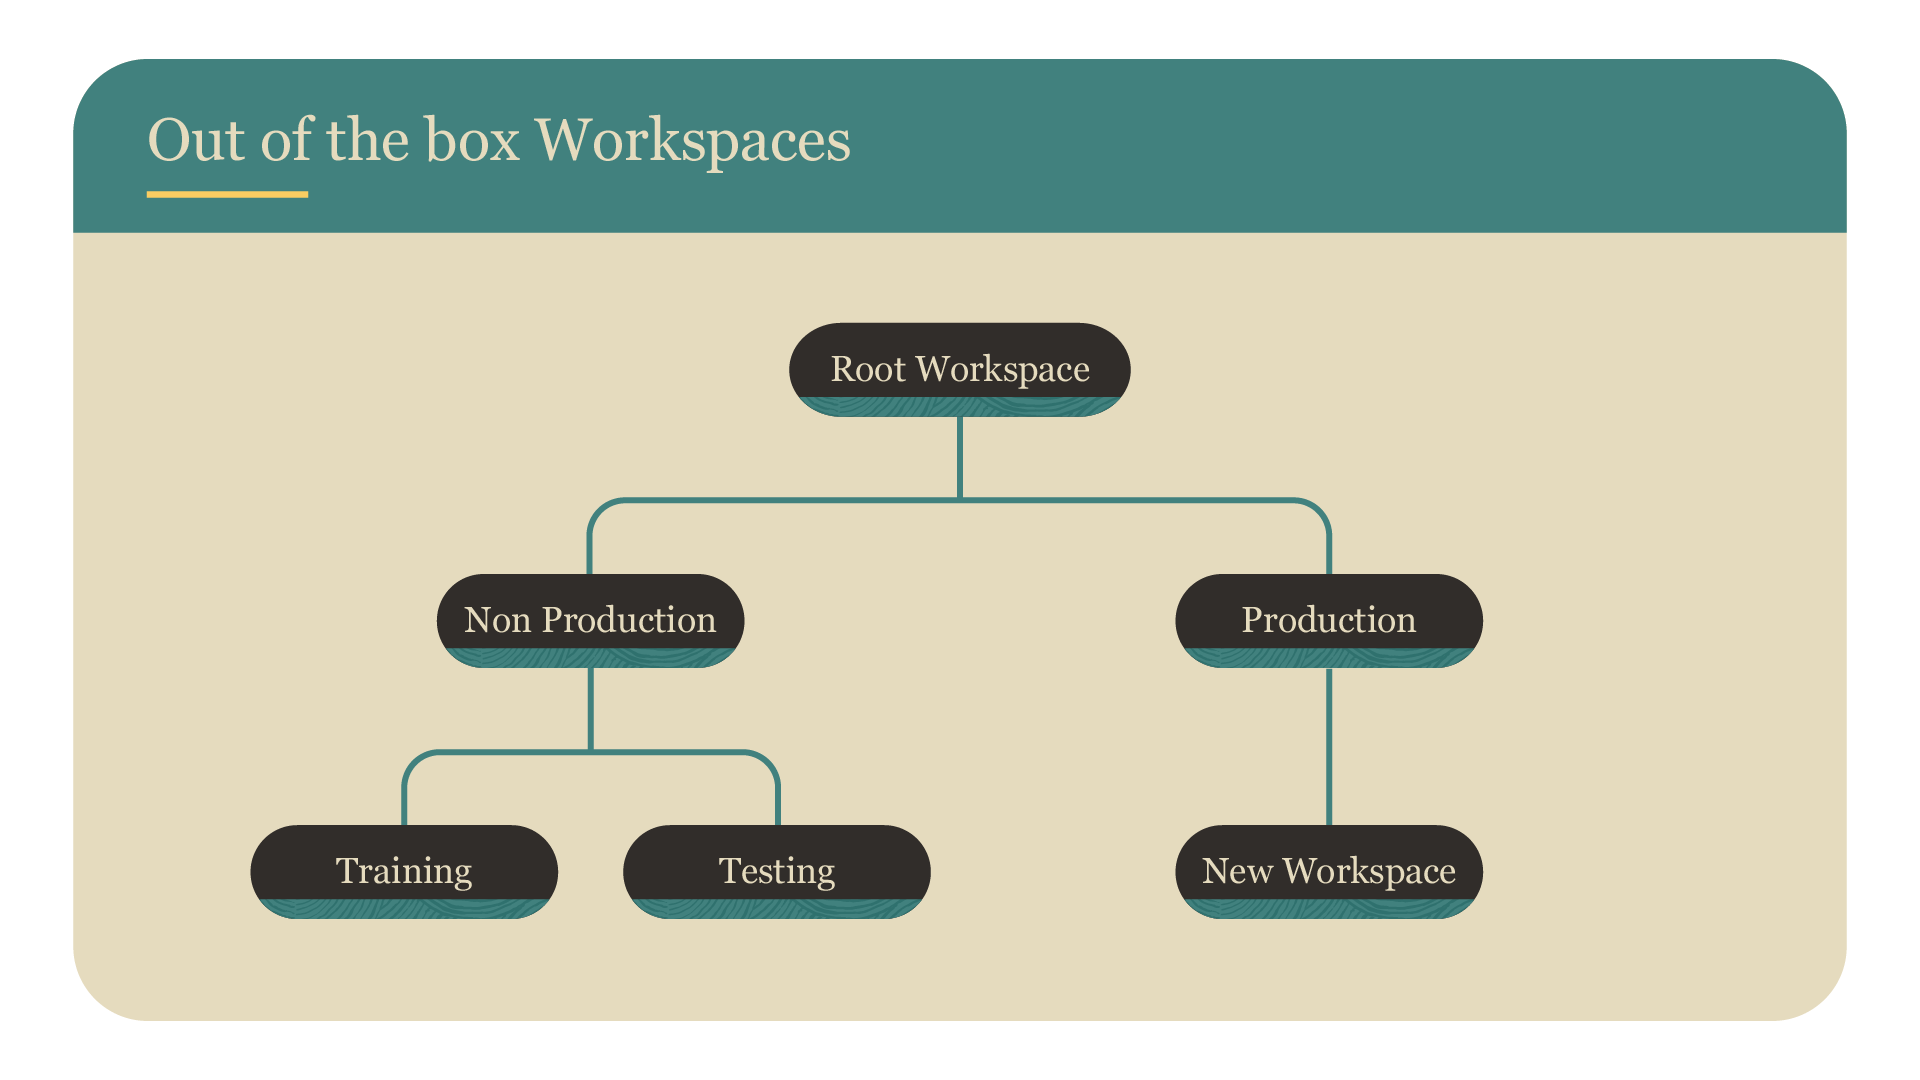
Primavera Cloud comes with an out-of-the-box workspace configuration that consists of two levels:
- Root workspace: The top level of the hierarchy, which represents your company.
- Parent workspaces called:
- Non Production: Typically used for testing new configurations or training new users.
- Production: This is where you'll put your configuration once it's ready, and is where all of your projects, programs, and portfolios will live.
You can add child, grandchild, and lower-level workspaces below Non Production and Production to build out your structure.
With workspaces, you can:
- Rename them as desired. Note that you can't delete the Root, Non Production, or Production workspaces.
- Add as many child, grandchild, and lower-level workspaces under Non Production or Production, respectively.
- Have as many workspaces as required to meet the needs of your organization. Though we recommend keeping your configuration as simple as possible.
Data sharing
Understanding how data sharing works in Primavera Cloud will help when setting up your workspace configuration.
There are three main data-sharing principles.
1. Ownership
All data, like a project, code, or calendar, is owned by a single workspace.
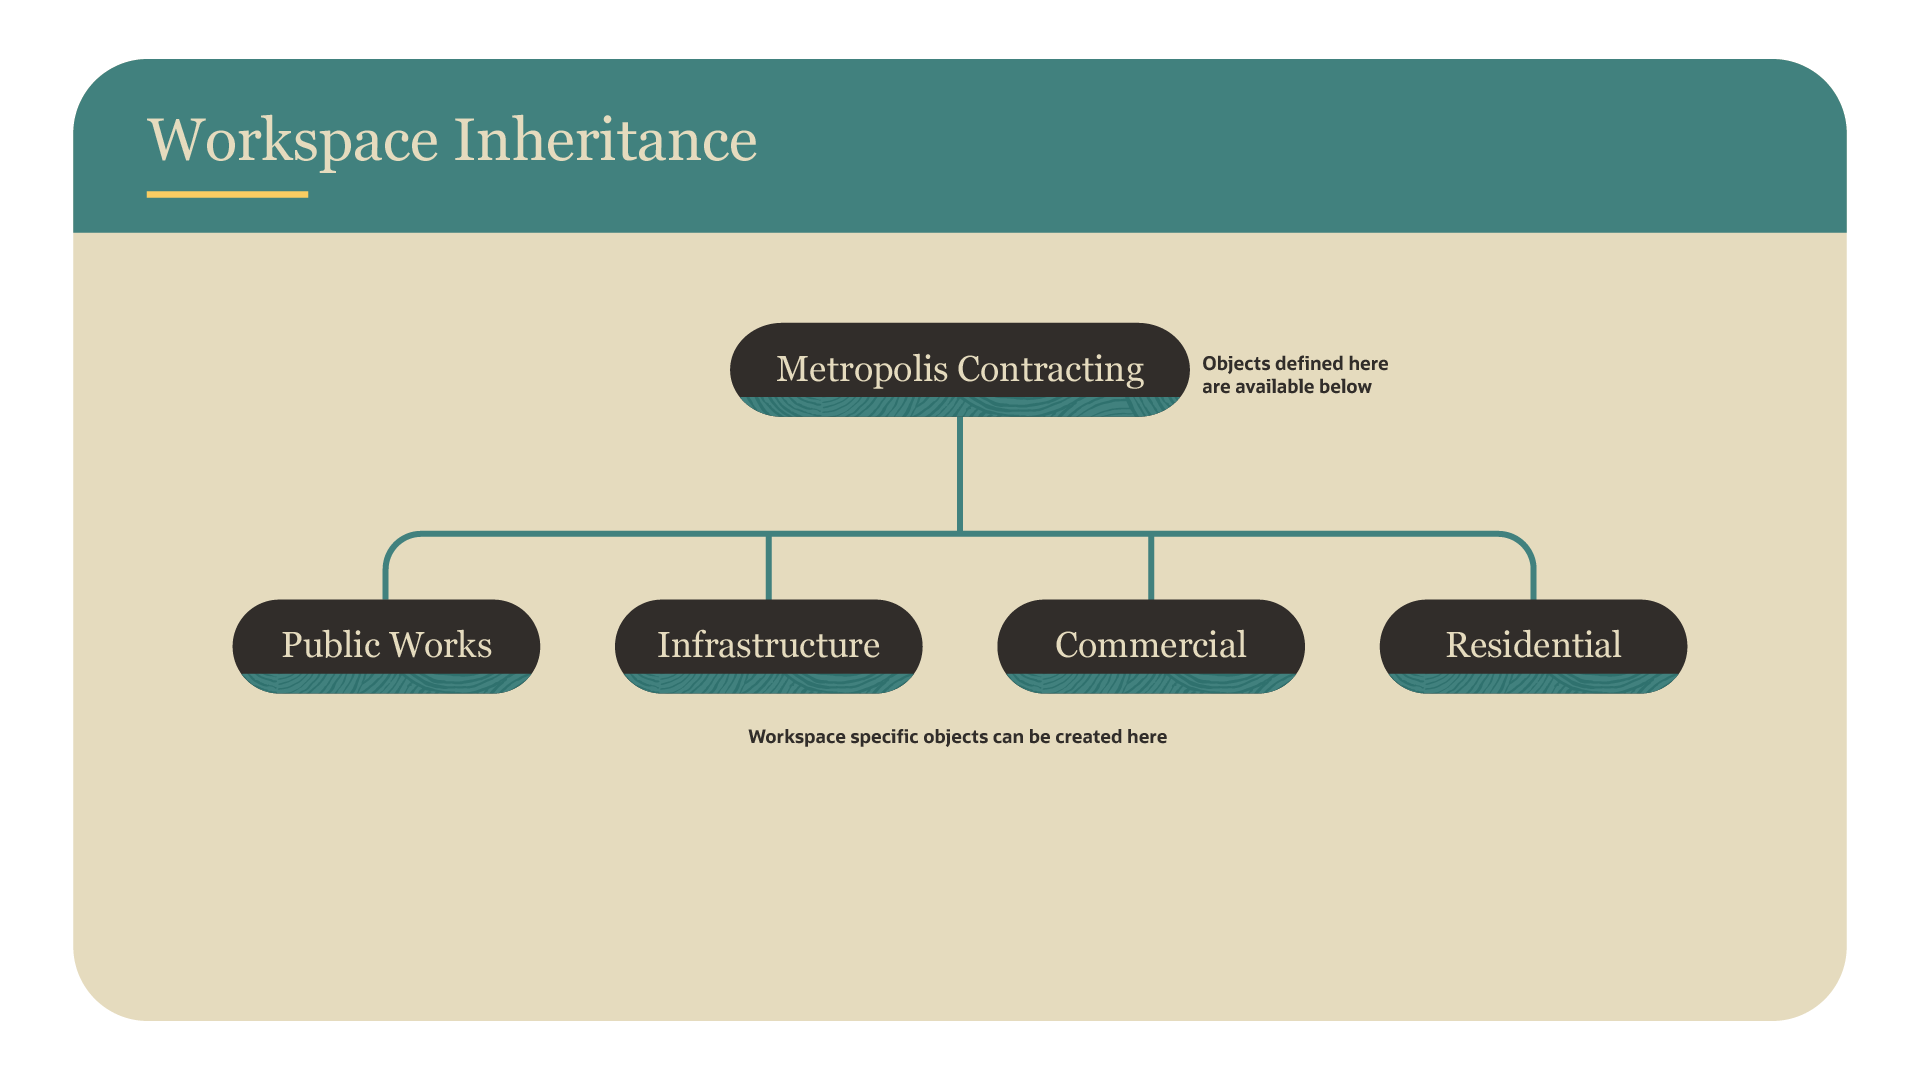
2. Sharing
Most data created in a workspace can be shared with lower-level workspaces. This saves administration time, as you don’t have to configure data at each level. You can share data automatically or manually from the workspace it's created in, such as the root, parent, or child workspace, to lower levels. It’s recommended to share automatically, unless there’s a reason why data shouldn't be shared. Primavera Cloud defaults to sharing data manually, so you'll need to update the sharing method to automatic, if desired. Note that not all data in Primavera Cloud can be shared automatically, like resources and roles.
3. Promotion
If data is needed in a higher workspace level, you can promote it by selecting Change Owning Workspace. Be certain that the data is needed at a higher workspace, as it will require a lot of work for you and/or Primavera Cloud developers to manually demote the data later to lower workspaces.
For more information, visit this article.
Best practices
Keep in mind the following when planning your workspace configuration:
- We often see companies align their configuration to their organizational structure, such as by departments or industries. Companies have also organized by location or project type. The best way to organize your configuration is to do what makes sense for your company!
- It's helpful to understand how security works in Primavera Cloud to plan your configuration. Reference this article for more information.
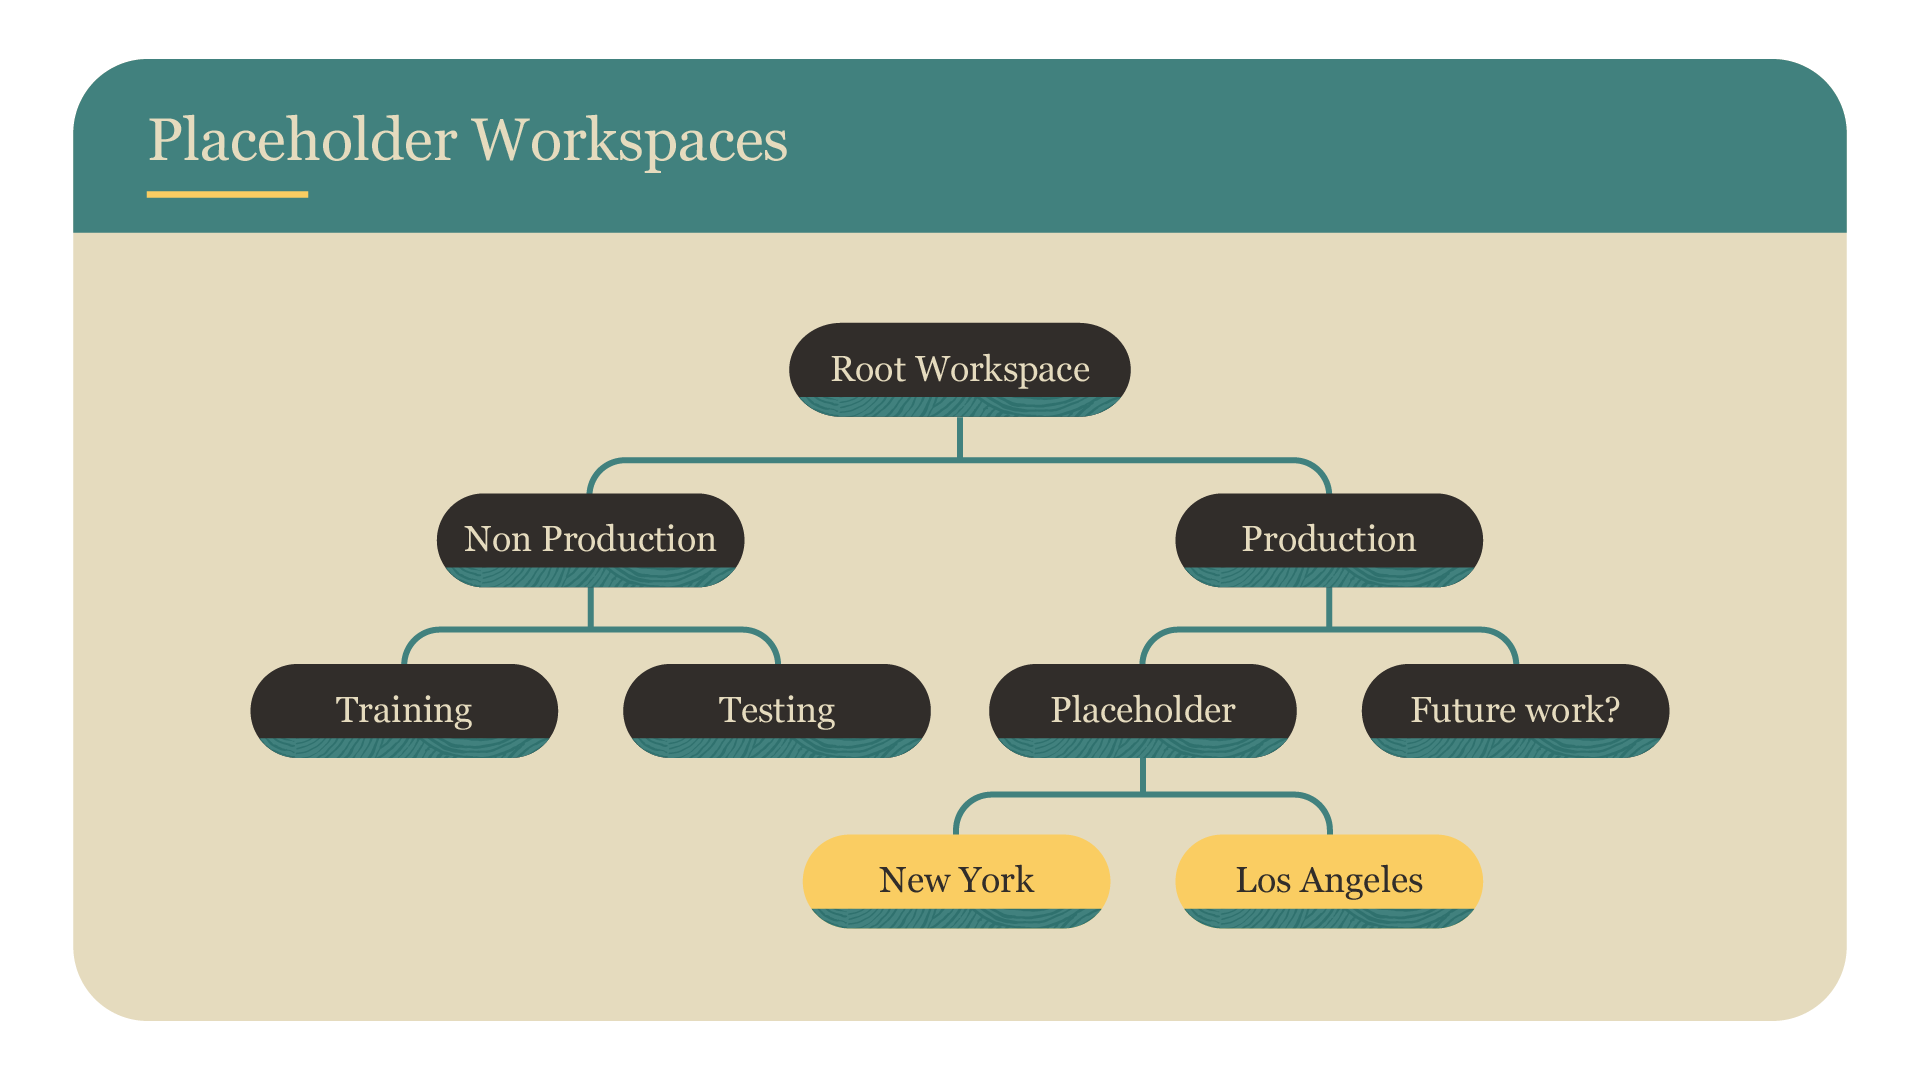
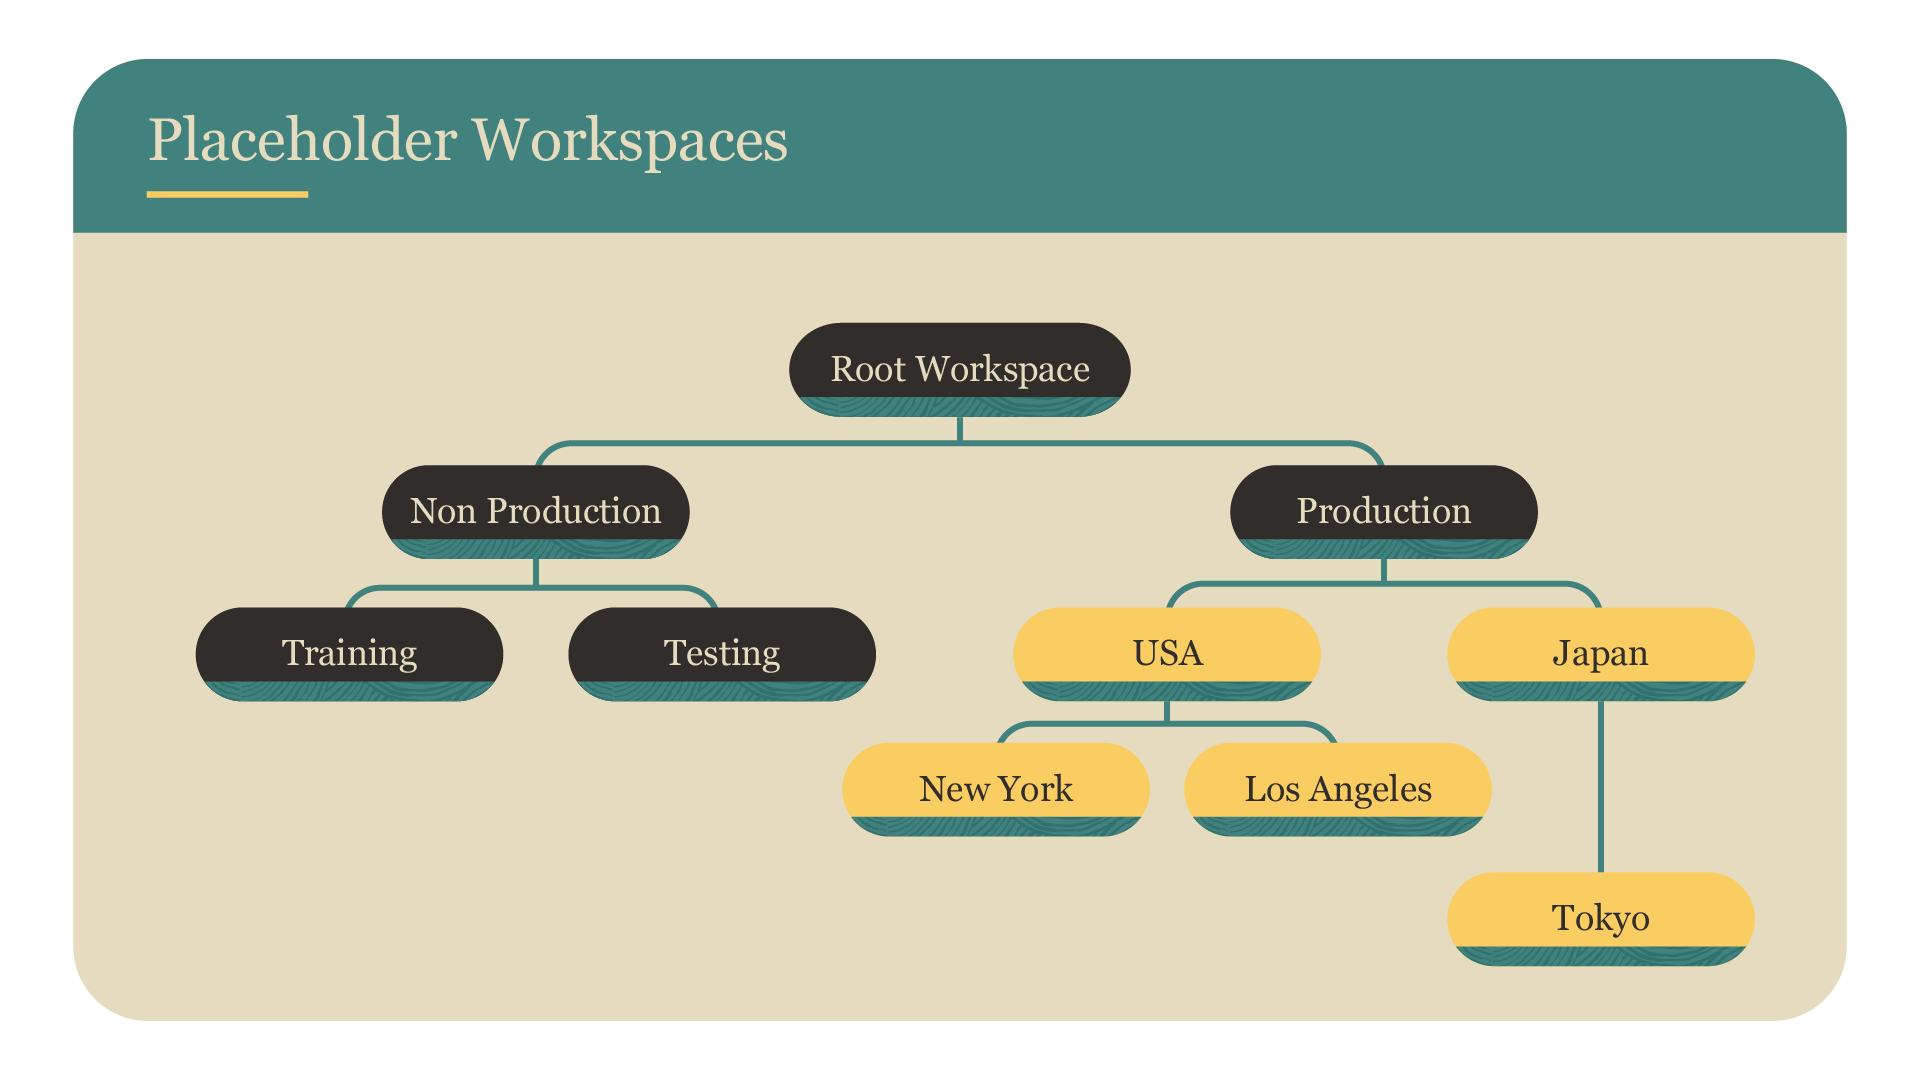
- It's not possible to add workspace levels in your configuration once it's in Production. Future-proof your configuration by using placeholder workspaces if you think extra levels may be needed in the future.
- Use the Non Production workspace as a test area for new configurations. This workspace includes preinstalled permission sets, user groups, codes, and more that you can use to help build your configuration. Once you’re happy with the configuration, you can transfer it to the Production workspace.
- Configure data as high up in the workspace hierarchy as possible and set it to automatically share to all lower workspaces. That way, you won't have to configure data manually at each workspace level, saving you time.
Tip!
Document your workspace configuration, so you know where objects are located in the hierarchy. Keep your documentation up to date as you make changes.