Creating your contract schedule in Oracle Primavera Cloud
After you create or import a project in Oracle Primavera Cloud, the next step is to plan your schedule. In this article, we’ll discuss how to create a schedule that follows the Critical Path Method (CPM) by utilizing a work breakdown structure (WBS) and activities.
Work breakdown structure (WBS)
The schedule-planning process begins by creating your work breakdown structure, or WBS. You can create a WBS on the WBS page or Activities page in Primavera Cloud. We recommend using the Activities page if you prefer to manage your WBS and activities together. If you use the Activities page, you can also create a separate WBS for each version of your schedule.
Your WBS structure should be based on the project scope and represent what is being produced.
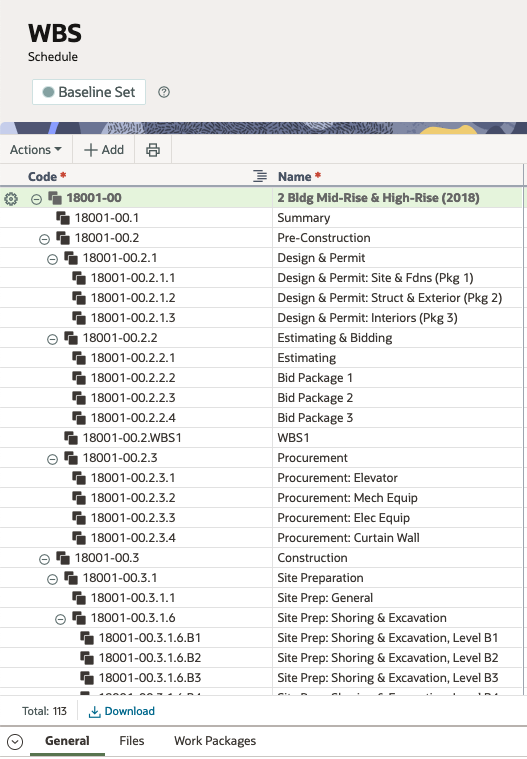
The project is the Root node, or top level, of your structure. From there, you’ll create subsequent nodes, or levels, that represent deliverables with applicable work elements that are required to complete the project.
When creating a WBS, we recommend not exceeding three to four hierarchical levels, if possible. Adding additional levels creates more complexity and becomes difficult to manage. If your organization has a standardized structure across projects, save time by creating a WBS from a template.
Visit this article for more information.
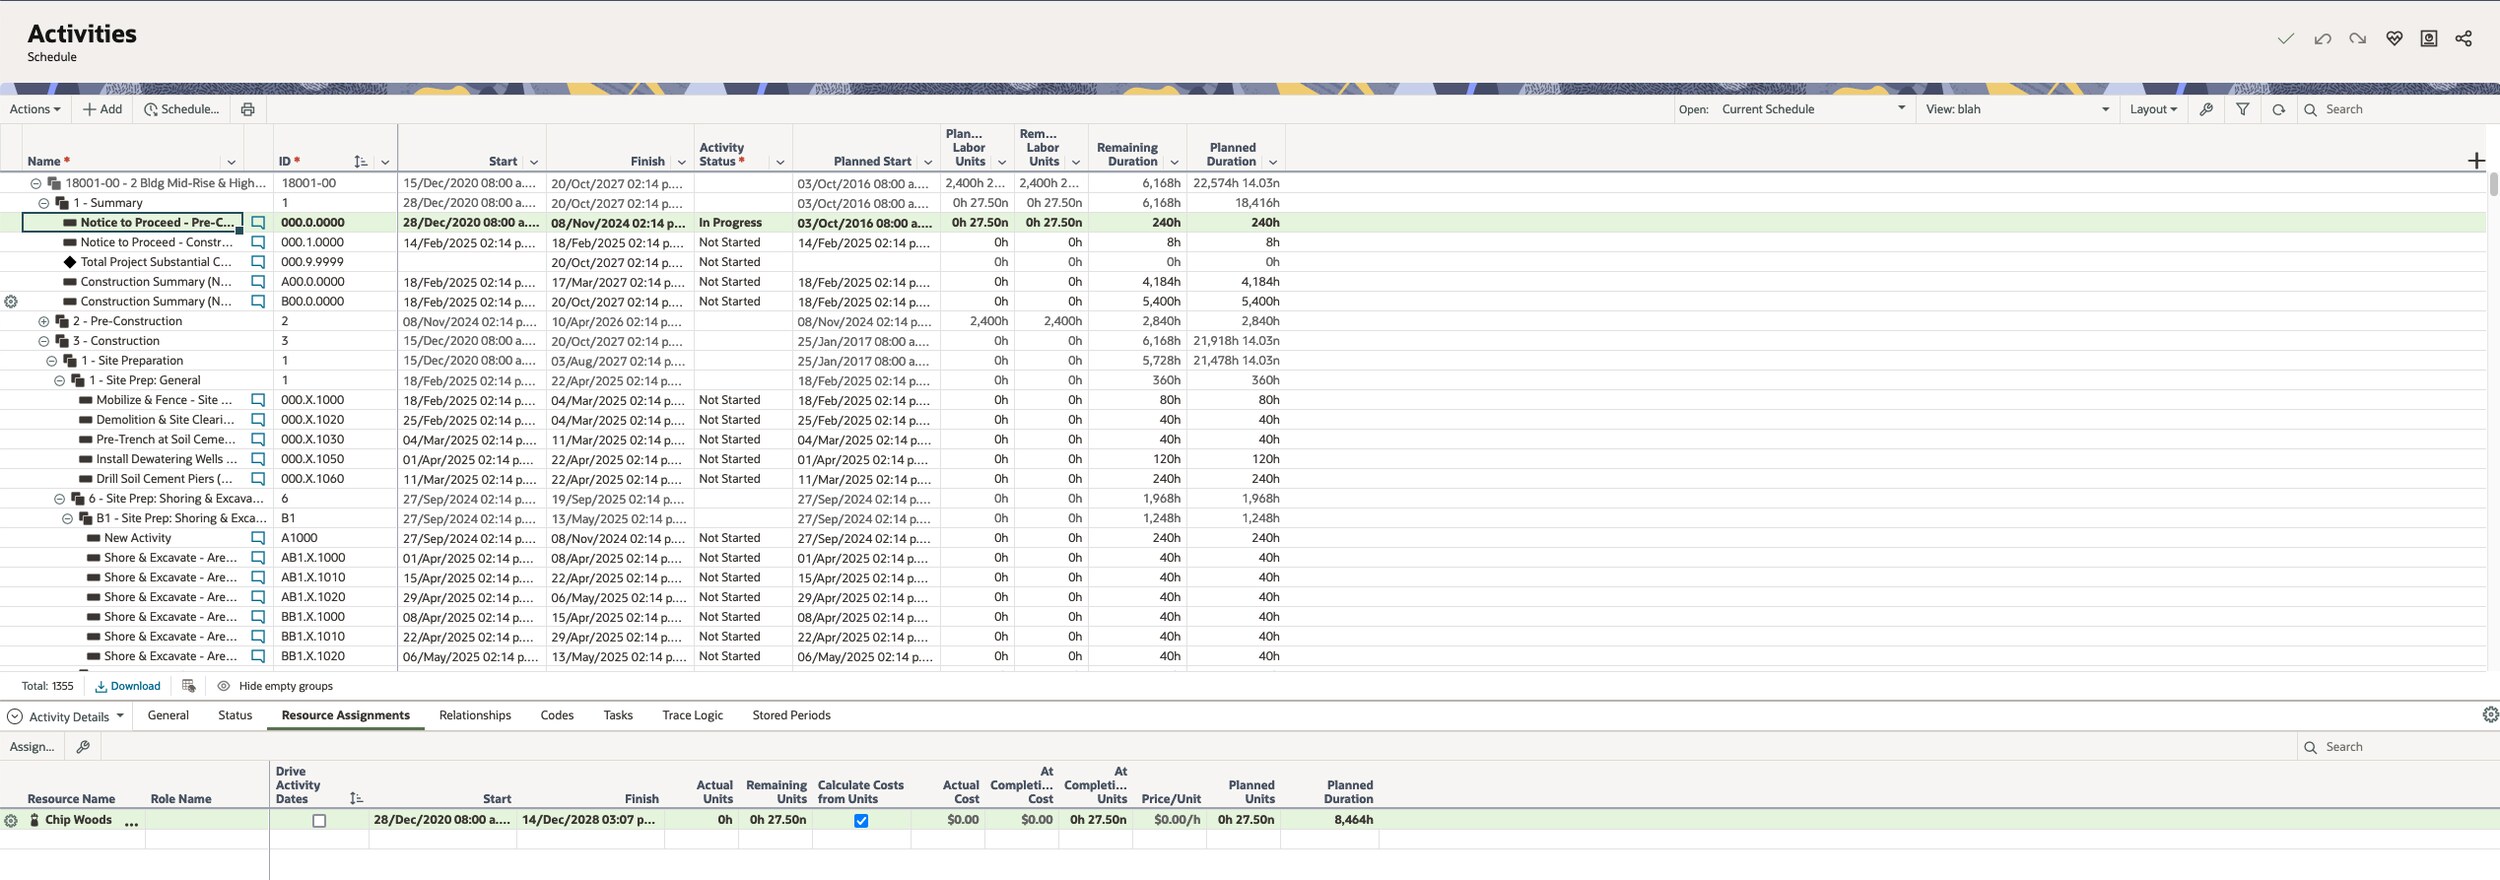
Activities
Once your WBS is complete, the next step is to add activities to your schedule. Activities represent the lowest level of your WBS and specify the work that must be completed for your project.

General tab
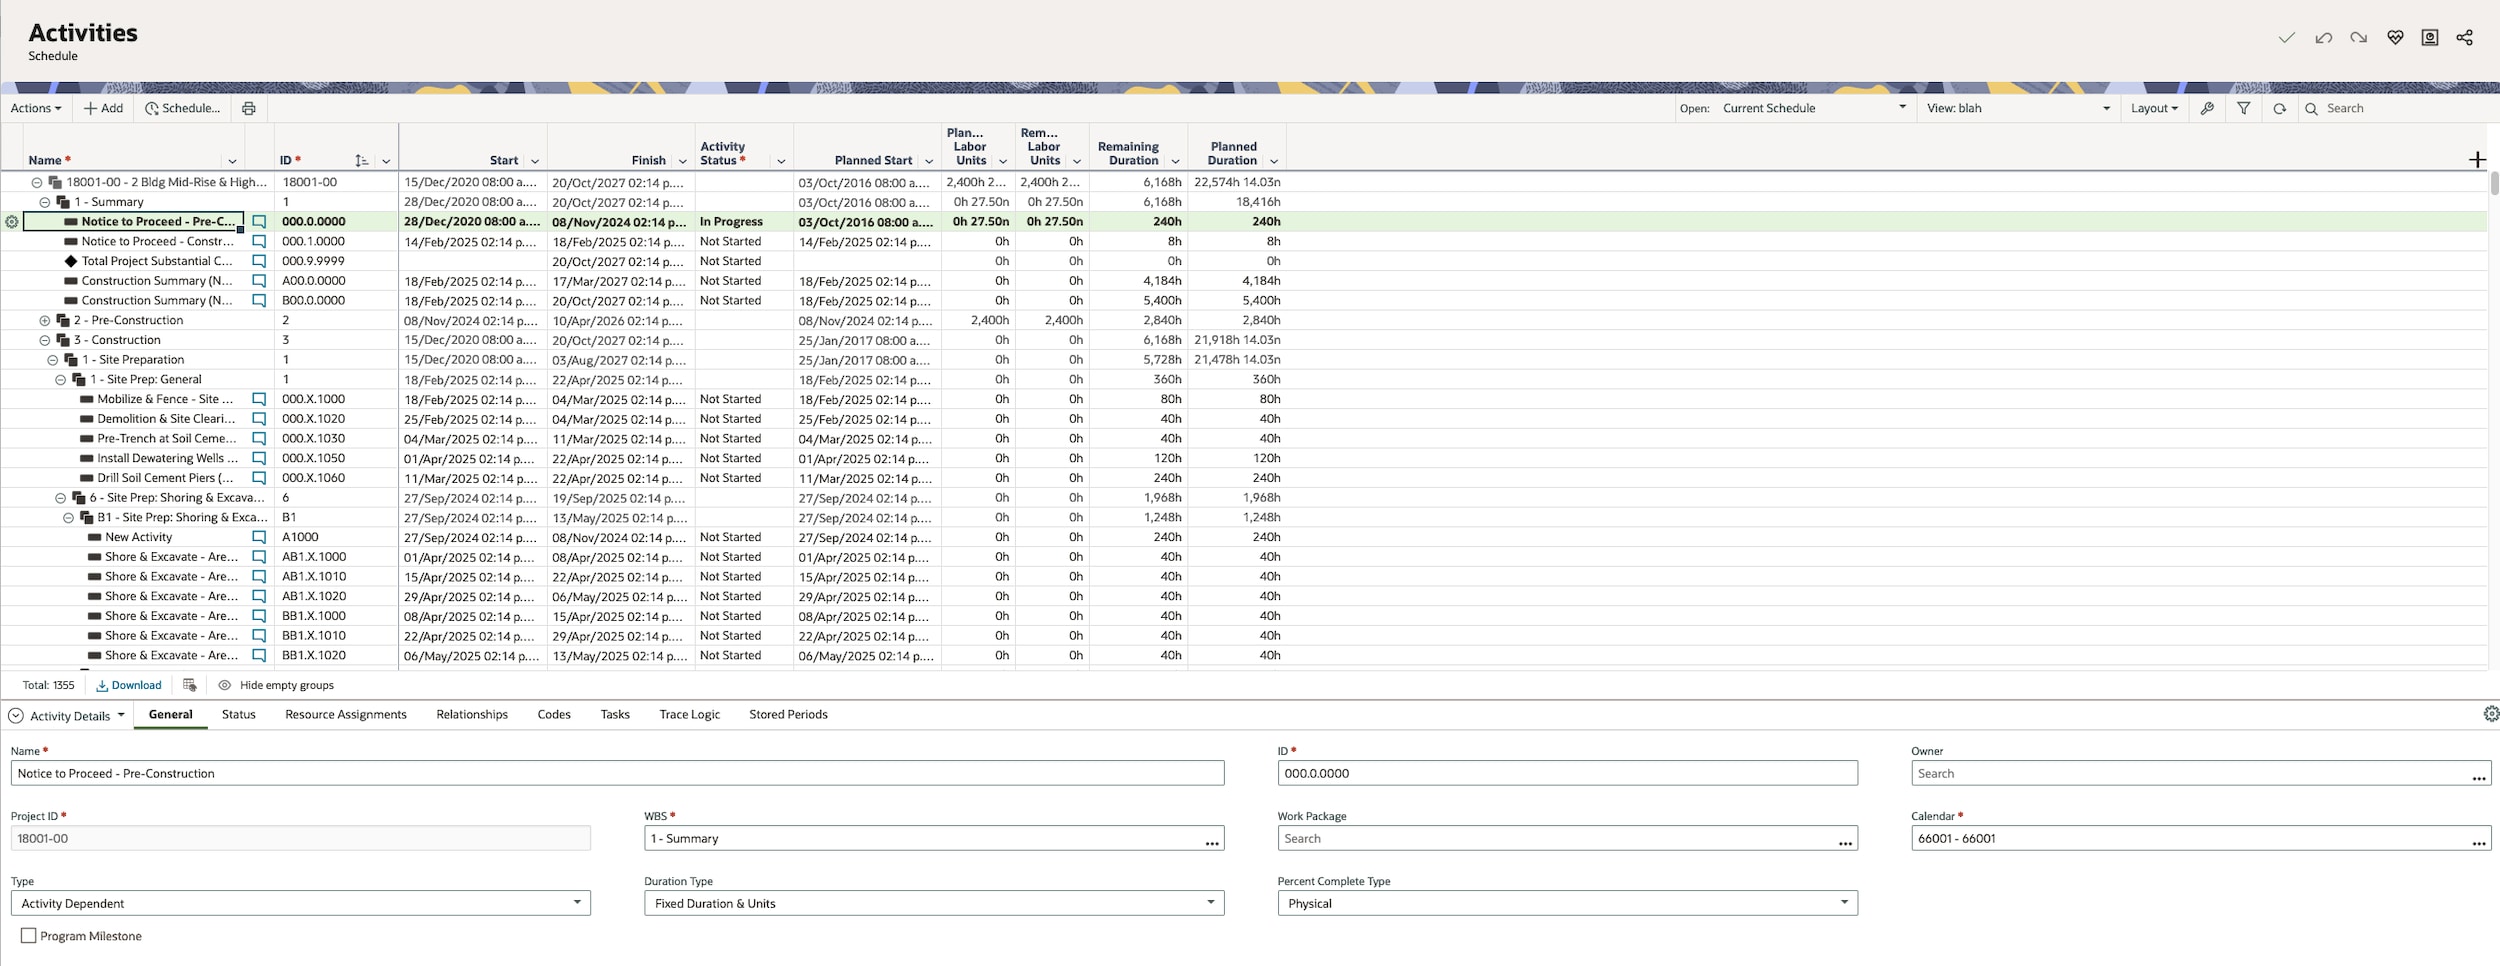
For easy identification, use clear and concise activity names. It's common to include a verb in the title, such as pour foundation or install windows, to clearly describe the work to be performed. Assign the activity to the applicable WBS element so related activities are grouped together.
Select the correct calendar, as it specifies the available workdays and daily work hours for an individual activity.
Choose the activity type, duration type, and percent complete type. Review the available options and select the types that are applicable for each activity. You can save time by setting default types for all activities.
Status tab
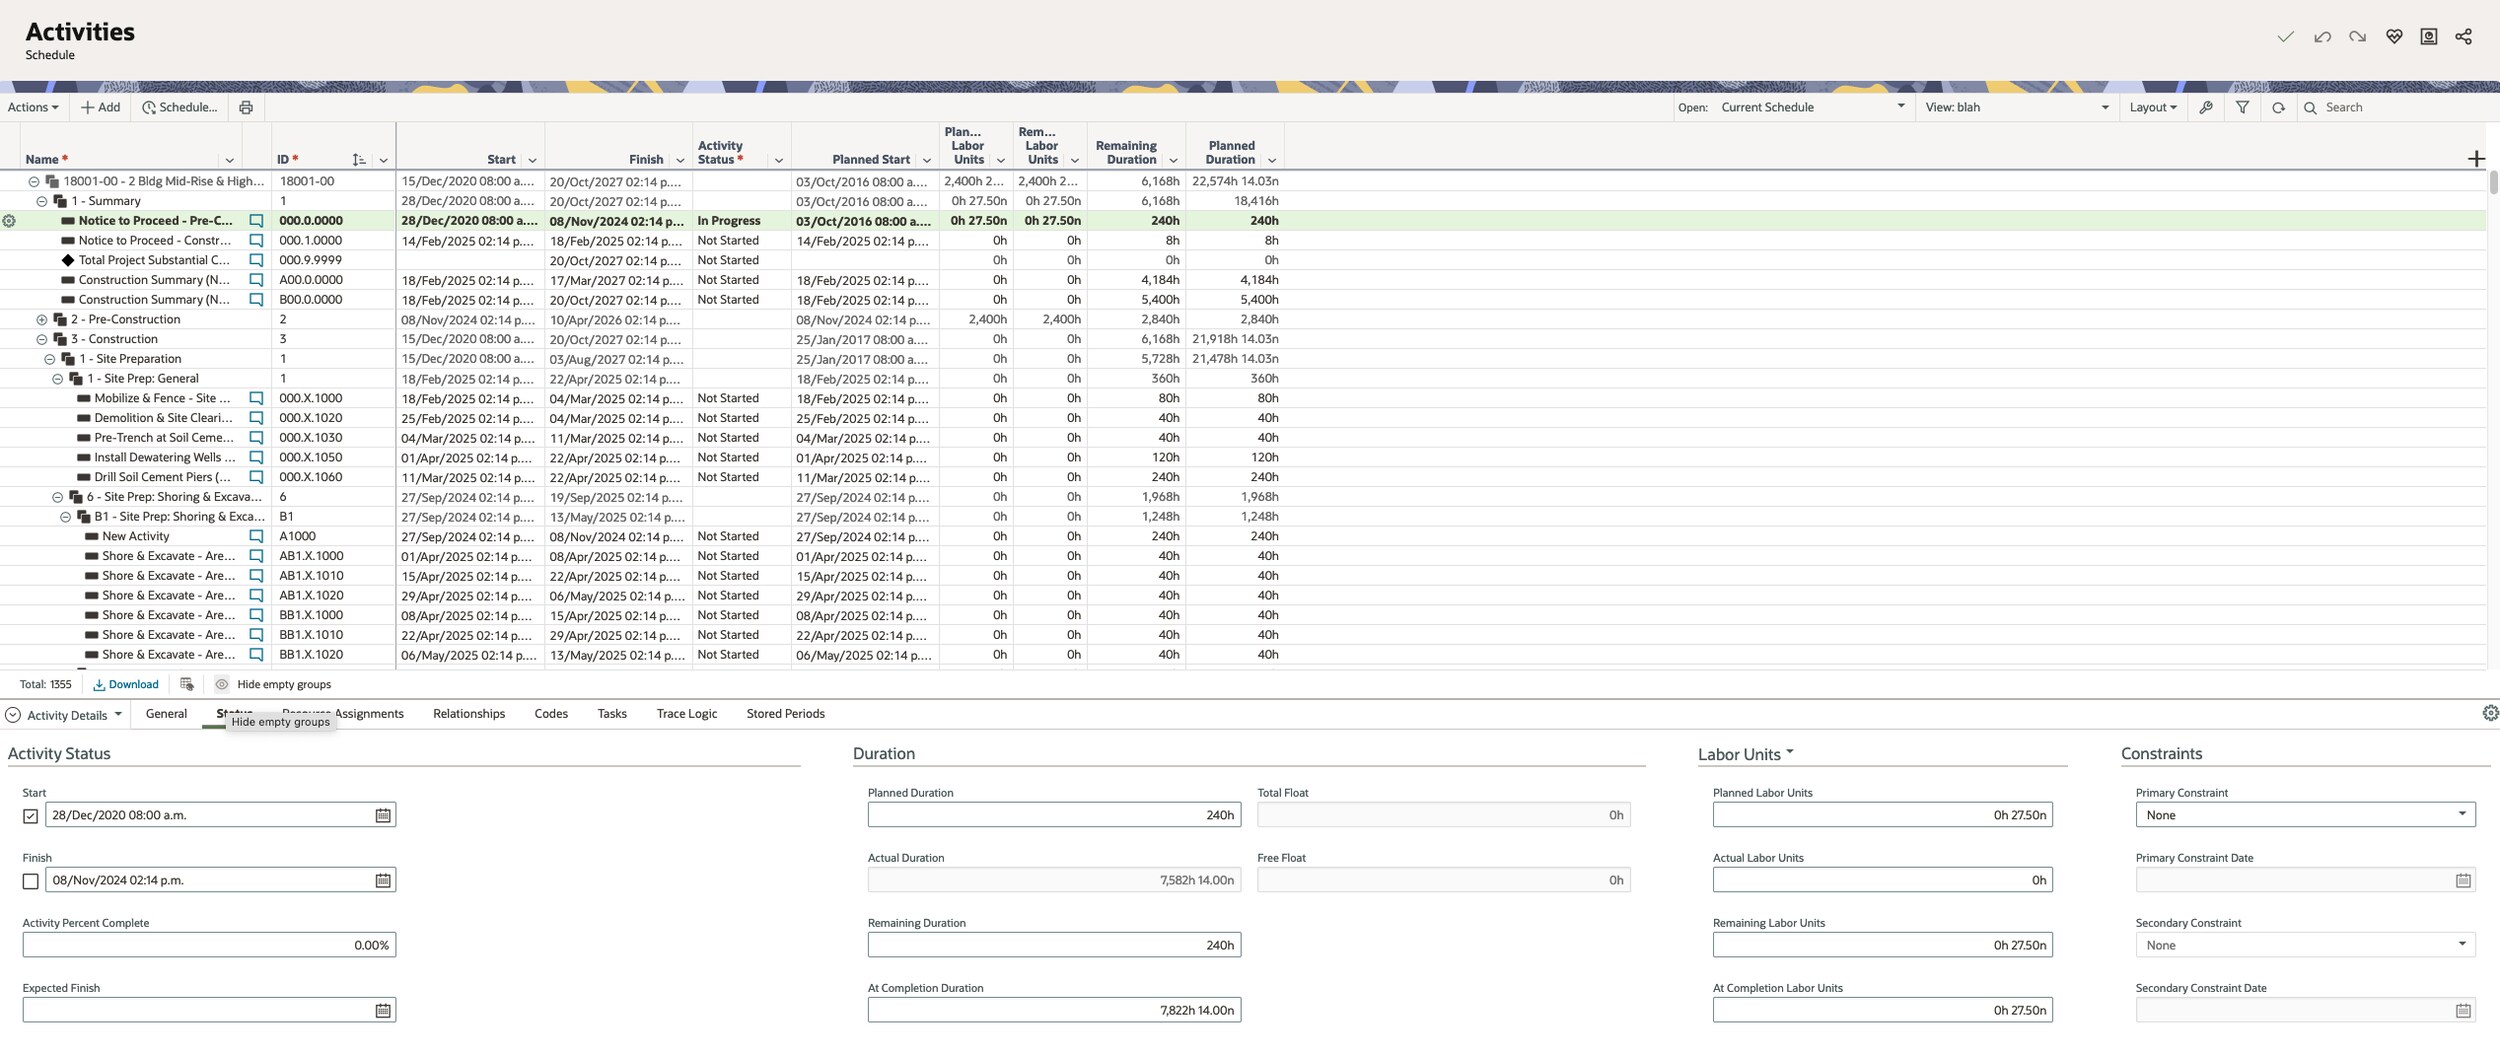
The Status tab is where you'll enter status information for your activities based on the percent complete type you chose. For example, if you chose Units as the percent complete type, enter applicable information in the Labor Units section. Updating the duration or labor units will modify the percent complete value. If you chose Physical as the percent complete type, then you'll manually enter the percent complete based on the amount of work completed on the activity.
We recommend that you use activity constraints only as necessary, as they can impact the overall project schedule.
Note that the sections in the Status tab are available to view as columns in the activities table, if desired.
Relationships
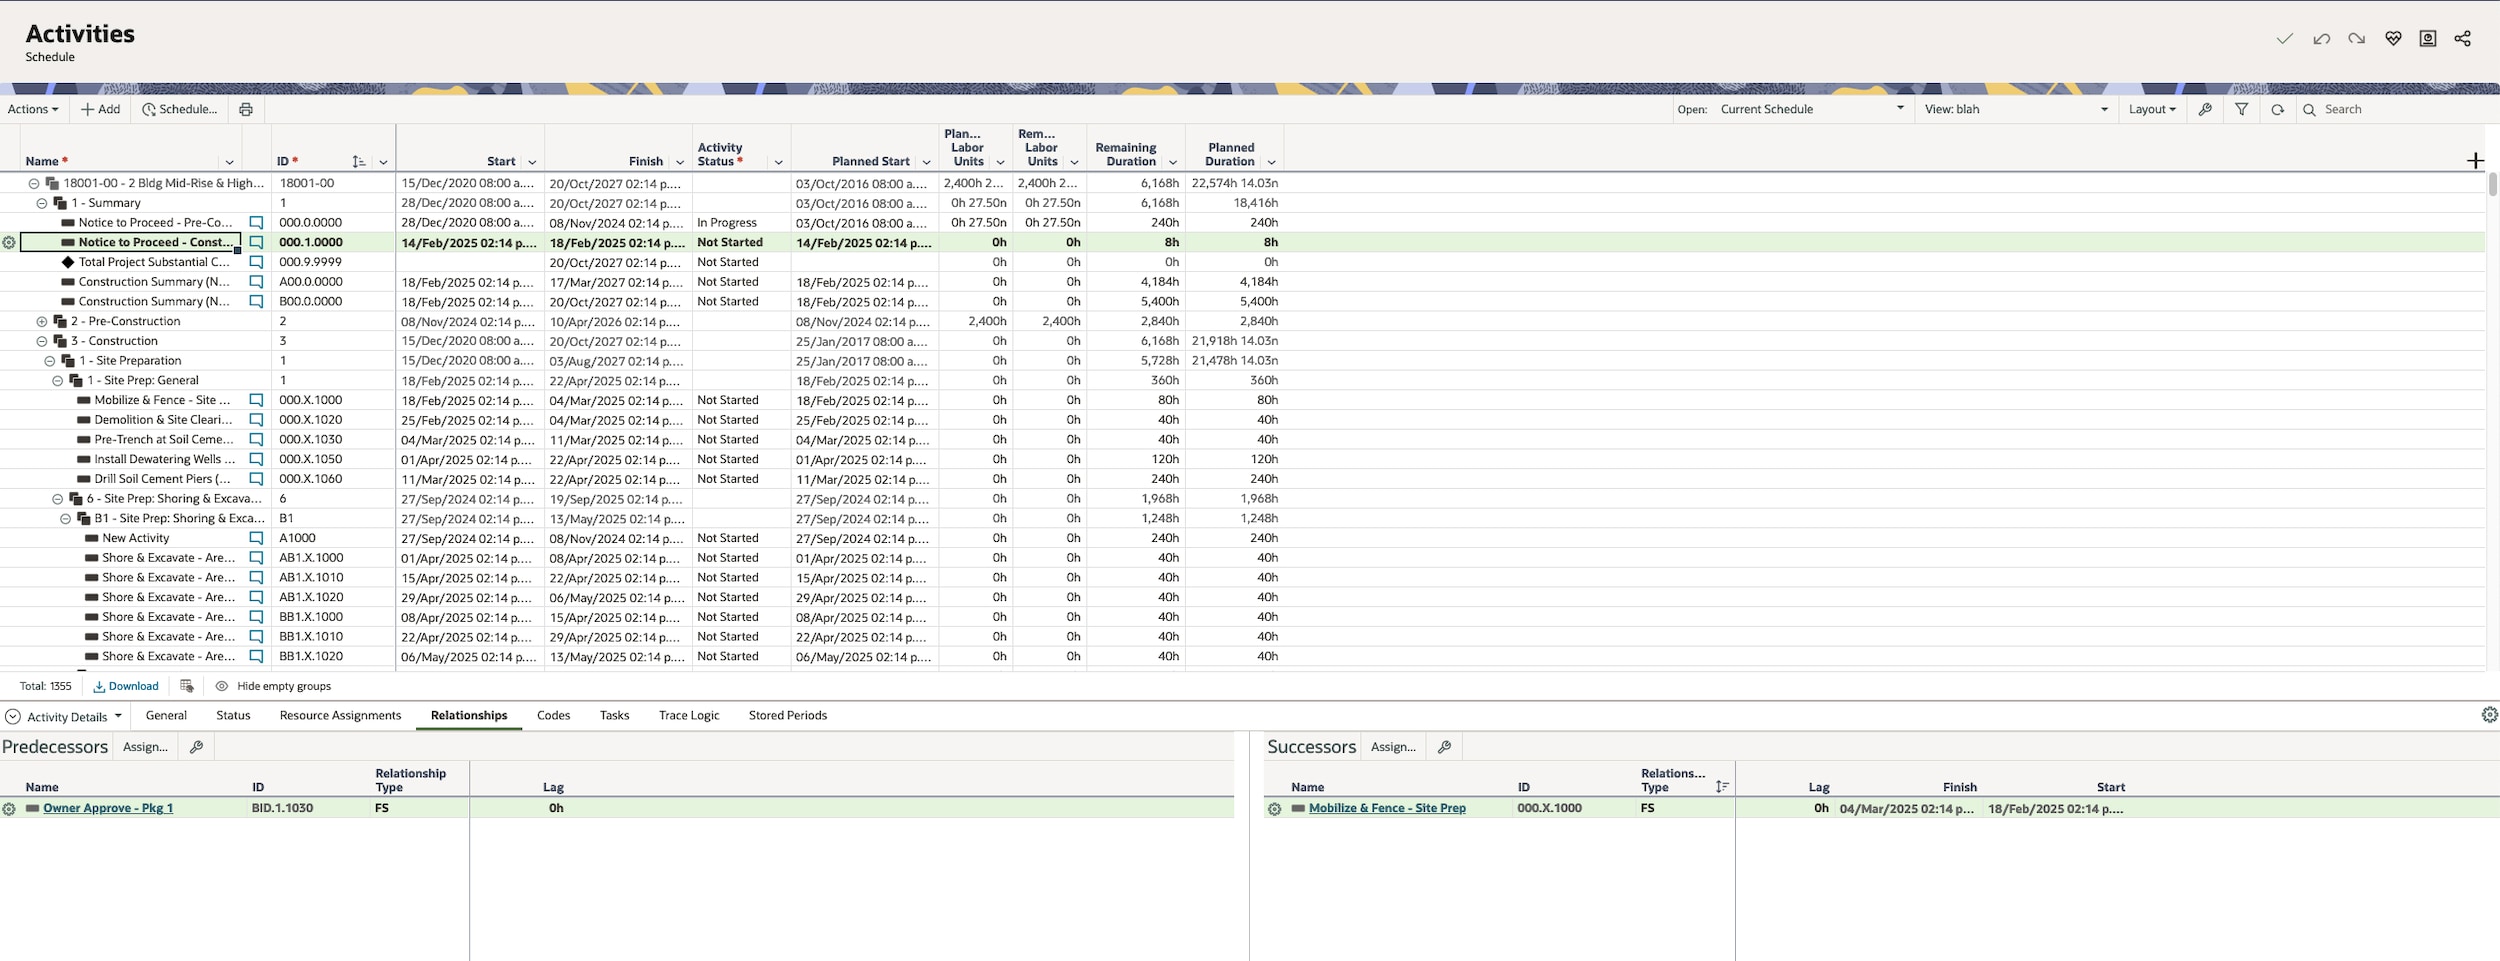
Select the correct successor(s) and/or predecessor(s) for each activity to accurately sequence the work to be performed. Activity start and finish dates will be based on these relationships when the project is scheduled. The work sequence determines the critical path and any potential scheduling conflicts.
Schedule your project
While adding activities, schedule your project periodically to determine the critical path.
Other considerations
If desired, use the Resource Assignments tab to assign one or more resources to an activity. Check out this article for more information on resources and roles.
Use activity codes and configured fields to classify and group activities by similar characteristics or attributes together, such as location or work discipline. This is helpful when managing a large number of activities, so you can filter and group them as needed.
Primavera Cloud is flexible and allows you to view project information according to your preferences. Check out this article to see available view and layout options.