Categories
What are categories?
Categories are used to organize a particular log.
Adding categories
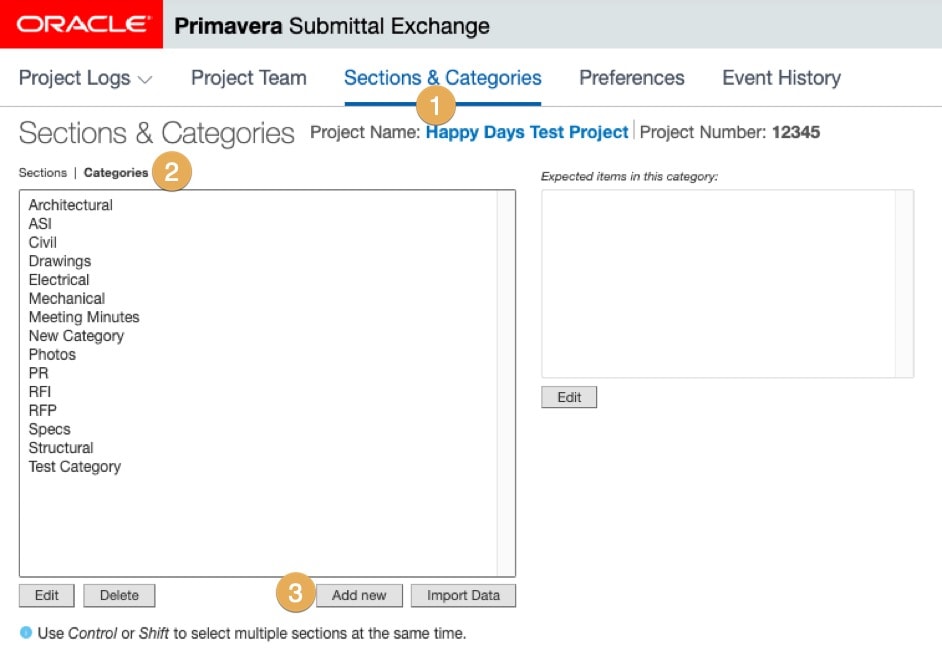
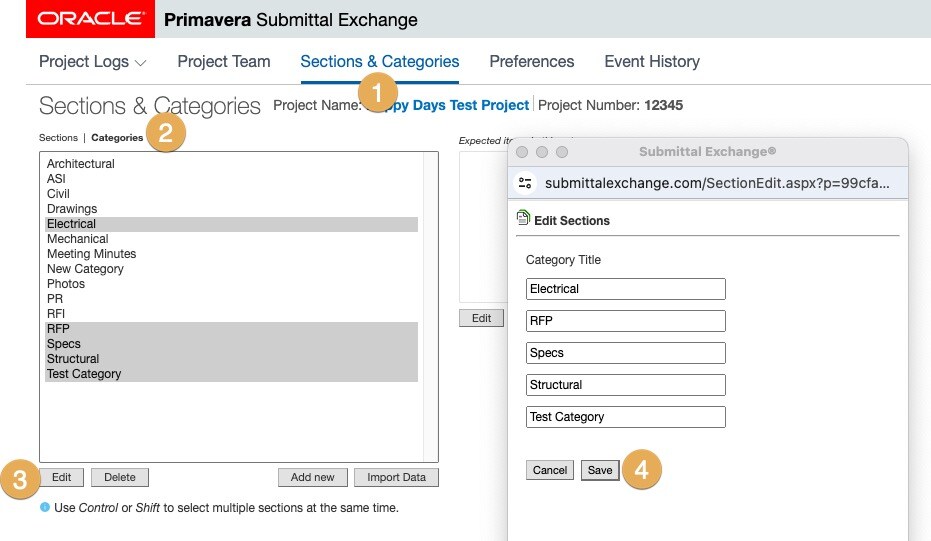
- Click on Sections & Categories.
- Above the box in the upper-left corner click on Categories.
- Click Add new in the lower- right corner under table.
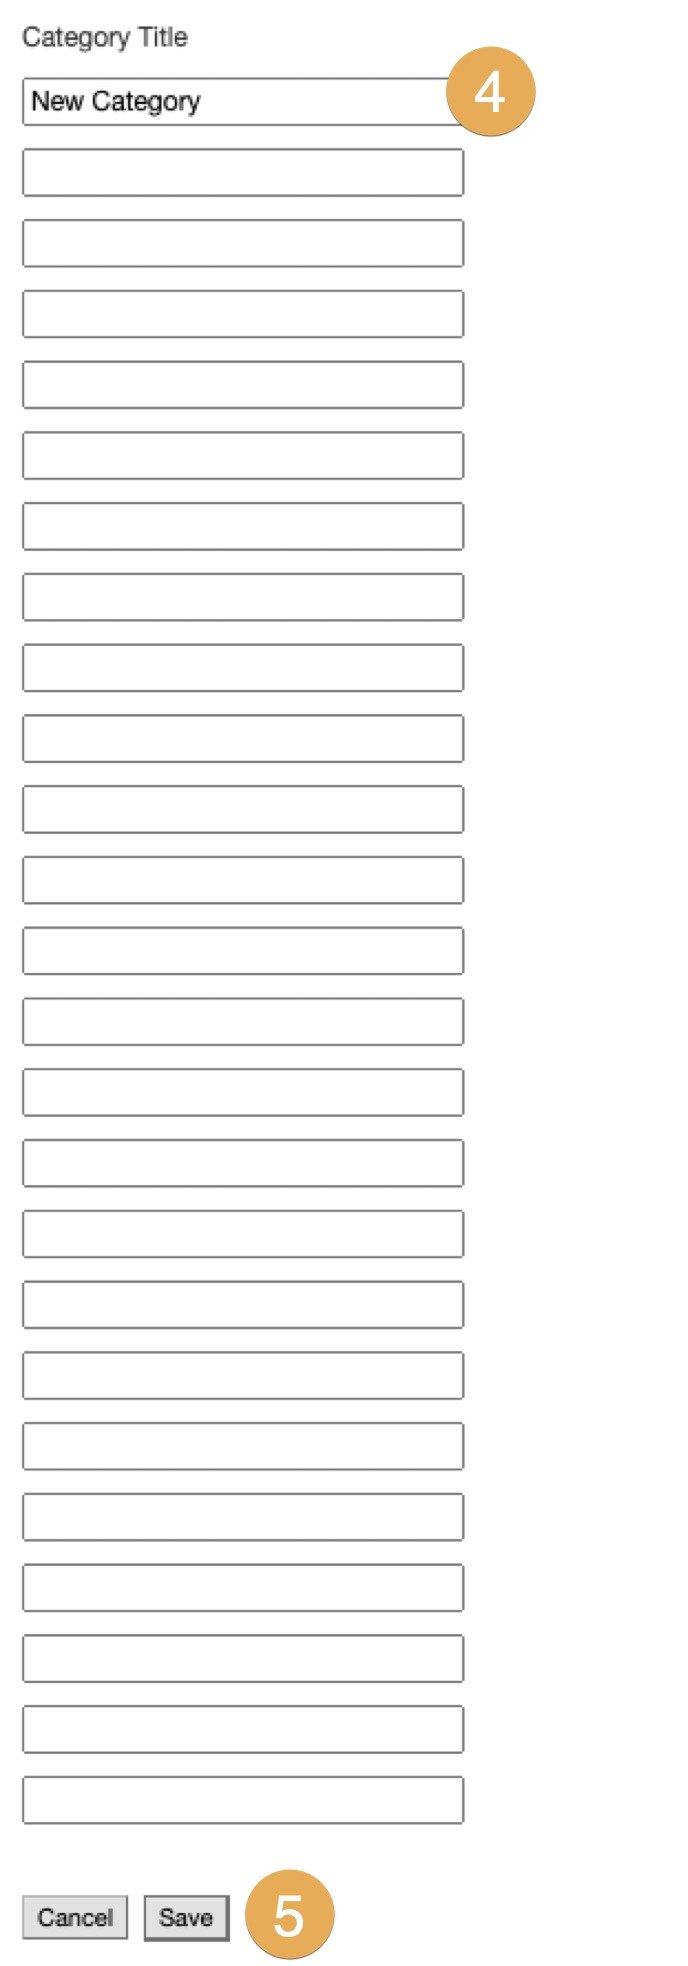
4. Type categories names, as needed.
5. Select Save at the bottom of the dialog box. The system adds the new categories.
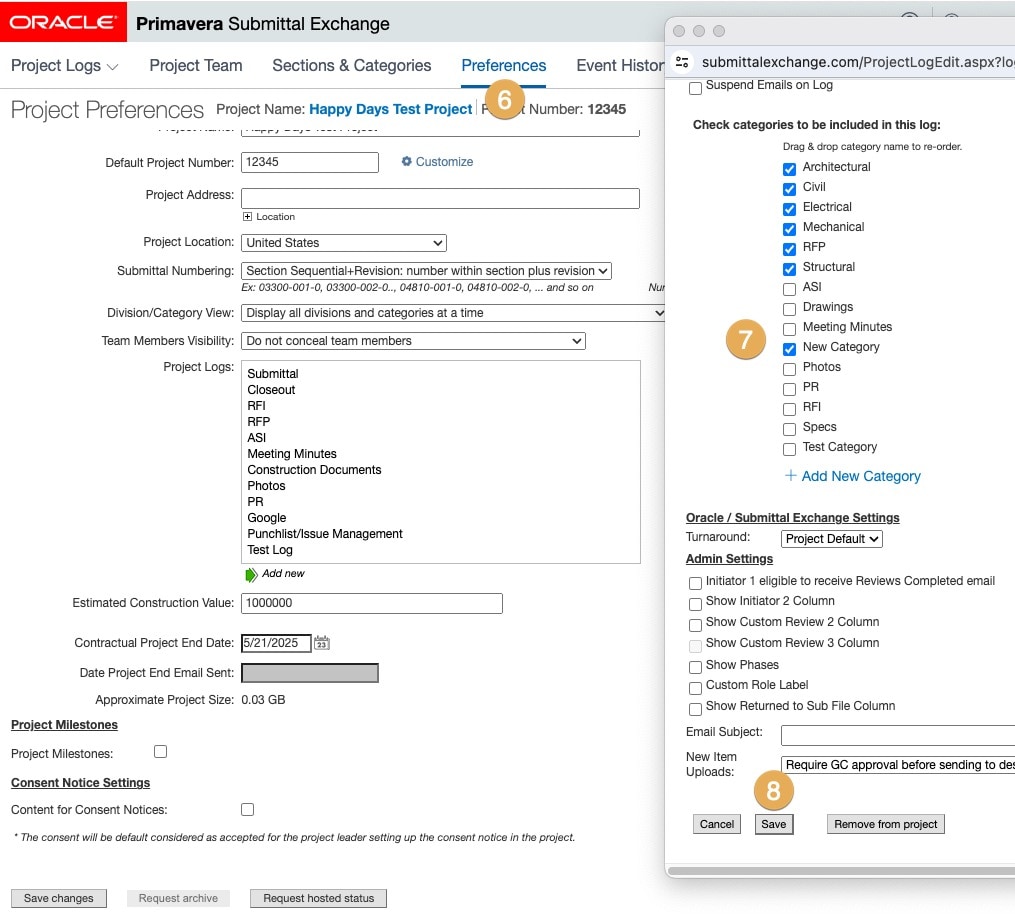
6. Click Preferences to add new categories to the applicable log.
7. When the box opens, scroll down and check the box of the new categories.
8. Click Save at the bottom of the dialog box.
9. Click Project Team to add new categories to all project team members profiles.
10. Place checkmarks in boxes next to all project team members to edit.
11. Click Manage Users then Edit Selected Users.
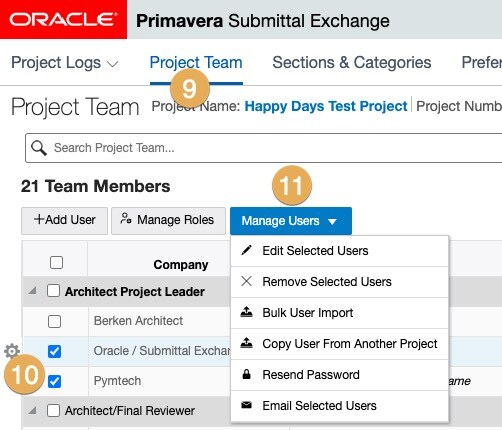
12. The Edit Team Members dialog box will open. Select the Categories drop-down and choose Add.
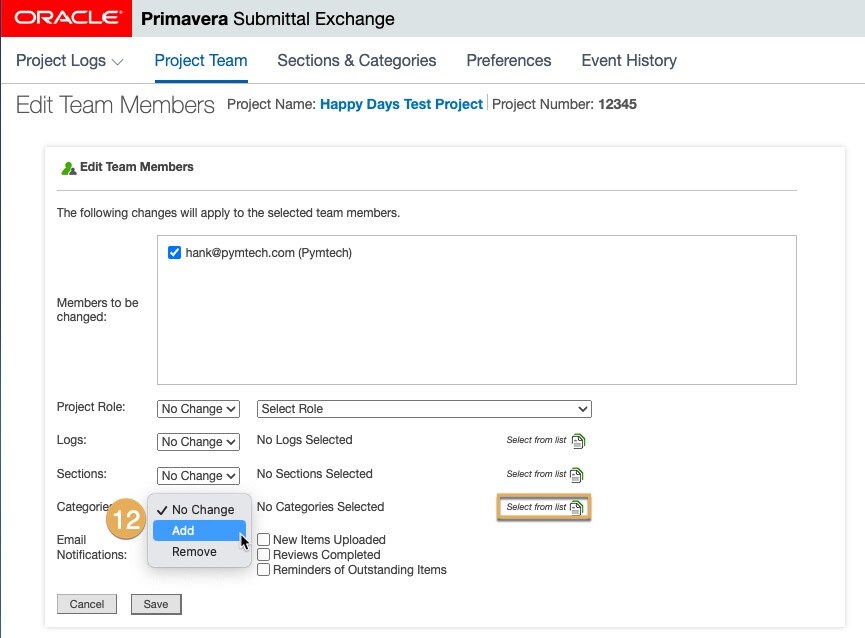
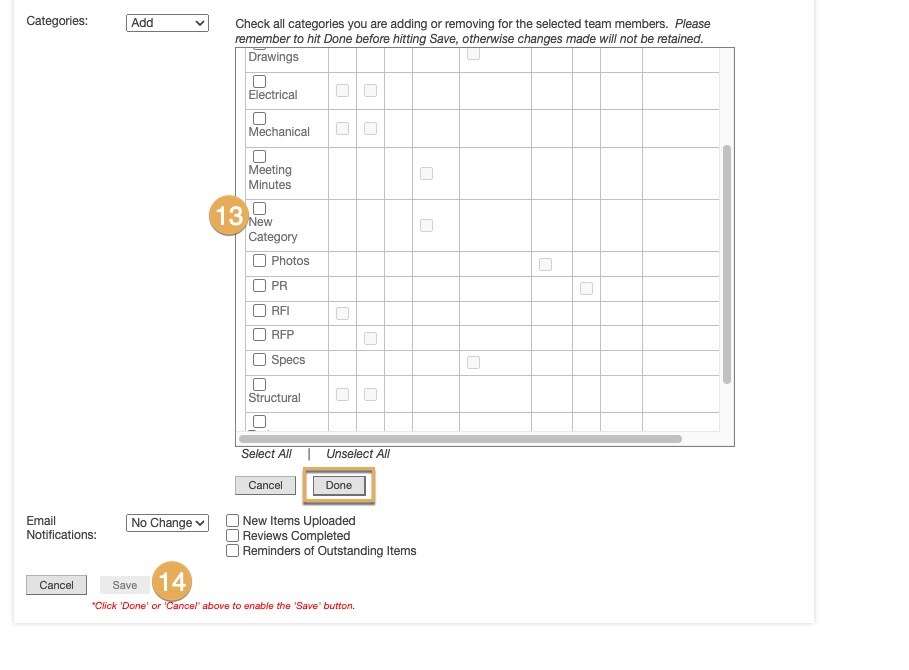
13. Next to No Categories Selected: click on Select from list. Place a check mark in the category(ies) you are needing to add to that log and click Done.
14. Click Save.
Editing categories
- Click on Sections & Categories.
- Click on Categories to edit. You can click on multiple categories by pressing CTRL and clicking on all sections to edit.
- Then click Edit.
- Make your edits and click Save.
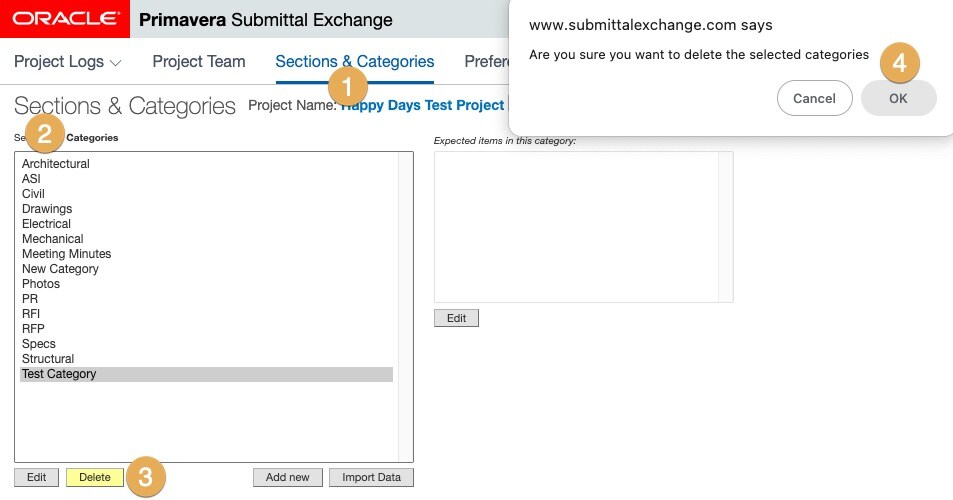
Deleting categories
- Click Sections & Categories.
- Click Categories.
- Click Delete below the left table. Click OK in pop up window.
Note: the system will not allow you to delete a category if there are documents uploaded to that category. - After clicking OK, the category will disappear from the list in the left table if no documents have been uploaded for the category.