Adding a Log
What is a log?
Logs are like drawers to a file cabinet. Use them for organizing information, like storing and reviewing documents.
Why should you add a log?
Logs help maintain official documentation over the course of a project lifecycle. Keep records of job site progress, updates, issues, setbacks, and weather issues. These records help construction companies regularly update other project stakeholders.
Tip!
If you add a new category, you will also need to give users access to the new category, including yourself. This is done on the Project Team tab.
How to add a log
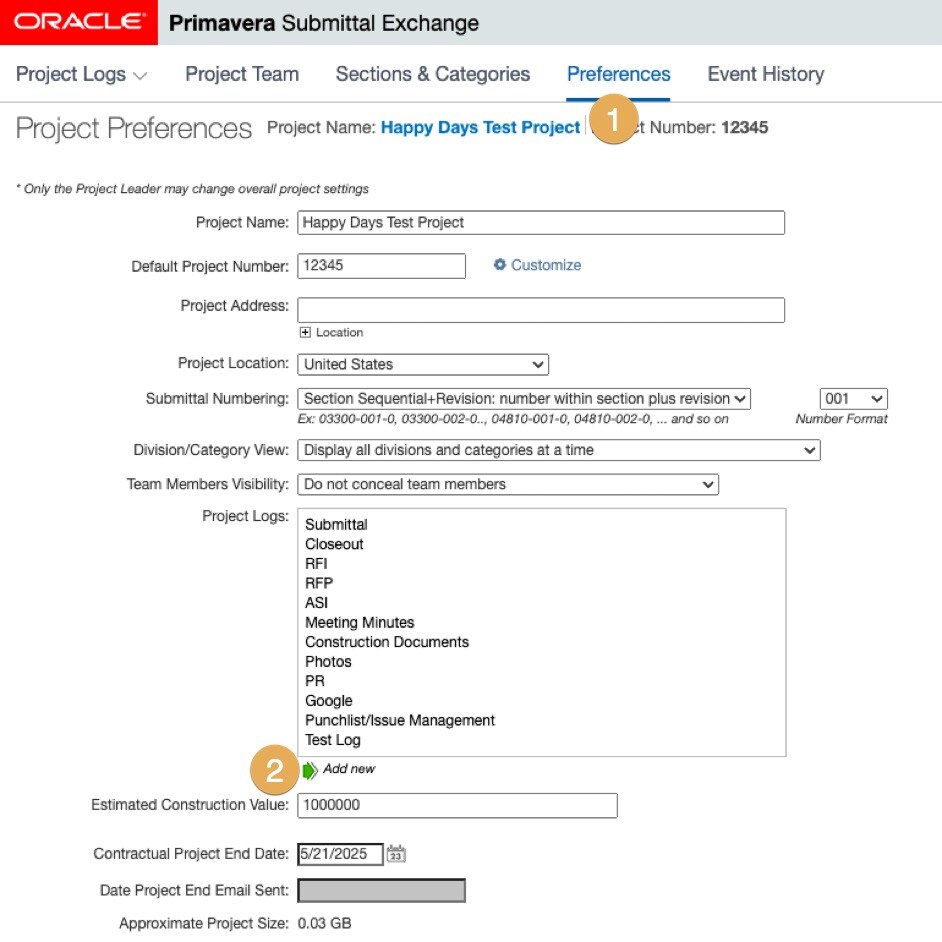
- Click Preferences.
- Under the current list of Project Logs, box click next to the green arrow Add new.
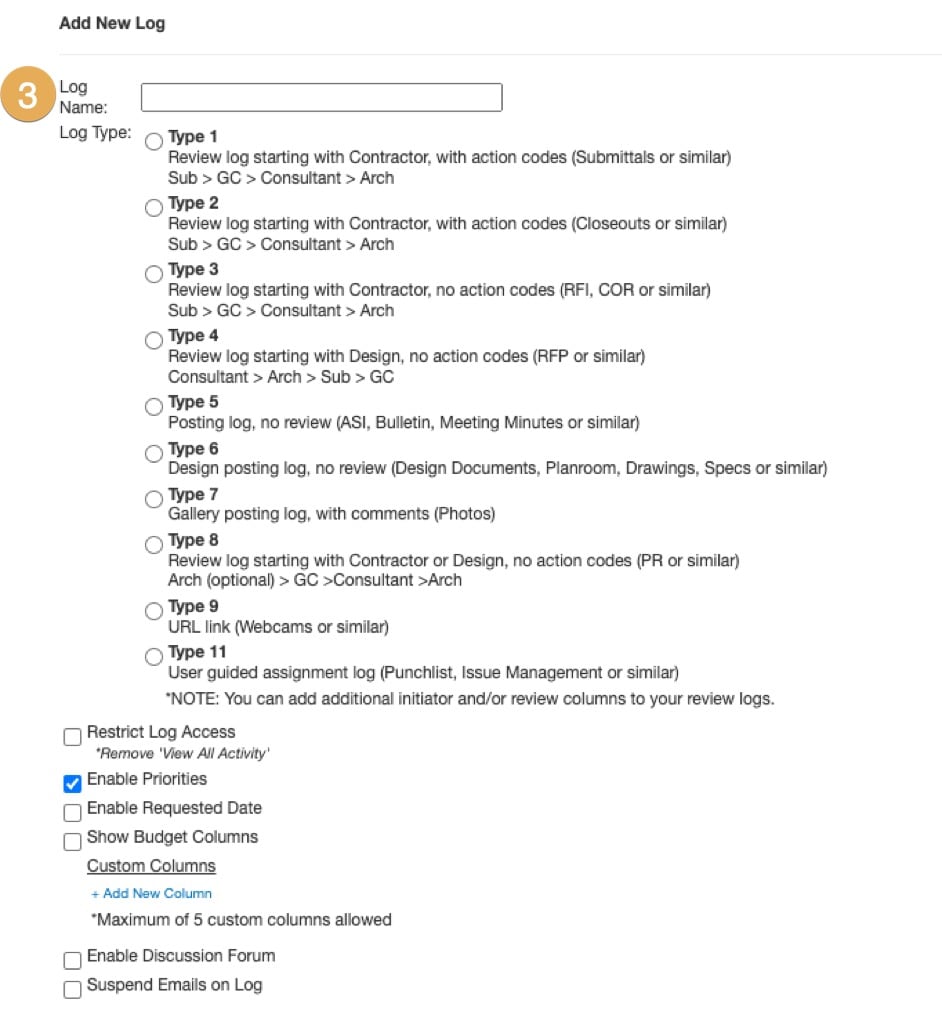
3. A new dialog box will appear. Add Log Name. Click the bubble next to log type. (To determine the log type you need please refer to "Article- Log Types.") Log Types 1 and 2 do not require a category box. Log Types 3-8 will require you to choose at least one or more categories).
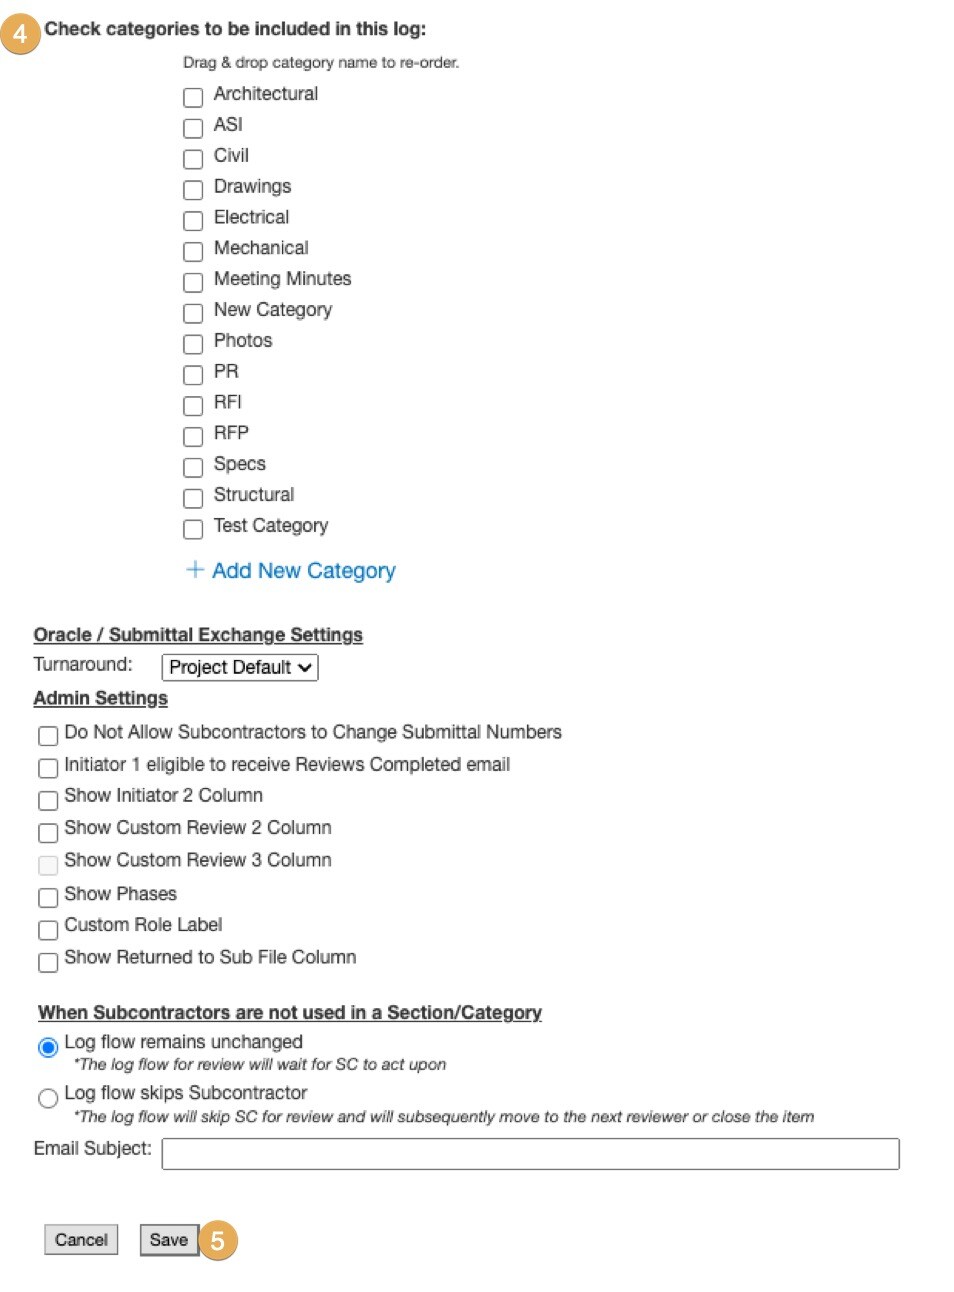
4. Check the box for any categories you need. Otherwise, you can click on Add New Category and type in new category name. Click Add. It will automatically place a checkmark in the box.
5. Click Save at the bottom of the dialog box.
Assign a new log to project team members
Once you have created your new log, assign it to all users who will need to view or be notified when submittals are uploaded.
- Click on Project Team. If all users need this new log and/or category(ies) you can click the box in the upper left corner and it will select all company names. Alternatively, select the checkbox next to an individual company name and only those selected will be notified.
- Click Manage Users and select Edit Selected Users.
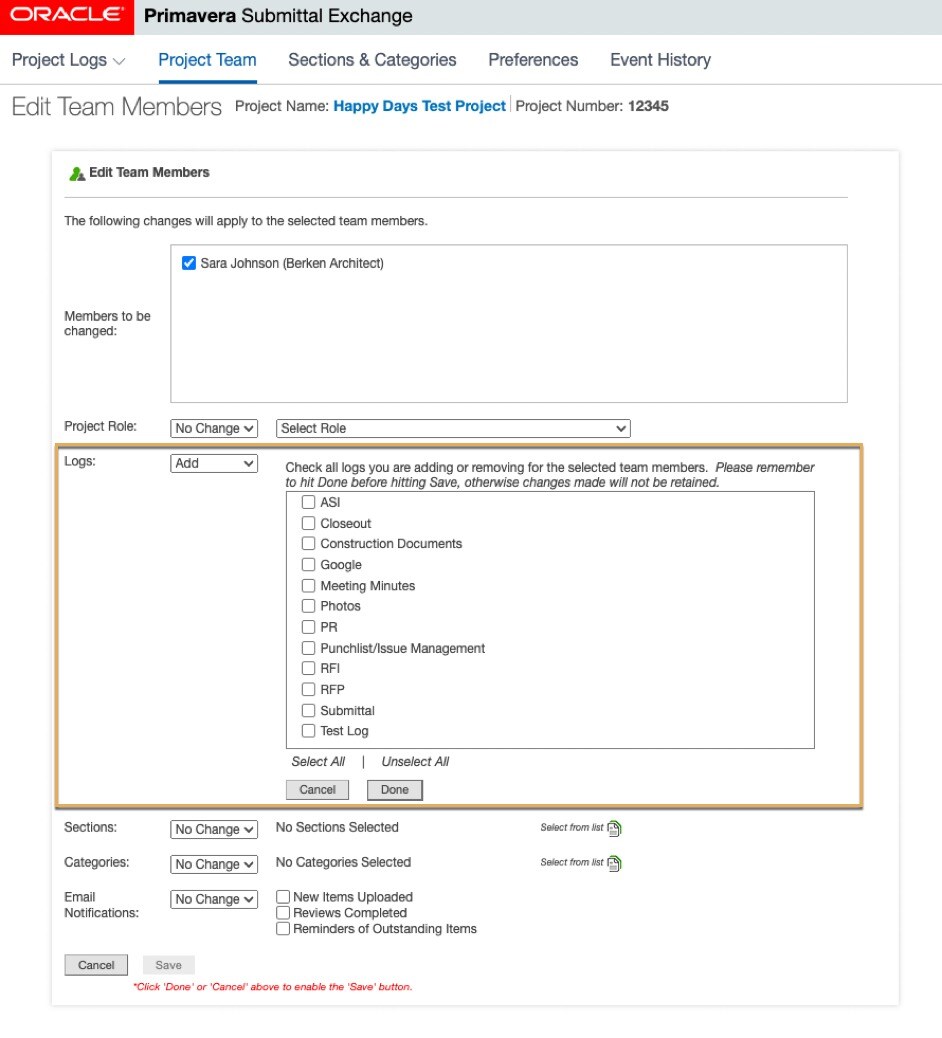
- When the pop-up box appears, click the drop-down next to Logs and select Add. To the left, you will see No Logs Select. Click on Select from list and check the box of the log you just created. Click Done.
- Click on the drop-down next to Categories and select Add. To the left of you will see No Categories Select. Click on Select from list and check the box of the categories you just created. Click Done.
- Last, click Save at the bottom of the dialog box.
Tip!
To grant access to specific users for a log and or categories, check the box next to the user. Then click on Manage Users and follow the same steps listed above.