Company Account
What is Company Account?
The Company Account allows you to:
- Update organization information
- Manage users
- Edit review codes
- Manage logos
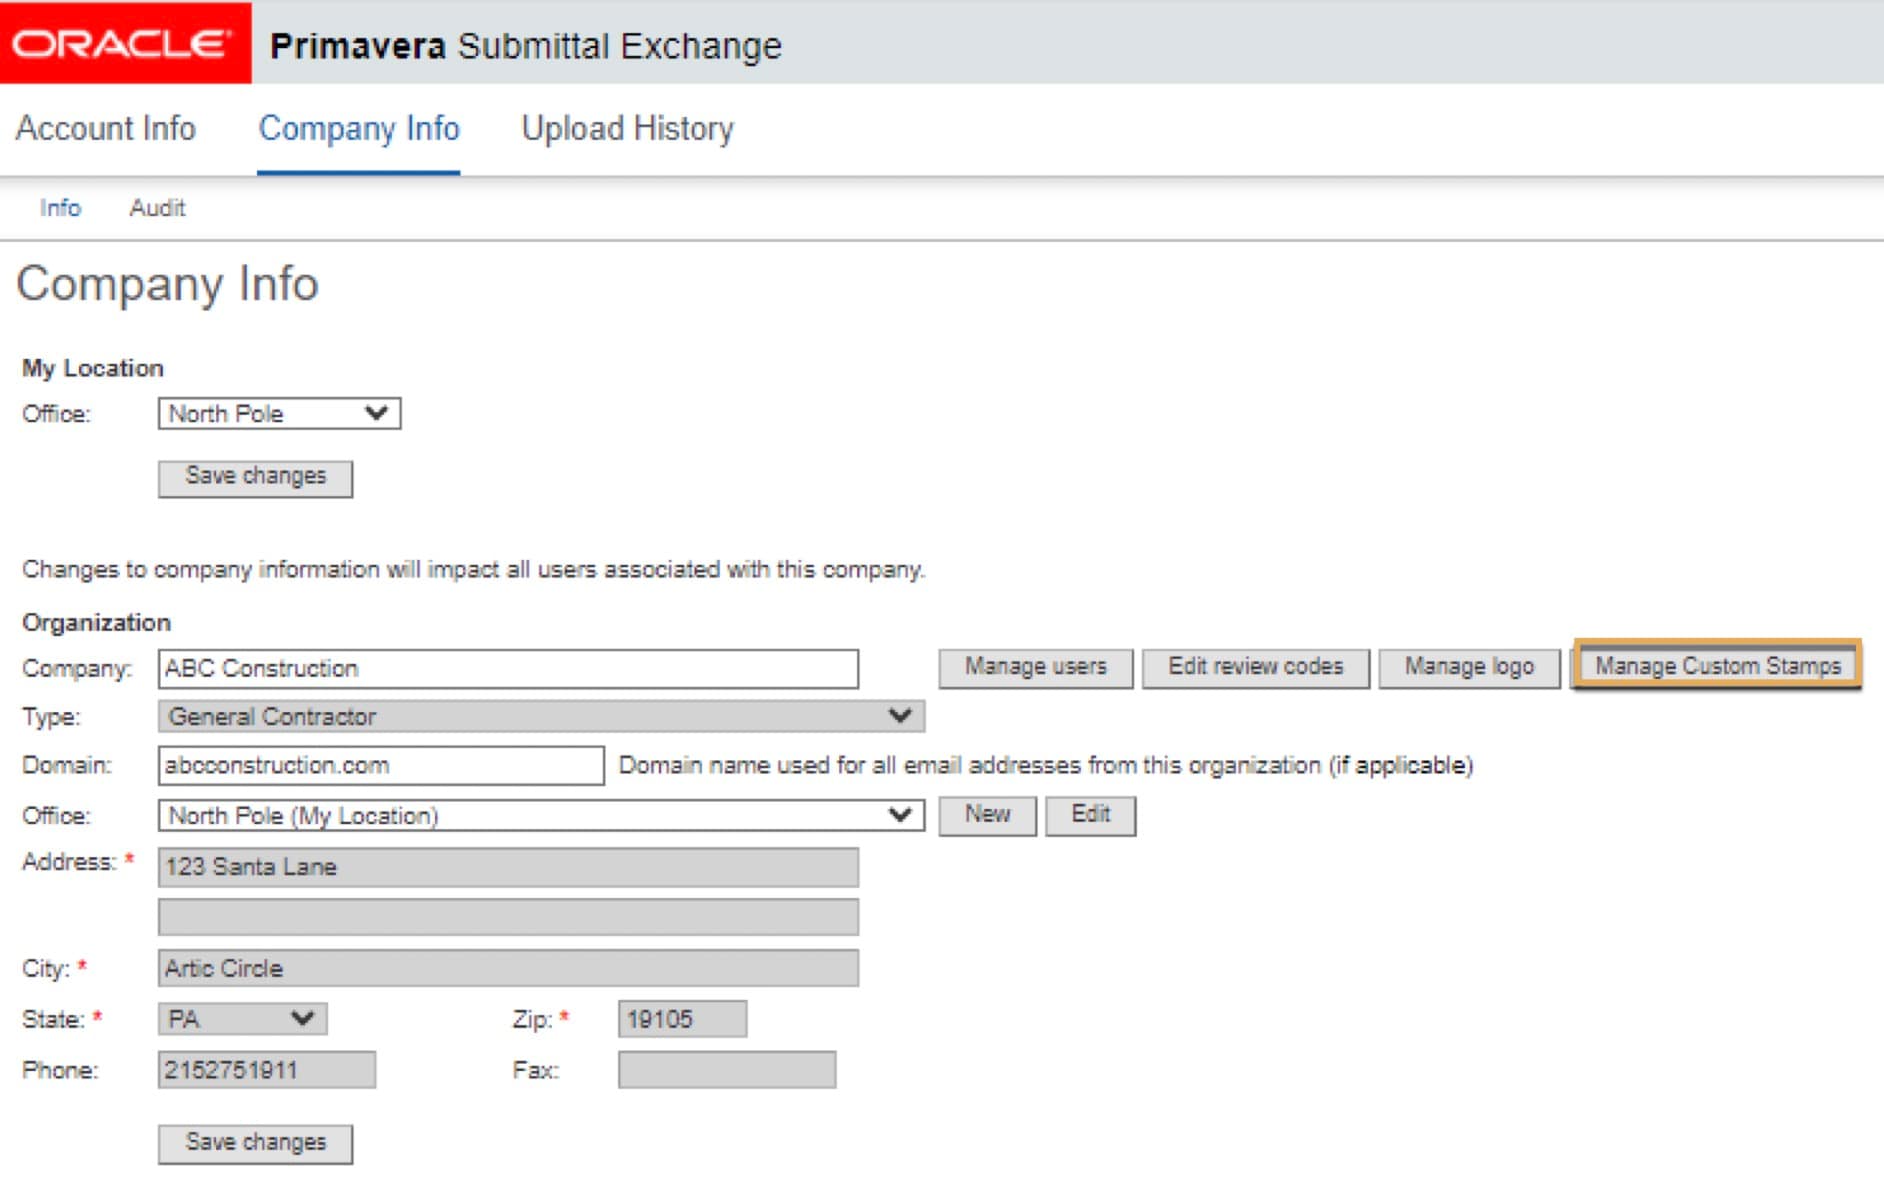
- Manage Custom Stamps
Next to your name, click the drop-down, and click on Company Account.
Tip!
Changes to the company account will be shared by all users assigned to the company.
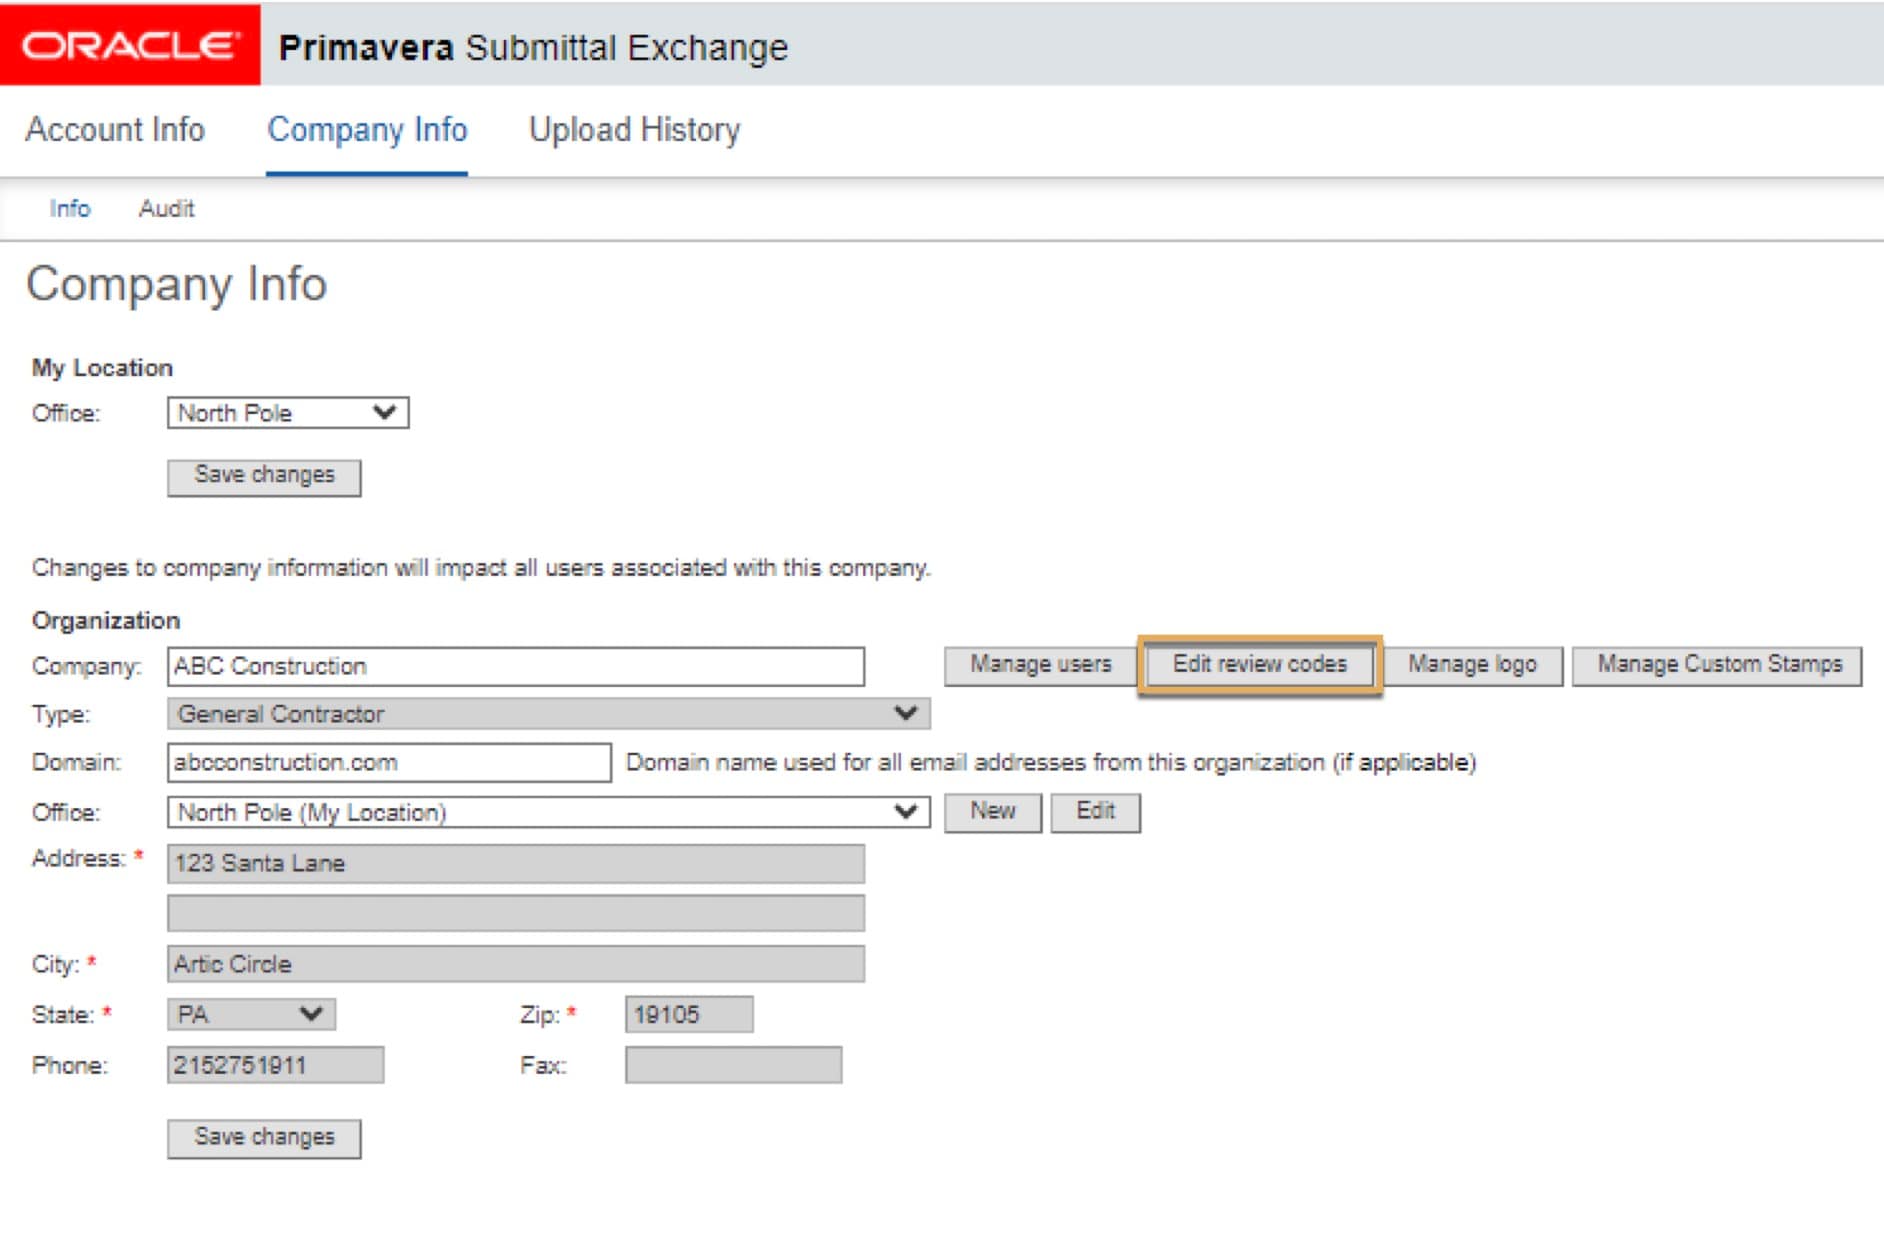
How to edit company info
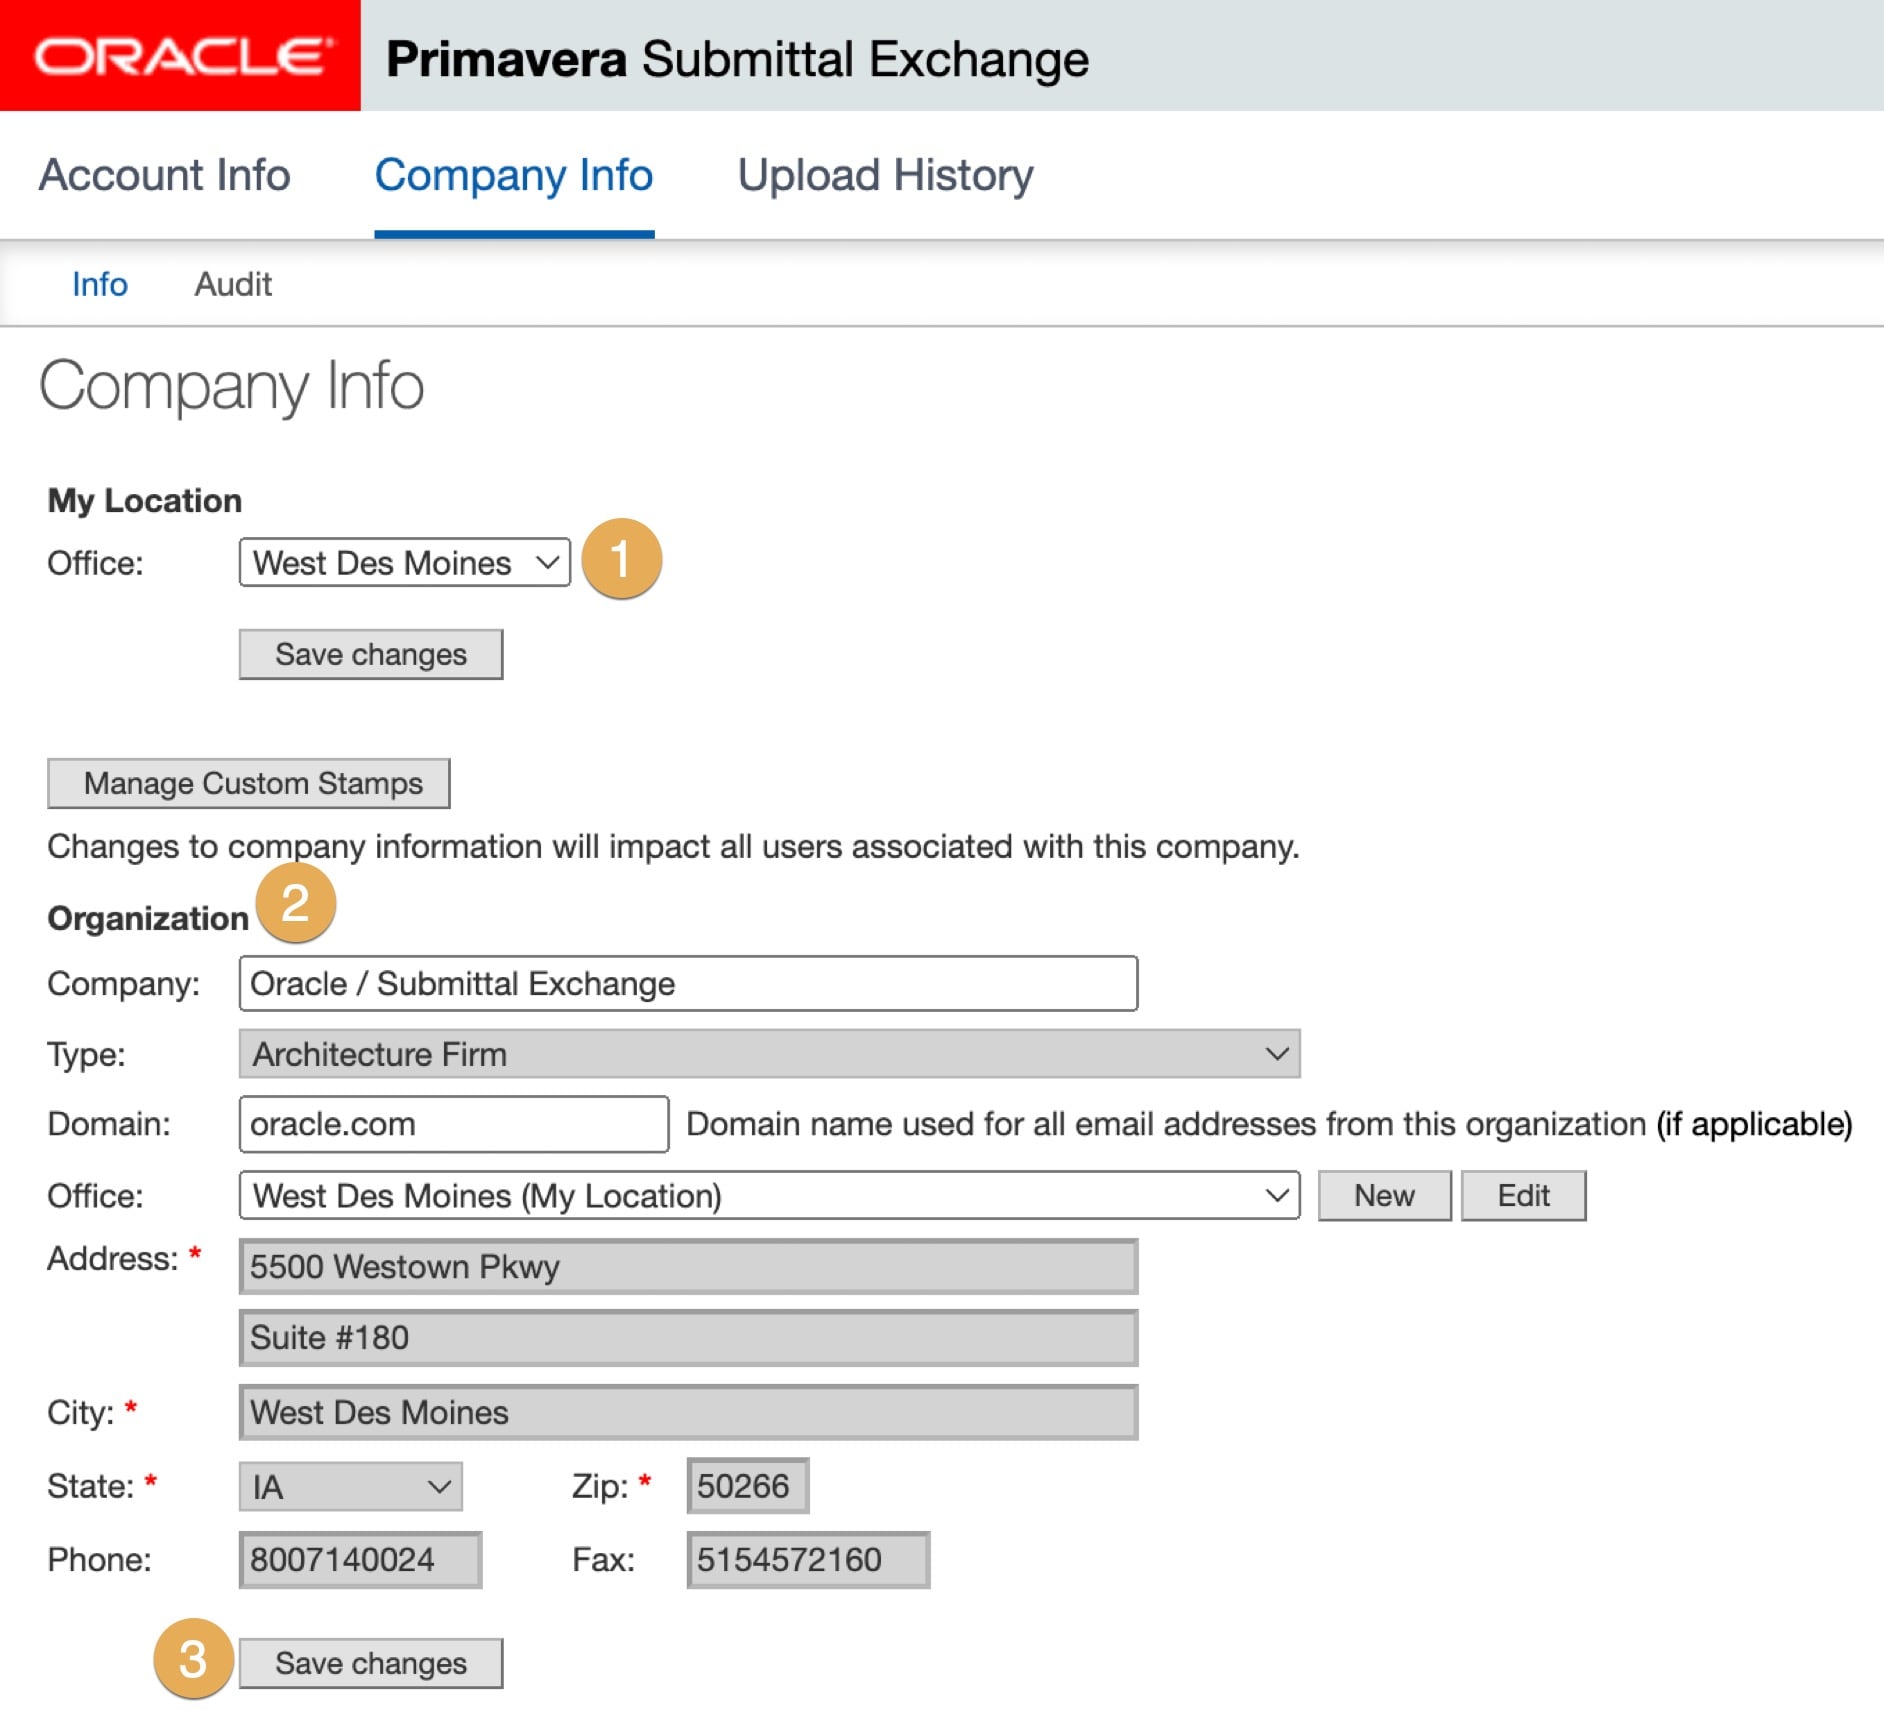
Within the Company Info tab, you can change your office location and company address.
- Under My Location, you can change the Office location by clicking on the drop down.
- Under Organization, you can change your company address.
- After you're done with your edits, click Save changes.
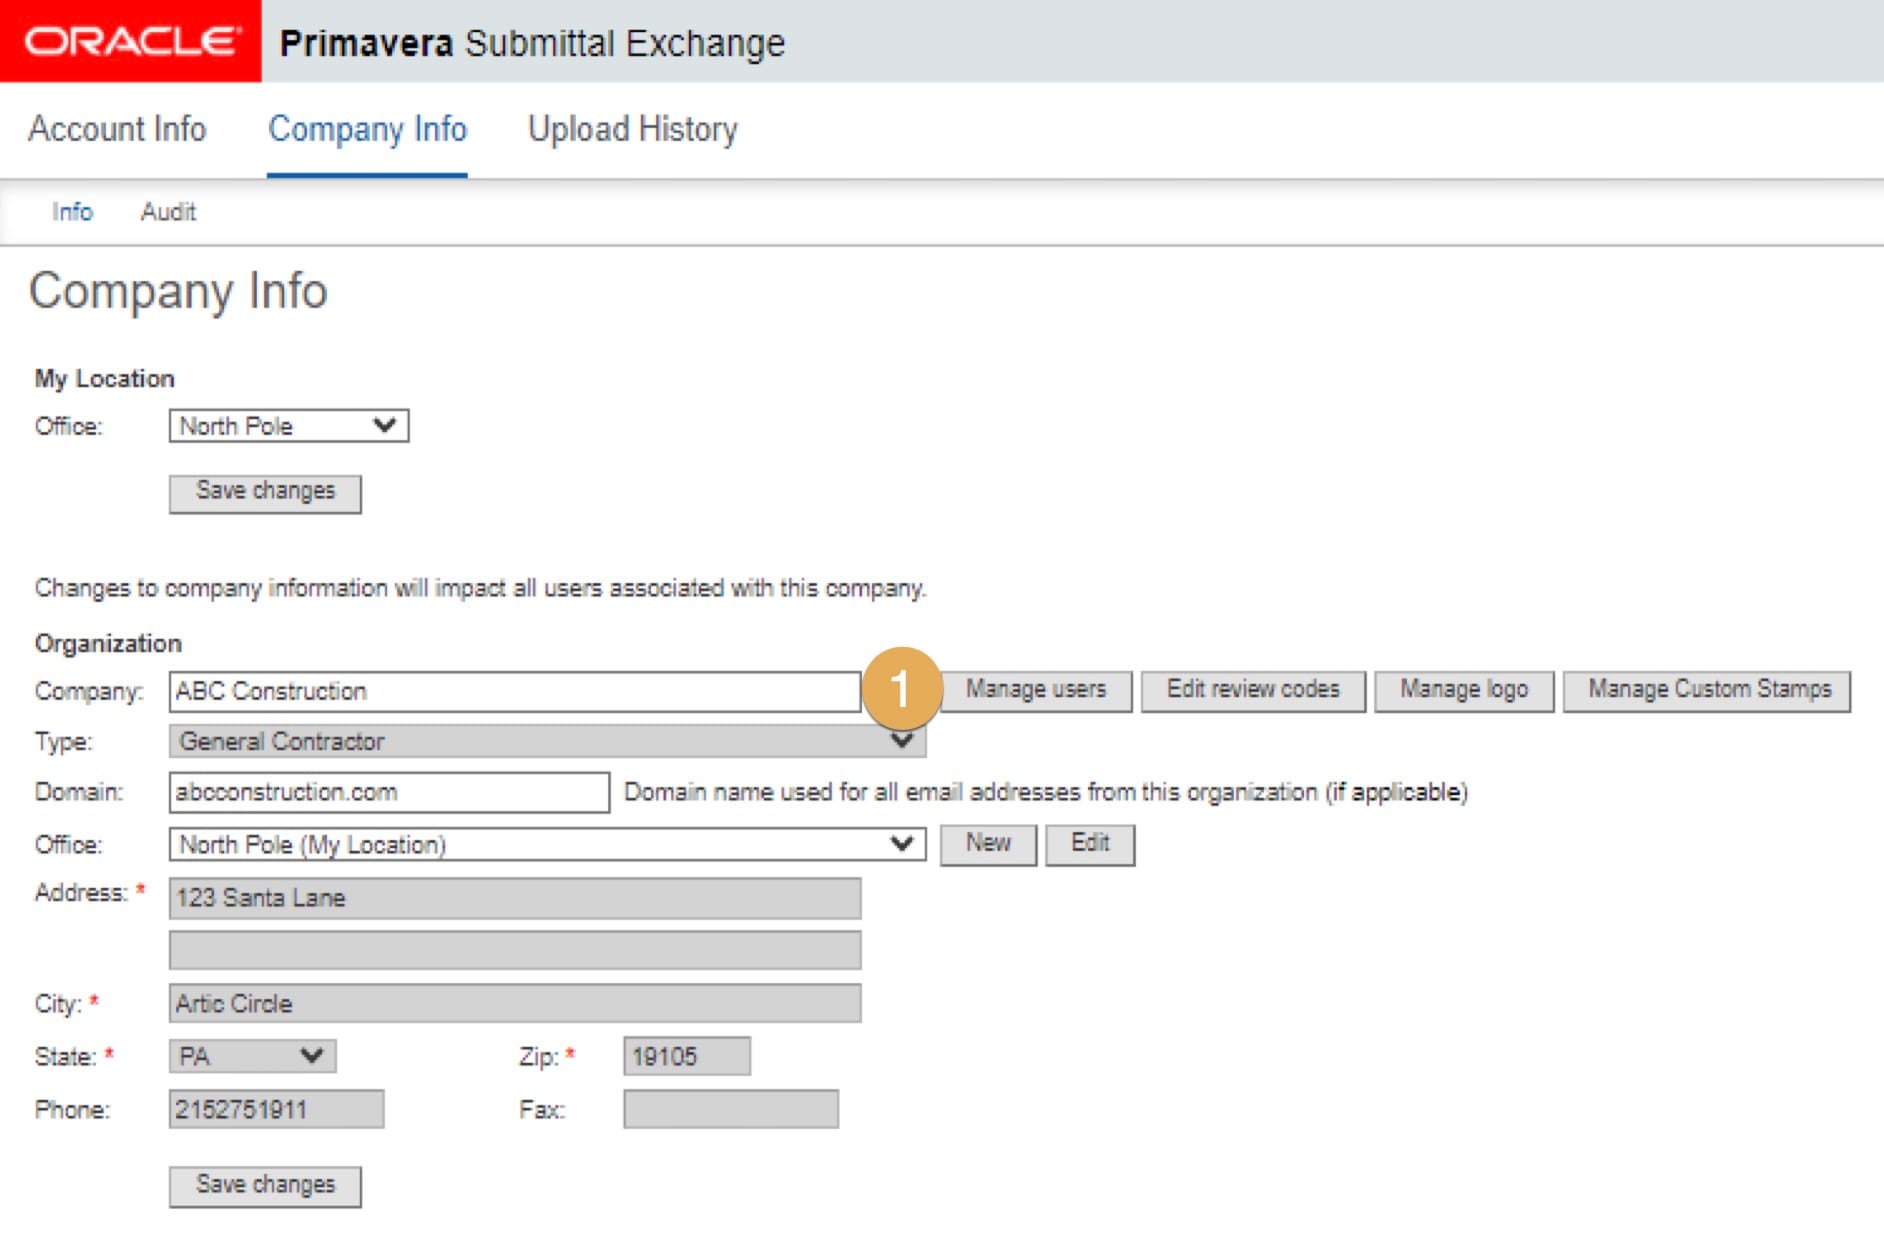
How to manage users
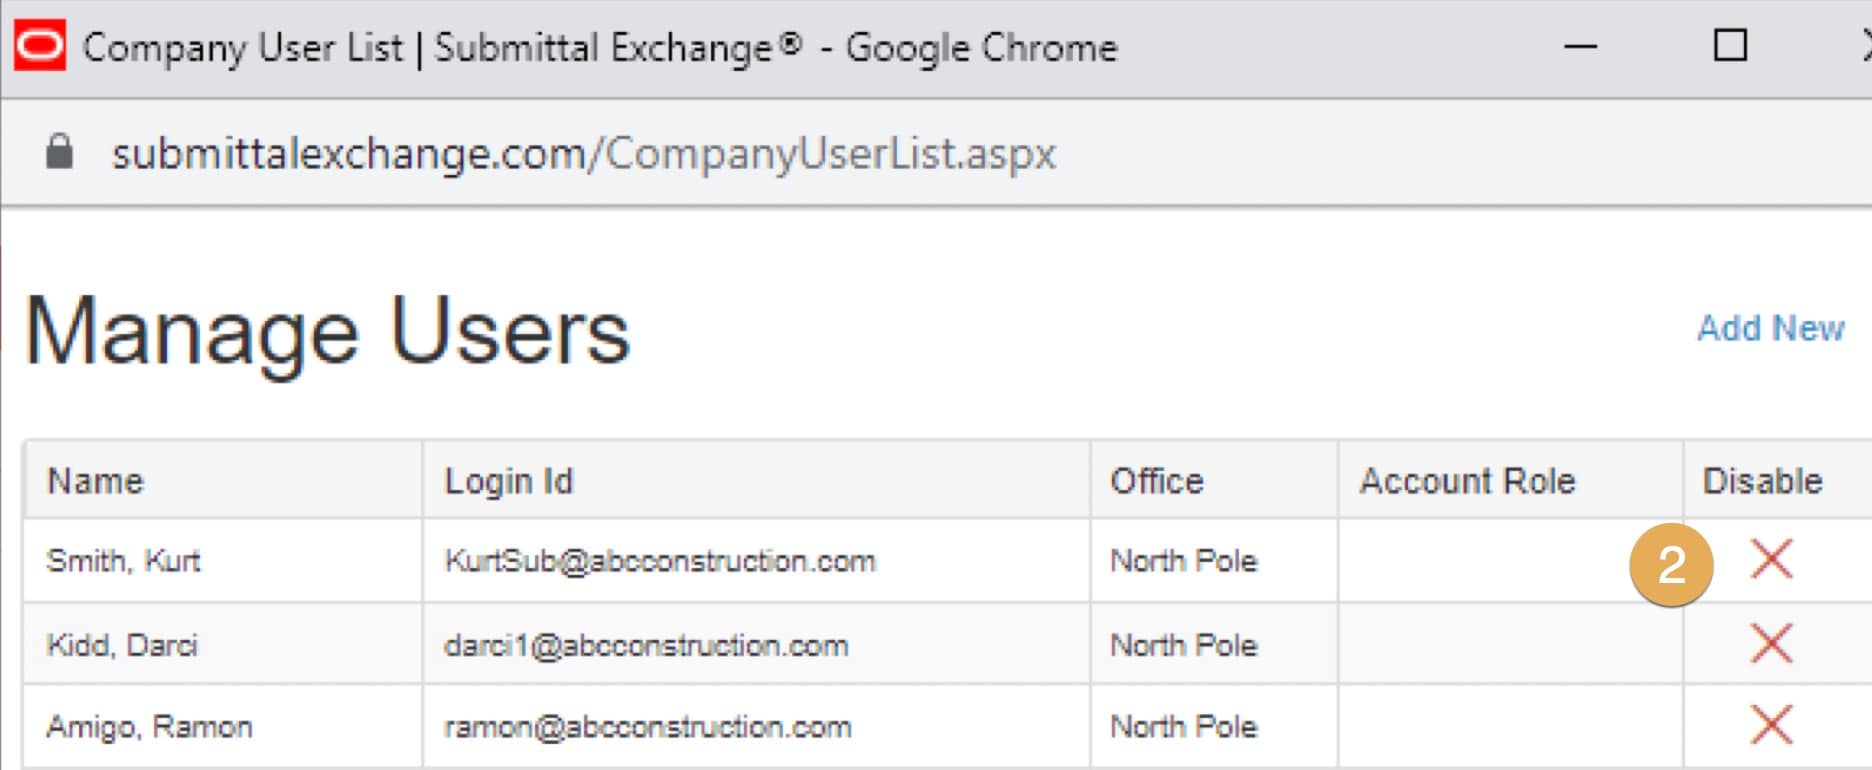
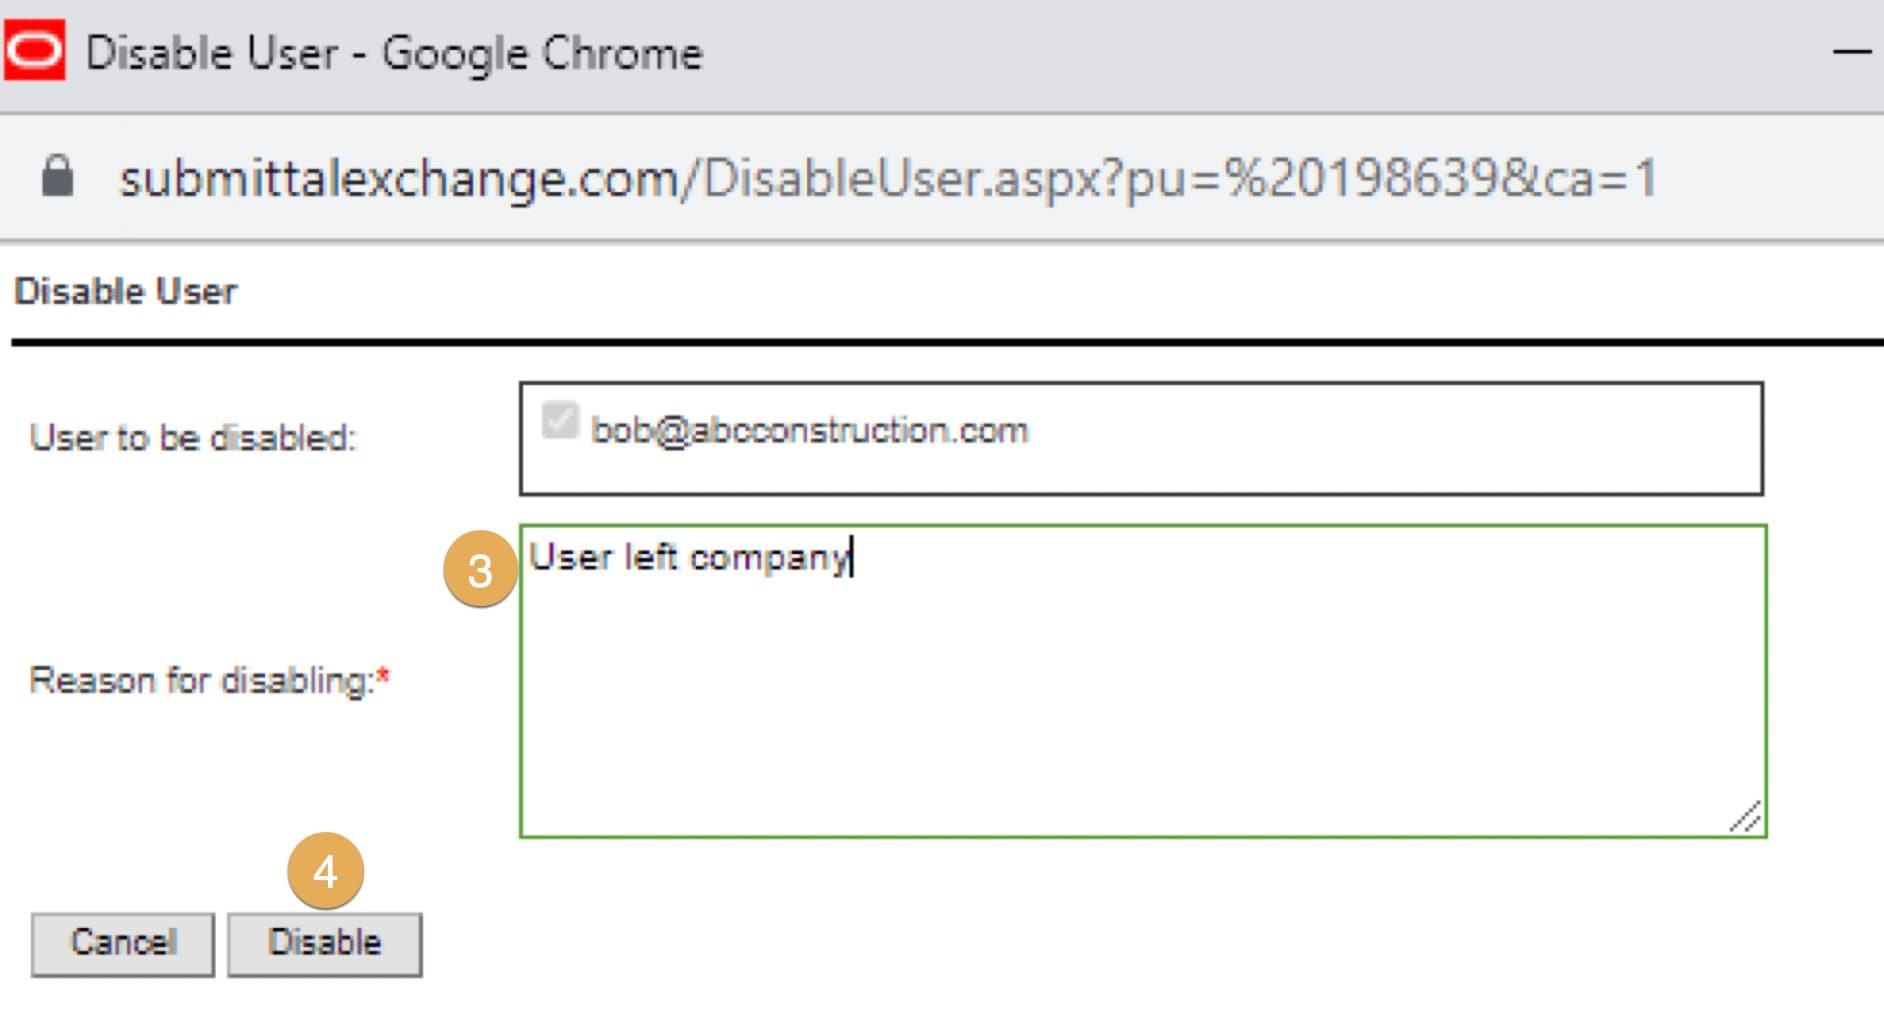
Use the Manage Users page to disable a user's access to their account. If a user's account access is disabled, they'll receive an email notifying them. Users whose access has been disabled have the option to cancel the request within 7 business days. The option to cancel the disable request is displayed when the user logs in.
- Click Manage users. A new dialog box will appear.
2. Under the Disable column, select the X icon next to the user whose access you want to disable.
3. Enter the Reason for disabling.
4. Select Disable. Click OK. A dialog box will appear showing the disable request was submitted successfully. Click OK.
Note: If a disable request has been submitted for a user, then the X icon will not display.
How to edit review codes
Review (Action codes) are abbreviations for terms that your company uses during submittal review. For example, MCN stands for "make corrections noted". Or APP stands for "approved". Review codes are shared by all users assigned to the same company. Changes will impact all users of this company.
Use the Edit review codes page to add or edit company review or action codes.
- Click Edit review codes.
- On the left, enter codes or terms that your company uses. On the right, enter explanations.
- If a resubmittal is required, be sure to check the box next to explanation. Click Save Changes at the bottom of the box.
How to manage a logo
Only GIF and JPEG files are compatible for use of a logo.
- Click Manage logo.
- Select the Browse button to search for the file on your computer.
- Choose a GIF or JPEG file. Select Open.
- Select Upload.
- Preview the new logo and select Save to use it.
Tip!
You may need to select Refresh to see the new logo after saving it. The company logo appears on the Project Index page and within the project. Only users within your company will see the logo.
How to add or manage custom stamps
To add a new custom stamp:
- Select the Manage Custom Stamps button.
- Select Add.
- Drop and drag files or browse to select files.
- Select Save. Then click Close.
To edit a stamp:
- Select the Manage Custom Stamps button.
- Under the box next to Capture, Select the Edit icon.
- From the Edit Custom stamp page, you can edit the stamp text or replace the stamp. A new dialog box will appear. You can change the Stamp Text or Replace the stamp.
- Select Save.
To delete a stamp:
- Select the Delete icon.
- Click Save and Continue.
- Click Close.
To download a stamp:
- Select the Download icon.
- A new dialog box will appear in upper right corner and click the download arrow.