Managing Sub-Tier Lien Waivers
- Enable Contractors and Suppliers who are not billing in Textura to sign their Lien Waiver documents electronically.
- Send emails when documents are ready to sign.
- Collect Lien Waivers securely with DocuSign.
Tip!
Lien Waiver process overview
The Lien Waiver Sub-Tier process consists of four steps:
- Search for or invite a Sub-Tier Contractor or supplier to Textura.
- Add the Sub-Tier to the project.
- Electronically request Lien Waivers from your Sub-Tiers.
- Approve the Lien Waivers to be automatically sent to the General Contractor.
Searching/Inviting Sub-Tier Contractors
Tip!
First, search for or invite a Sub-Tier Contractor or Supplier to Textura, begins on the Textura Home page. (NOTE: Manual Sub-Tiers can skip this step.)
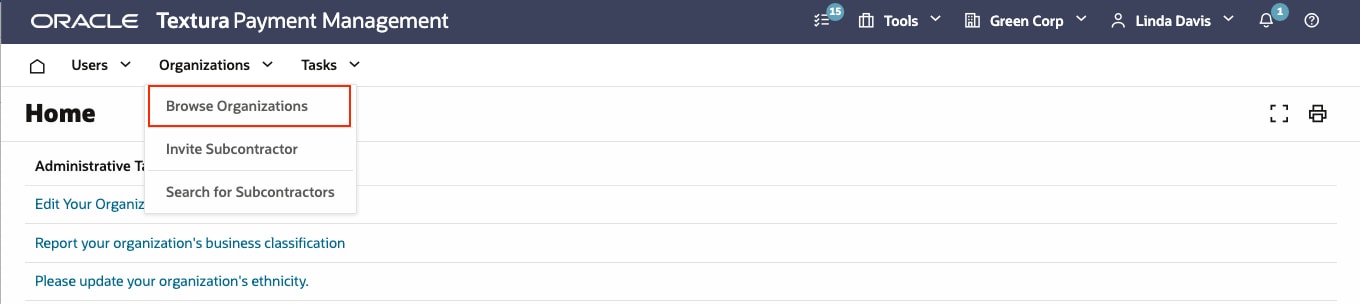
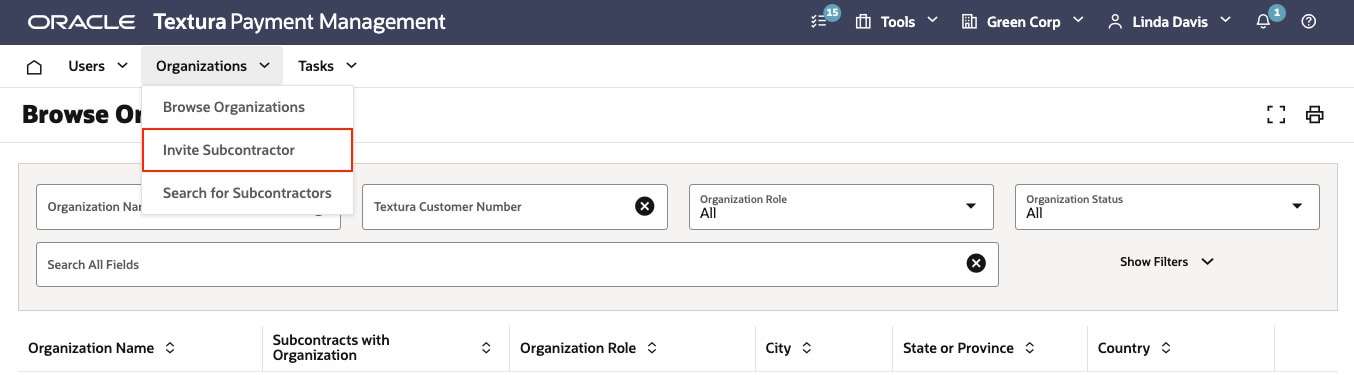
In the Organizations menu, click Browse Organizations and type the name of the organization. If the organization is already registered with Textura, you're finished with step one.
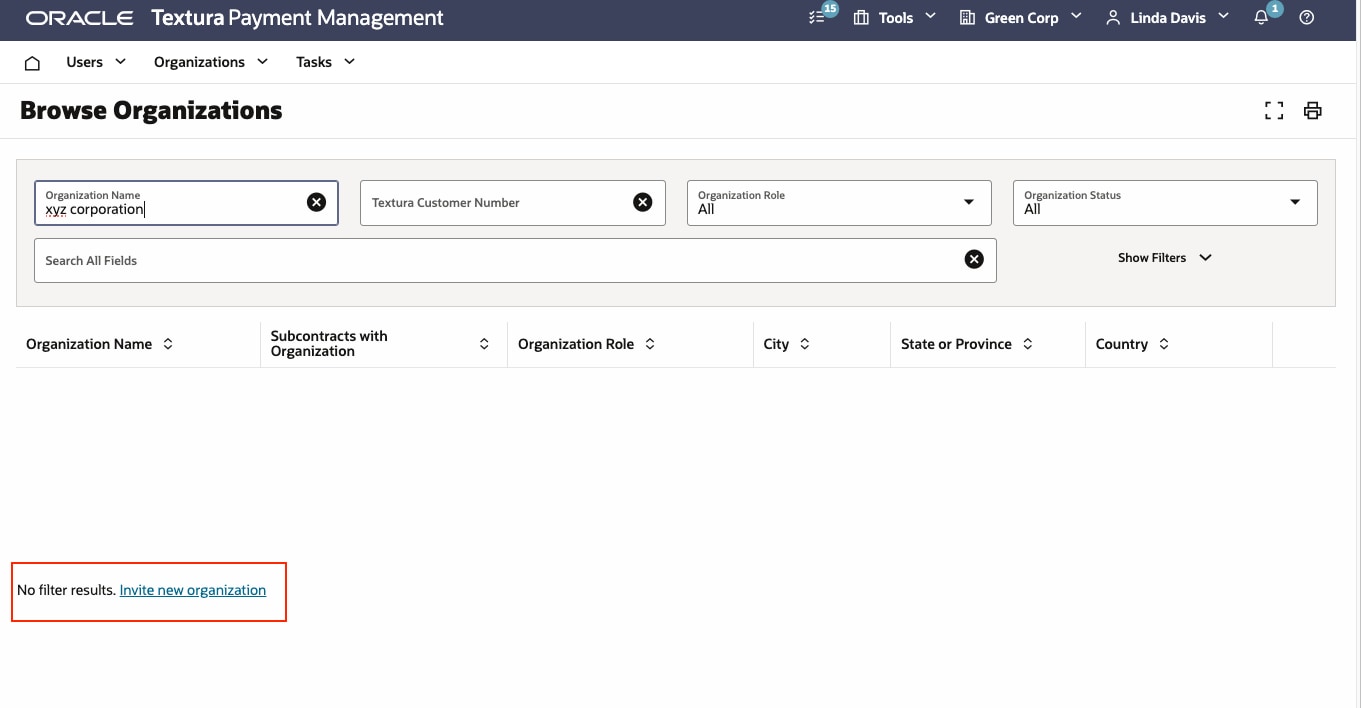
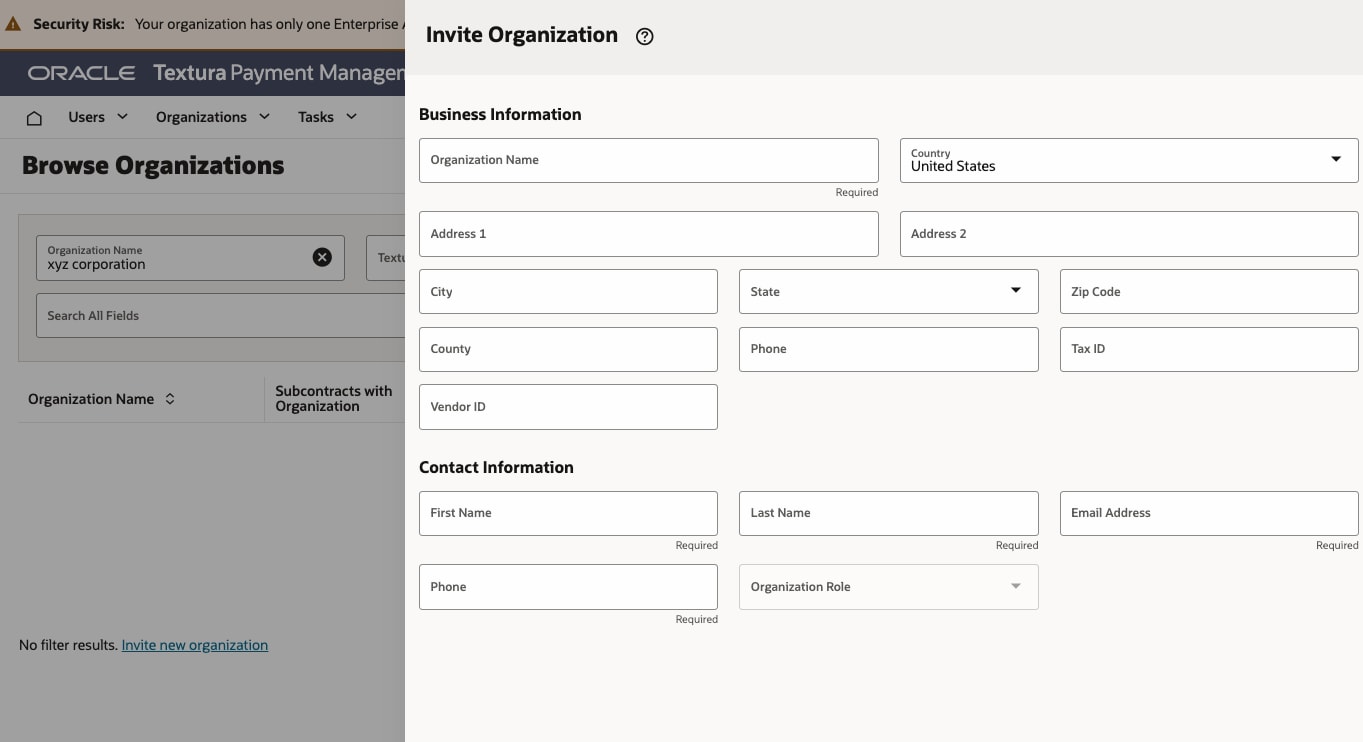
Fill in the organization's business and contact information. Clicking Save triggers an email to the organization's contact person, inviting them to set up a Textura account.
Tip!
Method 1:
Manually adding Sub-Tier to the project
Next, add the Sub-Tier to the project. This can be done in two ways.
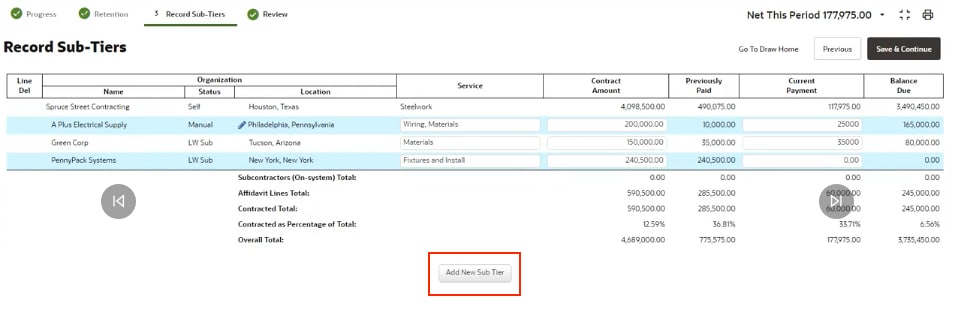
The first is when submitting an invoice for a draw. If the General Contractor requires you to report Sub-Tier contract and payment amounts, you will be prompted to record your Sub-Tiers during the Enter Billing Details workflow.
On the Record Sub-Tier step, click Add New Sub-Tier. To add a new Lien Waiver Sub-Tier, search for and select the Sub-Tier you found or invited earlier. Confirm the information that populates the form is correct and click Save.
Tip!
If you have Sub-Tiers who do not want to be registered with Textura or who are not required to sign their Lien Waivers electronically by the General Contractor, you can add them to a project as manual Sub-Tiers.
To add a manual Sub-Tier, type the name of the organization and its associated information directly into the form.
Tip!
Method 2:
Using the Manage Lien Waivers page
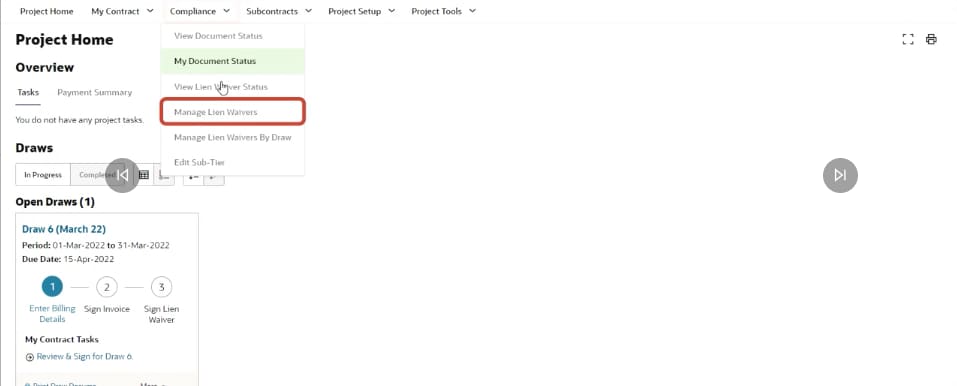
The second method of adding a Sub-Tier is to use the Manage Lien Waivers page.
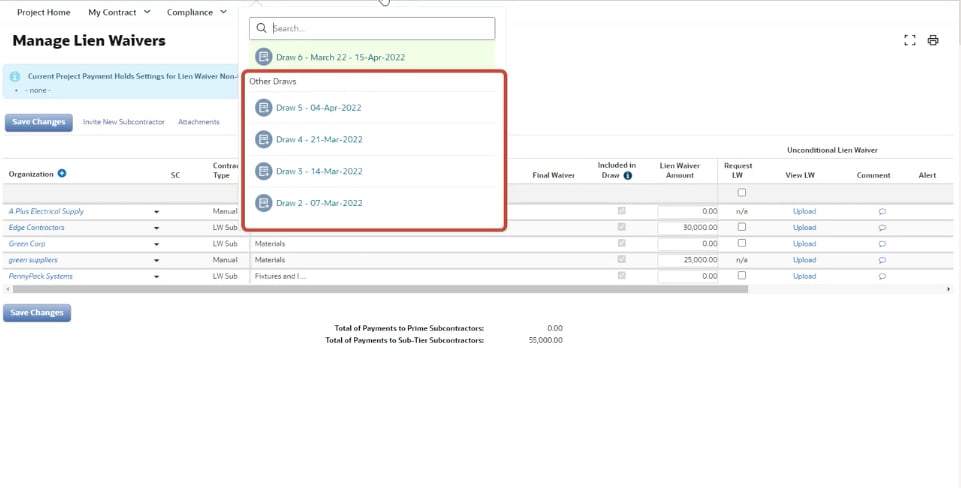
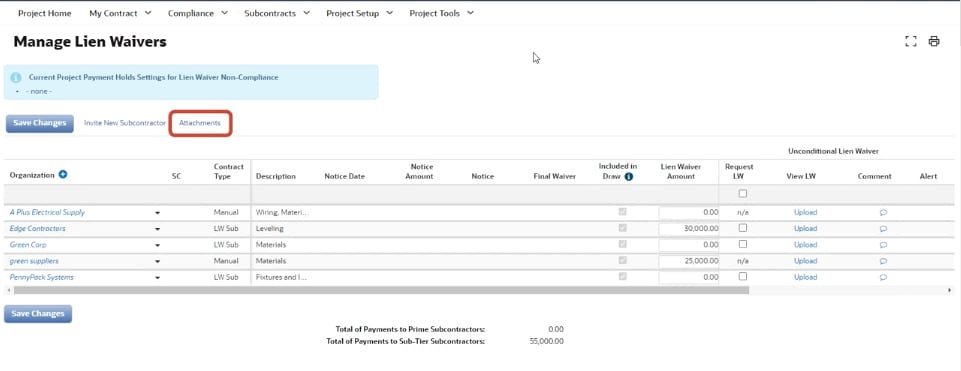
On the Project Home page, click the Compliance menu and select Manage Lien Waivers. The Manage Lien Waivers page displays all of your Sub-Tiers, along with their contract type and the services they provide.
Tip!
Selecting a draw
Uploading invoices
Adding Sub-Tier organization

Confirm Draw Number
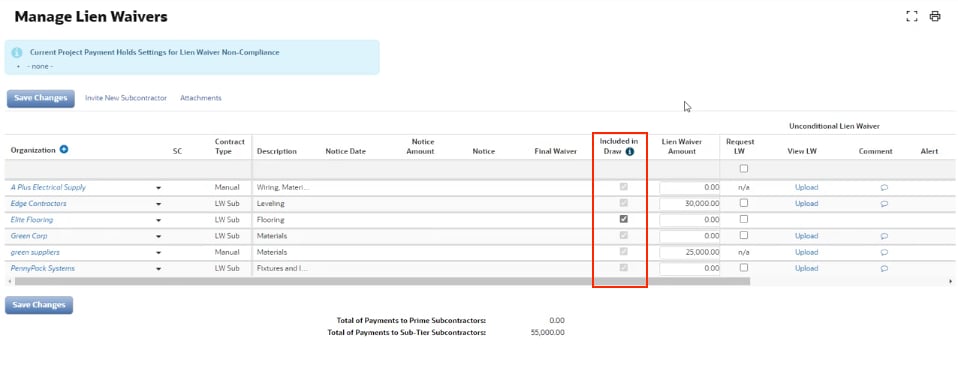
Next, confirm that you're in the correct draw number, and then click the Included In Draw checkbox for the appropriate Sub-Tiers.
A conditional and/or unconditional Lien Waiver will need to be collected from the Sub-Tier. Then click Save Changes.
Enter Lien Waiver amount
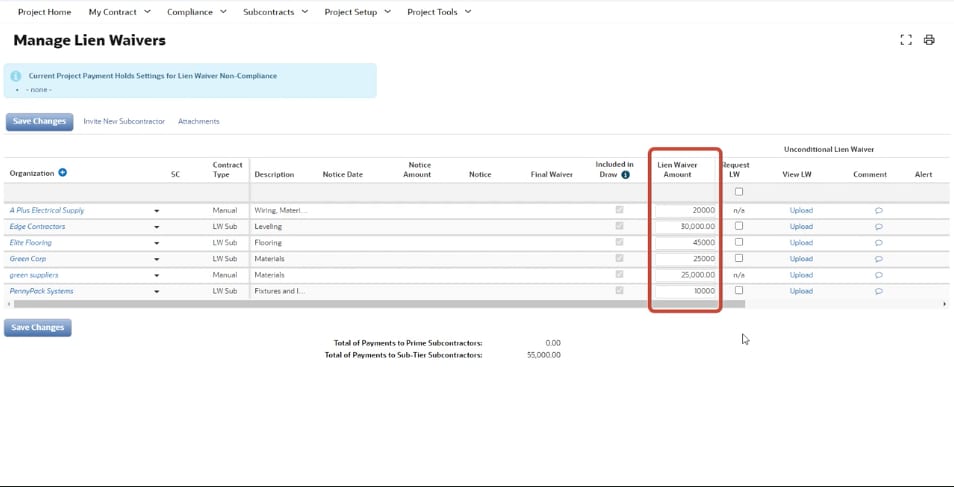
Select type of Lien Waiver
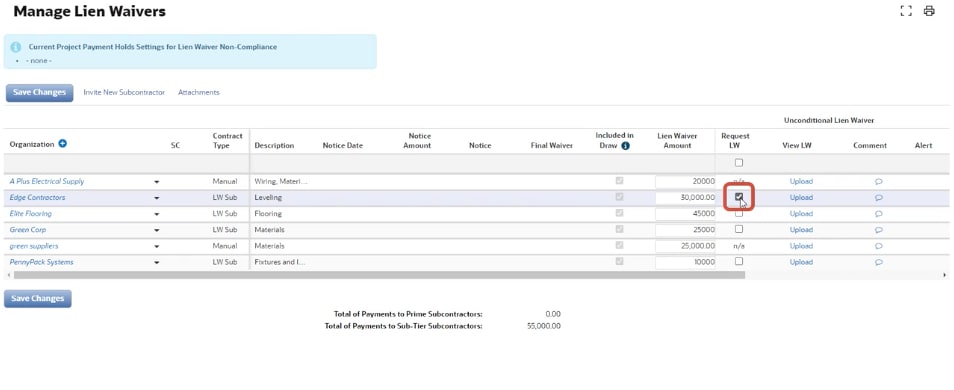
Requesting signature from Sub-Tier
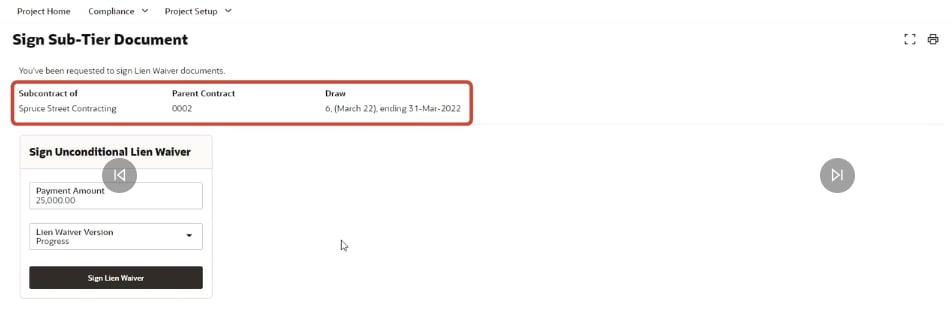
The Lien Waiver Sub-Tier receives an email requesting they sign the Lien Waiver, which is generated by Textura. Clicking the link will take them to the Sign Sub-Tier Document page. The page displays information about the Lien Waiver and the amount you specified on the Lien Waiver request.
The Sub-Tier can override the specified amount and enter the exact amount. If applicable, they can also type in an amount for extra work. They'll select a Lien Waiver version (progress or final), and then click Sign Document. Then they'll be taken to DocuSign to electronically apply their signature.
Reviewing signed amount
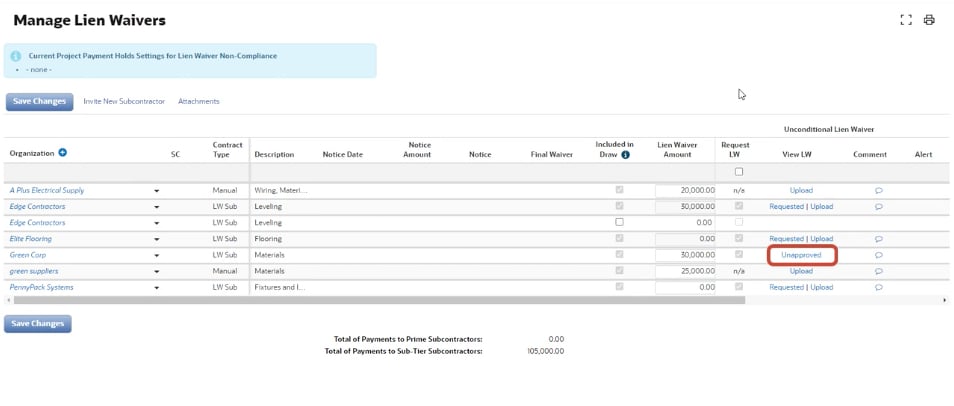
After your Sub-Tiers sign their Lien Waivers, you'll receive an email and a task on the Project Home, directing you back to the Manage Lien Waivers page. The page is now updated to display the amount the Sub-Tier signed for. Additionally, the status of the Lien Waiver is updated to Unapproved.
Click on the link to view the signed document. For your manual Sub-Tiers, scan and upload the signed Lien Waiver they provide to you.
Reviewing Lien Waivers
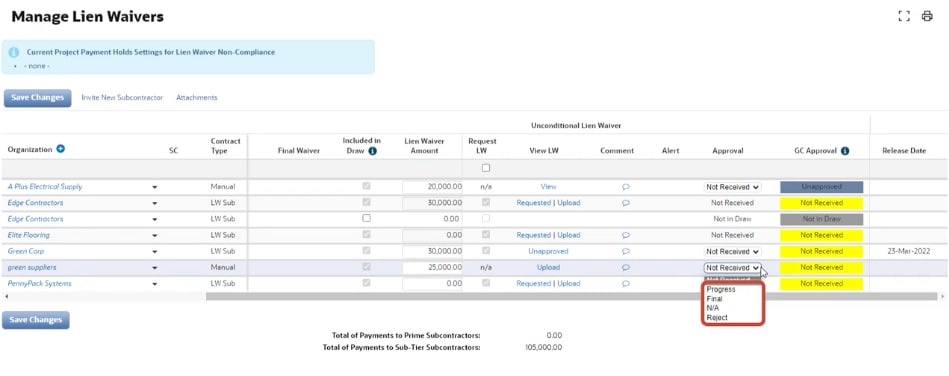
After you apply your approval, the Lien Waivers are sent to the General Contractor for final approval.
If the Lien Waiver is rejected, you will receive an email notification.
The Sub-Tier will also receive an email asking them to resign their waiver.
For a manual Sub-Tier, collect a new physical Lien Waiver from your Sub-Tier and click the View link to upload it.
Delete the previously uploaded waiver, and then proceed with uploading the new one.
Click Save Changes. The revised waivers will be sent to the General Contractor for approval.